$5 Wifi (RGB enabled) LED Dimmer w/ ESP8266
A super tiny LED dimmer, controllable from any device, based on the ESP8266. Doesn't require an arduino or rasp pi.
A super tiny LED dimmer, controllable from any device, based on the ESP8266. Doesn't require an arduino or rasp pi.
To make the experience fit your profile, pick a username and tell us what interests you.
We found and based on your interests.
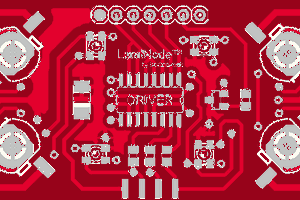
After playing around with the idea of an RGB version of the original model, I've finished a design that has 3 channels instead of the 1 present on the original.
This means you can now control RGB LED strips over WiFi for < $5!
The overall design has been improved, resulting in beefed up current ratings amongst others. You can now draw 8.5A per channel! That means you can hook up 306 Watts of LED strip awesomeness, pretty cool.
I've ordered the new modules, and am waiting for the PCBs to arrive. Check out a preview here: http://dirtypcbs.com/store/designer/details/tjclement/1329/5-esp8266-rgb-led-dimmer.
The Eagle files can be found on Github as per usual :)
The PCBs arrived from China, yay!
Initial measurements show that all electrical connections were good and things were connected as intended, awesome.
Except for the screw terminal blocks, all other components had come in already as well, so I put together a prototype with the wires soldered directly to the board, just to check it out.
This thing is _tiny_. Soldering was surprisingly easy enough though, phew!
Next up: writing an assembly description and messing about with the software. Can't wait.
Assembling this baby should be easy enough for anyone who has hand soldered a couple of times before. First up is the PCB itself. It comes panellised into two modules per board, so break one in half.
Next, we put the 12V -> 3.3V DC converter in place. I did this by first applying some solder on the 8 pads on the back. If you've not used solder flux paste before, try it. Seriously. Putting some flux on the pads before soldering makes your life a million times easier.
Then, I placed the converter on top (be sure to check its orientation! In this picture the part with the chip goes in the top). I then aligned it with the solder balls, heated up one of its pin holes, added a small amount of solder onto the pin hole, and let the solder seep through to the solder ball beneath it. Repeat this for all holes.
After that, I made sure that the converter was set to the right voltage. These converters are configured to pass on 12V by default, which would kill the ESP8266 chip immediately if found out too late.
The output voltage can be adjusted by turning the screw on the lower left side.
Because the screw terminal blocks hadn't arrived yet when I was putting this one together, I soldered the 12V power supply directly to the board:
I plugged in the power supply, and measured the voltage across the ESP vcc and gnd pads. In order to reach the vcc pad, I sanded the part where the PCB was broken in half down a bit.
After setting the output voltage to roughly 3.3V (I tend to give it a bit more, 3.5 is still within the ESP's specs), unplug the power supply again to make sure you can't short anything during soldering.
Create an account to leave a comment. Already have an account? Log In.
Hi Tom, I am new to Lua programing. I am having trouble uploading code to the esp. In the past I have tried to upload init.lua and say main.lua. i can't get them to both to upload. Your code has three .lua files, so even more problematical. If this problem is to simple, cluld you direct me to a beginners tutorial? Thanks
Hi Tom. I've made a similar project a while back ago using an RFDuino for BLE control. One thing that I did differently was I used an LP2950-33 to supply power to the RFDuino. What reasons did you have to use XM1584 instead?
Hi Miroslav, the LP2950-33 is rated up to only 100mA of current. The ESP chip can peak up to 200mA when it's using its WiFi antenna, so something beefier is needed.
I chose to use a switching power supply module instead of a linear regulator, because at these currents they waste less energy in heat dissipation (albeit only by a bit).
Hey Tom - well done - this an amazing ... but if I need to dimmer a 127v LED bulb what do you think I have to change on your project ?
Hi Sergio, I've not done any projects with that high of a voltage, so I really wouldn't know too much about it.. At the very least you need high voltage MOSFETs, but perhaps there are implications to the board design at these voltages, too..
Hello Tom
Good job!!
How is the project today ? I'm very interested as I have a led strip to include in my wall with a dual command method : switch on the wall (former lamp switch) and Home automation box (like Jeedom). Your small card should be compatible with the openess of Jeedom. Thanks for more information.
Thanks! The project is going very well, I'm working on the software whilst waiting for the screw terminal parts to arrive.
This module is compatible with any network based home automation software, but you'd have to add a script to support their API. Andries (see comment below) wrote some software to connect to Domoticz, for example.
As far as I can see Jeedom is based on zWave instead of wifi/networking, so I don't think it will connect with this module.
Awesome project! As you know I made a LED PWM WiFi dimmer a while back too, but based on the ESP-01. Definatly following this excellent project!
Shoulders of giants.. ;) Andries' project is super cool, and hooks up to the Domoticz home automation software: http://blog.quindorian.org/2015/04/esp8266-wifi-led-dimmer-part-8-of-x.html
Absolutely, you'd just need to add two additional MOSFETs, two pulldown resistors, and one extra terminal block, and hook them up to e.g. GPIO 12 and 14 just like the current one is connected to GPIO13. Since most homes will have 1 channel warm-white LED strips, this design doesn't include 3 channel output, but the ESP can definitely handle it.
I'll focus on sharing the software first, and getting some assembly pictures when the boards arrive from China. Afterwards, perhaps an RGB version would be cool to do.
I've made a RGB controller on a perfboard and just ordered the PCB equivalent on DirtyPCB.
Here is a link to the board: http://dirtypcbs.com/view.php?share=11029&accesskey=ecb6fb6901233ffc61522d9139bb7377
I've not received it yet so I cannot guaranty that there is no mistake on it... Also I've replaced the FDS8896 with some IRLZ44N (TO-220 package).
Become a member to follow this project and never miss any updates

 Jack Flynn
 Paul Gallagher
 Arkadi
 Tamojit Saha
Tom, Thanks so much for this awesome project. Can you please advise on a mosfet to handle a load of 20 amps. I am looking to implement your design on a car (Jeep Wrangler) to control off road lighting through MQTT and allow pwm control to the lights but the mosfets you used aren't capable of the current I need. Thanks again so much for documenting your project I have been looking for something like this for ages.