Klipsch simply tied a knot to protect the wire connection between speaker and the rest of the wires. This is not a complete solution. It is still possible for the pulled cord to exert lateral force on the wire connection when pulled. This resulted in broken connection after years of use. Also see amazon reviews for similar reports.

The repair method is simple. Simply cut the connection and re-solder new downstream wires onto the speaker (paying attention on which color wire goes where, of course). But it had one huge problem: The molded, fiber reinforced plastic housing is no where near user serviceable. So The housing must be smashed and pried open with a pliers first to extract the speaker. Then you can do the wire cutting and soldering repair job.
Next the housing must be redesigned and printed. There are 3 parts to tackle in the design process: The isolation ear tip connection, the main housing cavity, and a re-assembly plan.
1) Isolation ear tip connector
The isolation ear tip connector can be replicated by carefully measuring the original housing with a caliper. Pay attention to the smallest detail (such as the small bump along the connector axis) as they might be there for tightening the ear tip / housing connection.
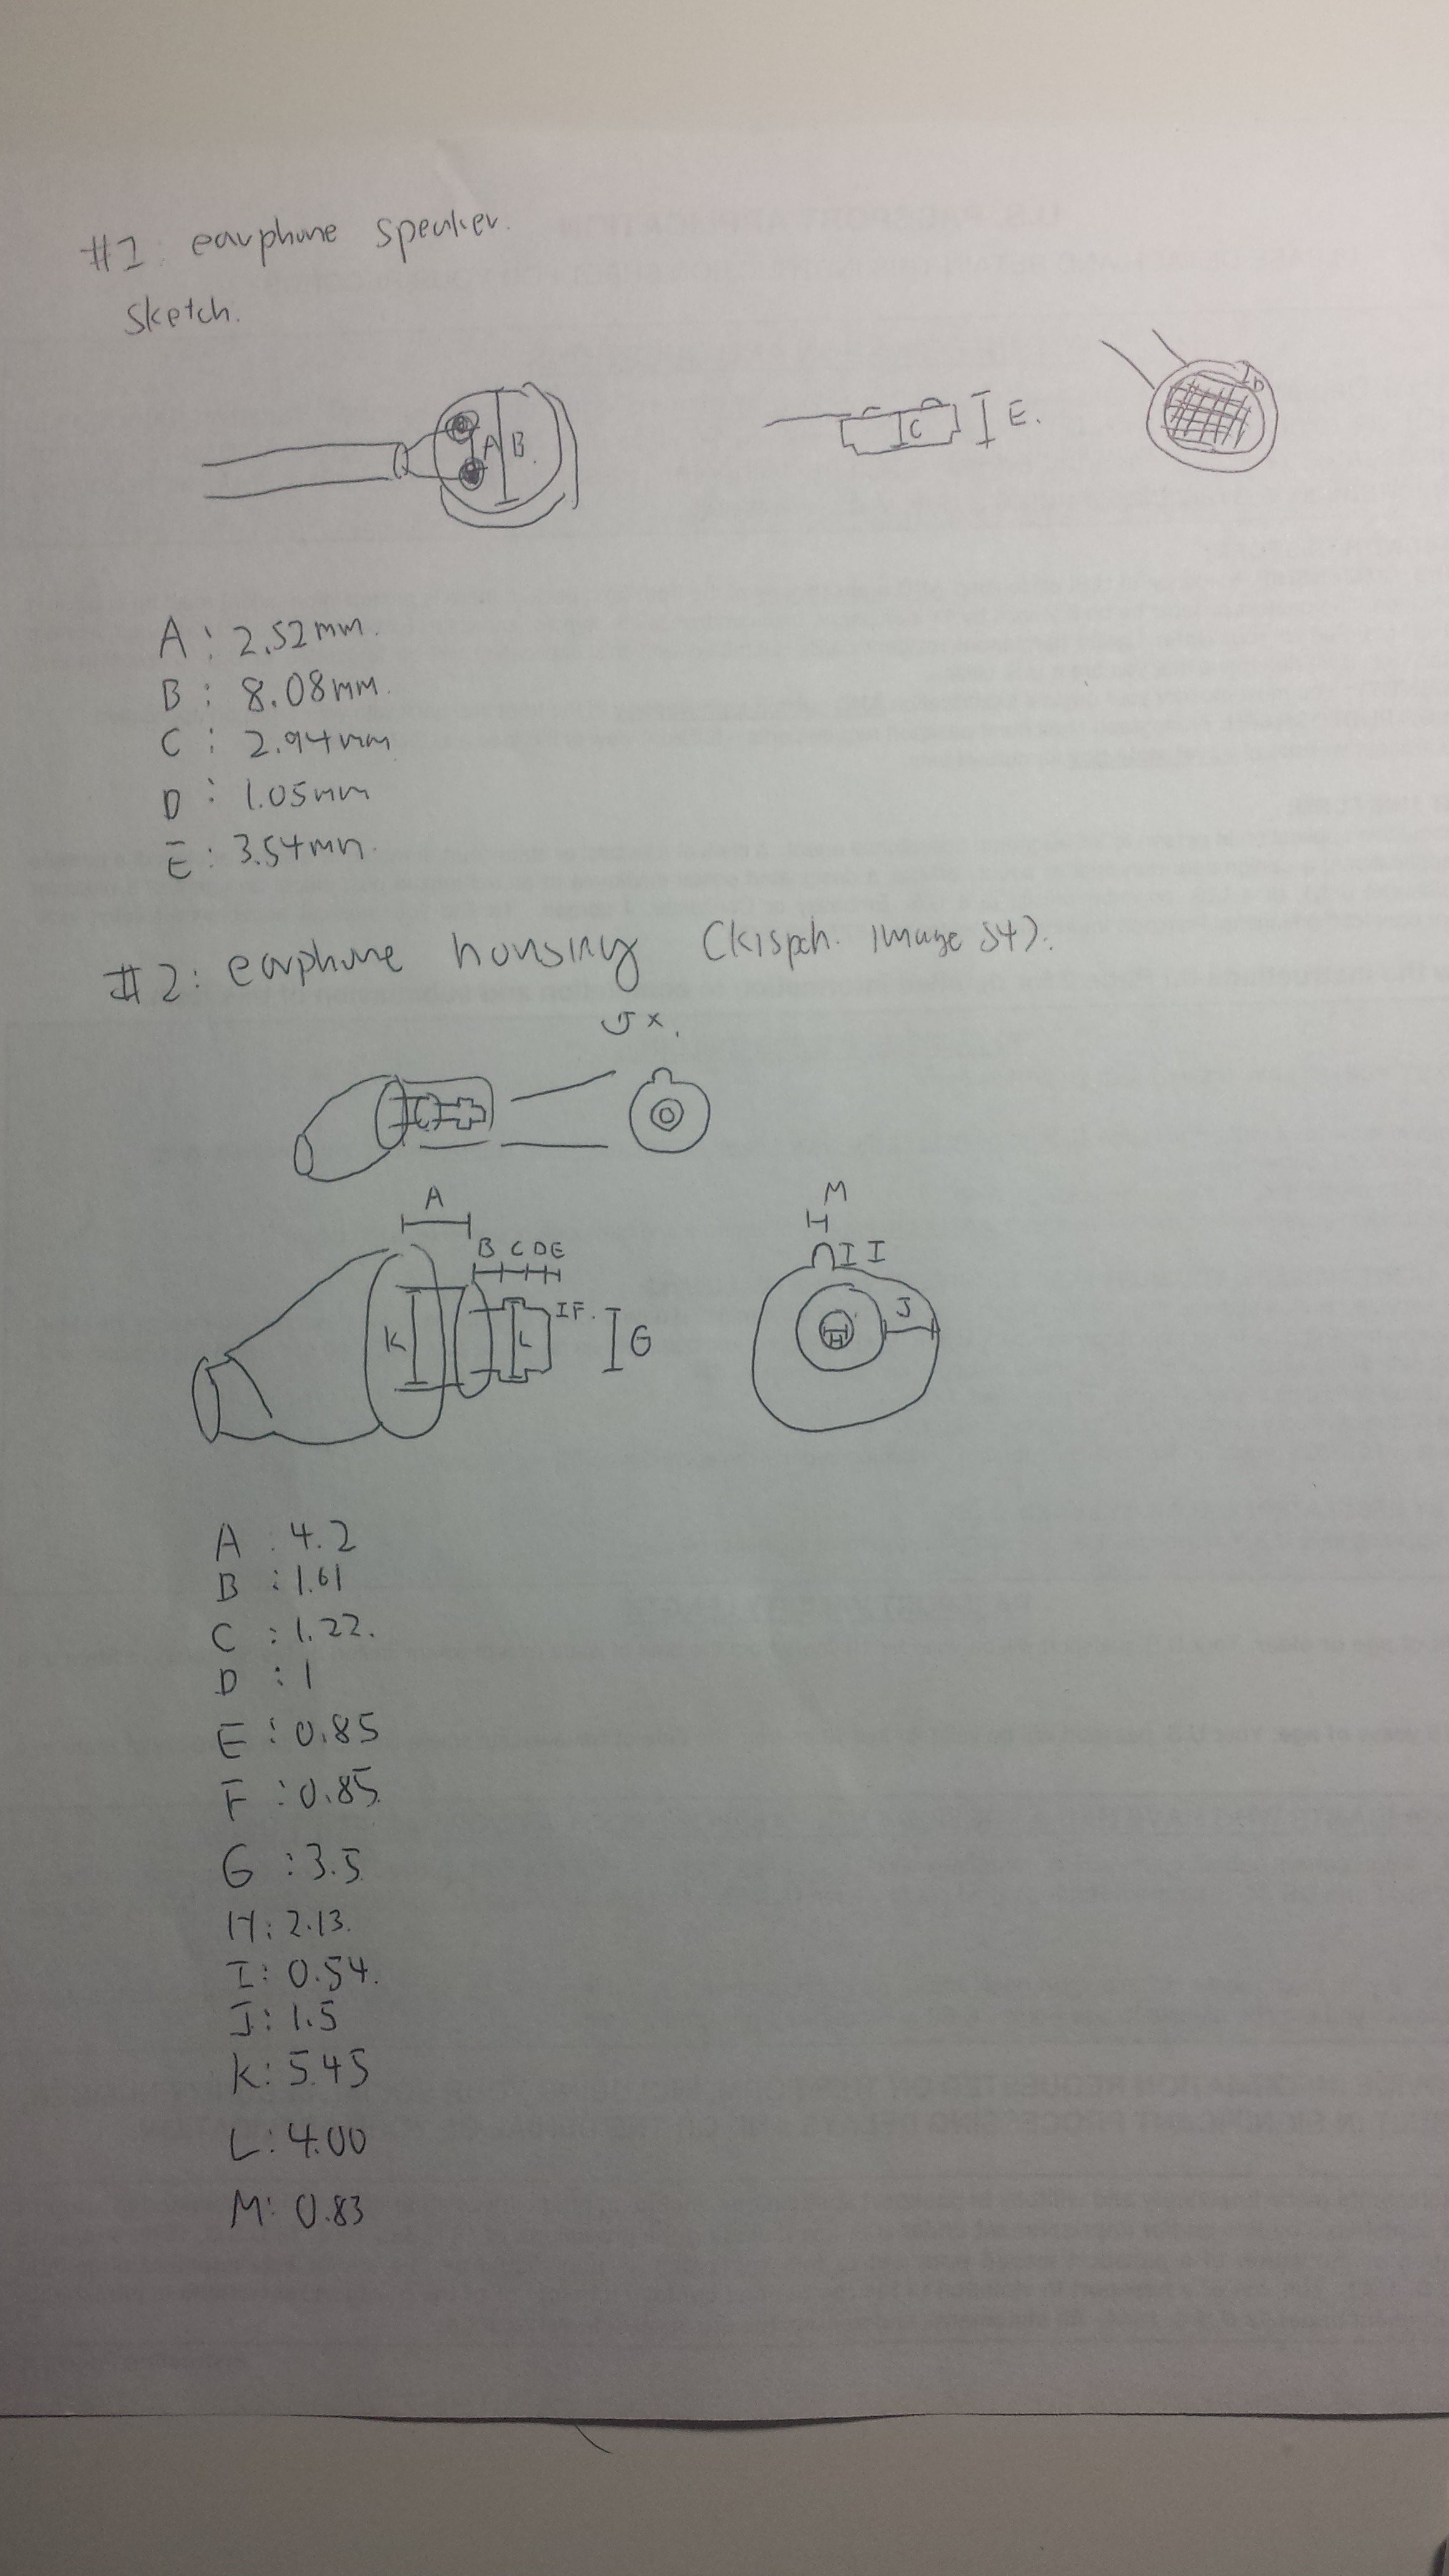
2) The main housing cavity
There are 2 things worth mentioning: 1) determining the entry diameter and 2) designing a good fit for the circular speaker.
It is obvious that bigger entry diameter, the easier the reassembly is when reinserting the speaker. But smaller entry diameter means a better, lighter design. So trail and error is required here. Do keep in mind when putting the speaker back it is not just the speaker diameter to fit into the housing but the 2x diameter of the wire + speaker diameter. If you don't know what I am talking about just think about it carefully. You cannot re-solder the wire while the speaker is in the housing. Therefore you have to reinsert the speaker with the wires attached, so you need some additional room + speaker diameter to insert everything.
It is also a good idea to add chamfer to the speaker cavity. It has 2 advantages: It guides the speaker to its cavity when press it into the housing, 2) it allow an angle for the printer to climb. Is best not to use support to fill in the inner cavity, so avoid harsh angle and have tapered edge in mind for a support-less print.
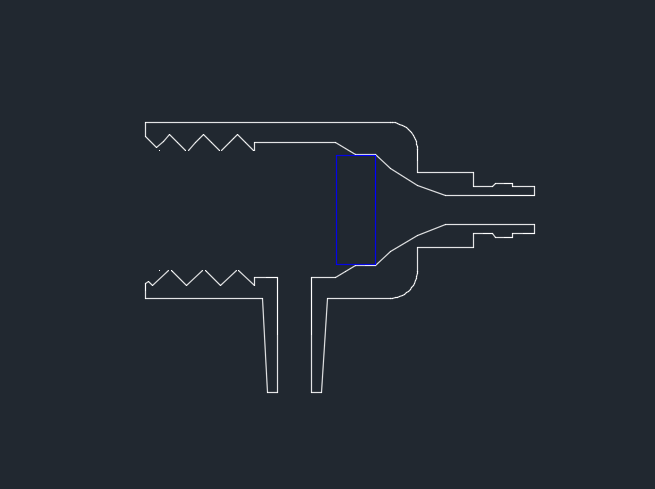
3) Re-assembly plan
The speaker had to kept in its cavity for the best sound quality. Super glue and other curable resin came into mind but these limit future repair potentials. So I devised a more self-serviceable approach. Blue tack is filled behind the speaker to seal the speaker wire holes and keep the speaker in place. Then cotton is placed behind the blue tack to act as a spring. Finally, a custom screw is inserted to exert force on the cotton and blue tack to keep the speaker at its right place.
Also do keep in mind you have to thread the wire though the housing first, then solder the wire onto the speaker. I was dumbfounded when I realized there is no way to insert the speaker + wire though the tiny wire hole.
That's it! sound quality the exact same as before. The isolation effect is the same since the ear tip alone determine that factor. I was very pleased with how everything turns out. I am glad I could fix it before my upcoming long-haul flight. It may look a little bulky because the original housing is so tiny. If you wish you can omit the threads if you wanted to use resin/glue to seal the speaker and reduce the size. I have included .stl for the housing plan if you had a Klipsch image S4 with broken channel. If not, you can always follow it as a general guide.
 Timescale
 Sepio
Sepio
 Breno Juliano "Dot"