 Rishi Bhatnagar
The idea is simple. It is not unique of course and things like these have been done by many before. The only reason why I wanted to do this was to finish the project end to end. From the mobile app to the server to the python code running on the pi.
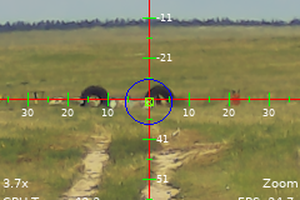
The images on the left are the test images taken by the Pi which were triggered by a movement in front of the camera.
0%
0%
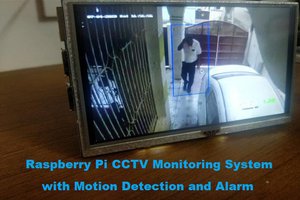
PiScream
Low cost, low bandwidth consuming surveillance system for homes and schools.
Become a Hackaday.io member
Already have an account? Log in.
Just one more thing
To make the experience fit your profile, pick a username and tell us what interests you.
Pick an awesome username
hackaday.io/
Your profile's URL: hackaday.io/username. Max 25 alphanumeric characters.
Pick a few interests
Projects that share your interests
People that share your interests
 ouch3994
 Markus Dieterle
 Aswinth Raj
Could you please run us through the set up ? I really enjoy your project but cant get it running after having it set up on heroku