Close
0%
0%

Teensy v3.1 - FrSky S.Port & WS28xx Led Shield

Teensy v3.1 - FrSky Smart Port Sensor Shield with addressable led output and telemetry port

Similar projects worth following
Teensy v3.1 - FrSky Smart Port Sensor Shield with addressable led output and telemetry port

-Allows for Smart Port Sensors to chain from the servo connector pins (marked) using arduino ide & serial monitor to log data info:

FrSky S-Port telemetry library - easy to use and configurable
http://www.rcgroups.com/forums/showthread.php?t=2245978

-=The only power that’s needed is usb while chaining sensors=- Disconnect Board Power while USB connected and vice versa

-Working on teensy code for outputting data to onboard telemetry radio port

-Addressable led output to run led code if implemented for gps lock ect

-cut trace resistor(1k) pad for led output

-end mount 1000uf Capacitor pads for mounting

led demo (example code)

  • Led Code Used In Example

    Charles Lakins05/12/2015 at 17:39 0 comments

    #include <Adafruit_NeoPixel.h>
    
    #define PIN 2 //pin 2 on teensy shield
    #define LEDS 15 //number of leds total
    
    // Based on Adafruit Neopixel example https://github.com/adafruit/Adafruit_NeoPixel 
    
    // Parameter 12 = number of pixels in strip
    // Parameter 2 = pin number (most are valid)
    // Parameter 3 = pixel type flags, add together as needed:
    //   NEO_KHZ800  800 KHz bitstream (most NeoPixel products w/WS2812 LEDs)
    //   NEO_KHZ400  400 KHz (classic 'v1' (not v2) FLORA pixels, WS2811 drivers)
    //   NEO_GRB     Pixels are wired for GRB bitstream (most NeoPixel products)
    //   NEO_RGB     Pixels are wired for RGB bitstream (v1 FLORA pixels, not v2)
    Adafruit_NeoPixel strip = Adafruit_NeoPixel(15, PIN, NEO_RGB + NEO_KHZ800); //NEO_GRB as below colors show
    
    void setup() {
      strip.begin();
      strip.show(); // Initialize all pixels to 'off'
    }
    
    int fademax = 10;
    int fadeouts[10] = { 0, 0, 0, 0, 0, 1, 4, 16, 64, 255 }; // of number of fasouts
    int fadelevels[LEDS] = {0, 1, 2, 3, 4, 5, 6, 7, 8, 9, 10, 11}; // of number leds
    int scancount = 29;
    int scanpos[29] = { 0,1,2,3,4,5,6,7,8,9,10,11,12,13,14,13,12,11,10,9,8,7,6,5,4,3,2,1,0 }; // of number of scan positions
    
    void loop() {
      // Some example procedures showing how to display to the pixels:
      for(int i=0; i<scancount; i++) {
        fadelevels[scanpos[i]] = fademax + 1;
        fadeout();
        delay(150); //speed of travel
      }  
    }
    
    void fadeout() {
      for (int i=0; i<LEDS; i++) {
        if (fadelevels[i] > 0) fadelevels[i]--;
        int level = fadeouts[fadelevels[i]];
    //    uint32_t c = strip.Color(level, 0, level / 2); // GRB Pink OR RGB baby blue
    //    uint32_t c = strip.Color(level, level, level); // GRB White OR RGB white
    //    uint32_t c = strip.Color(level, 2, level / 4); // GRB green + pink OR RGB blue + red
    //    uint32_t c = strip.Color(level, 0, level / 1); // GRB light purple OR RGB med blue
    //    uint32_t c = strip.Color(level, 3, level / 255); // GRB green + red OR RGB Red + green
        uint32_t c = strip.Color(level, 0, level / 60); // GRB red OR RGB green
    //    uint32_t c = strip.Color(100, 10, level / 3); // RGB all green + Blue fade
    //    uint32_t c = strip.Color(1, 10, level / 3); // RGB all RED + blue fade
        
        strip.setPixelColor(i, c);
      }
      strip.show();
    }
    
    // Input a value 0 to 255 to get a color value.
    // The colours are a transition r - g - b - back to r.
    uint32_t Wheel(byte WheelPos) {
      if(WheelPos < 85) {
       return strip.Color(WheelPos * 3, 255 - WheelPos * 3, 0);
      } else if(WheelPos < 170) {
       WheelPos -= 85;
       return strip.Color(255 - WheelPos * 3, 0, WheelPos * 3);
      } else {
       WheelPos -= 170;
       return strip.Color(0, WheelPos * 3, 255 - WheelPos * 3);
      }
    }
    

  • S.Port Example code

    Charles Lakins05/12/2015 at 17:35 0 comments

    /*
      FrSky S-Port Telemetry library example
      (c) Pawelsky 20141120
      Not for commercial use
      
      Note that you need Teensy 3.x or 328P based (e.g. Pro Mini, Nano, Uno) board and FrSkySportTelemetry library for this example to work
    */
    
    #include "FrSkySportSensor.h"
    #include "FrSkySportSensorFcs.h"
    #include "FrSkySportSensorFlvss.h"
    #include "FrSkySportSensorGps.h"
    #include "FrSkySportSensorRpm.h"
    #include "FrSkySportSensorVario.h"
    #include "FrSkySportSingleWireSerial.h"
    #include "FrSkySportTelemetry.h"
    #if !defined(__MK20DX128__) && !defined(__MK20DX256__)
    #include "SoftwareSerial.h"
    #endif
    
    FrSkySportSensorFcs fcs;                               // Create FCS sensor with default ID
    FrSkySportSensorFlvss flvss1;                          // Create FLVSS sensor with default ID
    FrSkySportSensorFlvss flvss2(FrSkySportSensor::ID15);  // Create FLVSS sensor with given ID
    FrSkySportSensorGps gps;                               // Create GPS sensor with default ID
    FrSkySportSensorRpm rpm;                               // Create RPM sensor with default ID
    FrSkySportSensorVario vario;                           // Create Variometer sensor with default ID
    FrSkySportTelemetry telemetry;                         // Create Variometer telemetry object
    
    void setup()
    {
      // Configure the telemetry serial port and sensors (remember to use & to specify a pointer to sensor)
    #if defined(__MK20DX128__) || defined(__MK20DX256__)
      telemetry.begin(FrSkySportSingleWireSerial::SERIAL_3, &fcs, &flvss1, &flvss2, &gps, &rpm, &vario);
    #else
      telemetry.begin(FrSkySportSingleWireSerial::SOFT_SERIAL_PIN_12, &fcs, &flvss1, &flvss2, &gps, &rpm, &vario);
    #endif
    }
    
    void loop()
    {
      // Set current/voltage sensor (FCS) data
      // (set Voltage source to FAS in menu to use this data for battery voltage,
      //  set Current source to FAS in menu to use this data for current readins)
      fcs.setData(25.3,   // Current consumption in amps
                  12.6);  // Battery voltage in volts
    
      // Set LiPo voltage sensor (FLVSS) data (we use two sensors to simulate 8S battery 
      // (set Voltage source to Cells in menu to use this data for battery voltage)
      flvss1.setData(4.07, 4.08, 4.09, 4.10, 4.11, 4.12);  // Cell voltages in volts (cells 1-6)
      flvss2.setData(4.13, 4.14);                          // Cell voltages in volts (cells 7-8)
    
      // Set GPS data
      gps.setData(48.858289, 2.294502,   // Latitude and longitude in degrees decimal (positive for N/E, negative for S/W)
                  245.5,                 // Altitude in m (can be nevative)
                  100.0,                 // Speed in m/s
                  90.23,                 // Course over ground in degrees
                  14, 9, 14,             // Date (year - 2000, month, day)
                  12, 00, 00);           // Time (hour, minute, second) - will be affected by timezone setings in your radio
    
      // Set RPM/temperature sensor data
      // (set number of blades to 2 in telemetry menu to get correct rpm value)
      rpm.setData(200,    // Rotations per minute
                  25.6,   // Temperature #1 in degrees Celsuis (can be negative)
                  -7.8);  // Temperature #1 in degrees Celsuis (can be negative)
    
      // Set variometer data
      // (set Variometer source to VSpd in menu to use the vertical speed data from this sensor for variometer).
      vario.setData(250.5,  // Altitude in Meters (can be negative)
                    -1.5);  // Vertical speed in m/s (positive - up, negative - down)
    
      // Send the telemetry data, note that the data will only be sent for sensors
      // that are being polled at given moment
      telemetry.send();
    }

View all 2 project logs

View all instructions

Enjoy this project?

Share

Discussions

Drew Fustini wrote 04/25/2016 at 19:31 point

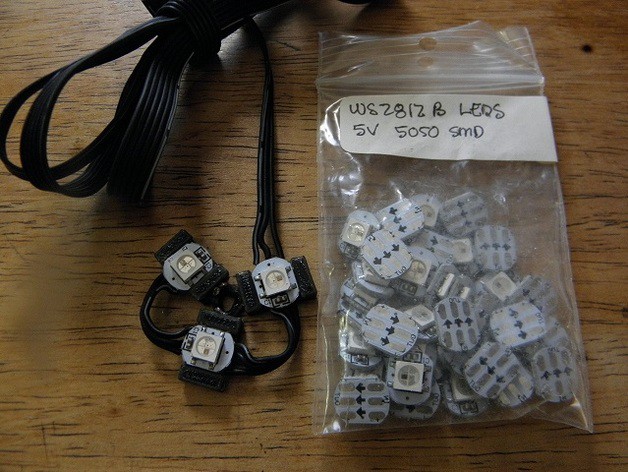
Very nice.  Where are those RGB LED boards from?

  Are you sure? yes | no

Charles Lakins wrote 04/25/2016 at 19:43 point

I added the info in the build instructions above :)

  Are you sure? yes | no

Charles Lakins wrote 05/12/2015 at 17:45 point

Im not the best at combining arduino code, i'm still working on trying to do so

  Are you sure? yes | no

Similar Projects

Does this project spark your interest?

Become a member to follow this project and never miss any updates