The brains of this remote control is an Arduino Nano using Ken Sharriff's IR library to blink an IR LED (thanks Ken!). Because of the voltage regulator's high quiescent current draw (4.5mA) circuitry was added around the Nano to power down the processor module when not in use. Even if the processor was put in its lowest current "sleep" mode the regulator would kill the battery in less than a week. One fix for this would have been to use an external regulator like a Microchip MCP1702 (significantly lower quiescent current of 2μA), but my junk drawer had more reed relays and diodes than fancy voltage regulators. With the relay setup it takes 0.0μA when idle.
Positive power is always applied to the Nano; the ground signal is switched by three different circuits. When either of the control buttons are pressed, the diodes provide a current path to power up the processor module. The first thing the code does is close the reed relay, activating the third ground signal path so the processor can continue to run even if the button was released. The program then checks which of the two buttons is pressed, sends the appropriate IR signals, then removes power from the relay which powers down the module.
On power-up the stock Nano bootloader spends a couple seconds looking at the USB to see if there are any programming instructions forthcoming before launching into the program. This delay proved a little annoying, so I reflashed it with Optiboot so that the IR signals would start as soon as the power came on / button was pushed.
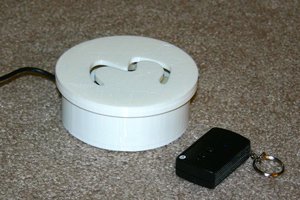
The case for the TV remote is 3D printed, and has two large colorful buttons of different shapes spaced far apart. Small rubber feet help keep the box from sliding on Easton's wheelchair tray.
Schematic:
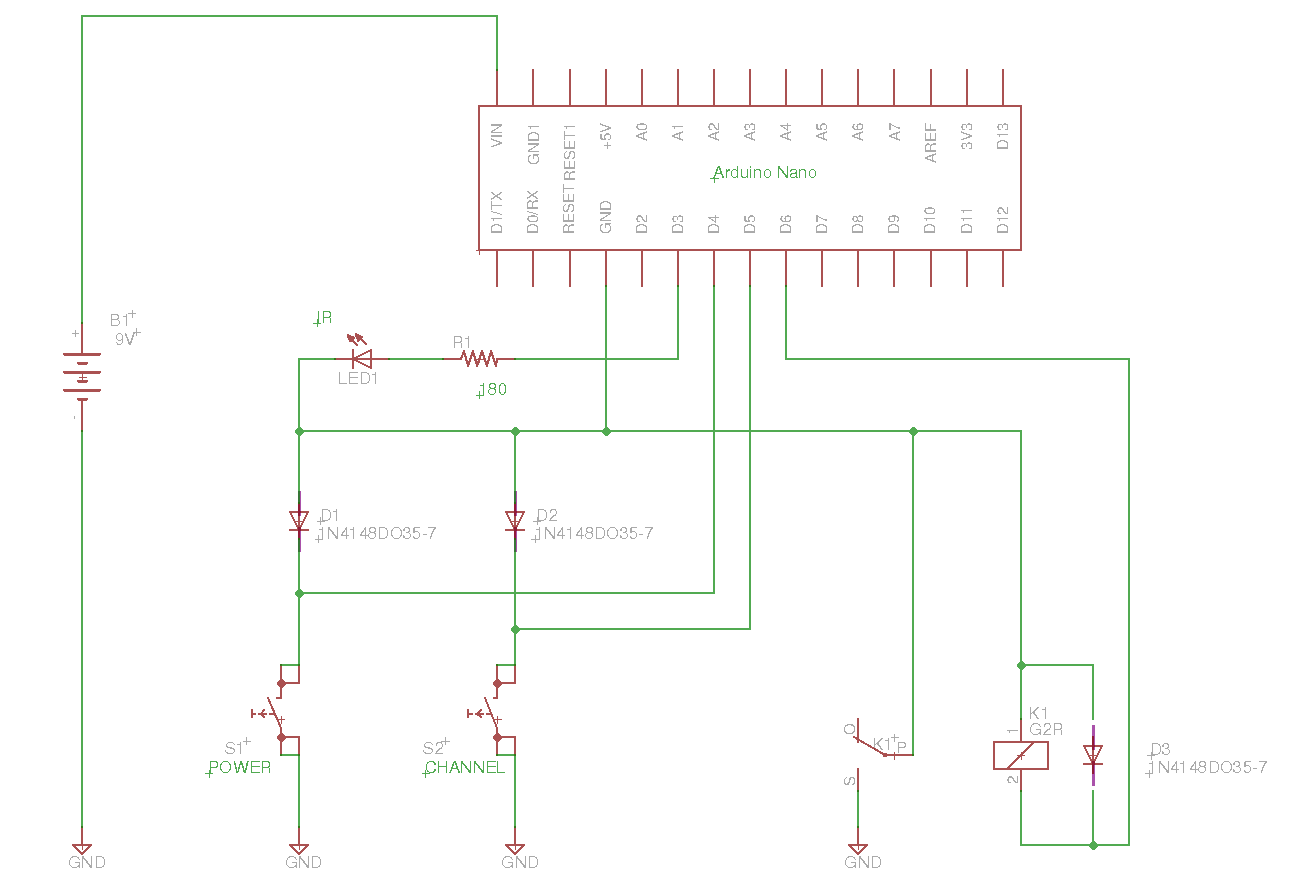
Parts List:
- Arduino Nano
- LED (850 nm, Infrared)
- Resistor (180 ohm ¼ Watt)
- Diodes (3) (1N4001 or equivalent)
- Relay (5V low current, Magnecraft W172DIP-5 or equivalent )
- Push Buttons (All Electronics LPS-5Bor equivalent )
- 9V battery and battery clip
Source Code:
#include
#include

IRsend irsend;     // Thanks to Ken Sharriff  http://www.righto.com/2009/08/multi-protocol-infrared-remote-library.html

int BoardLED = 13;

int IRLED = 3;
int SW_Power = 4;
int SW_Channel = 5;
int PowerControl = 6;

int Repeats = 5;
byte CarrierFrequencyKHz = 56;                // Dish remotes modulate a 56kHz carrier.  My IR receiver parts were all 38kHz -- being able to quickly change this made testing easier
byte MessageLength = 34;
int InterButtonDelay = 500;                   // Time in between digits "pressed" but the remote

byte SW_Channel_State;
byte SW_Power_State;

byte EEPROMChannelMem = 0;
byte SavedChannel;
byte NewChannel;

unsigned int DishRaw[34]      = {350,6200,350,2900,350,   0,350,   0,350,   0,350,   0,350,   0,350,2900,350,2900,350,2900,350,2900,350,2900,350,2900,350,2900,350,2900,350,2900,350,2900};

void setup() {                                // This routine runs once on power up
  pinMode(IRLED, OUTPUT);                     // Connection to anode of IR LED (high = on, low = off)
  pinMode(BoardLED, OUTPUT);                  // Arduino Nano board has a LED on this pin for diagnostics
  pinMode(PowerControl, OUTPUT);              // Battery is disconnected from board most of the time -- this relay that holds power on once booted up
  pinMode(SW_Channel,INPUT_PULLUP);           // "Change Channel" button, and one of the power-up buttons
  pinMode(SW_Power,INPUT_PULLUP);             // "TV Power Off/On" button, and the other power-up button
  digitalWrite(PowerControl,HIGH);            // Now that we're running (because either "Channel" or "Power" button was pressed turn on relay to keep power on until IR flash sequence is complete
  Serial.begin(9600);                         // Might want to send out some status/debug messages
}

void DishSendDigit(int Digit) {  // Sends out the flash pattern for one digit (0-9) or special characters (100 = power, 101 = enter)
  int BitCount;
  unsigned long Pattern;

  digitalWrite(BoardLED, HIGH);  // Turn on Arduino Nano board LED to show we're sending IR flashes now

  for (BitCount=0; BitCount < Repeats; BitCount++) {
    Pattern = 0;
    switch (Digit) {
      case 1:
 DishRaw[5]...
Read more »

 Kenji Larsen
 Christoph
 Mike Rigsby
Cool project, thanks for sharing.
You might be interested to see a similar one....
http://www.analysir.com/blog/2013/10/24/custom-remote-control-using-acade-style-console/
and
http://www.analysir.com/blog/2013/12/05/follow-custom-tv-infrared-remote-control-using-arcade-style-console/
Finally, check out IRlib via http://tech.cyborg5.com/