 Mark Langford
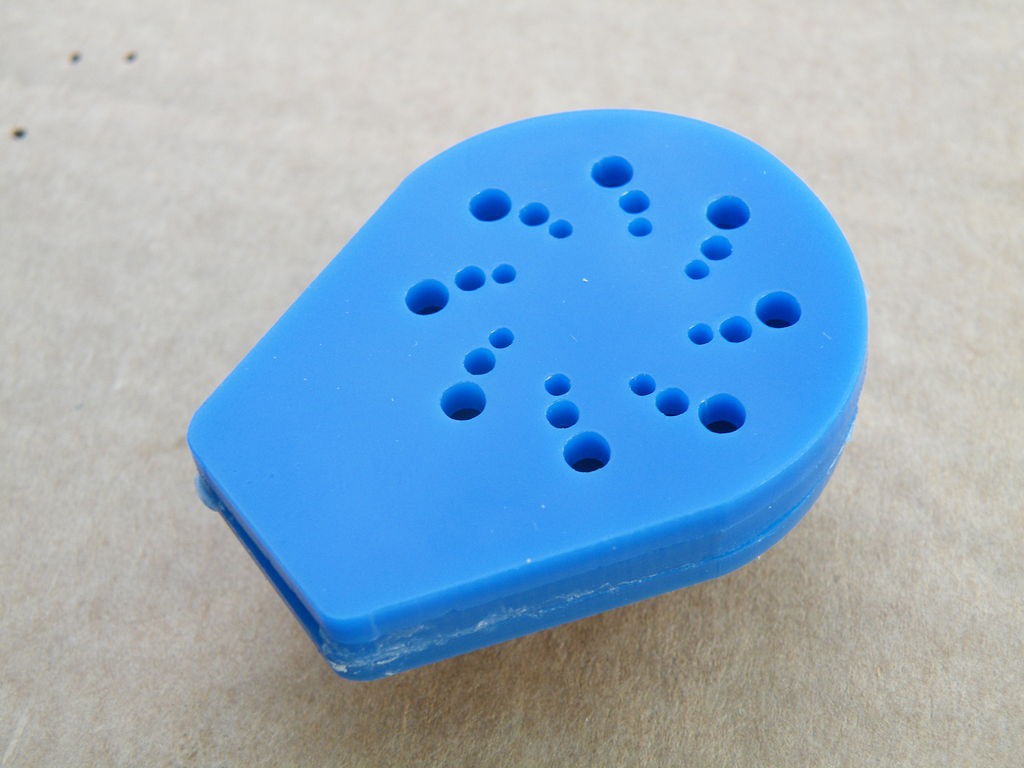
Have access to a laser cutter? Want to be really annoying?
Then you need to make a turbine whistle!
I designed it to work on the same principles as an air-raid siren, so you can imagine the noise... ;-)
(I have added an updated version in the final step. I've improved the manufacturing process, and added key-chain friendliness, but it's essentially the same, so I've not gone through and changed the original Making instructions.)
Step 1: Tools, Materials and Files

I used my own laser cutter, but if you don’t have the tools for cutting acrylic, you can use an online service. To make it easier, I’ve even added a file to this step that you can upload yourself (it uses the dimensions of the updated version I mentioned in the introduction).
I used 3mm acrylic. You could use plywood, but it's not so nice in the mouth.
You'll also need thin dowel (I used a bamboo skewer), sandpaper, super glue, a sharp knife and a surface to work on (something safe to cut and glue on).
Attached to this step are the SVG and DXF files you'll need as well.
Download Pocket Siren 3mm P1 Ponoko Ready.svg
Download Turbine Whistle.svg
Step 2: Cutting


Cut your acrylic, or wait for the mailman to deliver your lasercut parts.
(That's got to be the shortest step I have ever written!)
Step 3: Prepare the Turbine

The turbine needs to spin inside the whistle, but, being exactly the same thickness as the rest of the cut pieces, it will just jam.
To prevent this, you'll need to sand the turbine to be slightly thinner.
Place the turbine on the sandpaper, press firmly and evenly, and move it around in a circular motion. To make sure the sanding is even, regularly turn the turbine under your fingers.
You don't need to take a lot of the turbine off, just enough that the difference between the turbine and the surrounding acrylic is enough to catch your nail on.
Step 4: Make the Axle
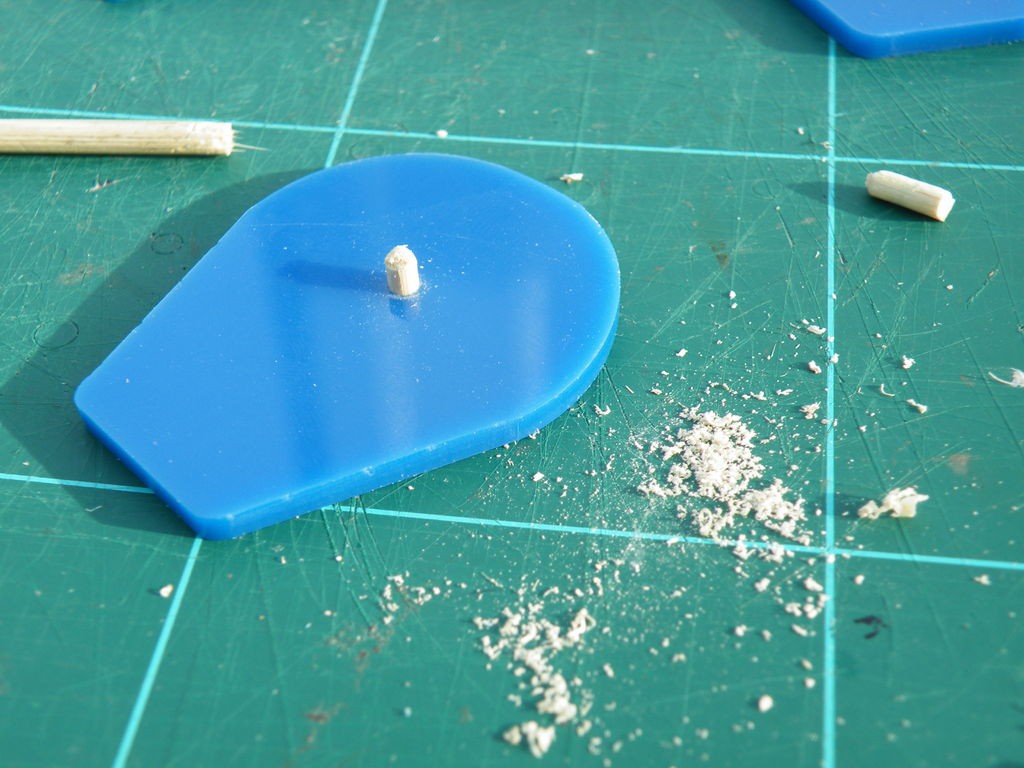
I didn't design and make this whistle straight as the final version - it went through a few "draft" versions first, and an early version had no axle, with the turbine spinning freely within the case. It worked, but not very well.
The axle I came up with is just a piece of bamboo skewer, shaved slightly so that it is a tight friction-fit in the hole of the bottom plate of the whistle's case. (If I could, I would have used an acrylic axle, but I couldn't find a source of thin acrylic rod.)
Trim the shaved bamboo to be thick enough to touch, or almost touch, the top plate of the case.
Step 5: Assembly


Putting the whistle together isn't hard, but it can be fiddly, and you need to pay attention to getting parts the right way round.
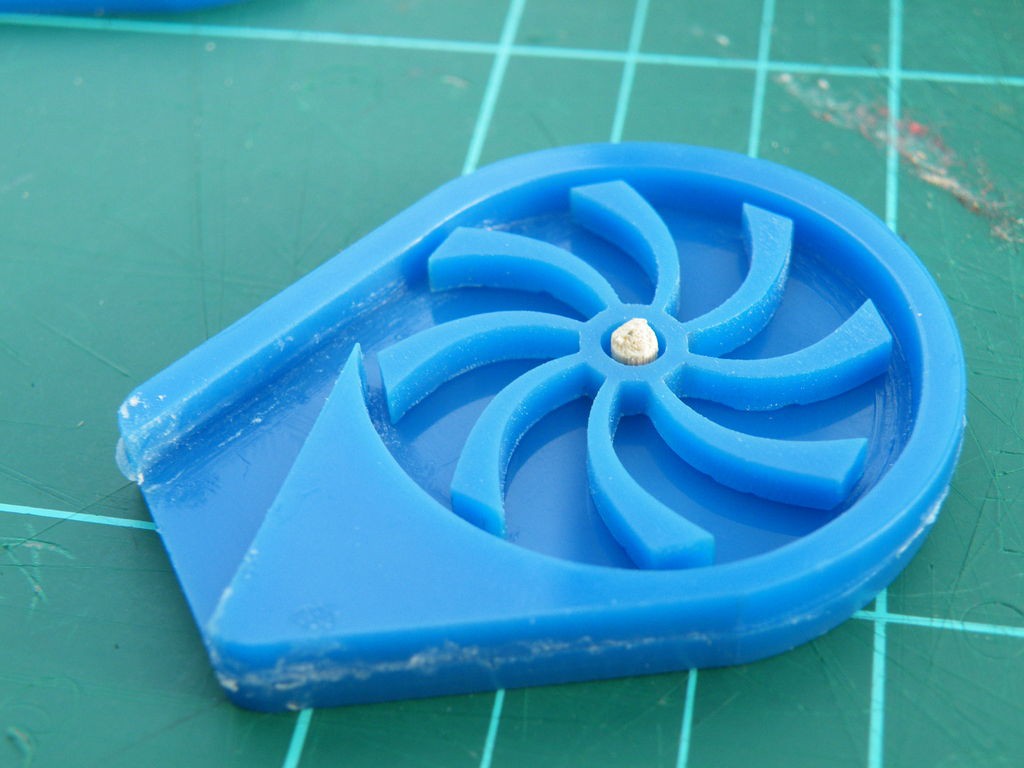
Start by gluing the central layer to the bottom plate. Note how the channel directs air to the left of the axle. It is also important to line the central layer up accurately with the bottom plate - if it's more than a fraction of a millimetre out, the turbine will jam against the case.
Because the central layer is flexible, I found it easiest to glue and align the large triangular section in place, then carefully lift the thinner parts to drop a little glue between the layers and align them too.
Make sure you let the glue dry completely before doing anything else!
If any glue oozes into the area for the turbine, wipe or scrape it clear to prevent jamming.
When the glue is dry, drop the turbine over the axle. Check the photo for the orientation - the curved blades catch the air coming up the channel.
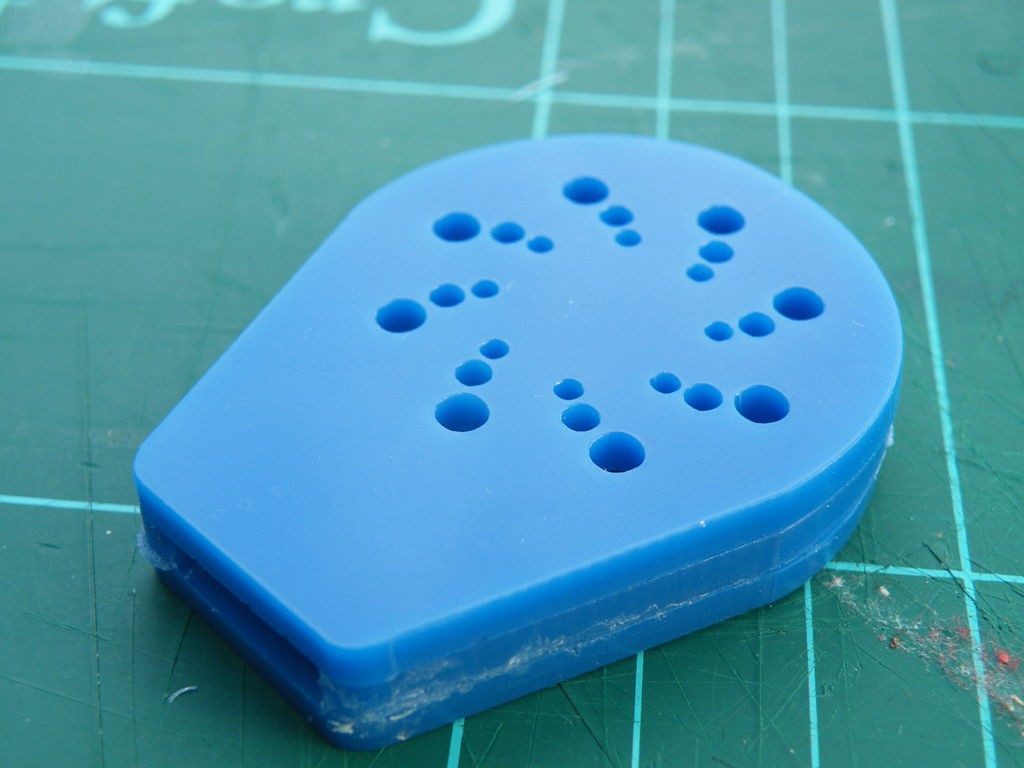
Finally, glue on the top plate. Again, be careful not to get any glue into the inside of the casing. You also need to get the plate the right way up - the curved pattern of circles needs to follow the curve of the turbine blades.
Wipe or scrape off any excess glue, let the rest of it dry properly, and you're ready to blow.
Step 6: The Whistle in Action

I said earlier that the whistle works like an air-raid siren. Here's how;
The air you blow in blows out through the pattern of holes, and at the same time, it makes the turbine...
Read more »


