 deʃhipu
Seeing how most of robots based on or inspired by Tote don't actually use the original printed circuit board, I conclude that ordering one is the main pain point. I don't really see why, because it's not very expensive and the waiting time is about the same as with ordering the servos and all the other parts. And it's not like you won't find a use for the other 9 boards, as they are pretty much generic servo breakout boards. They are just shaped in a way that makes it easy to attach the legs. Anyways, I decided to explain how you can build Tote with just a proto-board, like #Tote in the Wild and #Micropython Quadruped Robot. Let's start with the connections (note that the connections for your IR sensor may be different):
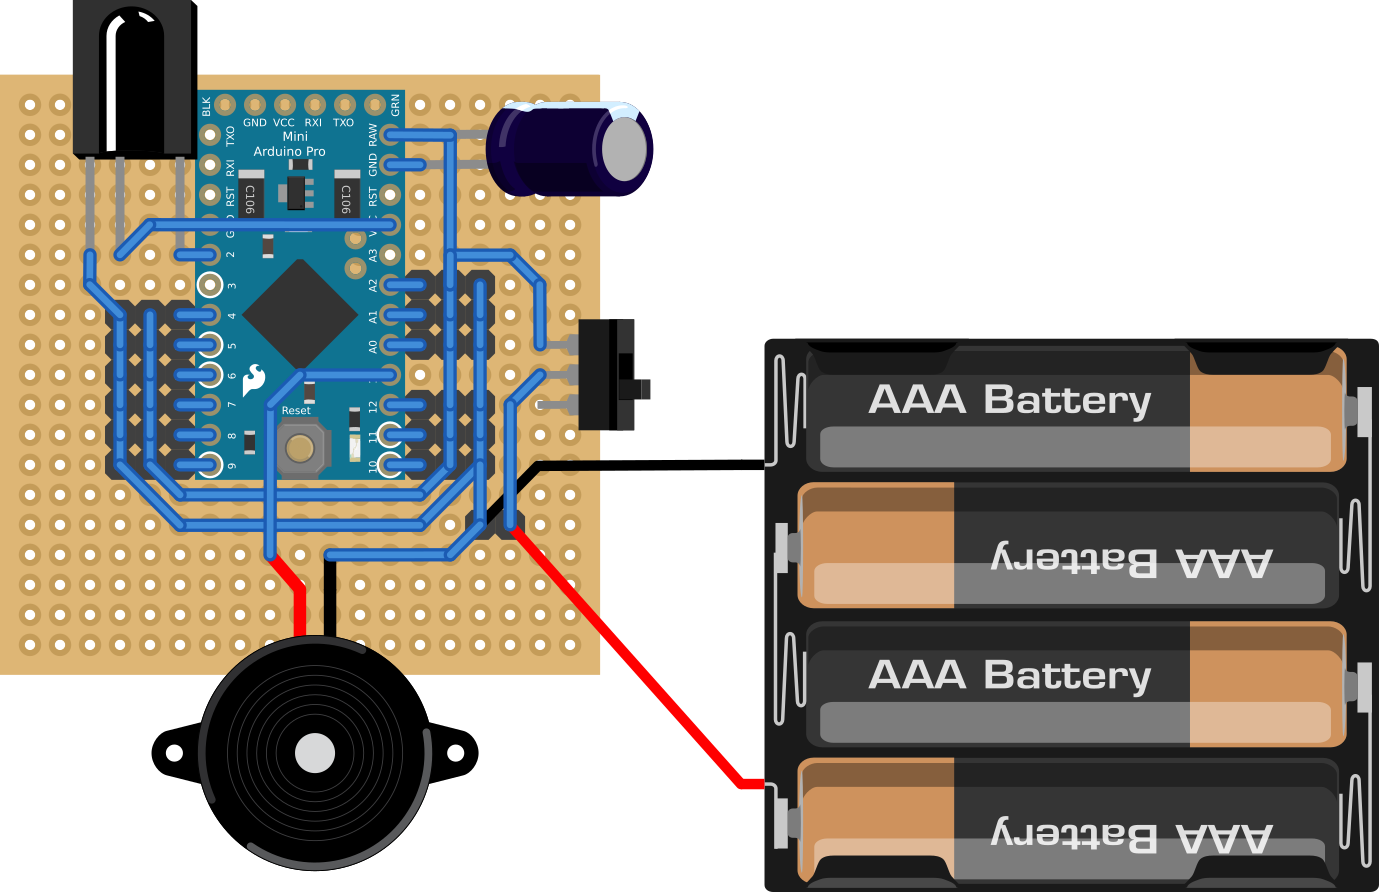
As you can see, it's not overly complicated. The board needs to be 19x19 holes to keep the original dimensions of Tote -- if you change that, you will need to change the BASE variable in the code, so that the robot knows how big it is. If you don't like to make so many connections with wires, you can also use a strip board and cut some of the strips.
Note one trick though. The pin 13 of the Pro Mini is not used for a servo -- there is a gap in there. That's because it has a LED on it, and we want to be able to use it for signaling.
I also skipped the battery voltage monitoring circuit, so you will have to comment that section in the code, or your robot will keep on shutting down randomly for no reason.
Next comes the mechanical part. You need to drill (or otherwise make) the holes for mounting the servos. You can use an electric drill, a dremel (like me), or even simply a metal file. I made a handy template that you can print out and glue to your board to get the holes right, but it's really quite simple. Four 7mm holes in the corners, and eight small holes for the screws:

You can also easily adapt for other microcontroller boards than the Pro Mini, of course.
Discussions
Become a Hackaday.io Member
Create an account to leave a comment. Already have an account? Log In.