Close
0%
0%

Music CD Ripper Robot

A CD Robot and PC combined, plus some custom software to capture my 25+ year CD Audio collection to the digital era.

Similar projects worth following
For years I've wanted to convert my entire quarter century plus CD music collection of several hundred CDs into the MP3 format. Now nearly all of the online music providers are DLC free, there shouldn't be any legality issues, provided I don't re-distribute them, of which I have no interest in doing.
Somewhat more of a grey area is doing mass DVD / BluRay captures, of which I don't yet have a method for, but is a possible plan for the future.
Yes I could just have very slowly done it all manually, by hand, tediously, repetitively, painfully - so why not robots!?
My robot building skills are, well, useless. I tried building something several years ago, but it was a wooden rickety imprecise monstrosity. I quickly realised one of the most difficult aspects was getting the 'gripper arm' to pick up individual disks from dense stacks of disks out of their jewel cases. Quite an engineering challenge.

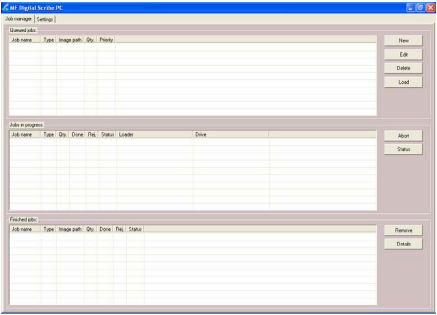
At work, in storage for years, sat an MF Digital Scribe. A huge lump of metal with a PC built into the back, a bulky Inkjet printer on top for labelling disks automatically, plus some really dangerous looking metal spikes for 'containing' the disks.

MF Digital Scribe

You don't want to get drunk around this monstrosity and impale yourself on one of it's spikes.

So I pleaded with my boss to allow me to take it home and fix it up, for the very purpose of digitising my entire CD audio collection to MP3.

Just two weeks ago at time of writing I got authorisation to de-asset it and lug it home!

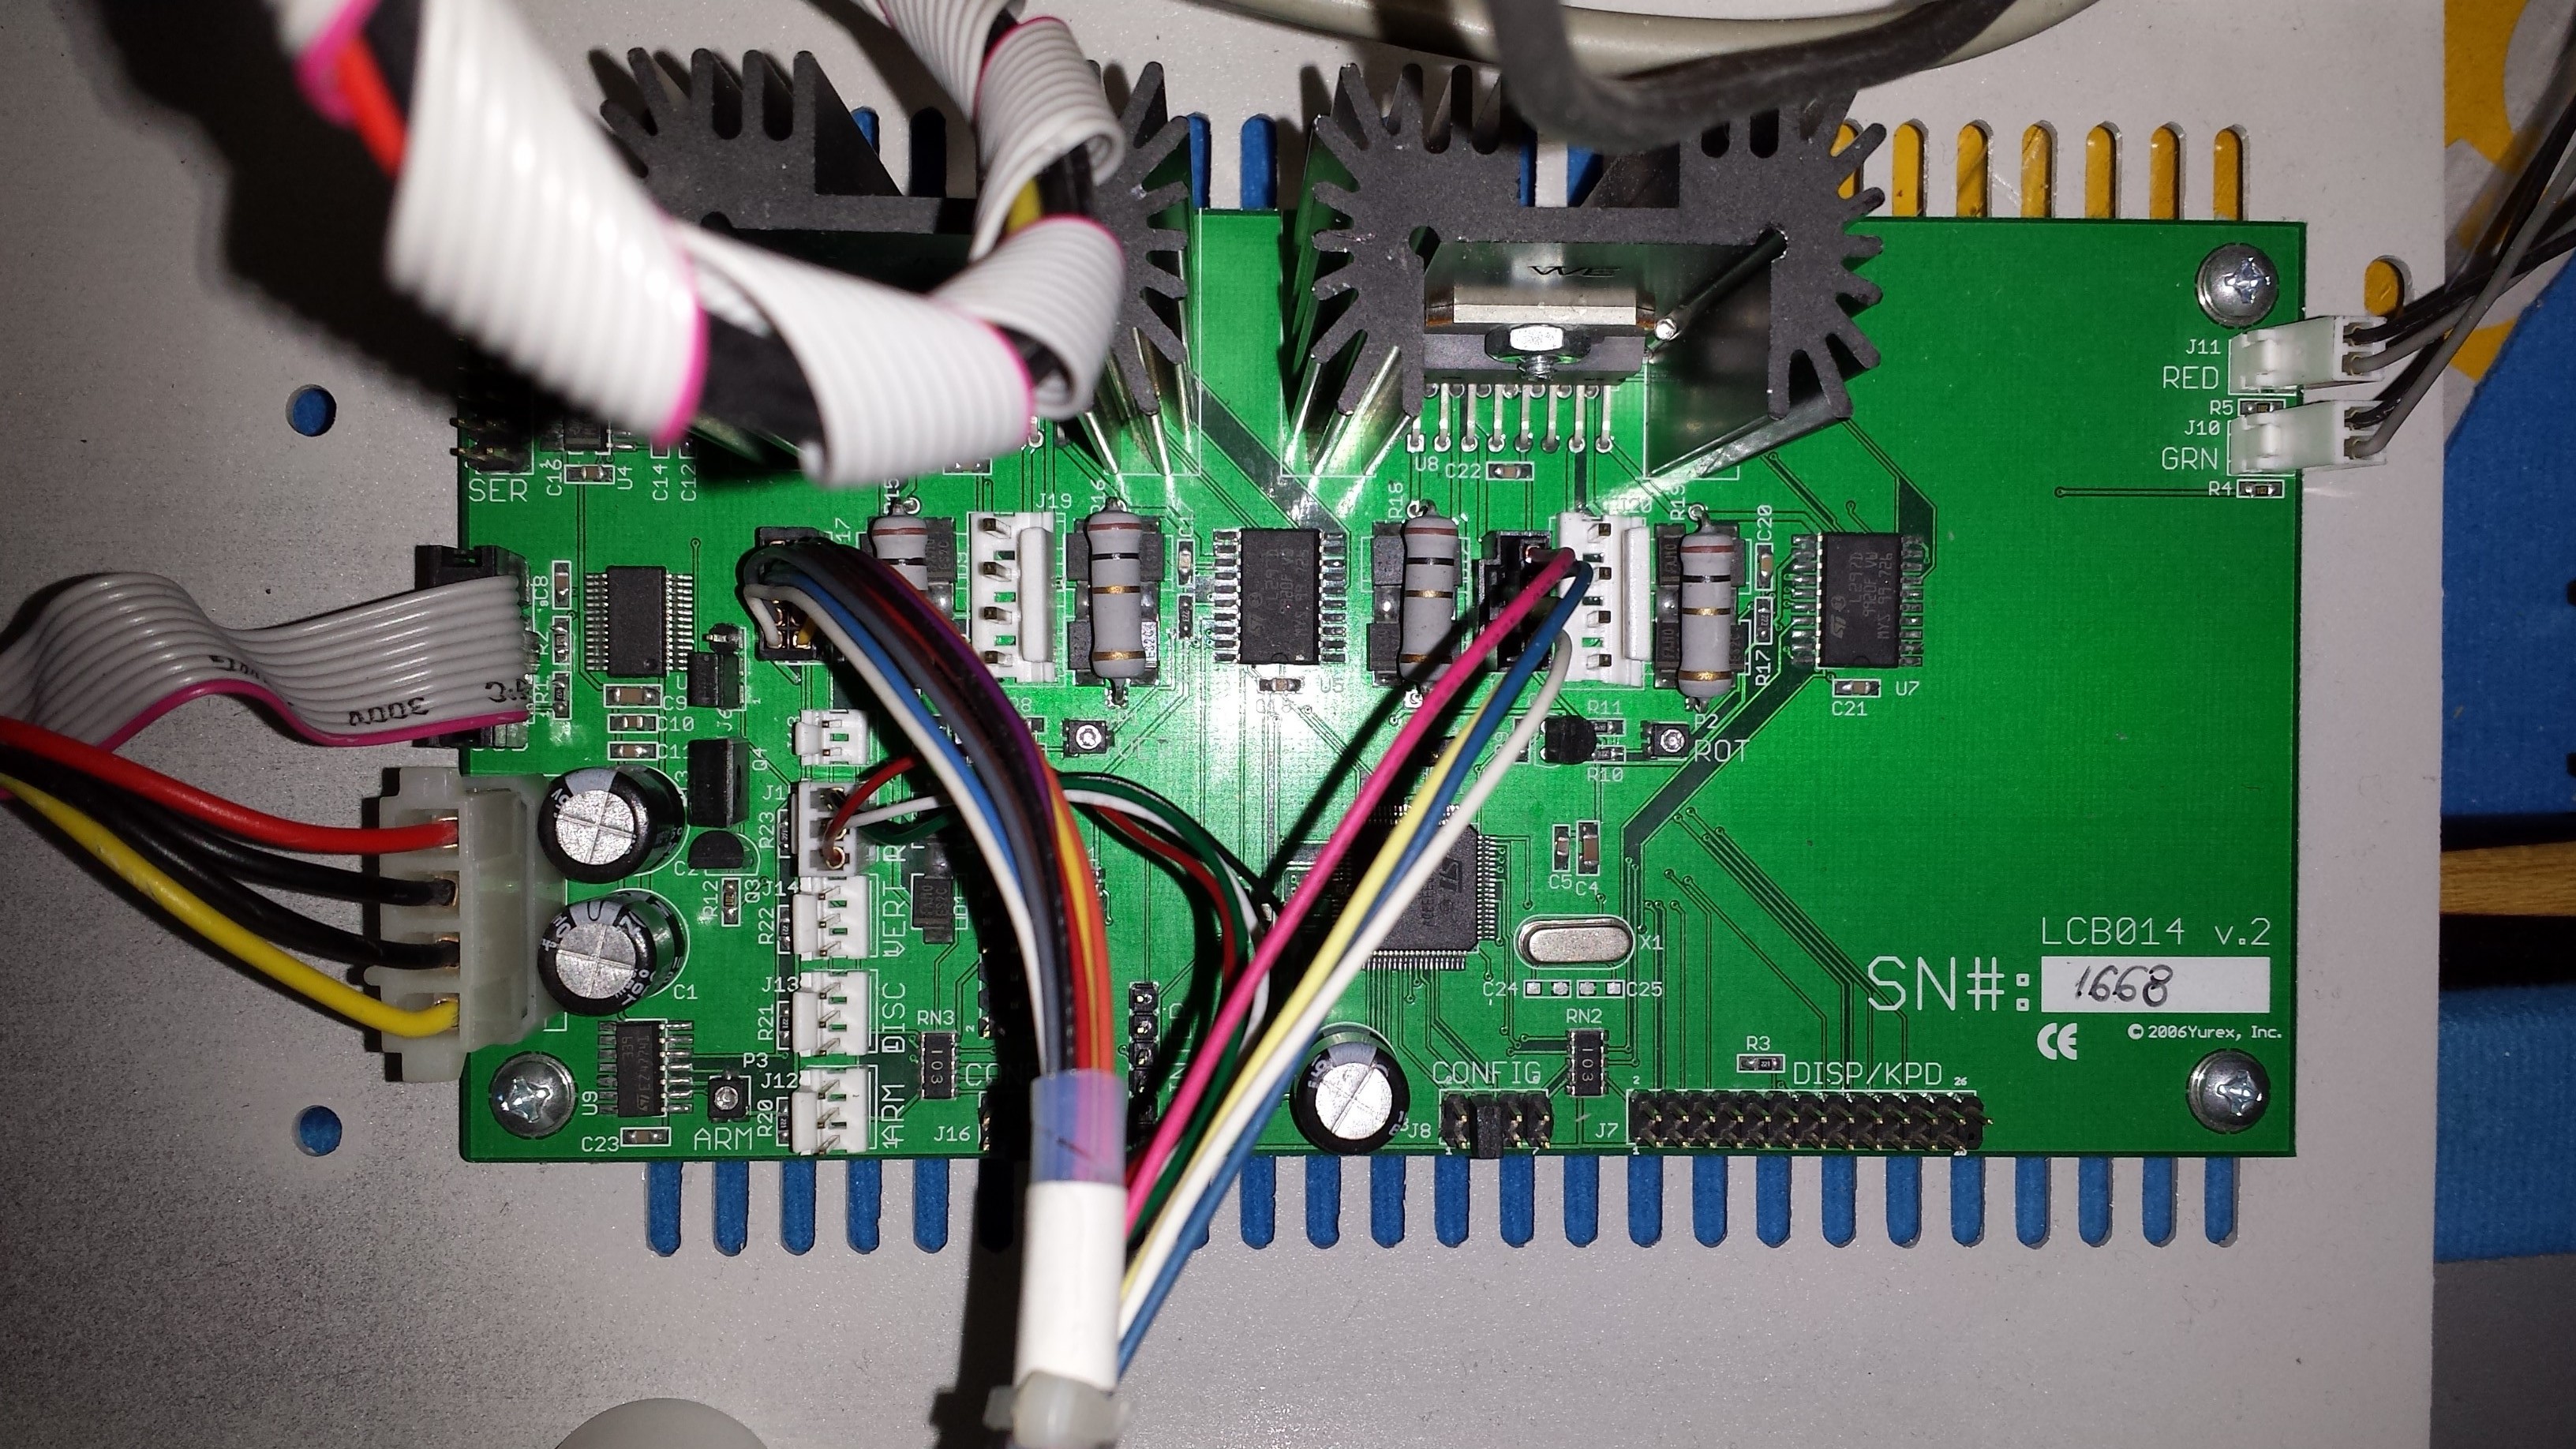
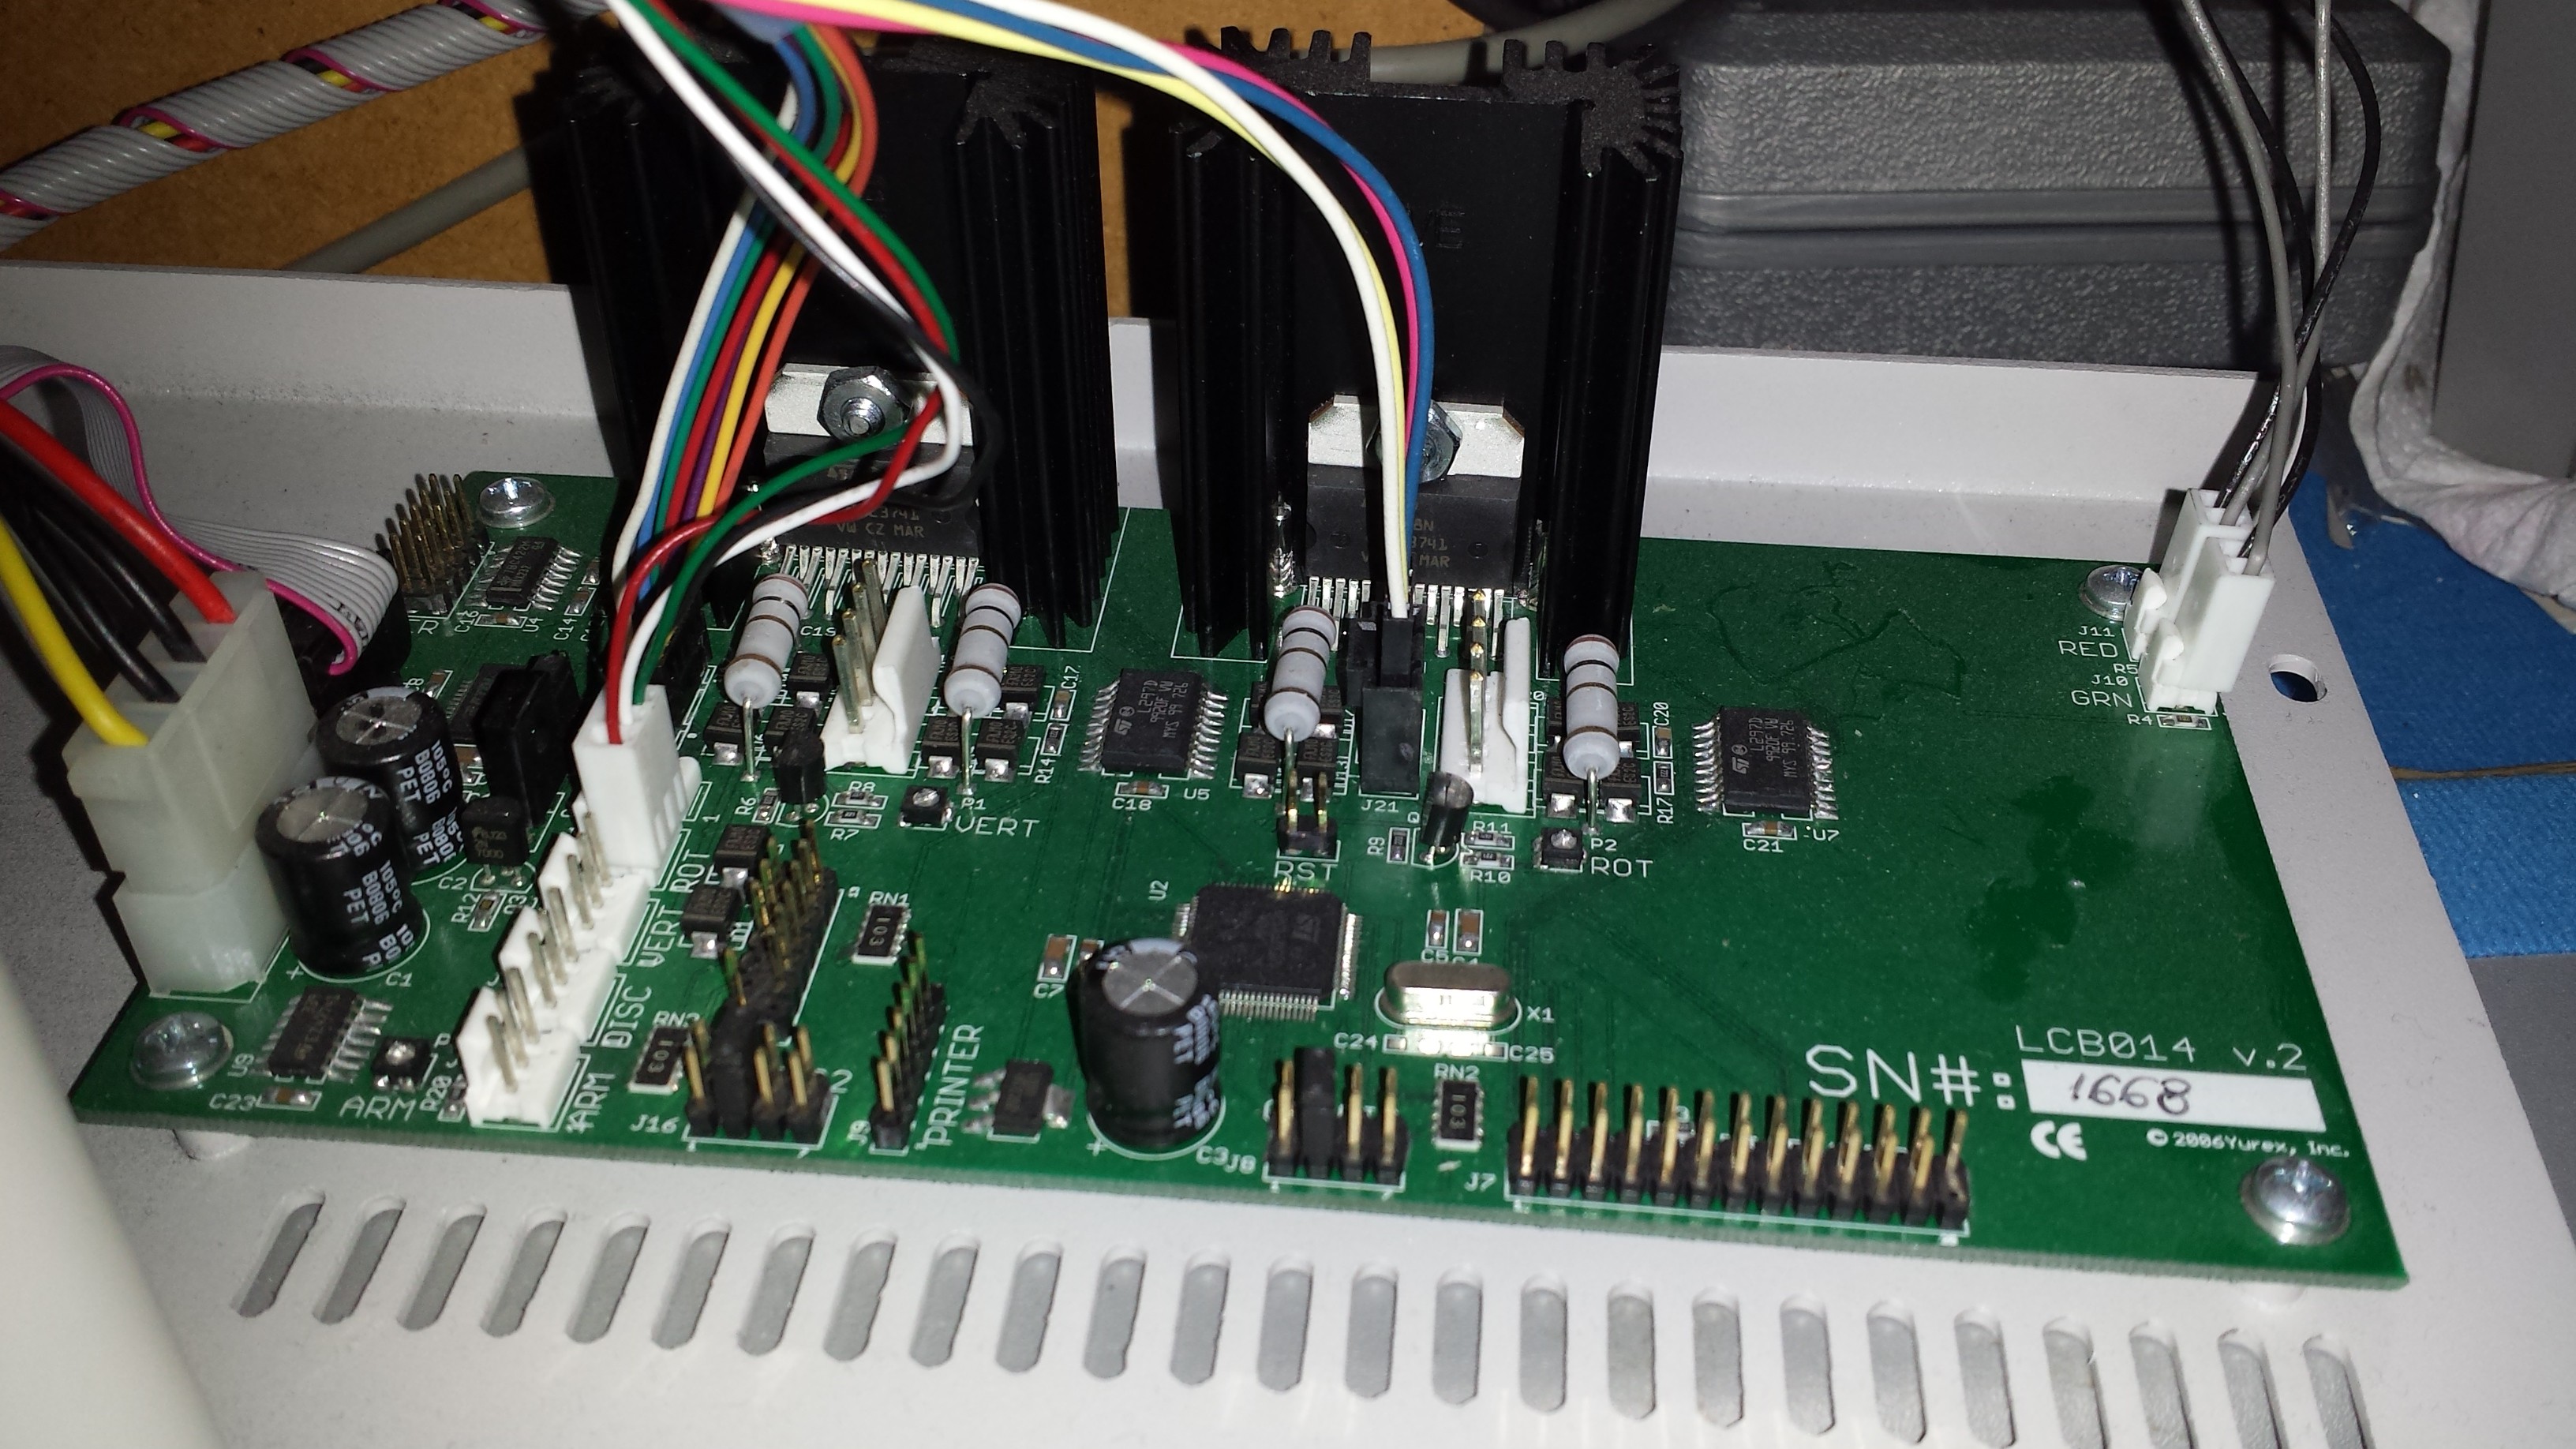
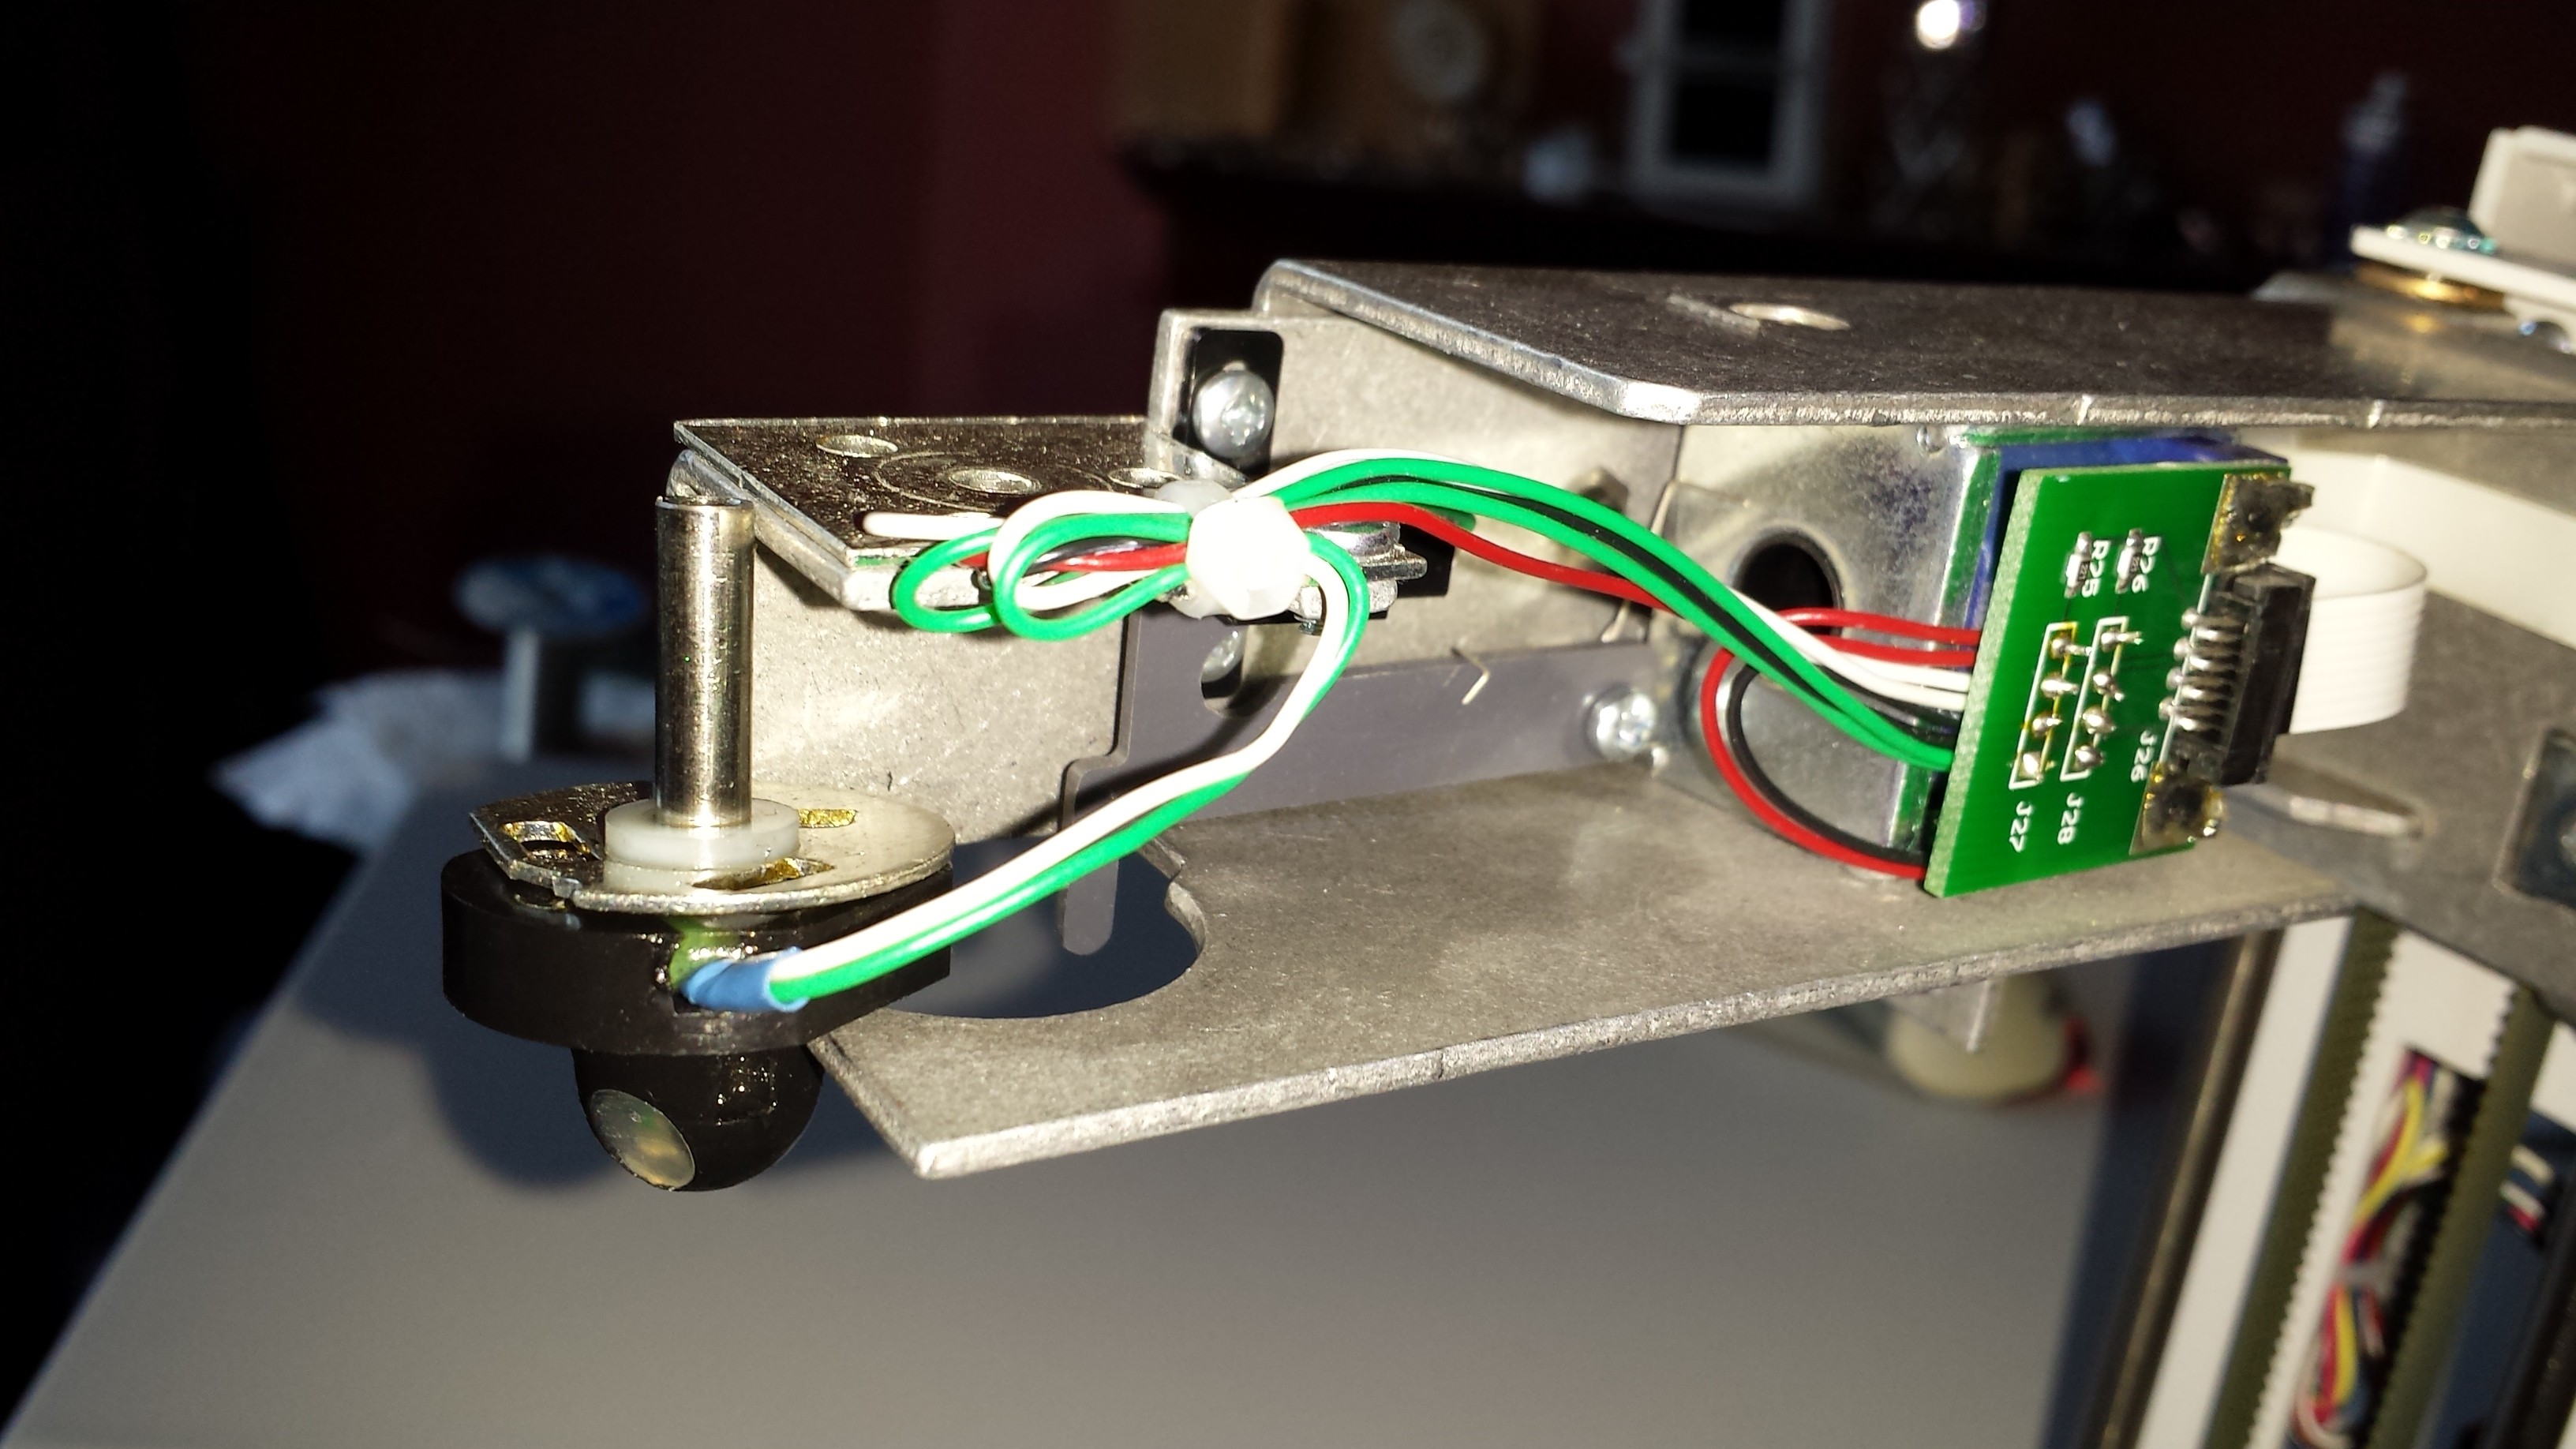
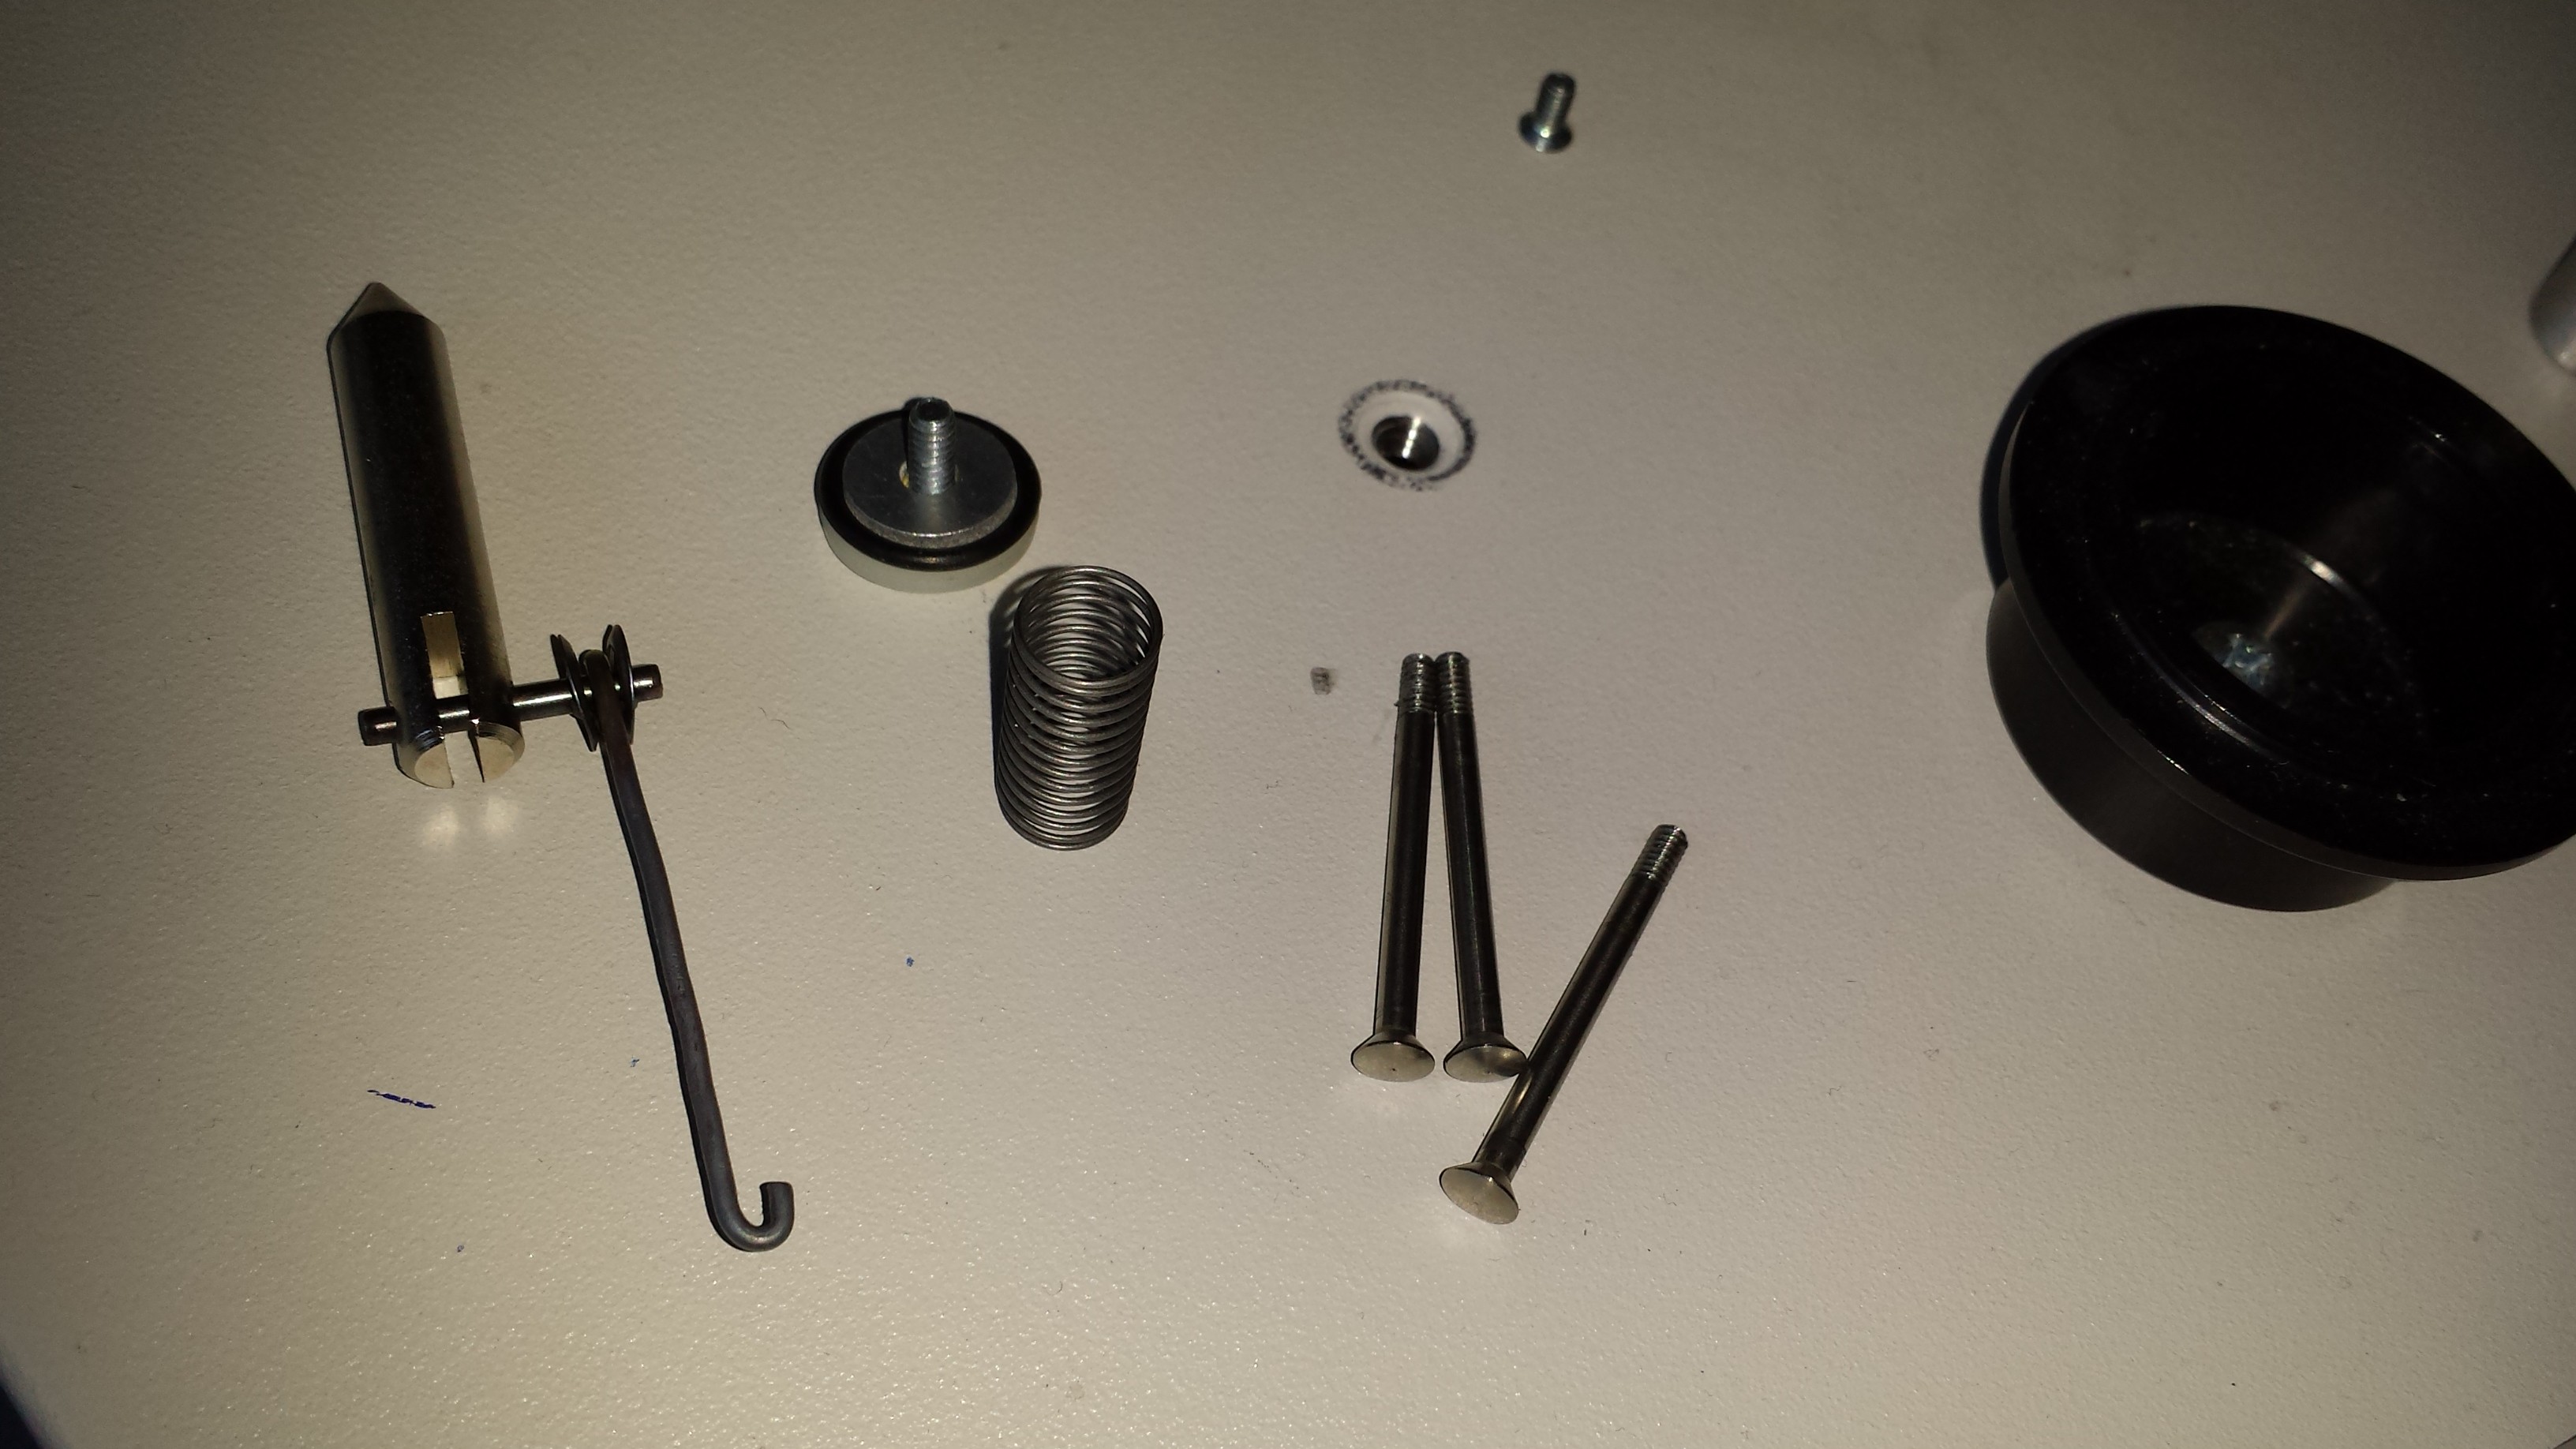
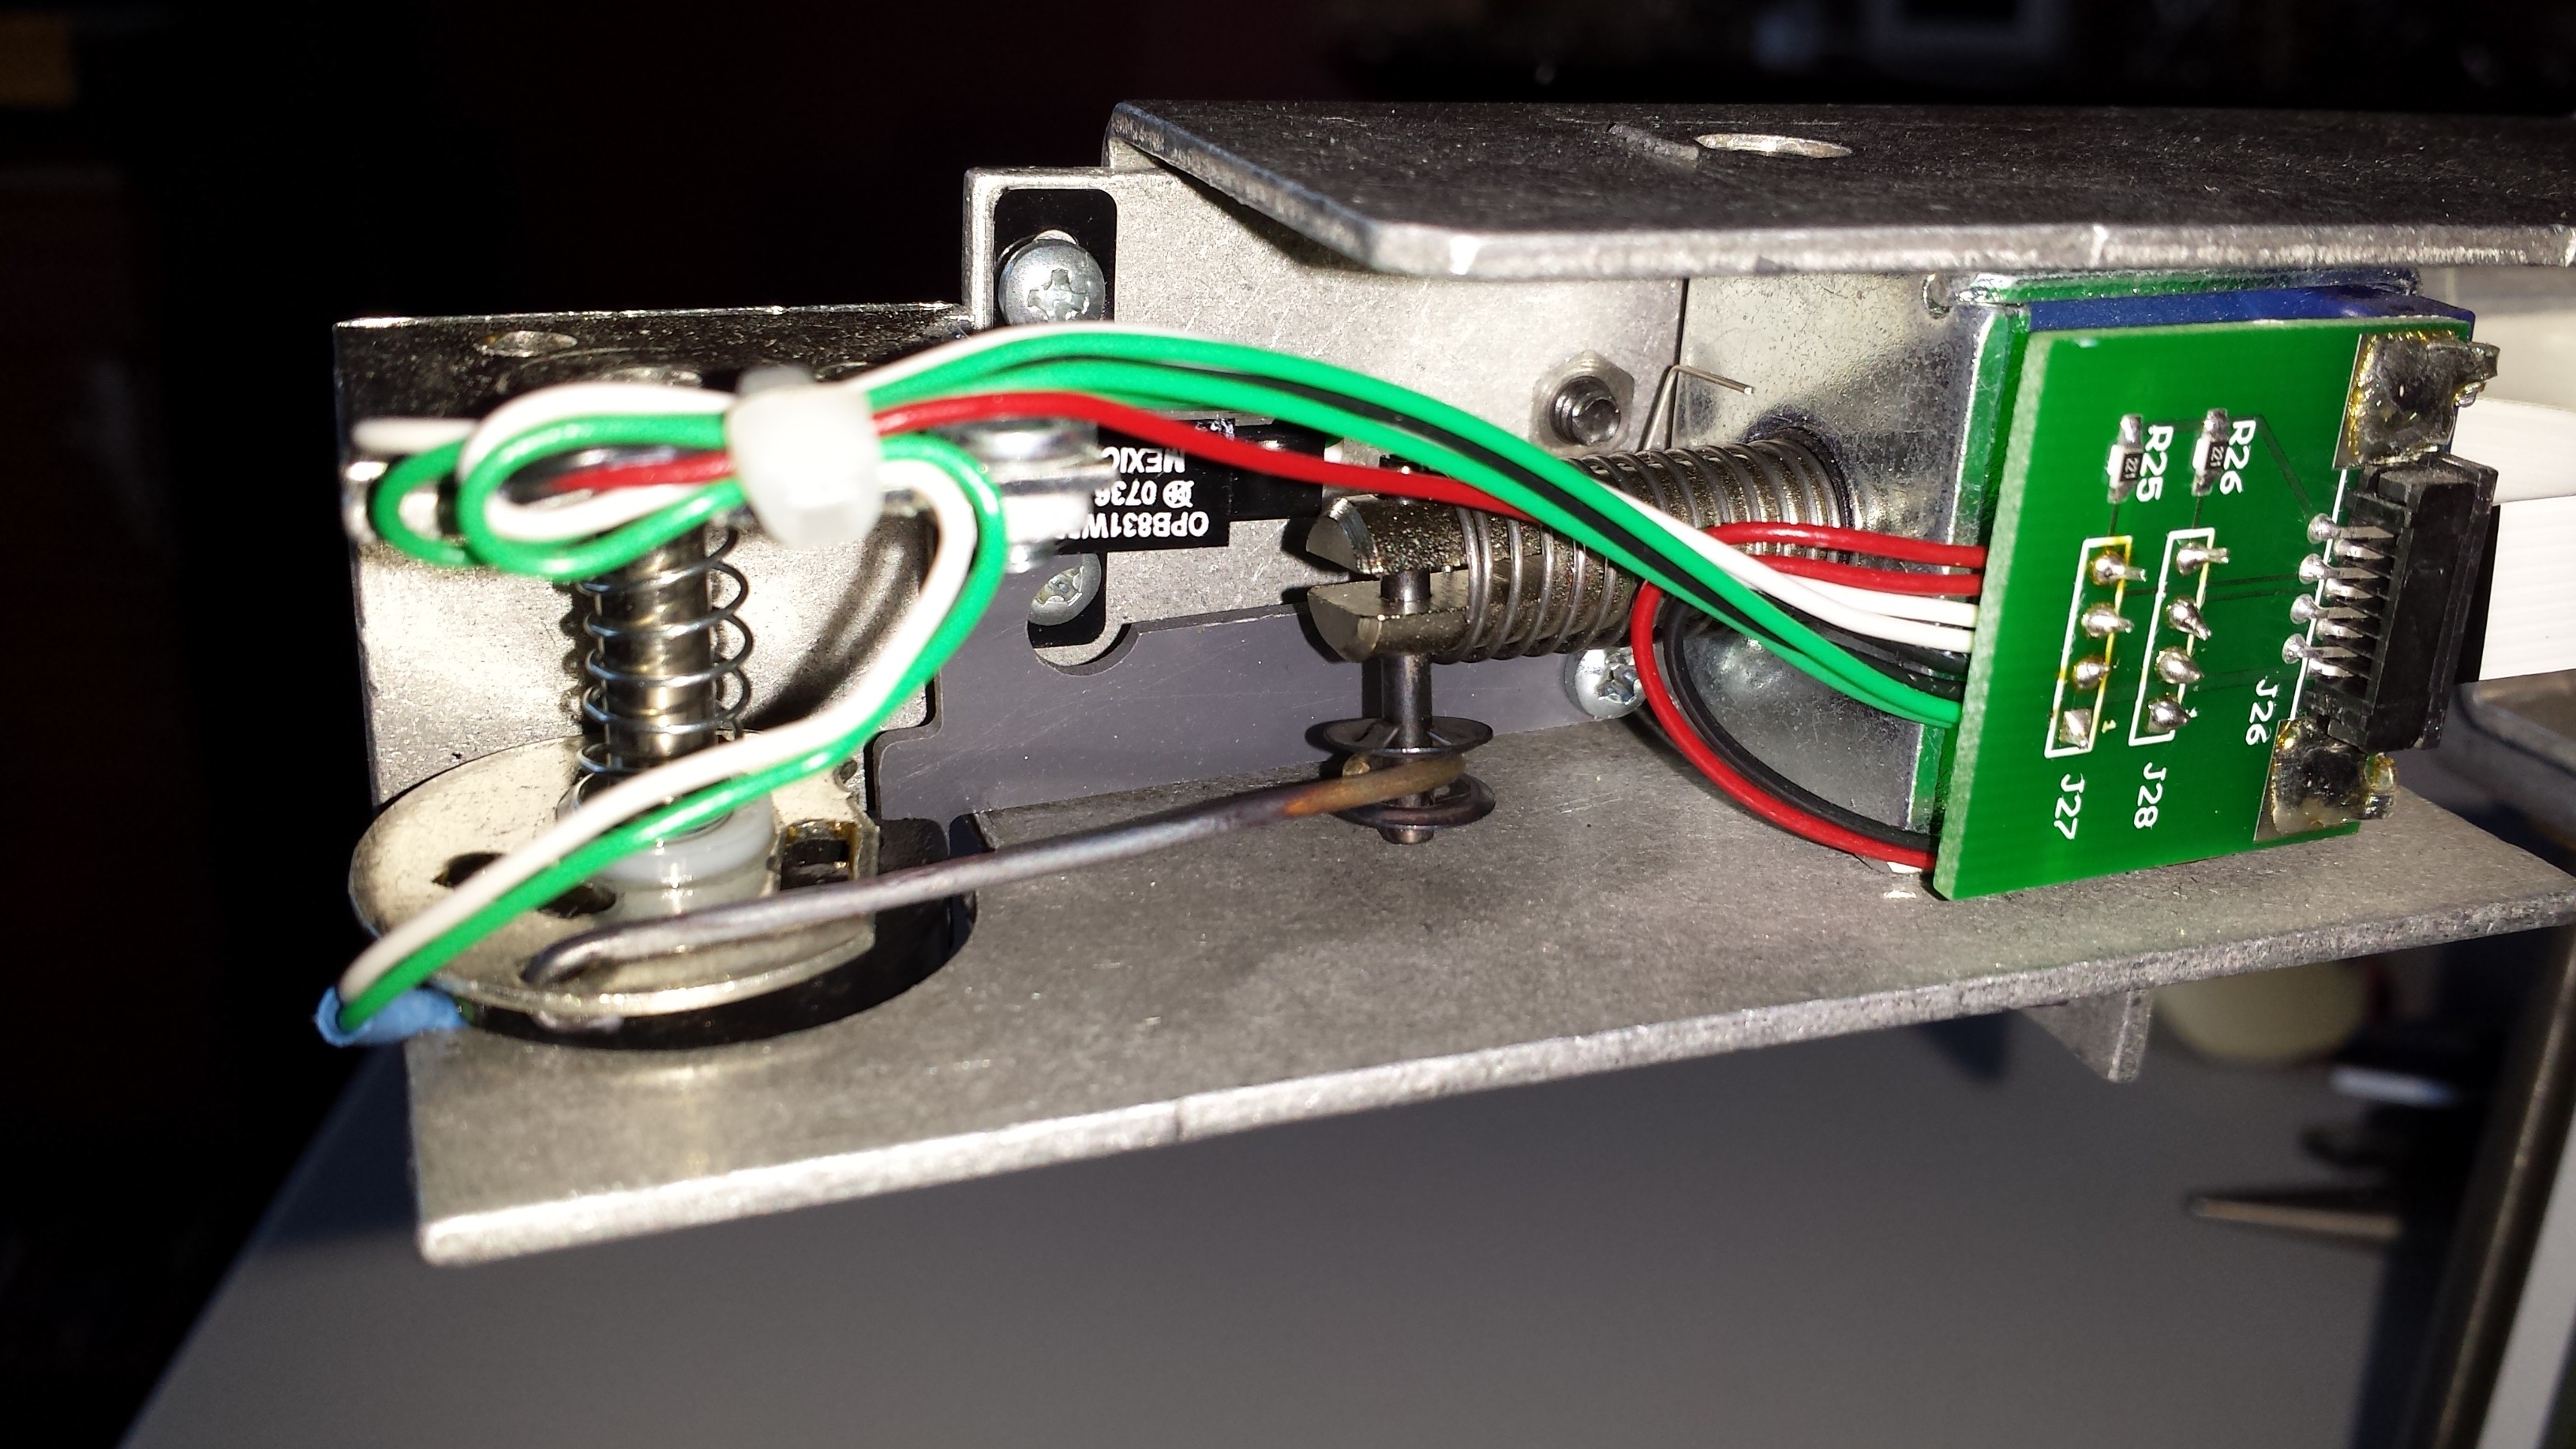
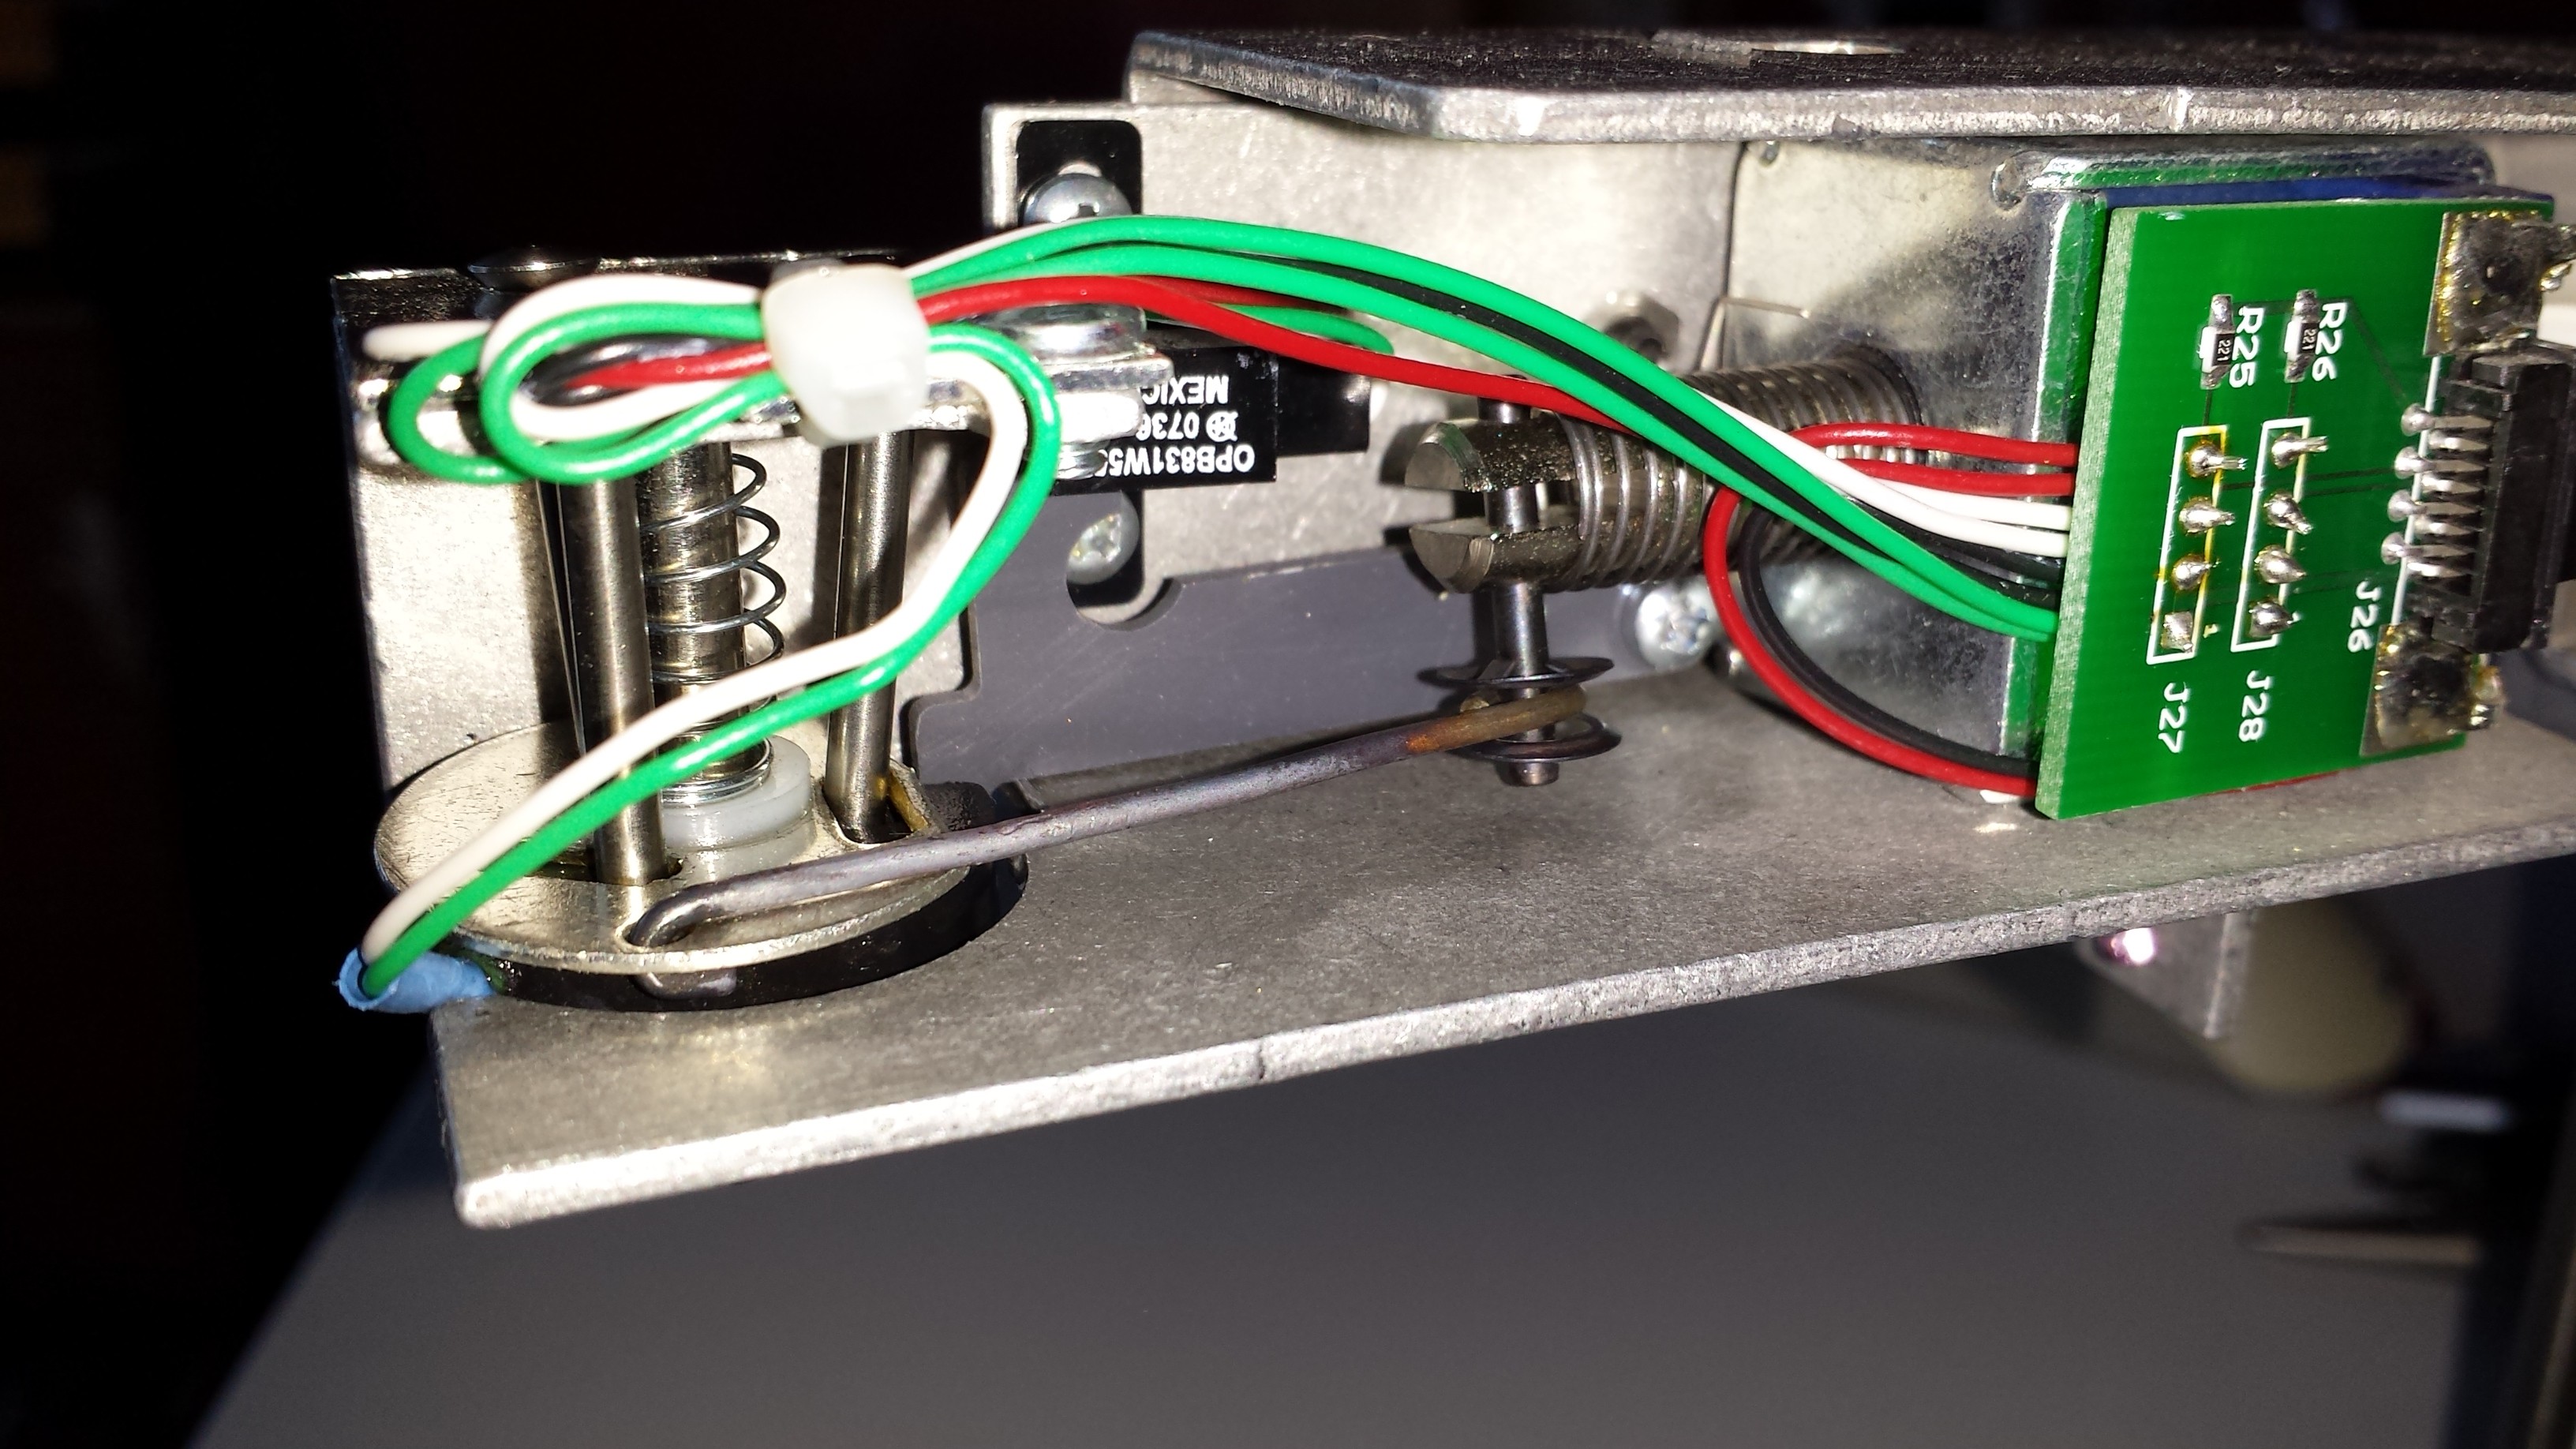
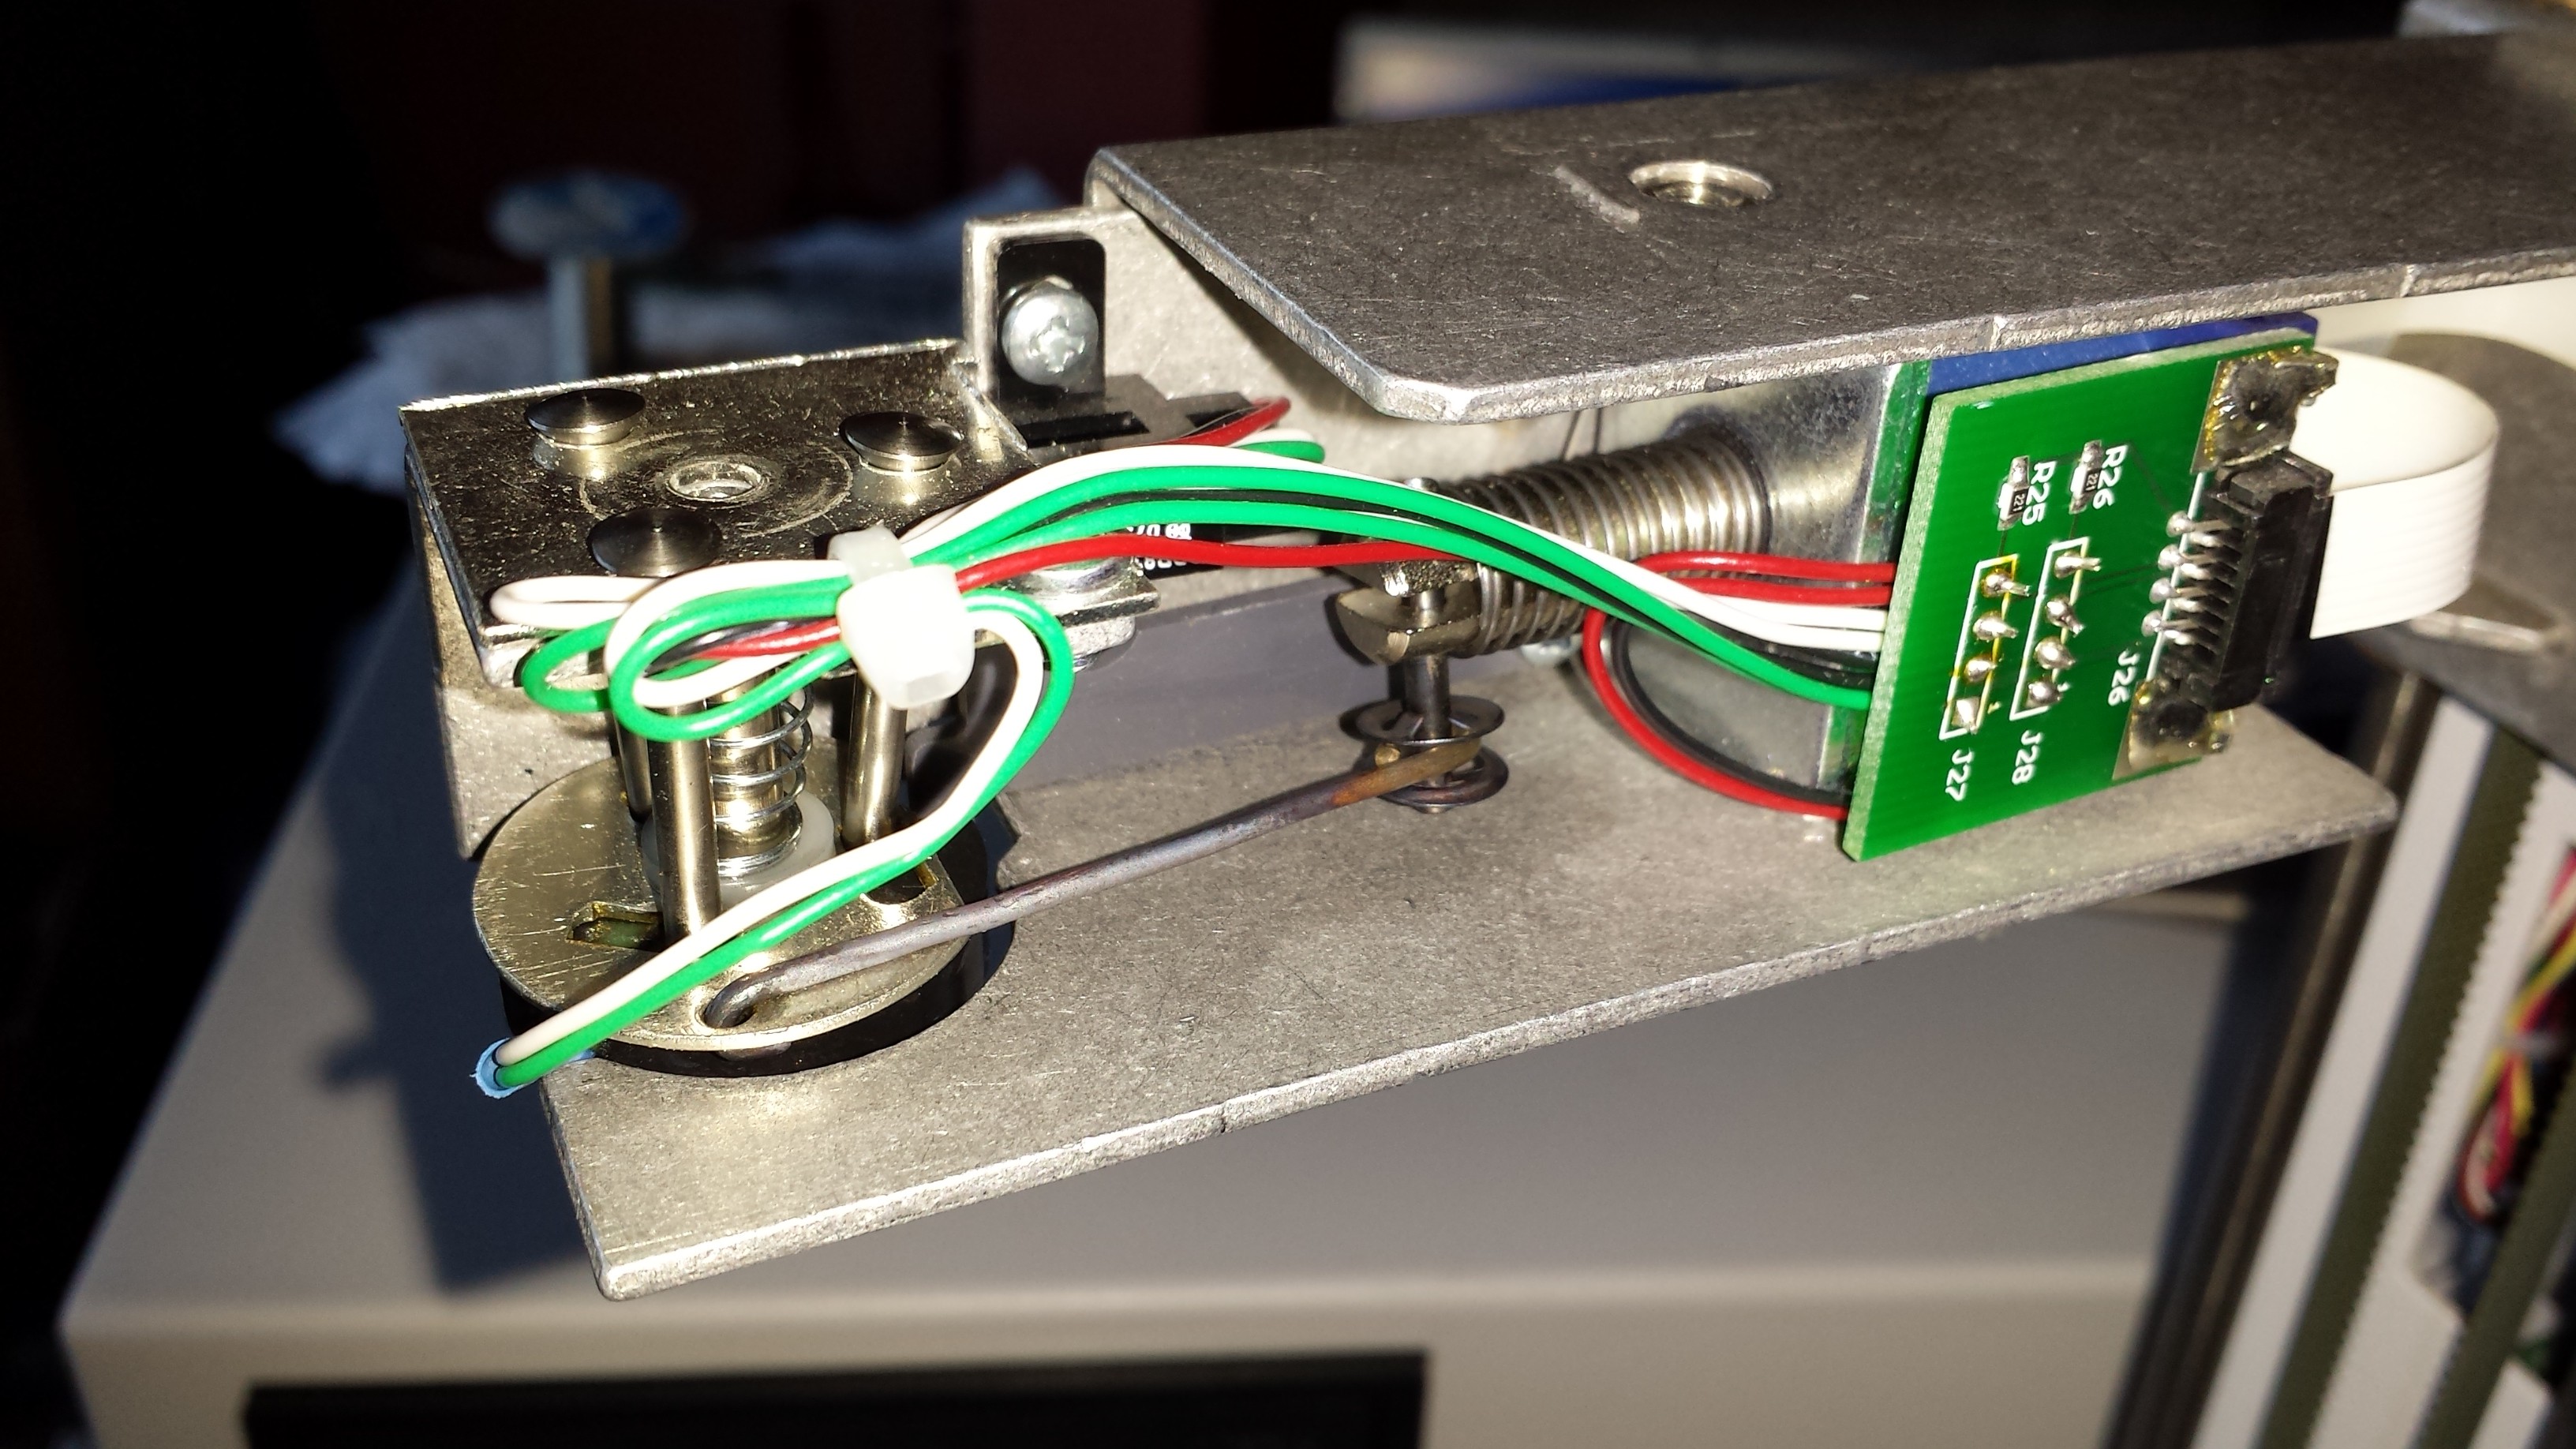
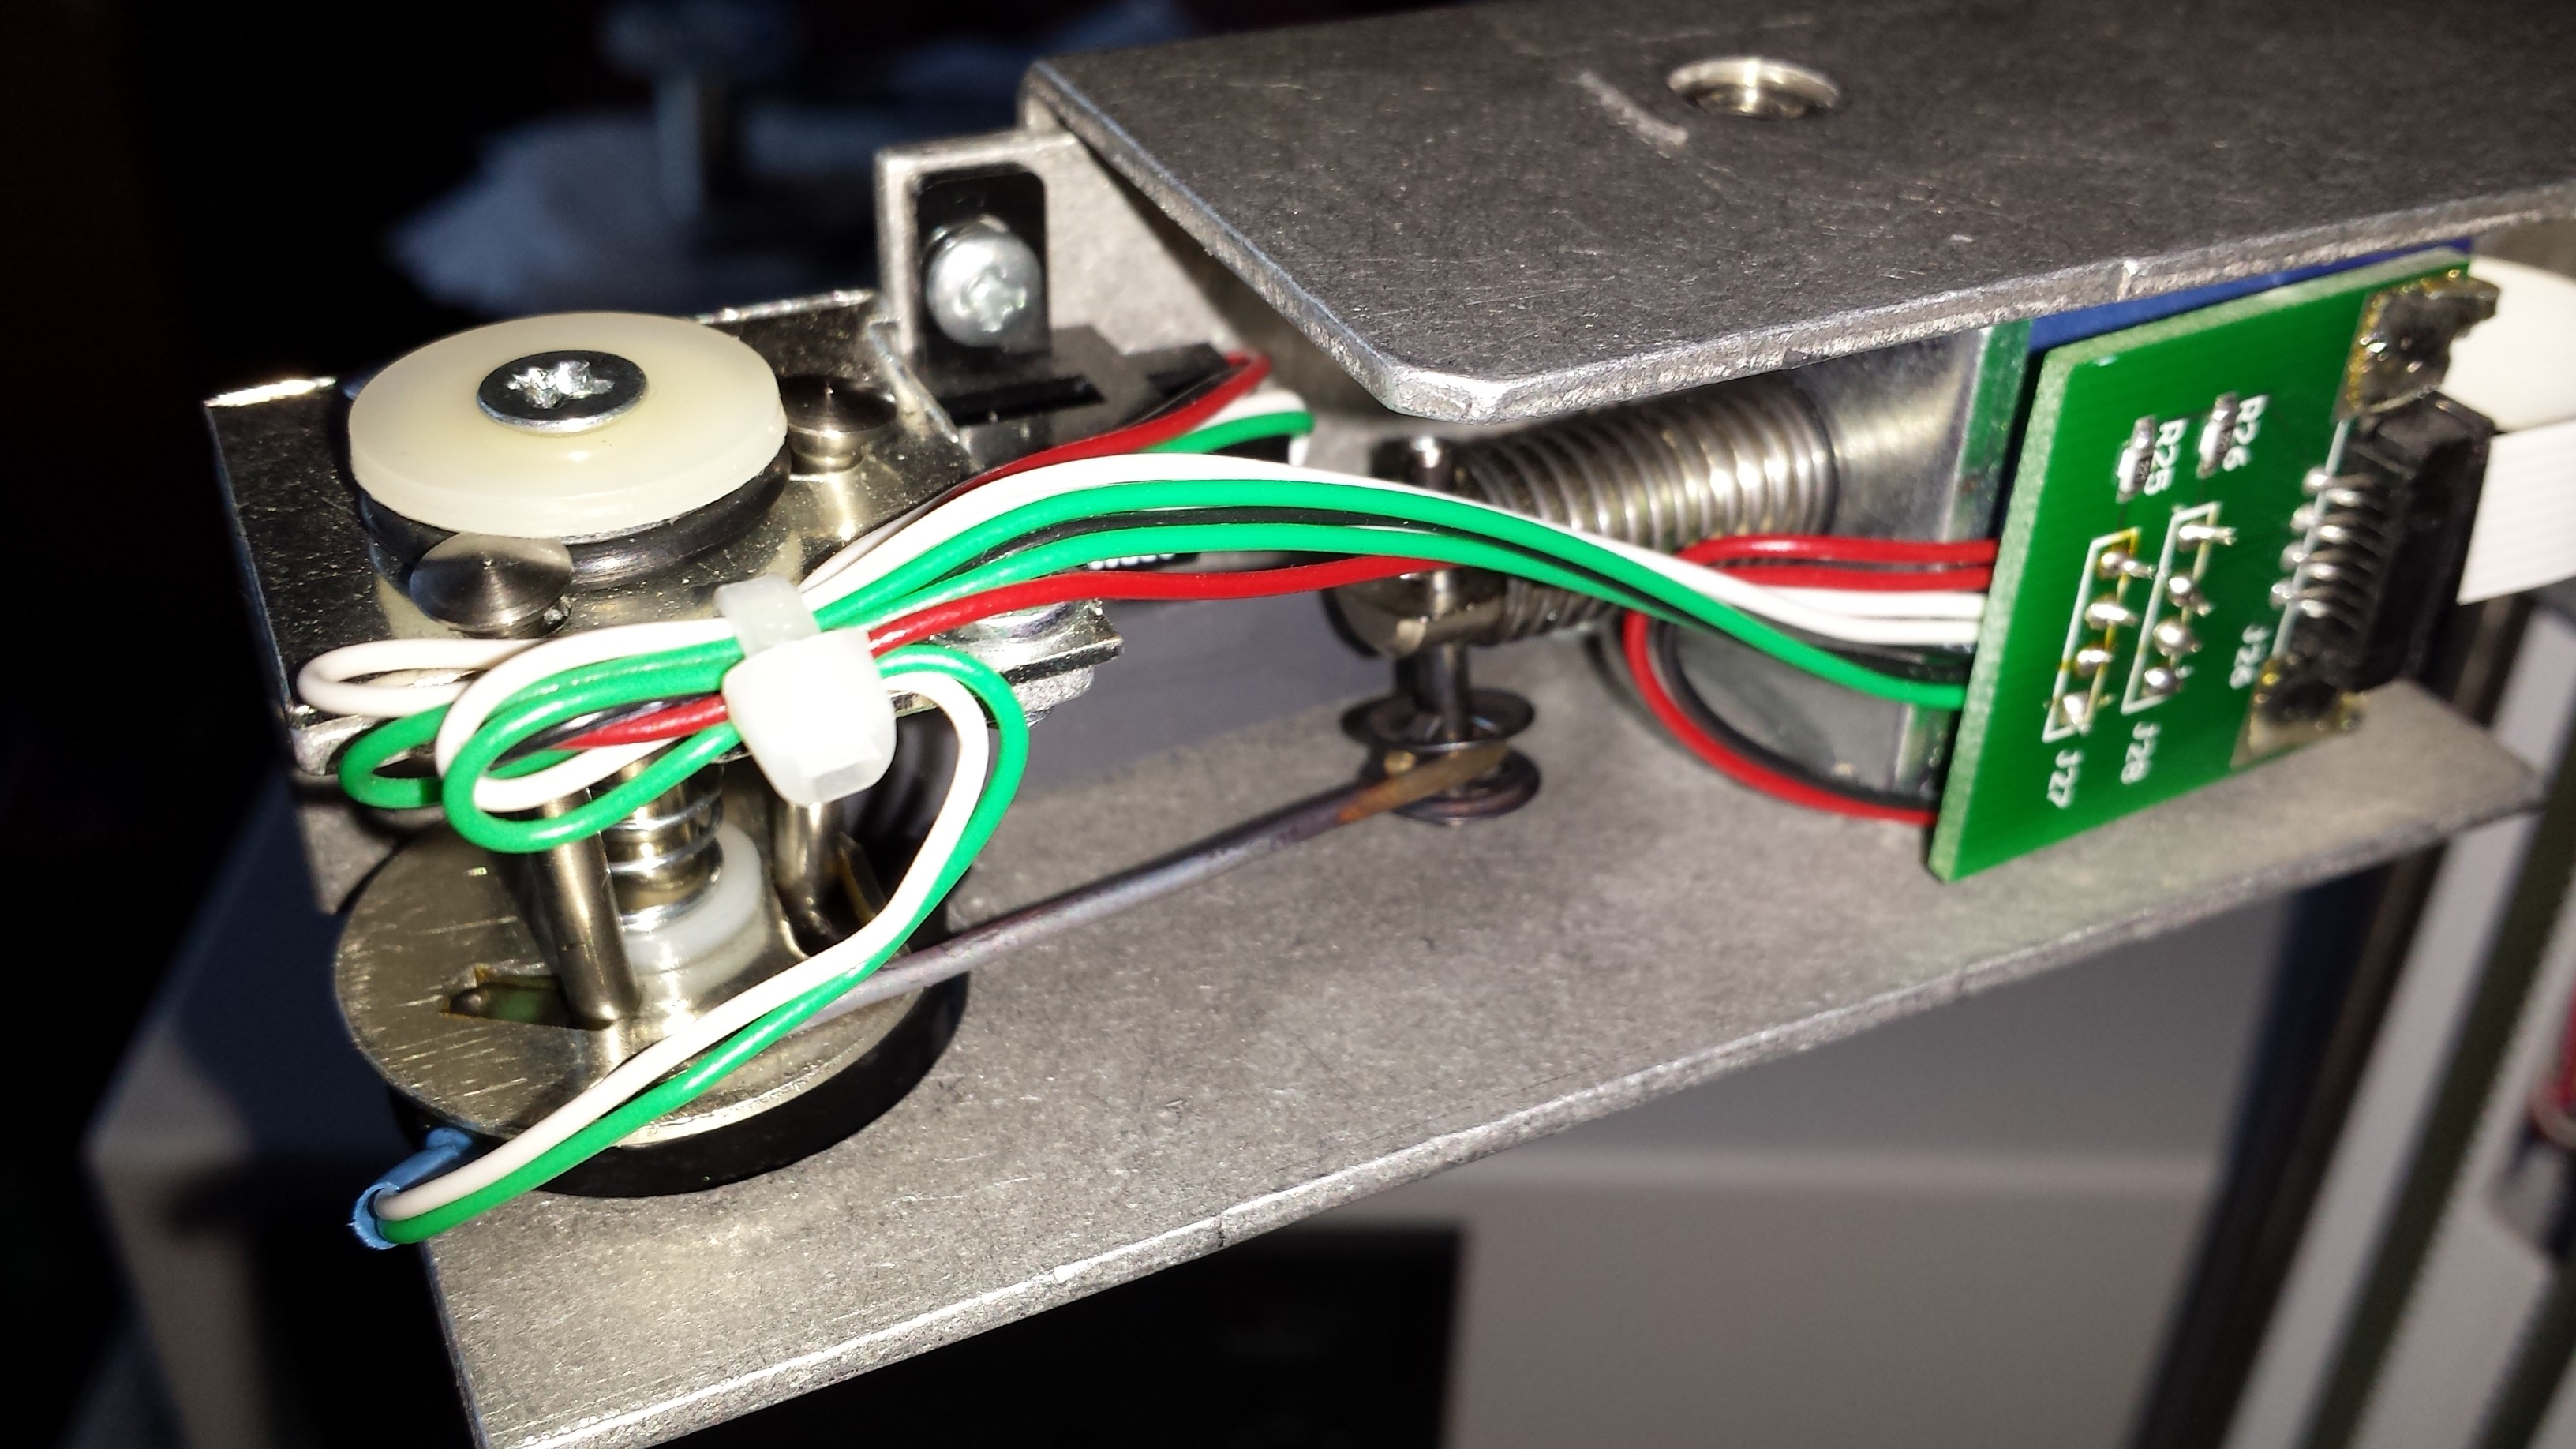
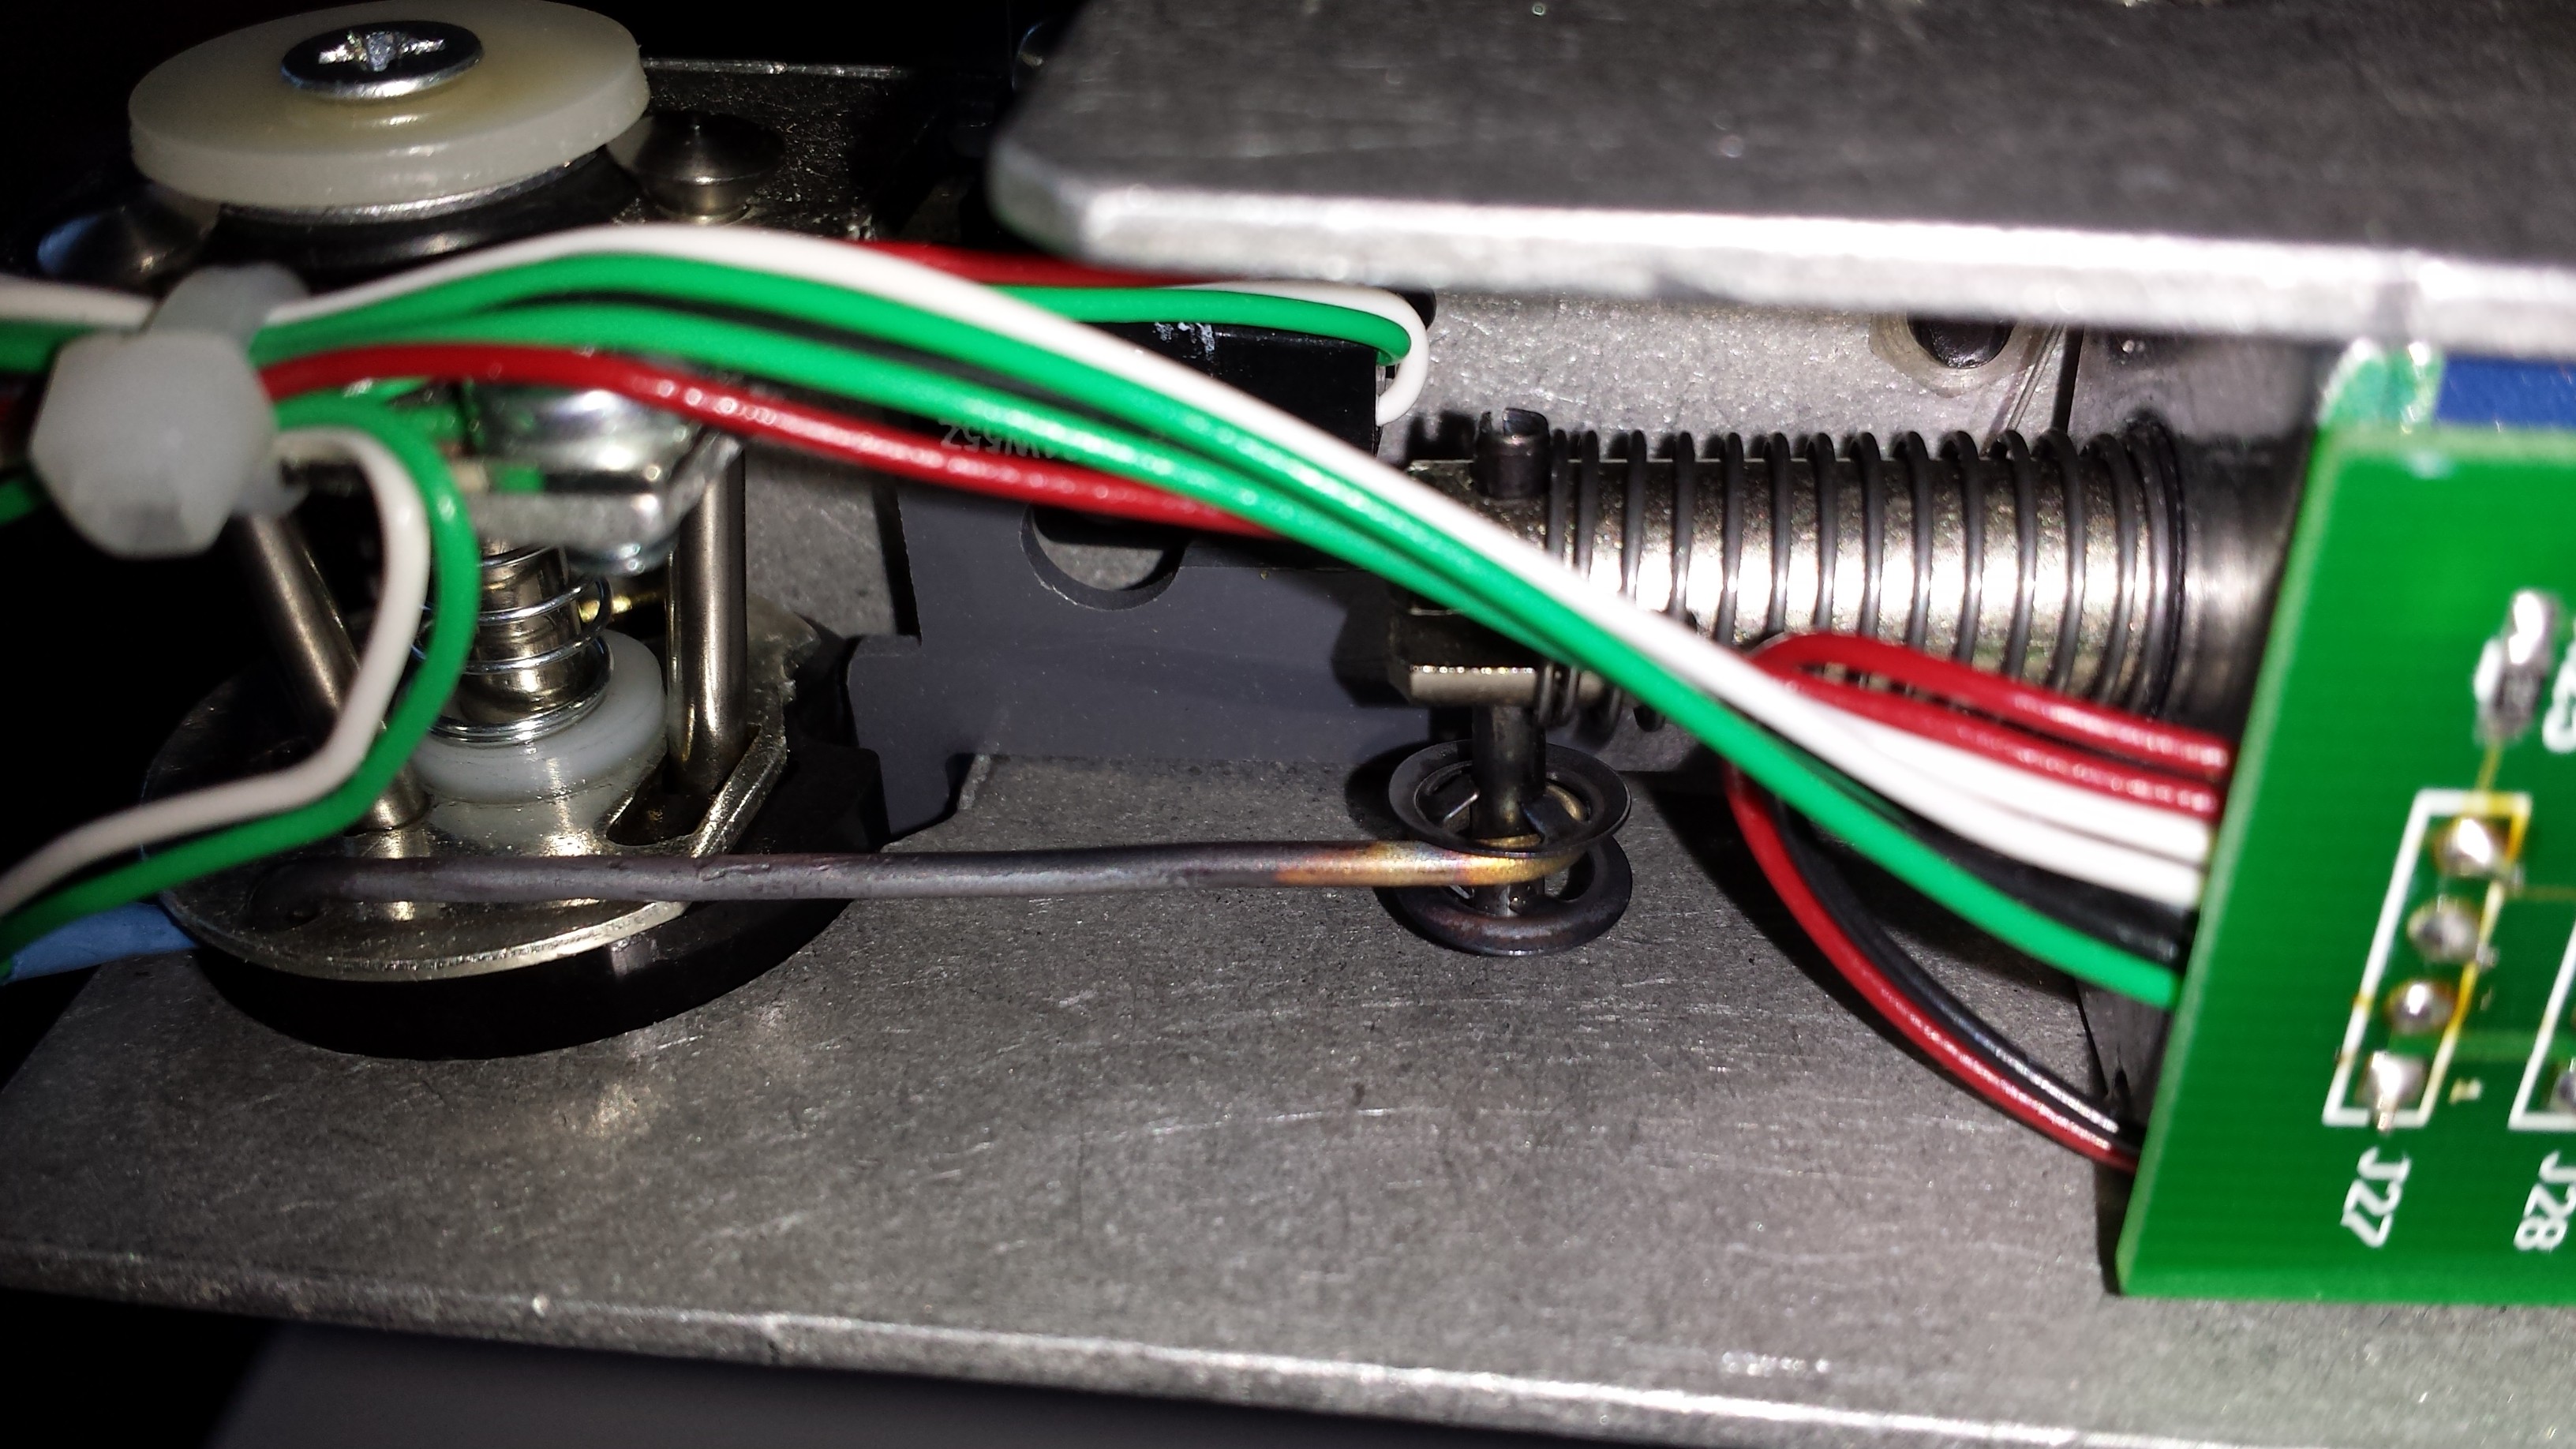
It's around 2007-2008 built, had a bad picker mechanism, of which was the sole component I wanted to be able to salvage! :-( I didn't even know whether the thing would even articulate at all, and I had thoughts of having to strip it down and build something else up out of its bits - luckily not necessary.

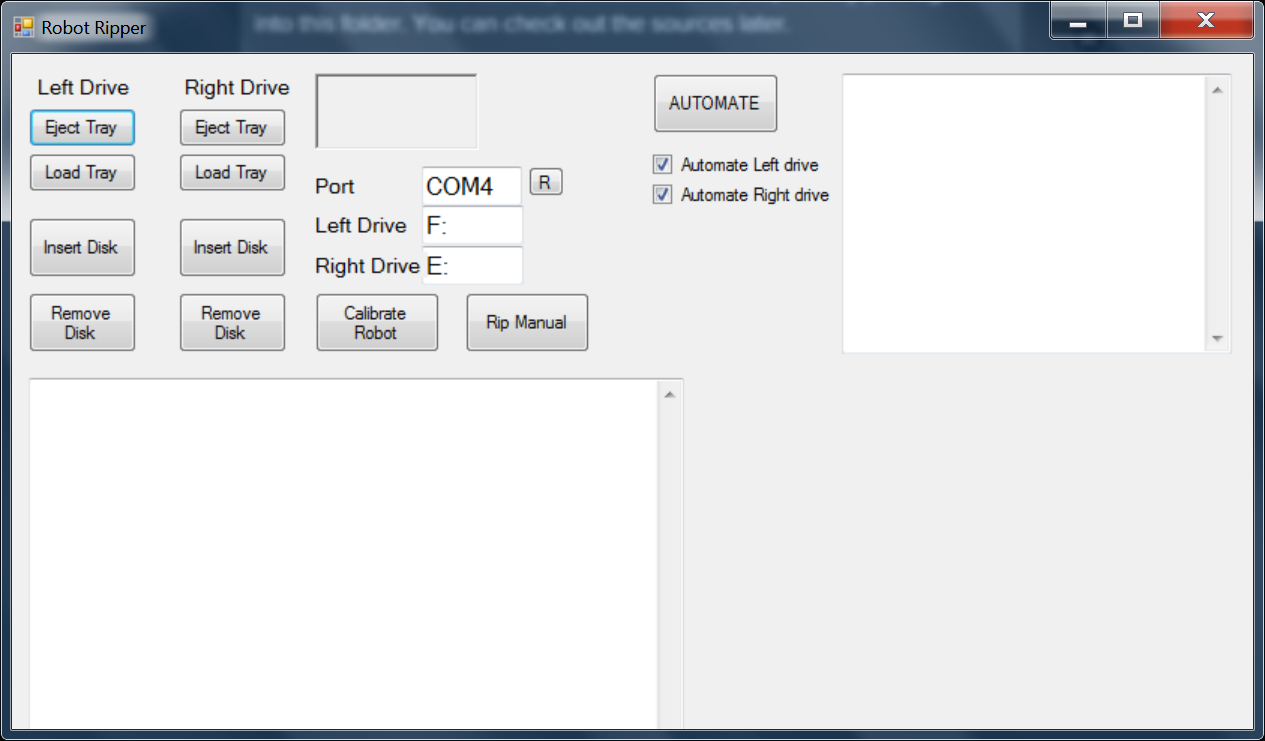
I knew it only had software for burning images to disk, or taking ISO images, and also for printing on blank CDs with the Inkjet. This meant I had to come up with some custom software to get it to automate the entire ripping process, but how could I bend it to my will?

This meant (and will still mean) some serious investigation / re-development. Not only from a software perspective, as the first job was to determine how to fix up the grabber mechanism, or even figure out how it all worked and hung together!

Read on for my break down to date, and will be continued, as this is still on-going as I'm still ironing out some bugs as I capture more and more CDs.

  • 1 × Replacement Internal DVD Drive The included units were 2007 era, slow as hell.
  • 1 × Visual Studio (2010 in my case) For developing Windows Software to automate the capture process, and bend the CD Ripping software to do my bidding.
  • 1 × CUETools 2.1.6 Software + Sources An excellent suite of MS.NET utilities for ripping CDs, critically a command line (scriptable) component within. http://cuetools.net/wiki/CUETools
  • 1 × MF Digital Scribe CD Robot - yes not easy at all to acquire. Perhaps eBay?

  • The (few) shortcomings of CueTools

    h3liosphan06/08/2015 at 13:47 0 comments

    CueTools.ConsoleRipper isn't perfect -

    • It does a database lookup and, if included in the Online database, tries to write a WAV and CUE file with illegal file characters, eg. Question marks, colons, slashes. It even found a funny character with three full stops in a line! Suffice it to say, it just errors out and stops.
    • It freely overwrites existing files, especially when a DB lookup failed (rare CDs) it just writes a file out called cdimage.wav, and cdimage.cue, of course overwriting the old ones.
    • It will also overwrite multi disk sets of compilation packs, instead of putting 'disk 1 of 2' in there it will just go over the existing file.

    Not massive issues, but pretty inconvenient. Suffice it to say I did run into actual disks with these errors in - there may be other issues to come as I continue thru my library of disks.

    Luckily the source code is available. However I've never had much luck getting things like this up and running in my dev environment (Visual Studio).

    Much to my delight, save for a few dependency issues (I think), it loaded into VS. More to my delight, the entire ConsoleRipper component (plus it's specific dependencies included in the solution) compiled and linked! It even ran as expected!

    ConsoleRipper is just a set of API calls strung together into the main() function! So I found the part of the code around which deals with the issues in hand, and added them in -

    You can do the same by getting hold of the repository -

    http://sourceforge.net/p/cuetoolsnet/code/ci/default/tree/

    I'd say fetch the 2.1.6 version, then supplementing the code found here under the CueTools.Ripper.Console folder, program.cs -

    foreach (var imeta in ctdb.Metadata)

    {

    meta = imeta;

    break;

    } //****************INSERT NEW CODE AT THIS SPOT -

    //string destFile = (release == null) ? "cdimage.flac" : release.GetArtist() + " - " + release.GetTitle() + ".flac";

    string destFile = (meta == null) ? "cdimage.wav" : meta.artist + " - " + meta.album + ".wav";

    Console.WriteLine("Drive : {0}", audioSource.Path);

    Console.WriteLine("Read offset : {0}", audioSource.DriveOffset);

    Console.WriteLine("Read cmd : {0}", audioSource.CurrentReadCommand);

    Console.WriteLine("Secure mode : {0}", audioSource.CorrectionQuality);

    Console.WriteLine("Filename : {0}", destFile);

    Console.WriteLine("Disk length : {0}", CDImageLayout.TimeToString(audioSource.TOC.AudioLength));

    Console.WriteLine("AccurateRip : {0}", arVerify.ARStatus == null ? "ok" : arVerify.ARStatus);

    Console.WriteLine("MusicBrainz : {0}", meta == null ? "not found" : meta.artist + " - " + meta.album);

    With these extra lines -

    [code]

    As you can see, the majority of the fixup just makes sure the 'destfile' variable isn't an illegal filename.

    I also subsitiuted the 'CDImage.wav' text with one adding a date and time.

    Rather brilliantly, the info to tell whether the CD is part of a multi-disk set is already included in the code as part of the database lookup. There's literally 'meta.disccount' and 'meta.discnumber' variables, which I just mashed into the 'destfile' variable when it detects a disk count > 1.

    I didn't build this up with the VS.Express edition, so I've no idea how you might fare with the freebie Visual Studio, but it should be a straightforward solution upgrade.

    Don't worry too much about some compilation or link errors if you build the entire solution (with its tens of C# projects), provided you can open up the consoleripper project (within the overall solution) and just compile that bit, you're golden.

    .

    So now my additions can deal with a whole lot of crap thrown at it from the online disk database! And deal with it when the DB turns up nothing!

    This has been a pretty win-win situation as it goes! I have so far ripped 89 individual disks amounting to over a thousand MP3 files!

  • Getting the software together for the job

    h3liosphan06/08/2015 at 12:47 0 comments

    The software included, called simply 'Scribe' was designed for mass duplication efforts plus printing, so wasn't suitable.

    It basically consists of a list of queued operations, and just typically either takes an ISO copy, or writes an image back to disk. It does have some half-arsed audio CD capability, but it wasn't viable.

    A browse around the C: drive revealed an interesting PDF file for technicians, detailing the task of altering the CD insertion point for different drives. This also revealed how you communicate with the robot, which is simply via serial USB (9600 8n1 I believe) and a set of single character commands.

    Hyperterminal served as the diagnostics tool.

    K (in capitals) for instance carries out the whole process of lifting a disk up from any of the input bins, and popping the disk into (one of) the left drive(s). It has limit opto-interrupt switches, IR optical sensors, and just goes through a pre-canned, quite fast, motion to complete the op.

    It knows if it succeeded in successfully depositing the disk, and will return either a capital X for success, or a capital E for error.

    Furthermore, another single capital character (can't remember) will also pick the disk out of the tray and deposit it on the output 'spike' which is just a thicker metal spike for containing loads of disks, through the middle hole - this output spike obviously rules out any possibility of the robot independently being able to get them back off of the output pile, so repeat ops are pretty much out of the question.

    I saw absolutely no reason to dig further into the control chip, or rewriting firmwares, or even hacking in some custom firmware, due to the fact it did everything I already ever needed. Furthermore I had aspirations of re-doing the driver board entirely, but simply didn't need to!

    So armed with this knowledge, to be able to rip disks in a stack, was simply to programmatically get together all the independent operations required, and implement them on a loop, with error checking in place -

    • Insert disk
    • Remove disk
    • Eject Tray
    • Retract Tray
    • Recalibrate robot (return home in error condition).
    • Rip CD.

    I had no idea whether any software was already out there to do this, but it seemed an interesting (and simple) enough job to just come up with my own software in Windows.

    So I set out building a Windows Forms .NET 2 application in C# (It's running on XP - didn't want to install any more bulky recent frameworks) which carried out all these steps.

    This is the result, called 'Robot Ripper'. Notice how I put up a button for all the individual tasks, very handy for trying out the gripper after reworking it. The main AUTOMATE button is the bit that just sequences everything, carrying out correct wait operations (not blocking delays!) before proceeding.

    It's all very simple, and because I've written it myself it's fully extensible, any error conditions could be flagged up and alerted in real time (although I haven't done this yet).

    Of course another feature needed was the all important ripping software, but I didn't have a clue about how to do this in .NET. So I leveraged the services of a brilliant suite called CueTools - critically includes a command line ripper program called CueTools.ConsoleRipper.exe.

    ConsoleRipper is great because it goes off and fetches a WAV of the whole disk, and a .CUE file containing the album name and song names, looked up in an online database. Then I need to convert the WAV to .MP3s, to do this, the CUE file contains all the info required to do the conversion, as it also stores the track separations for the disk.

    One of the key features is to be able to compare your rips byte for byte against a big database called AccurateRip, to see if it's a totally golden copy.

    I highly recommend it, even the GUI is pretty good.

    At the right time, Robot Ripper just shell launches the ConsoleRipper program and gives it the correct drive ID. Off it goes - Robot Ripper doesn't block horribly, it sits listening for the process-end callback event before it...

    Read more »

  • The whole lump

    h3liosphan06/07/2015 at 19:46 0 comments

    So here's the whole shebang, with my software running on the screen. Because it's still very much WiP, it's in pieces. The rotator arm should normally have a hexagonal metal shell, and the vertical arm should normally have a metal shell too, off for maintenance purposes.

    You can also see that the front part is missing an underside, the machine body is actually up on a box here (the brown thing visible thru the rectangular hole at the front), with the front underside (with driver board) sitting on the table, this helps diagnose it, so if the robot has an epileptic fit or something, I can simply wrench the power out of the driver board.

    Speaking of -

    This is the LCB014 v.2 driver board built by Yurex Inc. from New York. There's precious little details about this board though online. Any more info anybody knows would be appreciated, as I think I'm missing some features it can do, such as 'disk shake' to ensure the disk is seated correctly on a drive tray.

    Along the top you can see the stepper driver chips and massive heatsinks, one needed for each stepper driver, although I'm sure a high-ish current would also be required for the gripper solenoid, so that's in there too somewhere.

    I'm guessing the SMD chips and associated stuffs just below the stepper drivers are just encoders for the drive patterns for the steppers. Not sure.

    The big square chip near the middle is the ST Microelectronics uC / ARM chip, which I believe is the whole reason it can listen on a serial connection (via USB) and perform the disk pickup and placement it does, which is pretty much just some rudimentary behaviour of just initiating motor drive (just linear) and reacting to sensors. Could probably really be done with a PIC16F... chip.

    The wiring is luckily, really straightforward. There's a dedicated connector per stepper and sensor for rotation, another for vertical motion, and another for the gripper arm. On the left is the motherboard USB header connector, which goes back to the PC motherboard, not to a USB connector, and my old favourite, the standard Molex disk drive connector of yore!

    Interestingly there are extra unused connections for ARM, DISC, VERT and ROT, where ROT is the only one in use. There are very interesting looking connections along the bottom, labelled CONFIG and DISP/KBD. assumably for a screen and controls.

    Lastly on the right are RED and GRN connectors, for the indicator LEDs. In normal operation green is permanently on, whereas RED comes on when there's any 'error condition', such as if the disk was dropped.

  • Gripper Mech

    h3liosphan06/07/2015 at 18:48 0 comments

    It was two or three weeks ago I first looked at the malfunctioning gripper, and got it working again, but I didn't take any photos of the process - well as chance would have it, it started becoming unreliable again, would keep dropping disks as it removed them. So I went thru another process just today to get it up and running again.

    Long story short - the linkage arm between the solenoid and the guide disc had bent again, causing the 'reach' to be reduced.

    So what you can see here is the mostly dismantled picker mech. The black and chrome component on the left is the picker body, you can see there's an optical sensor on the front for detecting whether it has a hold of a disk, out of shot here is an IR LED towards the middle of the arm on the underside, to IR illuminate the sensor, for this to pick-up on. Above the plastic black picker body is a simple guide disk with three runners.

    Shown here is the collection of bits that go into the picker, from left to right - solenoid core and linkage arm (this linkage was the culprit). Top washers and screw for securing everything down from the top, solenoid spring, and the three gripper points. These three gripper points are simply screw ended rods of steel. To activate the gripper these are 'protruded' sideways out of the black picker body (by the guide disk runners shown above) and grab the disk.

    Here the picker is back in position, and screwed in from the opposite side with a single screw (the one at the top of the previous picture). The solenoid core and linkage is back in place attaching to the guide disk.

    In the middle is the black component, shown directly between the solenoid and the gripper mech. This is the opto-interrupter switch to detect if the arm has touched anything (It didn't need removing to fix up the gripper mech). The dark grey shape directly below this is a spring-loaded arm that protrudes out the bottom - as anything touches it, it is bumped up and interrupts the beam in the opto-interrupter. Simple!

    Although not much different a picture, this now shows those three screw ended steel rods. They slide in thru from above, into the runners in the guide disk. From this angle you can now see the small IR LED on the underside (far right).

    Above is a different angle showing the rod head inserted into the top. Next this is secured in place with some washers and spacers, then screwed on -

    This is essentially everything re-fitted. A great simple mechanism requiring no special tools, and no need for a brain for unravelling clever mechanics, 'cos I sure don't have one!

    A slightly different view, clearly showing the solenoid, which simply pulls on the core, pulling on the linkage, pulling on the guide disk, which then slides the steel rods up the runners, effectively extending the ends outwards. You can test this yourself by pushing in the solenoid core to see if it works smoothly.

    I didn't grab a pic of the underside, but you can see how the threaded ends make it quite easy to see how it's so reliable, the natural 'notches' give it a good way of grabbing only one disk. I never thought of this when I was experimenting with different gripper ideas myself.

    First time round I also put on a bit of machining oil on there to help the motion, as it was still binding a bit as it moved. It didn't need any more this time round.

    So after this, using my custom software I manually tested out the mechanism 10 cycles, disk in disk out, with 10 successes!

    So what did I actually do to fix it, well all was needed was to straighten the linkage wire. You'll notice also that in the last photo above that it looks, well, tarnished a bit! This is because I also tried to make the fix a bit more permanent by heating it with a blowtorch to red hot, then quenching it in water. I then re-heated it and let it cool naturally, although I know I should probably do this properly by gradually reducing the temperature, I don't really have the equipment for this. Hopefully anyway I've gotten rid of any 'internal stresses' in...

    Read more »

  • Initial looky

    h3liosphan06/06/2015 at 01:39 0 comments

    So the thing needed dismantling, not least to completely remove the un-needed printer hanging off the top. One thing you can say about it is that it's very well built, proper folded sheet steel throughout, the only bodgy thing seemed to be the printer, which was seemingly just a third party inkjet attached to the top awkwardly.

    I'm terrible at figuring out how things come apart. I must have twisted and turned it a hundred times in an effort to take the printer off of it. It turned out you remove it by undoing a latch at the rear of the unit, then sliding the printer backwards. Doing this helped reduce the weight, and sheer bulk, considerably.

    Next was the main case, of which I couldn't quite figure out it's design. I undid all screws and still couldn't figure out how it came apart. That is until I lifted it a certain way and the back slid off a little!

    It turns out the main case is split in twain, with the PC and specially positioned DVD drives occupying a metal cage at the rear, and the entire top/front robot arm / disk input/output spindles, which slides off by pulling it straight out from the front via runners.

    Undoing the underside of the front assembly reveals a metal base plate with the driver board mounted, along with, of course, all the wires leading to motors and sensors, plus power and USB leading into the PC and PSU at the back.

    At this stage I was happy to loosely cobble it all back together, plug in the obligatory keyboard, mouse and monitor, and fire it all up.

    It lit up and the BIOS screen appeared.

    The robot arm carried out an initial homing motion, and became 'stressed' as steppers do when they're energised.

    Windows XP booted up.

    I found the password in work records, removed it from the work domain and re-configured it for my network, and fully Windows Updated it (as far as it'll ever go!)

    I then ran the included scribe software to test it out.

    Lo and behold, as expected the gripper mechanism wouldn't keep hold of disks - it would just drop them after lifting them a few inches.

    What's interesting is that it very consistently dropped the disks, there was no intermittency, which is what I thought would be the most likely thing to occur. Every single time, for about 20 iterations, it dropped the disk pretty much at the same height too.

    In the next post I'll describe the CD gripper arm, the diagnostics I carried out, and fix-up.

View all 5 project logs

  • 1
    Step 1

    Probably the least likely step - acquire an MF Digital Scribe. Although I'm sure this project could be adapted and applied to a different model of CD robot quite easily.

    Ensure the mechanism works fully as expected, that the PC inside it boots up and you can log in.

    If the PC is busted up, don't fret. You can pretty much substitute the entire PC component for your own bits, as the robot is USB, uses an FTDI serial connection, and uses the internal USB header, 0.1inch pitch to communicate with the driver board.

    The bits you do need working though is the complete driver board (lest you build a new one), the rotate mechanism and stepper + sensor, the vertical travel mechanism and stepper + sensor, and the gripper mechanism and solenoid.

    If these are busted up, you're gonna have a bad time.

  • 2
    Step 2

    Use the 'technician' software on the C: drive, which opens up a HyperTerminal session to the serial port it lives on.

  • 3
    Step 3

    The robot firmware responds to ultra simple single character inputs, to complete relatively complex arm movements. Press 'C' to carry out an initial 'calibration'.

    Press 'I' to load a disk into the Right tray, press 'K' to load a disk into the left tray (Capitals important). The tray must be open to accept the disk.

    NOTE - The robot 'knows' if it succeeded in depositing a disk in a tray, as opposed to just dropping it on the base. It'll light a red LED if it detects an error status, including not being able to pick up a disk or properly deposit it. If the LED lights, you must press 'C' to recalibrate the arm positions before going again.

View all 9 instructions

Enjoy this project?

Share

Discussions

Chris Jensen wrote 09/15/2018 at 09:09 point

The [code] for improving console ripper seems to have disappeared. Any chance you could re-post?

  Are you sure? yes | no

h3liosphan wrote 12/06/2015 at 23:48 point

coool. Nice to know the scribes are still in use in business,  despite CDs going a bit of of favour.

Well my Scribe has served its initial purpose of digitising my music collection, has been put to one side due to short space in my house. Hence no updates for a while. But now on my main PC lives a vast folder of MP3s - all of them from my CD collection!

The robot has been mostly flawless in loading and unloading the entire collection, but did hit a few snags which halted the process - usually to do with the pickup mech or the rotation belt.

Next comes my DVD collection when I get round to it!

  Are you sure? yes | no

Daren Schwenke wrote 11/24/2015 at 01:29 point

Brings me back.  I did exactly what you are doing with a Kubik 200 disc changer I got at University of Michigan's Property disposition for $25.  They had 4 in various non working states.  I bought them all and made 2 good ones.

Serial interface deduced by randomly sending keys.  Also single character controls incidentally.  

Pulled track names from some web service, tagged, encoded, all in perl.  It was 1999.  :)  

I've been stealing parts from those things for years.  The optical gates some of the bearings, and the carousel drive motor now live on in my current 3D printer.

  Are you sure? yes | no

ResistImpulse wrote 11/24/2015 at 00:39 point

Hello, part of my job is to maintain and repair 22 of these machines.  I have extensive knowledge, as well as information about replacement parts pricing, and how you can perform some repairs yourself etc.   I just joined this site to get in touch with you.  From time to time I try to google search to find if any more information in this industry has floated to the surface and was super intrigued to see that you had such an up close picture.  I am going to try and get in touch in a private message to give you my email (if this sort of capability is possible on this site). Our company was recently purchased and I was asked to make a short video of what the machine looks like when it is going through the auto mated stages.  Here is a short video of one of our machines.  If you look carefully you can see a plethora of machines in the background.  I look forward to getting in touch to see what we can learn from each other!  It looks like you began diving into the code which is something I have suggested we do in house many times because of the issues that result from using the scribe software.  

  Are you sure? yes | no

Similar Projects

Does this project spark your interest?

Become a member to follow this project and never miss any updates