 TAIBHSE DESIGNS
Phase three is the fun part, the phase in which I get to start designing my idea and fleshing it out.
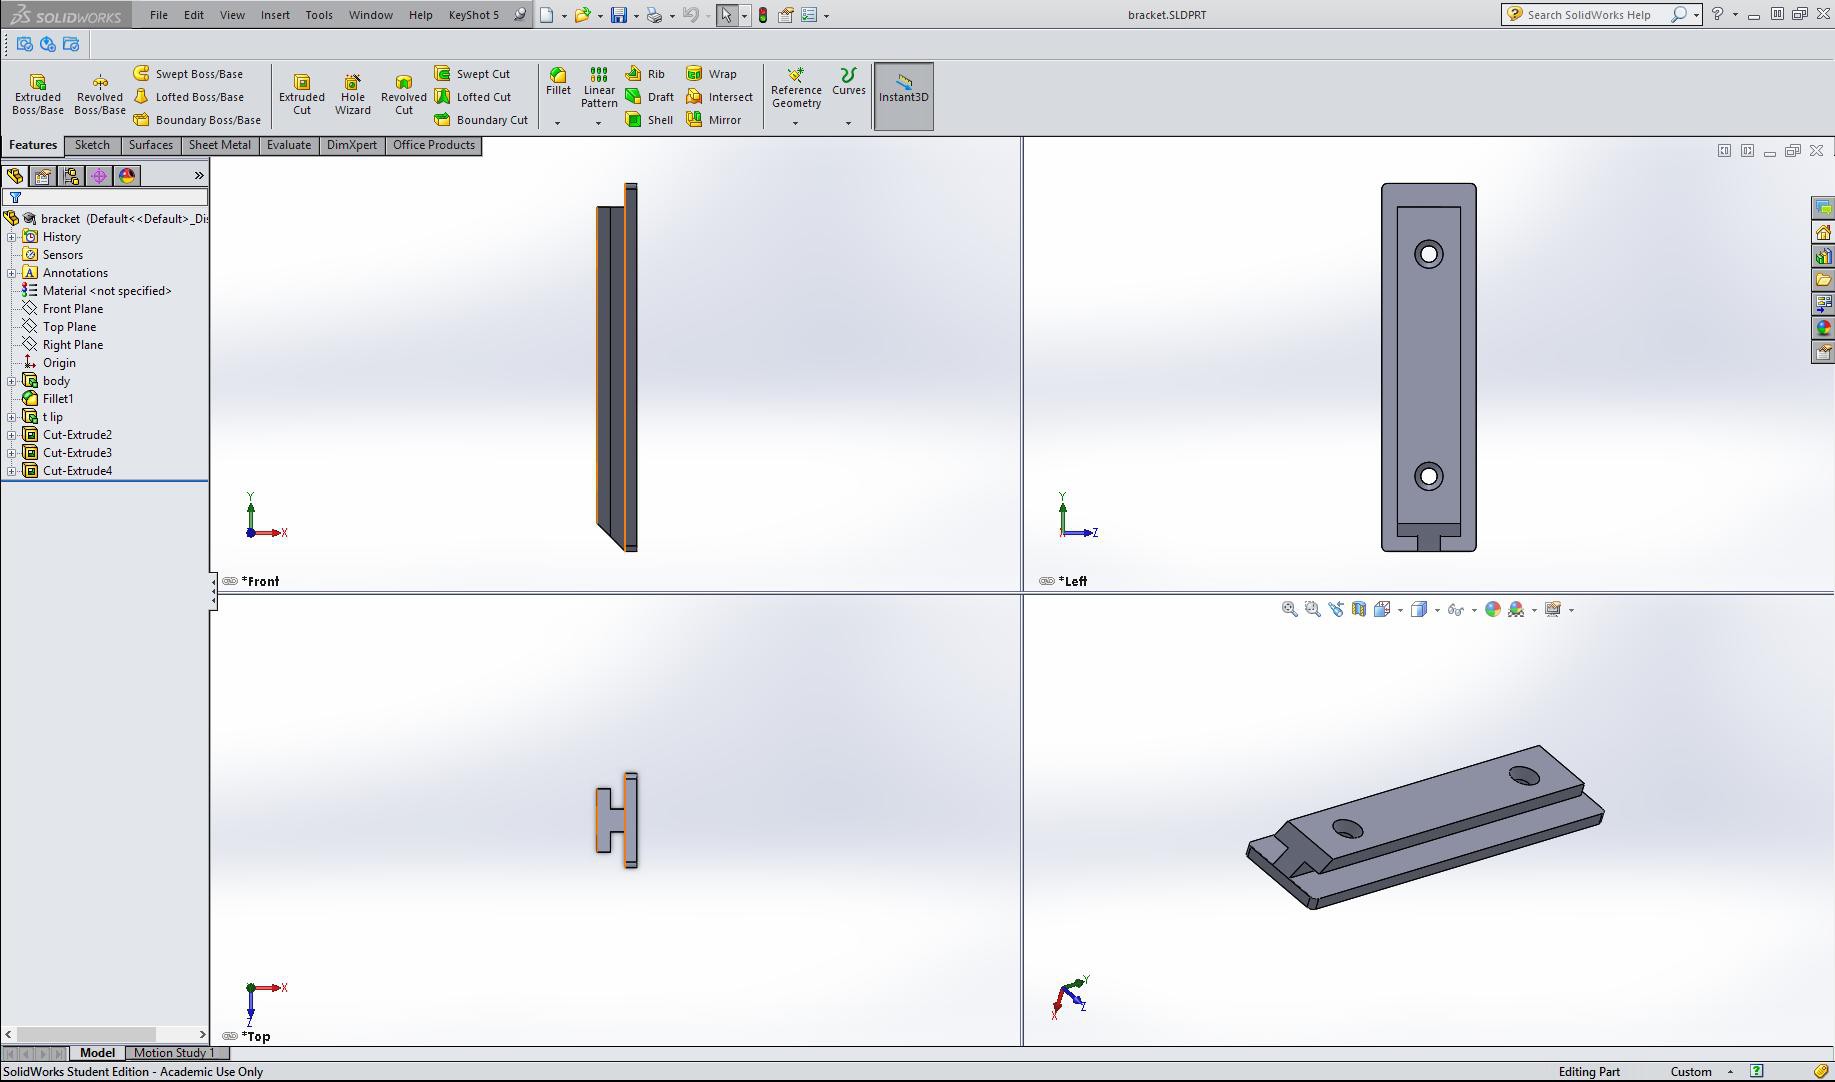
WALL BRACKET
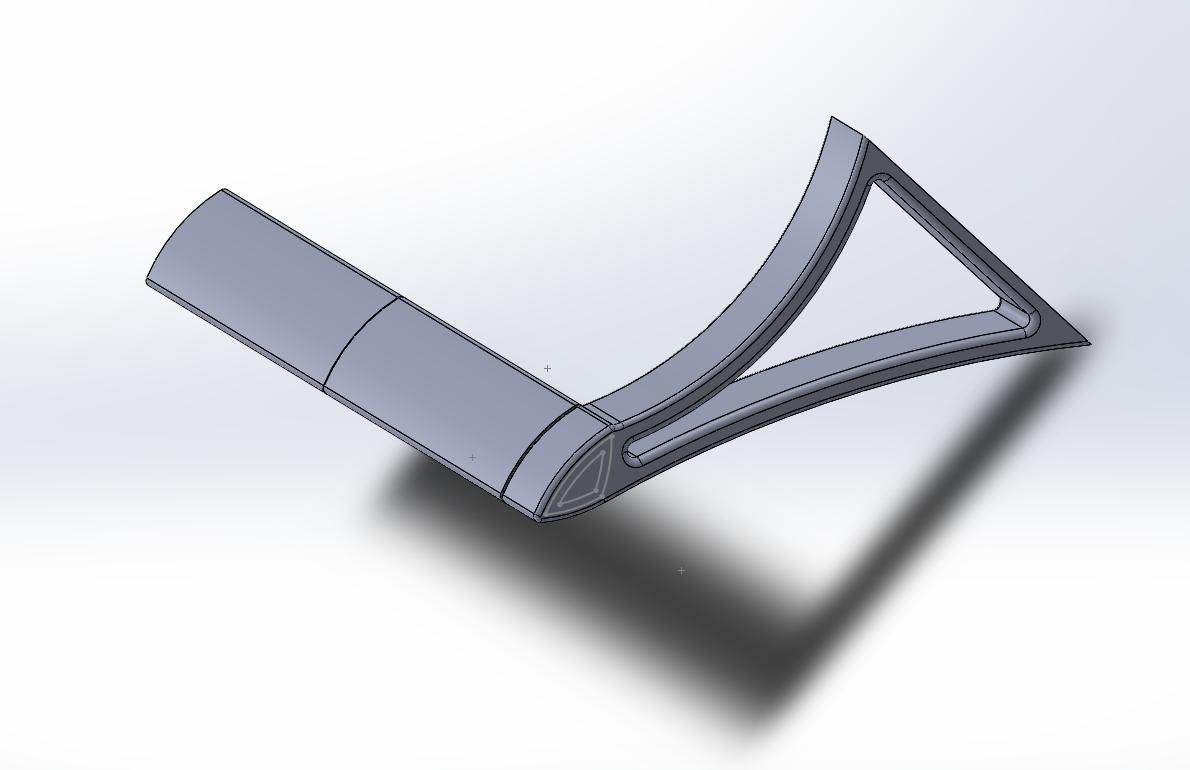
The design I went for uses two arms to hold a bar in which the headphones rest on, to mount this to the wall, two brackets are used in which the arms just slide tightly down onto.
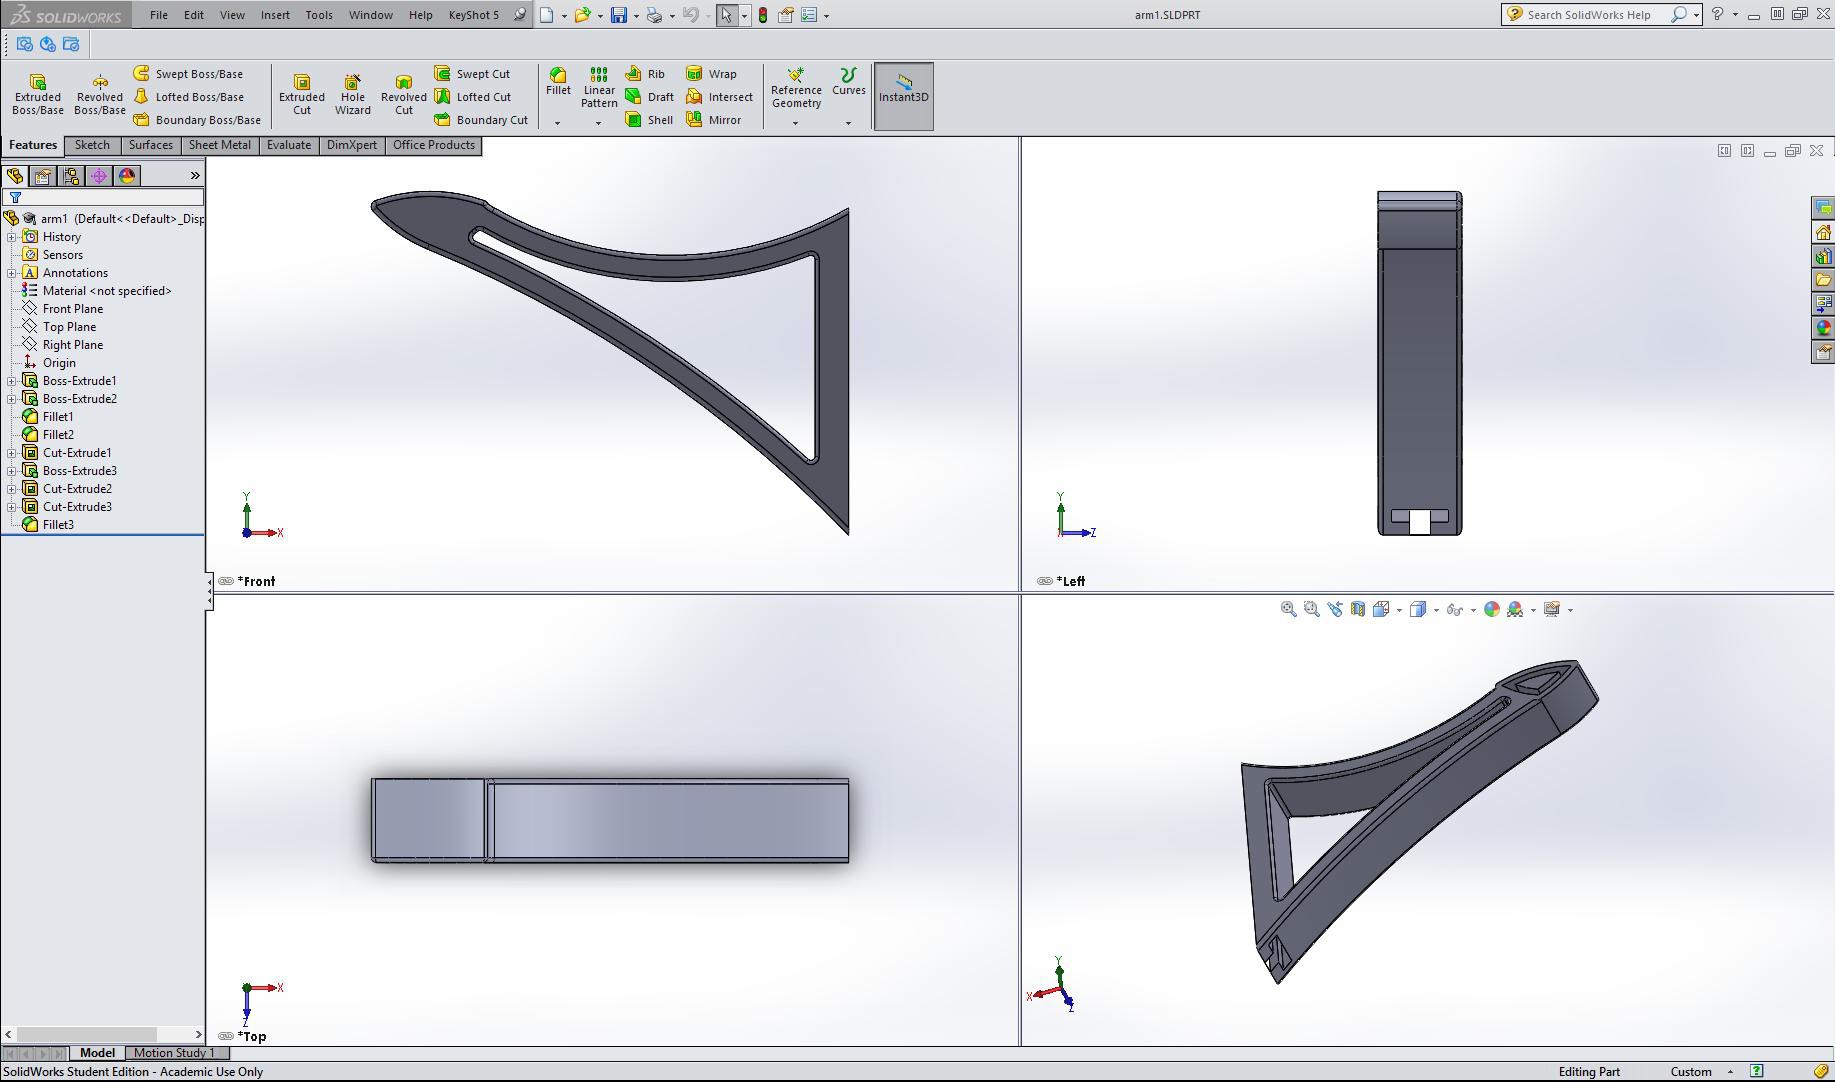
ARM ONE
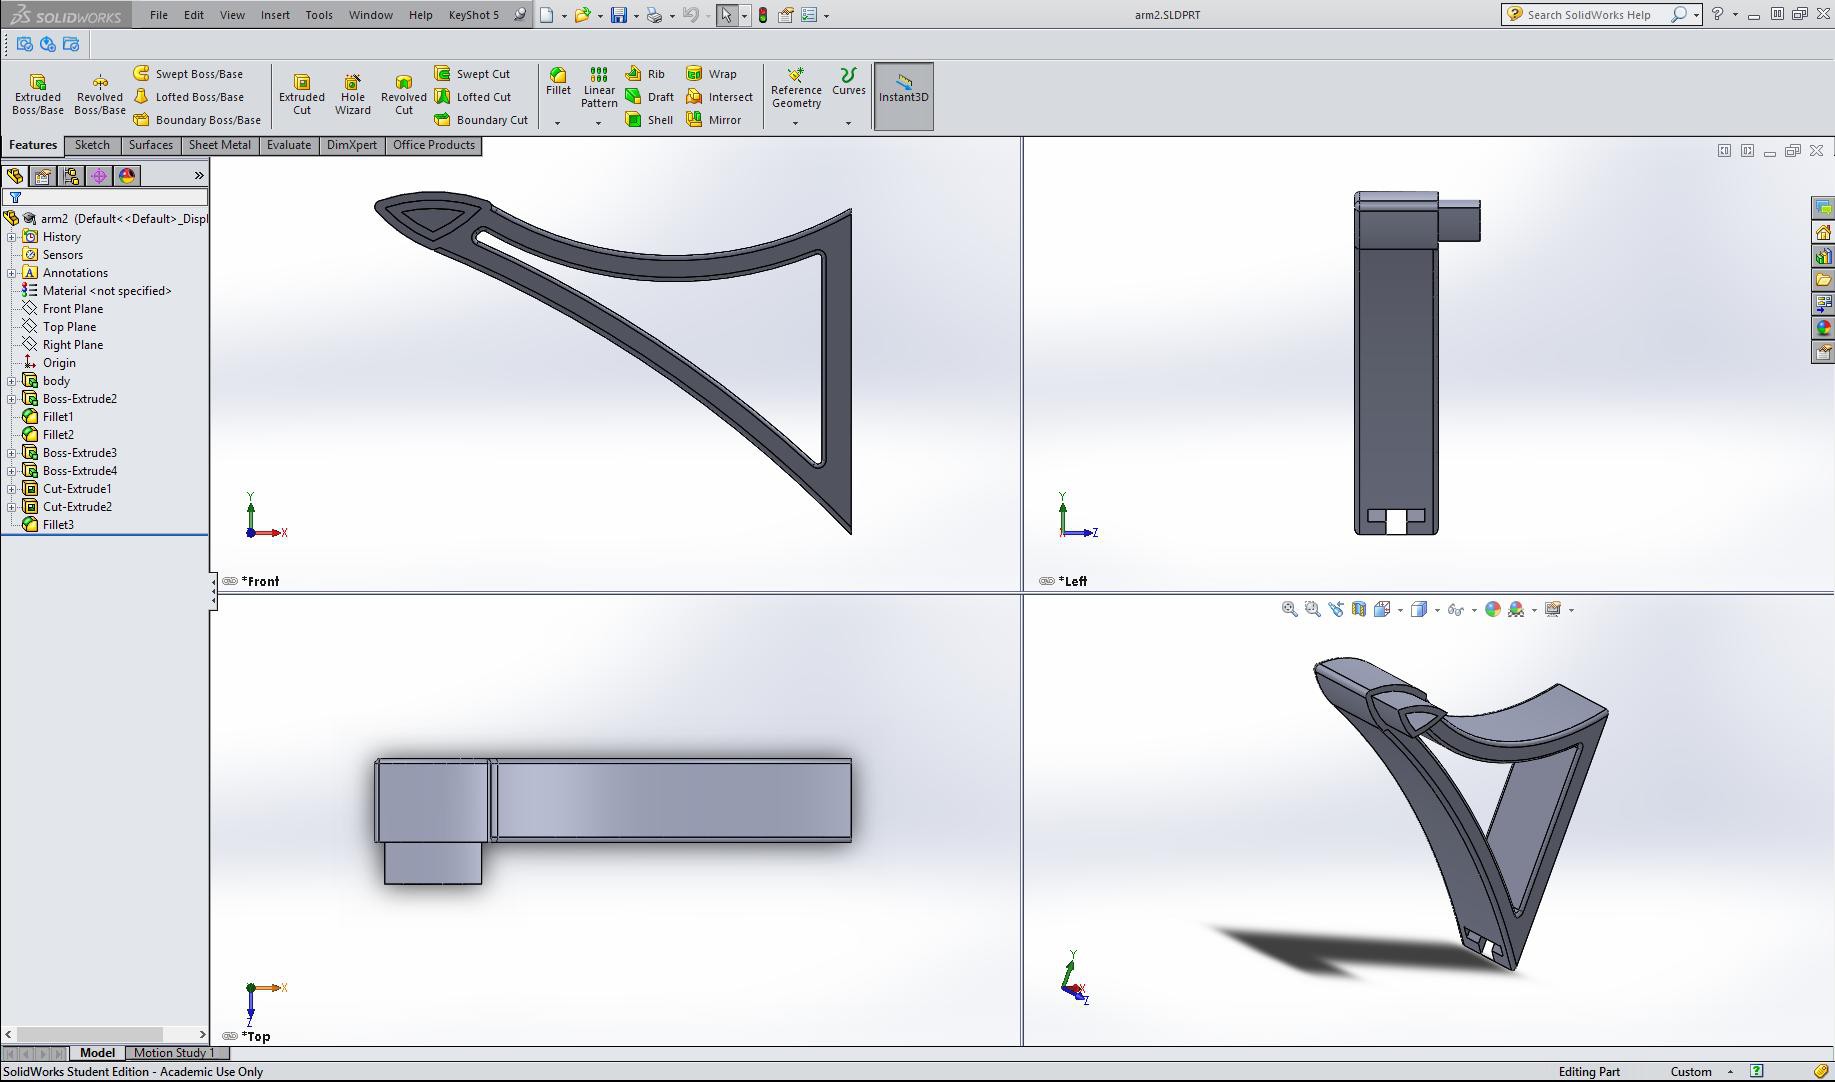
ARM TWO
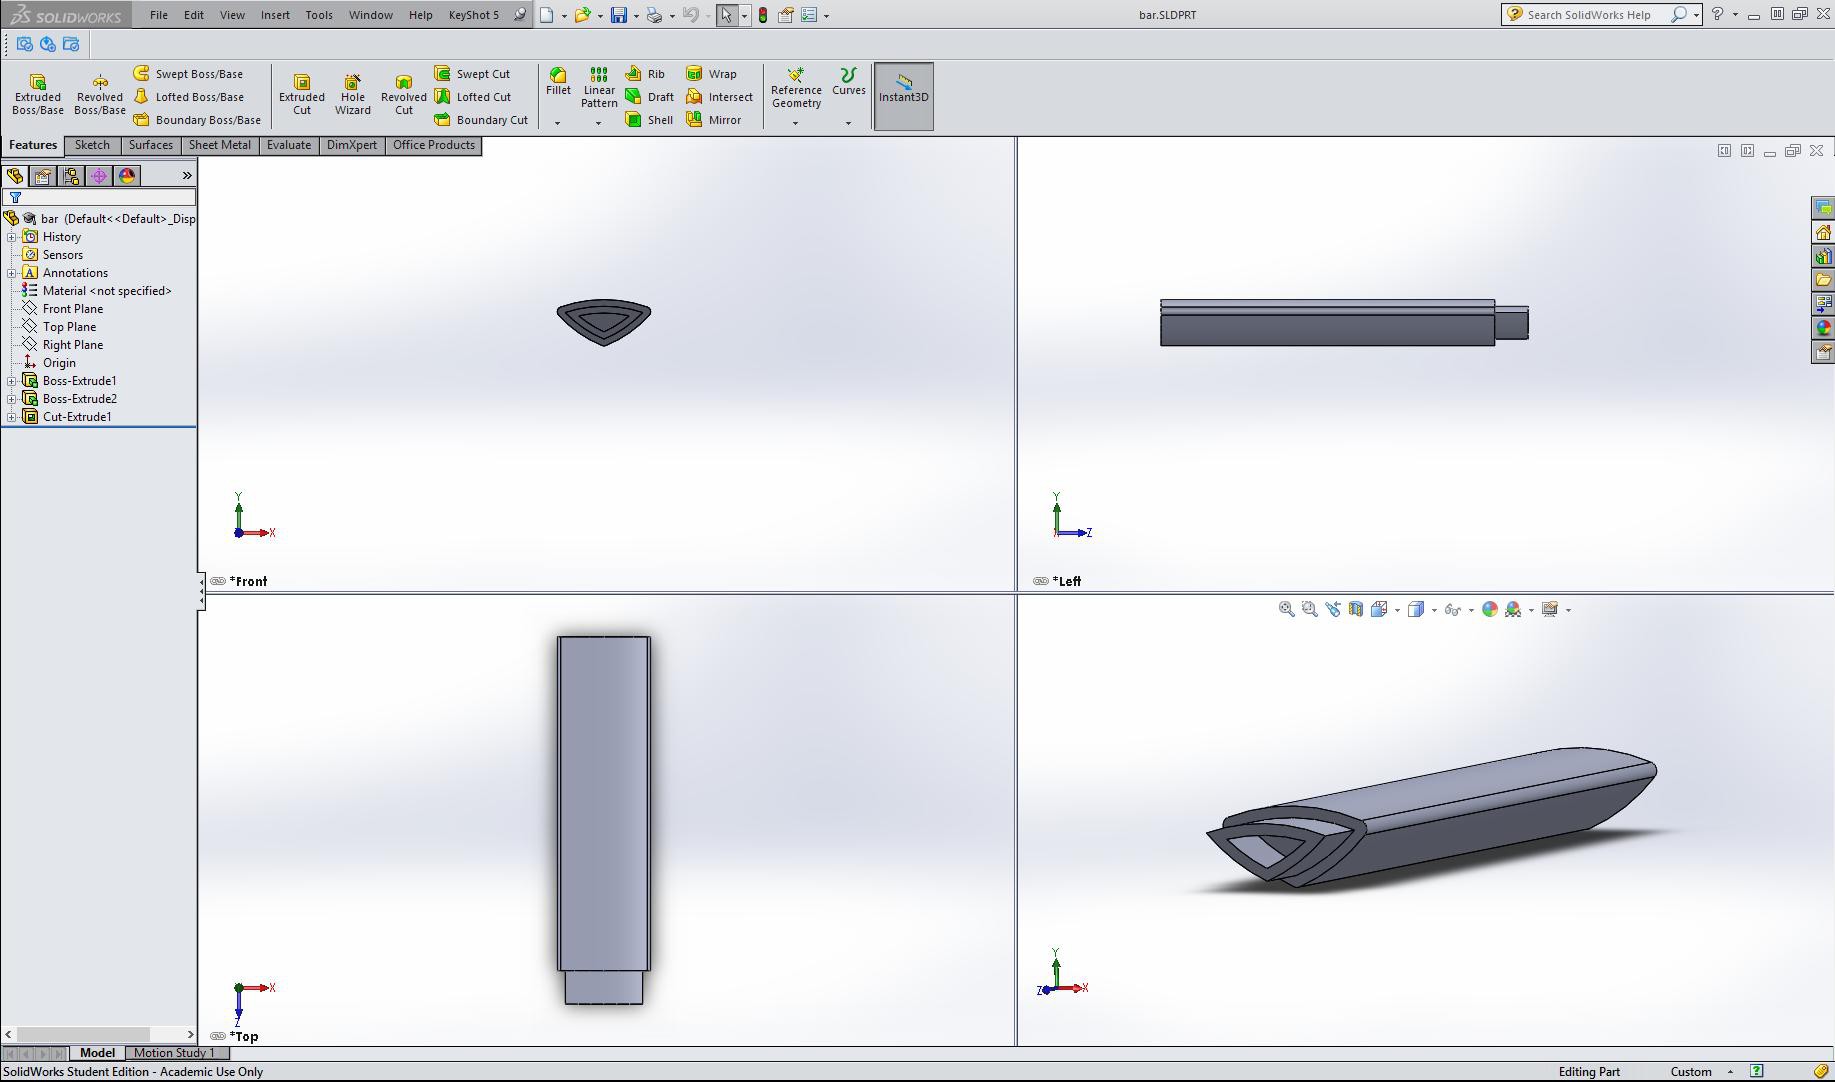
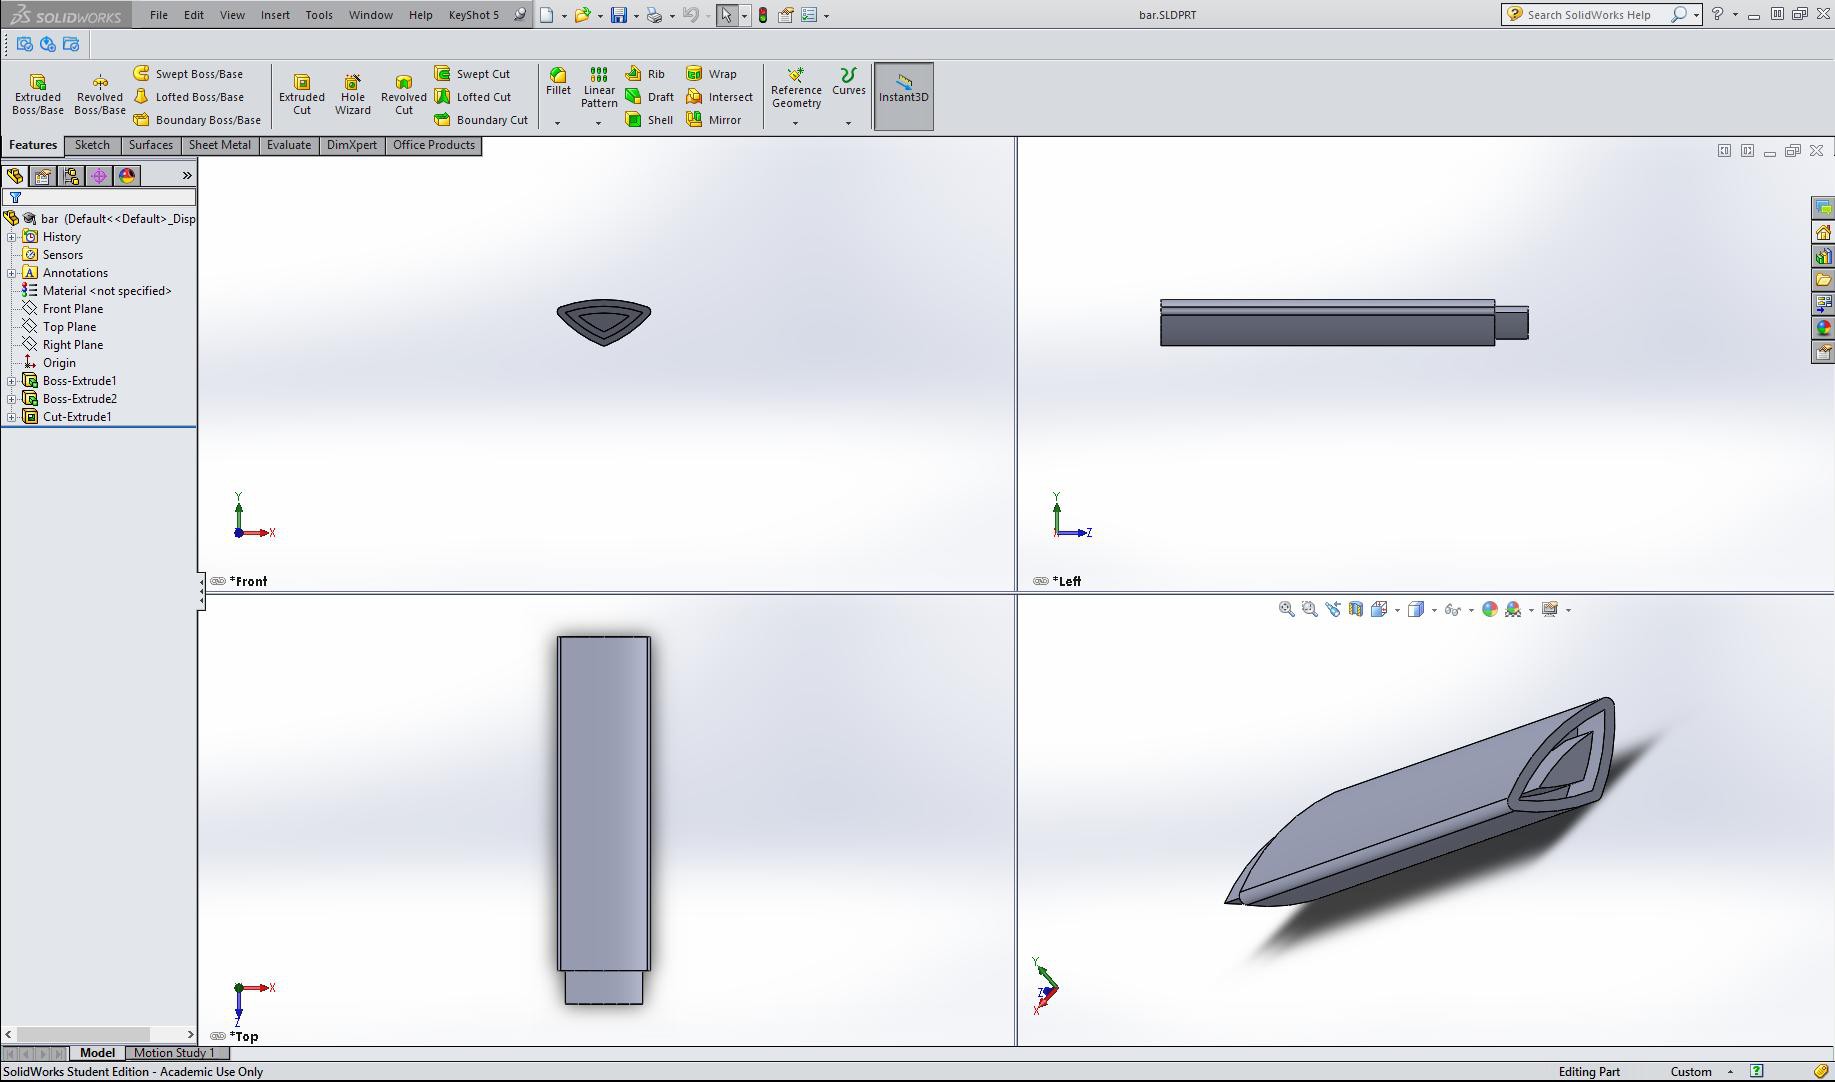
100mm BAR SEGMENT
All parts were modelled to scale using solidworks and rendered using keyshot 5 (See later images). Any number of bar segments can be used so that the overall length of the headphone stand can be made to work for any reasonable collection of headphones. The bar segments join together using a slot and hole method,
showing two bar segments and one arm assembled. (screen grab from solidworks)
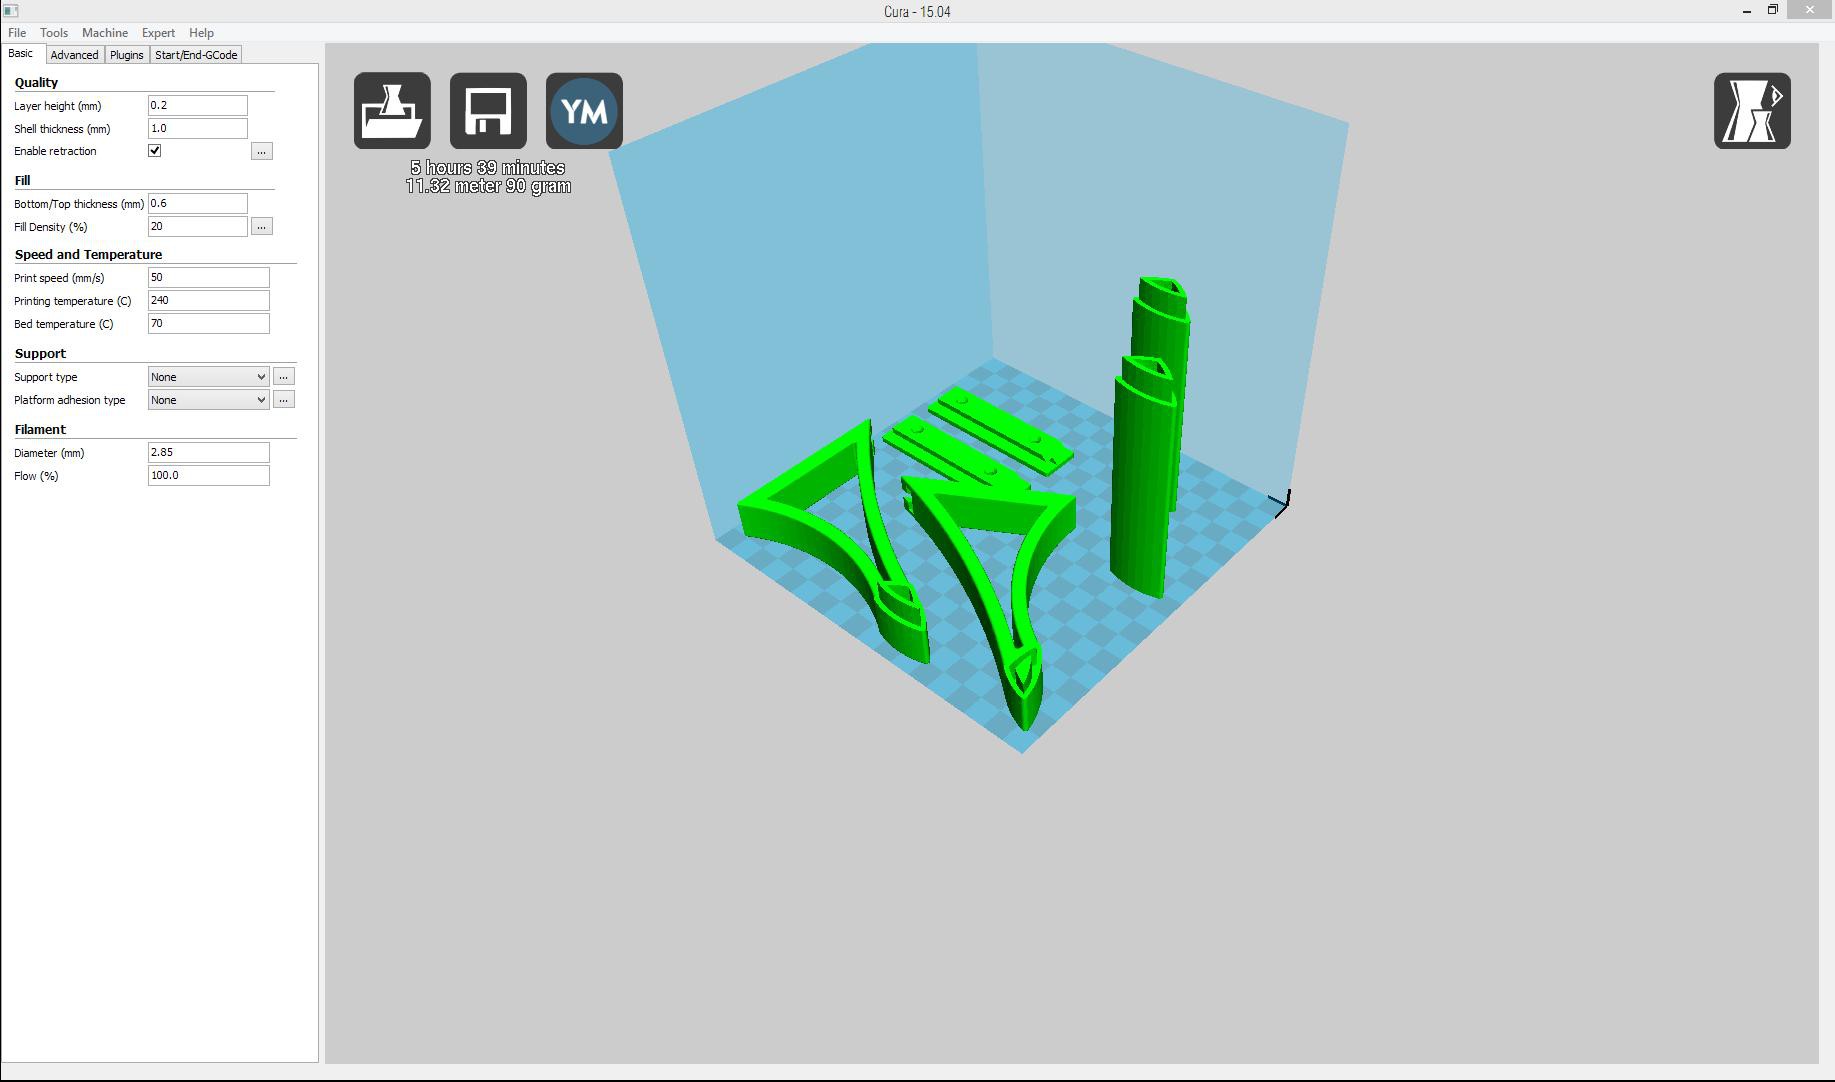
Before moving onto rendering and the prototyping phase, I used cura ( http://reprap.org/wiki/Cura ) to test all the parts and ensure they would fit inside the 18cm * 18cm * 18cm 3d print bed limit set by MyMiniFactory for the contest in which this design is entered in.
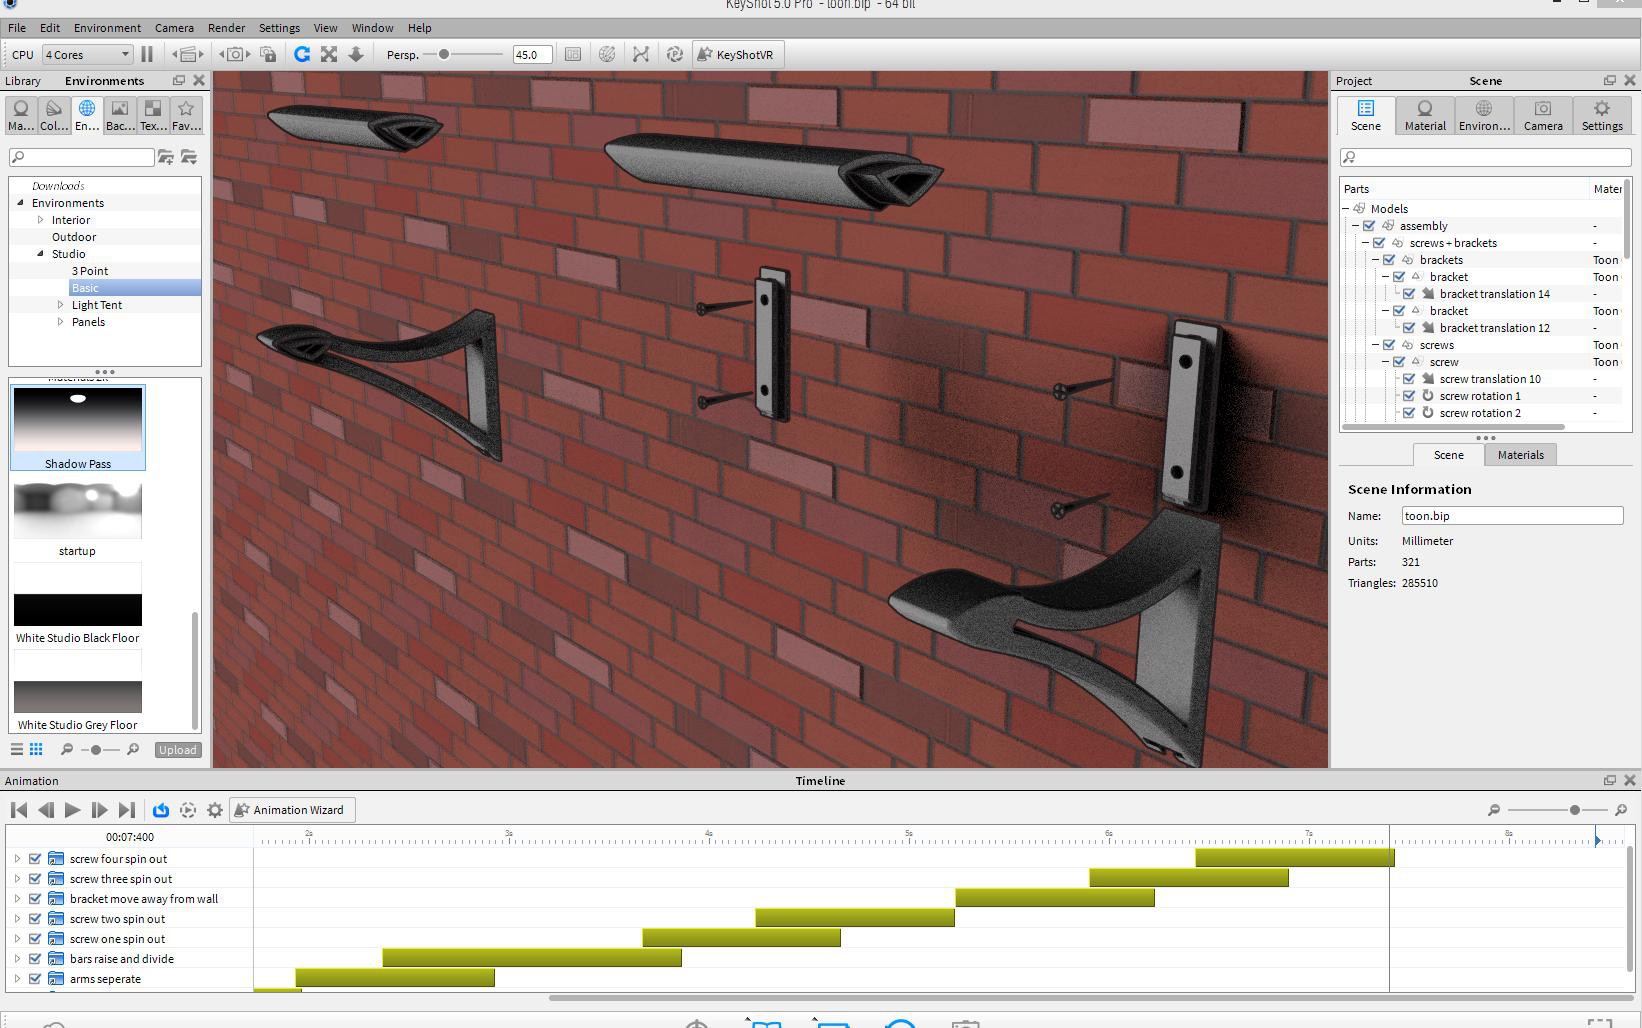
Screen grab showing a cell shaded render style in keyshot 5, here the design is in an exploded view against a wall.
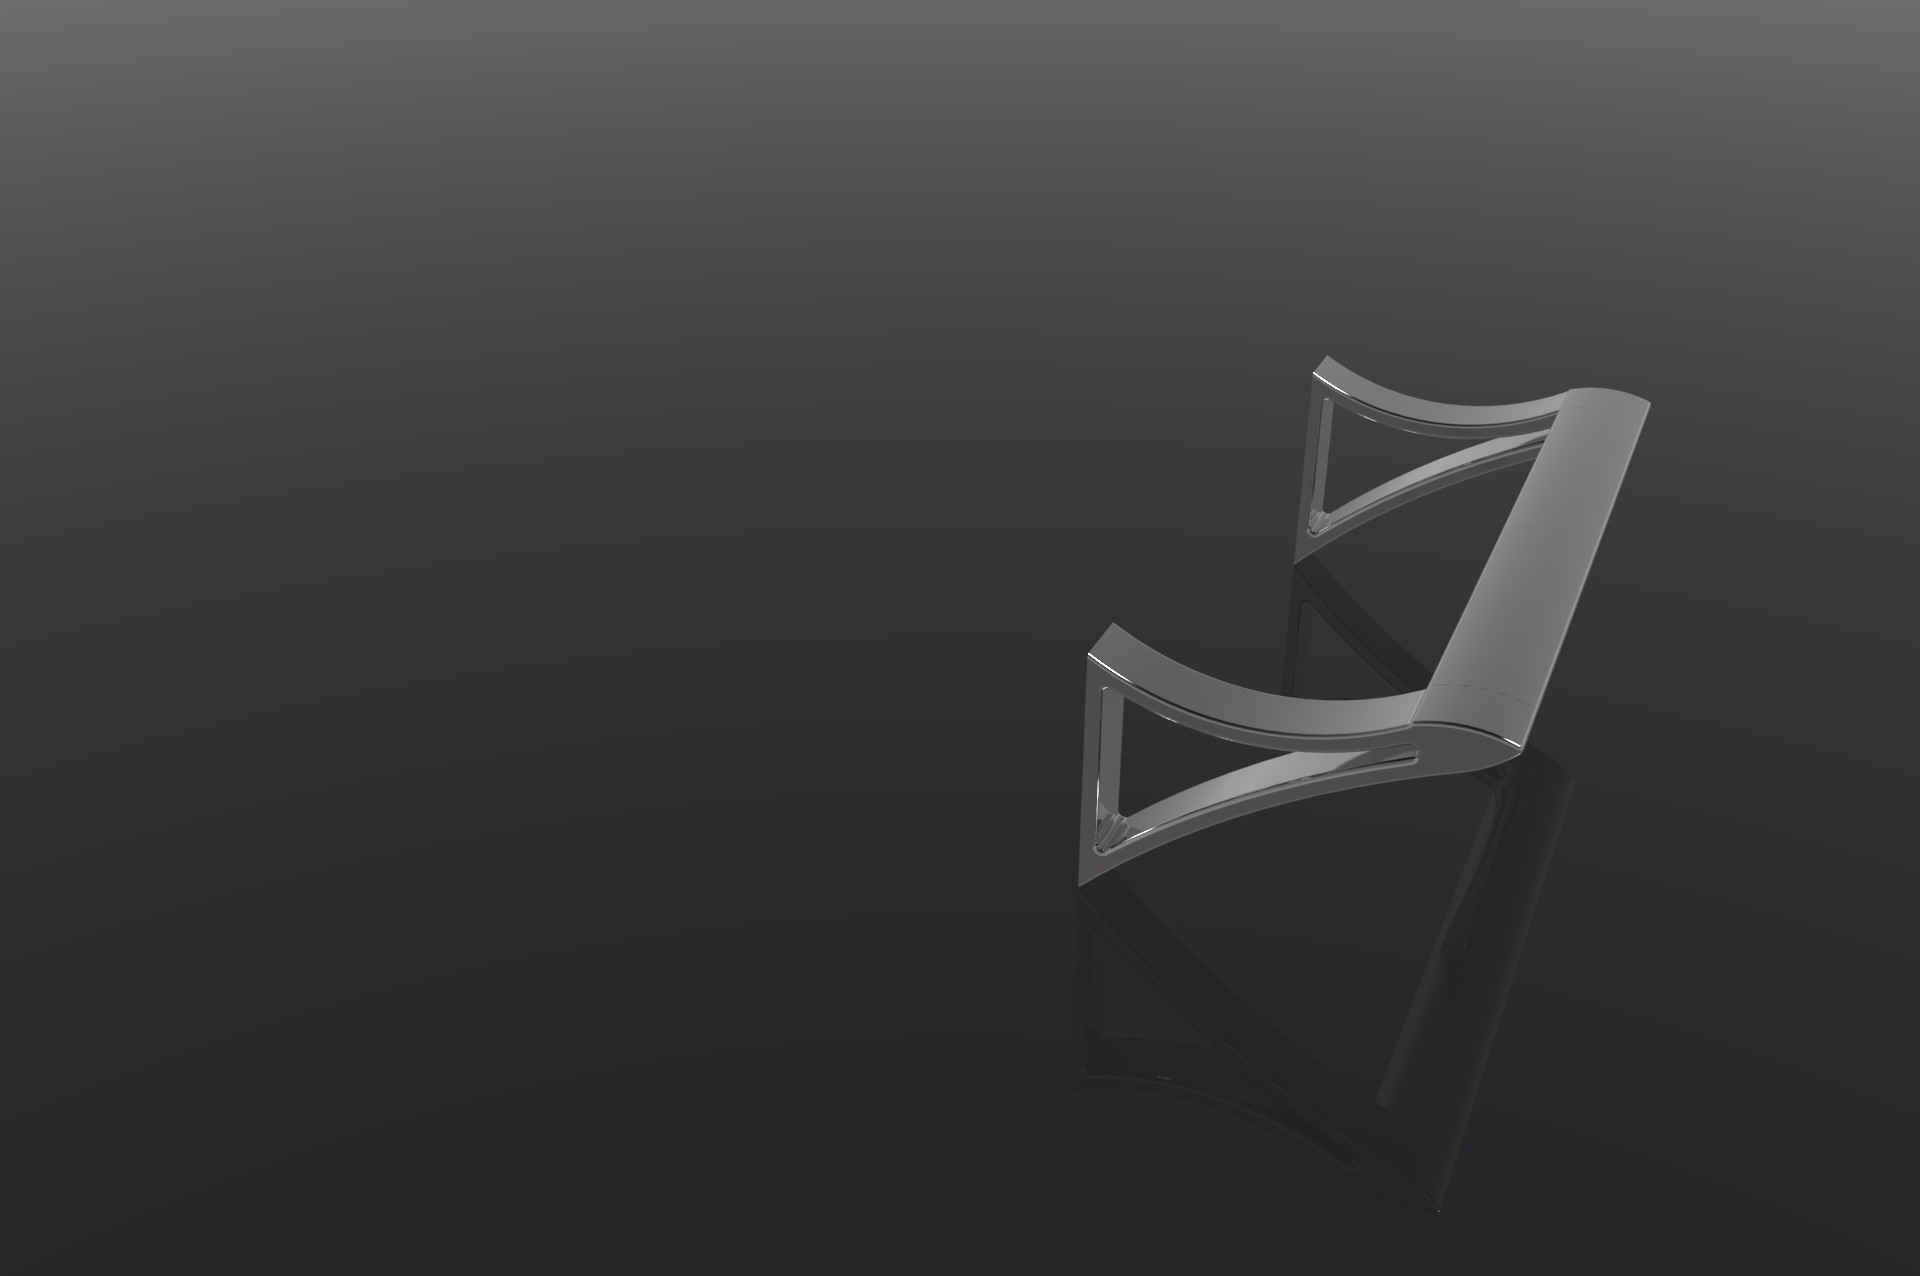
A render from keyshot 5, I played around with this off centre view and rendered the design in multiple colours.
A toon styled render animation showing the design being dissasembled and reassembled.
Discussions
Become a Hackaday.io Member
Create an account to leave a comment. Already have an account? Log In.