Stefano Balzan
If you want to build a good Real Time Clock for your Raspberry here's the tutorial you were looking for!
This is a revised and simplified version for http://hackaday.io made out of this article at my personal blog. Difference is mainly in the structure and my article is a bit more verbose.
Why another "annoying" how to on building a Real Time Clock for the RPi?
Because almost everywhere you find instructions telling you to build the circuit on a breadboard and simply wire it with a couple of loose wires.
This is a full Stacking Shield you can elegantly install on top the RPi leaving the GPIO entirely exposed for other devices. And you can build it for no more than 8$, instead of buying one for double the price.
NOTE: The RTC module is compatible with Raspberry A+ / B+ / 2.
This tutorial was originally written for a Raspberry B+ running Arch
Linux ARM, however you should be able to adapt it to other
configurations with few or even no changes.
I picked a simple DS1307, although not very precise, for many reasons:
- it was cheap
- my RPi is always connected to the internet, therefore can sync time periodically
- required a simple circuitry and few components
- it could be easily connected through a I2C interface
- Arch Linux ARM already has a kernel module compiled for it.
Anyway drift should be around 20ppm, a couple of seconds per day. Check with your requirements if it's accurate enough.


 Frederick
 Sebastian
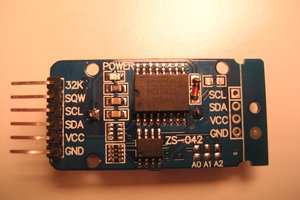
 AlfredC