 Mark Langford
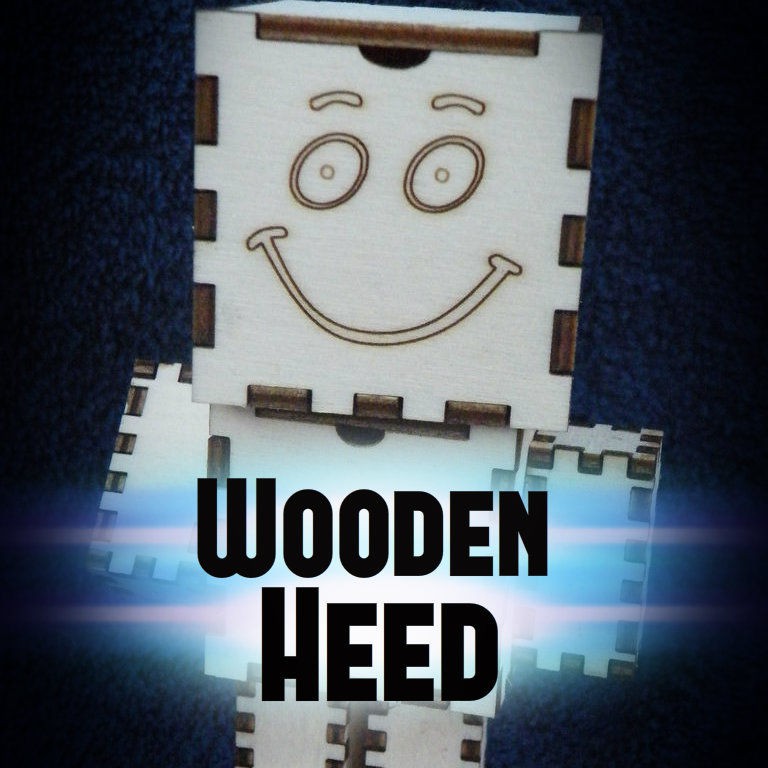

Way back in 2007, I made a little paper chap I called Heed the Box.
He proved to be a popular little chap, able to store his torso and all his limbs inside his head, but after a comment on my much more recent ring box, I decided to re-visit little Heed in a more durable form.
(Why "Heed"? In Scotland, a silly person was sometimes called a heed the ba' (head the ball), because their head was empty, like a ball. Since this chap's is so empty that it can hold his entire body, the name was (to me) quite logical...)
Step 1: Design Issues
Recreating Heed in plywood was a little more complex than the paper version.
Sizing was a little restriction on the size of parts, due to the thickness of the plywood.
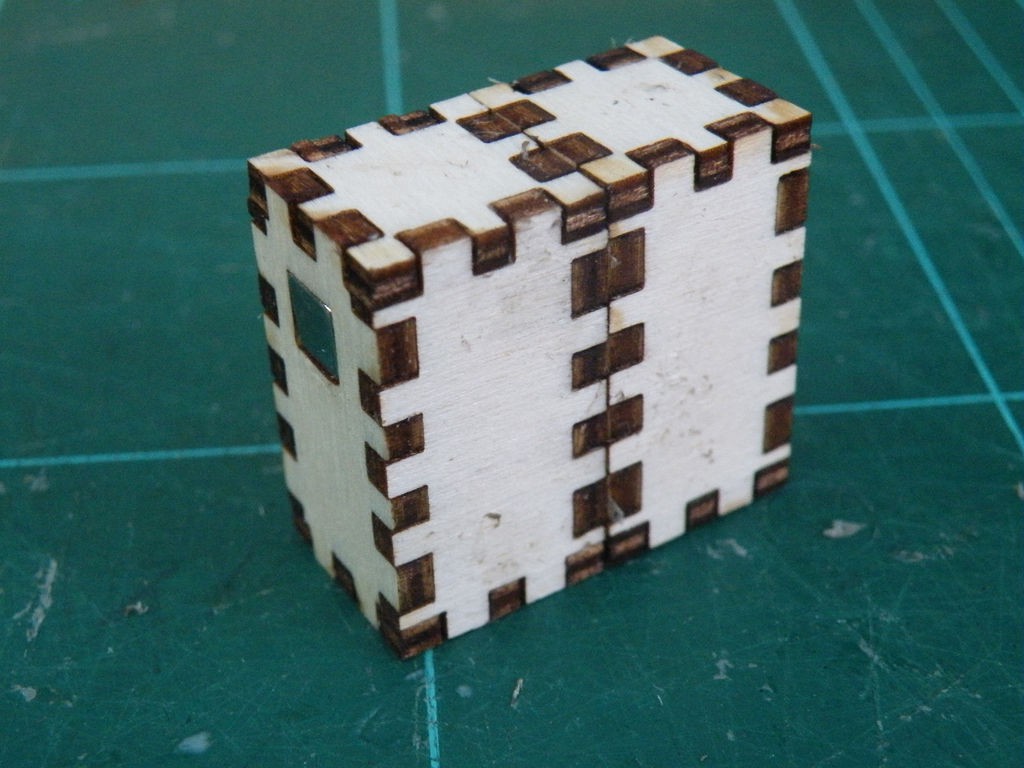
Attaching the arms needed a completely different approach - the paper original relied on cuts and creases to provide a hook. For the wooden version, I decided to use magnets - I embedded a penny in the sides of the torso, and small magnets in the arms.
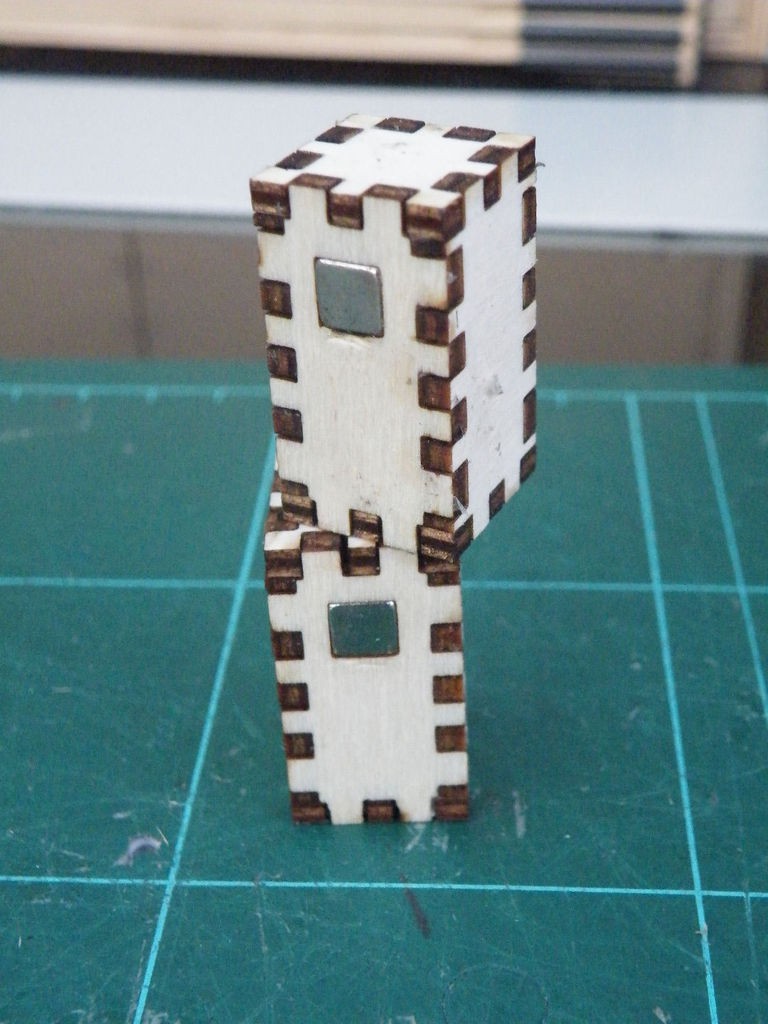
Attaching the head became a non-issue. It would have been nice to use magnets again, but the ones I had were too thick to allow the arms and legs space to fit. So, I decided to simply balance Wooden Heed's head on his torso, and the same with the torso on the legs.
I have attached all the files I used - feel free to edit them as you wish.
If you don’t have your own cutter, you can always try the online laser cutting at Ponoko - if you use the first file I have attached to this step, you can upload it and get the parts cut from a P1 sheet of 3mm plywood for about $20.
Download WoodenHeed 3mm 24x12.svg
Download Heed2.dxf
Download Heed2.ecp
Download Heed2.pdf
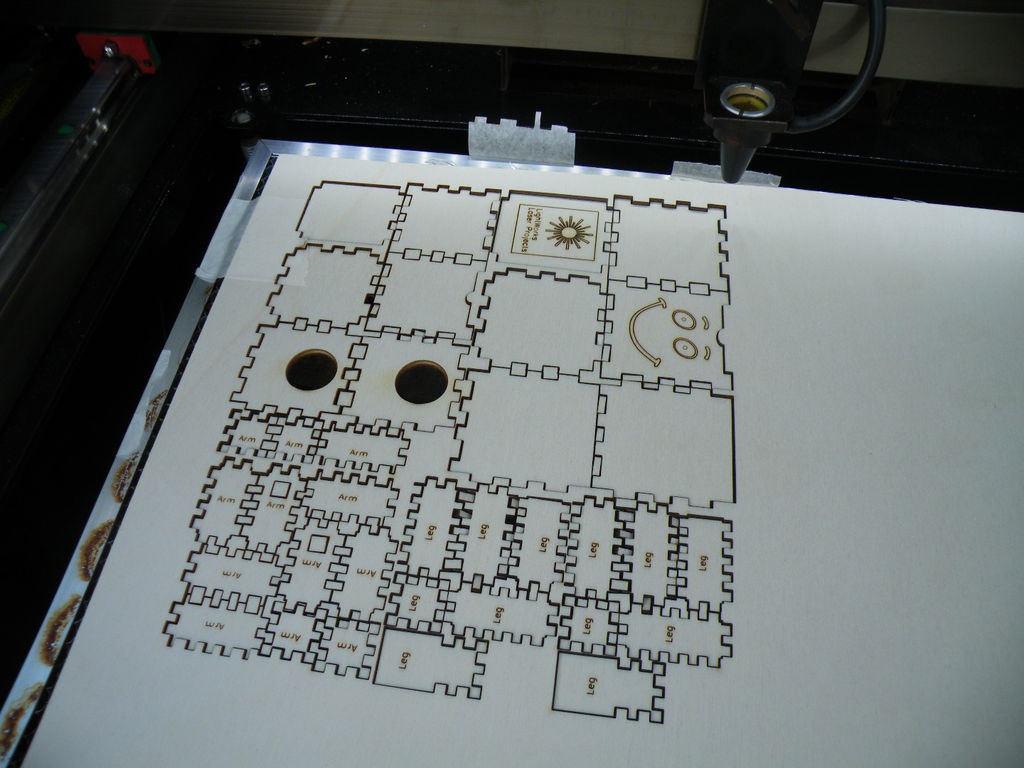
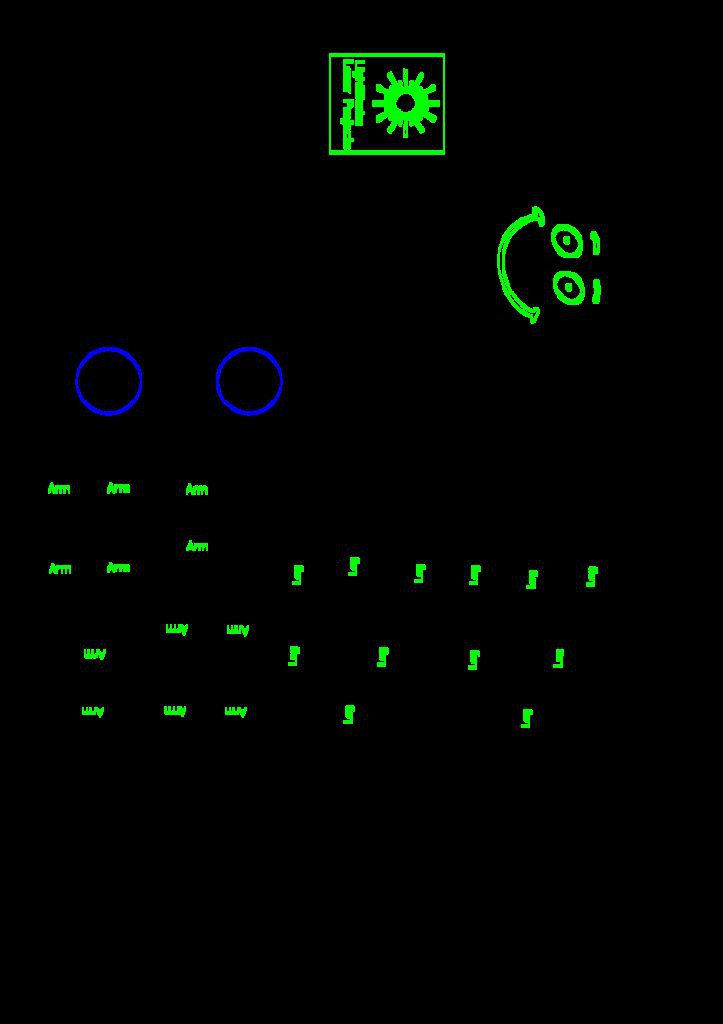
Step 2: Quick Summary of Parts
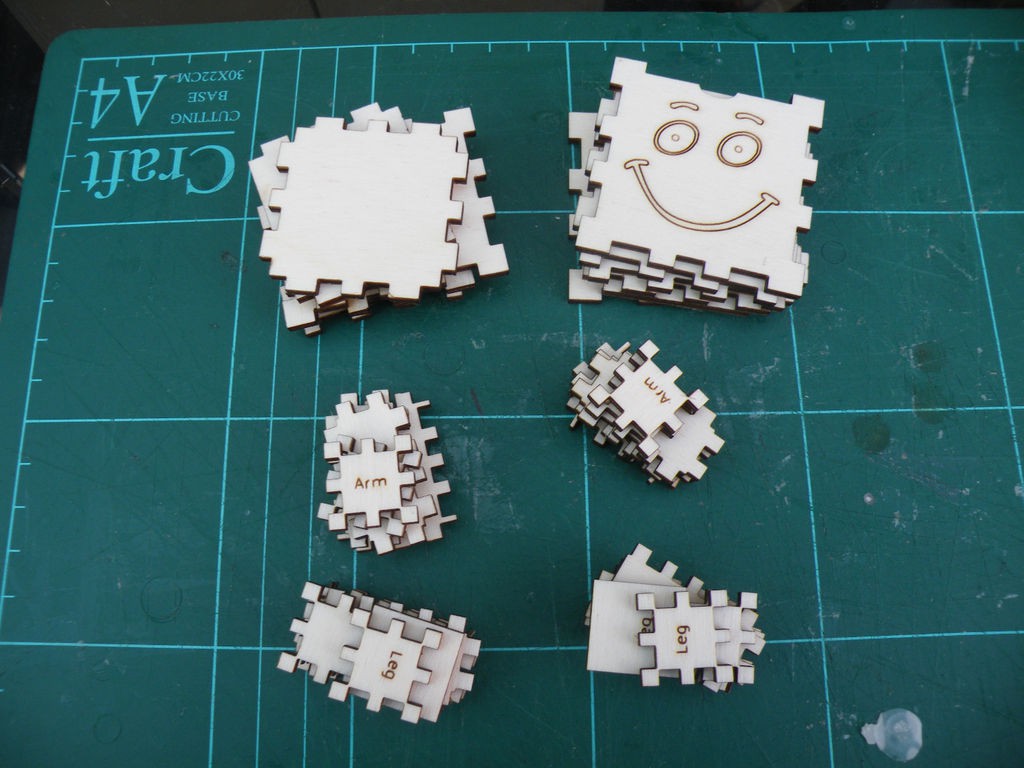
Each part of Heed is made of six pieces of wood.
Because the arms and legs are very similar, but not identical, I decided to mark each with a label - it only adds about 45 seconds to the cut, and saves accidentally gluing the wrong parts together.
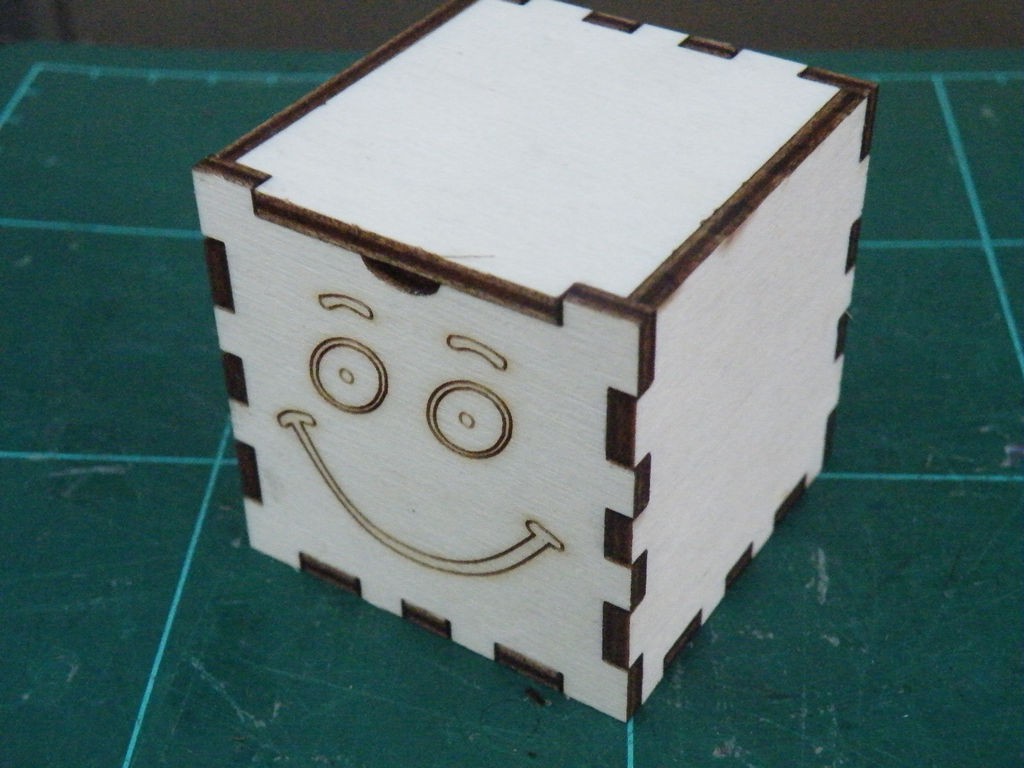
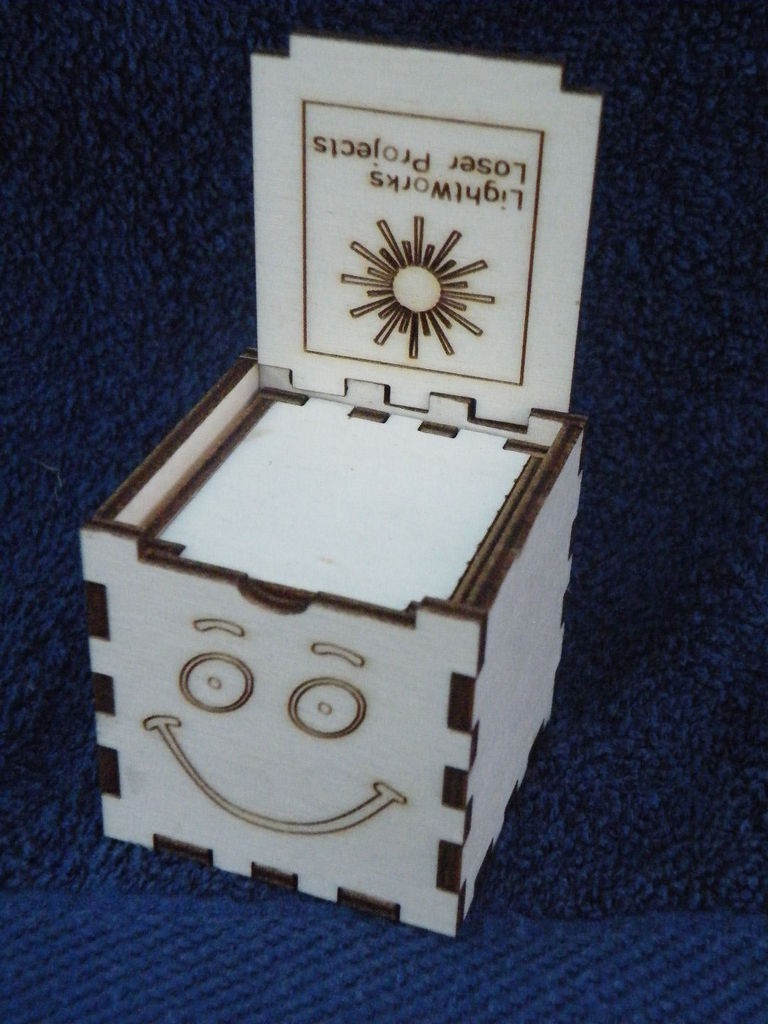
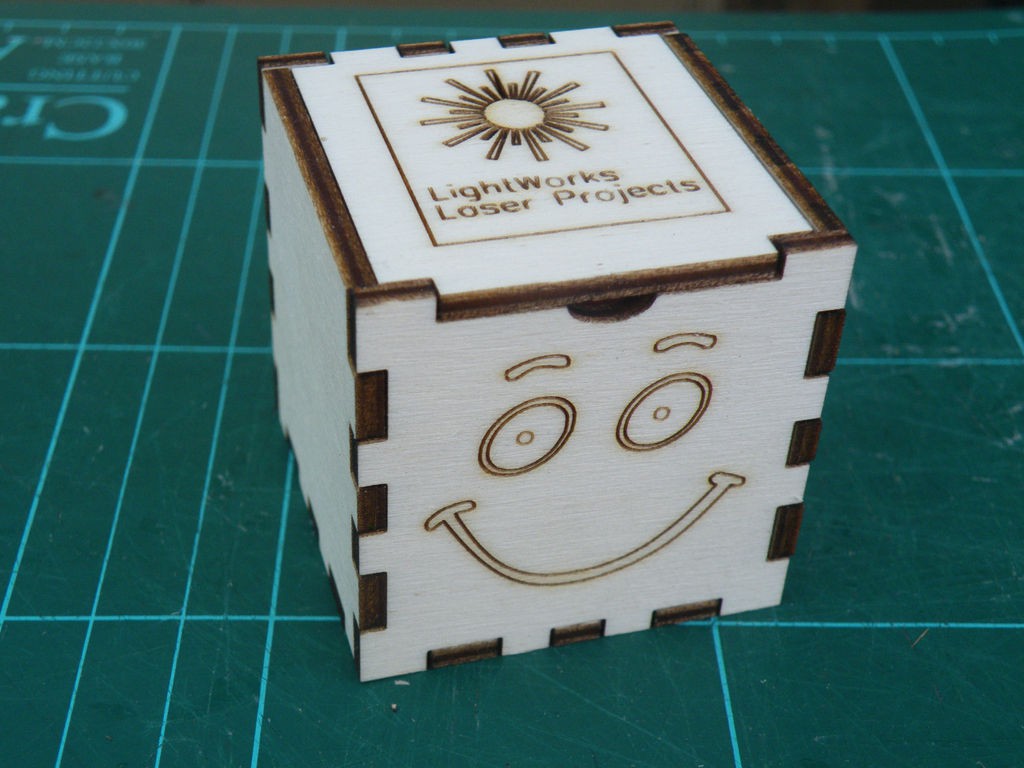
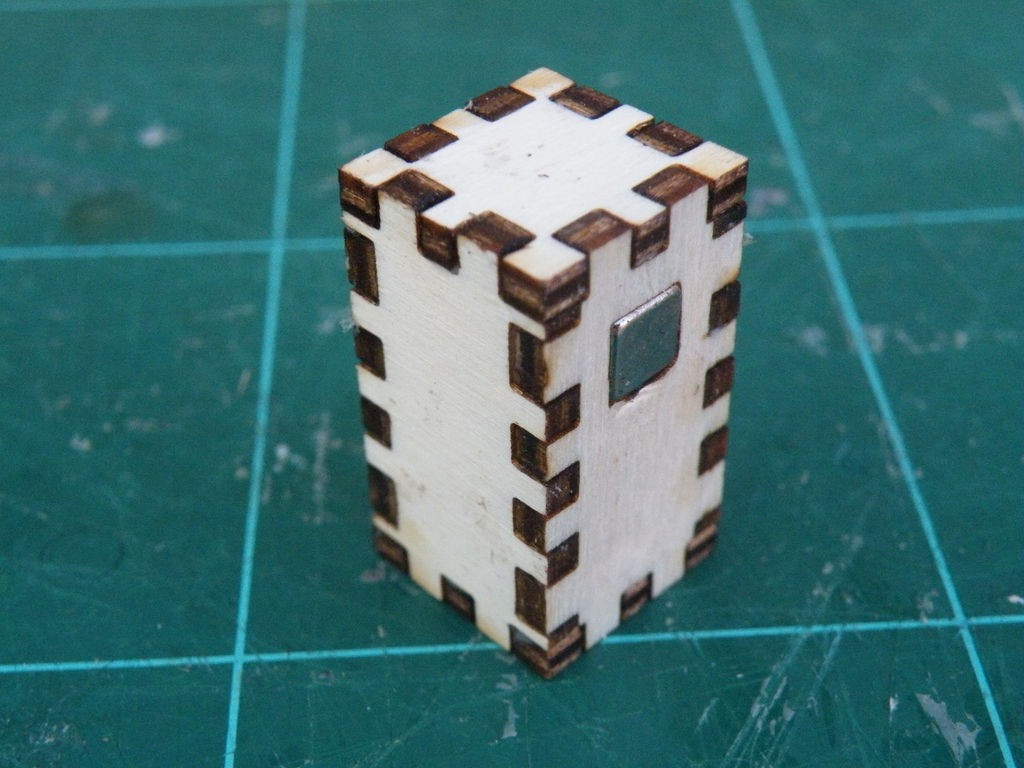
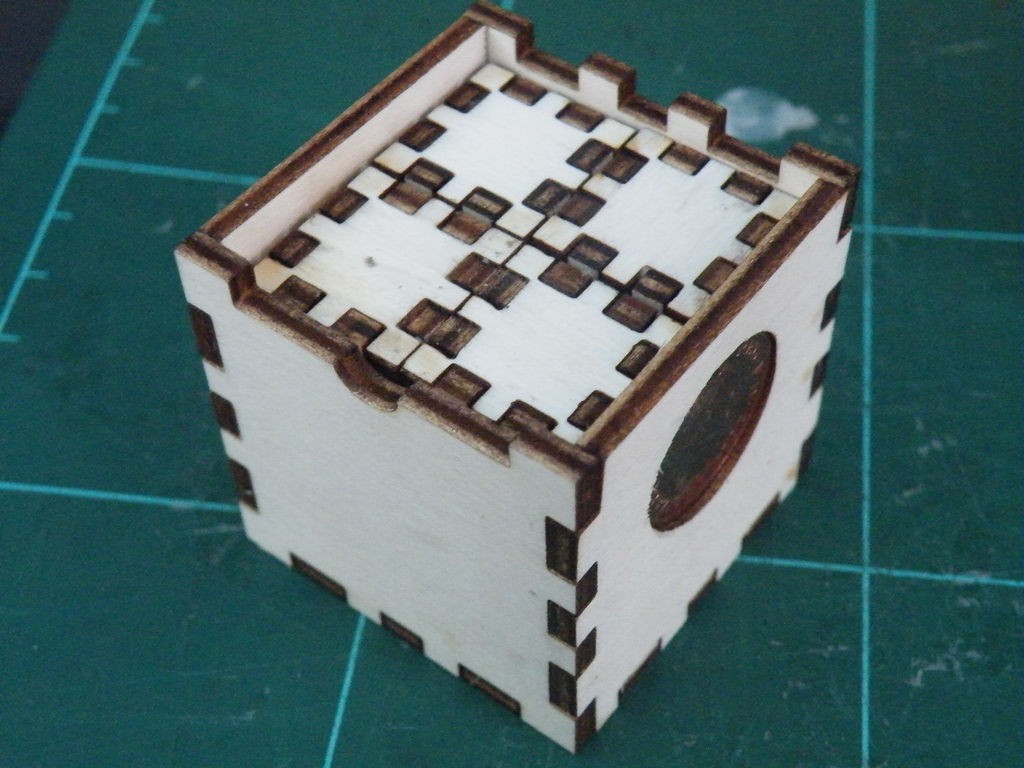
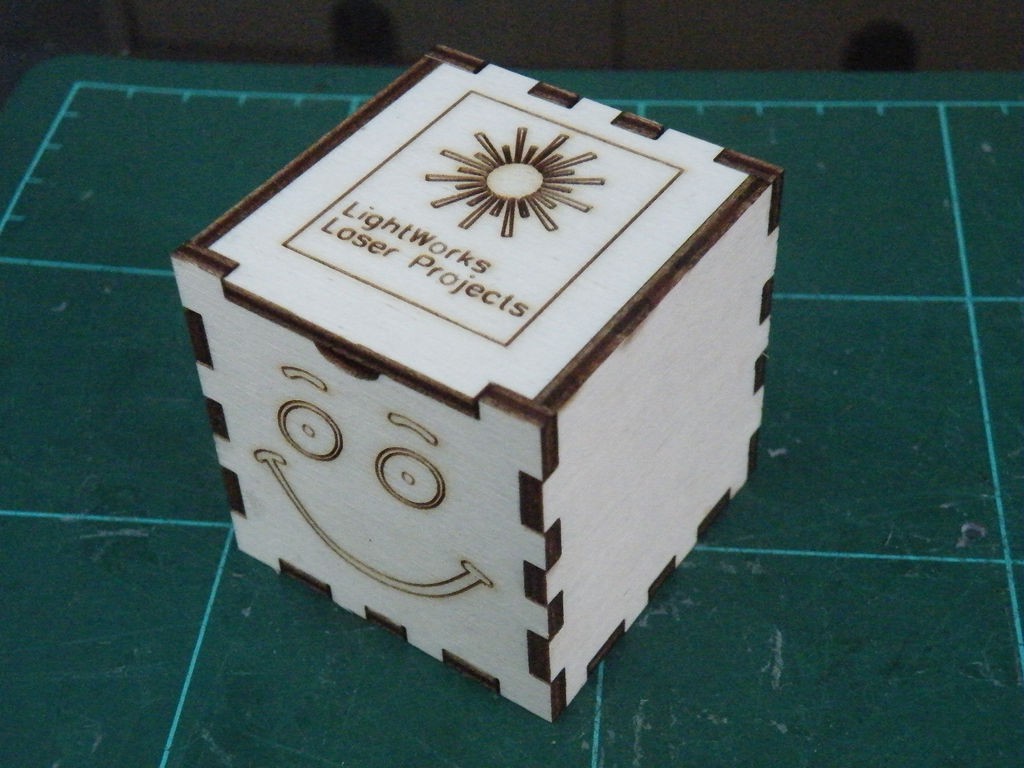
Step 3: Construction: the Head
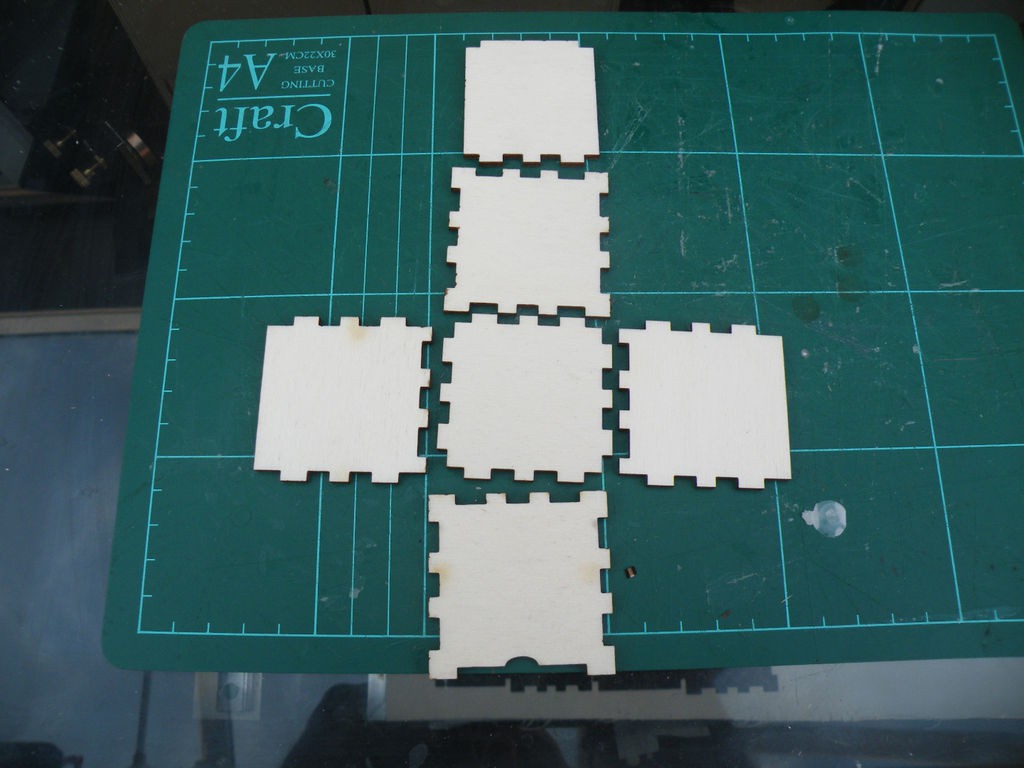

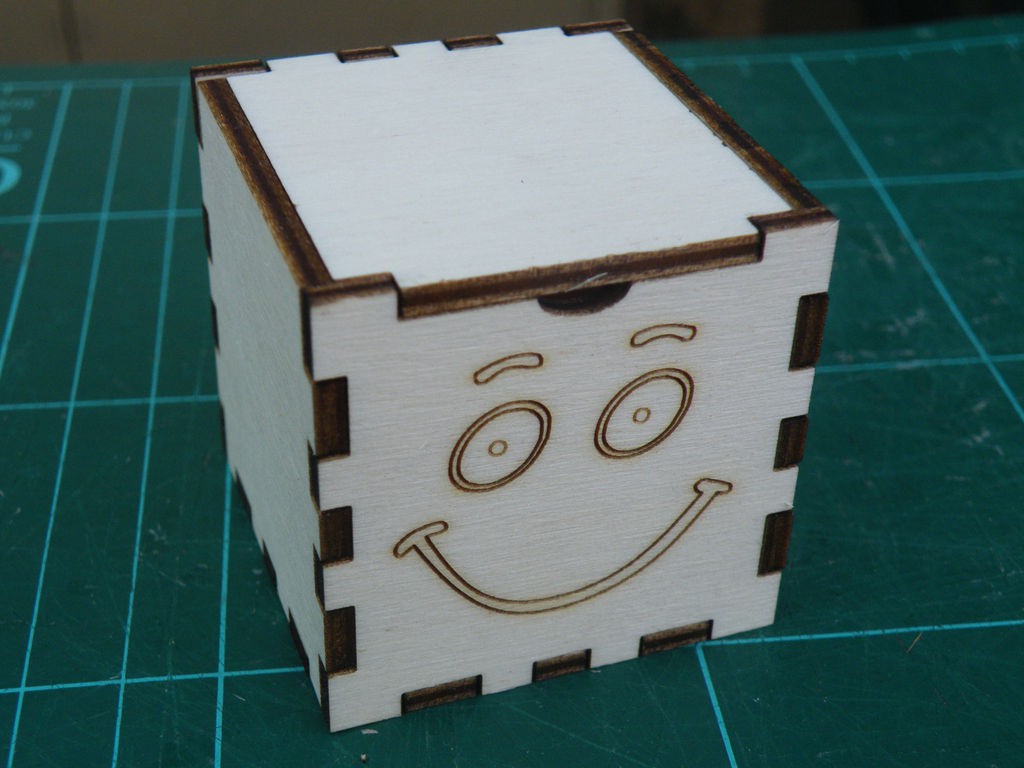
Lay the parts out and do a dry test-fit to make sure you have the right parts in the right order.
Apply PVA (wood) glue to the tabs around the base and the corners - not to the top edges.
Refit the parts, and hold firmly together for a few moments. Do not leave the top piece (the lid) on, just in case oozed glue fixes it in place.
(I took the liberty of adding my Etsy shop logo to the lid, but the lid is reversible if you do not want it visible.)
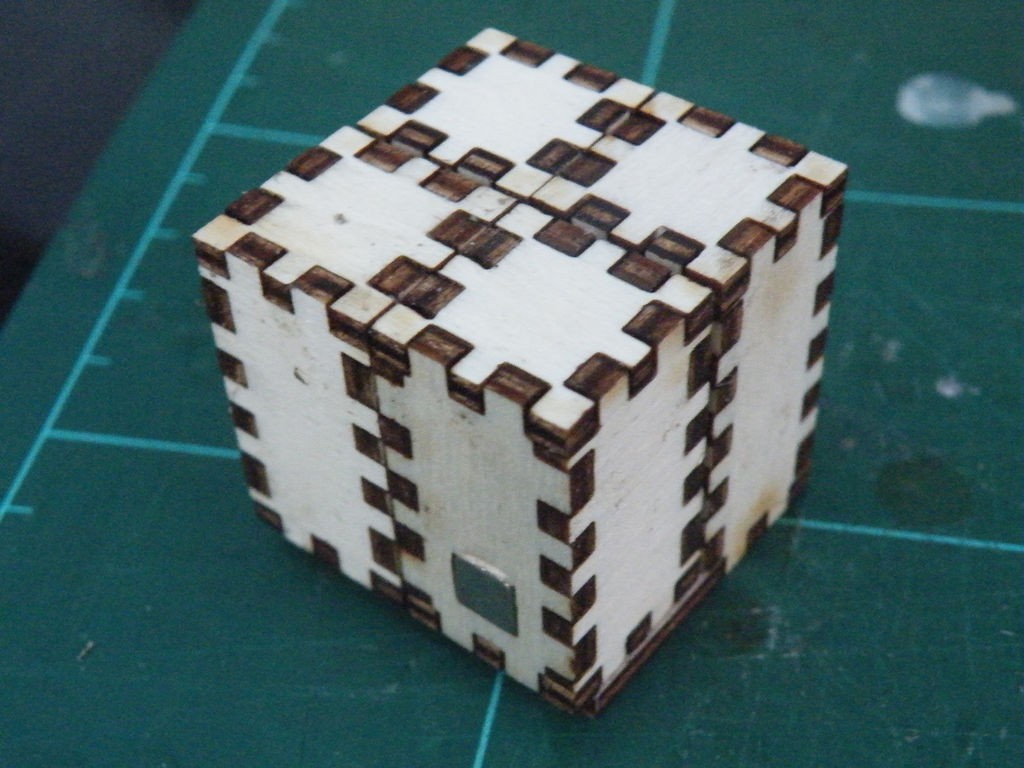
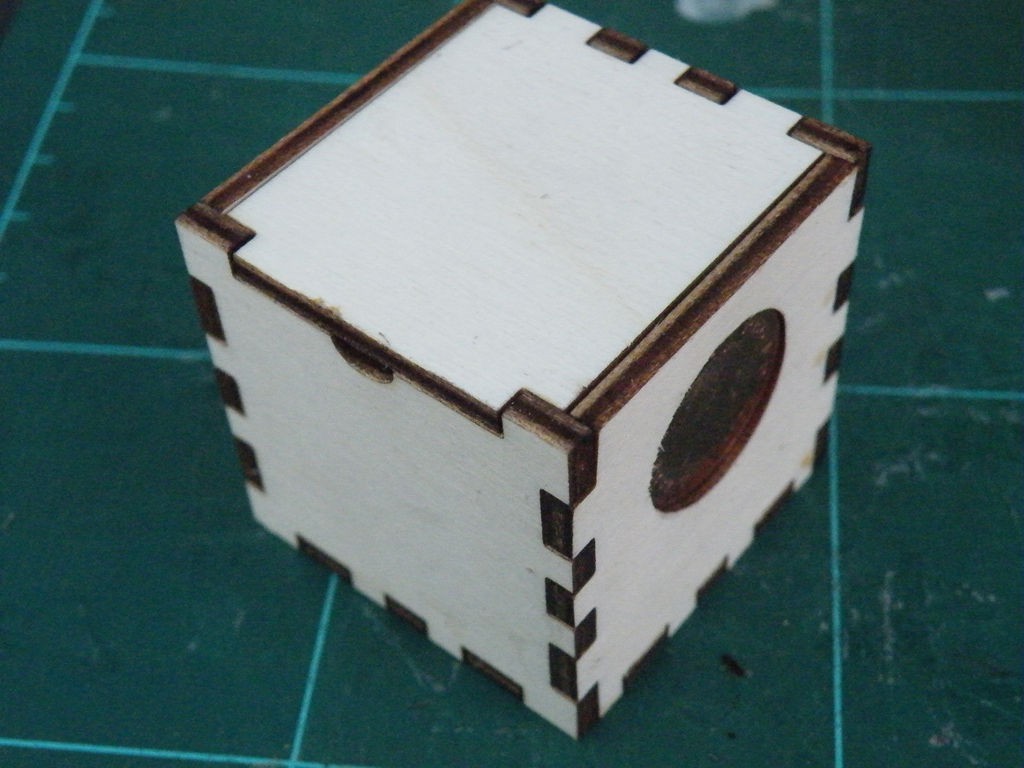
Step 4: Construction: the Torso
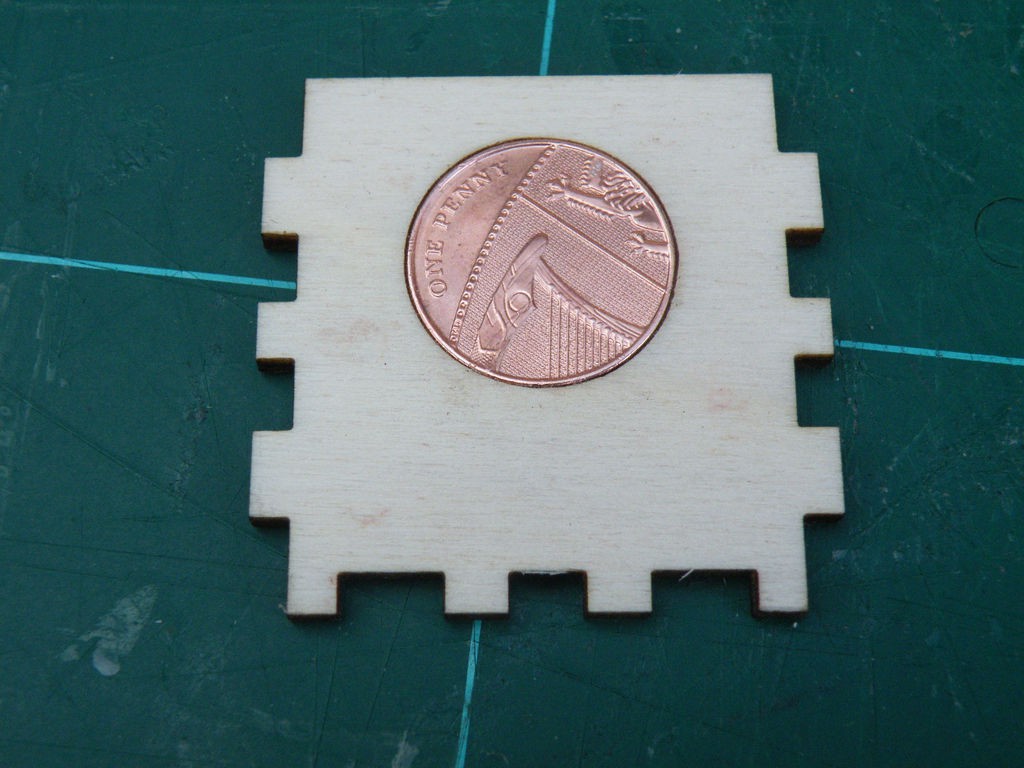
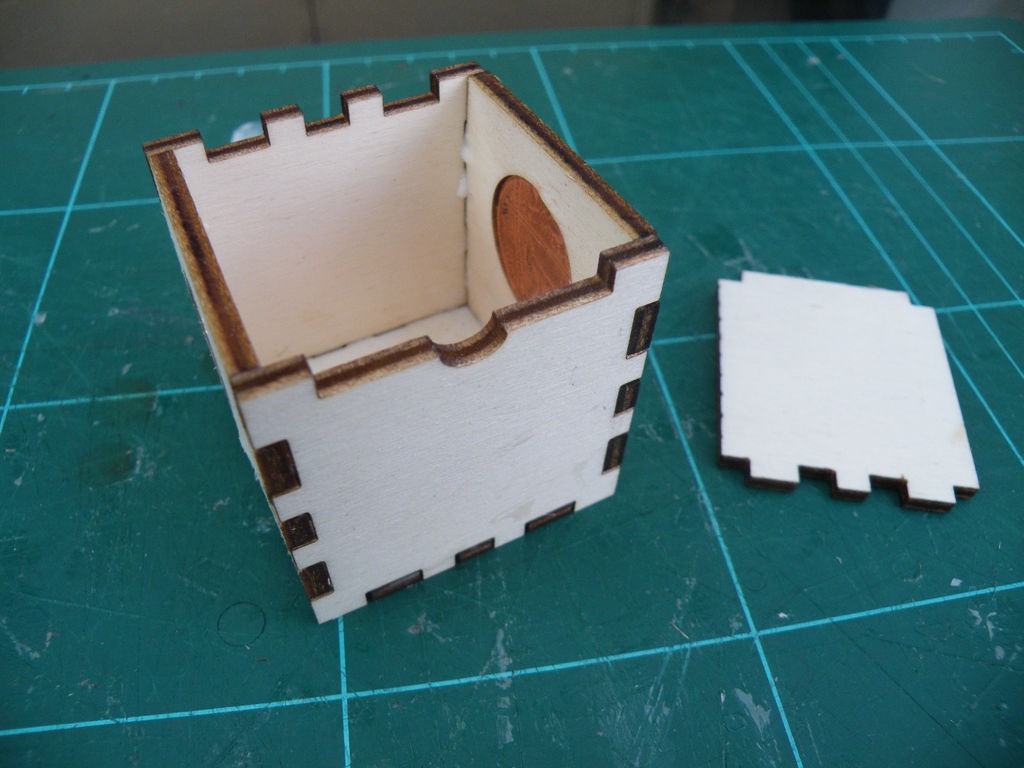
I designed the torso with holes in the sides.
The holes are the exact size of a British penny - a few moments with a small hammer firmly friction-fits the coin in the hole.
The construction of the torso then continues as for the head. Again, do not glue the lid in place.
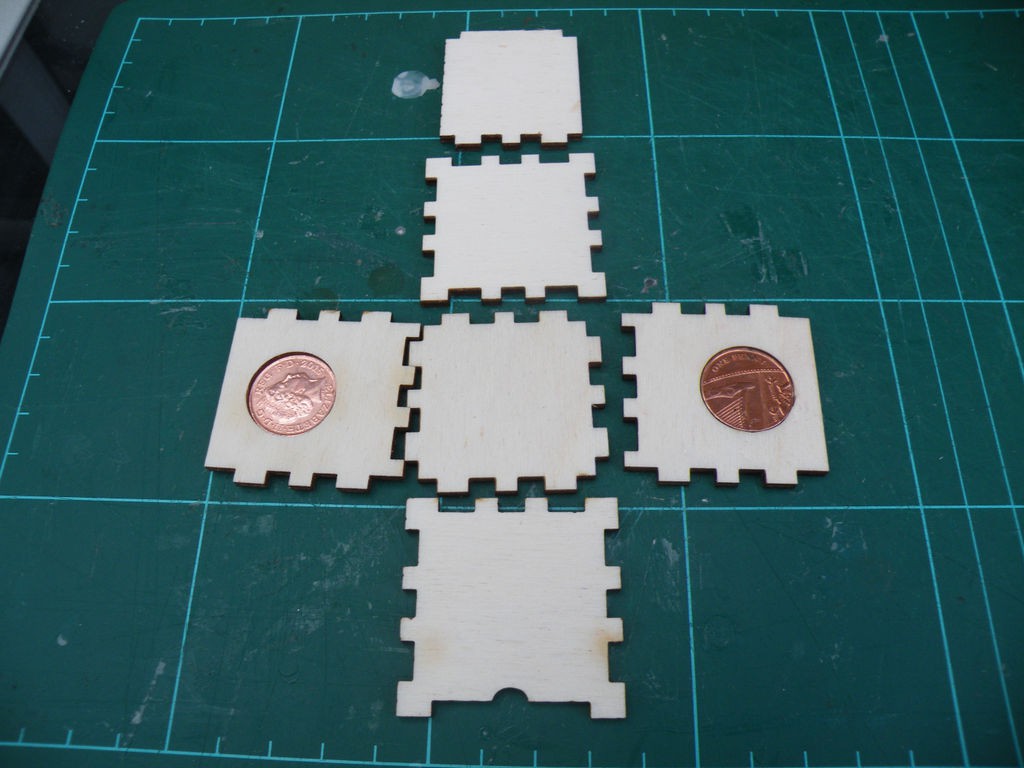
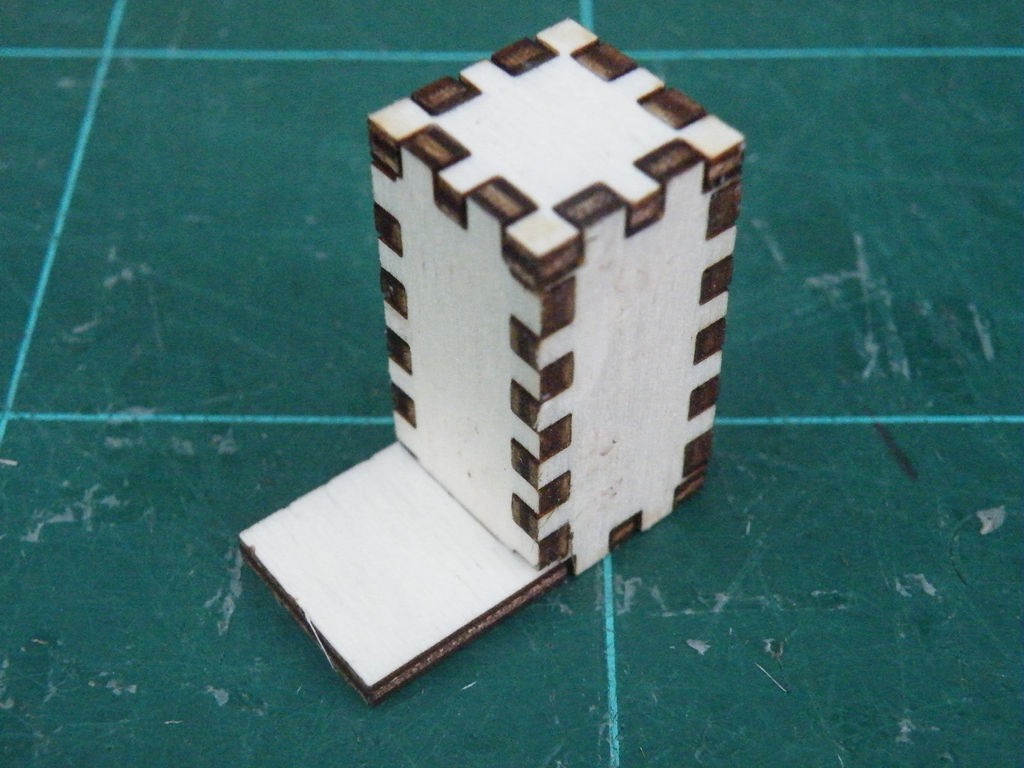
Step 5: Construction: Arms
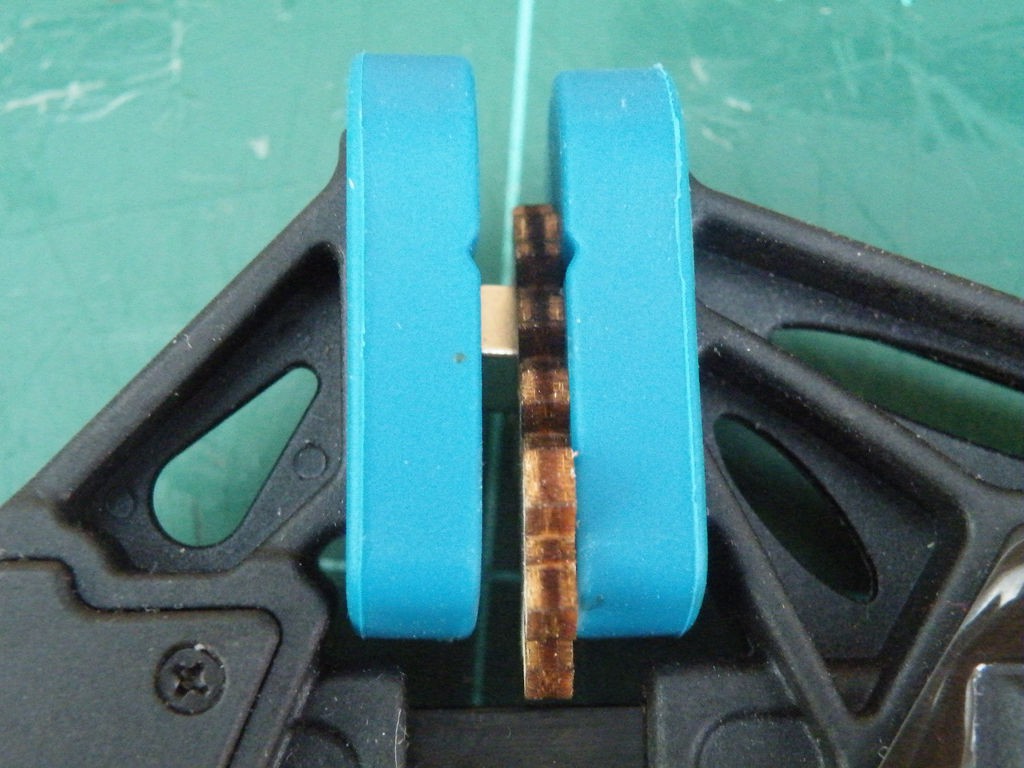
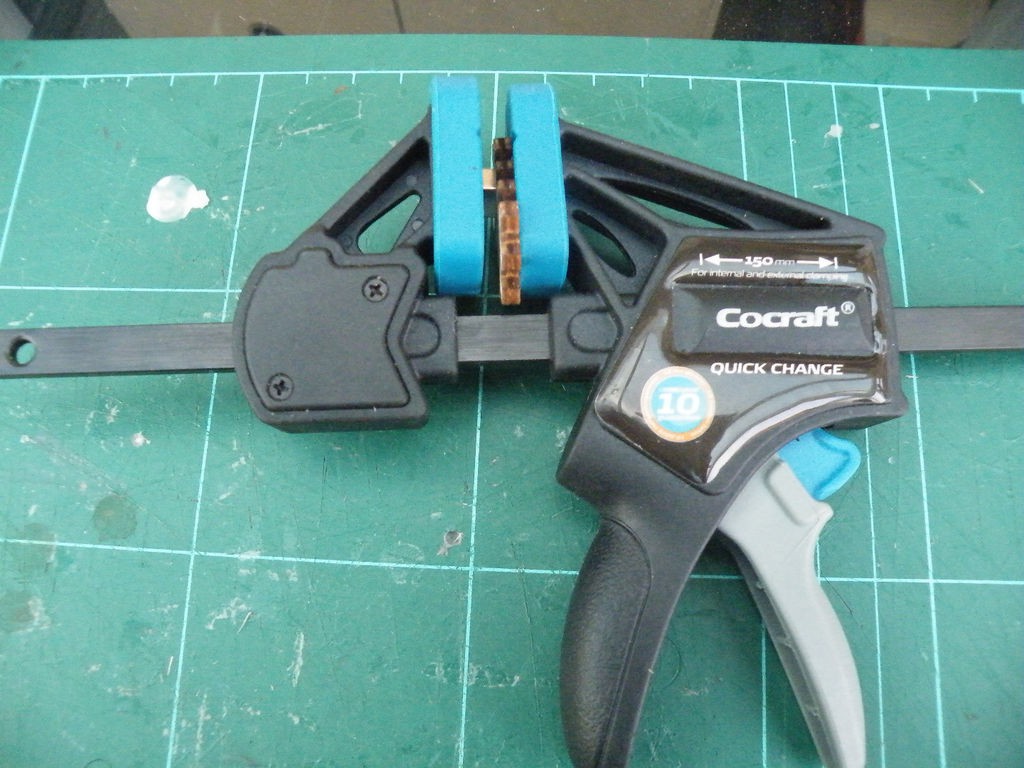
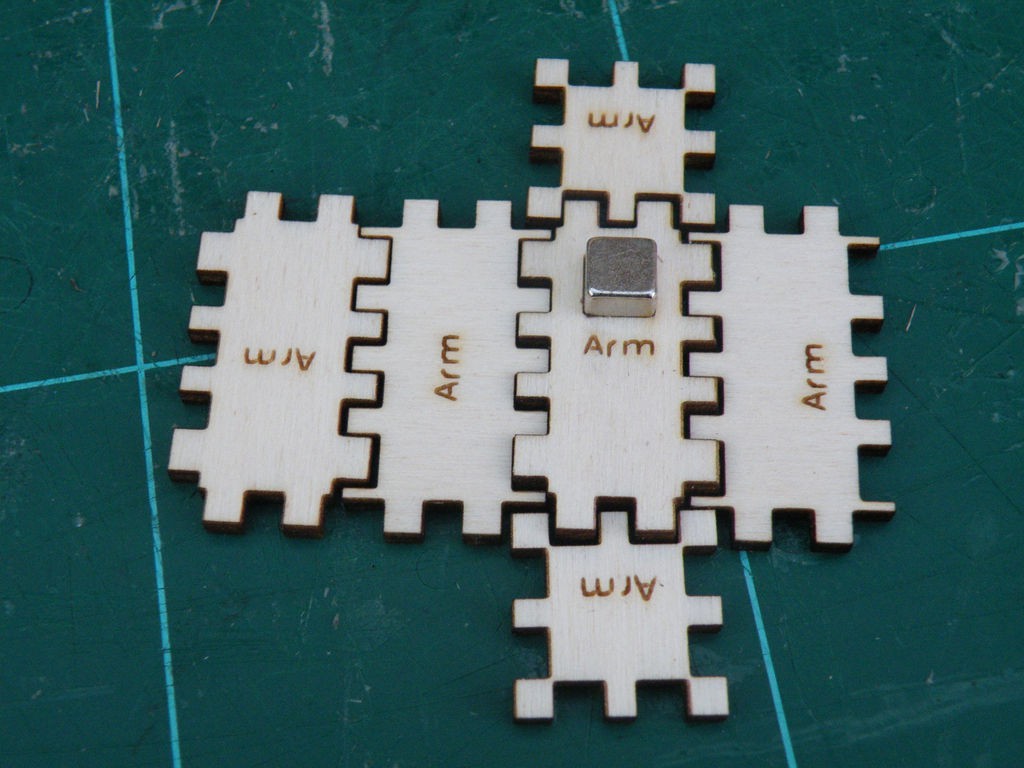
The arms have a 6mm square hole in one piece, sized to fit one of the small neodymium magnets I happen to have a small stock of.
Just like the coins, friction holds the magnet firmly in place, but it cannot be hammered into place - instead, I used a ratchet clamp to squeeze the magnet into the hole.
Again, dry-fit the pieces before gluing them. If you have not edited off the labels, make sure they all facing upwards so that they all end up out of sight inside the arm.
Step 6: Construction: Legs
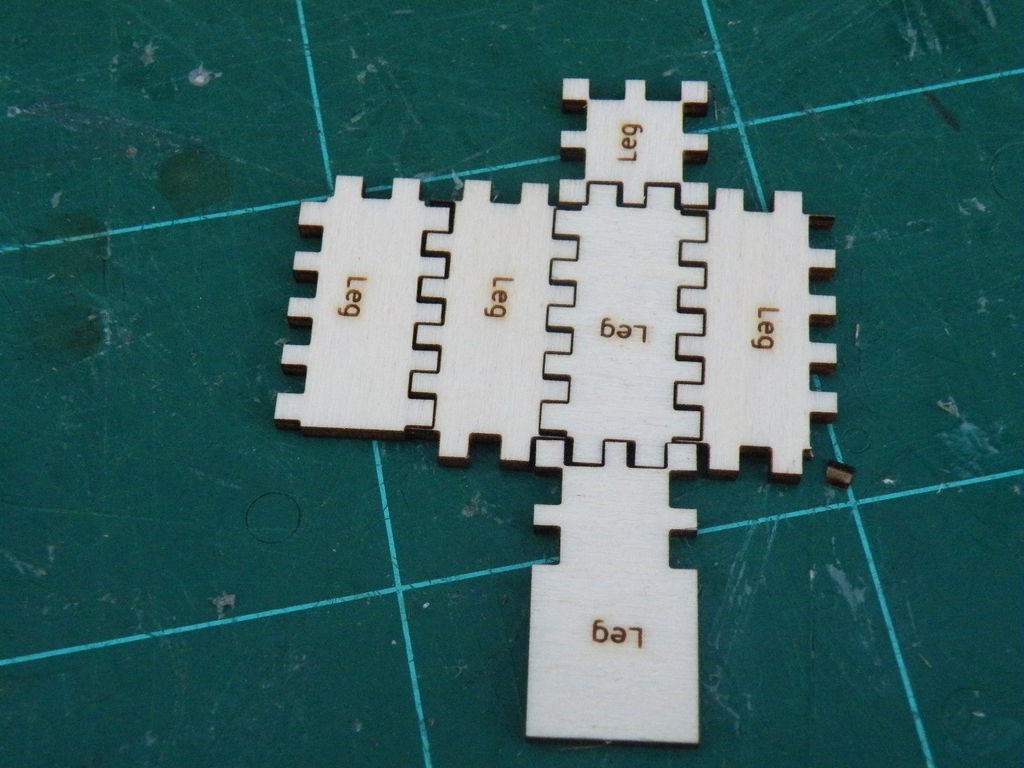

The legs are perhaps the simplest parts to assemble.
As for the arms, dry-fit before gluing, and make sure any labels are facing upwards when you apply the glue.
Step 7: Boxing


To fit all the parts together...
1. Stand the legs side by side.
2. Stand the arms on the toes.
3. Slide the arms and legs into the torso, and add the lid.
4. Slide the torso into the head, and add the lid.
Step 8: Assembly
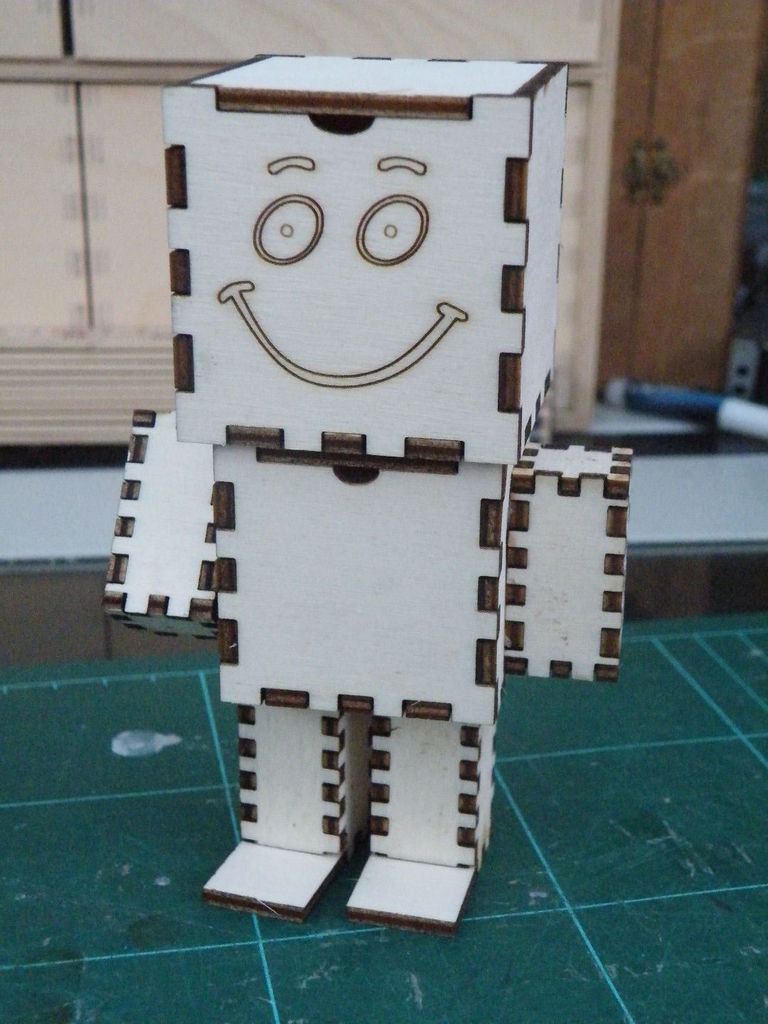

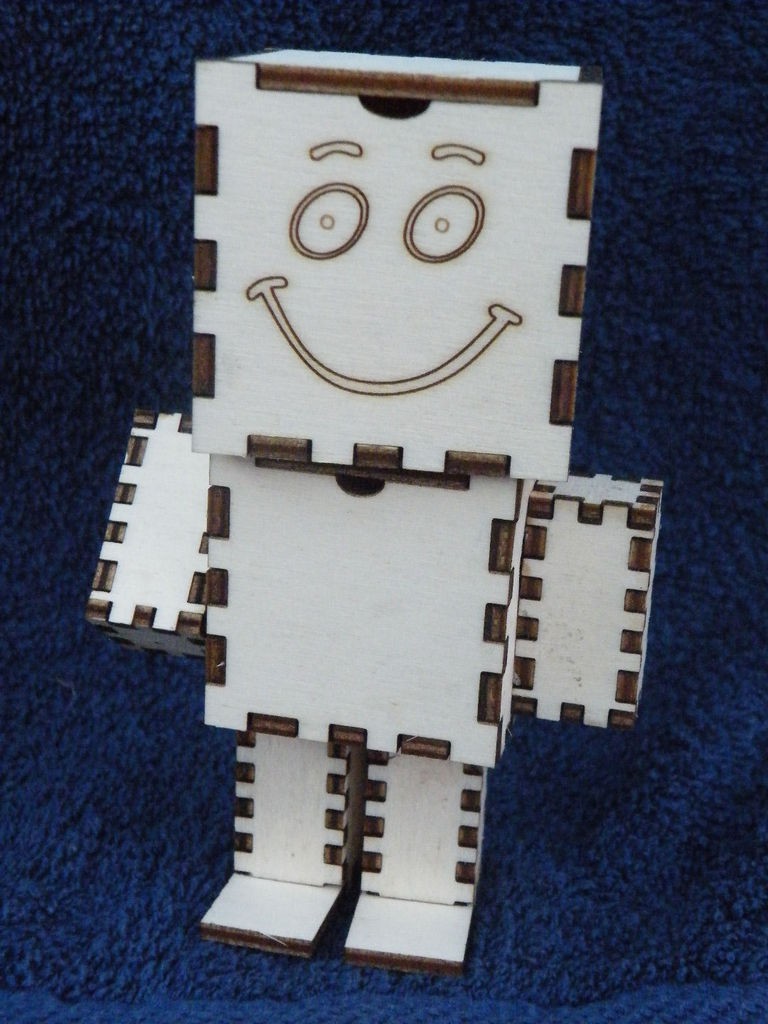
Assembly is even easier than the boxing.
Stand the legs on your chosen surface.
Attach the arms to the torso - they can be added at whatever angle you find pleasing.
Stand the torso on the legs.
Stand the the head on the torso, turned at whatever angle you like.
Step 9: Your Turn!

I'm sharing all the files required to cut your own Wooden Heed, so it...
Read more »
