 TAIBHSE DESIGNS
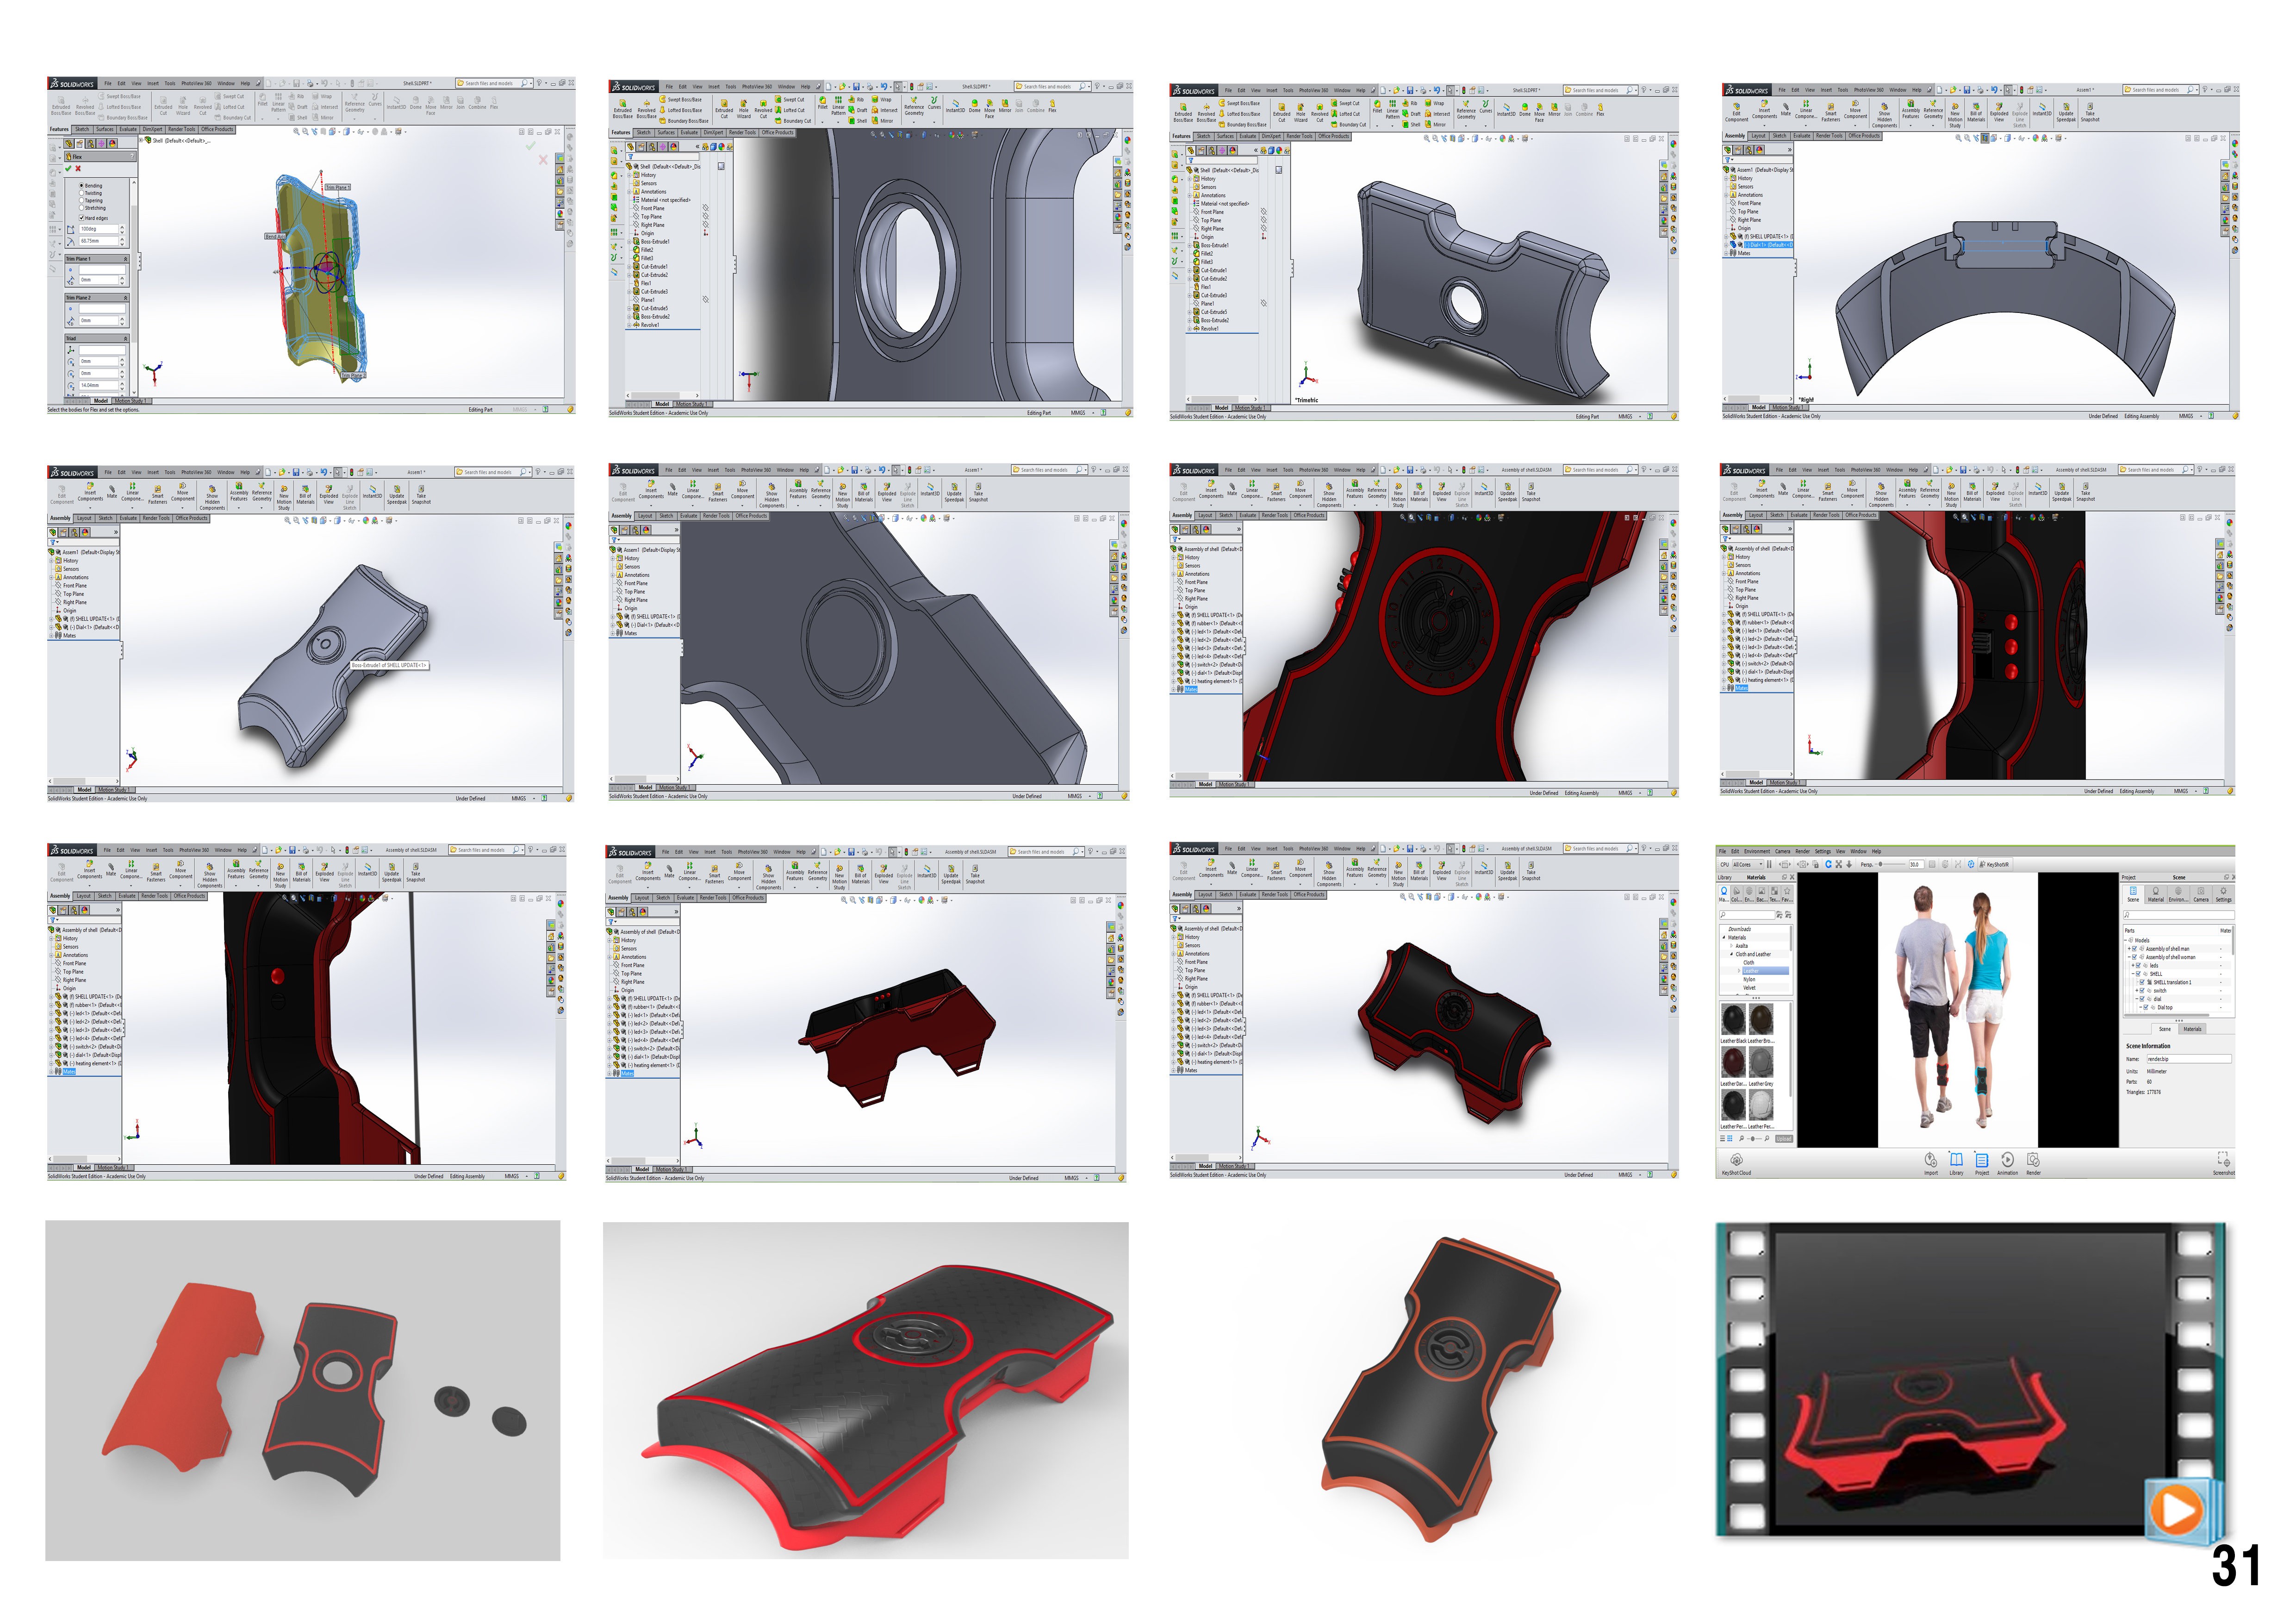
While most devices today are heading towards using apps to control them, we decided to go back to basics, our device was battery powered so it need an on/off switch and a way to indicate remaining power. We settled on a slider switch and three coloured LED’s, red, yellow, green to indicate remaining charge. We then discussed how the max temperature would be set, the concept used cycling heat to soothe pain, but some users may want it set warmer or cooler, we had two options, a slider or a rotating dial, we settled on the rotating dial. A charging port for the battery was also necessary, we added an led that glows red while charging and green when finished.
After deciding on the controls and the best way to keep them very simple for users, we had to deal with how best to design the shell to accommodate them, we didn’t want it to be possible to accidentally turn on or off the device while wearing it, if it gets bumped or hidden by clothing so we recessed the switch and leds deep into the centre of the shells side. We wanted the design to be symmetrical so we added an identical recess on the opposite side and placed the charging port and led there. Next was positioning and designing the shape of the temperature control dial. Given the symmetrical layout, we decided to place it on top of the shell, flush with the surface, centre between the two recesses. Large grooved cuts were added to the dial to allow for easy rotating.
We debated the main colour we wanted the shell to be, we decided to avoid white so went with the other extreme and chose black, while the shell was nicely shaped, and curved to conform to the lower legs profile, we were finding it to be looking rather plane, we added some engraved designs but it remained looking plain to us, we played around with the design until we coloured the engravings and found It to look appealing to us and those we showed it to. We tested various colours and found they all looked great with black as the dominant colour.
Using solidworks we designed every other part around the shell and carefully inspected everything for fitting to ensure everything is scaled right and all parts will fit together perfectly. We also intended to use the same cad files in Keyshot5 for rendering both images and a video simulation so we modelled the switch and led’s and created an assembly of the entire model. This is the finished video simulation for the project.
We had limited time for rendering as well as limited experience with the software so the end quality is not exactly what we wanted, while the animation worked perfect for us, we had to break it up into segments to run across 2 standard laptops with core i3s in order to get the renders finished in time for the projects deadline (the animation was finished and upload the night before the deadline). Neither of us had any experience with video editing at the time beyond windows movie maker, this did the job though of stitching the video renders together but came at the cost of the quality of the footage. We wish we had experience with premiere pro at the time like we do now for this part of the project as we feel it would have drastically improved the end quality of the video.
Discussions
Become a Hackaday.io Member
Create an account to leave a comment. Already have an account? Log In.