 Open Green Energy
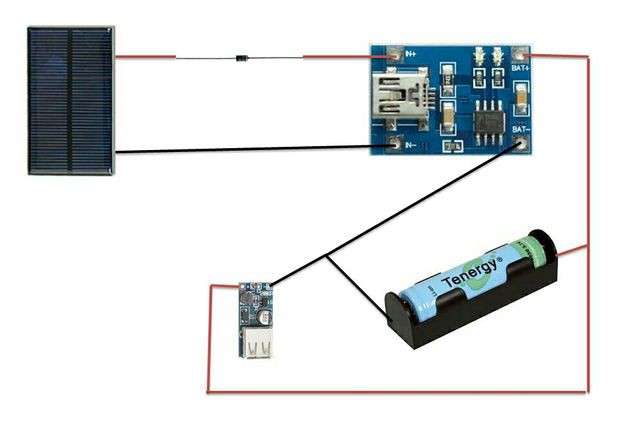
To power the Arduino I choose Li Ion battery (18650).If you look at the Periodic Table, you will find that Lithium is on the far left in the first column, where all the most reactive elements live.So during handling care should be taken.
Caution :
You must take certain precautions when dealing with Lithium Ion Batteries. In order to maintain a very precise voltage when charging. The 3.7V batteries we're using in this guide need to have a charging voltage of 4.2V.A volt high or a volt low can mean an out of control chemical reaction which can lead to danger.
Don't worry a suitable Li Ion battery charge controller will solve the above problem.
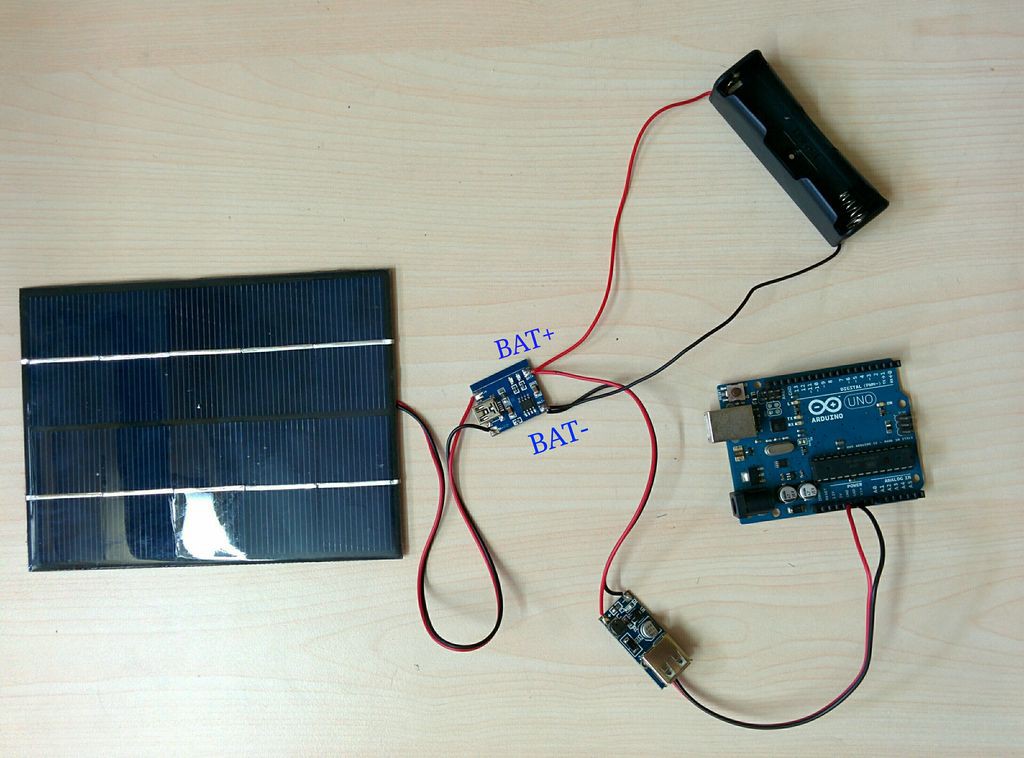
Circuit Connection :
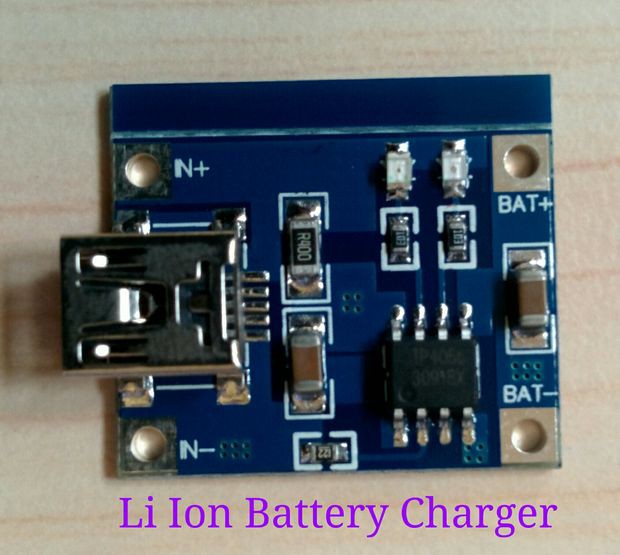
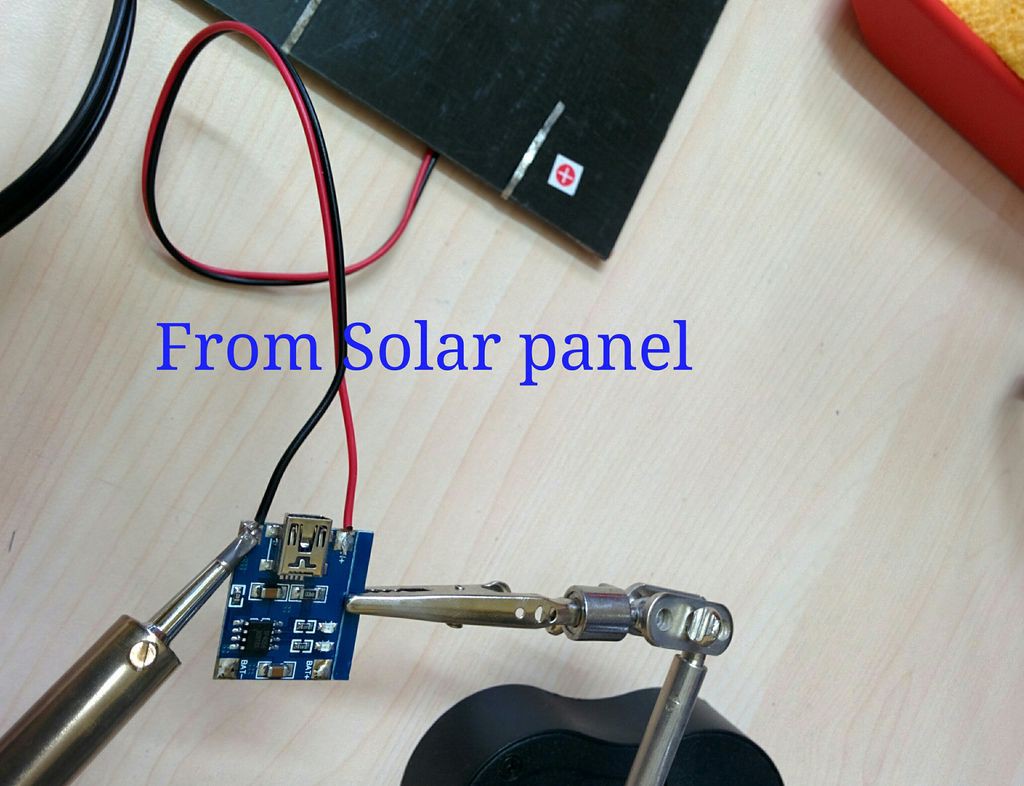
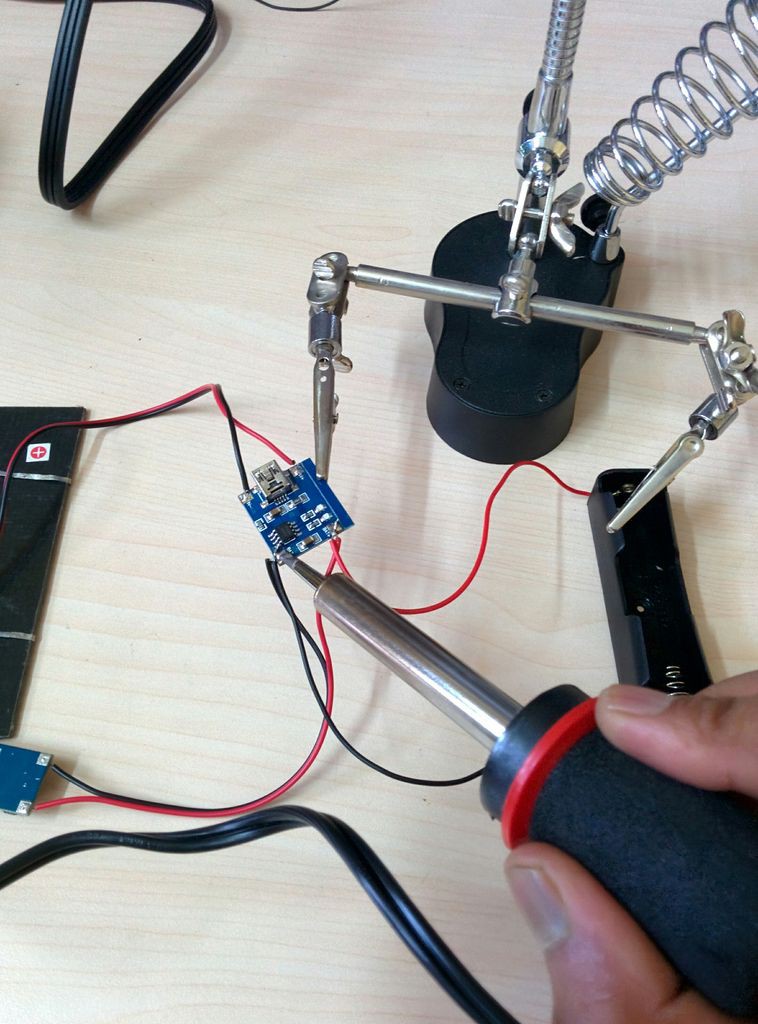
Solder the Input positive terminal of boost converter(red wire) and battery holder positive terminal(red wire) to the charging board's BAT + .
Solder the Input negative terminal of boost converter(black wire) and battery holder negative terminal(black wire) to the charging board's BAT-.
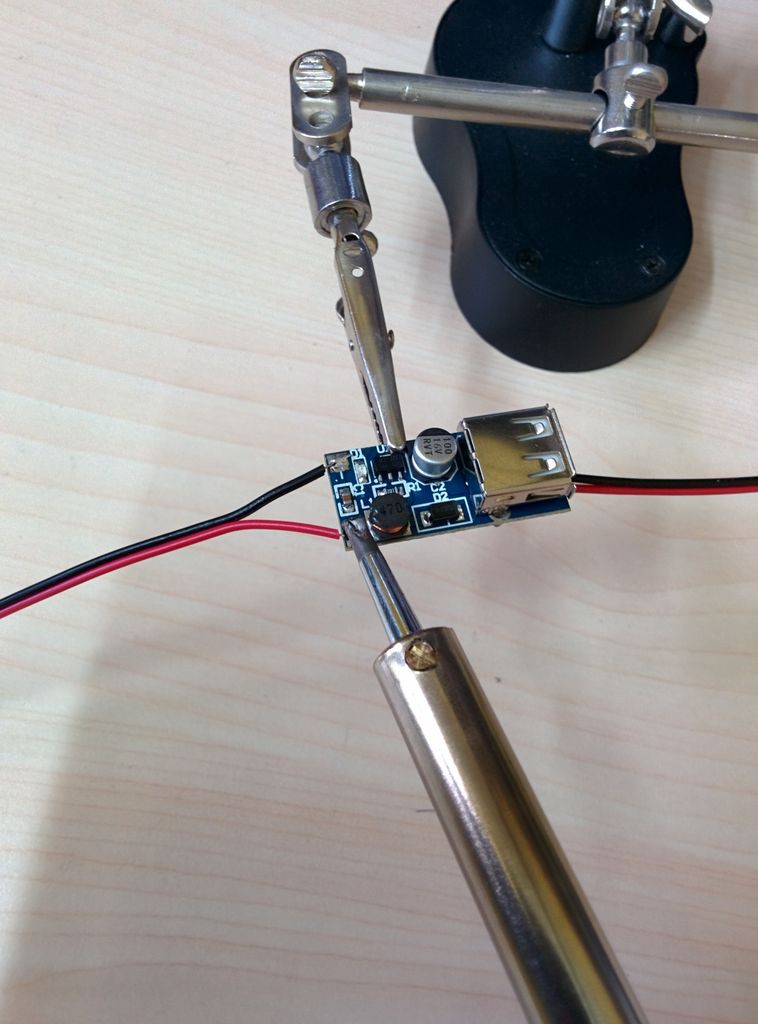
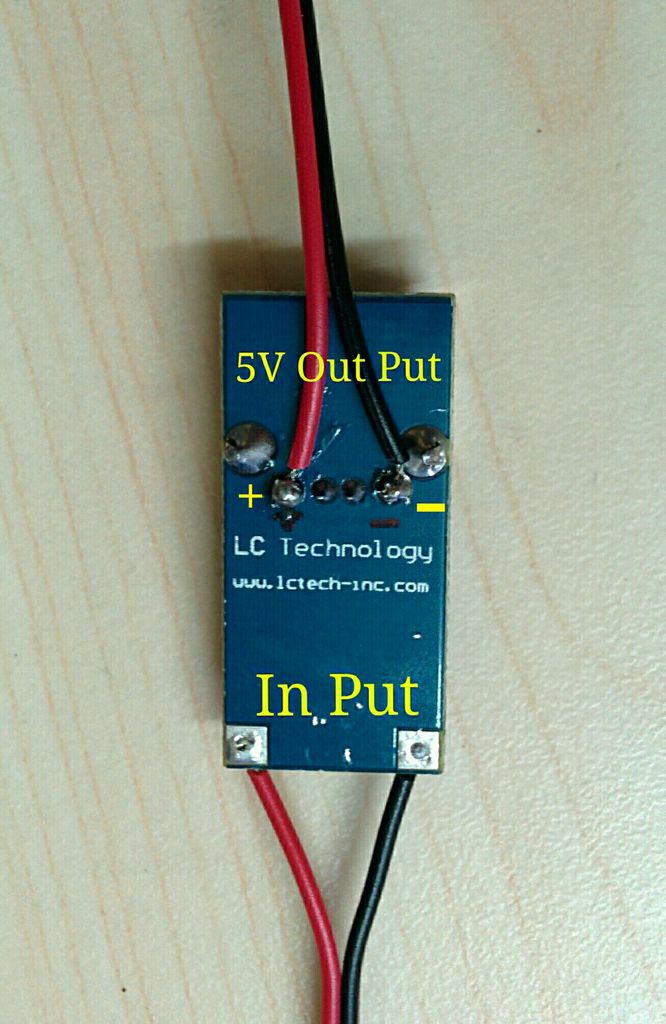
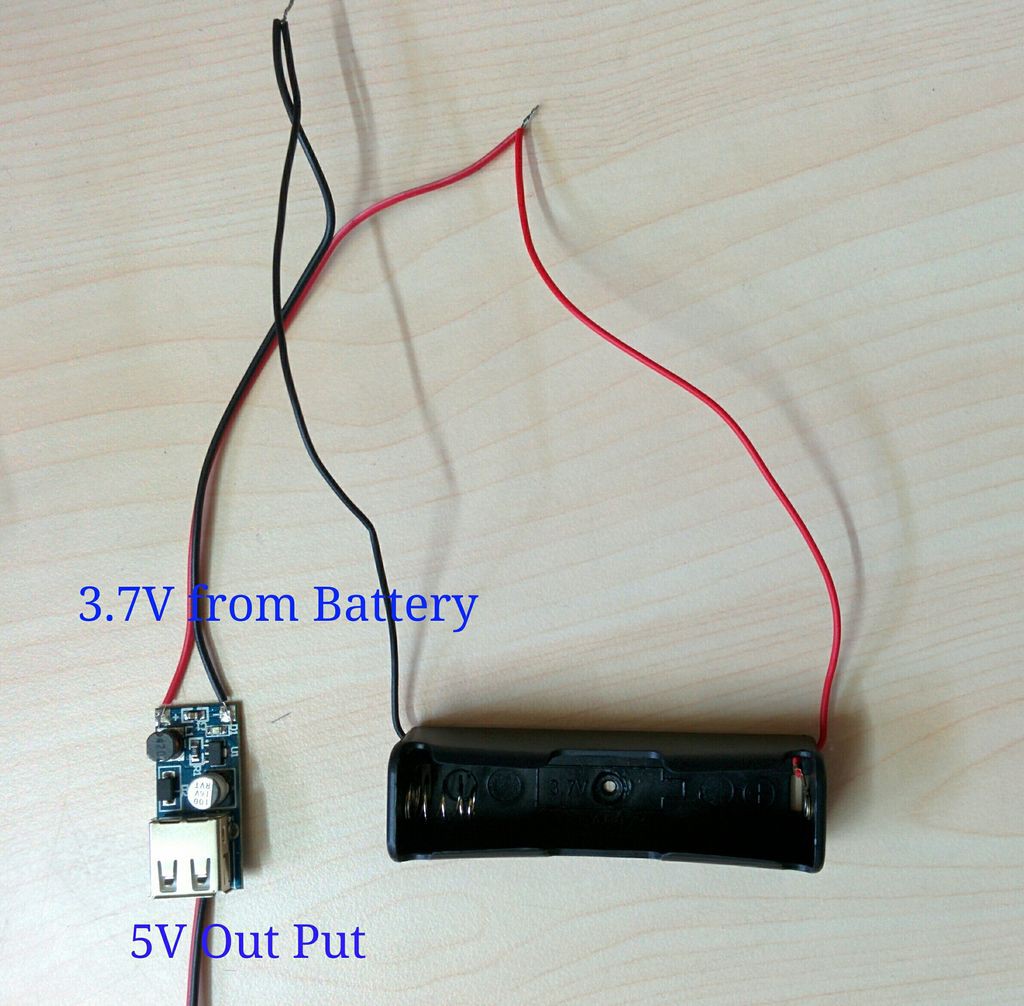
The boost converter output is a USB terminal. For powering a bread board circuit we need two wires for connection.So we have to modify something according our requirement.
The usb have four terminals (5V,D-,D+and GND).
Solder the red and black wire to the + and - respectively as shown in the back side of the boost converter.
Note : The boost converter do not have any marking.So use my picture during soldering.
Discussions
Become a Hackaday.io Member
Create an account to leave a comment. Already have an account? Log In.