 zaphod
as I mentioned in my last update the computer is finished and operational. here's a picture of its finished state:
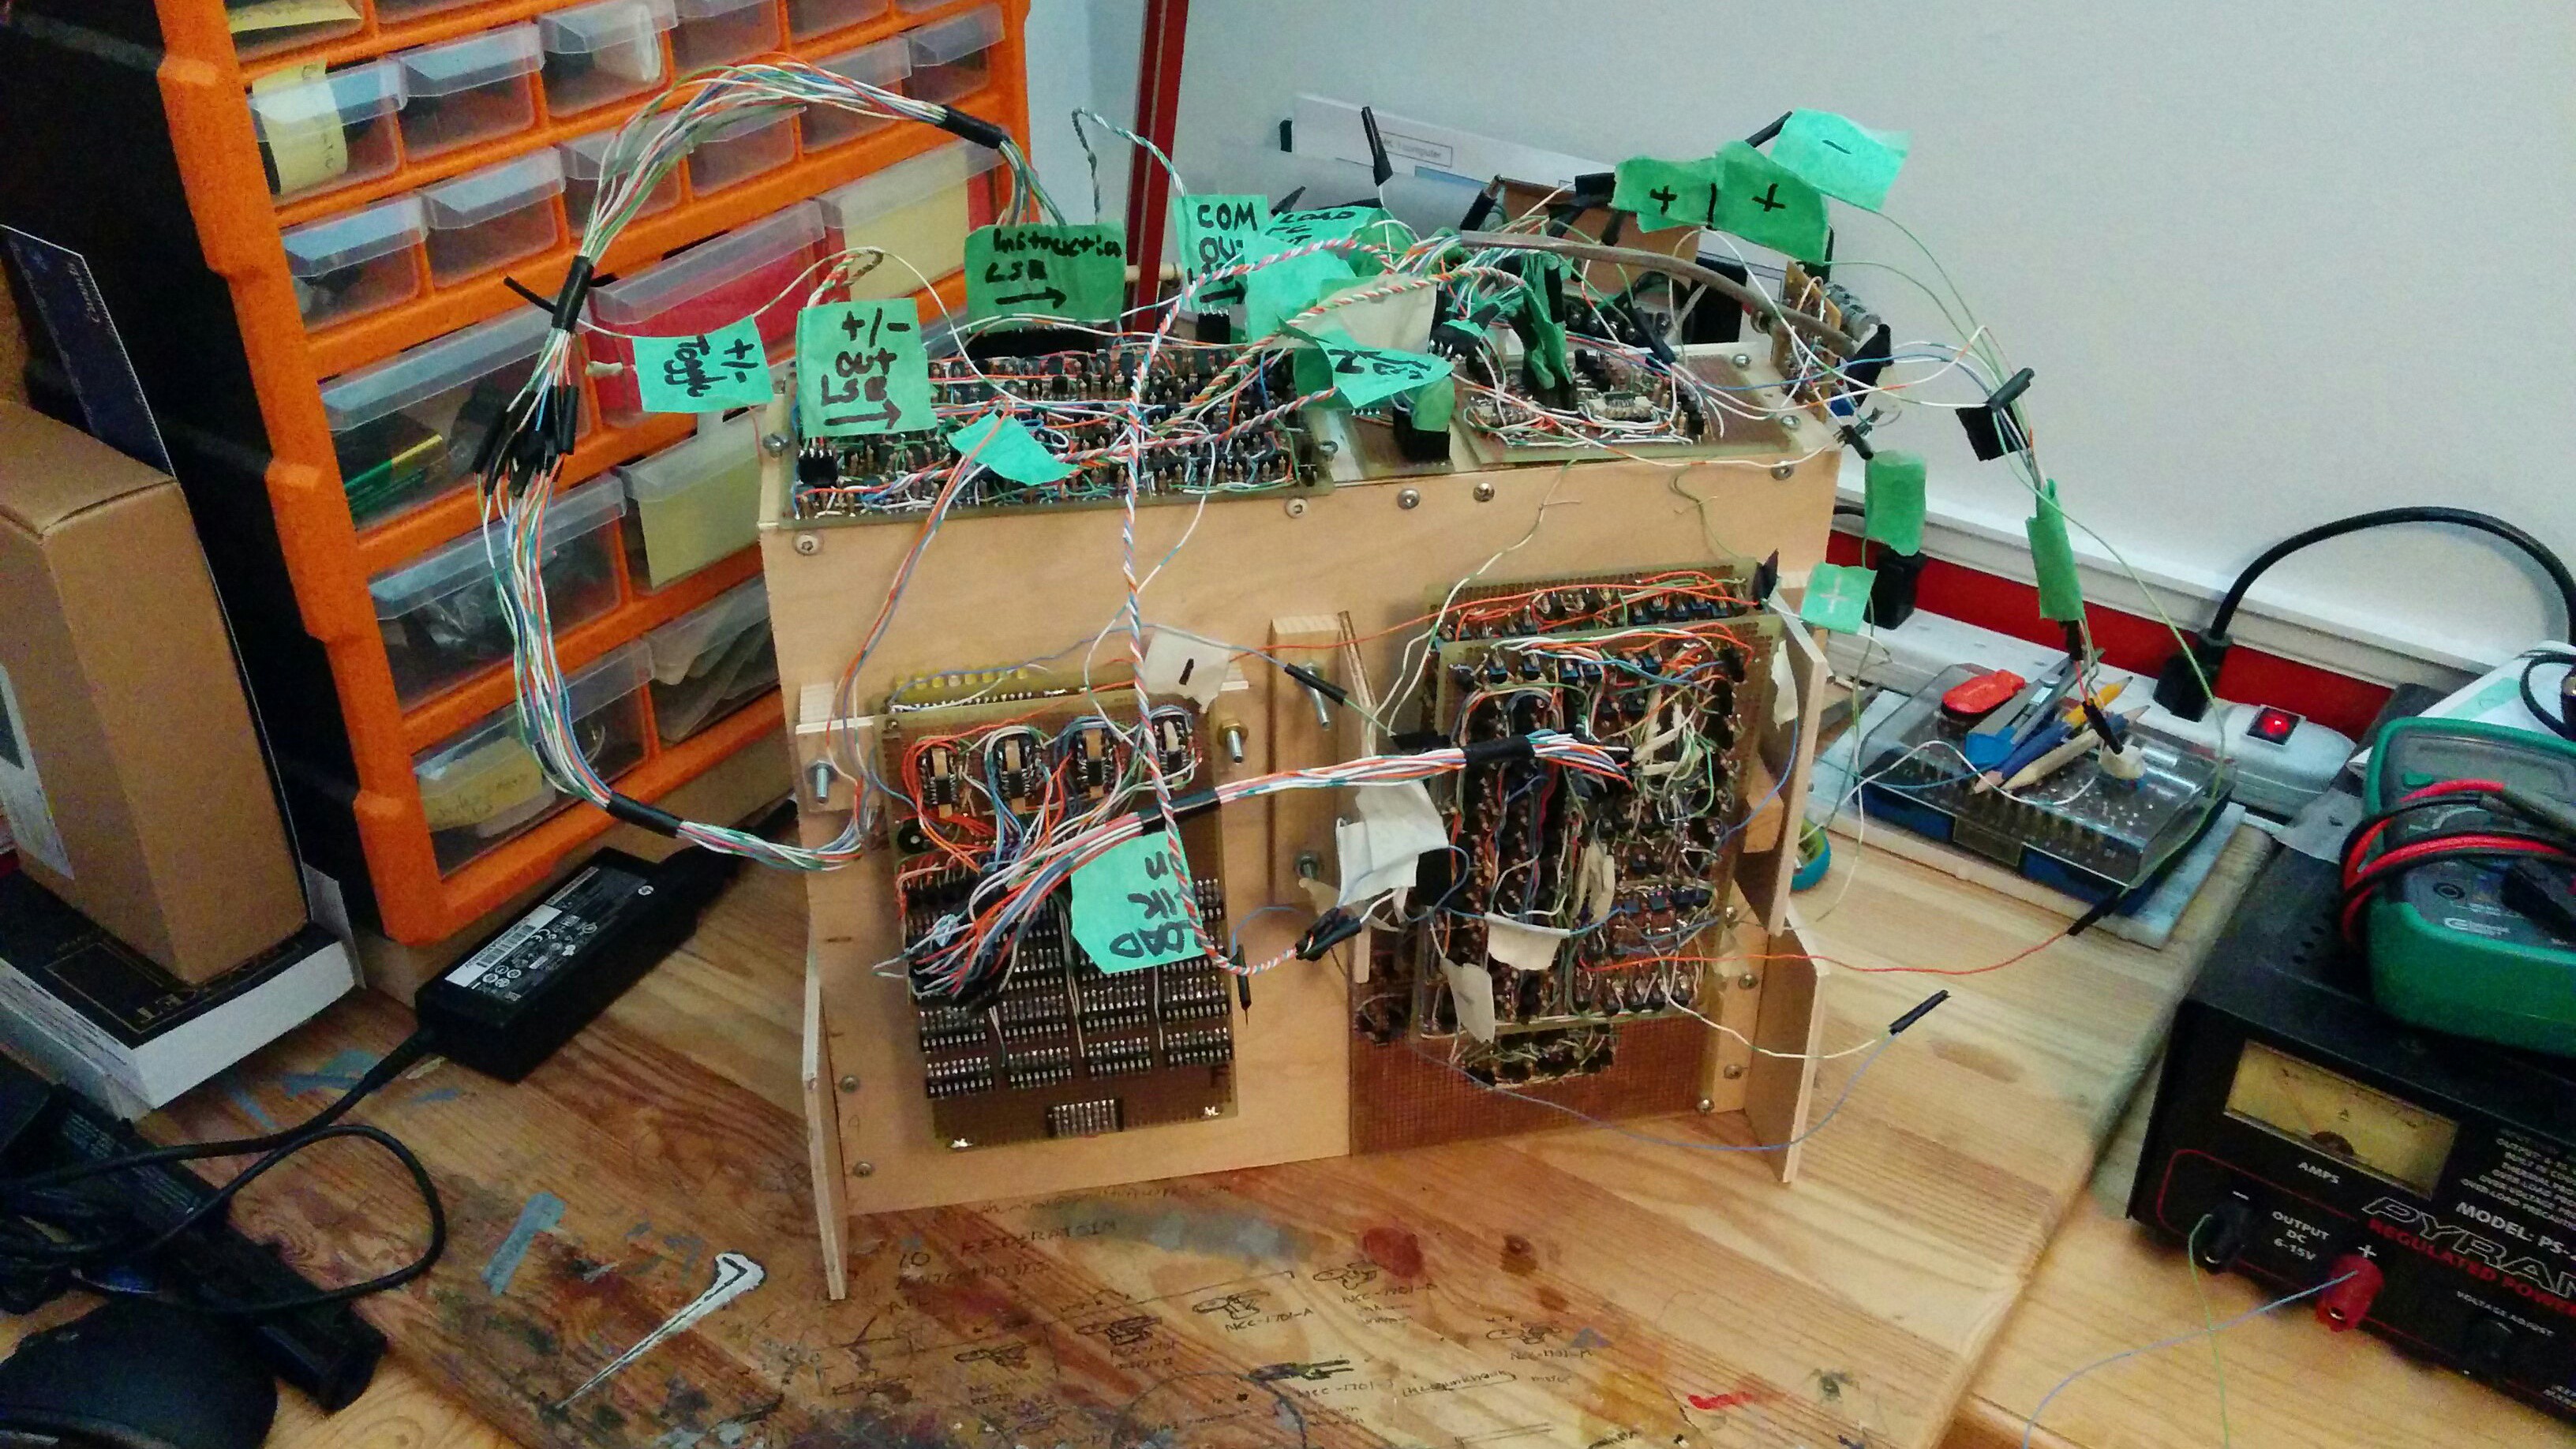
so what does finished mean?
-the computer is a physical representation of the architecture diagram
-all commands function
-it is capable of successfully running a multi-step, multi-instruction program
the first point is fairly straight forward as the architecture diagram omits a good deal of detail. all of the major parts of the computer seen on the architecture diagram have been present for quite some time.
the second point is more complicated. my last post described some of the difficulty I was having with the registers and the RAM. further inspection revealed another problem: the program counter would not reload to the correct value under any circumstances. these three problems meant that 7 of the 10 machine code commands did not do what they were supposed to. the first problem was that none of the registers would accept data from the ALU or ROM, however they would load correctly if given 'good' signals. I spent a lot of time trying to clean up the logic levels with discrete components but ultimately failed. because of this I was forced to use comparators. I don't feel particularly good about using integrated circuits but I'll discuss my justifications later. the second problem was the RAM load and output enable commands not working. this problem was much easier to fix. since both the load and output enable functions are handled on the arduino each of these lines is connected directly to a pin on the microcontroller. it turns out that the logic that was generating the load signals was not producing a high that the arduino recognized, to fix this i added an amplification stage between the discrete logic and the arduino. the final problem was similarly easy to fix. the reload line on the program counter can receive data from two sources, to produce a useful output the sources must be run through an OR gate, I had been lazy and built this OR gate out of diodes, I replaced the diodes with a simple transistor OR and some amplification and the function worked properly
the third point of my original list is the ability to run a non-trivial program. this was completed successfully on the 19th of August 2015, roughly two years after I began this project. the program I ran simply added 2 + 2 and stored the result in RAM address zero. 2 + 2 was calculated to equal 4. the program in its entirety:
| mnemonic | value | command | comment |
| OE ROM | NULL | 0110 | asserts ROM out bus to main bus |
| LOAD B '2' | 0010 | 0001 | loads B register from main bus (since ROM is asserted to the main bus the value accompanying this command is also asserted to the main bus, therefore B is loaded with the value 0010 (2)) |
| LOAD C '2' | 0010 | 0010 | same as above except that the C register is being loaded |
| LOAD @ '0' | 0000 | 0000 | same as above except that the @ (adress) register is being loaded, RAM automatically points to the address indicated by the value stored in the @ register |
| OE ROM | NULL | 0110 | unasserts(?) ROM out bus from the main bus |
| OE ALU | NULL | 0101 | asserts ALU out bus to the main bus. since the ALU is combinational in nature the values stored in the B and C registers where added instantaneously |
| LOAD RAM | NULL | 0100 | RAM was loaded at the address indicated by the address register. |
when the program was completed I switched the clock off and used the arduino ide to look at the contents of RAM. originally the above program produced the result 0010, however this appears to be due to the lsb and msb on the ALU bus being inverted (i put a plug in backwards) oops. after flipping the bus around the program produced the expected results.
so that about covers it. I made a computer. the following is my reflection on the project, feel free to skip to the tl;dr at the bottom.
was this project a success? throughout this project I have had two goals, ranked by importance they are:
1. learn how computers work
2. build a computer out of its constituent parts
I feel that the first goal was achieved. I started this project with no understanding of what a computer is. currently I am not entirely comfortable with the theoretical definition of a computer, however I feel that I have deepened my understanding of how these machines work and what constitutes a computer. in this regard the project was a success.
the second goal was not achieved. primarily because I did not understand exactly how complicated a computer is, and how little I know about electricity. the first casualty to complexity was the RAM, rather than build all of the RAM and accompanying access logic I opted for the significantly easier route of using a microcontroller. while this did feel like a defeat I believe this was a necessary step to success. without using the microcontroller this project could have become quite daunting and I may even have given up, which would have dealt a blow to my first goal. secondly I used integrated circuits to resolve issues I had with logic levels on two occasions. while I don't feel particularly good about this, I again feel it was necessary to achieve the first (more important) goal. I also feel that the use of comparators speaks to my very limited understanding of electricity and semiconductors. in this regard the project was a very near miss, I did not build a computer out of its constituent parts, but I very nearly built a processor out of discrete parts.
so, was this project a success? yes. I learned how computers work which was the primary point of this project. could it have been done better? absolutely.
next steps: in the immediate future I hope to clean up this project page and write a more complete details section. in the more distant future I hope to display this project at the upcoming Ottawa Maker Faire. I have applied to display it but have not received conformation.
as for my next endeavour in the world of computing, I hope to build another processor in the coming months. naturally I will document that project if it materializes. I would also consider building another computer out of discrete transistors, in an attempt to fix the mistakes I made along the way with this one (and make exciting new mistakes!).
tl;dr:
I made a computer and I would do it again.
Discussions
Become a Hackaday.io Member
Create an account to leave a comment. Already have an account? Log In.
I have recently come across your computer saga and am impressed. I have been attempting to do the same for the very
same reasons for the past year and have had nearly the same results so far. The one big difference is that I
am using DTL to your RTL. My signal levels are very close to rail to rail. So far my adventure has resulted in the ALU,
Program counter, 4 to 16 instruction decoder and now the FSM/Sequencer ( I am taking 2 clock cycles to produce 5 ripple outputs to help
in the timing.). I will keep checking in on you from time to time for more updates and future projects.
Take care, Mark Nesselhaus
Are you sure? yes | no
Please share your results, even intermediary, as they become available !
Are you sure? yes | no
Inspirational!
This has gotten me playing with building logic gates and flip-flops out of transistors now too! Who knows, maybe one day I'll build a "zaphod-alike" discrete 4-bit computer as well :)
Congratulations on finishing it!
Are you sure? yes | no
While you may not feel like your second goal was achieved in its entirety, what you have accomplished is still impressive. Your success has the potential to be a foundation for future endeavors, and it is certainly an inspiration to others. Congratulations zaphod.
Are you sure? yes | no
Thanks, it's been a long road.
Are you sure? yes | no