By my count a Pipboy NEEDS the following:
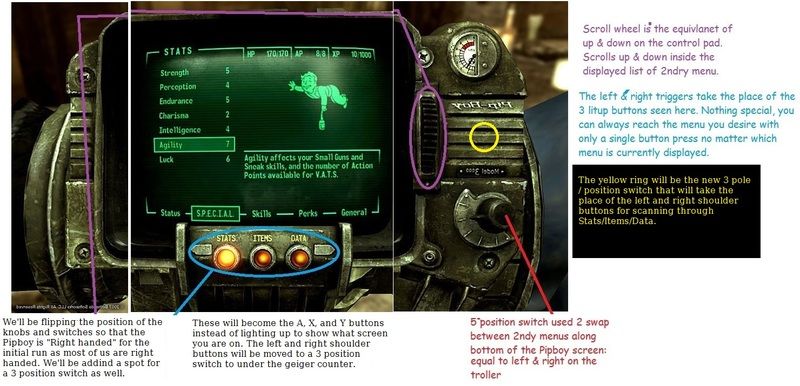
Left & right triggers Scroll between the Stats / Items / Data menus
up & down (control pad/cross) scroll up & down the lists of the Stats / Items / Data
left & right (control pad/cross) scroll across the bottom trees associated w/ the 3 lighted Pipboy buttons
A, X, Y buttons ARE needed
Maybe's:
B activates & deactivates Pipboy (menu button)
RB hot key (Mapping weapons to cross pad)
Right stick for scrolling around map in fast travel mode
My step-by-step (initial) plan is:
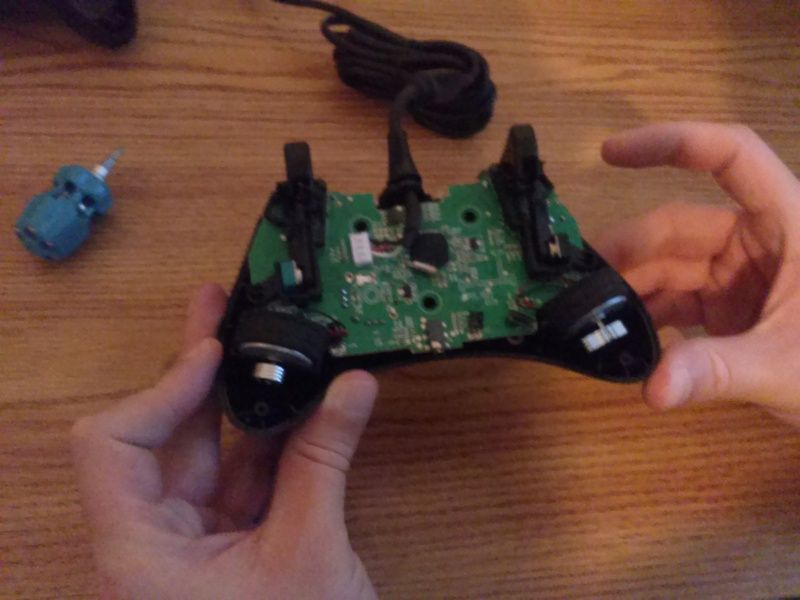
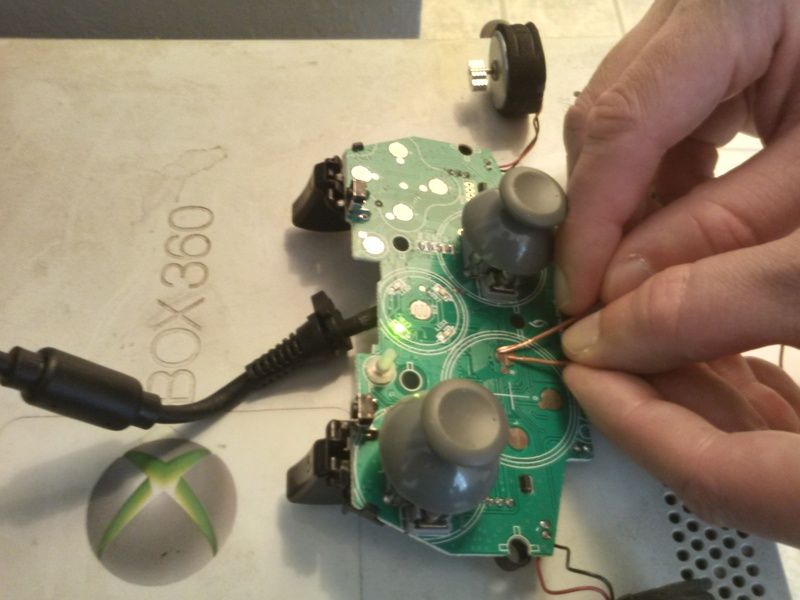
Buy 2 (likely 4 w/murphy's law) corded x-box controllers for use with my PC. Tear one open to get at the lovely electrical innards in true wasteland fashion. Label & mark EVERYTHING so I know which wire goes to which button, etc.
Take careful measurements of my arm & the amount of room I'll need to accommodate both my arm in the bracer and the technical doohickies & gizmos that make the controller work.
Using the above measurements plan out a bracer for my arm then plan out overall button & switch placement. Find or construct the bracer & the bottom box that will be the core of the new Pipboy. Section off the areas that will accommodate the buttons/sticks that are being used for the Pipboy.
Mark all areas according to their use. "This area is corresponds to the left/right triggers & the 5 point switch on the Pipboy"
Take already labeled parts out of their original controller & fit them into place within the Pipboy box. Carefully insure they all fit correctly. Sketch out or create stencil for proper placement of all buttons & switches for the top/surface of the Pipboy.
Create the surface of the Pipboy & fit into place.
Fire up the controller & verify all buttons/triggers/sticks work as is.
Take apart Pipboy & paint the shell.
Reassemble Pipboy including painted top, fire it up again & re-chk.
Remove top of Pipboy & connect "Pipboy Troller" to actual handheld controller that will be used to PLAY Fallout 4.
This is where things get sketchy
Do I physically WIRE the controllers together so that xyab on the Pip-troller are physically wired to xyab on the Play-troller? This seems the simplest option for me since I'm not a programmer & don't know how to make a wireless controller be read as the same input device to my PC as the Play-troller I'm using. If I go the wired route, however, how do I handle it?
Do I make a whole new cable with shrink wrap to connect the wires of each individual button from the Pip-troller to the corresponding buttons of the Play-troller? Literally making an old school electrical circuit?
Or do I try to create a splice between the two cables from each controller?
If I do go for the splice, how do I do that? Chop up another X-Box cord so I have the plugs it utilizes and simply solder the Pip-troller cord with a 1 foot cord length & at the end of it a new protection plug (think OEM plugs in a wiring harness) then add 1 new protection plug on the Play-troller cord so that the Play-troller has its own cord but now there is a place to plug the Pip-troller into the same cord, potentially making it line up within the cord itself, & not having to go button to button (which protects from wires getting pulled out by accident).
Possible solution is that 2 wireless controllers CAN be made to read as the SAME controller to a PC. I wouldn't know how to do this but I'd prefer it, even at the cost of more rechargeable batteries. Especially since I could make the "Rad meter" of the Pip-troller be the battery gauge. Could they be made to read as identical input at the wi-fi chip level on the PC? Maybe an app-like program that camouflages the two signals as one signal in between myself & the game? I'm not sure.
Suggestions I've received so far:
Buy an older model phone so that I still have the screen on the Pipboy & just leave a place for the phone in the Pipboy.

 Metalnat
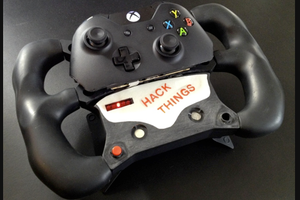
 tEEonE
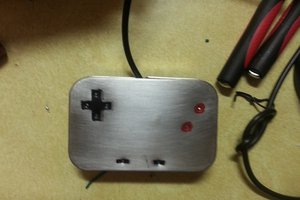
 Solderking
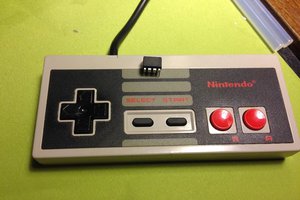
"Do I physically WIRE the controllers together so that xyab on the Pip-troller are physically wired to xyab on the Play-troller?" - sounds about right. If you don't want to go the extra mile and work with a teensy (https://www.pjrc.com/teensy/td_joystick.html) you should count your inputs and look for a gamepad or joystick with the same amount and wire each "button" to a new one with your function. Adding wires to a bought gamepad pcb can be tricky though. There are many "ifs" in your project, that I hope to see to be solved in project logs ;) Buttons cost nothing, so grab a 5 bugs gamepad and some switches and try it out first, before you buy expensive stuff you might not need.