 1101010
-
1find a cool rotary phone
![]()
This is the easy part and the hard part. You can find them in many places, including eBay or occasionally still thrift shops. But finding one you love could be harder. The parts of the electronics you'll use in this project are not that complicated, and very resilient so for the most part the way it looks is more important than whether it actually works. Obviously if it works as a phone you know all the parts you need for the project will work too, though.
-
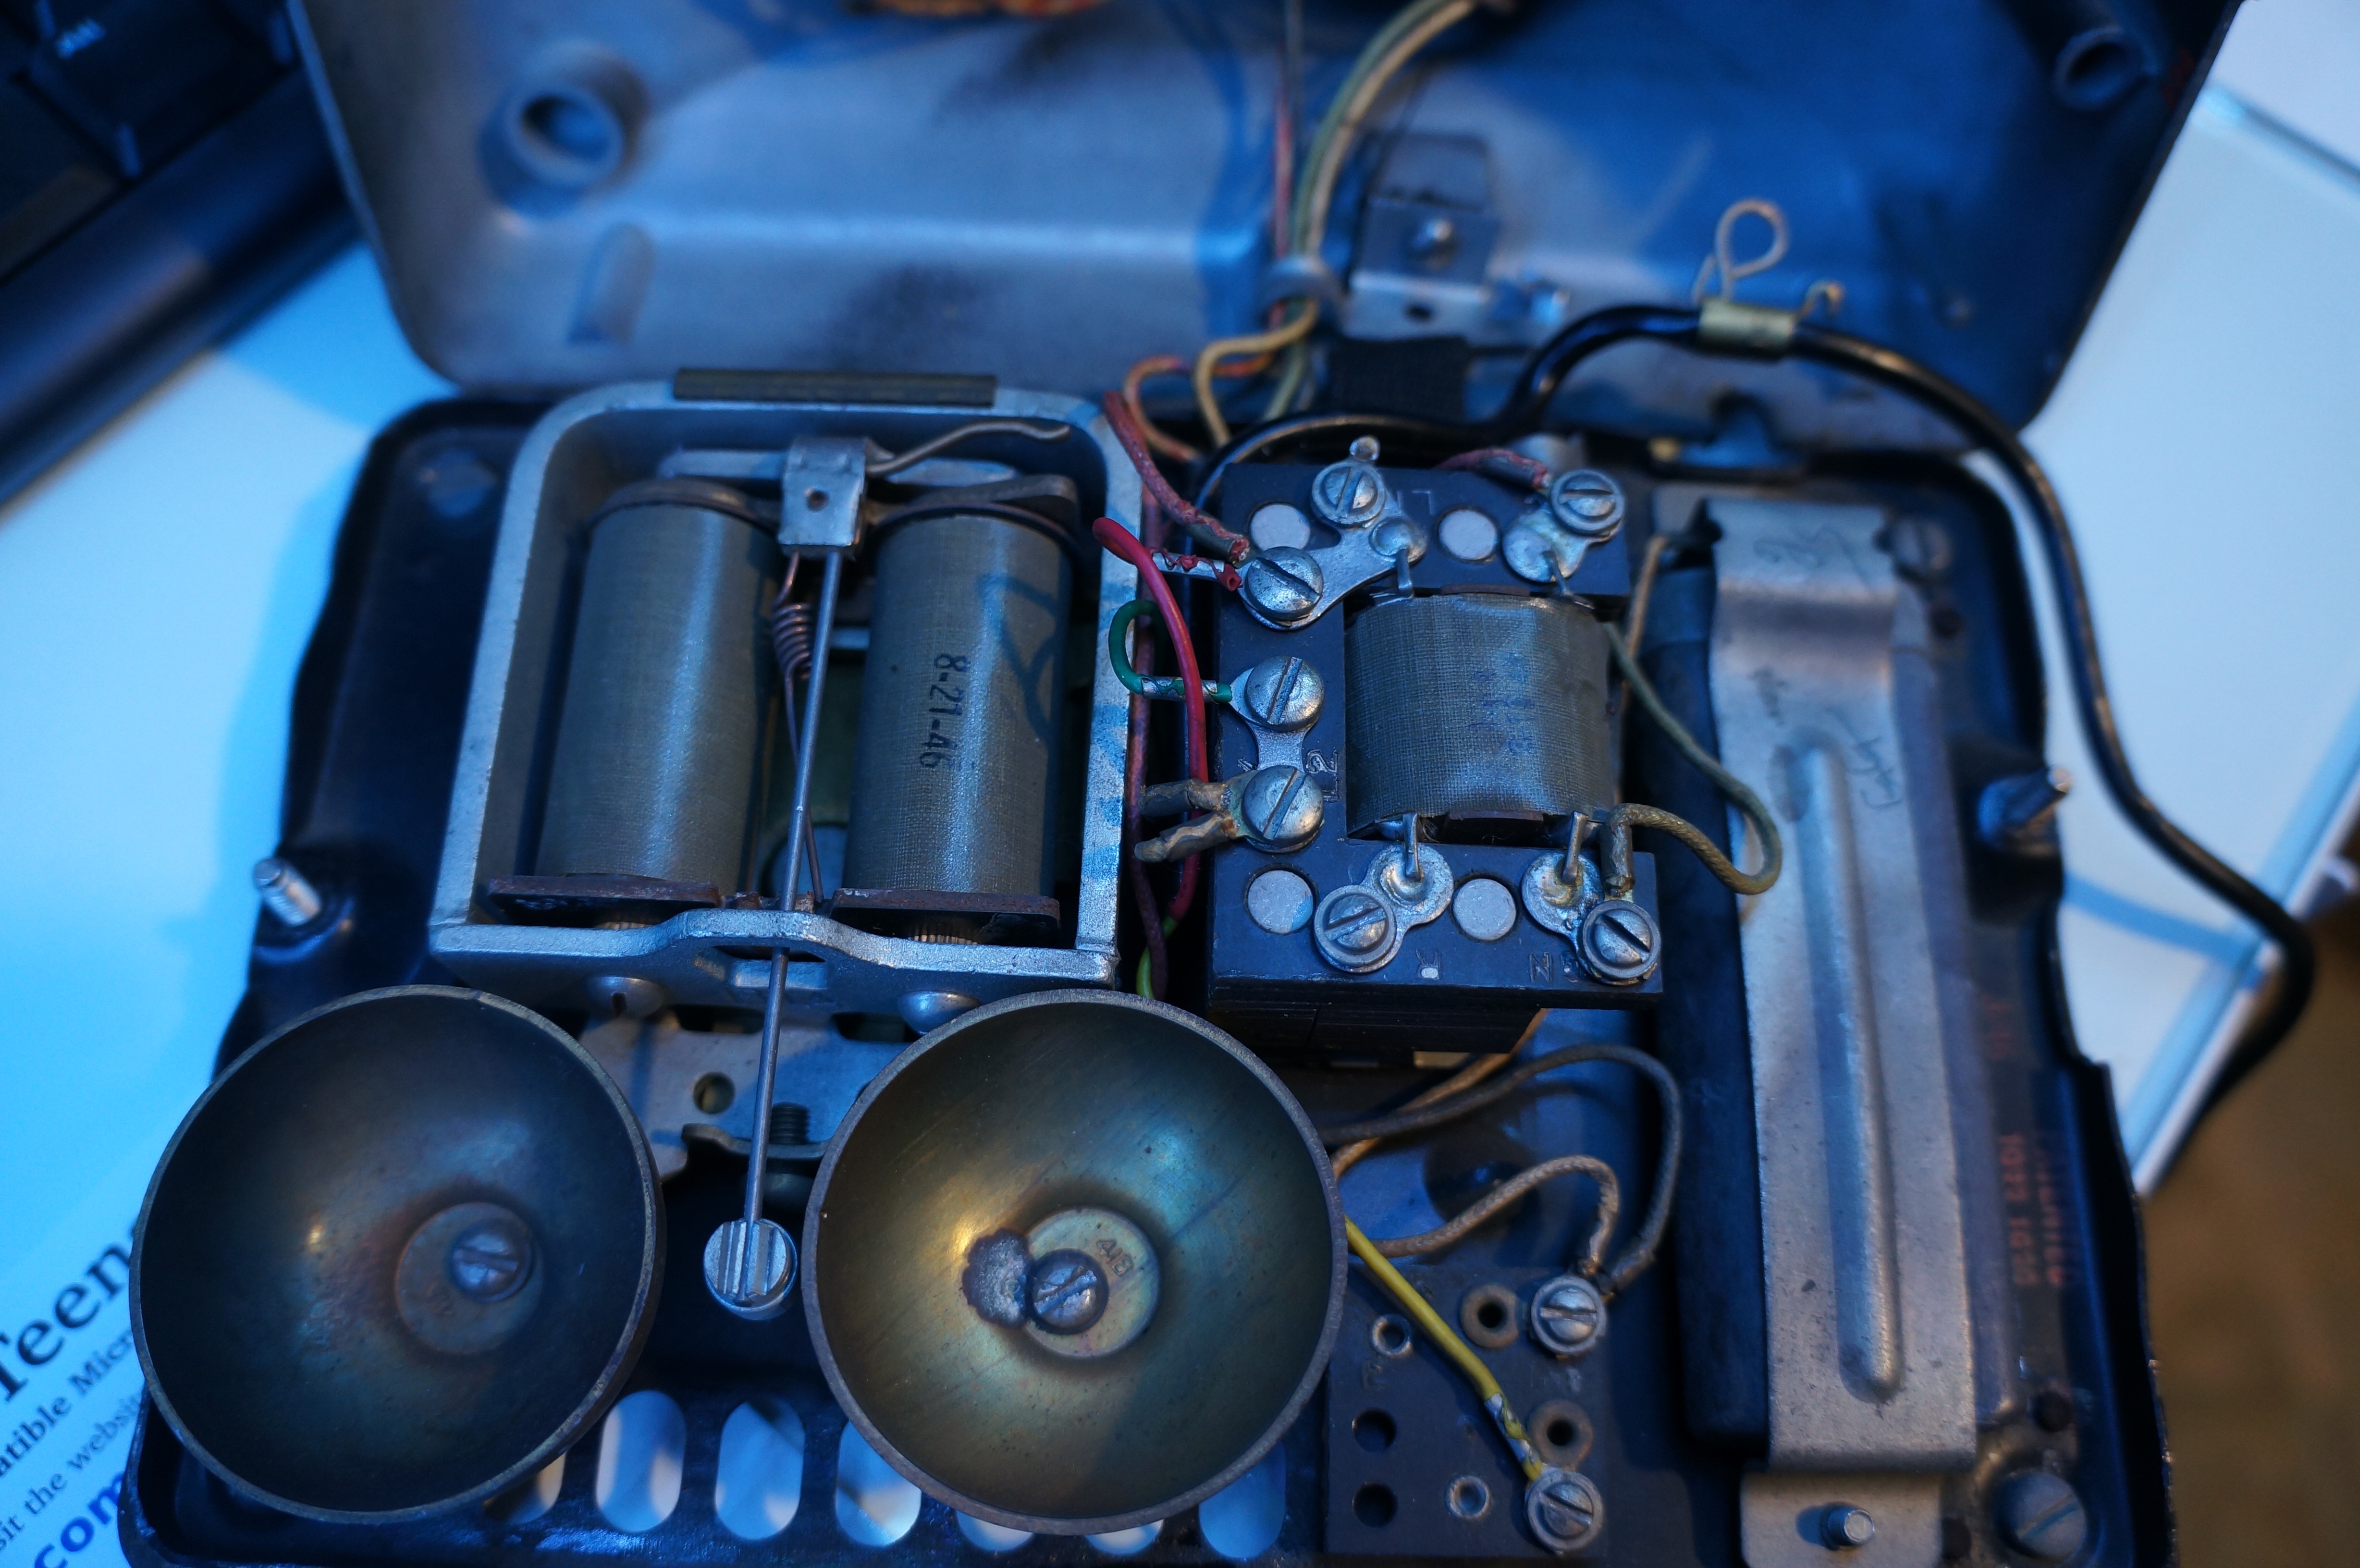
2take it apart and inspect it
![]()
![]()
This is the interesting part. Two phones which have the same function, and look almost exactly the same on the outside can be engineered completely differently inside. Some have discrete components visible, some have everything hidden in a metal box or encased in hardened plastic. There are interesting techniques for relieving strain on wires, making connections, etc. There may even be hand-written notes or schematics on pieces of paper inside. Take some time to appreciate the engineering, artistry, and manufacturing prowess before you start thinking about it too practically in terms of the project. Unscrew the handset mouthpiece/earpiece covers too, and look at how the mic/speaker are connected. Take pictures of everything. They can come in handy later.
-
3identify the components/connections you need
Find the following wires/connections.
- The rotary dial and the (usually 4) wires coming out of it.
- The earpiece and ground/common connections from the handset (sometimes you can tell by the color of wires at both ends, sometimes you might need to use a continuity tester).
- Two connections from the hook switch that are connected when off-hook and not when on-hook. I usually look for screw-terminals that connect to these and don't seem to connect to too many other electronics inside the phone.
-
4identify the connections from the rotary dialer
The rotary dial is basically two switches. One is normally open, but closes as soon as you turn the dial the slightest bit away from its resting position. I call this "dialing" because it indicates that someone is dialing. The other is normally open, but closes momentarily for each digit passed when the dial is returning. I call this "click" because on some phones you hear it as clicks when you are dialing. Counting the clicks tells which number was dialed. Usually there will be 4 wires that directly correspond to these 2 switches. In which case you can tie two of them together and use as ground, then use the remaining two as your signals. Use a continuity tester with an audible tone to figure out which is which.
-
5figure out how you can connect to what you need
This is going to be different for every phone. I usually spend some time thinking about it and try to minimize the impact to the phone in case i want to revert it to normal function sometime later. If you're lucky you can do most of it with the screw terminals. Probe around to make sure you aren't making connections you don't want. Sometimes there will be several wires going into a terminal and you only need one of them so you need to pull one or more out.
-
6find or make some space for the teensy
This will also be different for every phone. Some of them have tons of empty space. Sometimes you might have to remove something (for example the ringing apparatus, or one or more of the bells - we won't use that in this project).


Discussions
Become a Hackaday.io Member
Create an account to leave a comment. Already have an account? Log In.