 zittware
1/2013: Mid week last week; I activated my Techshop.ws membership and schedule myself for the Laser cutter SBU on Saturday. No; I didn't feel like I needed the SBU; but given my issues with my personal laser cutter - I still needed to make some progress.
After class; I scheduled a 2hr block on Laser cutter#2. I wanted to use the Laser cutter to create the Inserts I'll need for the new playfield. I went to Regal plastics earlier in the week and got some material:
Translucent White @ 0.25"
Translucent Yelllow @ 0.25"
Transparent Green @ 0.25"
Transparent Yellow @ 0.25"
Transparent Orange @ 0.25"
I already had Transparent Red @ 0.25" so didn't need it.
No; I didn't need all these colors to exactly match the existing Inserts; but I wanted to experiment to find the right mix for what I wanted on my pinball table.
I drew up some inserts in CorelDraw X4 ... and decided that I wanted to take three different tests:
1) Try Transparent Inserts without anything. Just "clear".
2) Transparent Inserts Frosted.
3) Transparent Inserts Clear with a "spiral galaxy".
4) Transparent Inserts Frosted with a "spiral galaxy".
I figured; since I was creating my own table... might as well add some enhancements for some added details. Hence the spiral galaxy might look good.
I also figured that I don't really like "clear" inserts; some frosting would hide the bulb filament and/or the electronics/LEDs under the inserts.
Here's a Corel rendering of my work: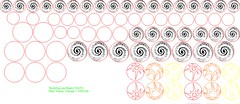
For the frosted; I hit the acrylic with a 220 grit orbital sander... the followed up with the sandblaster. The spiral galaxy would be etched into the acrylic with the laser cutter.
The Translucent White and Yellow look really good. Here they are compared against existing inserts and being back lit by a White #555 LED: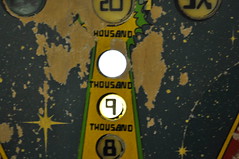
Now for the Red 0.61 insert test: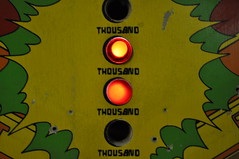
Top is the clear insert, bottom is the frosted insert.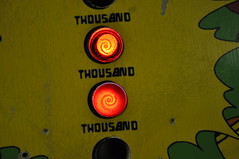
Top is the clear/spiral insert, bottom is the frosted/spiral insert.
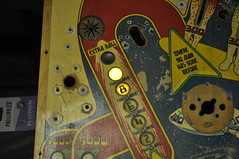
Let's try the a bigger insert... how about the shoot again insert.
Before (stock/old insert):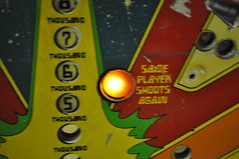
Clear/Spiral: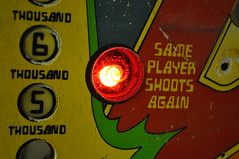
Frosted/Spiral: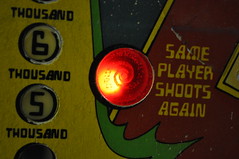
Based on the current tests; I gotta say I'm diggin the Frosted/Spiral inserts. I wouldn't do the spiral galaxy for every insert... but as an embellishment to specials like the green; red; amber inserts. I think they do a good job of defusing the led light while adding a little something extra.
Here's the Clear Yellow and Green inserts. I didn't bother to photo each version; since I pretty much decided I like the frosted Spiral Galaxy versions.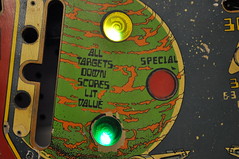
I didn't need to clear yellow; but I cut them anyway... because I need the smaller pieces you'll see next. I think I'm going to use the clear yellow inserts to represent the 3X bonuses.
2/5/2013:
Observant people noticed there some details pieces on the CAD drawing I showed earlier. These detail pieces are for the Nacelle graphics in the original playfield. I was always... disappointed these warp nacelles didn't light up on the original PF. So; I wanted to see if I could change that on The Mirror Universe.
Anyone like Puzzles? If so... have I got some fun for you:
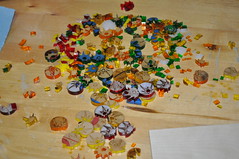
All kinds of colors of the rainbow. And no... I not real fond of puzzles.
I laser cut some plywood in about the size of the nacelle image on the PF. and put together the puzzle of Yellow, Red, Orange to replicate the nacelle. Once I had the 20some odd pieces in the correct order I "tooth pick" clamped the pieces tightly together: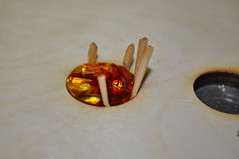
and then used some acrylic solvent to glue the pieces using capillary action. I made sure these pieces were tight together to ensure a tight bond was formed. I haven't really tried to "Break" these parts; but I've dropped them a couple of times and they haven't shattered.
I made two with the Yellow/Orange/Red/Yellow combo - the identical combo as the PF graphic. Since I had the pieces; I went ahead and created a combo which more closely resembles the Enterprise... W/ Red as the main color; orange/yellow/white.
Once I had the pieces welded together with the solvent; I need to make them level. However, I notices that even tho I cut these parts from the same file; their with minor gaps between some of the pieces where they didn't meet. I didn't want to see unfiltered light come from between the acrylic. I pondered; thought about Epoxy w/ some kind of dye... but remembered that I created some crafts with the wife many years ago. It was some plastics stainglass in a bottle. I had pearl white; but couldn't find the Red or Yellow. I tried Michaels... and all they had was some sh1tty martha stewart glass "paint" for $4 a bottle. "Meh" I thought. So I waited until Monday when Hobby Lobby would be open. A lunch trip turned up the exact thing I remembered:
Ruby Red Gallery Glass and the Sunny Yellow. These two oz bottles were like $2.75 a bottle. Using the bottle applicator; I filled the cracks with the appropriate color. I didn't get the Orange- because I wasn't sure Pumpkin Orange would match the acrylic orange. Since red and yellow always border orange; I could use one of the two. I used pearl white for the center "star" on the red insert.
Once I had the cracks filled; I proceeded to attempt to use the orbital sander to help level these inserts; at which one of the yellow inserts went flying into the nether regions of my garage. a quick search didn't turn it up. At that point I went to manually sanding these parts flat.
The result?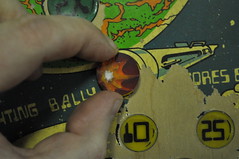 And the money shot:
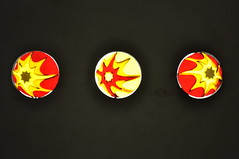
I like the red a lot better than the yellow.
Discussions
Become a Hackaday.io Member
Create an account to leave a comment. Already have an account? Log In.