 zittware
7/29/2013:
As I stated; been working on the cabinet for the Mirror universe project. I bought a couple of "project" Bally Star Treks from a fellow pinball collector out of Shertz a few years ago. These have been setting in storage for a while... and were very rough.
I took the cabinet with the most flaking and damage as the donor cabinet for this project. Here it is in all it glory: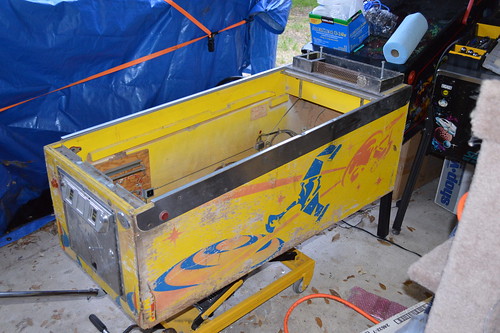
I began by stripping all the hardware (coindoor) and side rails off of the machine so I could access the state of the "bones" (ie wood) of the cabinet. I noticed that the front corners were beginning to separate.... also some of the plywood cores were starting to come apart. 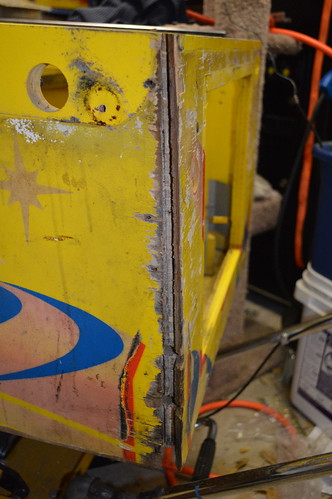
First I used some white gorilla glue to repair the plywood core: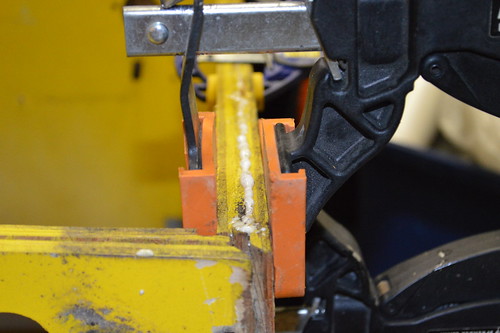
Then I used ratchet straps to re-glue both sides: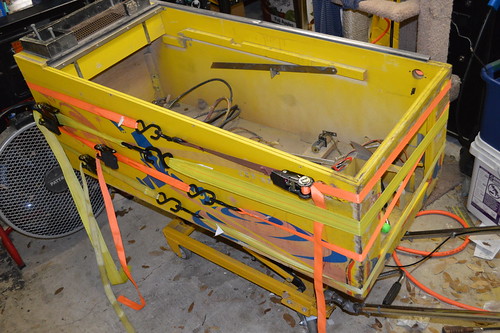
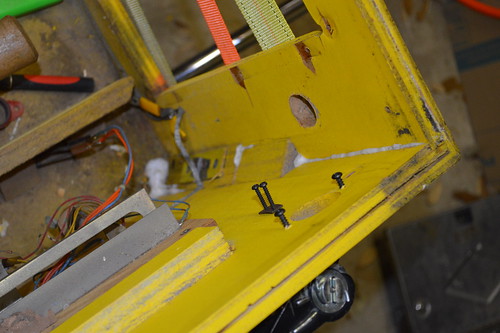
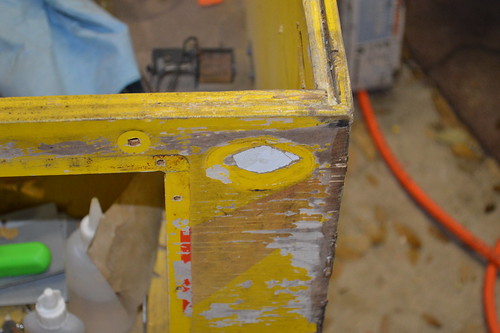
I CNCed a diamond shaped piece out of MDF and glue it in the old shooter hole:
With that I began stripping the old flaking paint off with CitraStrip along the way I tried to save as much of the wood as I could. When possible; I reglued the laminate back to the plywood... or used some wood filler to fill in the rough areas.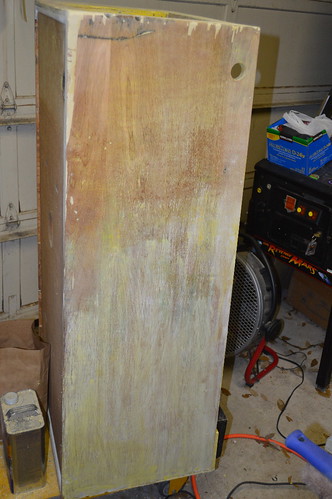
I also repaired the bottom - not pictured. 3 of the four sides had lost the plywood under the grove... which means the bottom would probably fall out at some point. I fixed this by saving as much of the plywood core on the 1 "acceptable" side... then using quarter round pieces from Lowes. The quarter round piece was secured with the same gorilla glue and some 18 gauge pin nails.
I bought some mill wax ebony oil stain as I wanted to stain the cabinet black instead of paint. I wanted something "different" looking. Here's one side stained with several coats. Looked like absolute trash...
That just would not do AT ALL.
The next day I went to our local WoodCraft store ... they seemed to have a better selection of stain.
Since I was in new territory on this project; I decided to get a couple of product. The first was a Ebony Wood Dye product and the second was a Black Water-based Stain. The guy at the store claimed the dye would dye the fibers of the wood in a "molecular" like fasion ... while the Stain is pigment based (and would act more like paint). I added the later. I figured I'd buy both and try it on the cabinet.
After I got home; I stripped the back of the cabinet and put down some test swatches:
Upper right hand: Ebony Dye
Upper LEft: Satin Black Stain
Lower Right: Stain over Dye
Lower left: 50/50% mix of both
I didn't like the ebony stain as is... as it still had a purple/blue hue to it.
The stain looked ok; but had a paint like view.
The Dye under Stain had what my mind thought was the best of the two. The Dye in effect raised the wood grain a little; and the stain still let the overall look like a satin look. The 50/50 worked; but wasn't as vibrant as the Stain over dye.
With this decision; I proceed to dye then stain the cabinet. The Outsides of the cabinet were stripped of all paint; then dyed then stained. The inside of the cabinet I decided to lightly sand the interior then spray it with a Satin Black spraypaint from Rustolem. I also sprayed the bottom side with the same Satin black so it'd look more finished.
The results: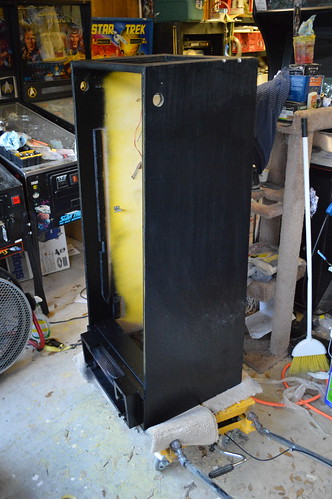

Yes... I probably could have save myself some more time by just painting the cabinet with some latex black... Or any black paint; but I kinda wanted to have the wood grains show thru the background. I may regret this decision later... but I'm currently very happy with the way it turned out.
Tonight I worked on the stencil design for the cabinet. Obviously; it's going to be a black background; however, I wanted to pay a nod to the original cabinet design. I traced the existing design and pulled it into Corel Draw. Given Black background; I still wanted to keep some of the same colors in the stencil. So the stars became Yellow. The planet Yellow/Red... and The Phasers became blue. I going to make the Enterprise BattleShip grey.
I removed the Klingons ... instead having the Enterprise fire on the planet. 
Still need to work on the front design... and the Head. I'm thinking about keeping the Head design the same... but change the blue background to black.
Thoughts?
7/31/2013: Did some more work to the side art; terminating the phaser beams on the planet. Not ideal; but probably the best I can do with a stencil application. I also worked on the front art; "inverting" the shooter location and making the color scheme similar to the sideart.

Not sure about the text at the bottom. Again limited by a stencil; but need to look at this further.
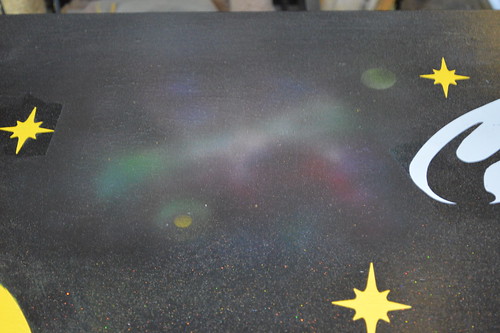
8/16/2013: I decided I wanted to do a little something extra for the background of the cabinet - approx where the Klingon ship would have been. I debated internally in my head of I wanted to go this far... in the end deciding "it's my machine; make it yours!".
I did some looking around on google images for Hubble space telescope pictures when I came across this picture of the M82 Galaxy: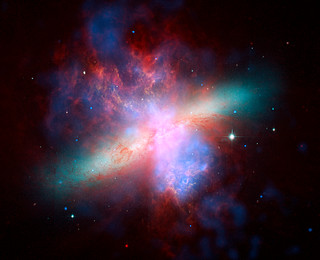
Remember to Click the image to get higher rez shots you can zoom in on
Now that I had the picture... it was time to figure out how to get in on the cabinet. I had some White backed Water slide decal paper for my color laserjet; so I figured I'd give it a shot. Some water slide work... some Airbrush work... and we are left with two similar yet uniquely different reditions of the M82 galaxy on either side of the cabinet:

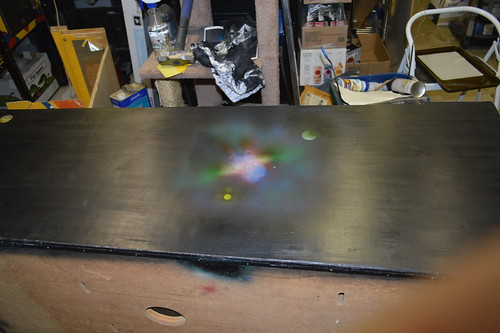
I coated the airbrush/decal work with some Matte clear spray paint.
I knew I wanted to do something different with the background black... that was adding holographic gold and silver flake to the topcoat before I stencil. So I did some google searching and ended up purchasing some gold and silver flake from PaintWithPearl.com. The idea was I wanted to have a star field over the black. Nothing really special about this webstore; other than they seem to be the most competitive w/ regards to color selection as well as price/ounce.
I mixed about 1/8 a tsp of silver and 1/8 tsp of gold into the polyacrylic clearcoat I was going to spray over the black stain to seal it. With my Harbor Freight spray gun I sprayed the cabinet and head. 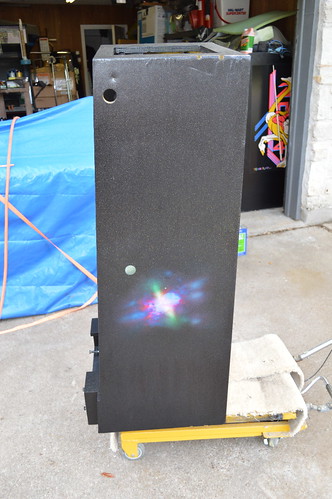
In retrospect; the metal flake at 0.004 inch was just too small... looks more like star dust; not a starry night. Ideally; I'd have gotten several sizes and mixed them for a more random look. Here's a close up showing the gold/silver flakes: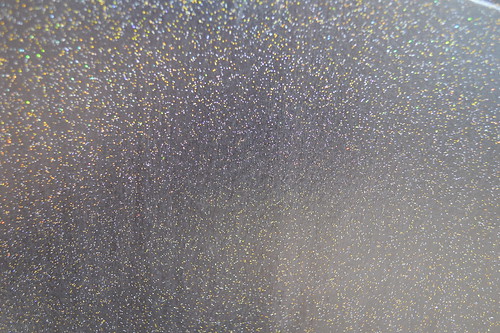
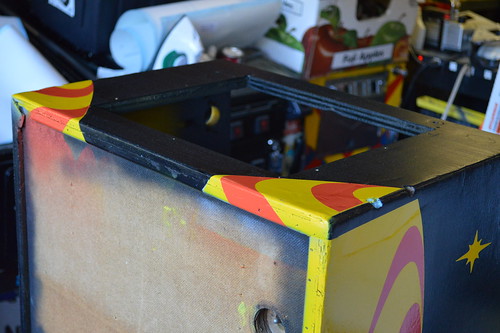
9/26/2013: Now my attention turns to the stenciling of the side cabinet. First color... yellow: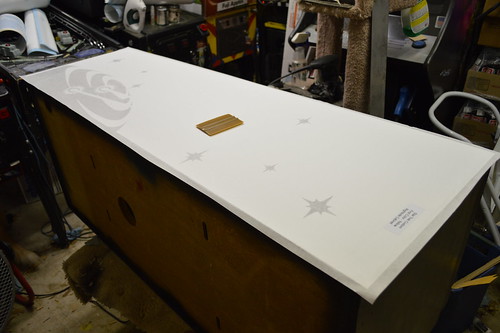

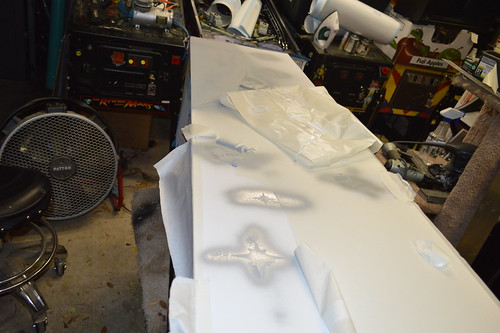
Once the yellow dried overnight; I pulled the stencil up:
Yeap; that's right... The use of the waterslide decal came back and bit me in the butt. The stencil pulled the toner right off label. 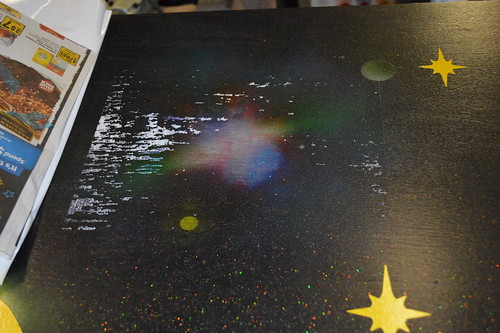
< sigh>
9/26/2013: After many choice explicatives; I decided there wasn't much I could do now... so I went ahead and continued stenciling the grey; opting to see what (if anything) the Enterprise would cover. Ofcourse; I designed the decal location to be where the Klingons were; so I knew it wouldn't cover jack... but it made me feel better. I also figured if the next stencil pulled up more; I could fix it once and be done.
Down goes the Enterprise stencil.. This time I left the protective backing on the section which went over the waterslide decal.
I sprayed the grey primer and let it dry overnight. The backing protect the label; so I proceeded to cover the paper areas with the black stain to match the color of the cabinet. I then re-airbrushed to blend the new black with the background image. I then re-sprayed the holographic flake and clear coat as best I could with airbrush.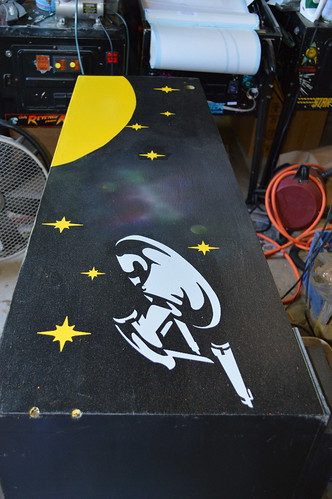
Good as new? no. but, not too bad I guess.
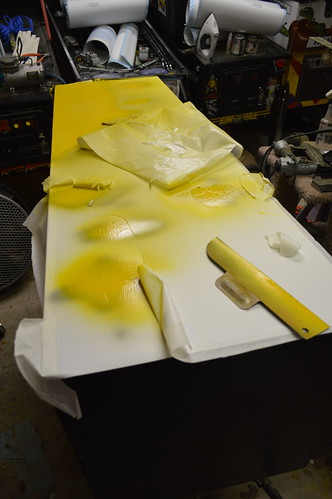
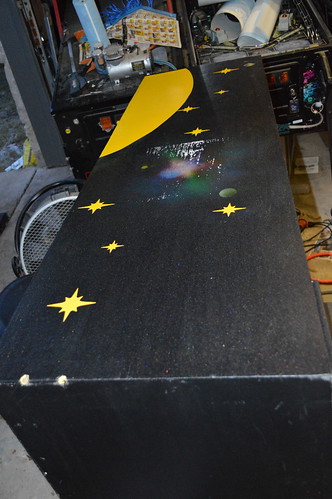
Now for the orange stencil. 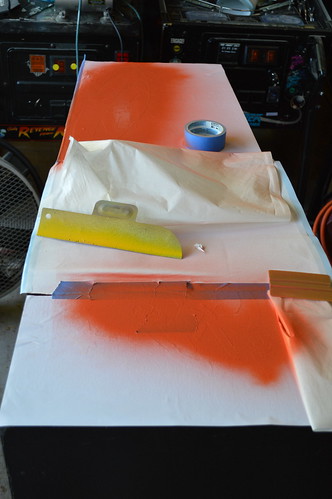
The orange wasn't Red enough for my Nacelles... so I sprayed them with cherry red.  And finally; the blue phasers:
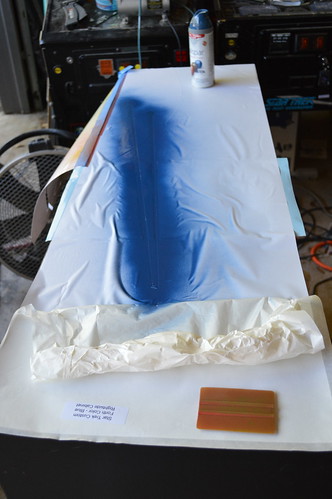
Ofcourse; the blue phasers crossed over the nebula - I had to use some of the stencil to prevent paint bleed. At this point more toner came off; so I had to do some more repair. The result: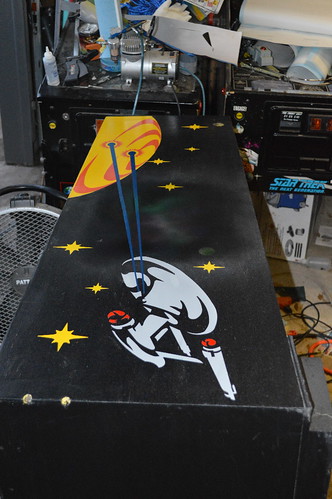 I'm not real happy with the blue phasers; they tend to not show up ell on the black without a grey border. Not sure what if anything I'm going to do.
9/29/2013: Now my attention turns to the front stenciling... First the Yellow: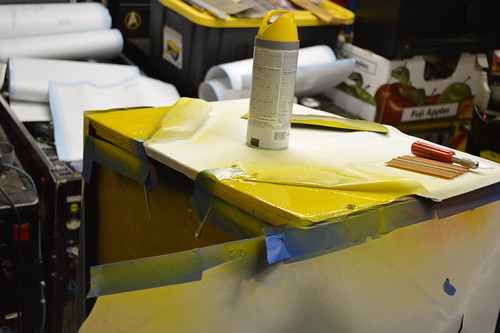
I decided that I'm going to start "wrapping" the images under the cabinet to give it a unique look.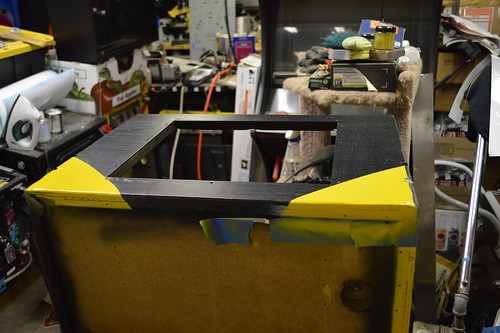 Orange:
 Grey:
Grey: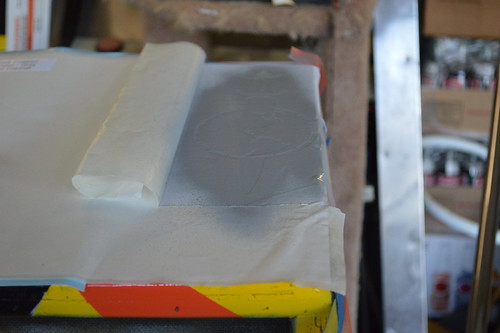 And the final result:
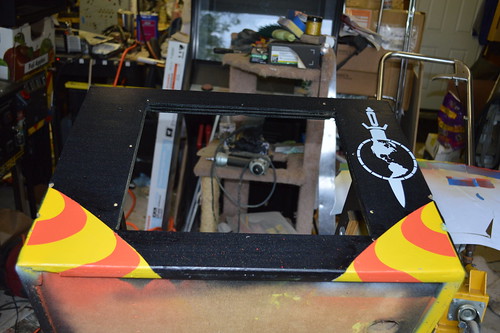
With that; I've completed one of each side of the cabinet. Now the "Busy" work of finishing the other sides of the cabinet begins.
Discussions
Become a Hackaday.io Member
Create an account to leave a comment. Already have an account? Log In.