Close
0%
0%

LASER Pointer Light Show

A simple 'Spirograph' style LASER light show using mirrors and motors and potentiometers.

Similar projects worth following
This toy project is an affordable way to turn any LASER pointer into a light show that uses 3 spinning mirrors attached to motors to project spiral patterns onto the nearest wall or ceiling. Each motor is controlled by a potentiometer with different motor speeds generating different patterns.**

**Note - I didn't invent anything here. This is a pretty common project that a lot of people have done. There's boatloads of 'LASER spirograph' threads on laserpointerforums.com with all number of mirrors, multiple colors, pocket versions (using cell-phone vibration motors), etc. Many of the 'how-to's online have errors in design or construction that negatively affect the end product, the most notable error being the failure to use front surface mirrors.

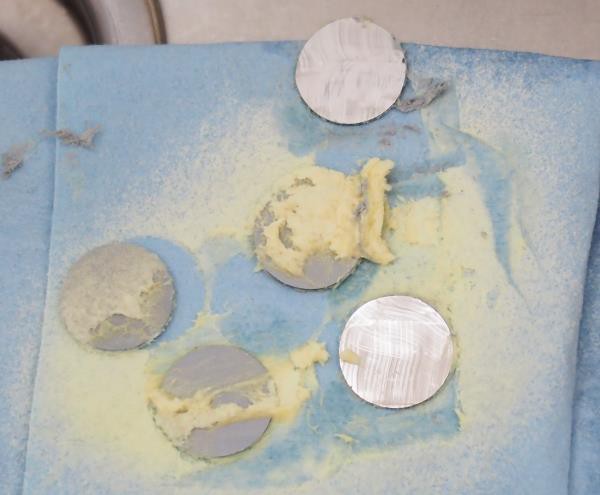
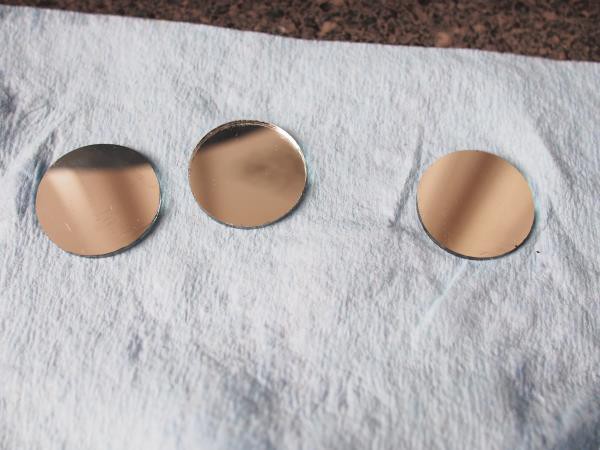
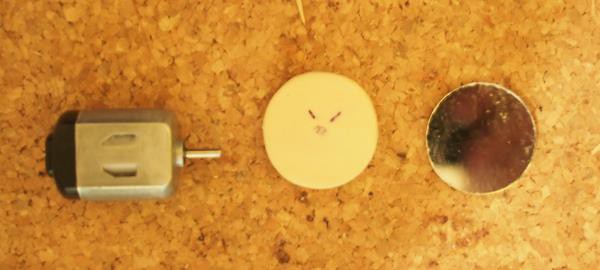
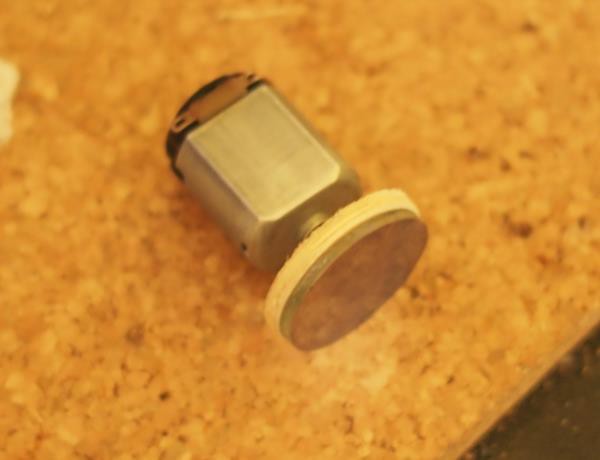
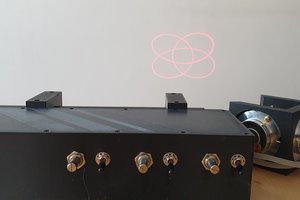
The LASER Pointer Light Show uses 3 different motors each of which spins a mirror. Each mirror is mounted slightly off of 90 degrees causing the LASER beam to project a circular pattern. The spiral pattern is a combination of the 3 circular patterns running at different speeds. The usual analogy for those old enough to remember is the Spirograph toy invented by Denys Fisher.

Each mirror is mounted approx 90 degrees from the previous mirror, creating a 'U' shaped pattern. The light also travels a 'U' shape of 270 degrees total (45 degrees off of the mirror's angle). The motors are cheap 6V ~12000RPM hobby motors I found online. The speed of the motors is controlled by 100 Ohm, 2W pots. (50 Ohm pots would be better but are harder to find.) Power is provided via 4 AAA batteries.

It would be easy to include the LASER in the box if you wanted to. The one I built just has a hole in the side where you shine a LASER pointer in and another hole where the pattern emerges.

  • 3 × High Speed DC hobby motors Usually a dollor or two apiece
  • 3 × 1" Round Glass Mirrors From hobby store
  • 3 × 1" round wood discs, 1/8" thick from hobby store
  • 2 × 100 Ohm potentiometer, 2 Watt, 10 turn wirewound
  • 1 × 100 Ohm Potentiometer, 2 watt, 1 turn

View all 12 components

  • 1
    Step 1

    Front Surface Mirrors

    Normal household mirrors use the back surface of the mirror to reflect. For this project we need our mirrors to reflect from their front surface. (Otherwise our projector will have 2 dots instead of 1 as about 10% of the light will reflect off of the surface of the glass.)

    So the first step is to remove the (usually grey or green) backing paint from the 1" circular hobby mirrors. This is done with Aircraft Paint Stripper*.

    * There's a bunch of different stripping products out there. Not all of them will work on mirror backing.

    Using glovesand eye protection, spray the back of at least 3 of the 1" hobby mirrors and let them sit for a few minutes. Then using a plastic scraper or old credit card/hotel key, scrape off the softened paint. The photo below shows 2 of the mirrors after scraping.

    Once the paint has been scraped off, rinse the mirrors with soapy water then dry. There will still be a little 'fog' on the mirror. Using a little bit of acetone (or alternately nail polish remover), gently rub off this remaining fog. After that you can use a bit of glass cleaner or just a little soap and water to finish cleaning up your mirrors.

    Congratulations! You know have some front surface mirrors suitable for projecting LASER beams with!

  • 2
    Step 2

    Motors

    Next we mount our mirrors onto the motors. Since we can't drill holes in the glass we need to use some small 1" wood circlesas backing. First drill out a 2mm hole in the center of each wood circle. Then use 5 minute epoxy to glue the wood discs to the motor shafts and the mirrors to the wood discs.

    Make sure that-

    • Do not get any epoxy into the motor where the housing meets the shaft or you'll seize the motor
    • Do not use superglue/CA. Use epoxy. Cyano-acrylate will fog the glass.
    • Do try to get the mirrors as straight and centered as you can. Even though we are relying on them wobbling to make our pattern, if you try to make them wobble, it'll be too much. Plus if the weight is too far off the unit will vibrate. Just get them on there mostly straight and don't sweat it.

    The finished motor/mirror assembly.

  • 3
    Step 3

    Motor Mounts

    Next we want to make the platform that the motors mount to. To do that, first take your 1/8" plywood (or plexiglass) and cut 9 x 1" squares and one 3 1/2" x 3 1/2" square. Glue the 1" squares into stacks of 3, then arrange each stack of 3 so that the mirrors form a 'U' shape with just enough space to spin without the mirrors touching. (see picture).

    Below you can see the inner workings. Light enters from the top, then reflects around counter-clockwise 270 degrees until it exits through the large aperature on the left.

    Glue the 1" squares to the base, but do NOT glue the motor/mirrors on yet. Let it all dry.

View all 6 instructions

Enjoy this project?

Share

Discussions

Similar Projects

Does this project spark your interest?

Become a member to follow this project and never miss any updates