I was doing some tests today with different pad designs, and I found that one is far ahead of the others. It is pretty simple, and only changes how the foam is laid out.
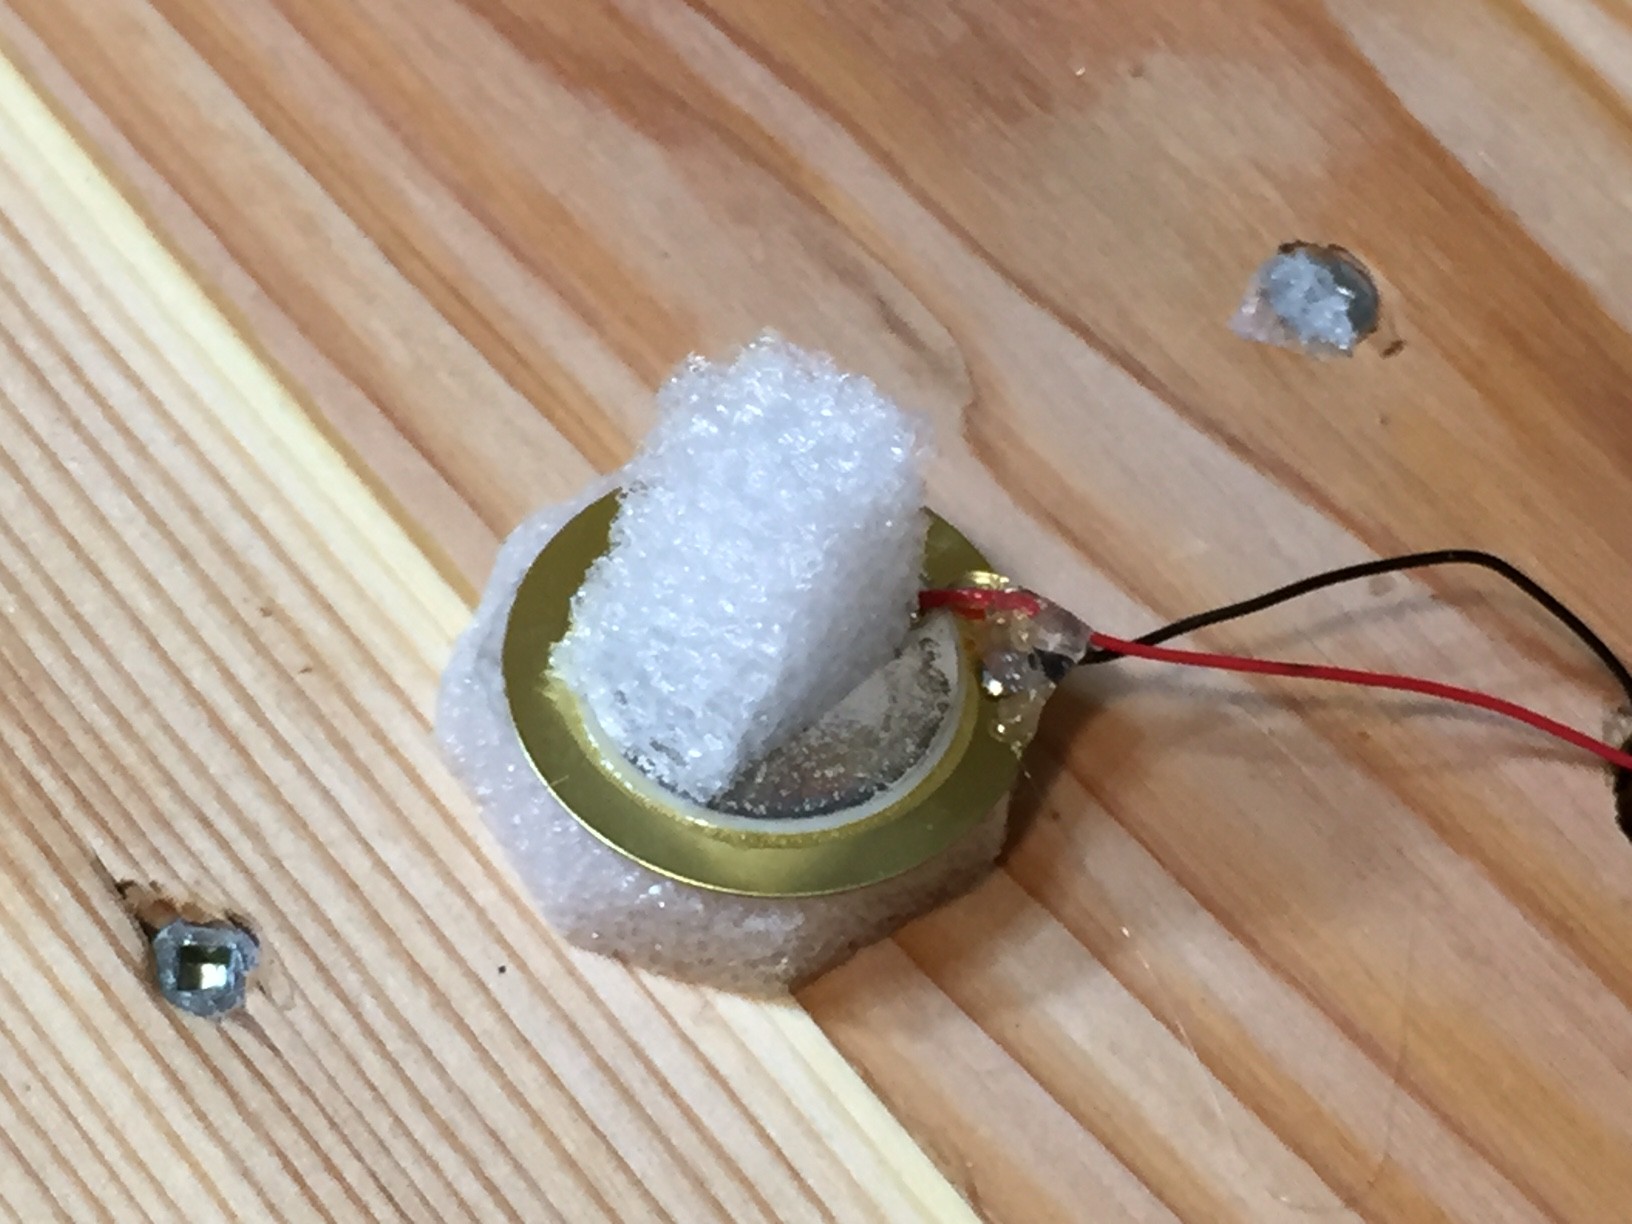
Previously, I had just sandwiched the piezo elements between approximately equal sized / shaped / thickness of closed cell foam. This worked alright, but there was some issues with differing sensitivities depending on where you hit the pad - if you hit right above the sensor it would sometimes be (much) louder than if you hit near the edge.
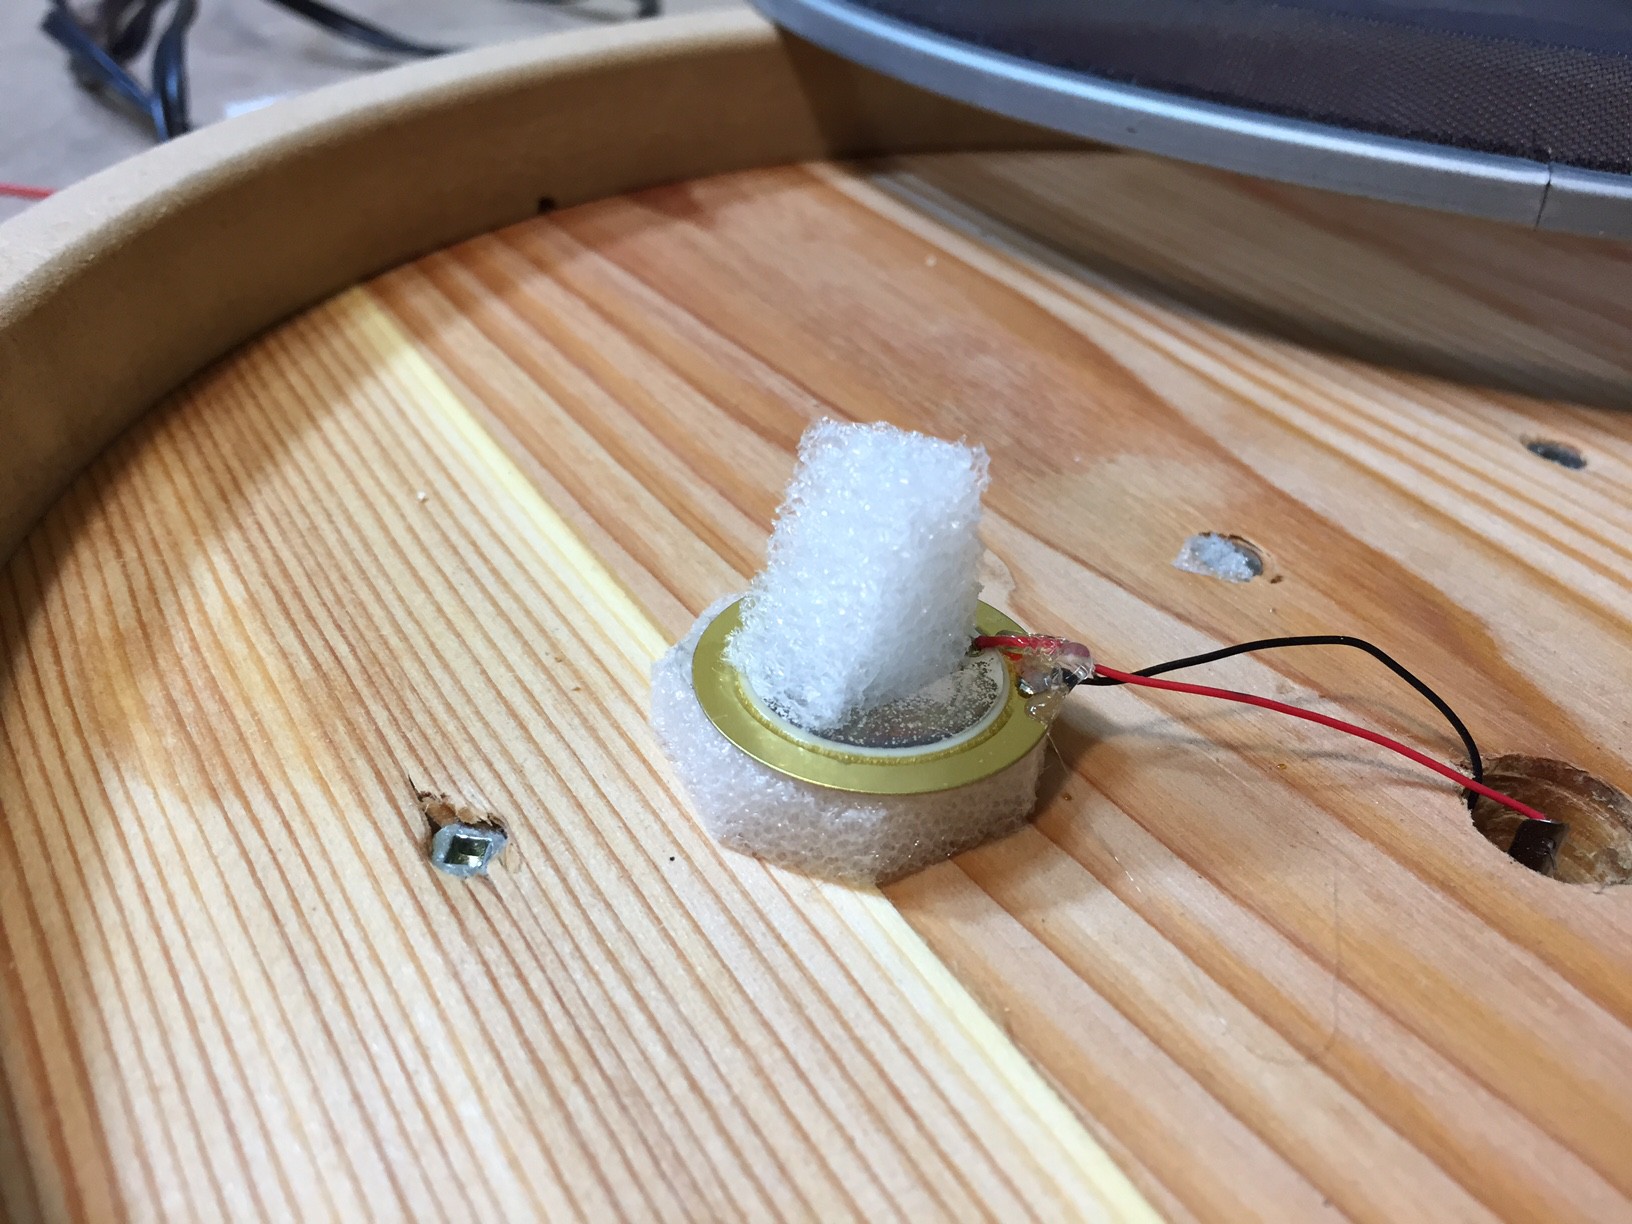
The change was to reduce the thickness of the bottom part, and decrease the width while increasing the height of the top part.
Pictures explain better than I can:
The bottom part of the foam should be about 1/4" thick, and the same size (or slightly larger) than the piezo element itself.
The top part of the foam should be about 3/4" thick, and pyramid or cone shaped.
Since the bearing edge of my drums are 3/4" thick, if you were to look at it from the size before putting the head on, it should stick up higher than the rim by about 1/4" or so.
Once the drum head is on, tighten the rim down so that the head is taught. The foam cone will compress down to be flush with the head.
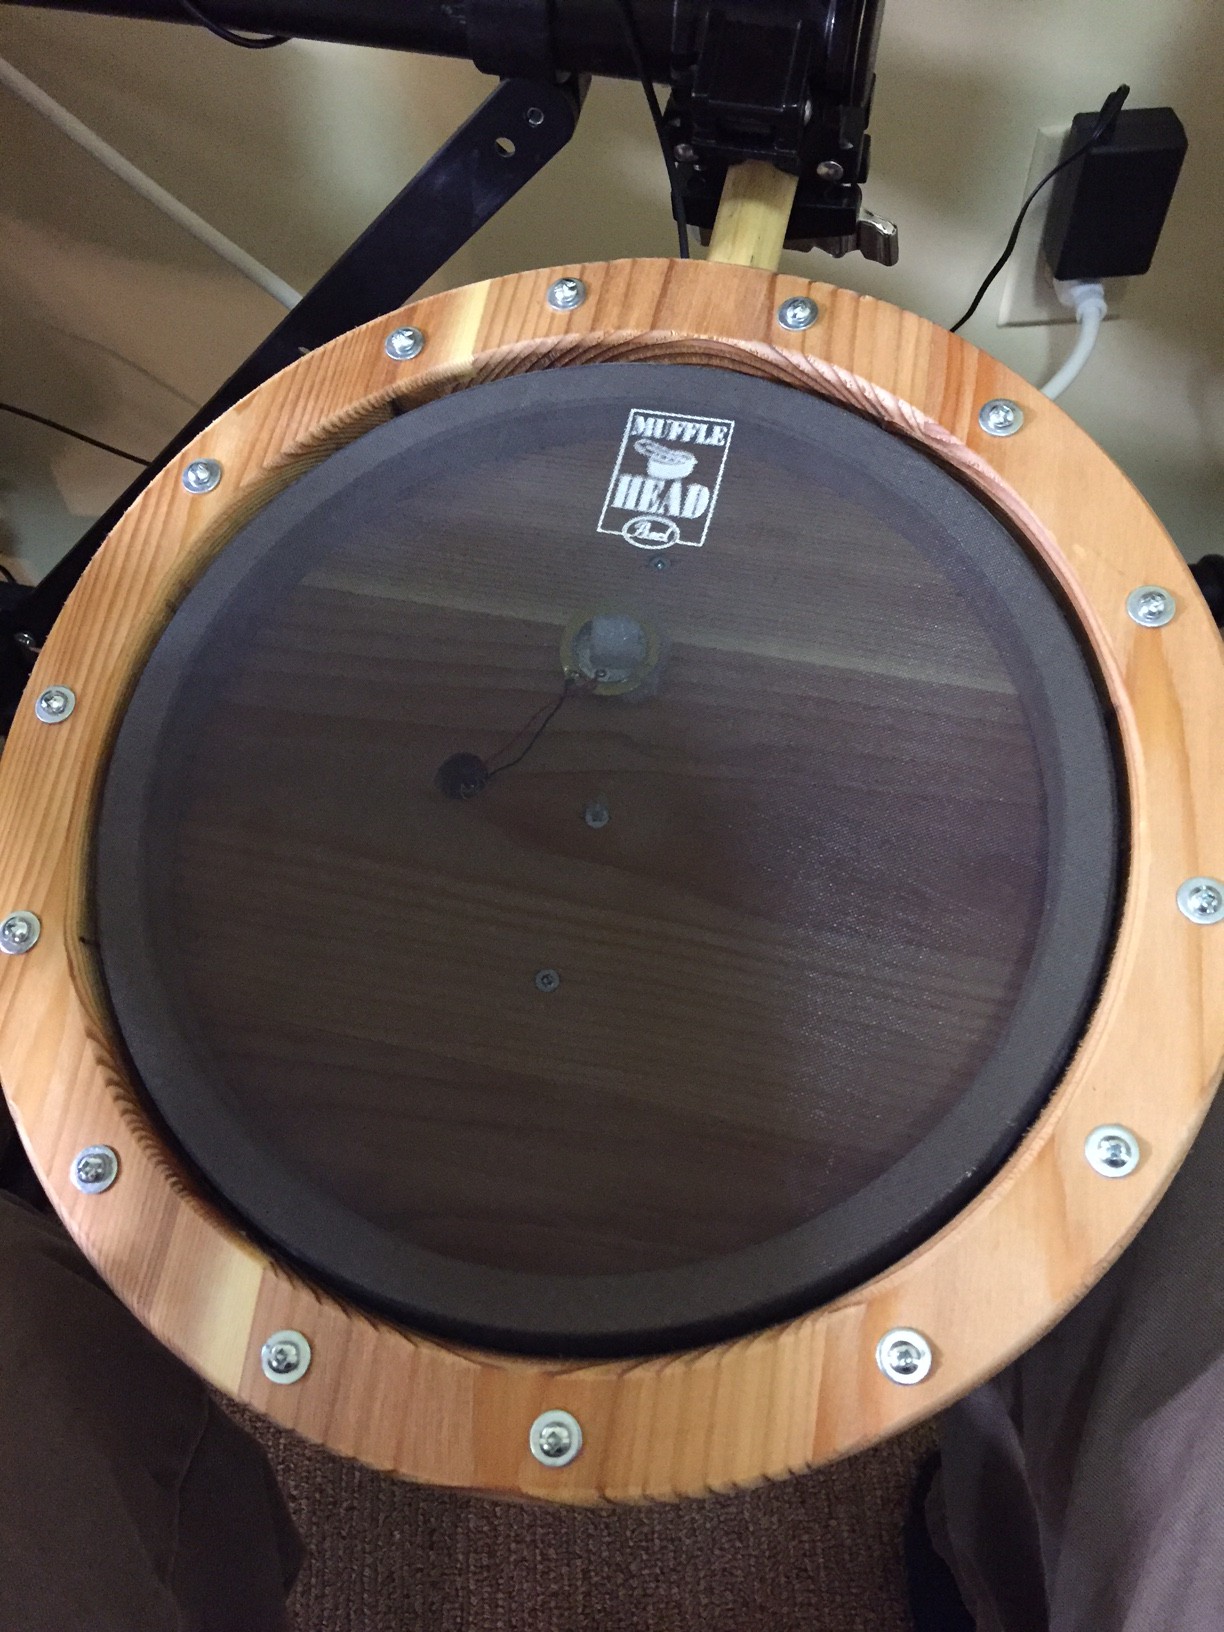
You also do not need to put the sensor in the middle of the drum, as I had done previously. On these new pads, I am finding that I can hit the head anywhere and it sounds the same. I have thus moved the sensor up to the top 1/3 of the pad:
I am now in the process of changing all my existing pads to the new design.
Also, a teaser for the coming week - the hi hat pedal design is coming along nicely, and I hope to have it finished sometime this week if I can find any time to work on it. Keep posted for logs on that...
Cheers
 The Big One


Discussions
Become a Hackaday.io Member
Create an account to leave a comment. Already have an account? Log In.