 The Big One
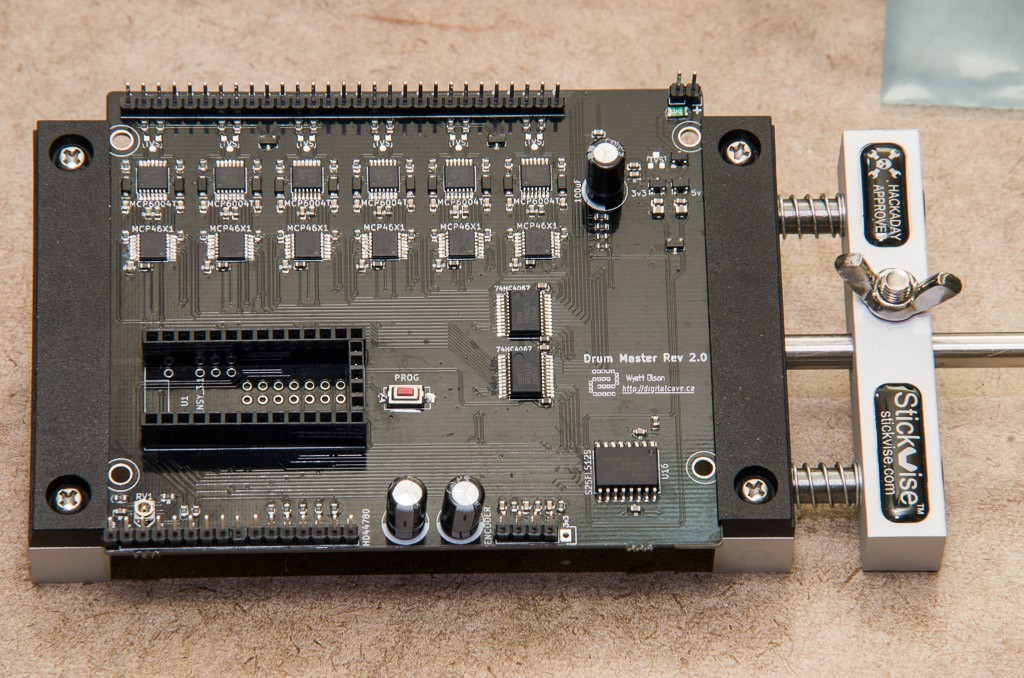
I just finished soldering up the second Drum Master board (the first having gone the way of all the earth, due to repeated rework attempts to fix all the stupid problems I made the first time). Lo and behold, the thing actually works!
First up I have a video showing some of the features:
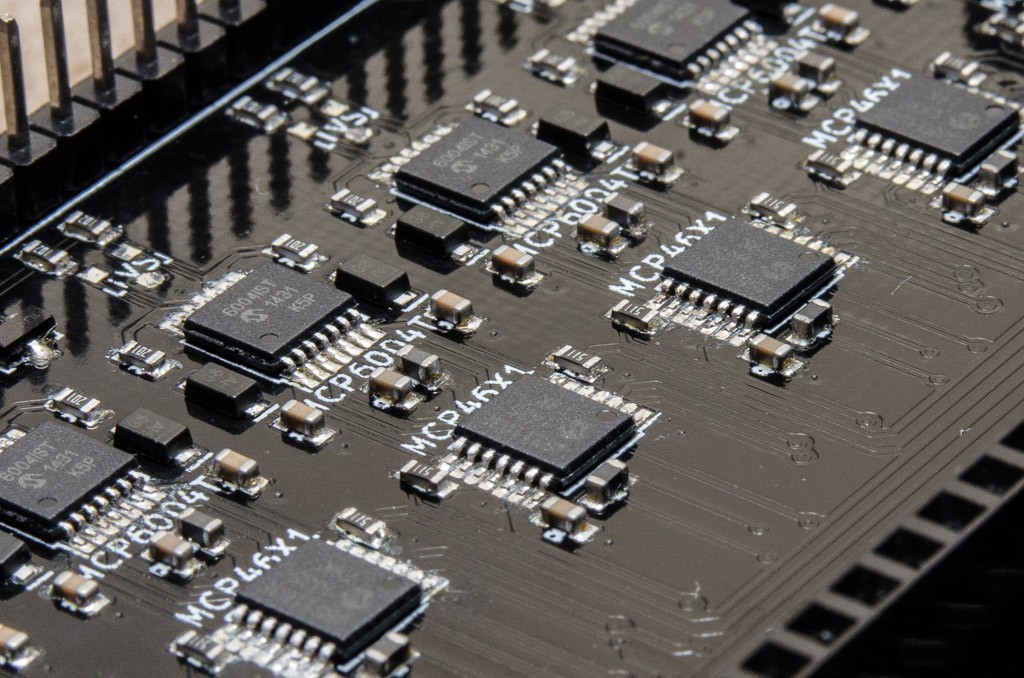
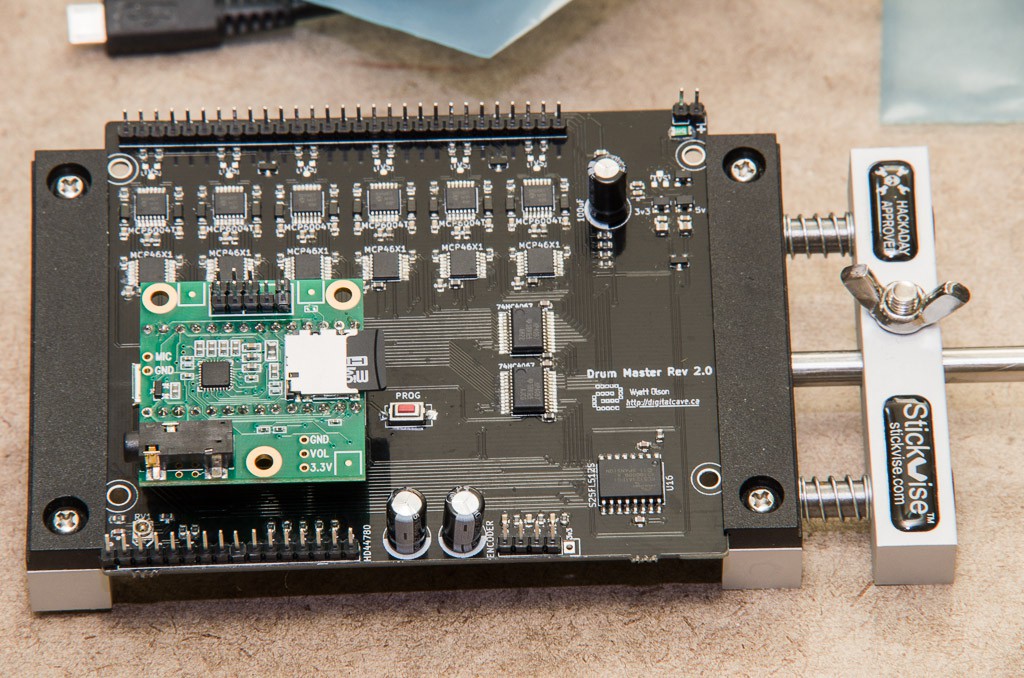
In addition, I have some pictures of me placing components prior to soldering, a closeup of the soldered board, and the entire board (with and without the Teensy 3.1 + Audio board):

Discussions
Become a Hackaday.io Member
Create an account to leave a comment. Already have an account? Log In.
That's awesome! Looks like it works pretty well! Congrats.
What are th next steps now?
Cheers.
Are you sure? yes | no
Thanks!
The next steps are to:
1) Make the enclosure (already started, I am now just waiting for the laser etched faceplates to show up, which were ordered from Ponoko yesterday, with an ETA of about 2 weeks). I will need the enclosure to be completed before I can do too much work on the real system, as currently it is just about impossible to have more than a couple pads plugged in at once - the mess of wires is already close to unmanageable. Once all the pads are connected to the panel mount RCA jacks, it will be much better.
2) While waiting for the faceplates (and probably for a long time after that, too), I will be working on the software. There is still a lot of work to do on that:
a) I need to have each channel play different samples, I need to support different samples for different velocities (I am planning on having up to 10 samples per channel, based on velocity, numbered from 0 to 9; depending on how hard you hit it, it will pick a different sample as well as set the volume accordingly).
b) Add an auto pad calibration routine (let the software run through all 255 steps in the per-pad gain settings, and find the optimal value for a 'normal' hit). My plan for this is to set it into calibration mode for each pad at a time, and ask the user to hit the pad at a 'normal' velocity (whatever that means). It will then adjust the gain such that the output is some constant value, say 70% of max or something. I also need to persist the channel gain values to EEPROM.
c) Add a per-channel EQ, persisted to EEPROM or possibly saved back to the SD card in the proper sample folder as a text file, so that when you load a new sample kit you also load the EQ for it.
3) Finish the drum hardware. I still need to make the bass drum pedal mounting bracket and the hi hat pedal. I have a rough idea for both, but I need to finalize the details and actually make the things in such a way that it looks good and is not too large. The bass pedal mount is not too complex; the hihat pedal will be a bit more interesting. I am planning on using IR LEDs and photo transistors to provide a varying analog voltage depending on the pedal position, in addition to having a physical switch at the end of movement to allow for a differentiation between hihat 'closed' and hihat 'tight'. I had all this working in my 2008 version, but it was made of 3/4" MDF, was hideously ugly, and quite large and heavy. I need to scale things down for this version, as well as make it cleaner.
I'm sure there are lots of other small things, but this lists the major steps still outstanding. Still lots of work, but it is definitely coming along nicely. :-)
Cheers
Are you sure? yes | no
Great! Yeah I understand what you mean for the hi-hat.
I already tested a photo-transistor that seems to be quite good, if you're interested check this out:
https://hackaday.io/project/7499-raspidrums/log/25935-time-to-think-about-the-hi-hat.
Datasheet here: http://www.osram-os.com/Graphics/XPic1/00101829_0.pdf, there's an infrared (SFH 320 FA), and a visible light version.
Cheers.
Are you sure? yes | no
Interesting.... It looks pretty similar to what I have, just not IR. I am planning on using a bass pedal as the hihat pedal, with the padded striker removed and a flat solid blocker (just a thin sheet of wood) installed instead. As the blocker goes down it progressively blocks the IR beam. Hard to explain but simple in concept. The approach works fine as proved in my previous version, I just need to make it smaller and not as ugly. ;-)
Are you sure? yes | no
:-) I had pretty much the same idea. I'm still very busy with the software, so not sure how to make the pedal yet, I guess we'll see...
Are you sure? yes | no