 Retroplayer
I received some of the parts today, including the Cubieboard 2 (wow, that was fast. Just ordered it Friday), adafruit smart power switch, the SATA caddy, and 6" HDMI cable.
I started playing around with layout and realized for optimal positioning, I need a longer HDMI. The hardware is going to need quite a few mods done, and I don't have all the parts in yet to do it. So I have put them aside for now. Just thought I would post some eye candy and talk about the Cubieboard and the planned mods a bit.
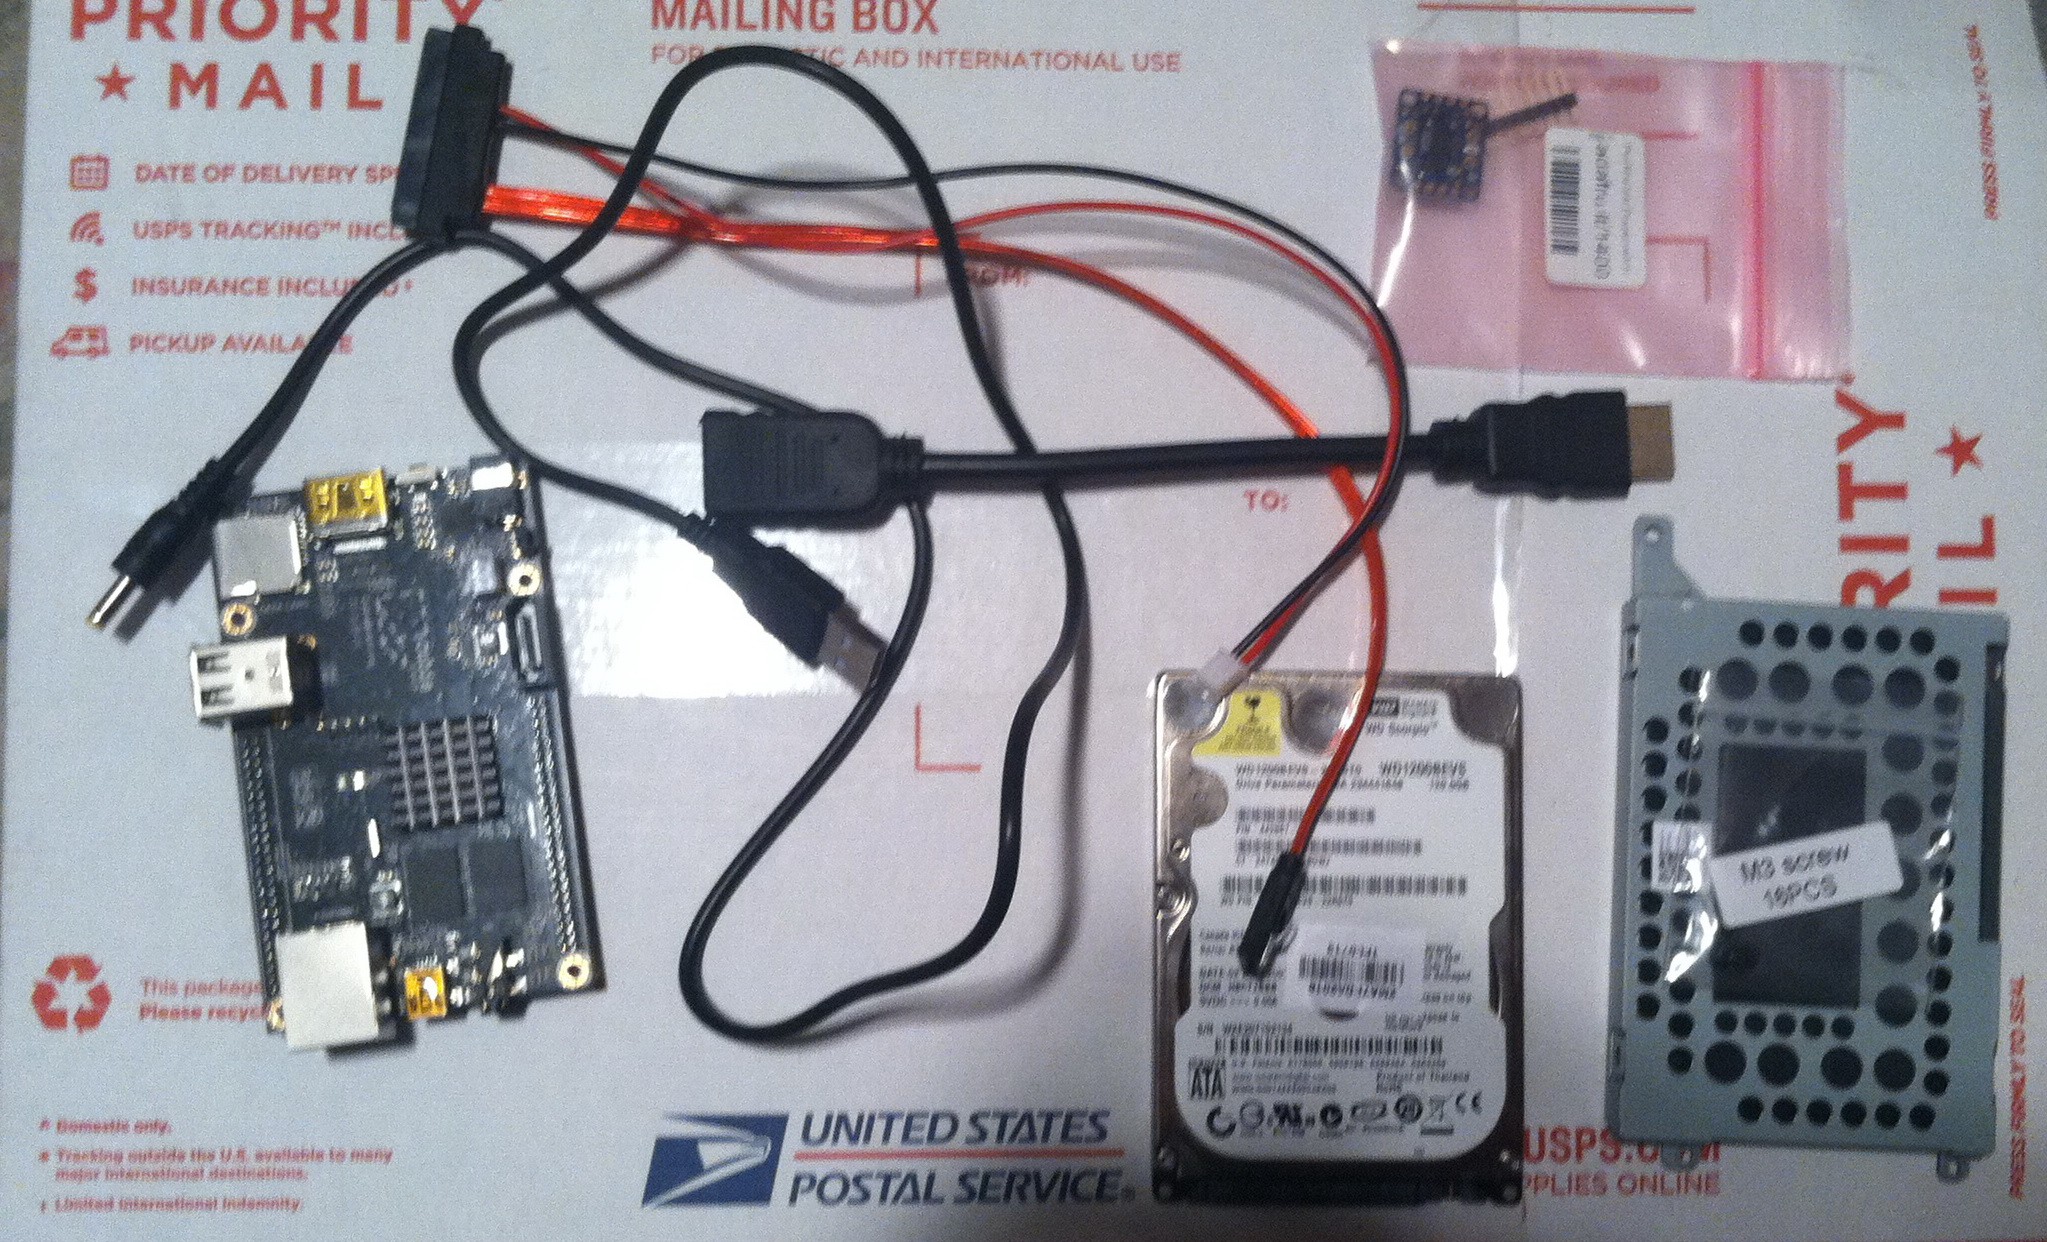
I decided on using a HDD caddy because it makes things easy to mount. So I looked for one with flanges. It came with the screws for the drive as a bonus. It was intended as replacement parts for a dell laptop.
The Cubieboard 2 comes with the custom SATA cable, which has a 2 pin header to plug into the Cubieboard for power. I will connecting that separately to the 5V bus. Also coming with the cubieboard is a USB to barrel jack cable for powering the board from USB. It can also be powered from the micro-usb port much like the raspberry pi. But unlike the raspberry pi, that port is also an OTG port.
You can also see in this picture the 6" HDMI cable and the adafruit smart power switch. I didn't have enough light to get great pictures, so I'll borrow some from the respective sites...
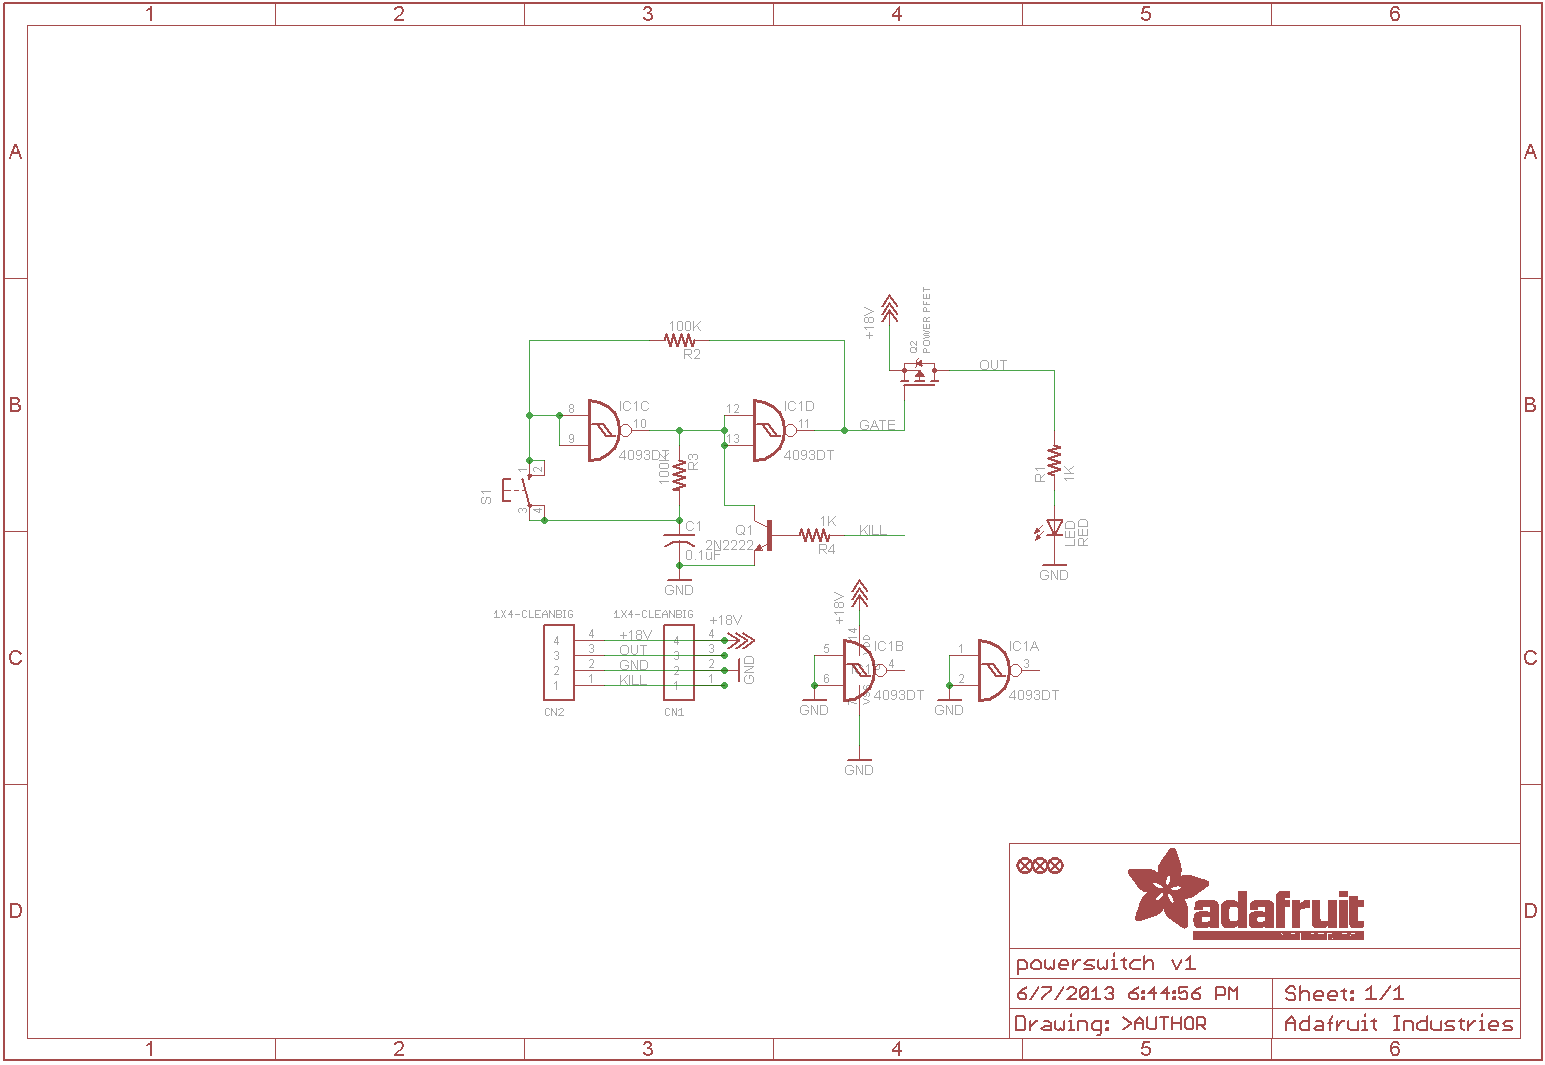
The Adafruit power switch is push on/push off switch that can switch a 3A load between 3 and 14V. It also has a kill pin integrated which can be used by your system to kill power as part of the power down script. The project has had a bit of scope creep since first conception, so I am rethinking the 3A limitation. According to the adafruit datasheet even at 3A, the FET gets pretty toasty. Thanks to the schematic, I could easily whip together my own version with a bigger FET. Also, I'd like it not to kill power right away when the switch is pressed, but instead initiate a proper shutdown and have the Cubieboard kill the power. So some redesign is going to be necessary. Really all that is needed is to switch to a stable latch which can be reset by a GPIO line. Still a nifty part at $5. For the power switch itself, the N64 used a slide switch. I will be modifying the switch so that it has a ramp that presses on a push button, and spring returns.

The cubieboard is great for hacking. There are through holes on the board for nearly all the connections. This makes it great for hardwiring into a device. The USB jack needs to be removed to access the header connections, but the rest are accessible without removing anything. The ethernet jack includes LEDs and integrated magnetics, so I will be building an extension cable rather than wiring directly to the board.
The cubieboard also has two 48 pin headers with multiplexed pins for GPIO and special purpose applications. Lots of expansion possibilities. The pins are 2mm pitch.
Currently I have planned to use the I2C bus for the front OLED display, and 2 of the GPIO pins. One for the power switch and the other as an output to kill power.
That's it for today.
Discussions
Become a Hackaday.io Member
Create an account to leave a comment. Already have an account? Log In.