HERE IS MY SYSTEM DESIGN DOCUMENT:
This past week has been busy building my latest prototype version for the Hackaday competition. I had abandoned the constraint of keeping the prototypes to a counter top form factor simply for ease of construction. I can later scale down the design once I get a prototype that works to my level of satisfaction.
I have tested that the high voltage circuit works reliably and can suck smoke out of the air in an enclosed chamber. Now is the time to integrate high voltage with churning water.... Sooo amazingly dangerous!
The high voltage circuit was dangerous enough by itself. To add to the danger, the capacitors in the cockcroft-walton multiplier kept its charge even after turning the power off. After each run, I would short out each capacitor with a long stick that had aluminum foil on the end just so I can rearrange the terminals.
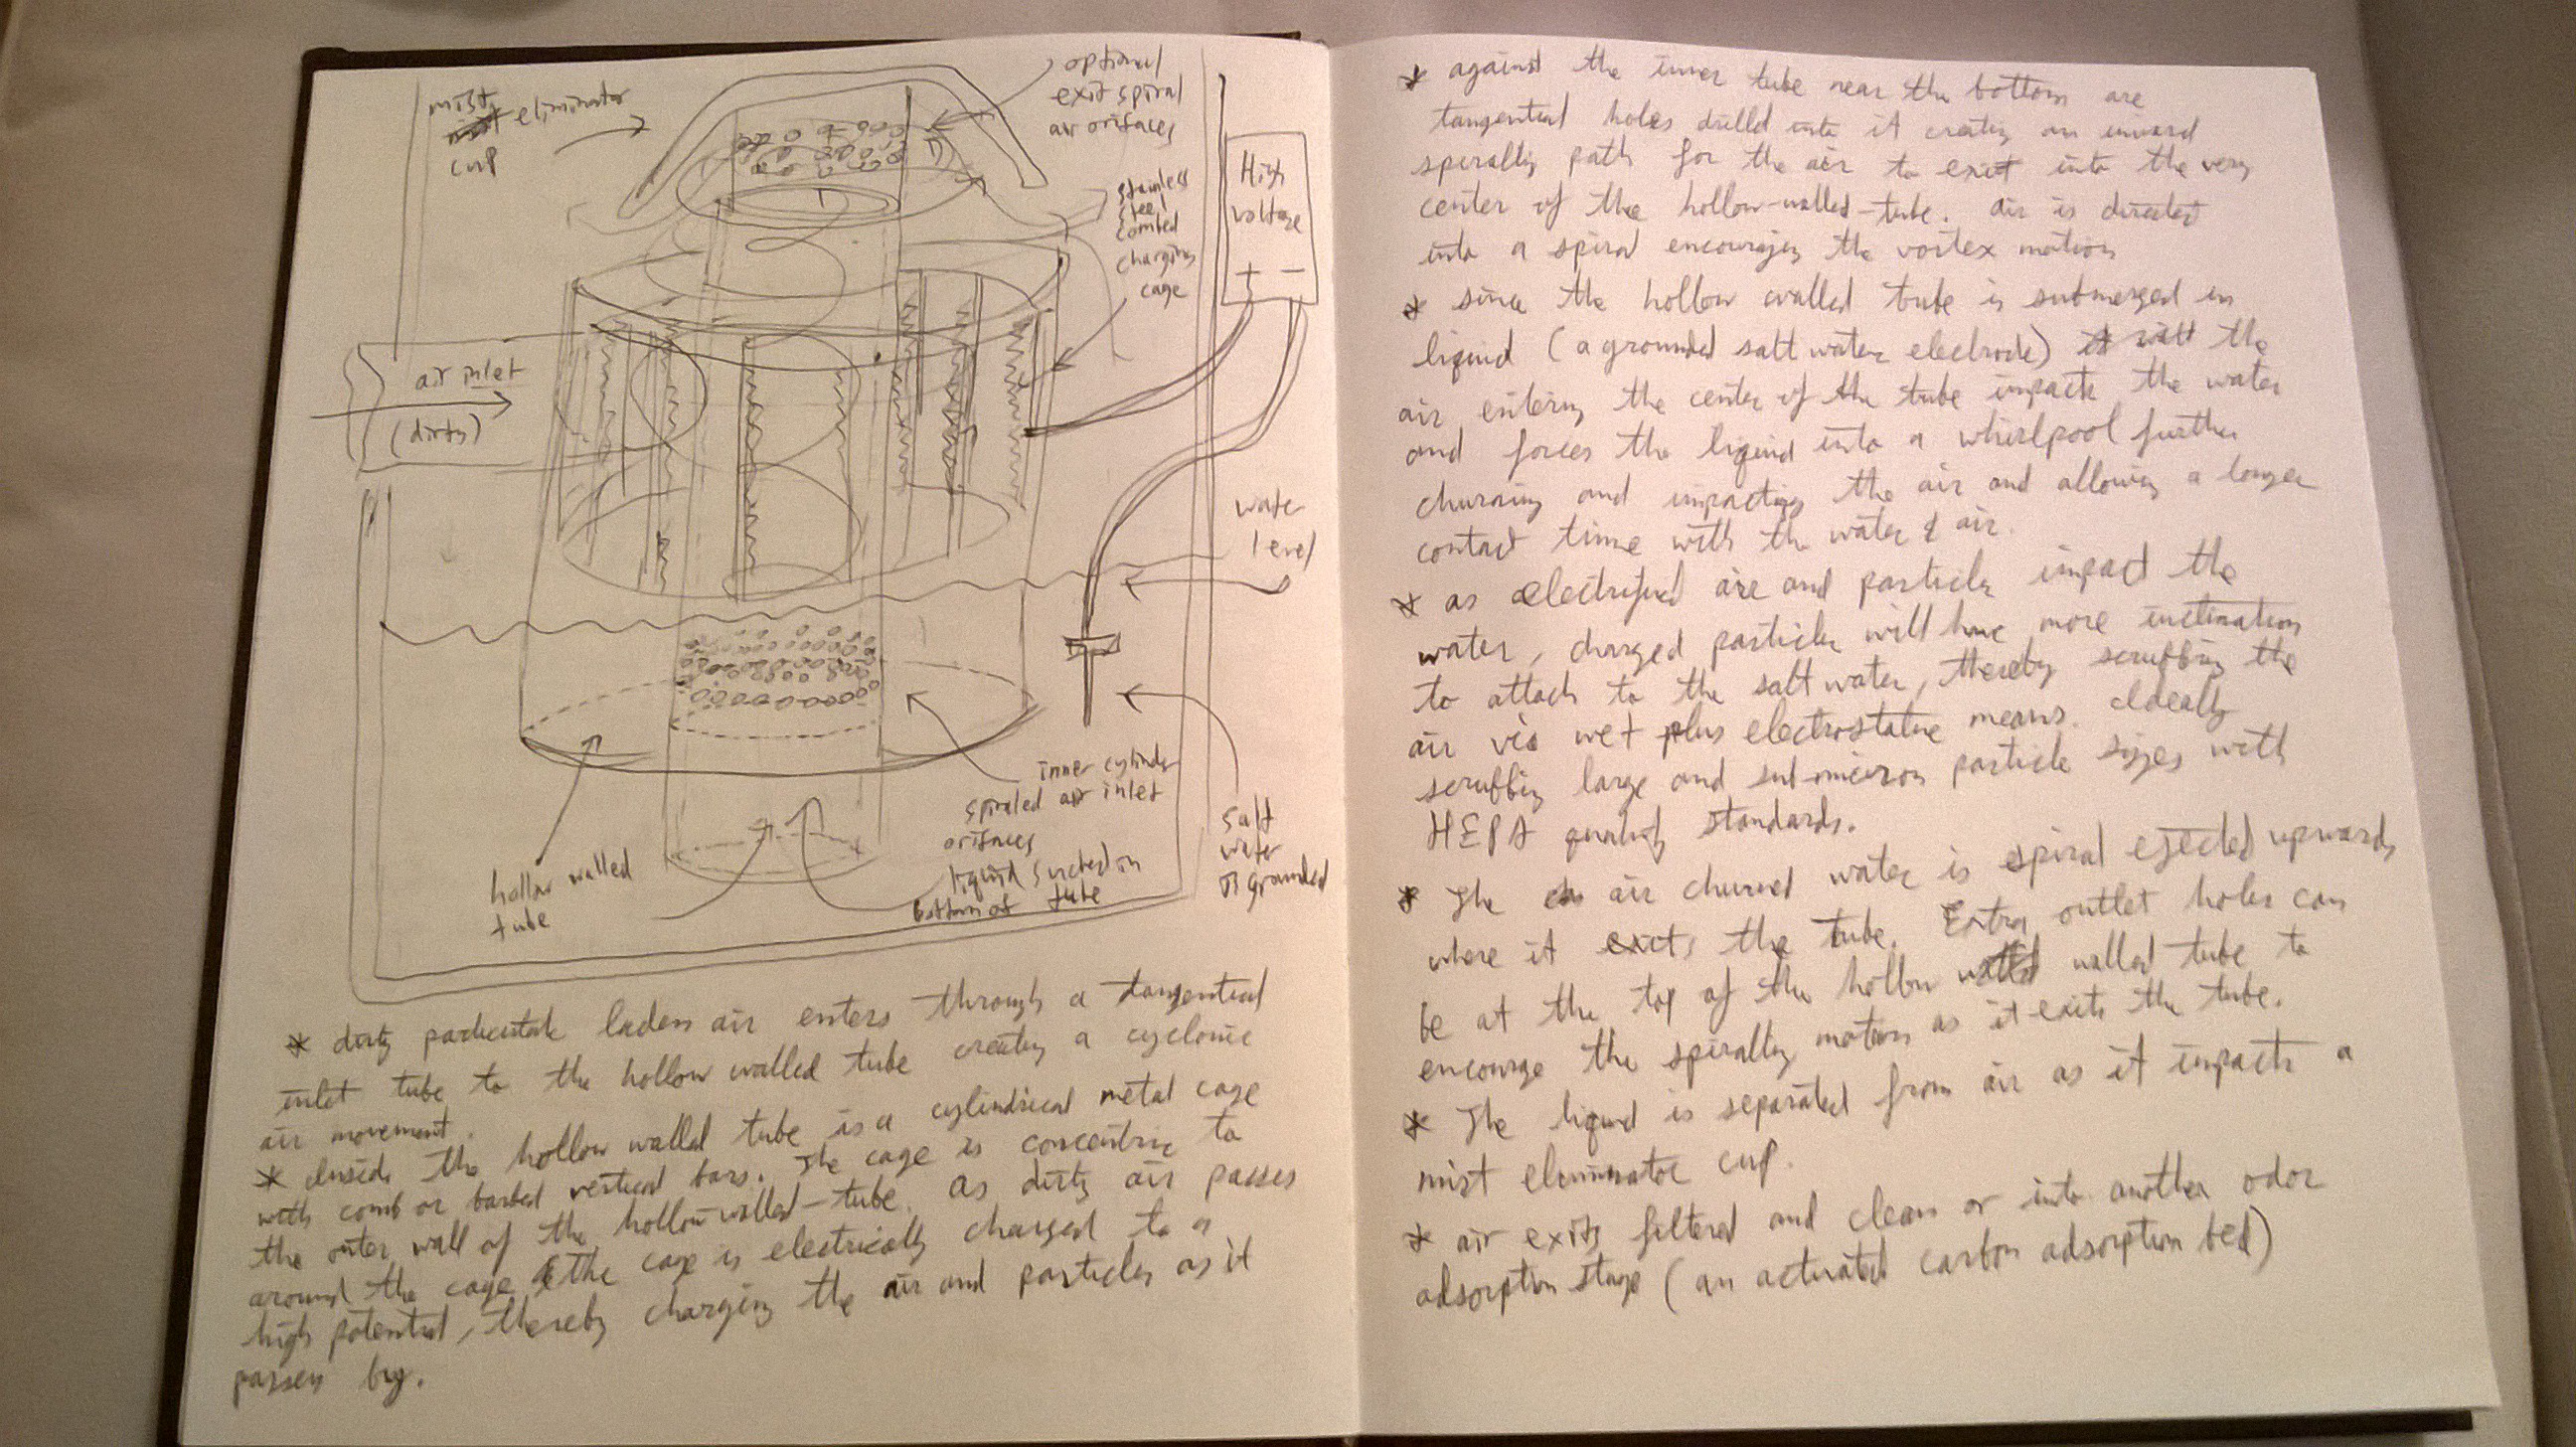
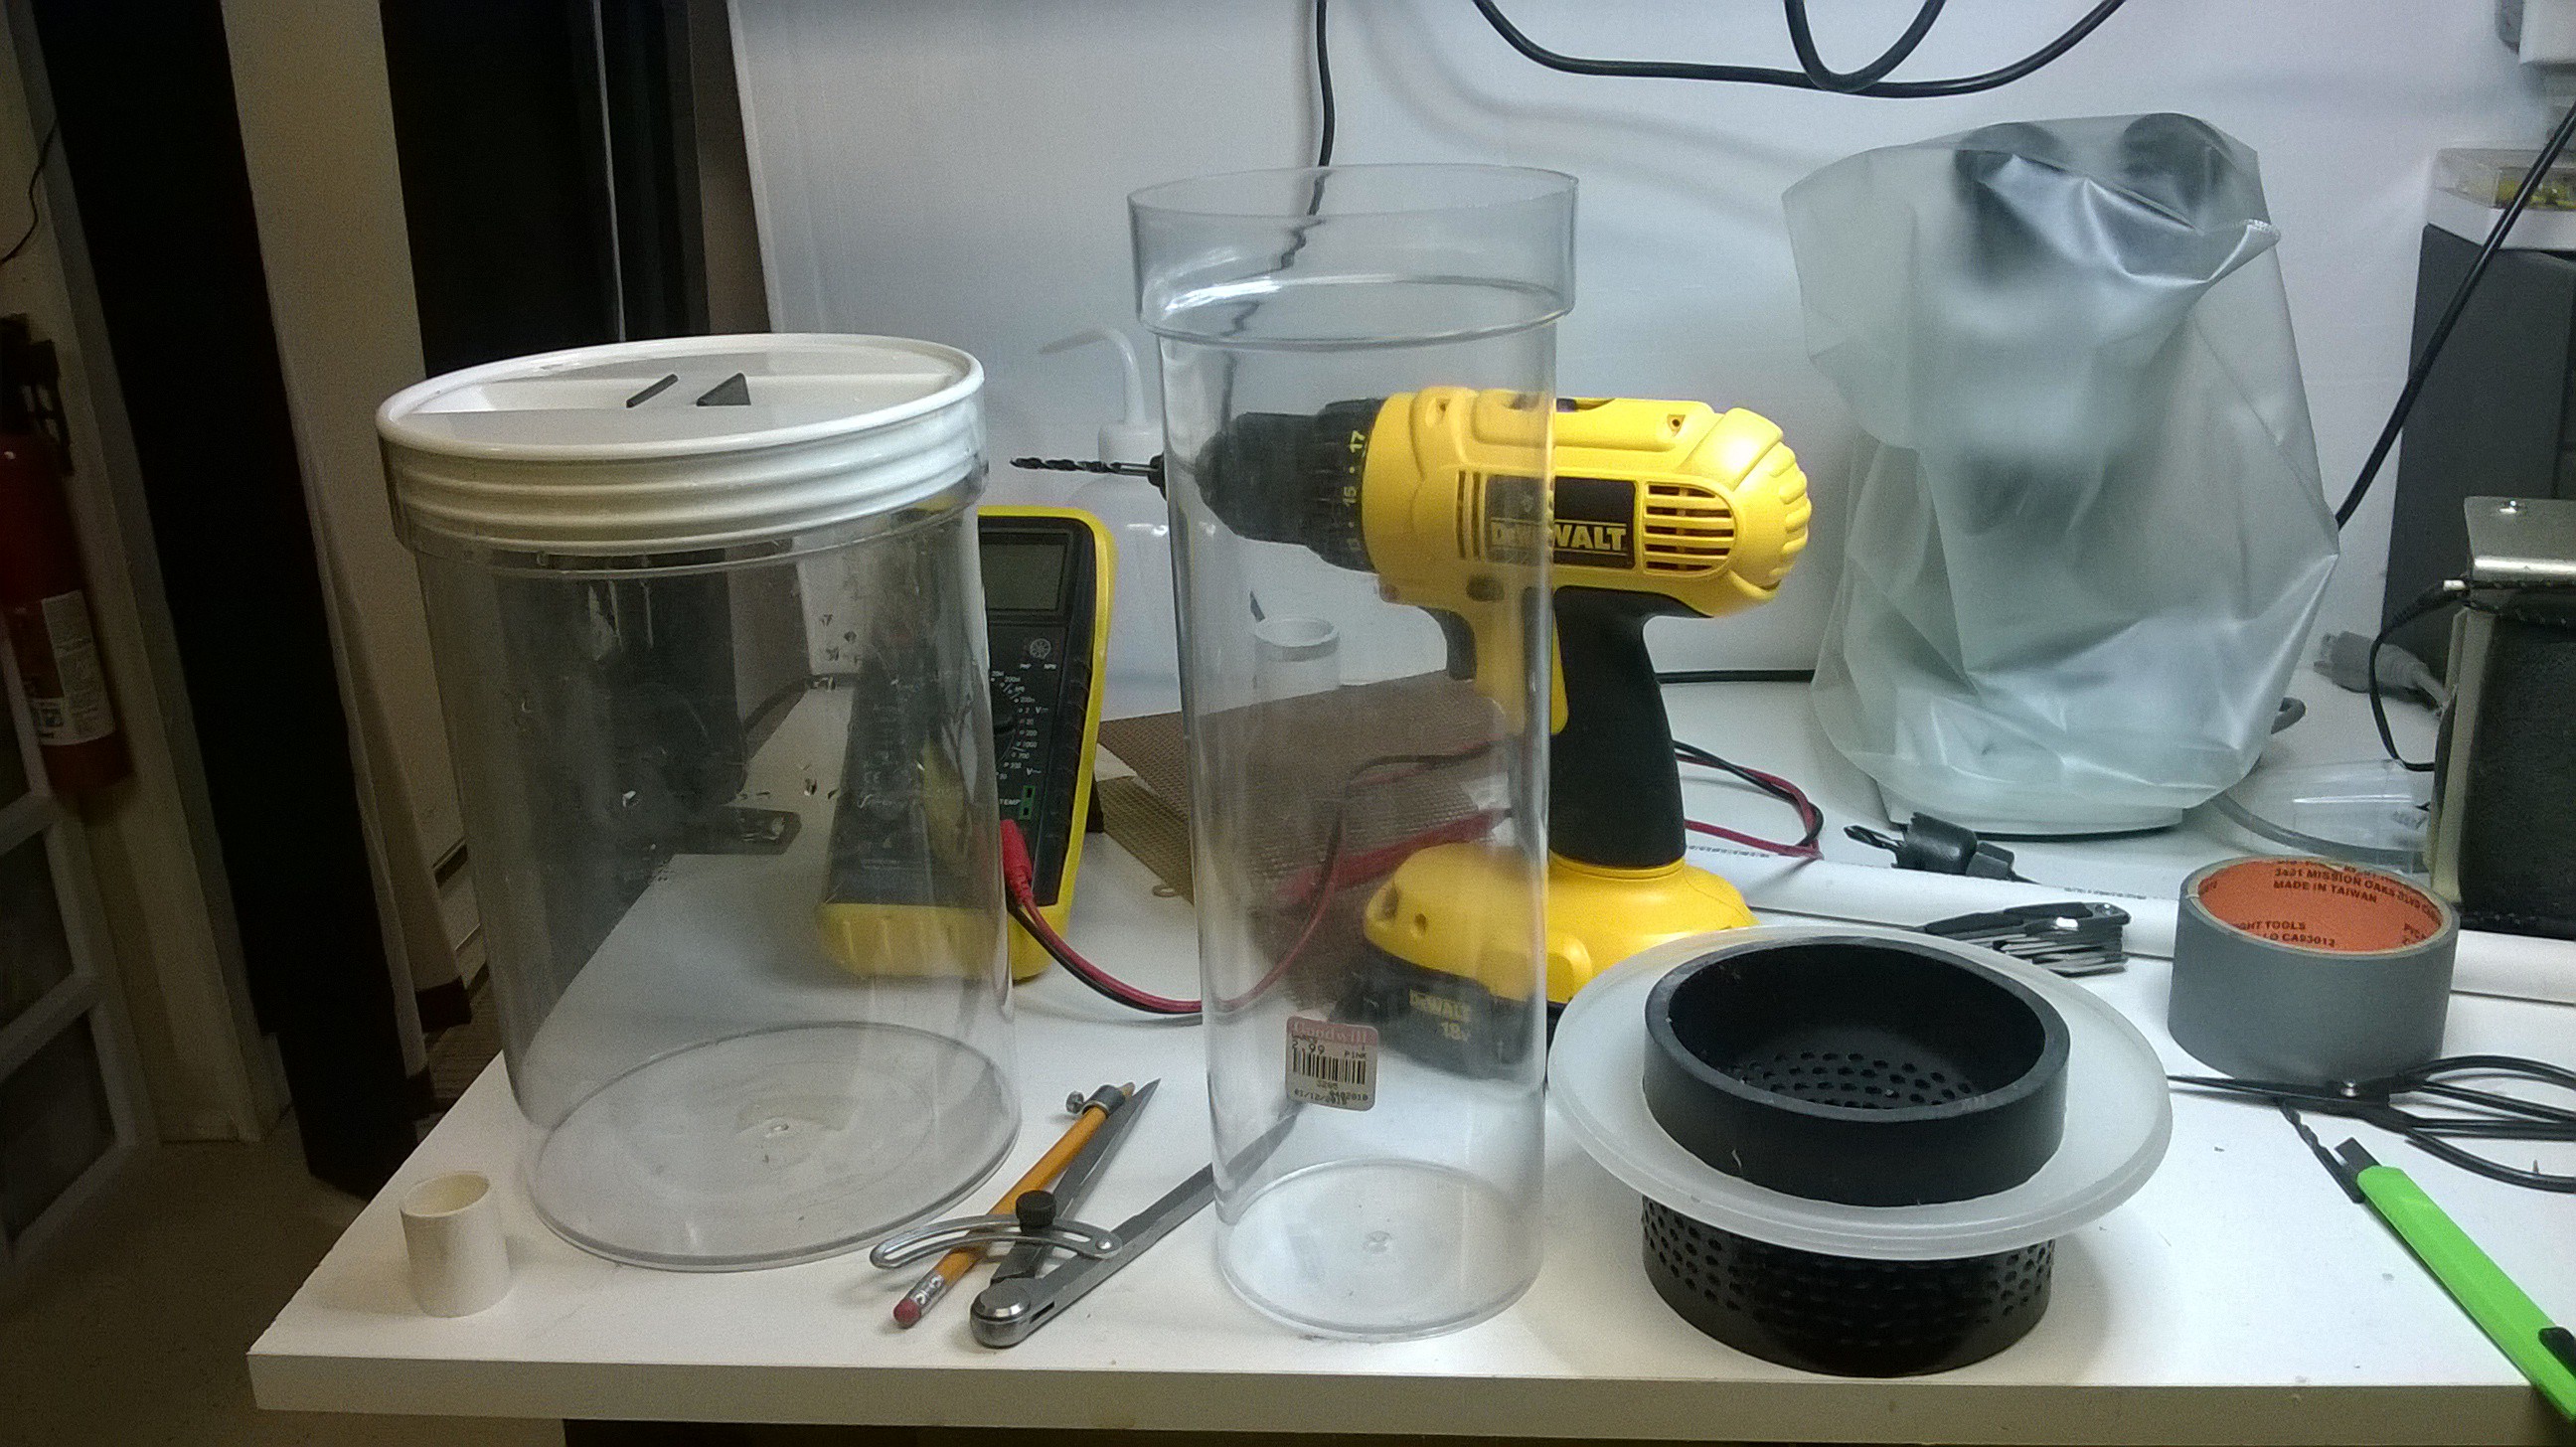
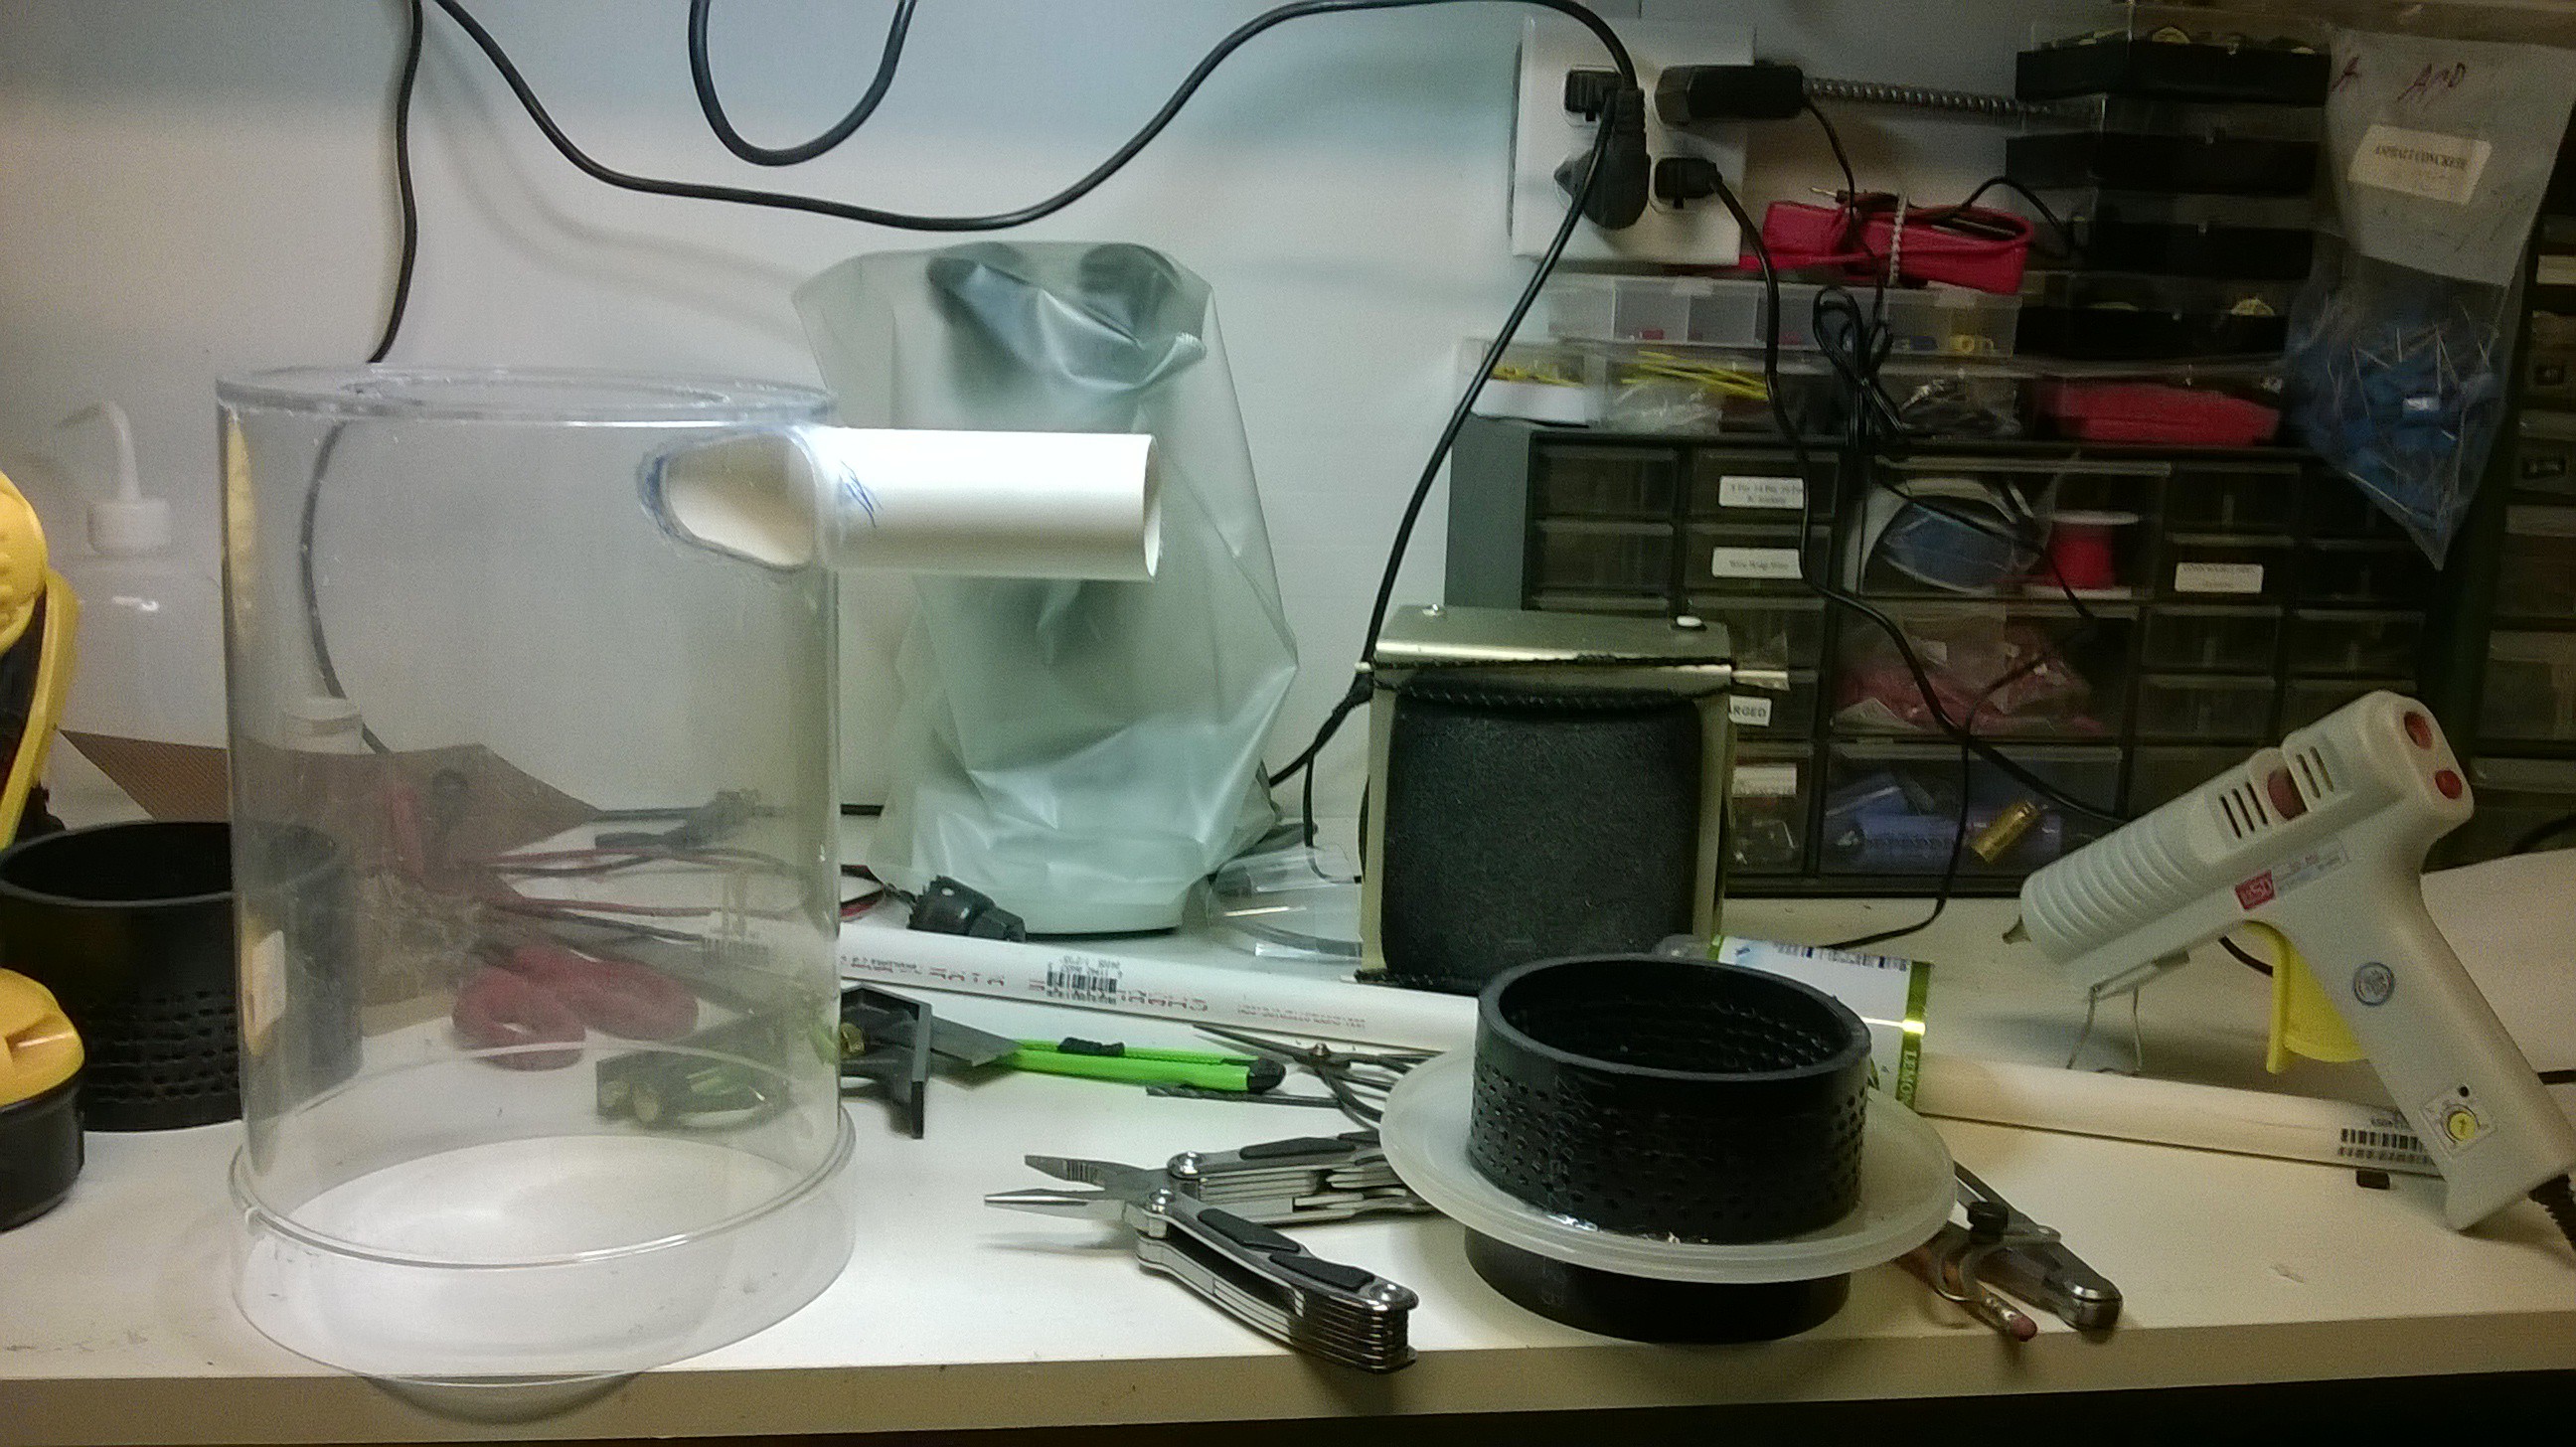
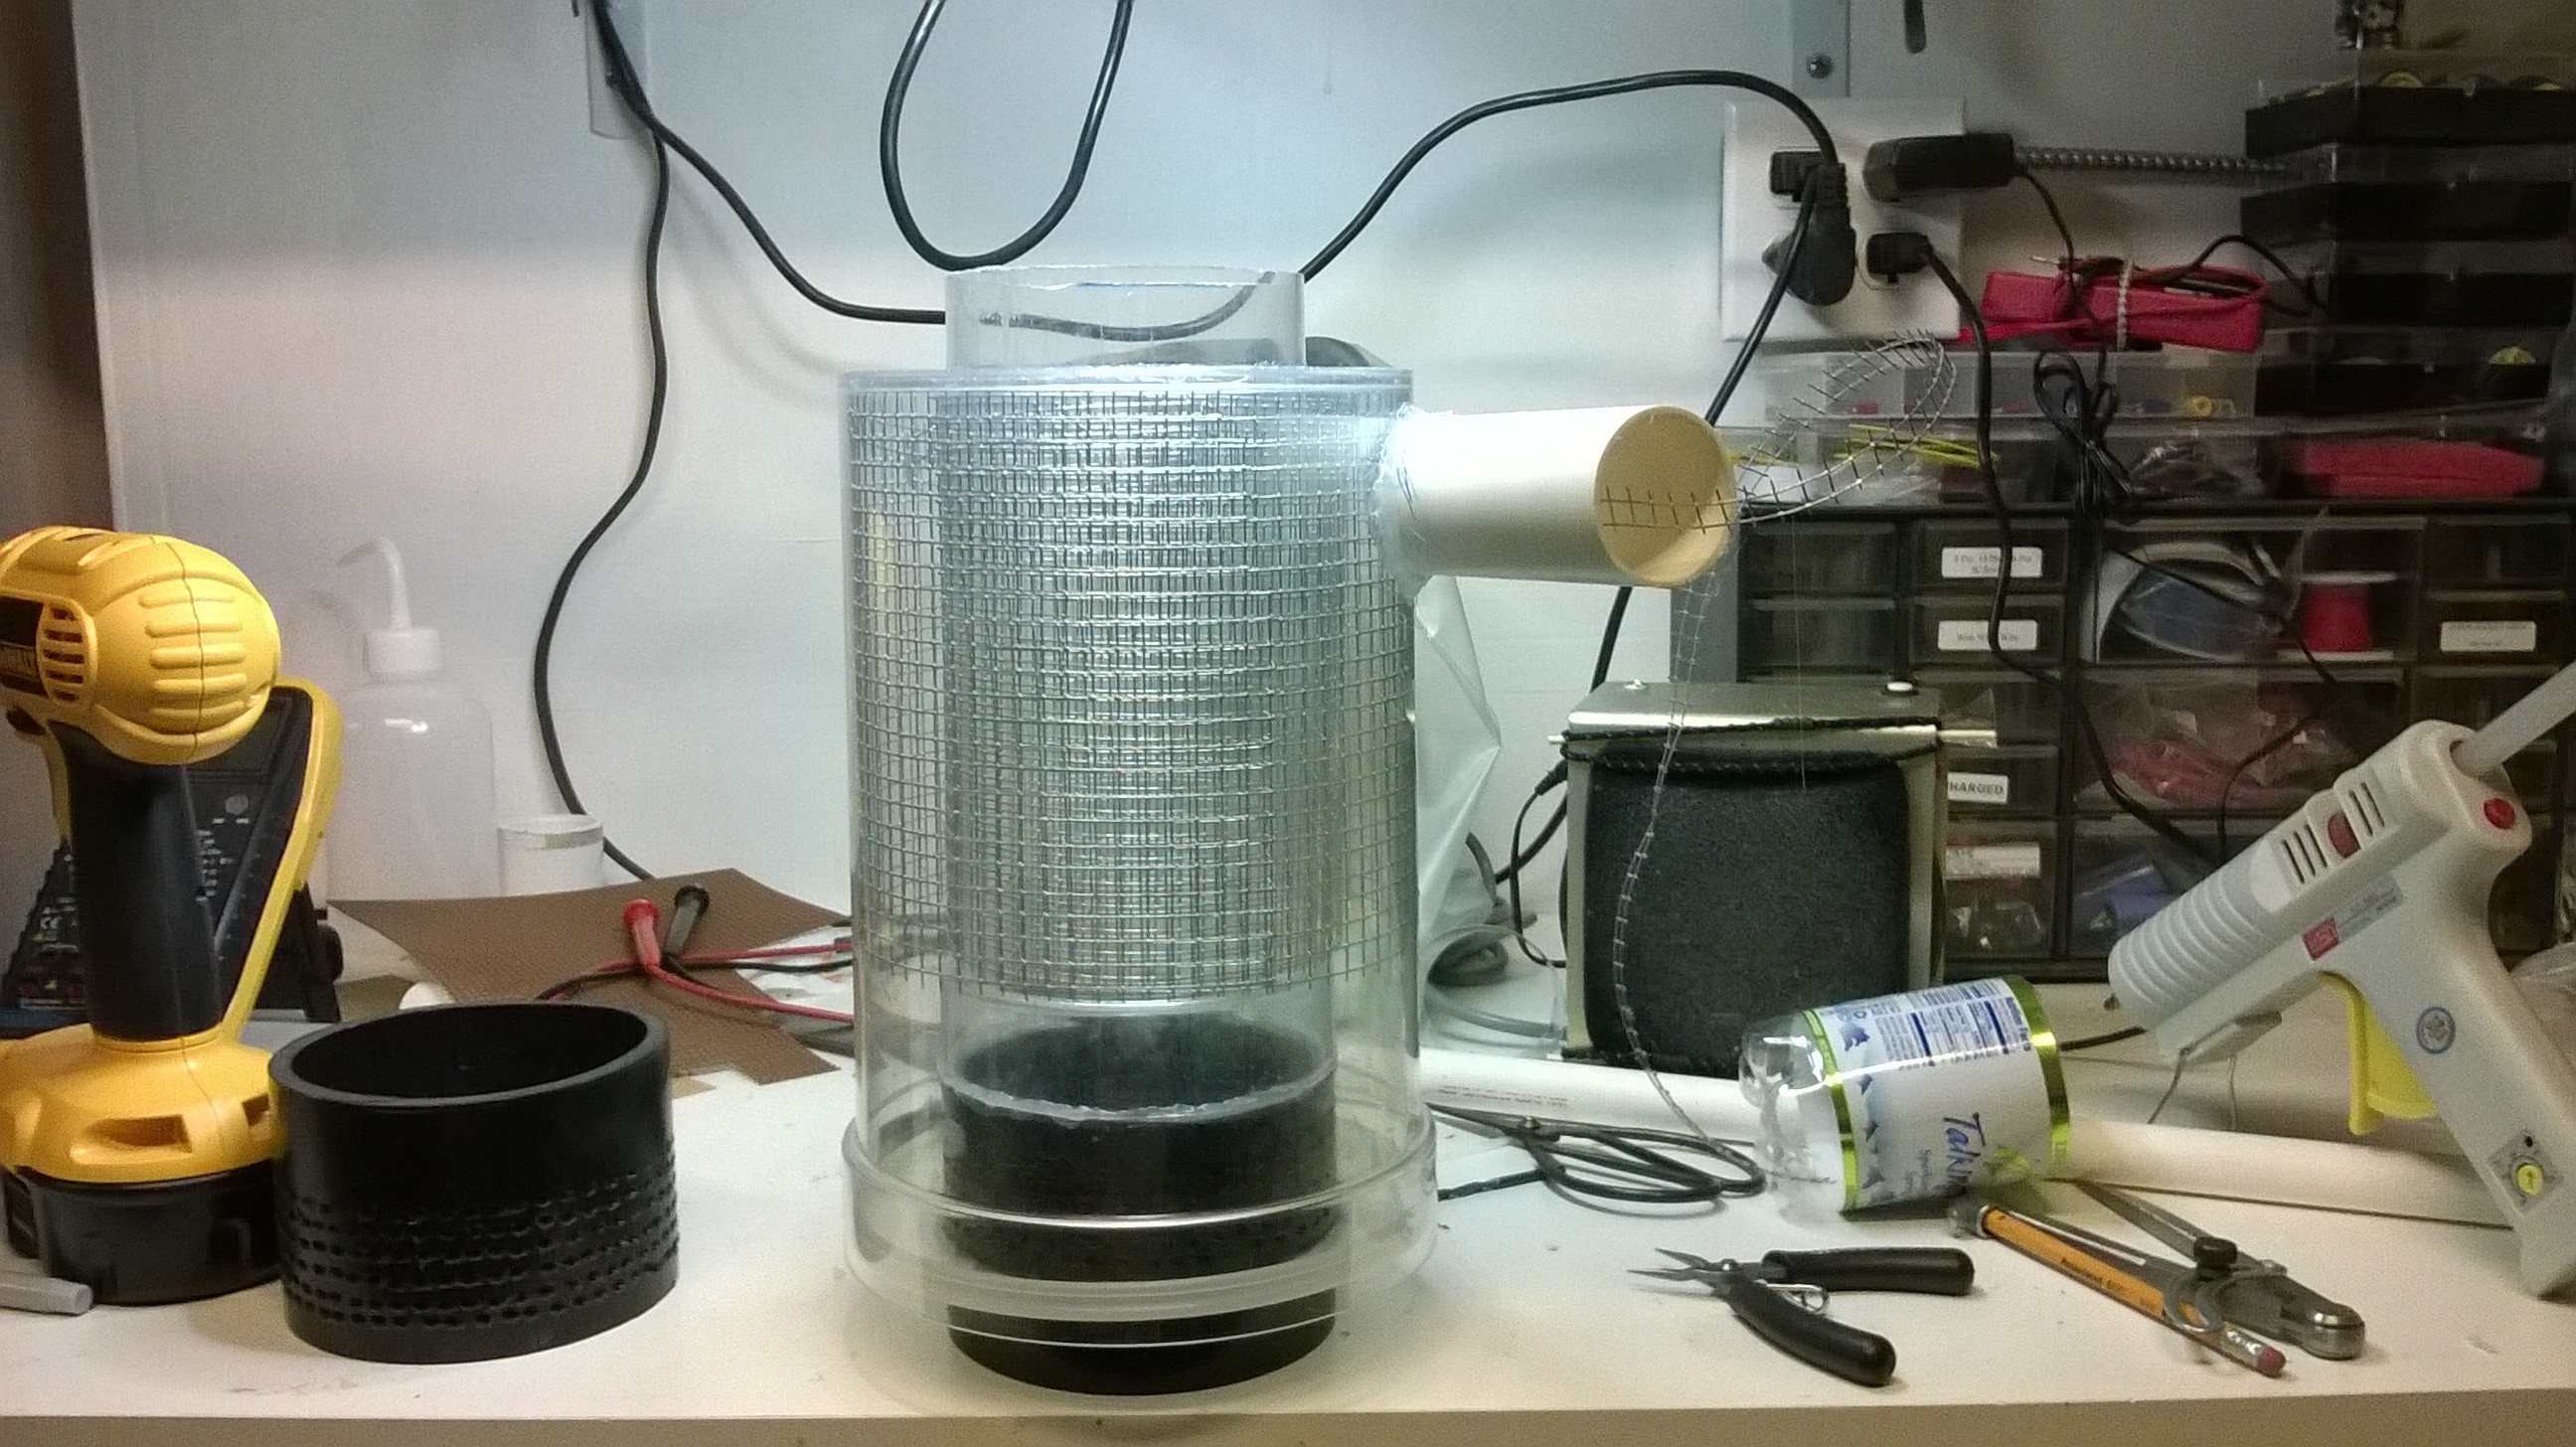
I wanted to make this prototype a little more cleaner so I used larger containers (all my material being sourced from Goodwill thrift store). I had a large clear cylindrical food container and a narrower taller one that I would insert inside. This creates the hollow walled tube.
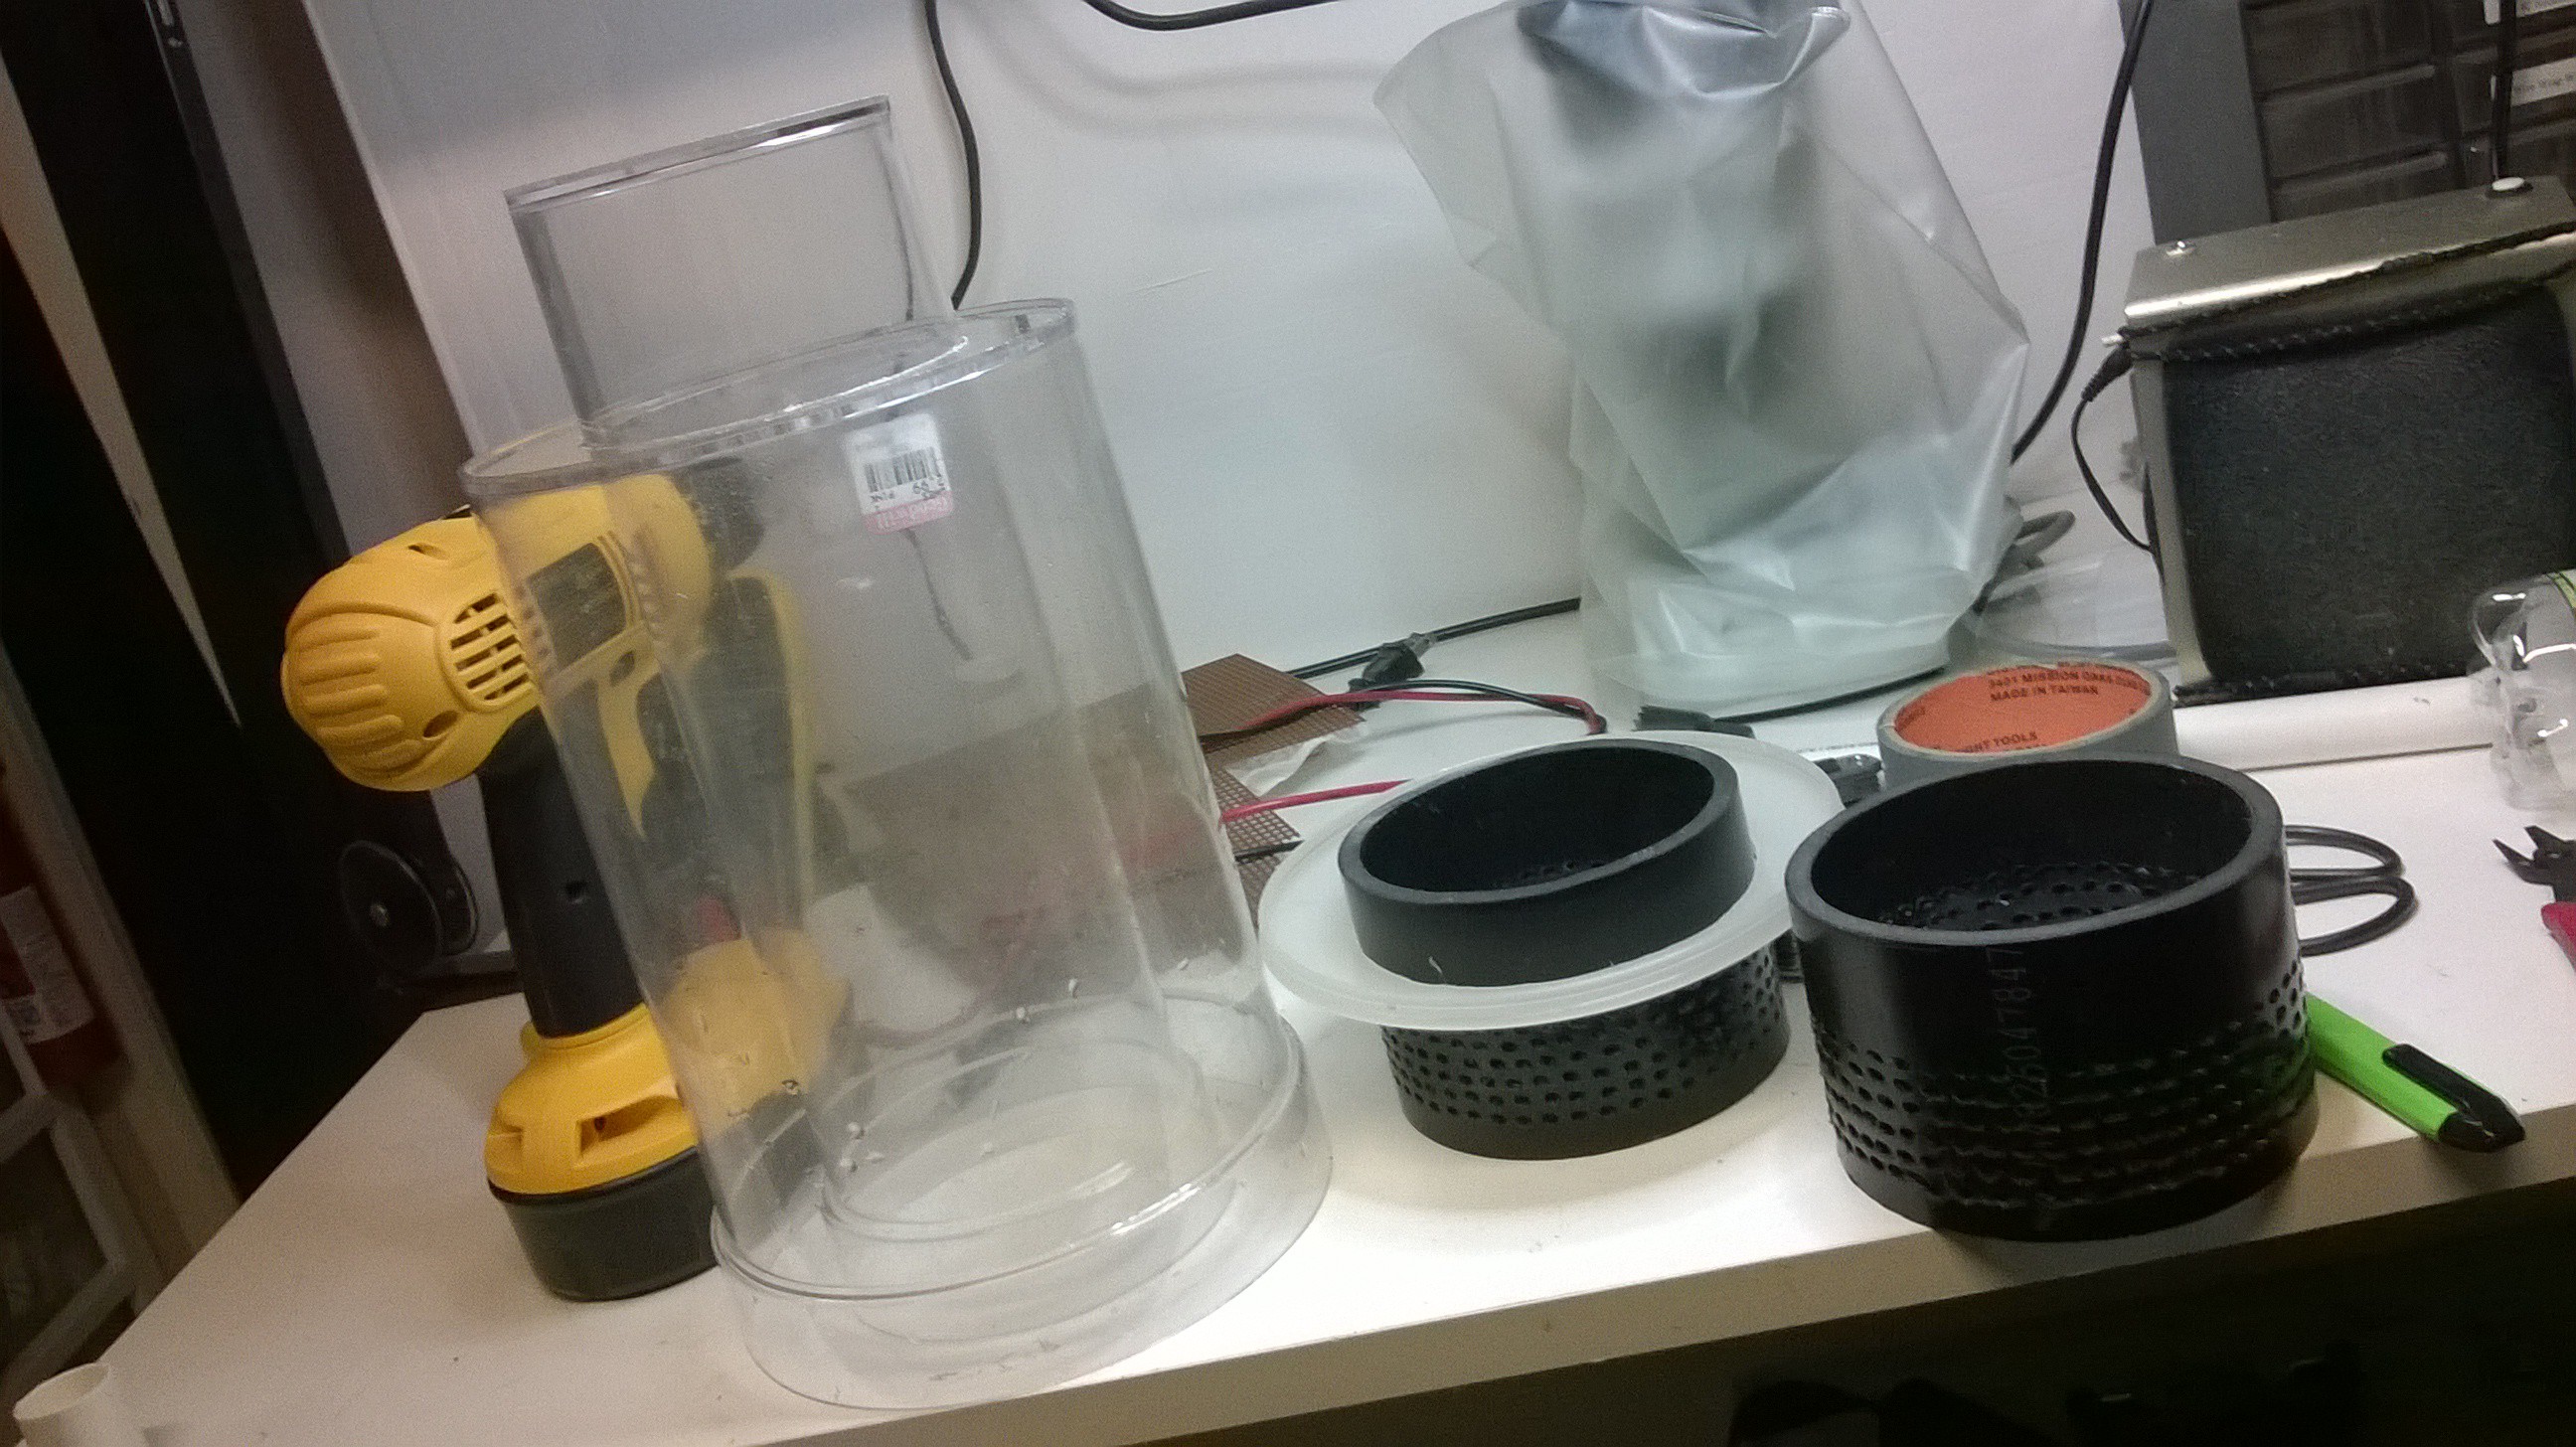
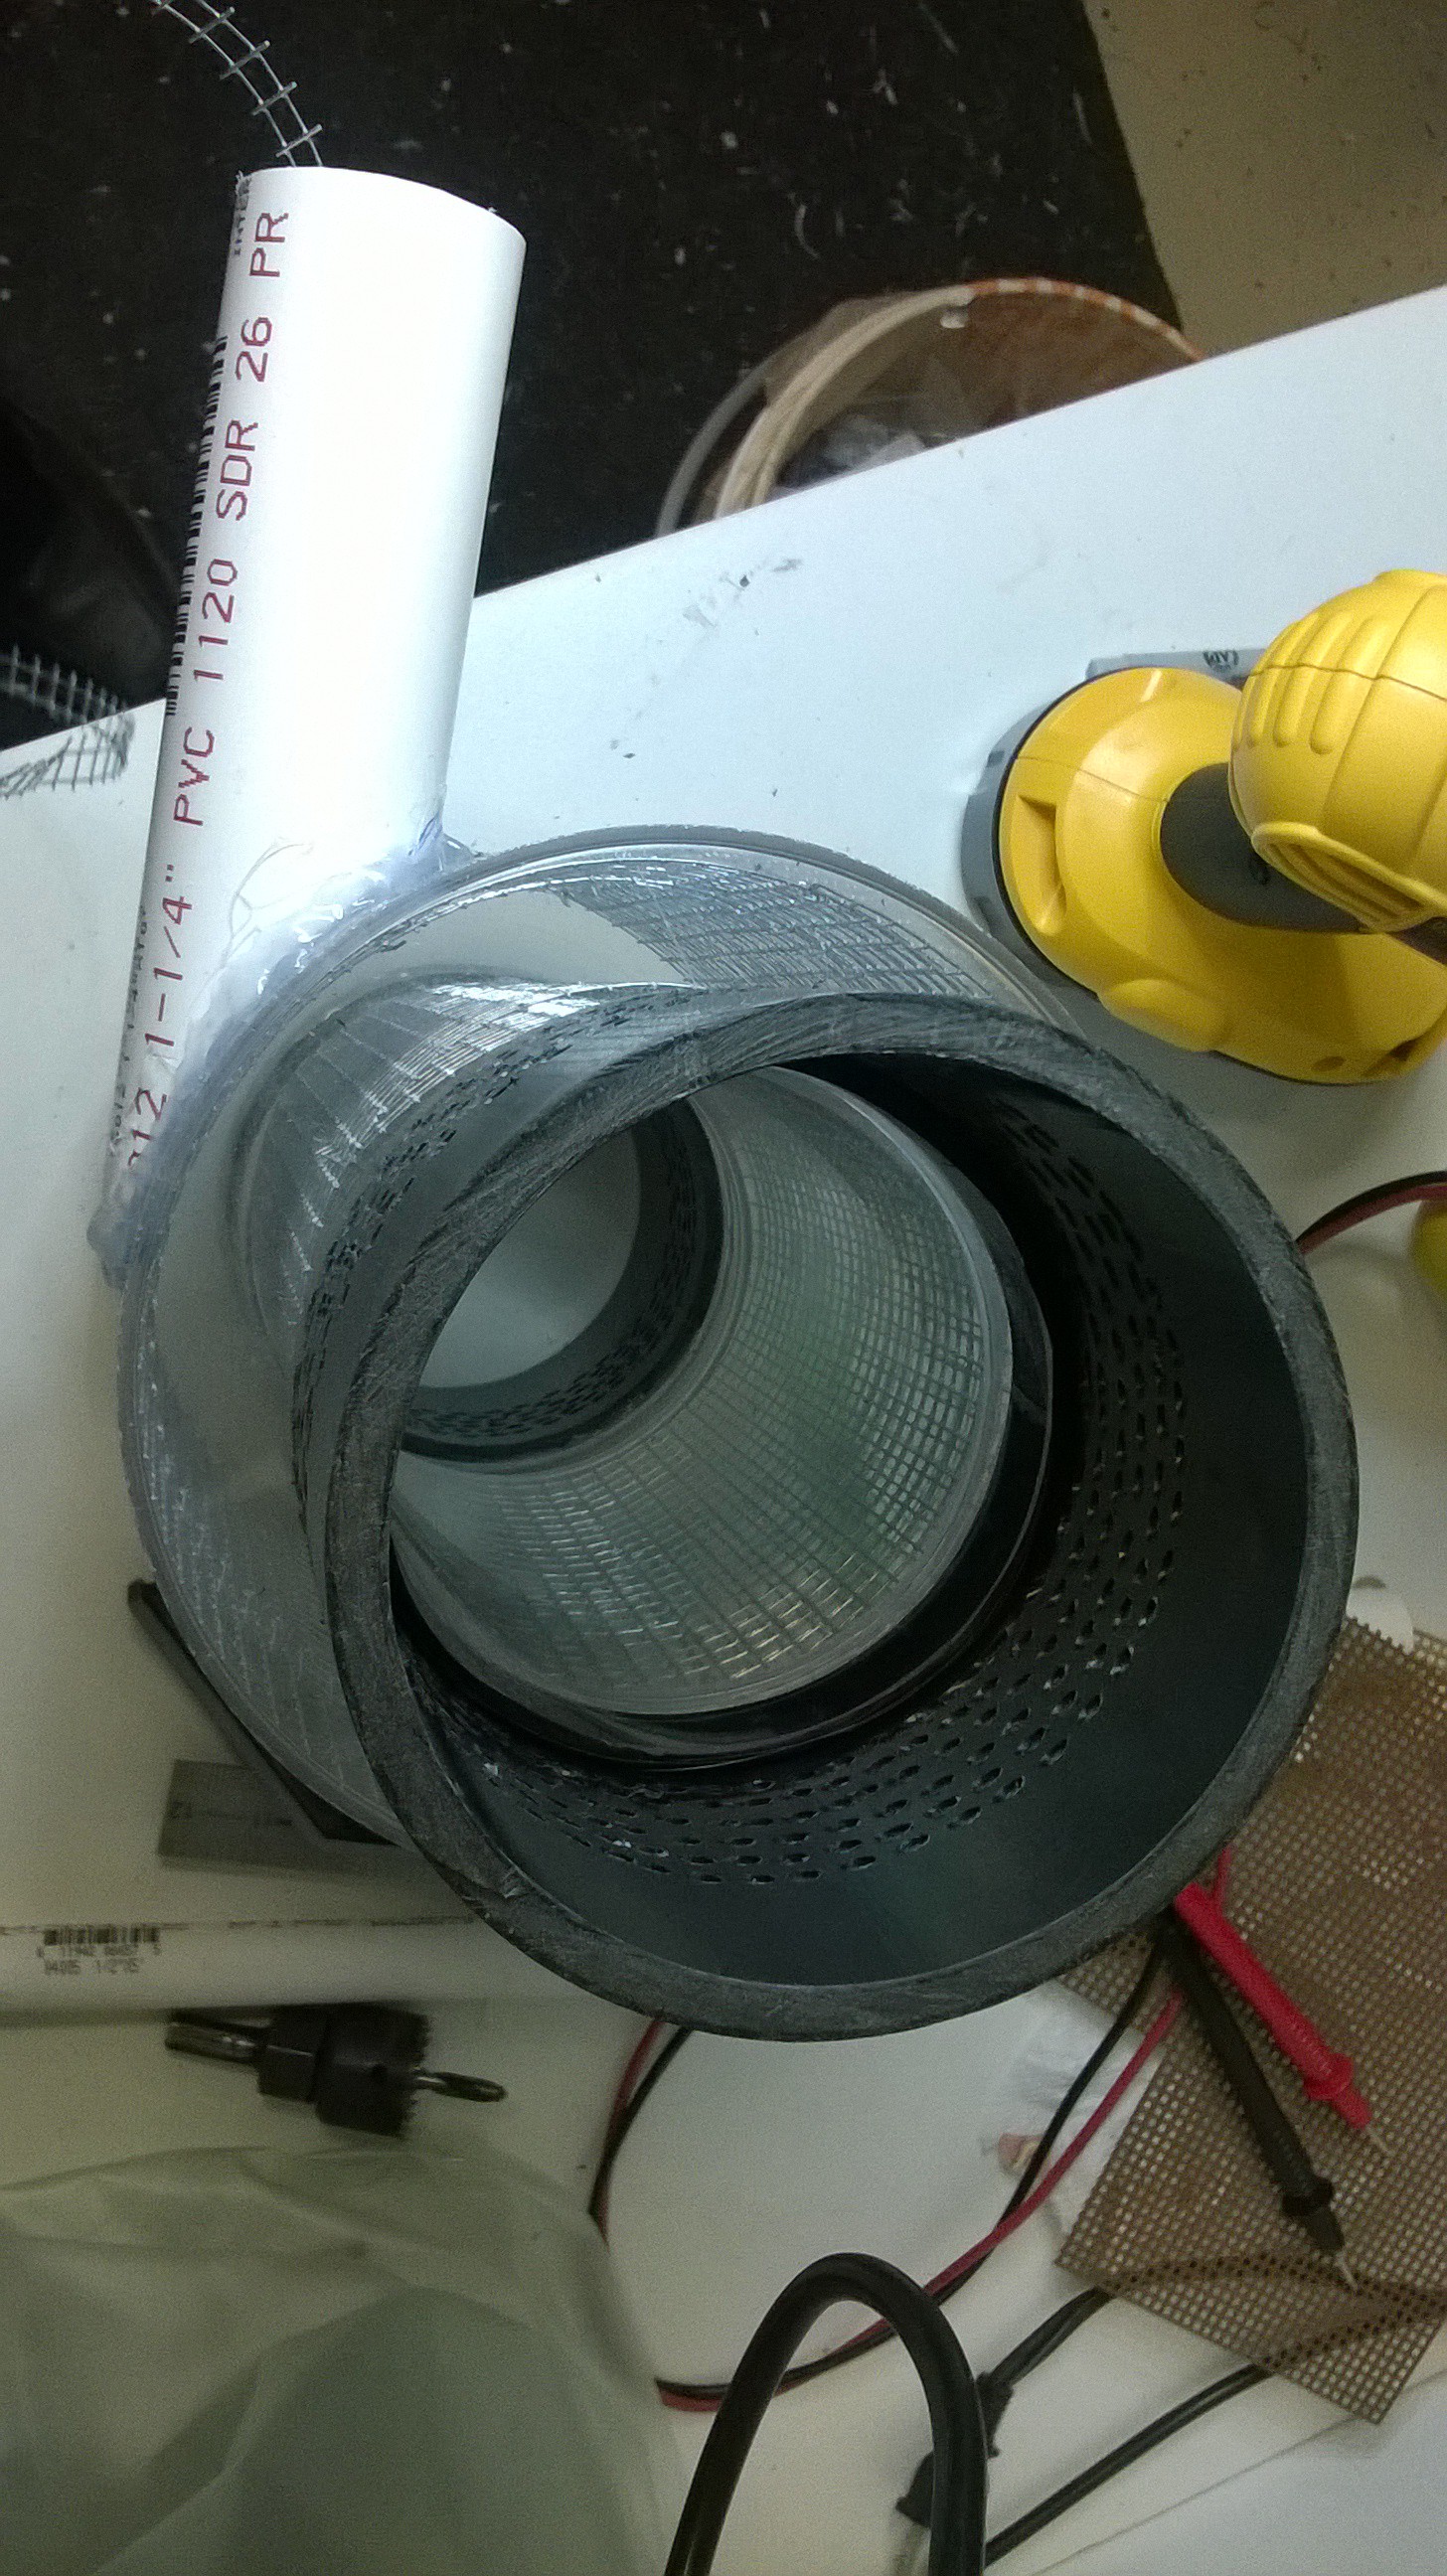
To create the spiral nozzles, took 4" slices of schedule 40 ABS pipe and drilled numerous holes that angle inward tangentially to create an inward spiral. This is much faster than drilling holes and gluing inlet pipes to create the spiraling nozzles. During operation, the entire assembly is placed in scrubbing liquid (water) with the liquid level being above the inward spiraling nozzles. Note that there must be sufficient number of holes so there is not a great air resistance placed on the blower motor.
I planned to insert the ionizing grid inside the hollow walled section of the tube. To make the grid I took some 1/4" in fencing grid from Home Depot and cut it into two cylindrical sections. One grid section would hug the outer wall of the hollow walled tube and the other charging grid section would hug the inner wall of the hollow walled tube. This allows a cylindrical path for the air to be ionized before it enters the inward spiraling nozzles. To give the incoming particulate laden air more time to ionize, I piped the inlet nozzle tangentially to the inside of the hollow walled tube causing the incoming air to follow a longer cyclonic path before it enters the spiraling nozzles.
 For the mist eliminator section, I took another slice of the ABS pipe and drilled a bunch of inward spiraling holes into it and flipped it over so it spirals outwards compared to the nozzles at the bottom. These holes help continue the spiraling motion of the misty air in the inner tube until it exists in an outward spiraling fashion.
 A bowl like container is placed on top of the inner tube sealing it forcing the misty air to exit the outward spiraling nozzles. As the misty air exist the outward spiraling nozzles at the top of the hollow walled tube, it will crash into the bowl that is placed over the nozzles, thereby separating the mist from the air. Note the number of holes on the outward spiraling nozzles must be equal to or greater than that of then inward spiraling nozzles so to let the misty air exit out the top and not escape out the bottom of the hollow walled tube and bypass the scrubbing action.
 The charge grids had a wire that ran through the air inlet pipe and terminated at a screw on a PVC "T" joint. I made it this way so the high voltage circuit could easily be attached to the terminal from the outside.
To submerge the entire assembly I used a 5 gallon bucket my Dad got for me for free at the Safeway China Express / Deli. Yes, it is a soy sauce bucket, it adds a kick of special flavor to the air... I drilled a hole into it centering the scrubber unit in the center of the bucket. I then used epoxy puddy to secure the port I created.
The entire assembly protruded from the bucket so I needed a dome type lid. A salad spinner from Good Will was perfect for this and since it was clear I could easily see what was going on inside. 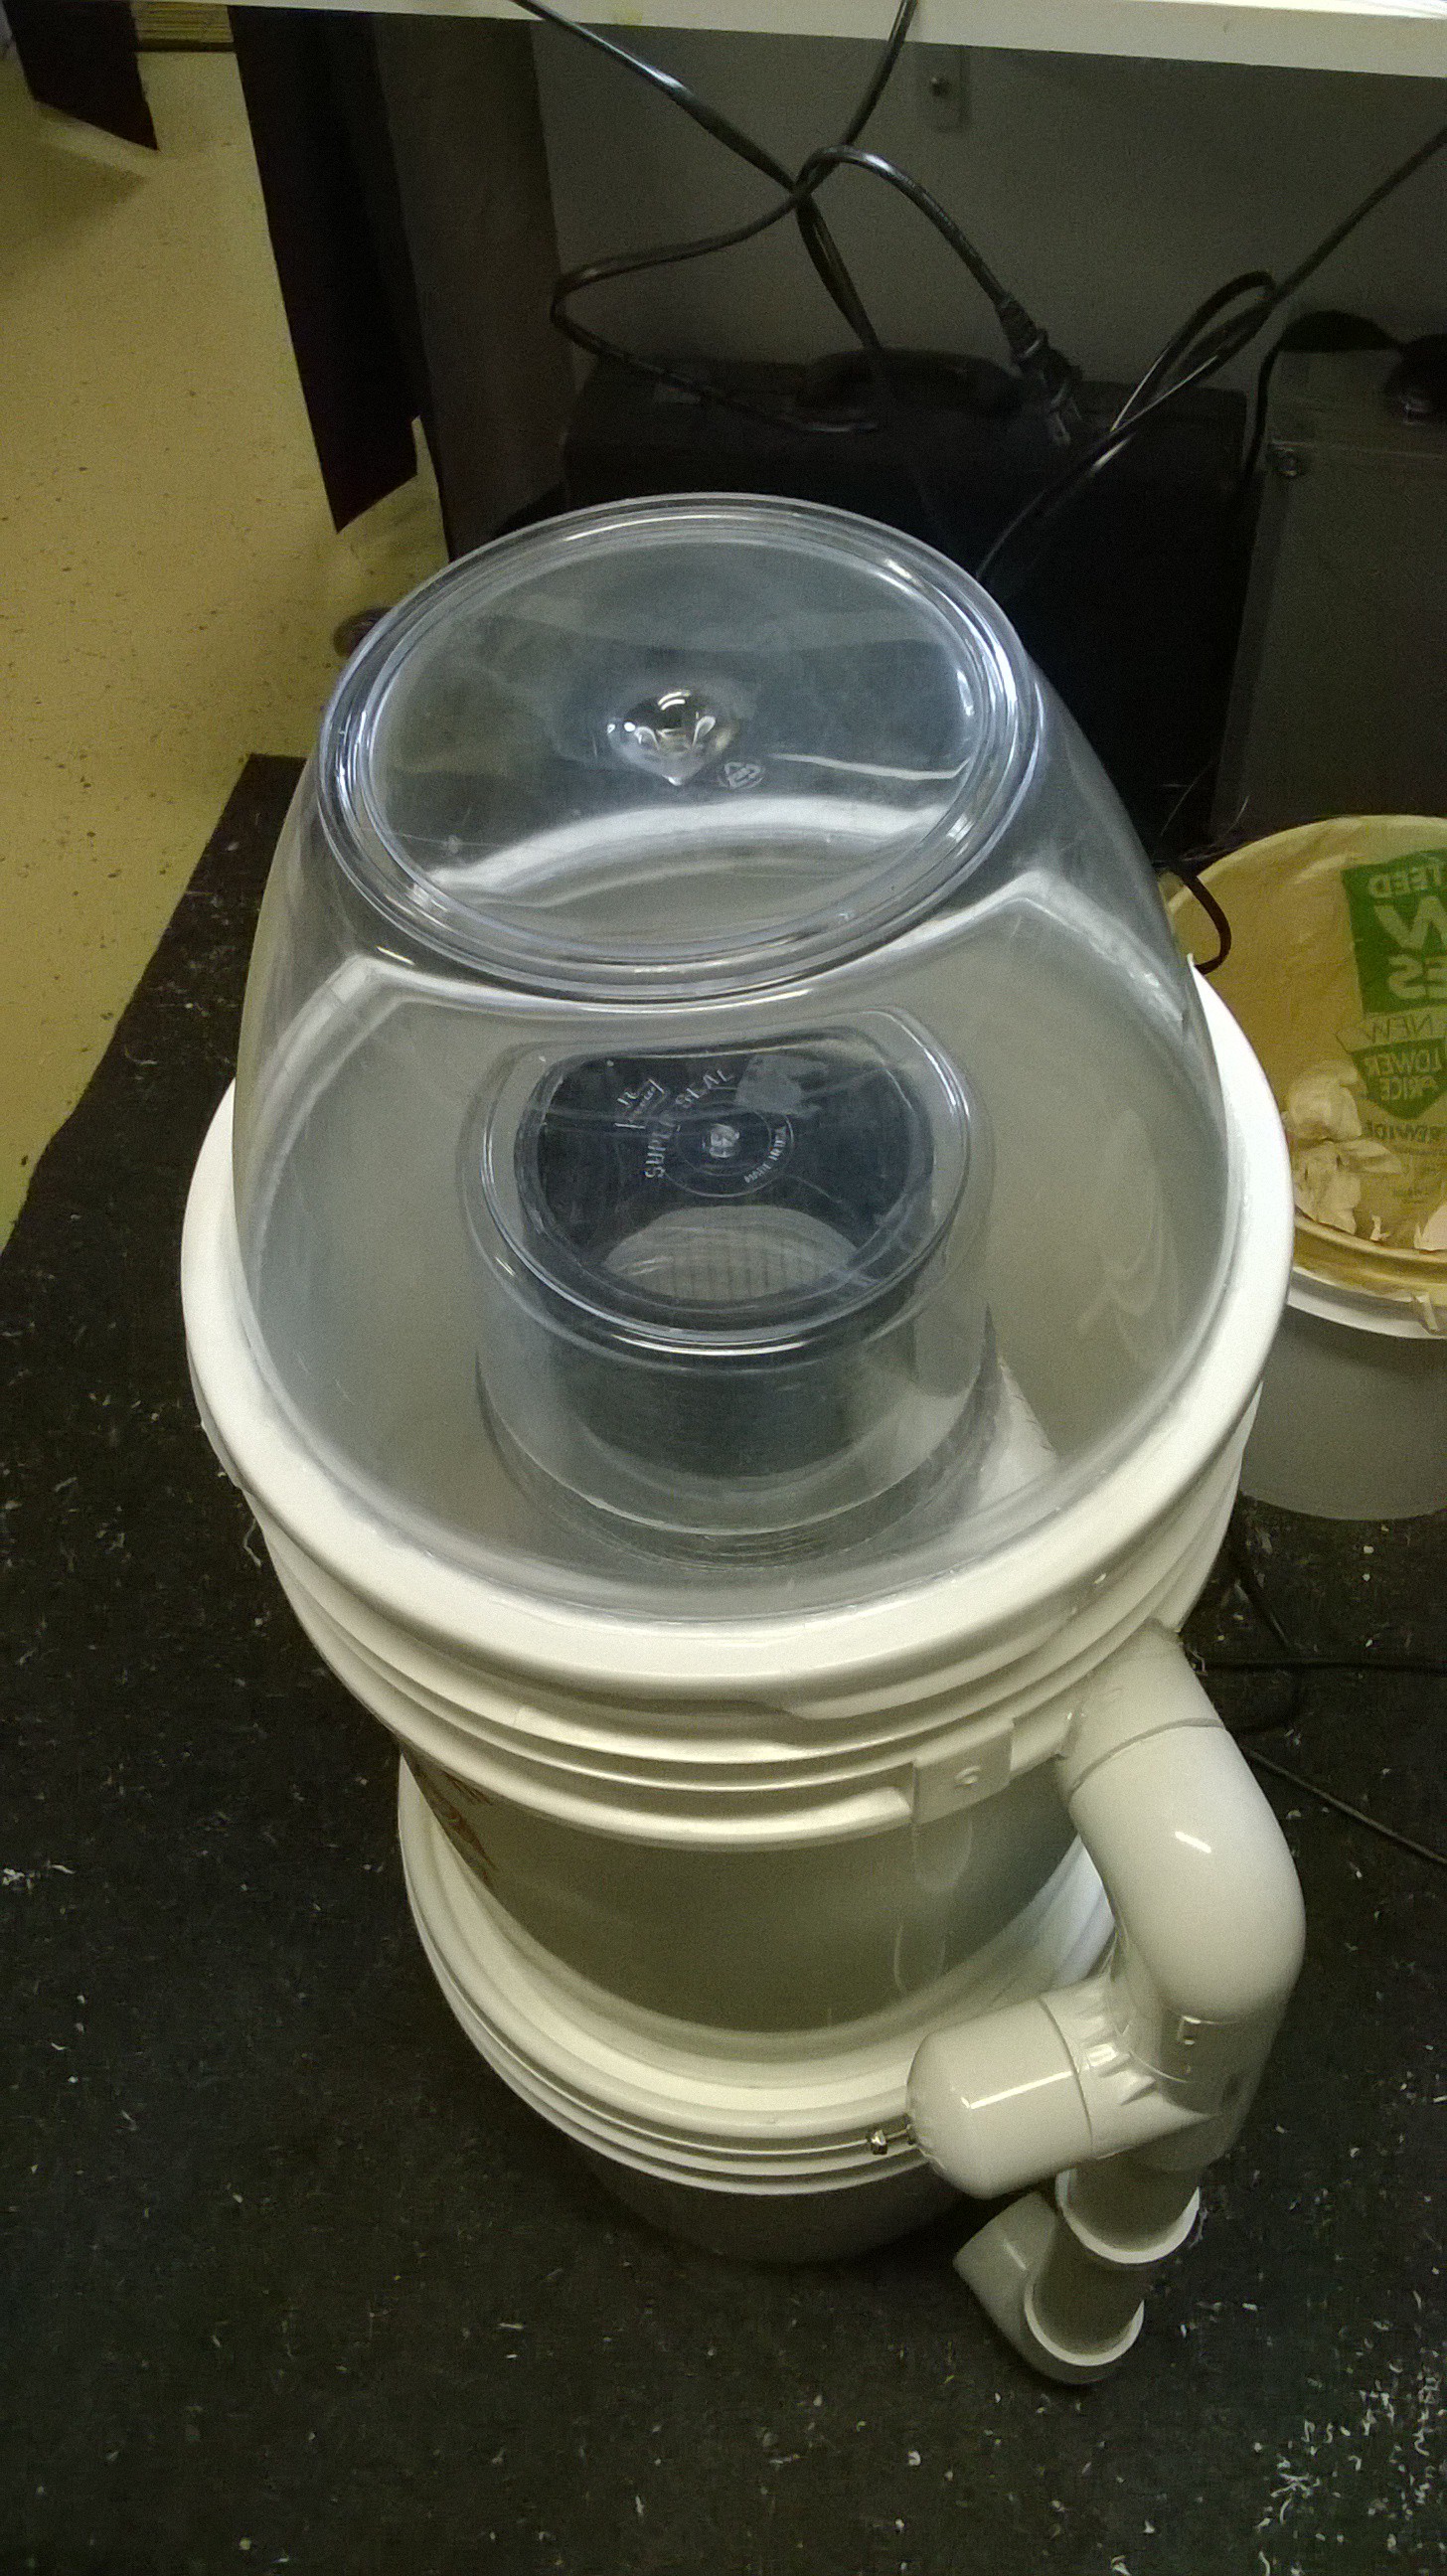
For this larger iteration prototype, I used a larger vacuum motor to provide greater air flow. I took apart a vacuum cleaner and placed the vacuum motor in a CD case so I can easily attach PVC pipe fittings to the input and output. Debating whether to put the motor and high voltage circuit in another bucket below the 5 gallon bucket, I went ahead and kept it to a one 5 gallon bucket design and placed the vacuum motor on top of everything.

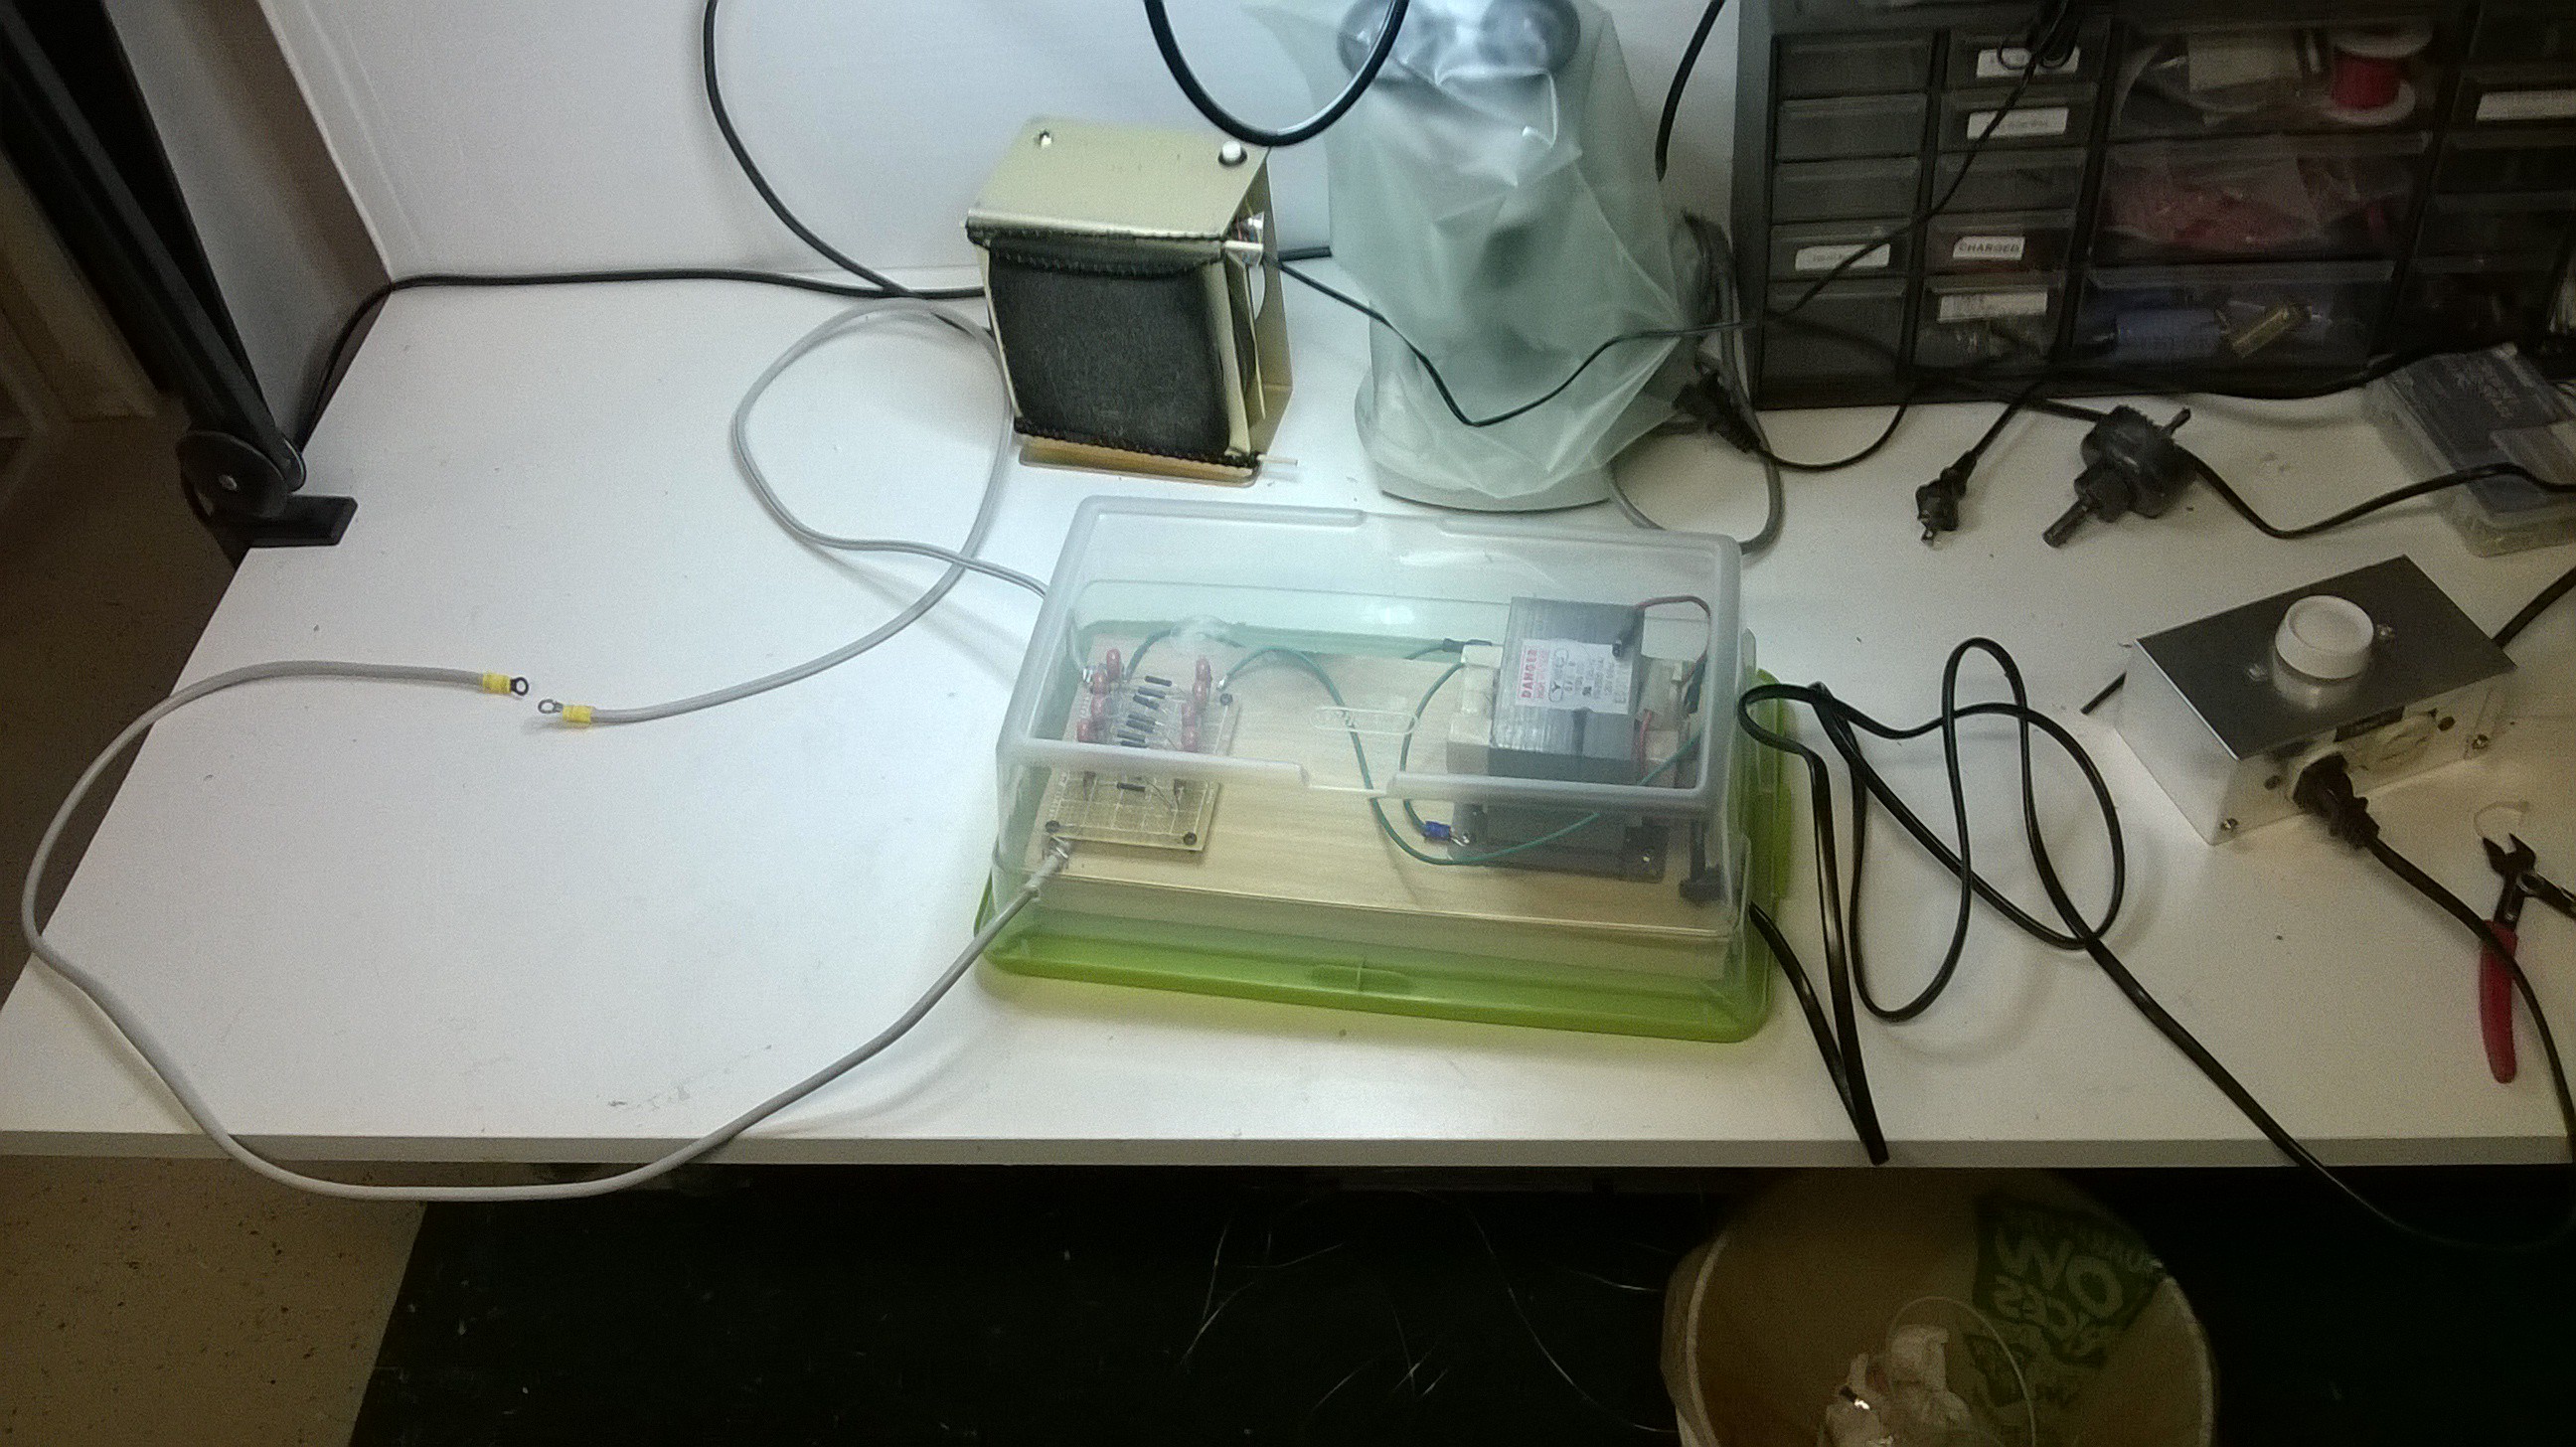
I placed the high voltage circuit inside a small plastic container to prevent me from accidentally touching it and killing myself. I screwed the components onto piece of wood with a hook so I can hang it to the side of the bucket.
Discussions
Become a Hackaday.io Member
Create an account to leave a comment. Already have an account? Log In.