Here I have a video showing my Tote walking forwards, rotating left and right and finally reverse.
I chose to build my version using double sided protoboard (however a PCB file is kindly included in the package distributed by the original author) as can be seen in the photo gallery.
I was paranoid about stripping gears on the cheap plastic geared servos that I had used previously, so I ordered some metal gear 9G servos to complete this build with. My Tote uses an Arduino Pro Mini 3.3v clone, and I have incorporated the IR sensor and remote (had these lying around) as per the build instructions. I have also implemented the battery voltage monitor for peace of mind.
I needed to redo my servo positioning when I first got the robot going. I had used the arduino command myservo.write(90) to perform my centering prior to assembly, and ended up with incorrect geometry after the robot starts up. After looking thought the code, I could see that the myservo.writeMicroseconds method was used to locate the servos once the calculations had been made, so I dissembled the legs, used myservo.writeMicroseconds(1500) to perform the centering and reassembled and all was good.
Using the Arduino Pro Mini, I had to also change the code for the hind left leg in the servos section to the following (this allowed the pins to line up exactly with the traces on the protoboard):
static const unsigned char SERVO_PINS[SERVOS] = {
// ankle, knee, hip
/* For Pro Micro
14, 16, 10, // front left
A0, A1, A2, // hind left
*/
12, 11, 10, // front left
13, A0, A1, // hind left
6, 5, 4, // hind right
7, 8, 9 // front right
};
I am pleased to say that this robot performed exactly as expected, and if you choose to build one you should be guaranteed a positive outcome if you follow the directions. I am grateful to Radomir Dopieralski for taking the time to create such a project, and hope that others will choose to build one also - I have learnt a great deal about a walking robot from this project.

 lbinder
 gumballrabbit
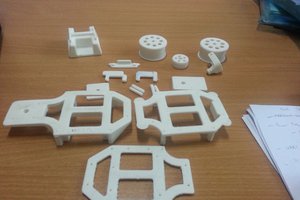
 shamylmansoor
 Norbert Zare