 tlankford01
In the above link you will go to my thingiverse page and be able to download the files to 3D print this object. If you do not have a 3D Printer you can go to 3D Hubs and order from my hub or from a hub closer to you. I will give the actual instructions for 3D printing on the next step. This step is more of a discussion of designing parts for additive manufacturing while adhering to industrial design principals
The pictures for this step are 3 of the 8 pieces that are required to build this camera housing. I wanted to show what I am starting to do in my designs to look more and more commercial. The goal is to create an item that is virtually indistinguishable in quality and appearance, from an item that can be purchased on the market.
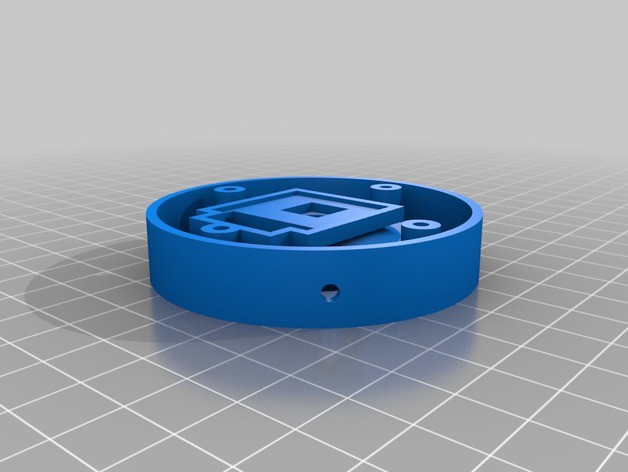
The disc shaped piece is the inner camera cone and recess to hold the 38mm acrylic protective lens. On the side we can see in the rendering, we also see the screw hole supports and fitted recess for the actual camera board. Adding these make for a strong piece but also shelling out the design also makes for a lighter piece that looks like a piece that came from a factory. Lighter pieces also translate into less filament used and faster printing times.
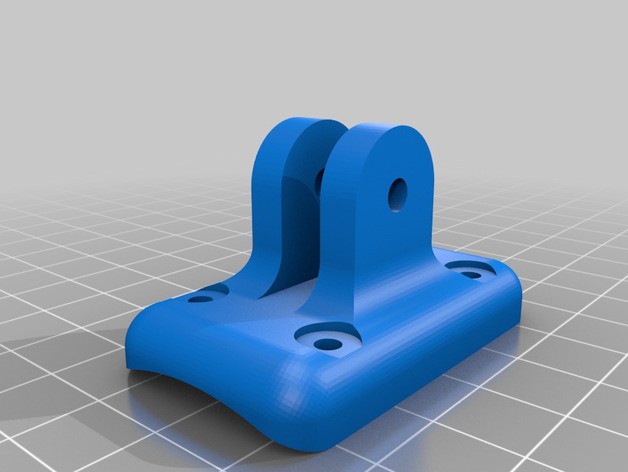
The second piece is actually the bottom mount of the entire camera cylinder housing. It is an exterior finished piece as well as structural. To make a piece strong and attractive we fillet (curve) the edges especially perpendicular support pieces. This smooths everything but also provides base support to cross connected pieces. Finally we recess our screw locations and we use stainless steel button head screws. The screw heads are exposed so these will not rust and they are also attractive since the head is rounded.
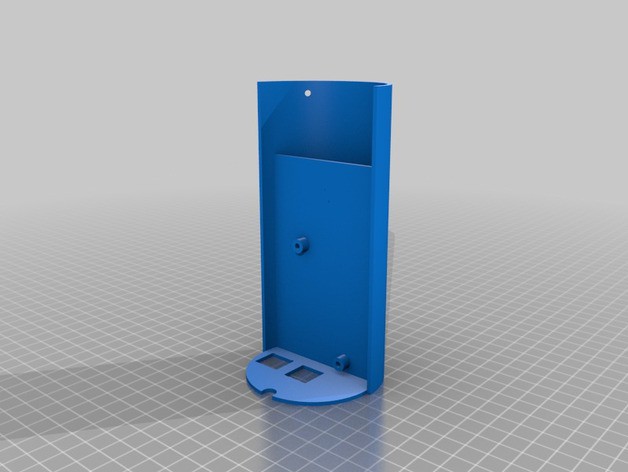
Our final example is the main housing. it is printed without supports and is strong and has integrated hardware locations to secure everything in place. The Raspberry Pi is secured to its own mounting posts and the wires are all routed through a specific channel to keep them secure, dry, neat and out of the way. We will see more examples in the printing and assembly steps.
Discussions
Become a Hackaday.io Member
Create an account to leave a comment. Already have an account? Log In.