 leadacid44
When I discovered that the contact disks were failing on the keyboard, I decided that I wanted to try to make a new set. I chose this instead of coming up with some different method of achieving the same goal. In my research I had heard of several people doing kooky things, like wadding up tiny balls of tinfoil and putting them inside the keyboard. There were also anecdotes of people making new disks by taking stiff plastic and gluing it to foam and then gluing a thermal blanket or some kind of foil to the opposite side of that, effectively recreating the original sandwich. I decided to go down that path.
So I dug up a thermal blanket that I had laying around, and tried poking it into the contacts on the keyboard. Letters appeared on the screen! Huzzah! That told me that the blanket would work, and probably more importantly, that the keyboard itself and its associated electronics still worked.
So I decided that would be a feasible route, so I'll just cook up a new set of disks. How hard could it be? Famous last words.
First things first, I took some measurements of the disks. Because of how flimsy and degraded they were, and the lousy ruler I had, I wasn't sure if they were metric or standard. Either 11mm or 7/16" in diameter.
The next question was how to cut the materials into little disks. I had debated whether or not to cut the disks first and then glue them together or to somehow cut them after the fact. On one hand, cutting them before would allow the use of a vinyl cutter, a hole punch or something else like that, whereas a complete sandwich may be too big to fit in the tool. But on the other hand, gluing those disks together after the fact and getting the alignment right would be darn near impossible.
I did some Google searching and came to the conclusion that there was no such thing as an 11mm OR 7/16" circular hole punch. Larger? Sure. Smaller? Sure. Goofy star-shapes? Sure. But round 11mm? Nope. And even if I DID find one that was the right size, often they had a very small (read: paper thickness) punch limit and cost a small fortune.
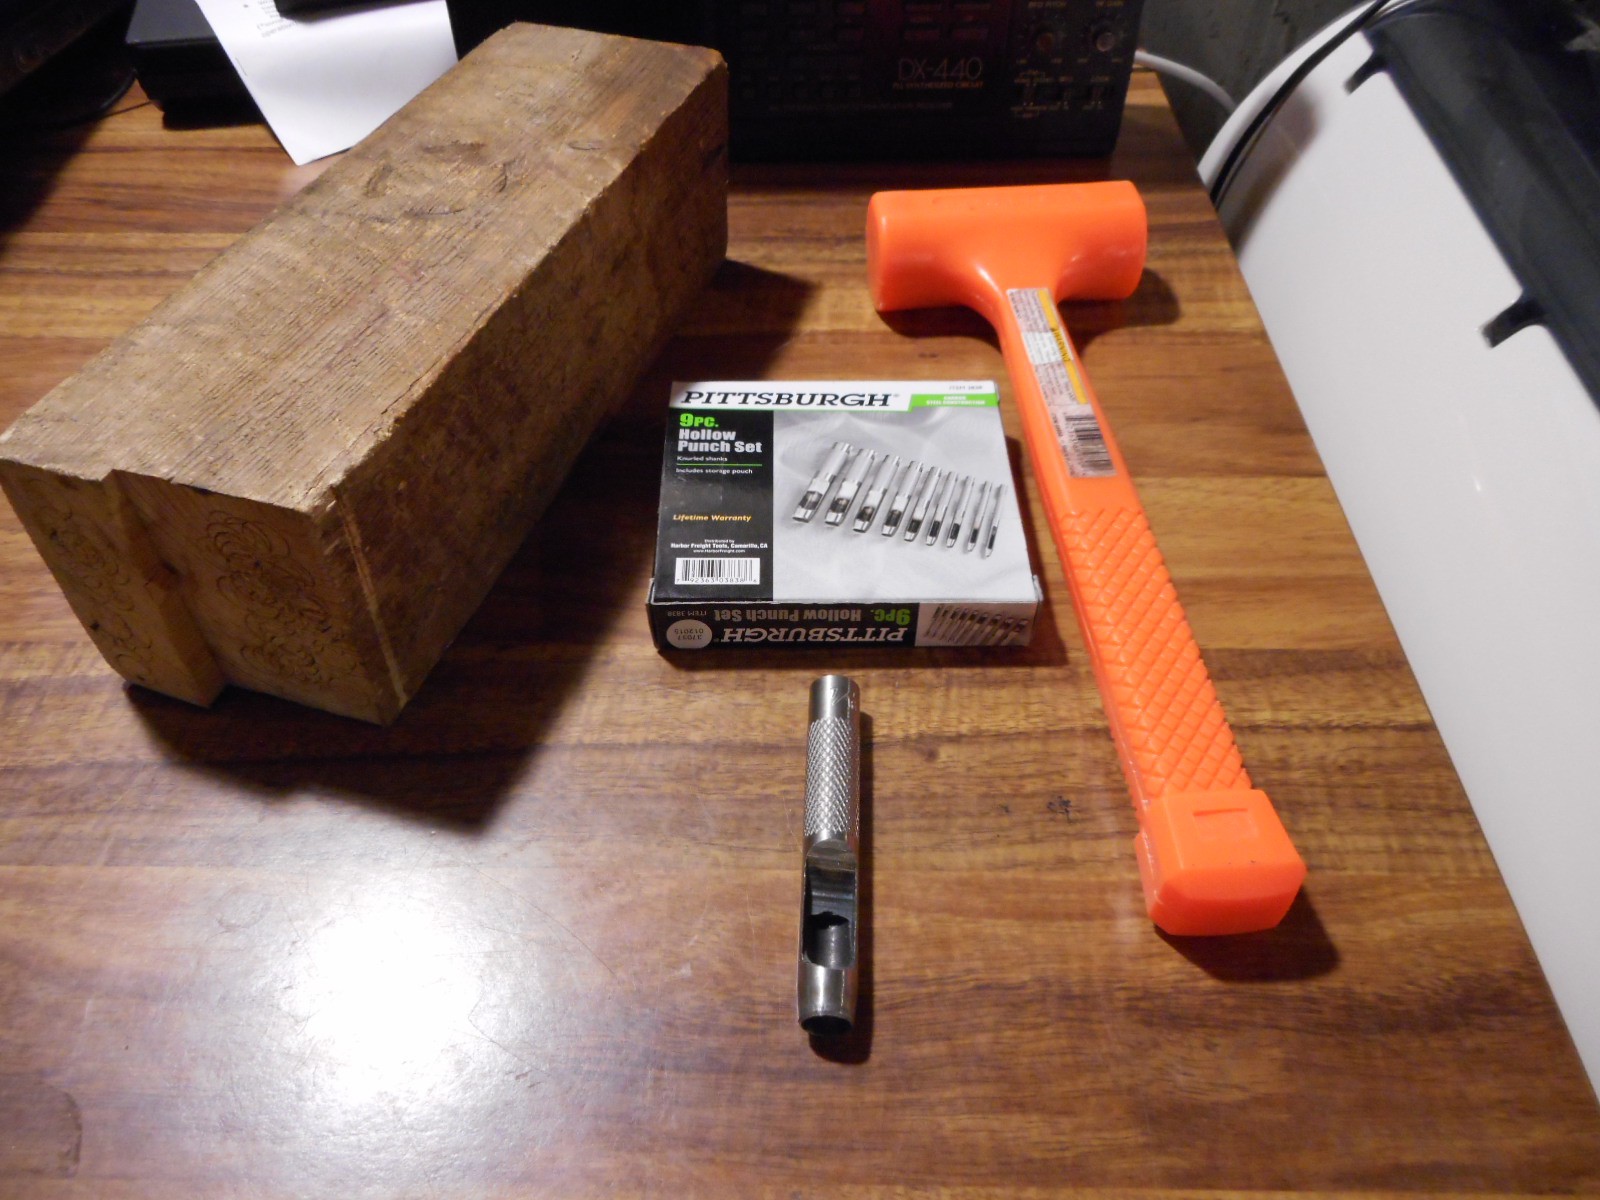
Finally (and I honestly have no idea how I even got to this idea) I thought of a leather hole punch. I did some more Googling, and found that Harbor Freight sells a set of hollow punches intended for leather crafting, and included in the set is a 7/16" punch. Huzzah!
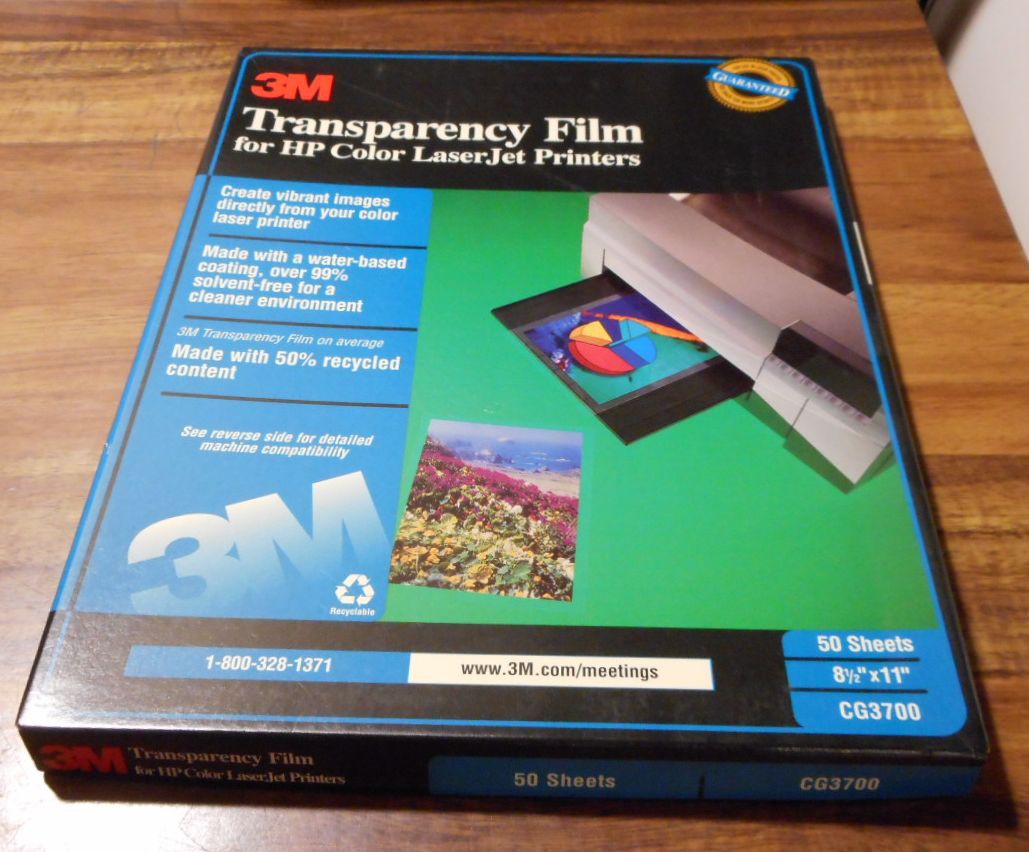
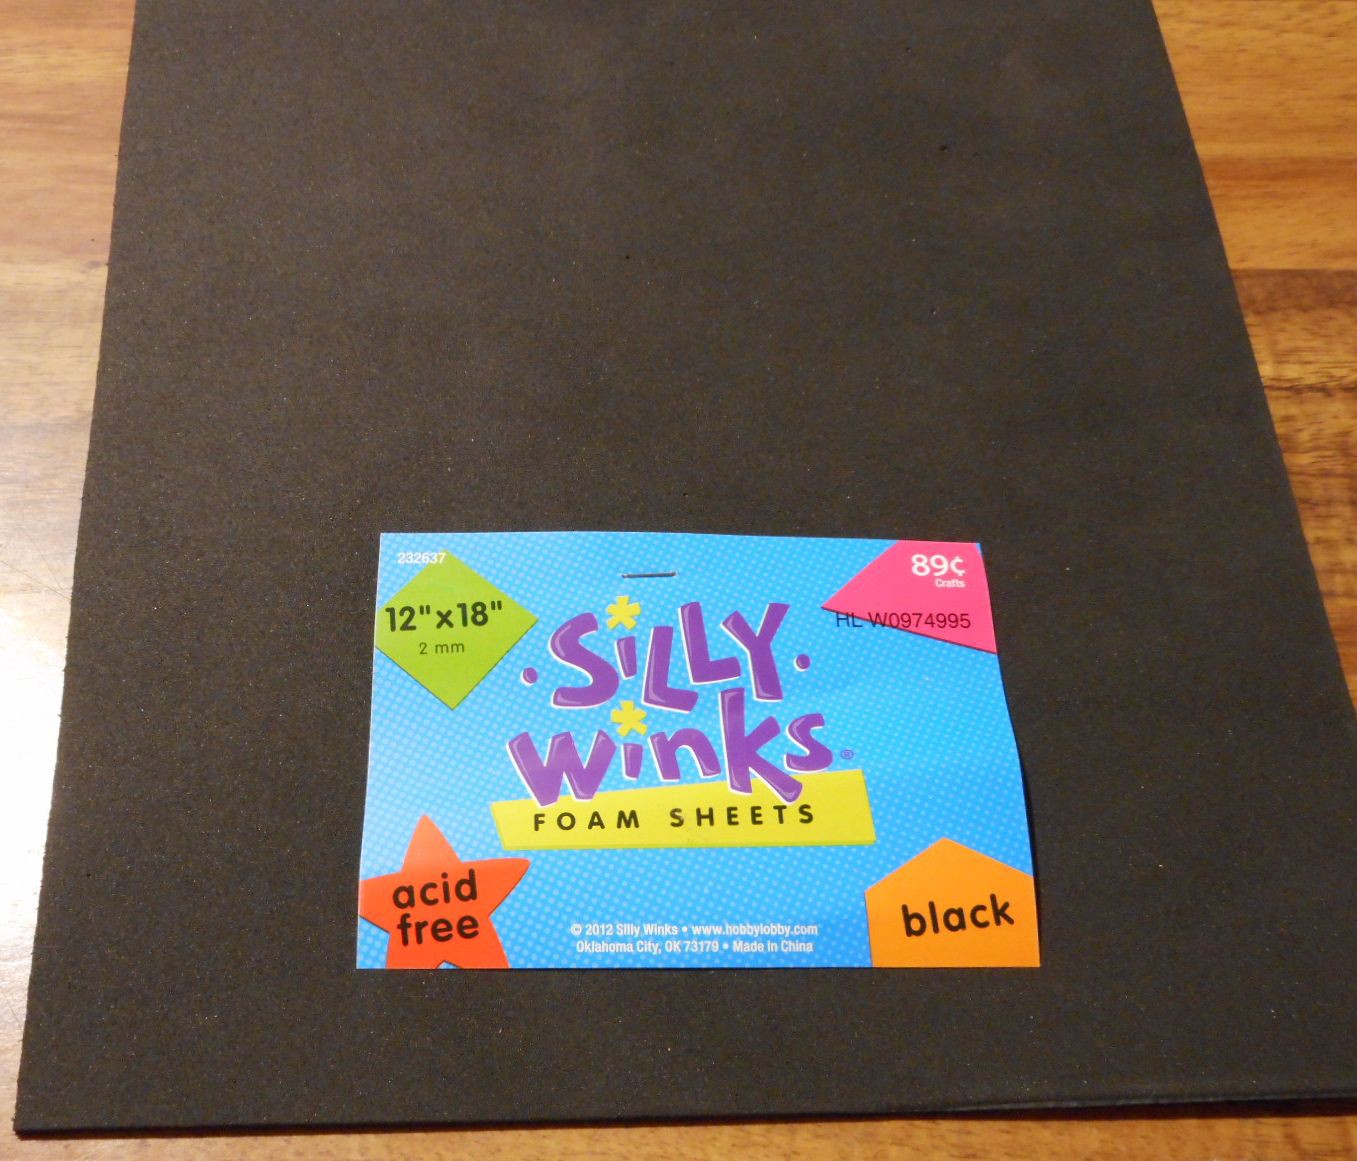
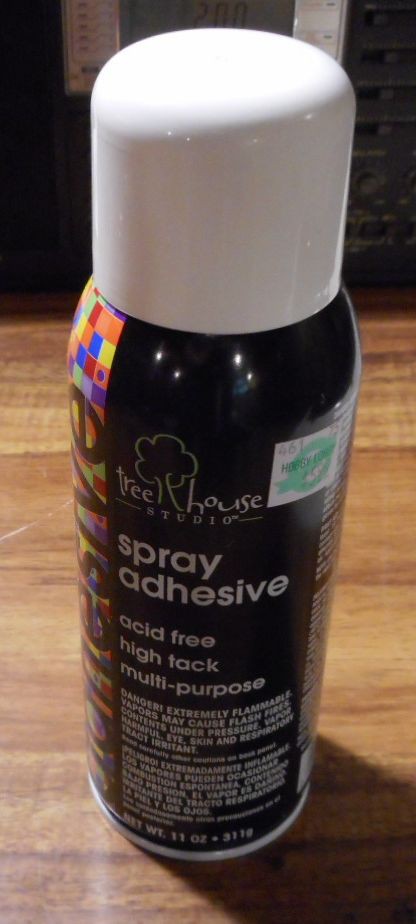
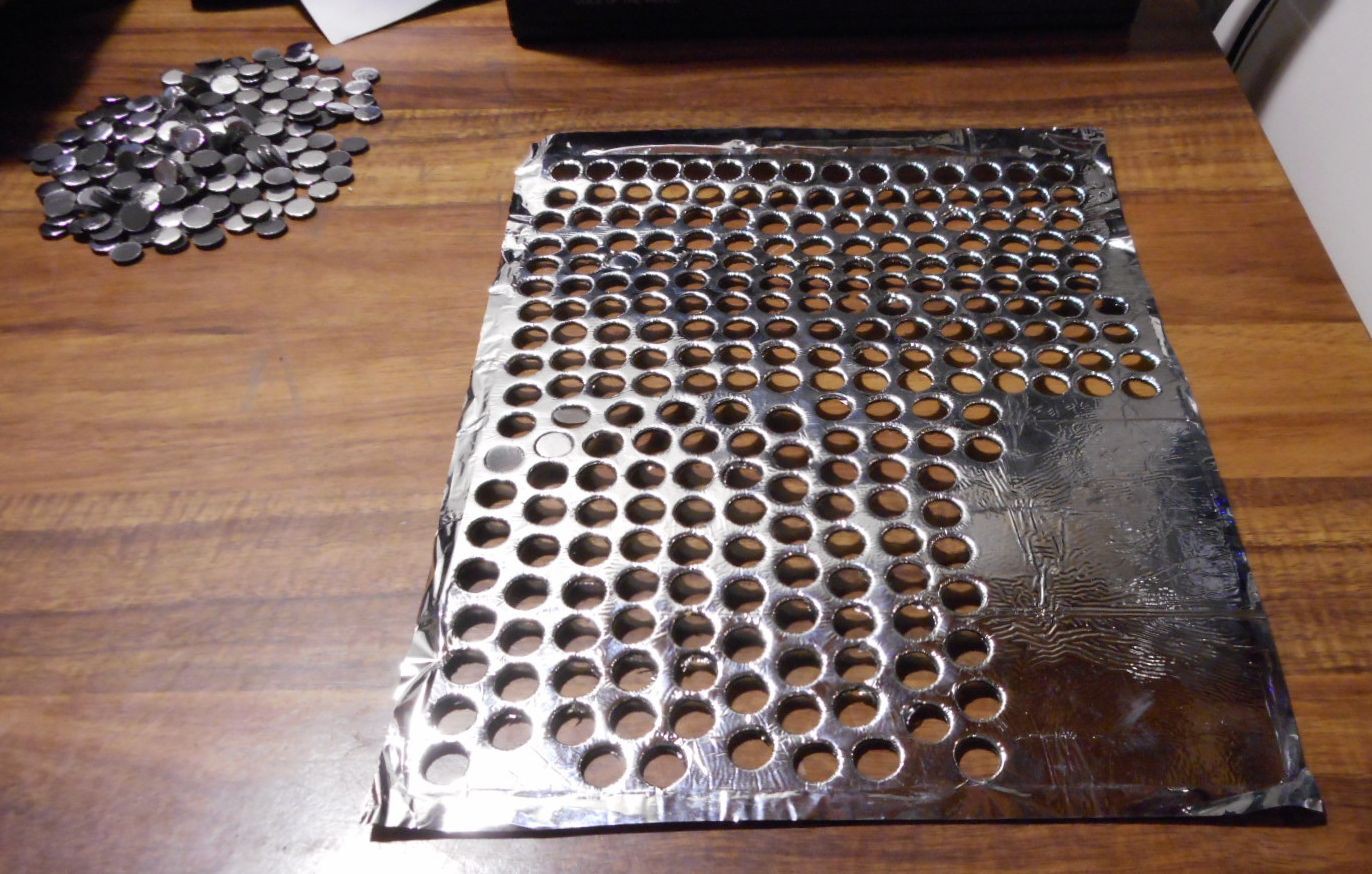
So I dug round the house, found some old 3M transparency film I had laying round, grabbed my thermal blanket, a took a trip to Hobby Lobby to get some black craft foam and some spray adhesive, and rounded out the afternoon by going over to Harbor Freight and buying the punch set.
I liked the transparency film as it was somewhat stiff, strong, but not brittle. Excellent for this project. Also, I didn't need to buy any. Always a plus. Honestly, I don't know why I have the stuff. Who uses transparencies anymore these days?
The foam I grabbed was the thickest sheet foam I could find that was still kind of dense and what I figured would hold up to the abuse. I figured if anything this would be my weakest point, but also the cheapest part to change out if it didn't work.
As for the glue, I went with spray adhesive. I would have gone with 3M Super 77 if I could have justified the high price of the can. So I went with TreeHouse Studio glue, which I can't seem to find anywhere online. It had the most VOC warnings compared to the others on the shelf, so I figured it had to be good.
So I glued up a sandwich, stuck it between some heavy boxes and the floor to allow it to cure completely under pressure, and called it a night. Of particular note, when you're gluing something like this, I did the spray-on-and-then wait-a-minute process, which seemed to form a very good bond between the layers. Of particular note, if you are like me and have some...shall we say...hairy arms, be sure to wear a long shirt or something to cover your arms from the glue overspray. While it wasn't bad or anything...the atomized glue has a habit of condensing on your arm hair. It is a very...annoying feeling.
Speaking of applying the glue, I found that applying the glue to the heaviest item was the only way to go. For example, don't try to spray the glue directly onto the Mylar space blanket. It will curl up and generally be a pain to work with. Instead apply the glue to the transparency and bond the foam to that. Then glue up the foam, and apply the space blanket to that. A heavy weight on the sandwich ensures a good and consistent bond between the layers.
The next day I took to the sandwich sheet with the hole punch with gusto. If you end up doing this, I recommend using the punch against a block of wood. I ended up using a combination of end-grain on a 4x4 or side-grain on a 2x4. It seems that when you use the end-grain as a blocking material you get better initial cuts while the tool is sharp, but once it starts to dull, use the side-grain. In either case, use whatever works to create perfect little disks without tear-out or odd creases in the transparency plastic. A dead-blow hammer seems to work really good as well. Your mileage may vary, so like I said, use what works best for you.
So I started wailing away on the punch while listening to a baseball game like some kind of madman and ended up with a little pile of new contact disks. Huzzah!
So, I spent the time popping them into the keyboard. This was a PAIN. Tedious work. It took me another evening (and another baseball game) to complete the job. The key when putting them in is to get them seated perfectly into those four plastic clips. You want the disk to sit neatly and flush in that little spot. I found that using a small bent paperclip, a AAA battery, a pen, or a small pointy screwdriver to really seat them in there was key to getting them to stay put.
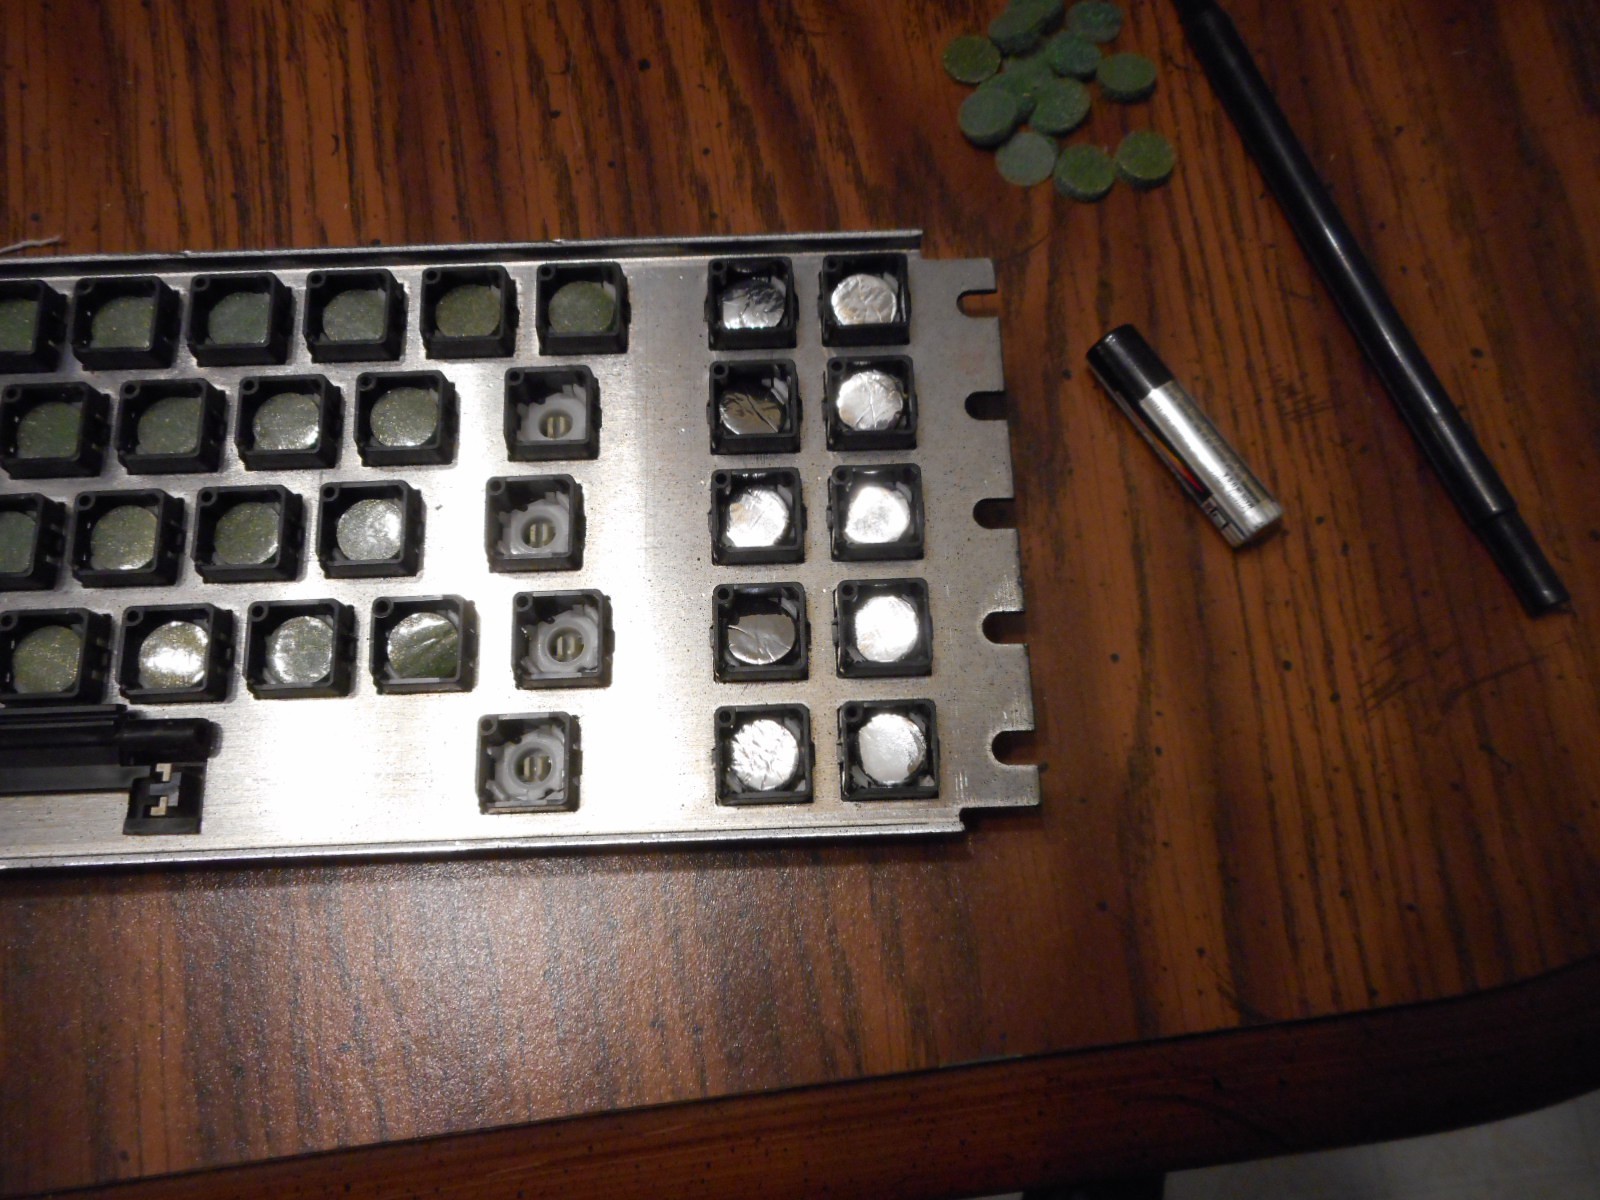
So I spend the time to get them all put into the keyboard, I tidy things up, put it all together and power on the system.
And when I to go try typing I get...
Nothing.
Nada.
Zilch.
I couldn't believe it! I went through all that work! What happened?
Discussions
Become a Hackaday.io Member
Create an account to leave a comment. Already have an account? Log In.