 Hexabitz
There are currently two ways to load and update firmware on modules. Both ways work on individual modules only. You cannot yet do mass update for the entire array.
1. Using ST Factory Bootloader and Array Ports
The microcontroller (MCU) used in Hexabitz mainstream implementation comes from the manufacturer (ST) pre-loaded with a small application called factory bootloader. This application allows loading a new firmware to the MCU via one of the UART interfaces connected to array ports. The port that enables bootloader-based update is marked with (*) . For this process, all you need is a UART-USB converter cable and a special application from ST called Flash Loader Demonstrator.
In general, when the module is virgin, i.e., it has no firmware at all, it boots automatically in factory bootloader mode and you can upload firmware right away. However, when the module is already running a firmware, you need to force it to boot into the factory bootloader. You can do that with either one of these two methods:
- Using the update CLI Command. Once you execute this command, the MCU will leave the running application and jump to factory bootloader. If you are already connected to the programming port, you will need to close this port in RealTerm (or any other terminal emulator) before you can use it to connect to factory bootloader.
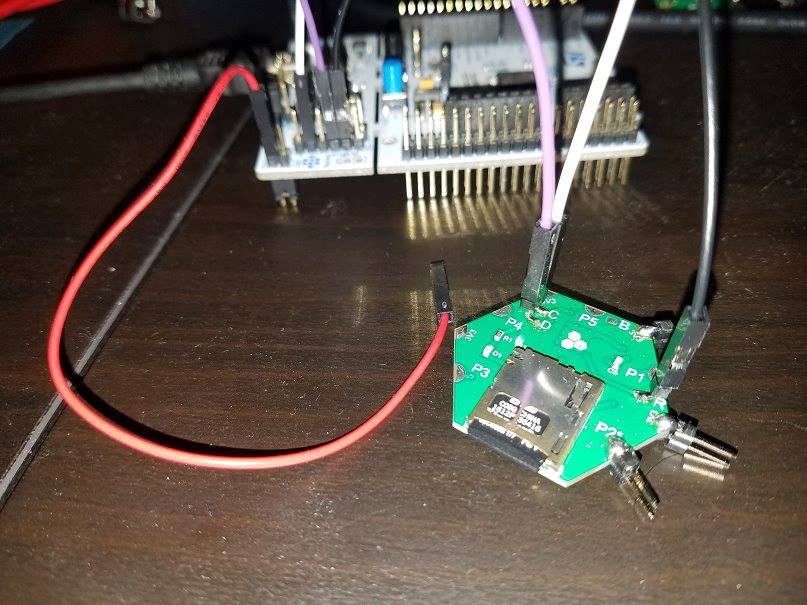
- Applying 3.3V on module B (Boot) pad while power cycling. Easiest way to achieve this is to connect a female-to-male jumper wire to one of power ports (edge ports) top connector, and then touch the B pad while power cycling the MCU.

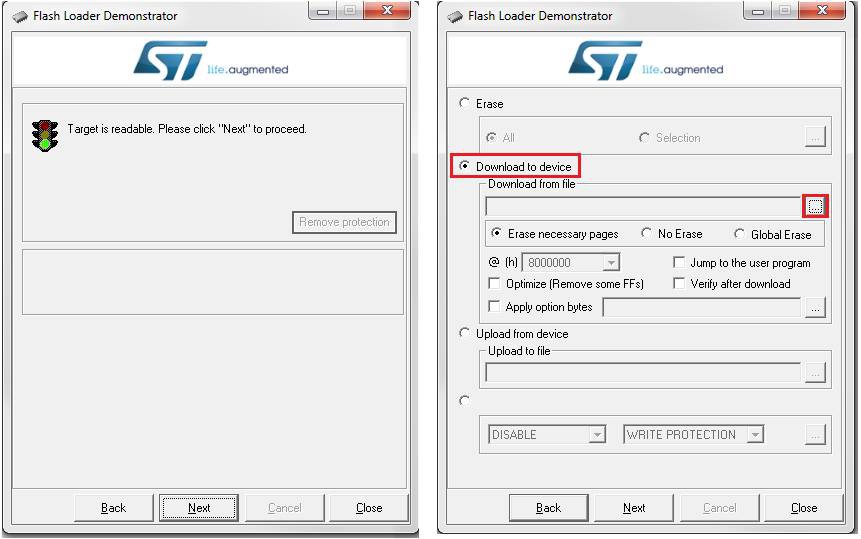
Once the MCU is in factory bootloader mode, connect the USB-UART TXD/RXD (yellow/orange) wires to the appropriate port and run the Flash Loader Demonstrator. Select the appropriate COM port and leave other connection settings to default then click next. If everything is working correctly, you will see a green traffic light with “Target is Readable” message. Other wise, if the module did not boot in bootloader mode correctly, you will get a red traffic light. Just power cycle and repeat the process again. Click next to select the default MCU Flash algorithm and another click to reach the programming tab. Choose “Download to Device” option and select the module firmware (it should be a HEX file). You can specify a full memory erase or only necessary pages. You can also enable verification. The “Jump to user program” option automatically runs the application after it has been downloaded. Otherwise, you will have to power cycle to run the application.
This article explains how to perform remote bootloader update, i.e., updating a module while connecting to another module.
Note 1: If you are not powering the module from the same USB-UART cable (or another cable connected to your PC), then you need to connect module GND and the PC GND together. Just connect the GND wire on the USB-UART cable to a module GND pad.
Note 2: If you compile your code with uVision, it does not generate a HEX file by default. You need to enable that in Options for Target >> Output Tab.
2. Using the Serial Wire Debug Interface
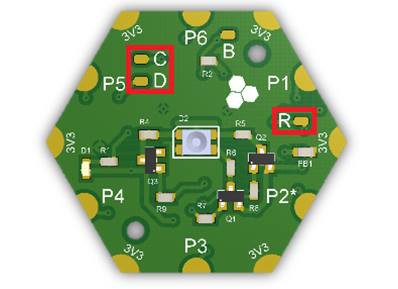
The Serial Wire Debug (SWD) interface enables fast firmware update as well as real-time debugging. You will need an STM32-compatible programmer/debugger (e.g., ST-LINK or the Nucleo board) and a programming software tool (e.g., ST-LINK Utility or via KEIL uVision IDE). Three module pads are needed for connection (plus GND): C (SWD Clock), D (SWD Data) and R (MCU Reset).
You will need to make the following connections between the programmer and the module (example provided for Nucleo programming header CN4):
- Pin 2 (starting up) >> C.
- Pin 4 >> D.
- Pin 5 >> R.
- You need to connect GND between ST-LINK and the module. If your module is powered from a USB-UART cable connected to the same laptop that you connect the ST-LINK to, then they both have a common ground and you might not need a separate GND connection.
Note: The ST-LINK Utility loads binary files while uVision loads AXF files. You can use ARM fromelf.exe tool to convert AXF files in binary ones.
Discussions
Become a Hackaday.io Member
Create an account to leave a comment. Already have an account? Log In.