Close
0%
0%

RPI based thermostat

RPI, 18B20+ 1-wire, wifi, touchscreen

robRob
Similar projects worth following
The two things I don’t like about the NEST thermostat are the cost and the need to connect to an outside service for it to work. I decided to jump straight into the building craze and try to create my own version of the NEST thermostat.
Simple interface
Self-Contained (no 3rd party service)
Touchscreen Controlled

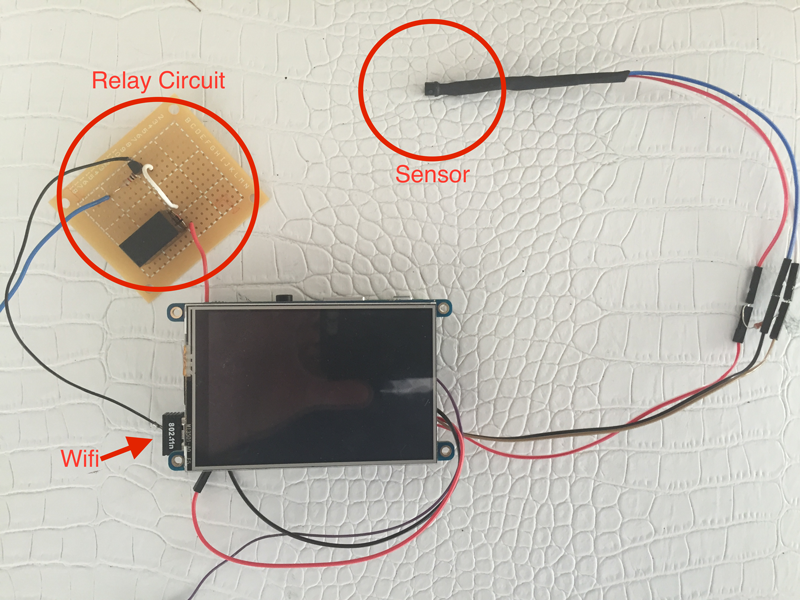
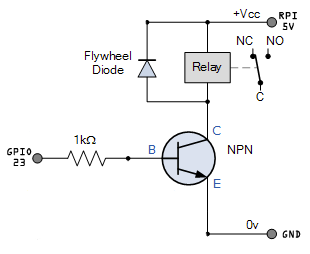
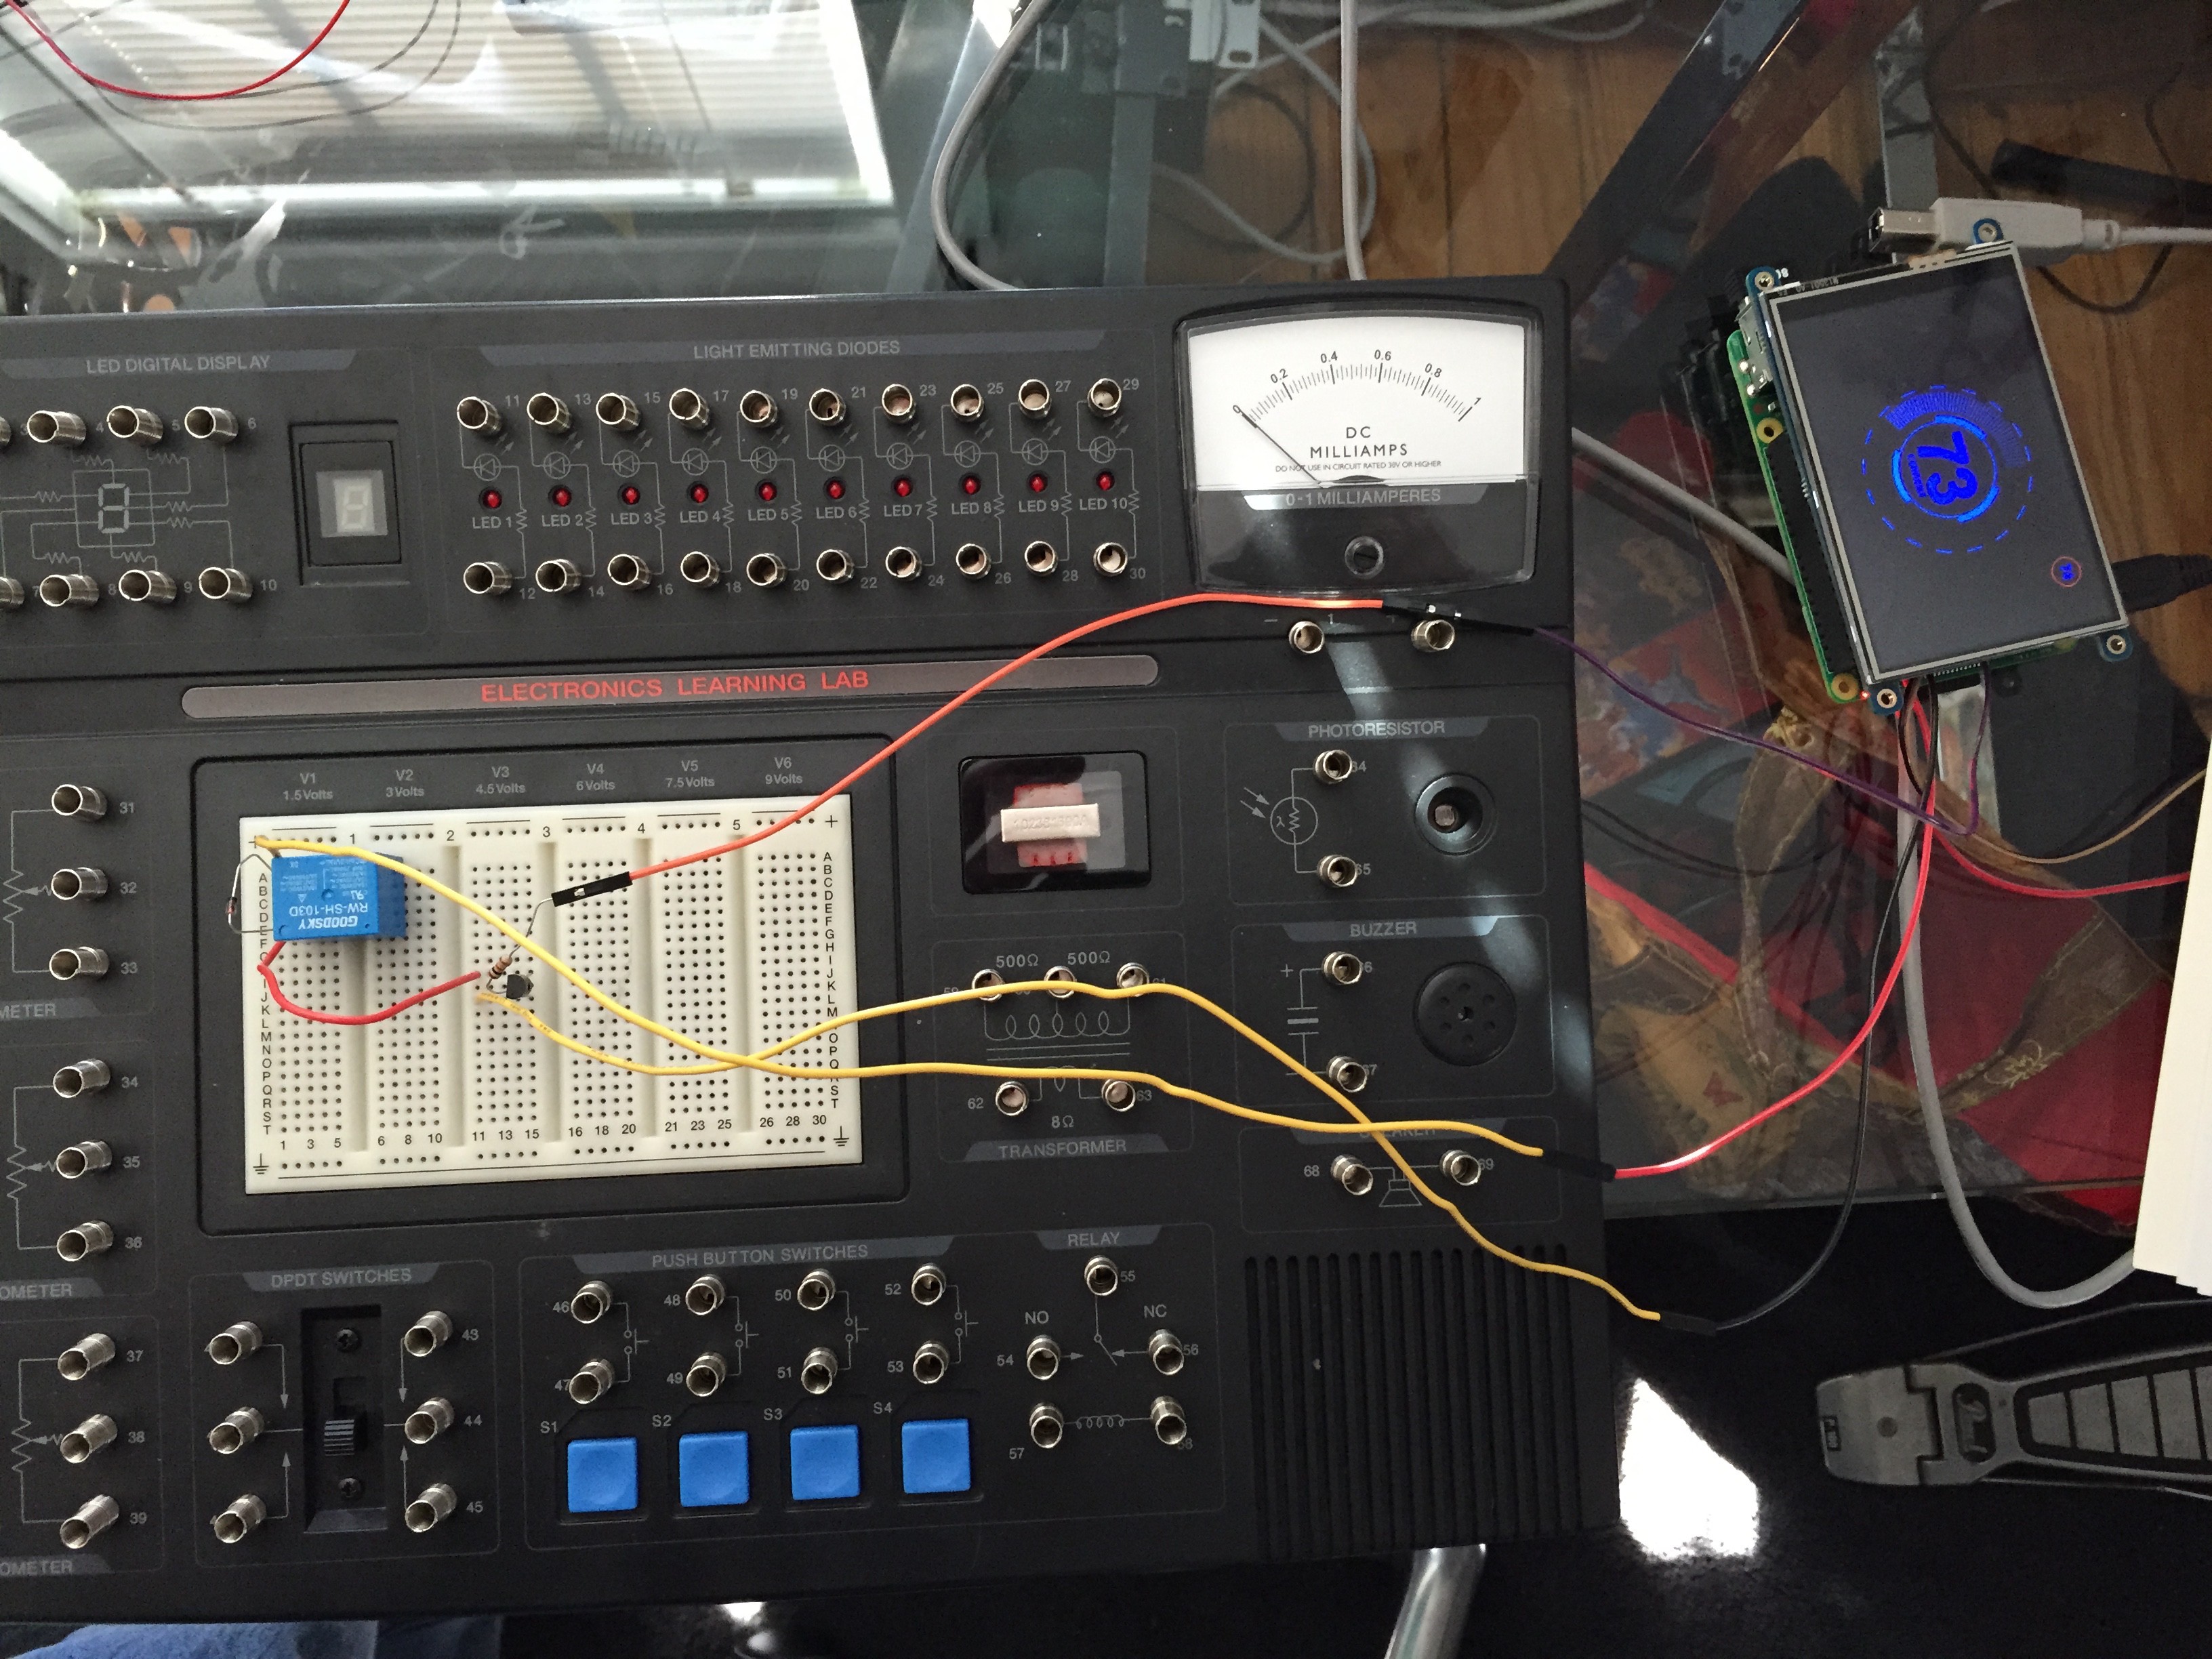
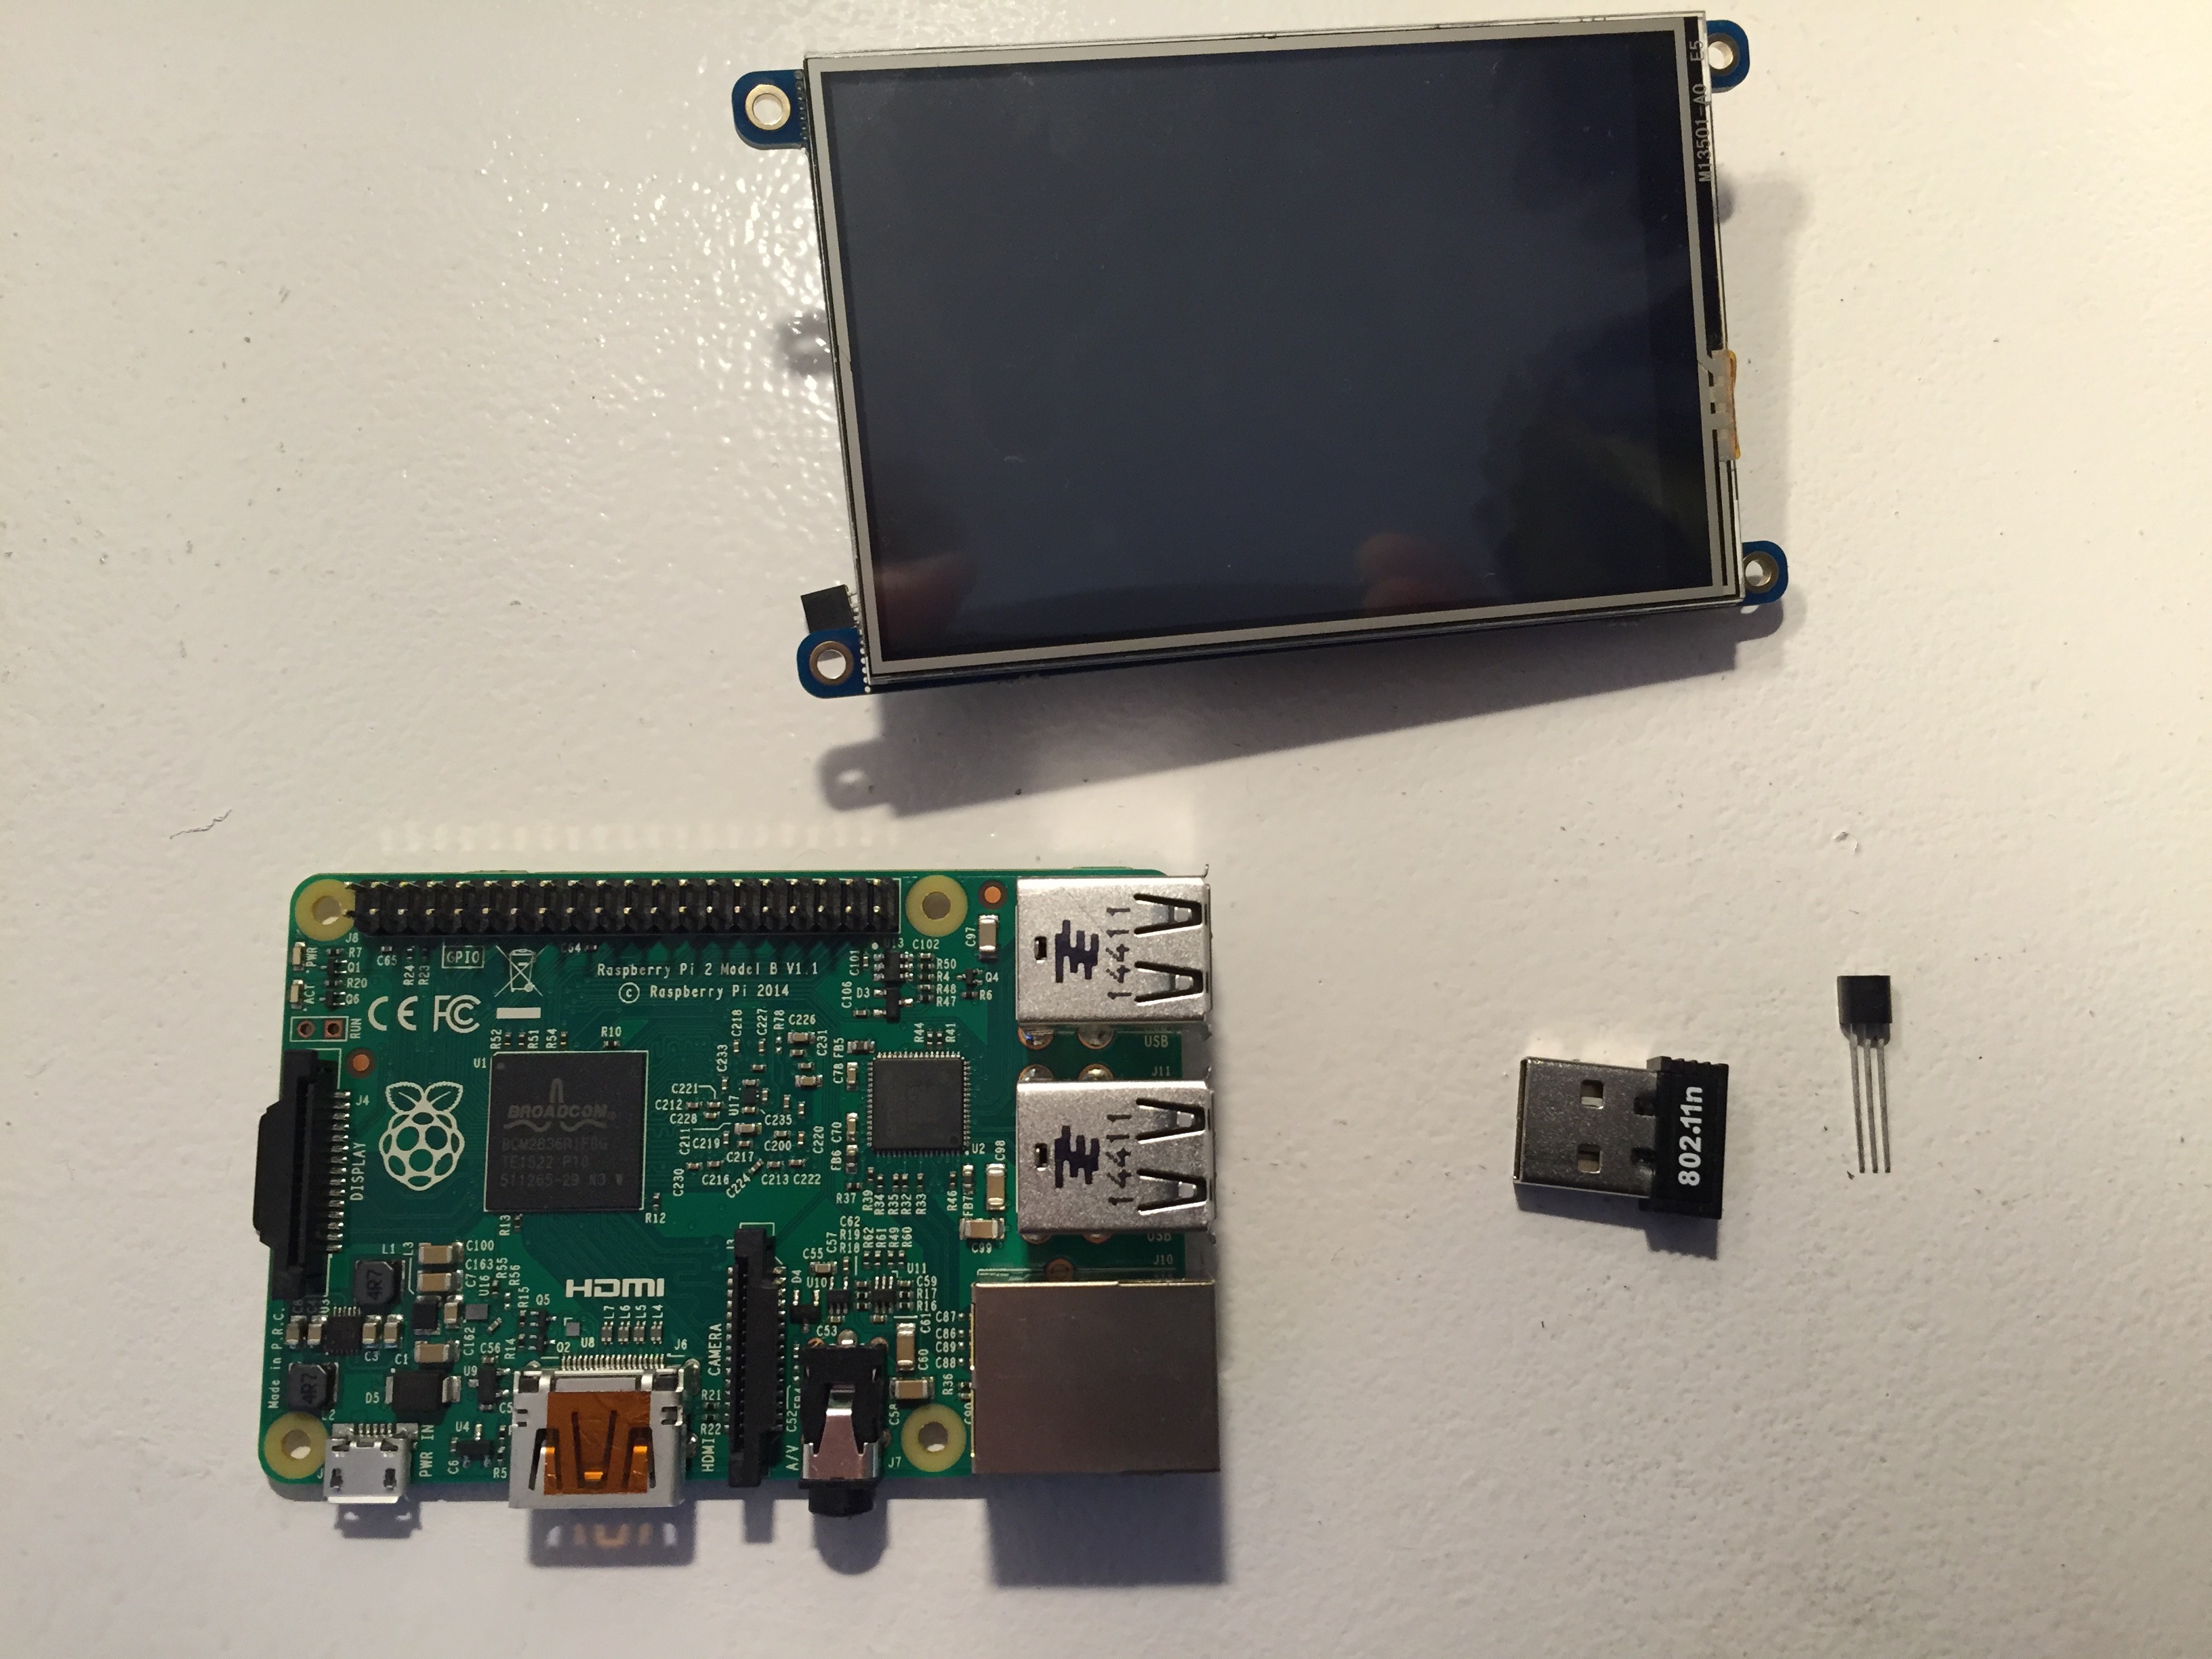
My needs are fairly simple. My home is cooled by window units, and they get taken out and stored for the winter. What's left is my heating system that currently uses a single thermostat to close a contact for my furnace. Nothing fancy there.

Using the RPI, I plan to write a good looking interface that uses a touchscreen to set the temp. Additional plans are:

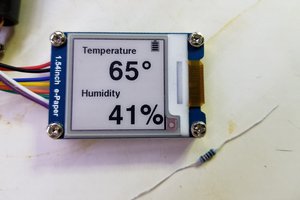
  • Add additional sensors to view temps in multiple rooms
  • Add an outdoor sensor for temp
  • Add a logger that tracks temp and furnace activation and cutoff
  • Display time and date
  • Control from wall, computer or iPhone
  • Configure alerts
  • Put it into a sexy case that mounts on the wall

  • 1 × Raspberry Pi
  • 1 × DS18B20+ 1-wire digital thermometer
  • 1 × Adafruit 3.5" touchscreen (480x320)
  • 1 × Wifi dongle

  • Update

    Rob11/13/2015 at 19:22 0 comments

    Well, everything "seems" to be running fine in a test environment, but I have a concern. The red led on the RPI will flash on and off regularly, and goes off completely when the relay is engaged. I read somewhere that flashing means that the voltage is dropping, so I'd imagine that going out completely can't be good. What's strange is that it is working fine...

    Also, I think I'm going to move to a solid-state relay. Checking into those now.

    No headway at all on the "sexy" case for this project, so everything is just sitting out in the open right now.

  • Python Code

    Rob10/26/2015 at 19:22 0 comments

    #! /usr/bin/env python
    
    import os, sys
    import pygame, time
    import RPi.GPIO as GPIO
    from pygame.locals import *
    
    # Load the thermometer drivers
    os.system('modprobe w1-gpio')
    os.system('modprobe w1-therm')
    
    # Point to proper device (your number will change)
    temp_sensor = '/sys/bus/w1/devices/28-000006f0ac17/w1_slave'
    
    # Setup relay pin
    GPIO.setmode(GPIO.BCM)
    GPIO.setup(23,GPIO.OUT)
    GPIO.output(23,GPIO.LOW)
    
    
    def load_image(name, colorkey=None):
        fullname = os.path.join('data', name)
        try:
            image = pygame.image.load(fullname).convert_alpha()
        except pygame.error, message:
            print 'Cannot load image:', name
            raise SystemExit, message
        #image = pygame.transform.scale(image,(400,400))
        if colorkey is not None:
            if colorkey is -1:
                colorkey = image.get_at((0,0))
            image.set_colorkey(colorkey, RLEACCEL)
        return image, image.get_rect()
    
    def write_log(rn):
    	lfile = open('therm.log','a')
    	lfile.write(rn)
    	lfile.close()
    
    def temp_raw():
    	f = open(temp_sensor,'r')
    	lines = f.readlines()
    	f.close()
    	return lines
    
    def read_temp():
    	lines = temp_raw()
    	while lines[0].strip()[-3:] != 'YES':
    		time.sleep(0.1)
    		lines = temp_raw()
    	temp_output = lines[1].find('t=')
    	if temp_output != -1:
    		temp_string = lines[1].strip()[temp_output+2:]
    		temp_c = float(temp_string) / 1000.0
    		temp_f = int(round(temp_c * 9.0 / 5.0 + 32.0))
    		return temp_c, temp_f
    
    def adjust_readout(current_temp, desired_temp, tcolor, ccolor, draw_circle):
    	 # Setup for circle
    	if draw_circle == True: 
    	  circle_temp_font = pygame.font.Font(None, 30)
    	  circle_temp_text = circle_temp_font.render(str(desired_temp), 1, tcolor)
    	  current_temp_font = pygame.font.Font(None, 18)
    	  current_temp_msg = current_temp_font.render("CURRENT",1,tcolor)
    	#
    	main_temp_font = pygame.font.Font(None, 130)
    	main_temp_text = main_temp_font.render(str(current_temp).strip(' '), 1, tcolor)
            background.fill((  0,   0,   0))
    	screen.blit(background, (0,0))
    	textx = main_temp_text.get_rect(centerx=background.get_width()/2)
    	texty = main_temp_text.get_rect(centery=background.get_height()/2)
            screen.blit(main_temp_text, (textx[0],texty[1]))
    	#
    	if draw_circle == True:
    	  screen.blit(circle_temp_text,(400,30))
    	  screen.blit(current_temp_msg,(210,198))
    	  pygame.draw.circle(screen,ccolor,(411,41),20,1)
    	allsprites.draw(screen)
    	pygame.display.update()
    
    def alt_display(temperature):
    	d = time.strftime('%l:%M%p %z on %b %d, %Y')
    	t = str(d[0:5].strip(' '))
    	dt = str(d[17:23].strip(' '))
    	background.fill((  0,   0,   0))
    	screen.blit(background, (0,0))
    	font1 = pygame.font.Font(None, 72)
    	text1 = font1.render(t, 1, (0, 0, 250))
            textx = text1.get_rect(centerx=background.get_width()/2)
            texty = text1.get_rect(centery=background.get_height()/2)
            screen.blit(text1, (textx[0],texty[1]-5))
    	font2 = pygame.font.Font(None, 40)
    	text2 = font2.render(dt, 1, (0, 0, 250))
            textx = text2.get_rect(centerx=background.get_width()/2)
            texty = text2.get_rect(centery=background.get_height()/2)
            screen.blit(text2, (textx[0],texty[1]+32))
            font3 = pygame.font.Font(None, 50)
            text3 = font2.render(str(temperature).strip(' '), 1, (0, 0, 250))
            textx = text3.get_rect(centerx=background.get_width()/2)
            texty = text3.get_rect(centery=background.get_height()/2)
            screen.blit(text3, (textx[0],texty[1]-50))
    	allsprites.draw(screen)
    	pygame.display.update()
    
    
    class InnerCircle(pygame.sprite.Sprite):
        def __init__(self):
            pygame.sprite.Sprite.__init__(self) #call Sprite intializer
            self.image, self.rect = load_image('c0.png', -1)
            screen = pygame.display.get_surface()
            self.area = screen.get_rect()
    	self.rect.center = (self.area[2]/2, self.area[3]/2)
            self.rot = 0
    	self.original = self.image
    
        def once(self):
    	center = self.rect.center
            self.rect = self.image.get_rect(center=center)
    
        def spinl(self):
            center = self.rect.center
            self.rot -= 4
    	rotate = pygame.transform.rotate
            self.image = rotate(self.original, self.rot)
            self.rect = self.image.get_rect(center=center)
    
        def spinr(self):
            center = self.rect.center
            self.rot += 4
    	rotate = pygame.transform.rotate
    ...
    Read more »

  • Getting Close

    Rob10/26/2015 at 19:11 0 comments

    I have the 'basics' of this working together. For now, that means that I can track the temperature, view the current and desired temperature on a 3.5" touchscreen, activate a relay to turn on the burner, and log when the burner is on or off. There's no packaging yet, as I have to figure out some kind of enclosure to put this all together, Here's a shot of all the components wired together (except the relay to the actual burner).

    Also, here is the circuit I used to drive the relay and activate the burner.

    So far I've had everything running for about 20 hours, and it mimics my regular home thermostat pretty closely.

  • Relay Arrived

    Rob10/23/2015 at 14:24 0 comments

    Ok...finally got the relay I'll use to control the heat. I'm doing some testing using a transistor and 5V off of the RPI to power the coil. I'll post the circuit as soon as I finish testing.

    As you can see my testing rig is fairly sophisticated :-) I also figured out a number of optimizations related to the display of the graphics, and have re-written the UI. With a few weeks of testing, I've had accurate and quick responses when using the touch screen.

  • The 2nd UI

    Rob09/22/2015 at 02:17 0 comments

    The second UI was a lot simpler. No rotating sprites, in fact no sprites at all. A simple graphic that is white for showing the current temperature, turns red when adjusting up, and blue when adjusting down. Same as before, tap on the left side of the screen to adjust down, right side to adjust up or center to view current.

    Current in center, desired temp in circle at top right.

    Temperature adjusted up

    Temperature adjusted down

    I haven't gotten around to adding the alternate screen to the new design.

    My next step is to find a 3.3V or 5V relay that I can easily control via GPIO to turn the furnace on or off.

  • The UI and Python

    Rob09/22/2015 at 02:02 0 comments

    I decided to use Python to code up this project. I'd never used it before, but it seemed pretty straightforward, and there were dozens of examples that I could cut and paste and mould to my needs. I started with the UI and discovered pygame as an easy way to work with graphics and sprites. My first version used sprites to animate the display with counter-rotating circles as the temperature was adjusted. This worked ok, but was a lot of code to get it all to work, and being new at python, my code grew unwieldy. Here's the first UI. Tap on the right to raise temp and left to lower.

    It also has a timeout where it reverts to a second screen 30 seconds after adjusting or viewing the temp.

    I also started to get worried about response to touch delays, but figured as I got more familiar with the code, I would find some optimizations.

  • The touchscreen and 18B20+

    Rob09/21/2015 at 23:03 0 comments

    This 3.5" touchscreen is actually my second touchscreen for this project. The first was a 2.8" capacitive touchscreen that required me to solder a header onto it for connection to the RPI. My soldering skills leave a lot to be desired, and I basically ruined the first one. I purchased the second one "fully assembled" so that problem was solved.

    The touchscreen plugs directly on to the RPI and breaks out the unused pins on the back. I needed three wires to read the temperature connected to +3.3V, GND and GPIO 4 (data) for the 1-wire to work.

  • Starting the build

    Rob09/21/2015 at 22:56 0 comments

    All components

View all 8 project logs

Enjoy this project?

Share

Discussions

Similar Projects

Does this project spark your interest?

Become a member to follow this project and never miss any updates