 jaromir.sukuba
Now you may want to build the sources using MPLABX IDE and SDCC or XC8 compilers under Linux or Windows. Here is how:
Using XC8 compiler
Download MPLABX IDE, I did my development on v 3.15 and 3.10. If you want to build using XC8, download it here - I did my development on v 1.35. Then, download sources from here, open project in MPLABX and you should be ready to build. Check project properties (right click on project name->Properties)
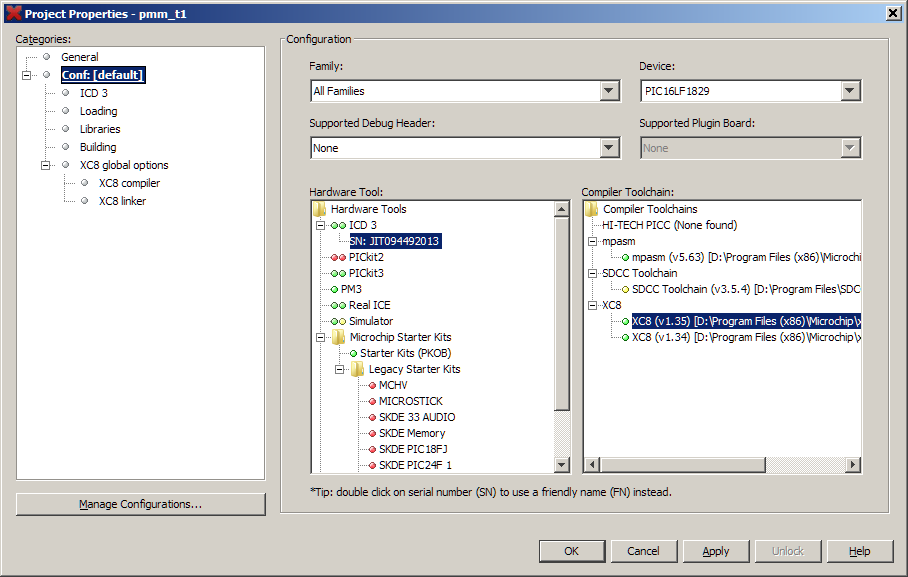
and if everything is OK, hit "clean and build" project icon.

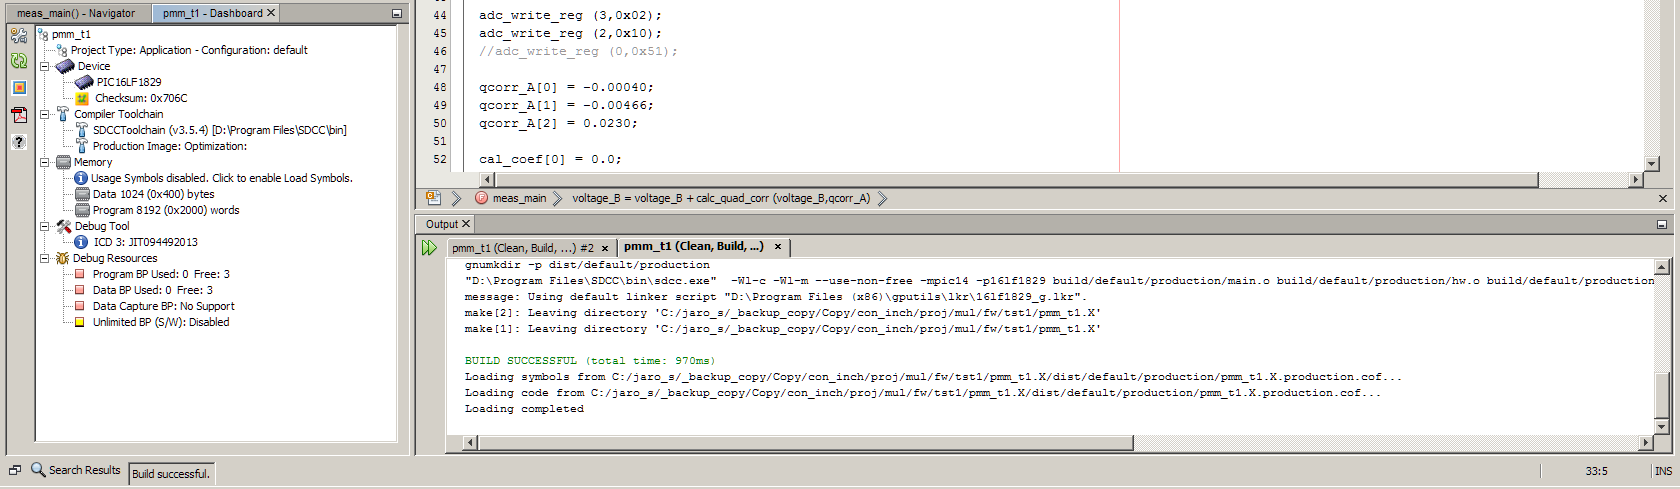
After a few seconds, you should be able to see successful build log

If you have ICD3 or PicKit3 connected (chinese clones work good), you should be able to program the target PIC16LF1829 in micro progmeter device, just hit "program" icon

And programming should run as expected. If do not happen to have ICD3 or PicKit3 programmers, you can use any other programmer, like this one and use build hex file found in "...path_to_project...\pmm_t1.X\dist\default\production", named like "pmm_t1.X.production.hex".
The same procedure applies under Linux. I tested it under Linux Mint 17.2 64-bit. Hint: if your compiler installer fails to start, use "--mode text" switch, like
# sudo ./xc8-v1.35-full-install-linux-installer.run --mode text For installing IDE, you may refer to help, but on Linux Mint 17.2 everything went flawless.
Now you have built micro progmeter sources using MPLABX and XC8 compiler
Using SDCC compiler
If you prefer open-sourced compiler, you can use SDCC, here is how:
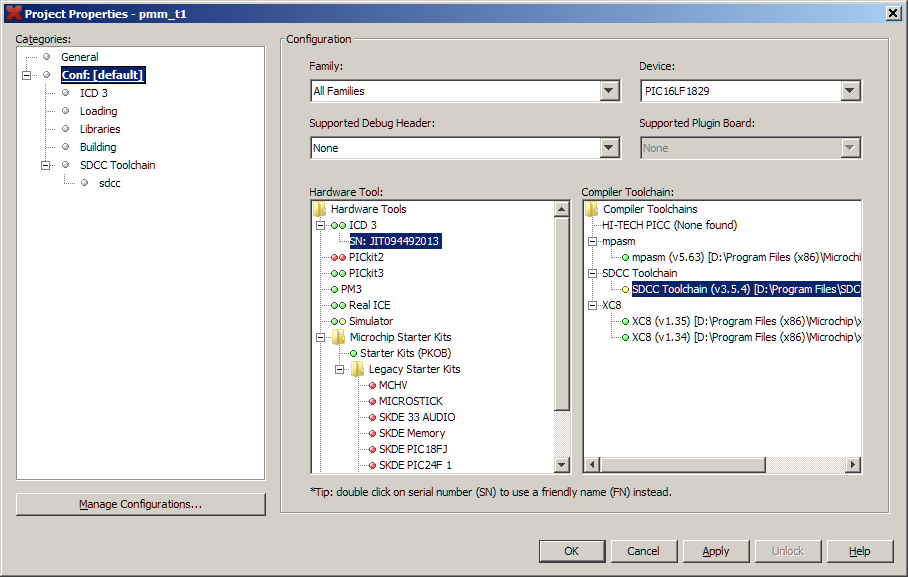
Download MPLABX IDE, I did my development on v 3.15 and 3.10. If you want to build using XC8, download it here - I did my development on v 1.35. Download SDCC binary for Windows or Linux and gputils along with SDCC plugin for MPLABX.
After installing MPLABX, SDCC and gputils packages, open MPLABX, go to Tools->Plugins and install SDCC plugin


hit "clean and build" project icon

and build should run as expected
If you have ICD3 or PicKit3 connected (chinese clones work good), you should be able to program the target PIC16LF1829 in micro progmeter device, just hit "program" icon

And programming should run as expected. If do not happen to have ICD3 or PicKit3 programmers, you can use any other programmer, like this one and use build hex file found in "...path_to_project...\pmm_t1.X\dist\default\production", named like "pmm_t1.X.production.hex".
The same procedure applies under Linux. I tested it under Linux Mint 17.2 64-bitTo get support for newst PIC micros, you may want to install gputils from source, it is relatively simple
$ svn co https://gputils.svn.sourceforge.net/svnroot/gputils/trunk/gputils gputils_svn
$ cd gputils_svn/
$ ./configure
$ sudo make install
Regarding SDCC - if you donwload actual release version of SDCC 3.5.0, you may happen to stumble across "GLIBC 3.4.20" problem. Please, download some newer snapshot, I used 3.5.1 #9263
Now you have built micro progmeter sources using MPLABX and SDCC compiler
Without using MPLABX
It should be possible to build the sources without MPLABX. There is makefile inside the project directory and it should be usable directly from command line. Honestly, I didn't test this one yet.
Discussions
Become a Hackaday.io Member
Create an account to leave a comment. Already have an account? Log In.