 Jeremy
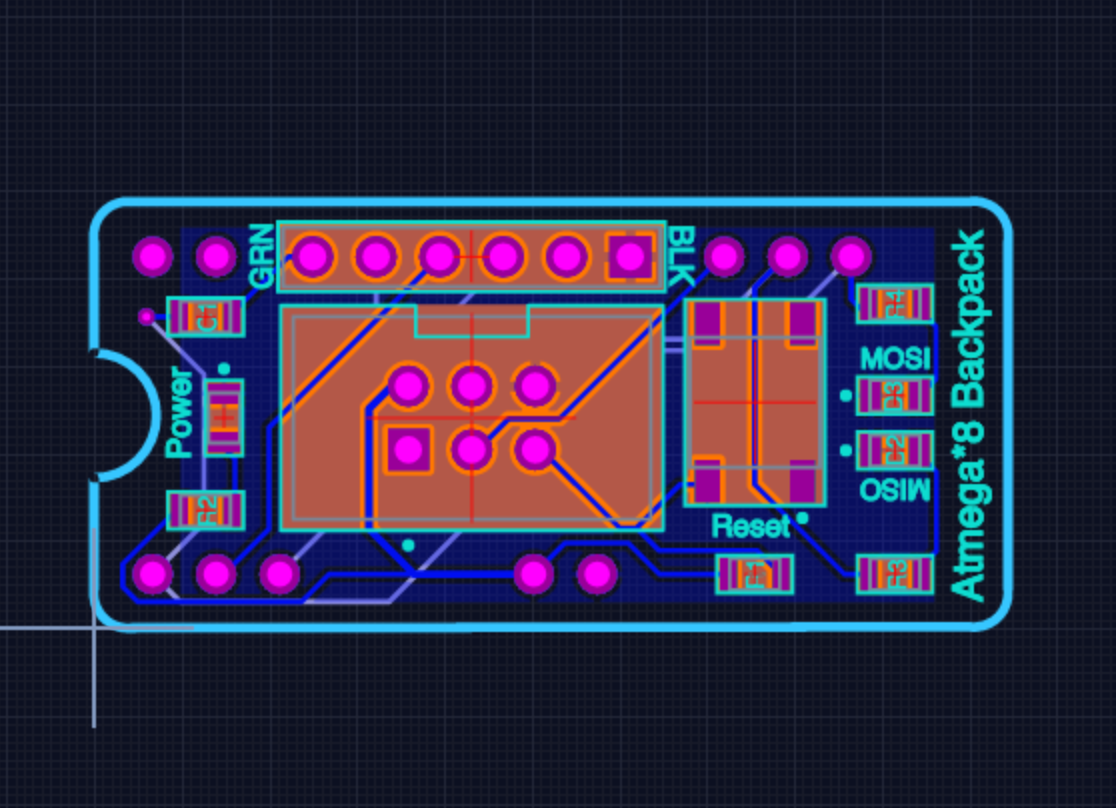
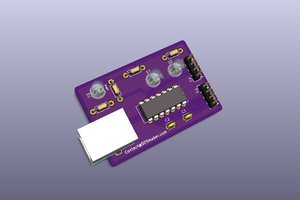
You can create a homemade version with any perf board and a few headers (see steps below) or you can make the advanced version with the PCB and gerber files from my upverter page. Or you can order the board directly from my project files on OSH Park.
0%
0%
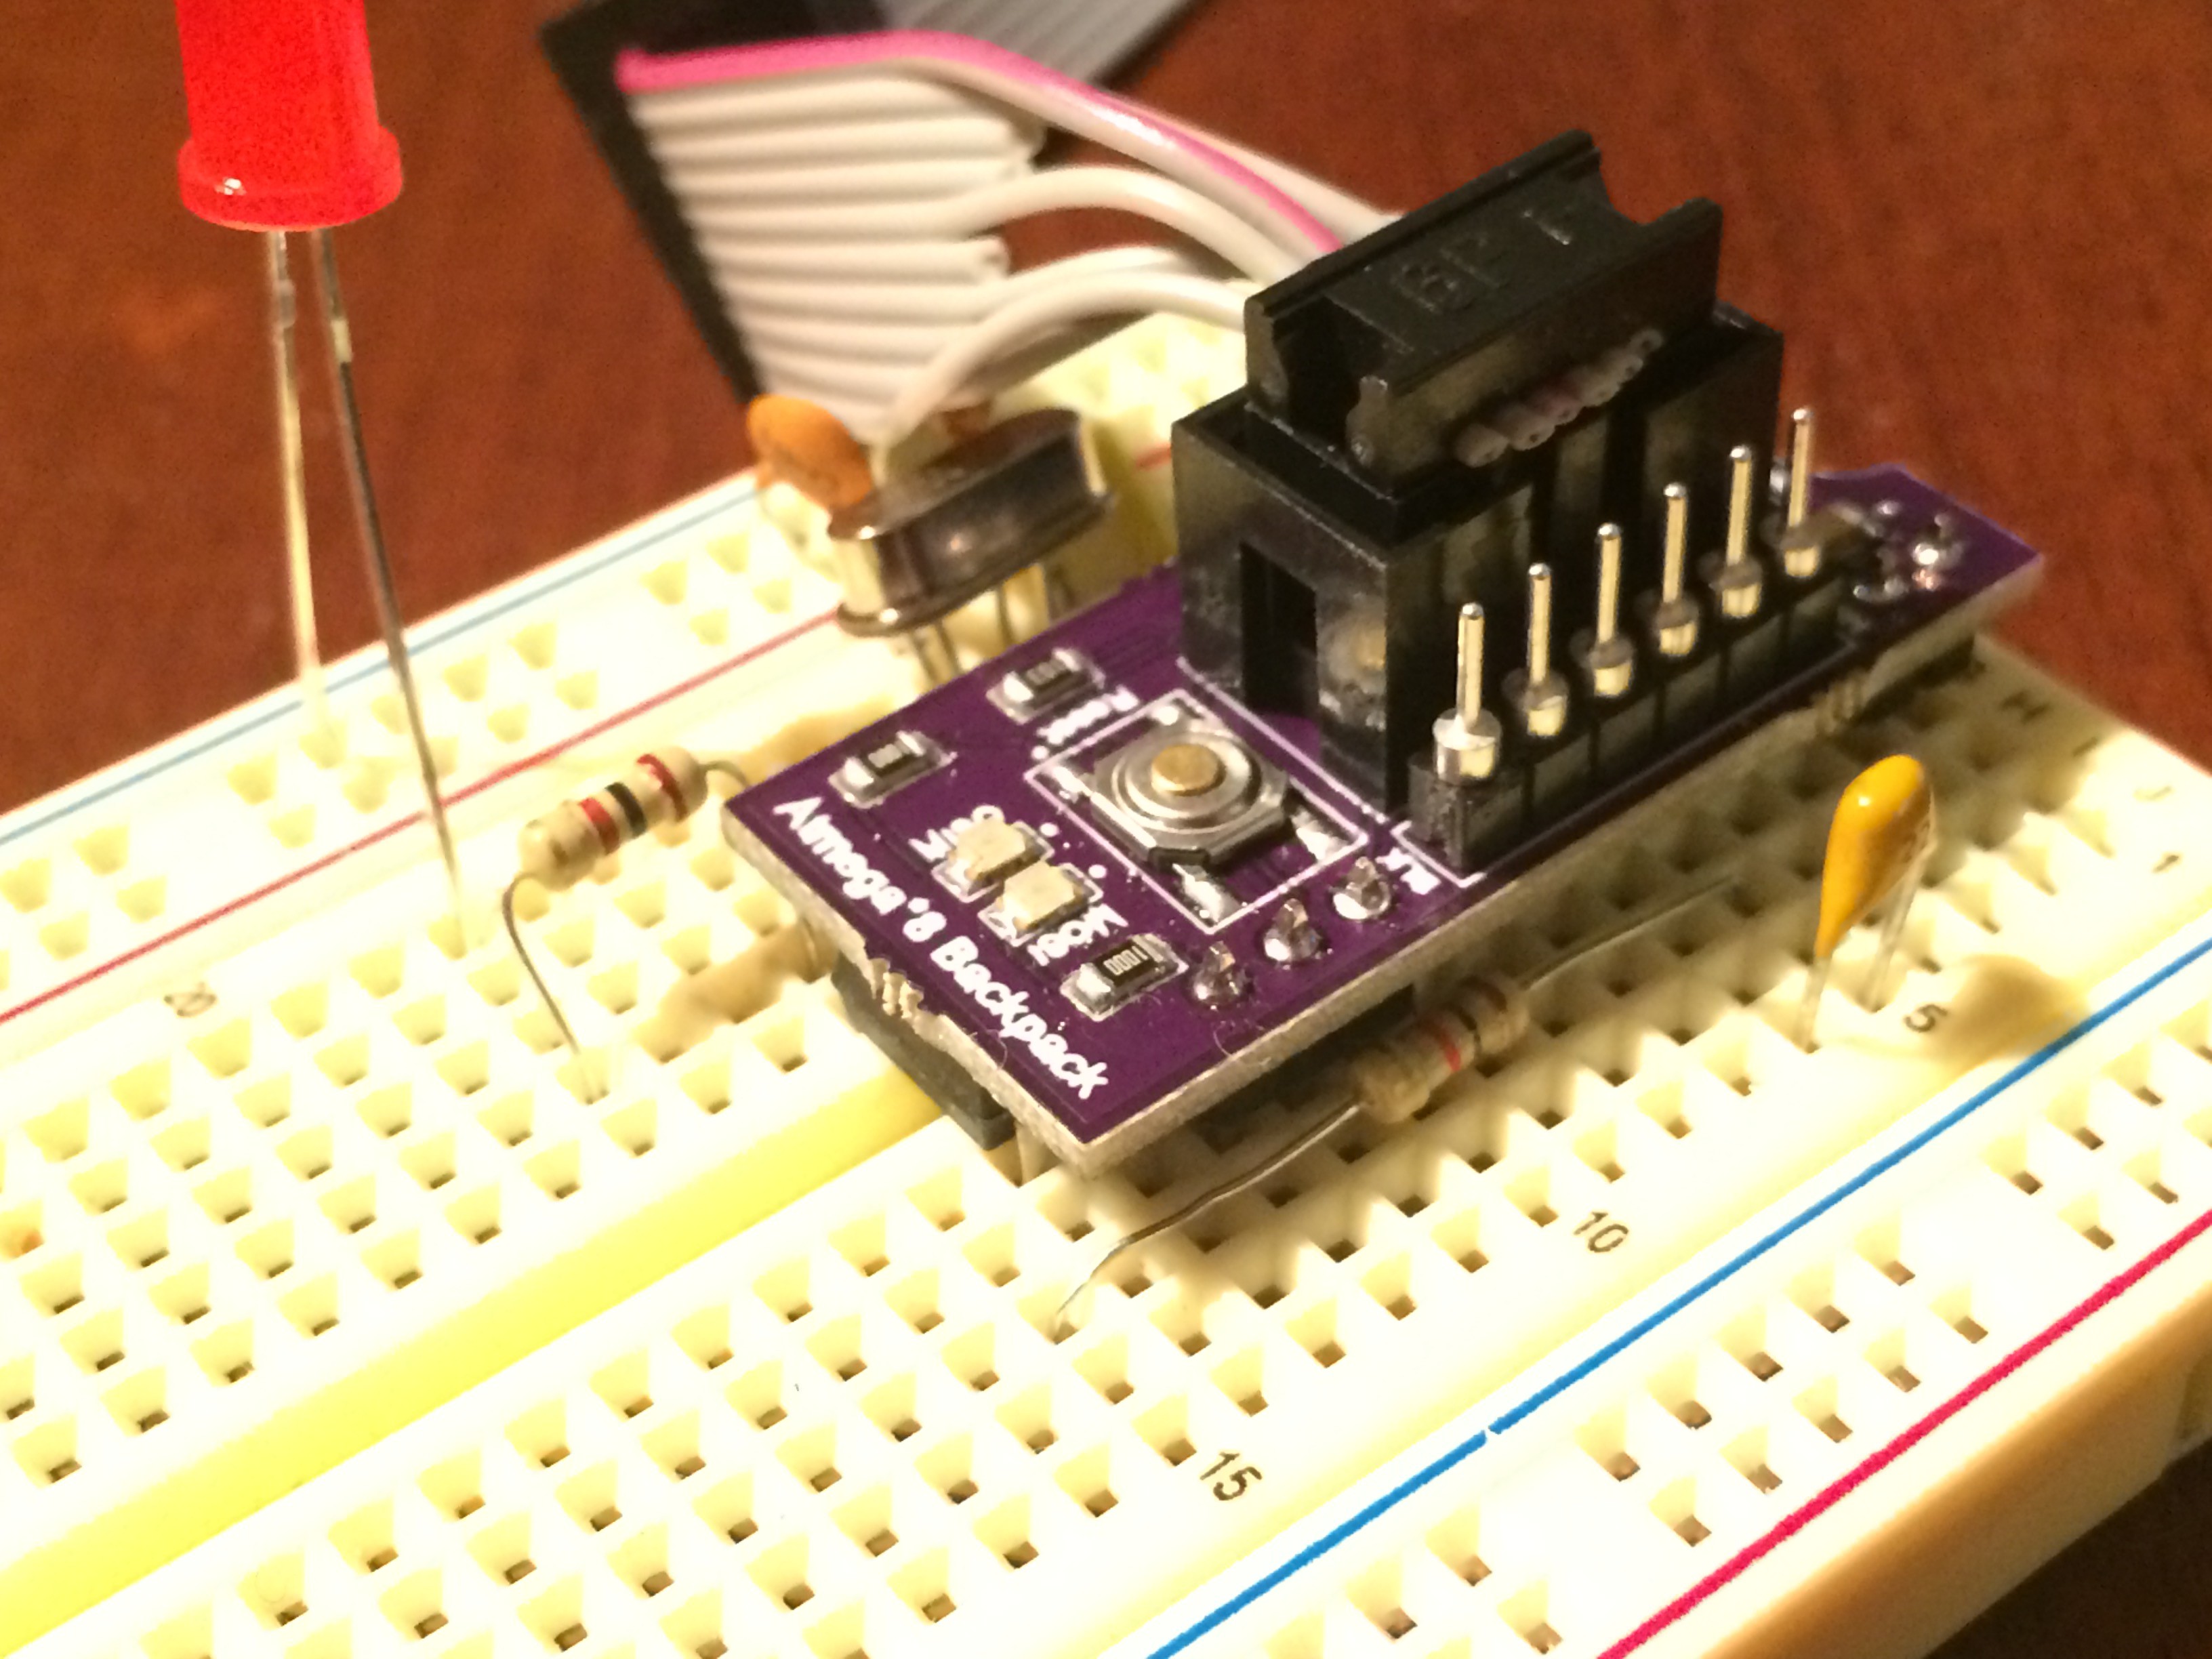
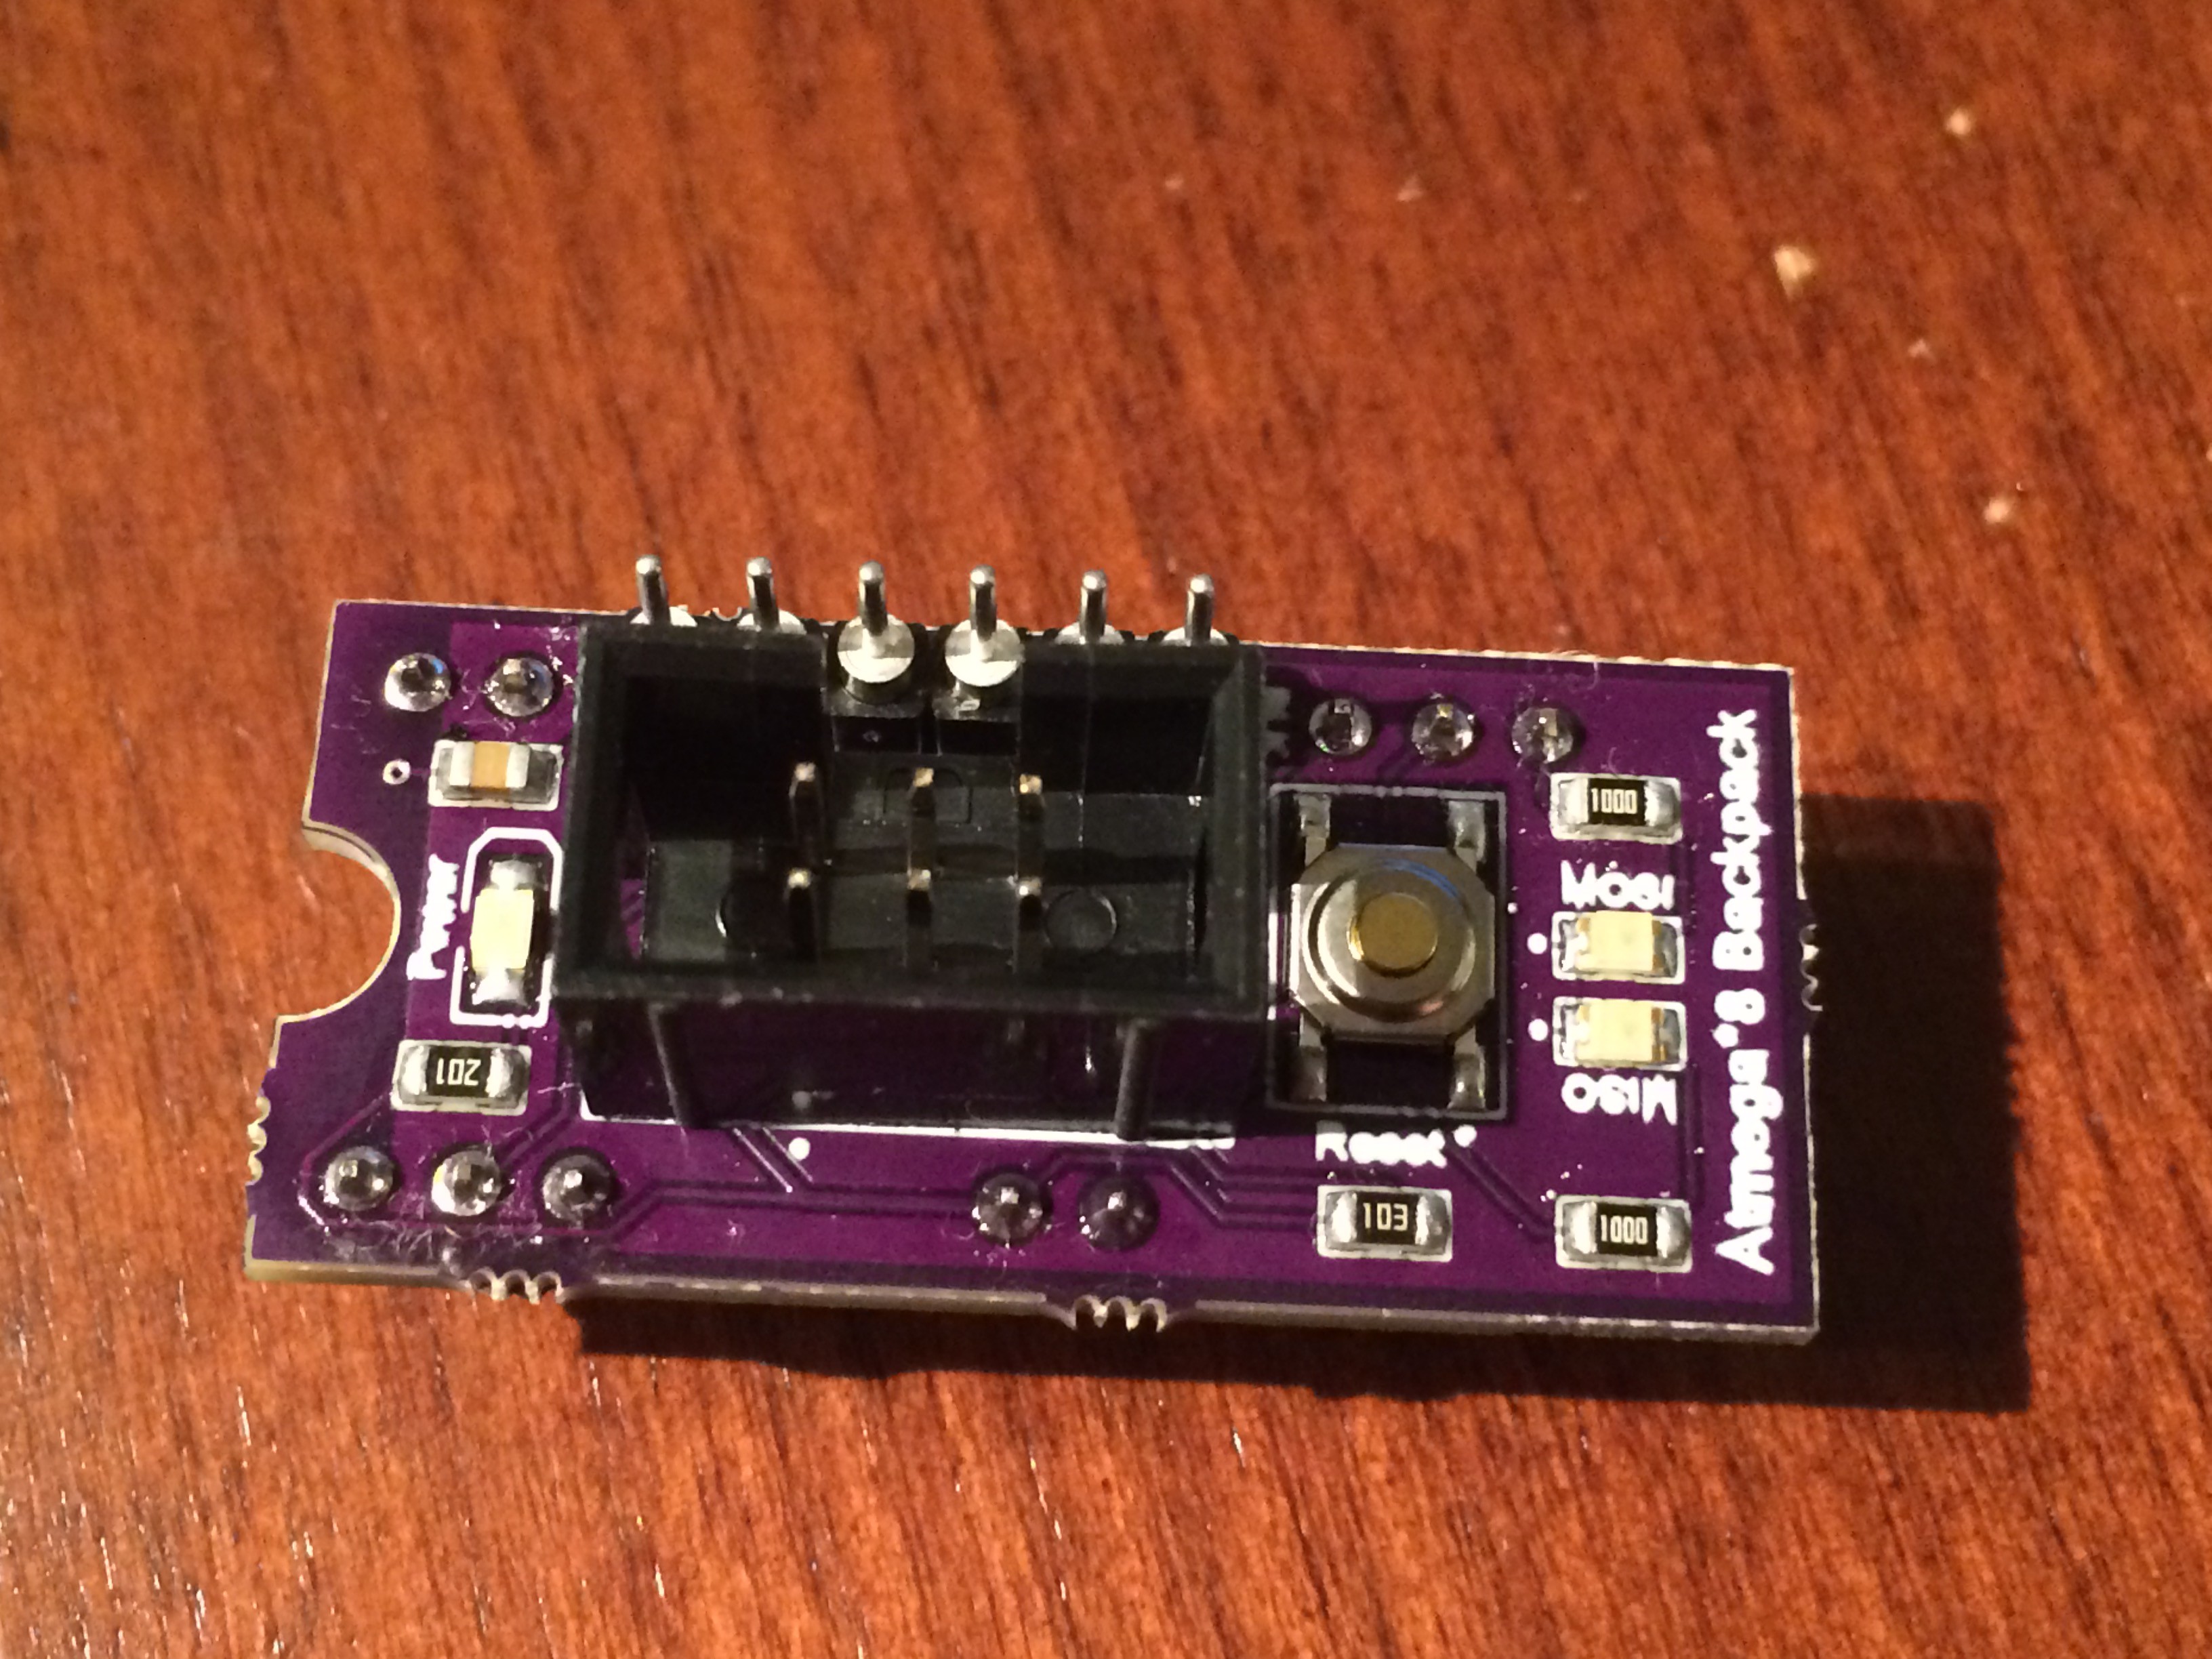
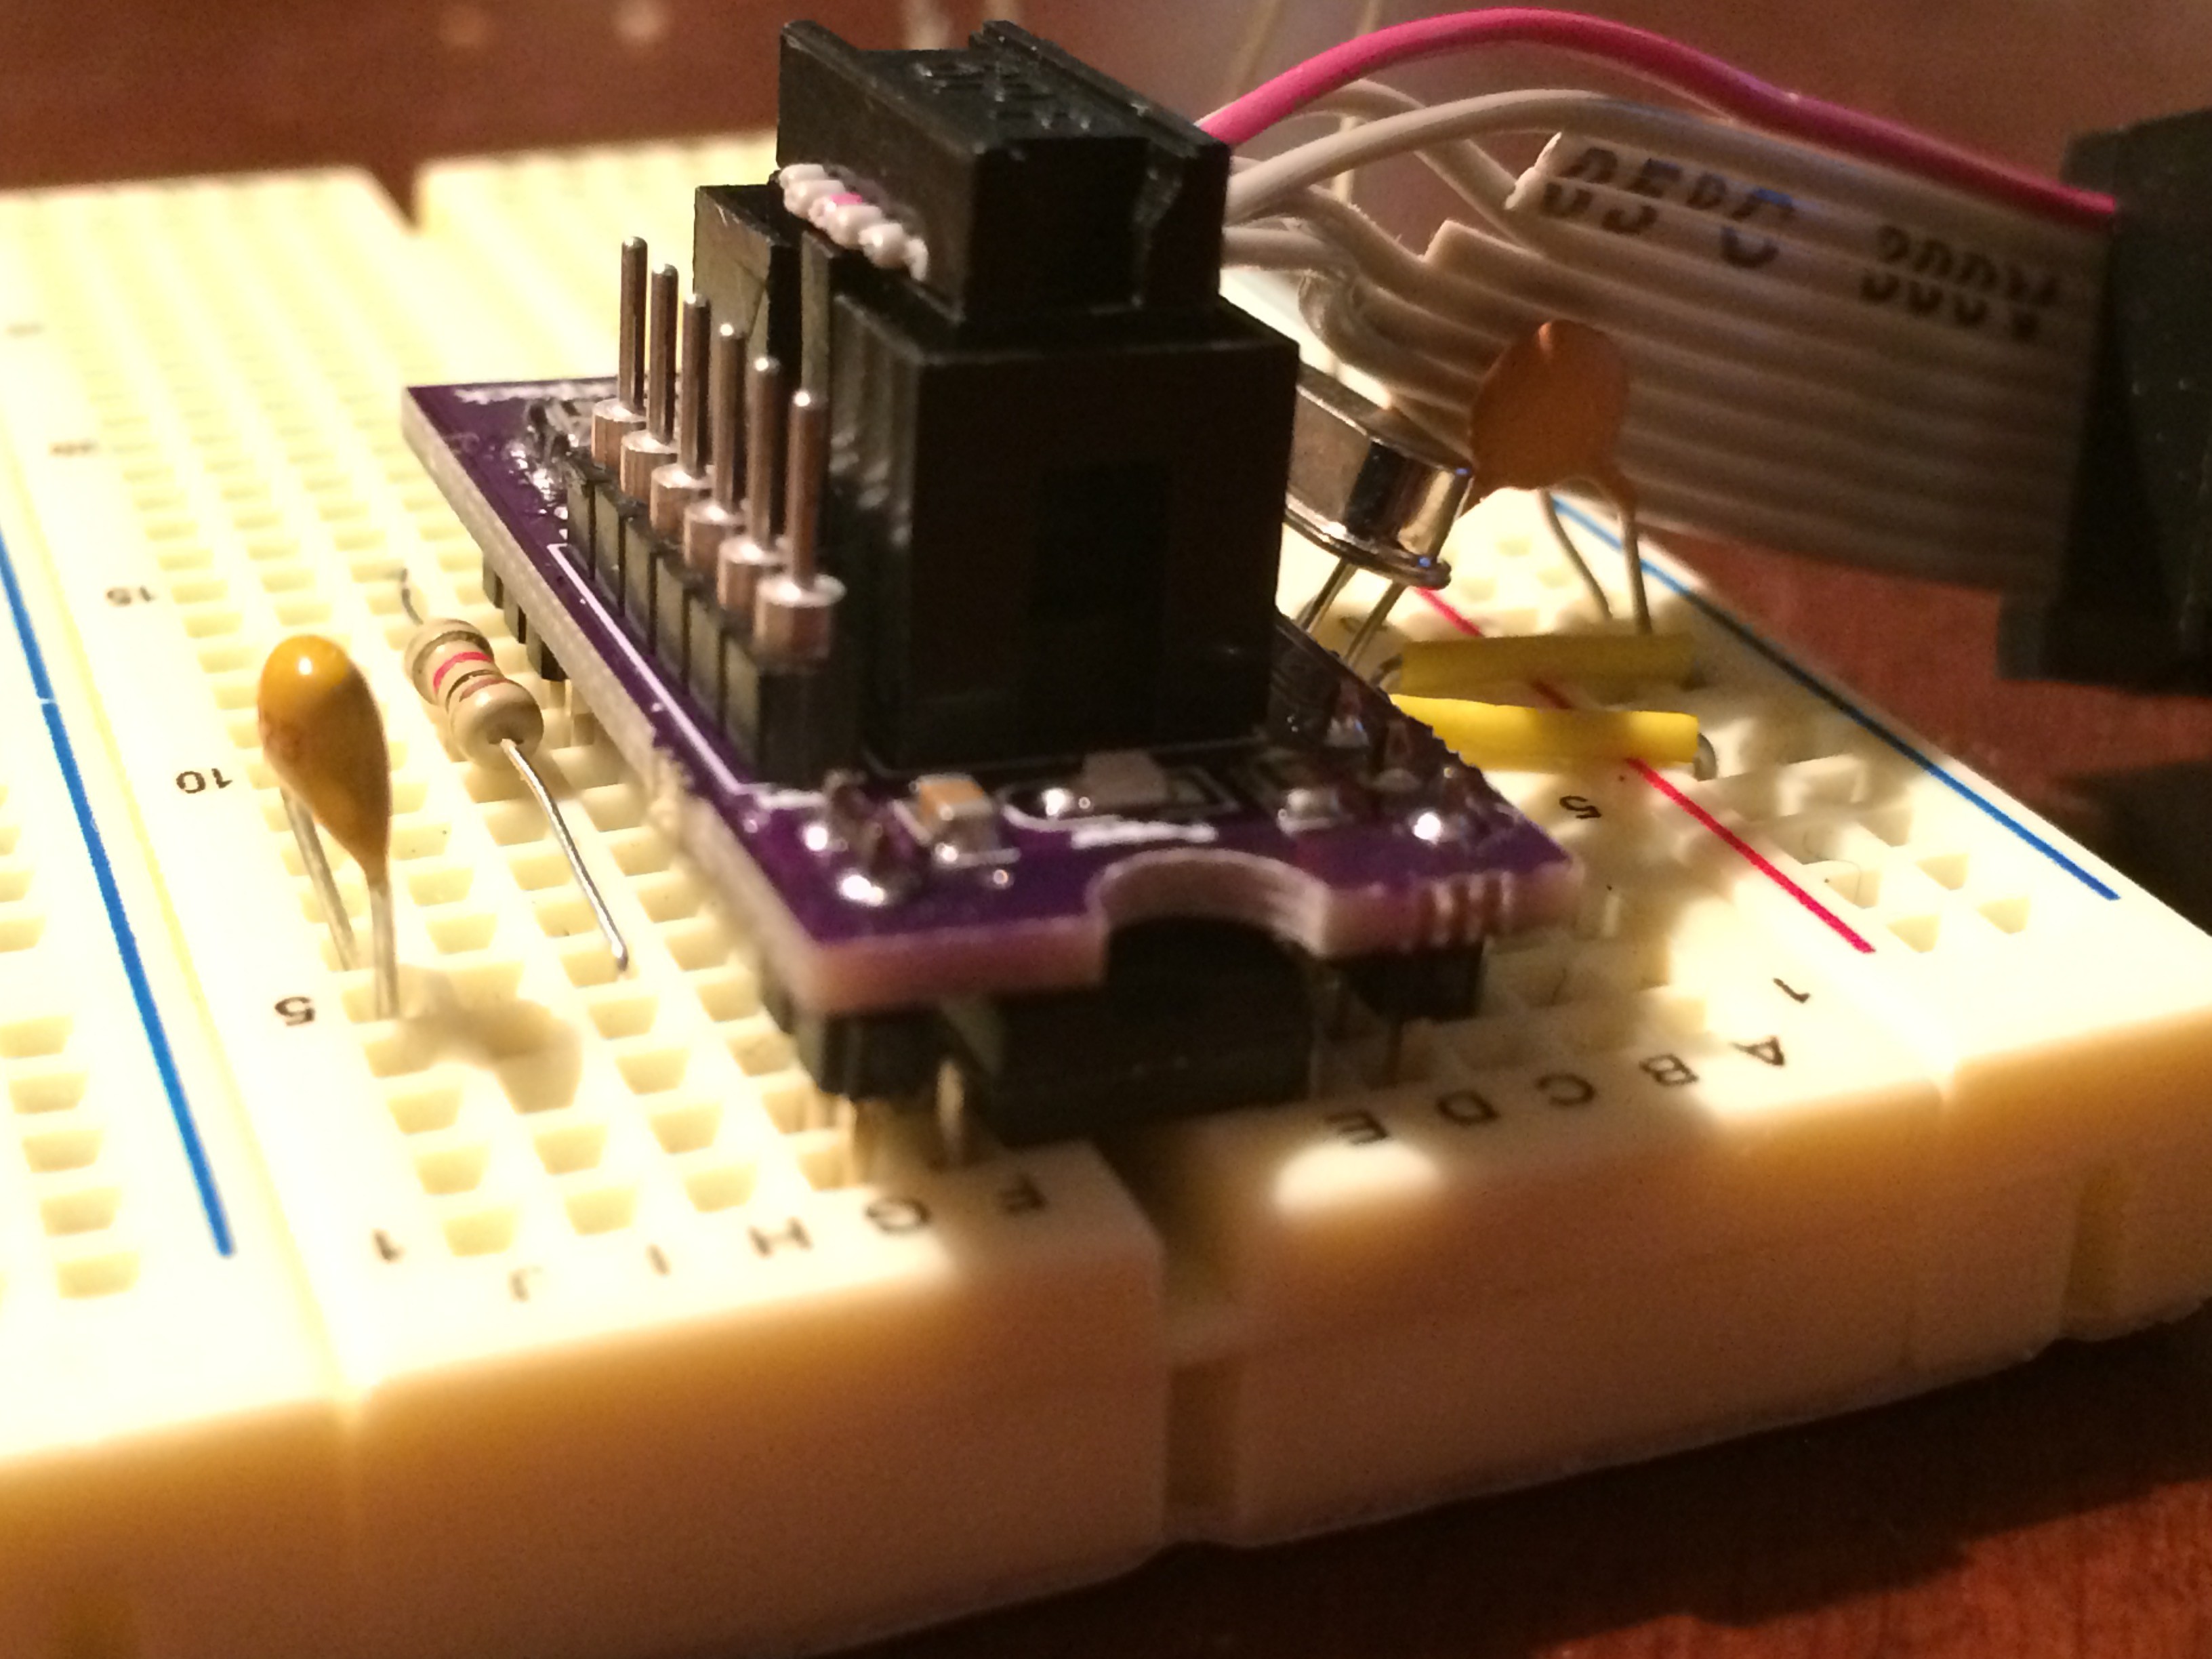
Atmega*8 Breadboard Backpack
Instant ICSP/FTDI headers that fit over your Atmega*8 on the breadboard.
Become a Hackaday.io member
Already have an account? Log in.
Just one more thing
To make the experience fit your profile, pick a username and tell us what interests you.
Pick an awesome username
hackaday.io/
Your profile's URL: hackaday.io/username. Max 25 alphanumeric characters.
Pick a few interests
Projects that share your interests
People that share your interests


 509Maker
 Josh Kittle
 natalie
 zacnotes
Great idea and implimentation.