 Tyler Anderson
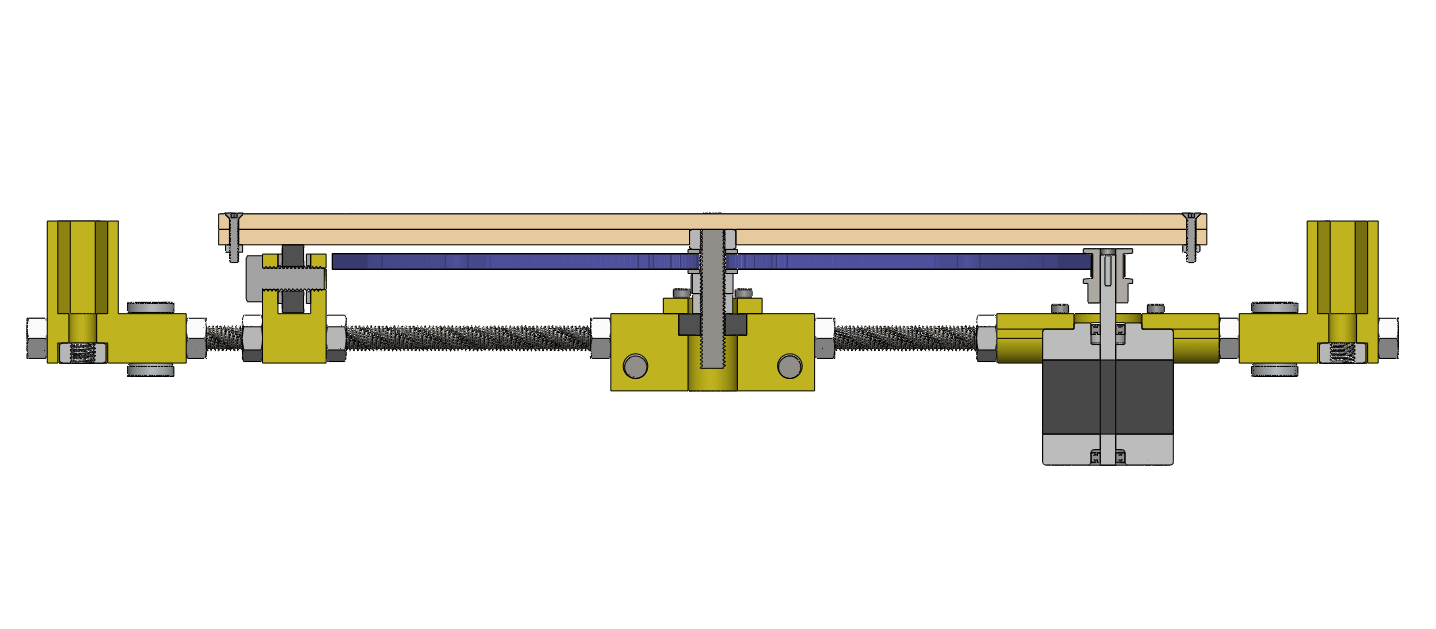
The cross sectional view below shows the original design for the platter. It consists of two layers of circular plywood. The lower piece has a hole in the middle where a nut is glued in place to connect it to the shaft. The upper piece is connected to the lower piece by countersunk bolts around the perimeter.
In testing, the wooden platter proved to be inadequate. The top of the platter is required to be extremely level. Its height could not vary by more than 0.25mm across the entire surface (the height of a single plastic layer on a printed object). Unfortunately, the plywood was naturally warped far beyond the tolerance. This test video demonstrates the problem (http://youtu.be/nC2cthvXTew).

An attempt was made to level the wooden platter by soaking it in water and clamping it in place until dry. This was unsuccessful. We decided to construct a new platter out of machined aluminium, which would have no trouble meeting our flatness tolerance. It would also be better for the heated bed since aluminium is much more thermally conductive than wood.
A suitable plate of 7075 aluminium was acquired from the scrap pile in the machine shop. This picture shows the plate being machined on a CNC mill to a diameter of 304.8 mm and a thickness of 4.2 mm. A hole was drilled and tapped in the center for the M8x1.25 shaft.
Heated BedThe original design did not consider the need for a heated build platform. This is standard equipment on all FDM 3D printers. As an object is being printed, thermal contraction causes the bottom of the object to shrink while the top of the object is still hot. This causes the entire object to warp. In the worst cases, the object will completely peel off of the build surface before printing is completed.
The larger an object is, the more warping occurs. Also different plastics will warp more than others. Since the purpose of this printer is to build large object from multiple material, a heated build surface is essential.
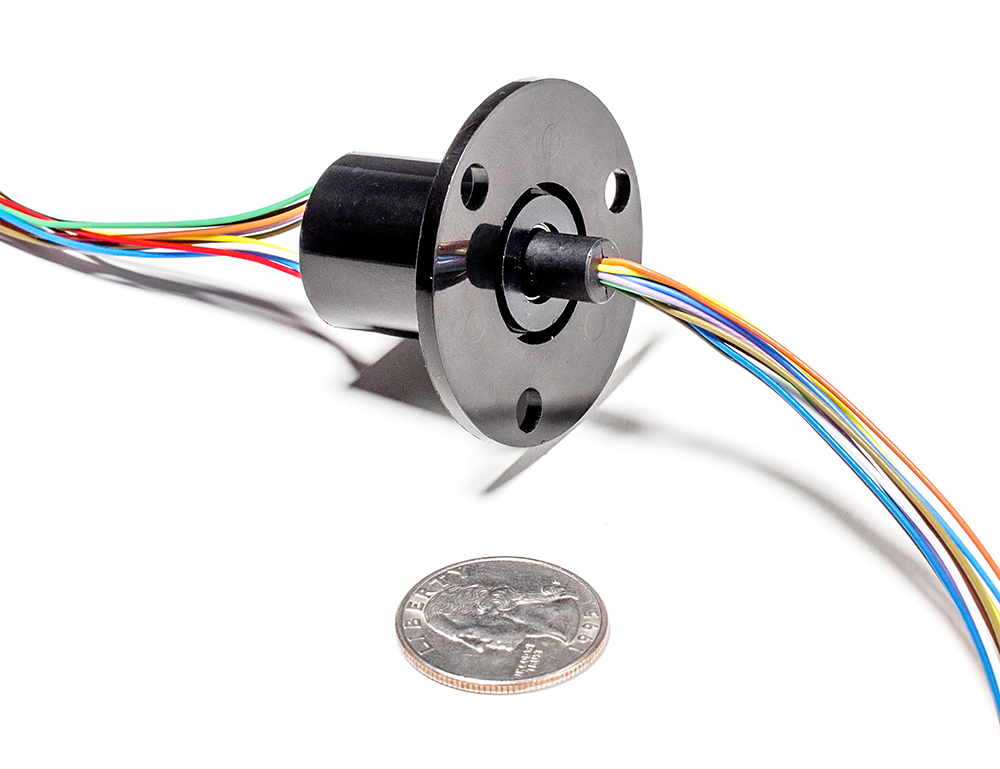
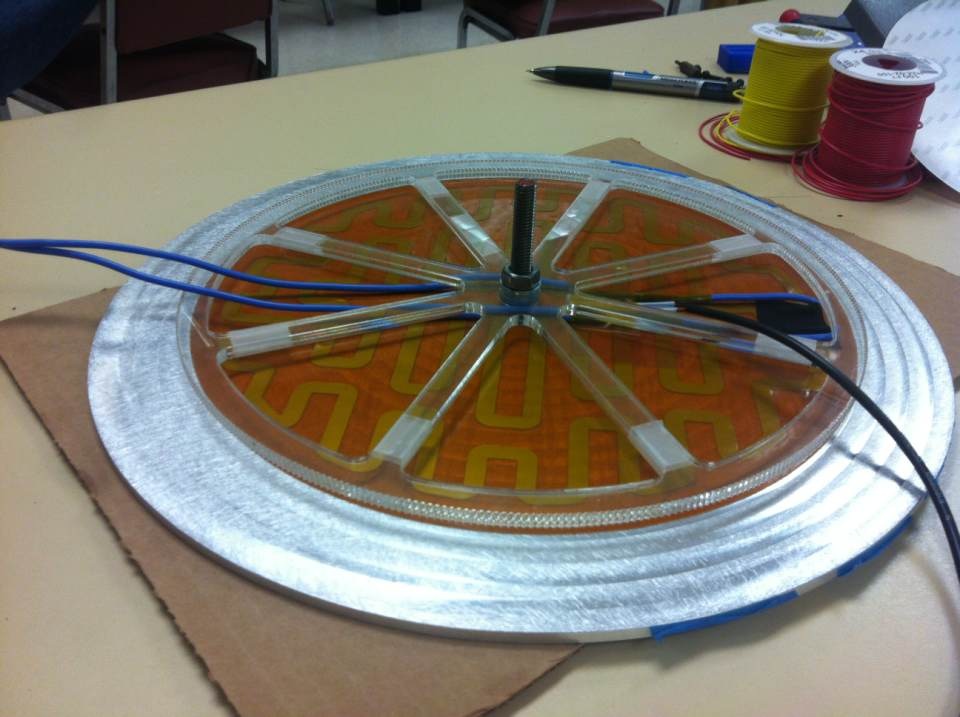
Most 3D printers use an electric heating element and a temperature sensor under the build surface. Unfortunately, the spinning platter on this machine means the wires running to the heater would get wrapped around the shaft. The solution is simple. The electrical connections are passed through a slip ring to prevent the wires from twisting around the shaft. After extensive research, we found a circular 200W heater with a 240 mm diameter and a 12 connection slip ring.
The slip ring replaced the central bearing underneath the platter. A hollow coupler was used to connect the shaft to the slip ring. Holes were drilled in the side of the coupler for the wires to pass through. Since each connection on the slip ring is only rated for 2 Amps, multiple wires were used in parallel to carry the full current of the heater. The heater itself is designed to operate at 24 Volts. Unfortunately our power supply only provides 12 Volts. Although the heater is run at half power, it still gets sufficiently warm given enough time.


Discussions
Become a Hackaday.io Member
Create an account to leave a comment. Already have an account? Log In.