Close
0%
0%

Key Pass

Keychain USB multiple password manager/generator/injector

Similar projects worth following
This project provides a way of store up to 16 passwords, that can be sent to your PC like keystrokes. It was inspired by USB Key Generator by Code & Life, and therefore is also based on AVR and V-USB.
One pushbutton is used to select the desired password, numbered (0-9,A-F) visible on a 7 segment display while another sends (types) the passord as keystrokes. The button operation can optinally be performed by Num Lock and Scroll Lock.
The Board was designed to fit inside a 1x1 inch circuit board and has a hole for being held by a ring on a keychain.

Operating instructions for KeyPass:


Normal Operation:

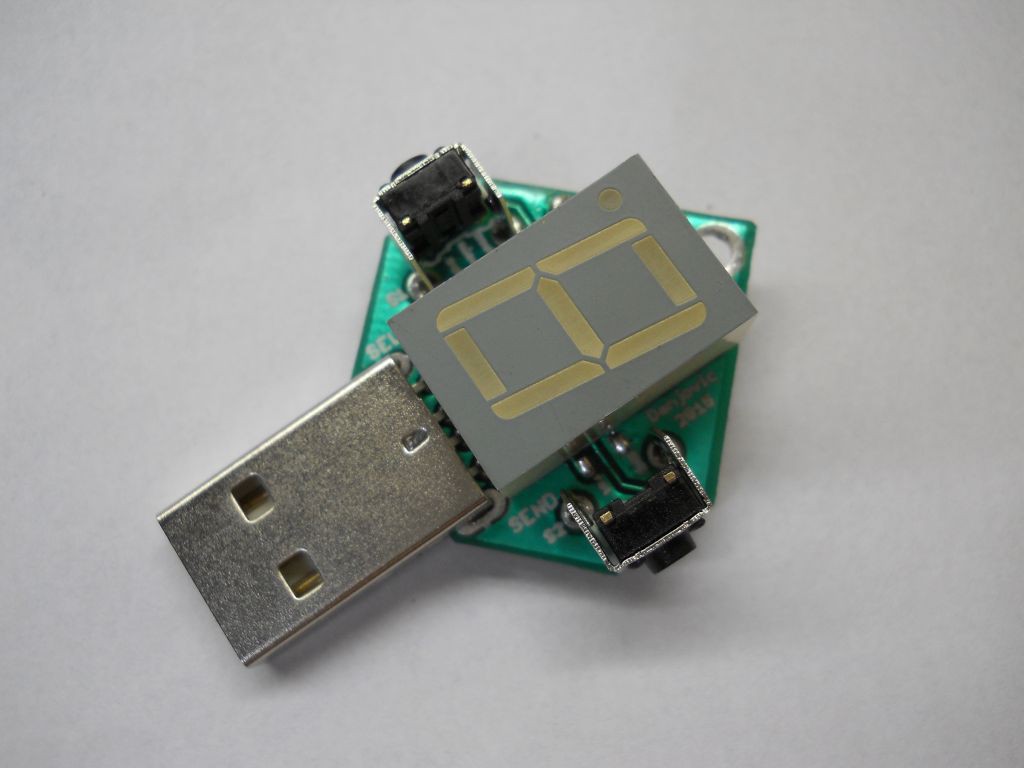
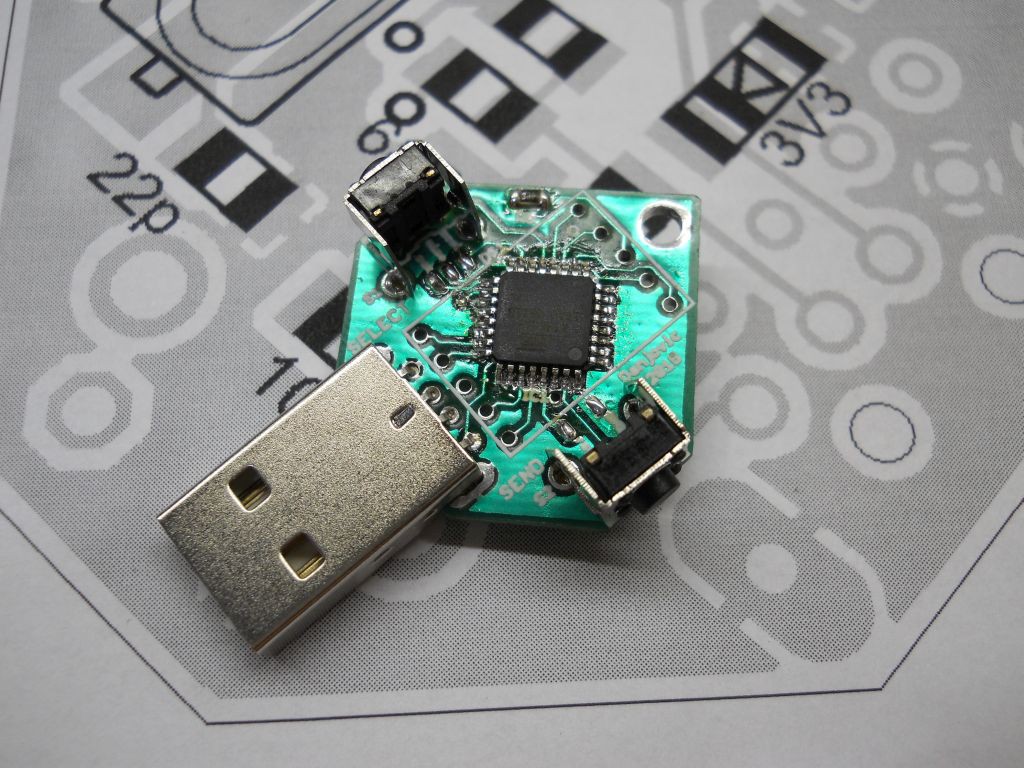
Insert KeyPass in a USB port in your computer. If this is the first time you use KeyPass on this USB port your computer might take some time identifying it and installing a HID driver.
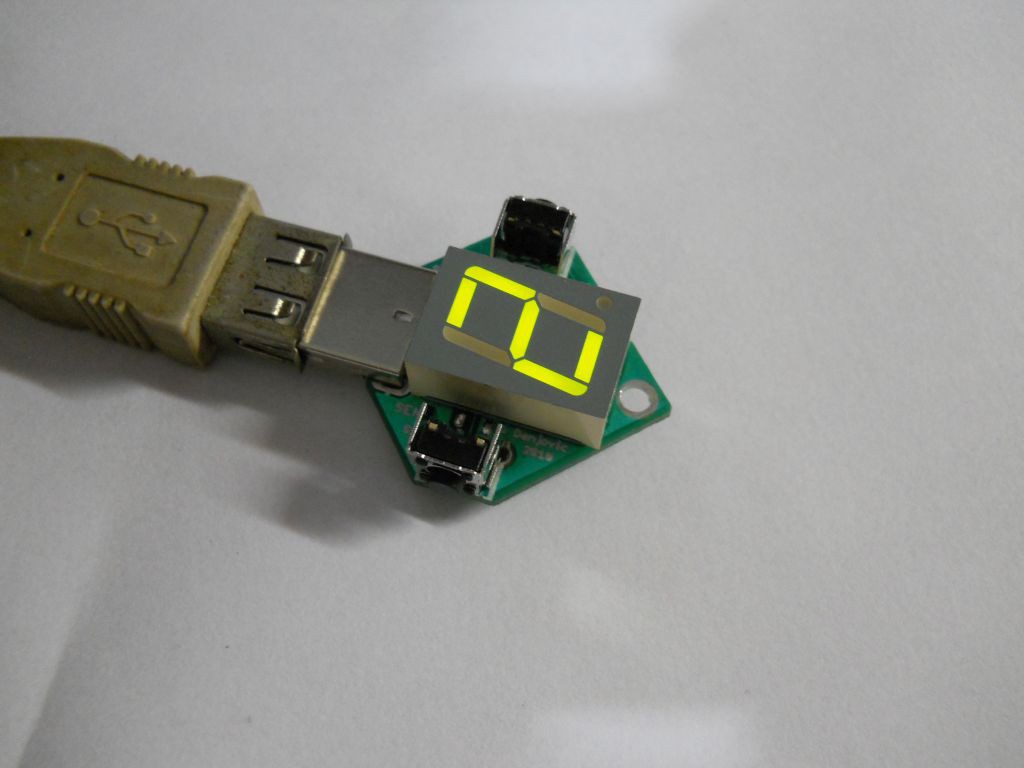
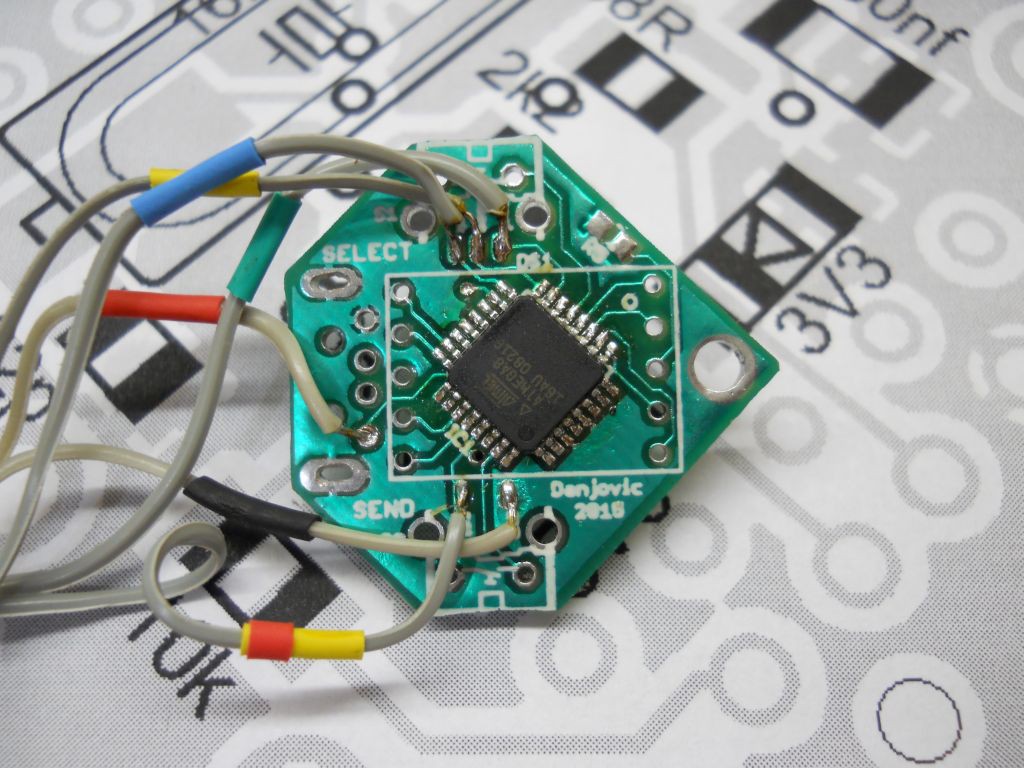
Using the SELECT button, or NUM LOCK key, select the desired password slot. There is 16 slots available from 0-9 and then from A to F.
After selecting the desired slot press the SEND button (or press SCROLL LOCK). The password stored on that slot shall be typed in automatically.


Disabling SCROLL LOCK activation
Some users might want to disable the operation of SCROLL LOCK. To disable the operation of SCROLL LOCK key press and hold SEND button while inserting the device on the usb port. This configuration will be stored on the internal EEPROM. Repeat the same procedure for re-enabling the operation of SCROLL LOCK key.

Disabling NUM LOCK activation
Some users might want to disable the operation of NUM LOCK. To disable the operation of NUM LOCK key press and hold SELECT button while inserting the device on the usb port. This configuration will be stored on the internal EEPROM. Repeat the same procedure for re-enabling the operation of NUM LOCK key.

Generating a new password.
To generate a new password, select the desired slot using SELECT button or NUM LOCK key (if enabled). Then press and hold the SEND button. While pressing the SEND button, tap CAPS LOCK 4 times. The LED Display shall be blanked and the decimal point shall be lit to indicate that the device is ready for generate the new password. While keeping the SEND button pressed, tap CAPS LOCK 12 times more. After the 12th CAPS LOCK press the LED display shall display again the slot number and the decimal point shall be OFF. Now release the SEND button and the newly generated password shall be typed in automatically.

Uploading legacy passwords.

For uploading legacy passwords, create a text file with up to 10 passwords, one password per line and add one line at the beginning with 3 'percent' characters in sequence (%%%), then save this file with the name "passwords.txt" and run the script "pass2bin.py" to generate the "eeprom.bin" file. Further rules for generating the legacy password file can be found in the Python script

After generating the passwords press and hold both SELECT and SEND buttons then insert the device into the computer. It will put the device in bootloader mode.

Now open a command shell on the same folder where the 'eeprom.bin' was generated and type the following command to upload the passwords to the device.


avrdude -p m8 -c usbasp -U eeprom:w:eeprom.bin


Now the device has your password in the same sequence they appear in the text file.

Important Reminders:

  • Delete the 'password.txt' as well as the 'eeprom.bin' files as soon as you finish the uploading.
  • If your 'passwords.txt' has less than 10 passwords the remaining will be created as empty passwords.
  • All passwords previously stored in the device will be erased.

  • 1 × ATmega8-16AU AVR Microcontroller, 8K Flash TQFP32-08 package
  • 1 × SC56-11GWA Single Digit Numeric Display, 7 Segment, 14.2mm (0.56 INCH)
  • 2 × ZMM5226B Zener diode, 0.5W 3.3V 5% , SOD80C
  • 1 × 12065C104KAT2A Multilayer Ceramic Capacitor, 0.1uF/50volts, 1206 package
  • 2 × VJ0805A220JXGAT5Z Multilayer Ceramic Capacitor, 22pF 1KV, 0805 package

View all 12 components

  • Generating a new password

    danjovic12/22/2015 at 04:10 0 comments

    This second video shows the generation of a new password, by pressing and holding SEND key while tapping CAPS LOCK Key. After the 5th tap the decimal point in the display gets lit. Then CAPS is tapped 12 more times until the decimal point turns off signaling that a new password has been generated.


  • Almost forgot! A video of Key Pass Working!

    danjovic12/22/2015 at 00:58 0 comments

    I still have to ask some help to record a password generation video. I need both hands plus another for the camera.

  • Small improvement for legacy passwords

    danjovic12/07/2015 at 22:18 0 comments

    Added a small improvement on the script that generates blank passwords. Now it is possible to add a carriage return by using the # symbol on the 13th column of the line containing the password.

  • Added script to support legacy passwords

    danjovic12/03/2015 at 03:56 0 comments

    The Python script generates a binary file (eeprom.bin) from a text file containing the passwords.

    After generating the passwords the device shall be put in bootloader mode and the following command shall by typed:

    avrdude -p m8 -c usbasp -U eeprom:w:eeprom.bin

    Script is available at GitHub

  • Uploading legacy passwords

    danjovic12/03/2015 at 02:04 0 comments

    I've been working how to upload legacy passwords to KeyPass. The first feasible solution that came to my mind is a Python script to parse a text file containing the passwords then generate a eeprom.bin file and a line of command for uploading the contents of EEPROM using AVRDUDE.

    The first part of the script is working. Here are the rules for the passwords.txt file:

    • File namemust be passwords.txt
    • One password per line
    • Maximum length 12 characters
    • Maximum 10 passwords
    • Blank lines will be ignored
    • Lines before a starting mark will be ignored
    • The starting mark is a triple percent signal %%%
    • Blank lines will be ignored
    • Valid Character set: a..z A..Z 0..9 . _ - (space) (tab)
    • Trailing spaces will be ignored if the line length is more than 12 characters. if the password has trailing spaces you must leave the rest of the line blank

    An example password would be:

    ####################################################
    #  Example of legacy passord file for Key Pass     #
    #                                                  #
    #  ATTENTION                                       #
    #        DELETE THIS FILE AFTER UPLOADING          #
    #                                                  #
    ####################################################
             111 
    123456789012
       %%%  This is the starting mark  
    123456      characters after 12th will be ignored
    
    password    blank lines like above and below too
    
    admin       trailing spaces on comment line too
    0000  
    admin       you can use this space to describe your
    1qaz2wsx    passwords but I highly discourage this
    12characters
    hackaday
    jeronimo
    ZX-81.Rulz  this is the 10th password

  • Board assembled and working

    danjovic11/20/2015 at 01:55 5 comments

    After some steps, I've managed to assemble the board.

    And it is working now!

  • Boards have arrived

    danjovic11/19/2015 at 23:02 2 comments

    The boards have finally arrived from my supplier. Next step: Assemble them!

  • Enabling/Disabling of NumLock / ScrollLock added

    danjovic11/12/2015 at 10:46 0 comments

    The functions to enable/disable alternative control by NUM LOCK (change slot) and SCROLL LOCK (send password) were added. Both configurations are saved in EEPROM, as well as the last slot number selected when a password was sent.

  • First Functional Version: Ready

    danjovic11/05/2015 at 02:05 0 comments

    The first functional version of the firmware is ready! Now I can use/generate 10 different passwords.

    To avoid non intentional password reprogramming the SEND key must be held pressed, as a safeguard, while tapping the Caps Lock key.

    Next step will be on how to upload legacy passwords, but I am prone to use USBaspLoader together with AVRDude to write the passwords directly to the EEPROM space of the AVR.

  • Safeguard added

    danjovic11/05/2015 at 00:21 0 comments

    Addeed a safeguard for generating a new password. Now the button SEND shall be kept pressed while CAPS LOCK is being tapped otherwise the current password is not changed.

View all 20 project logs

  • 1
    Step 1

    Start by assembling the components on the bottom side of the board:

    • Resistors, R1, R2, R3, R4
    • Capacitors, C1, C2, C3
    • Diodes D1, D2

    Then solder the microcontroller on the top side of the board


    Now solder the Crystal.

  • 2
    Step 2

    Solder some wires at the ISP connections of the board. The +Vcc will come from respective Pad in USB connector

    Then connect the ISP to an AVR programmer. This procedure assumes the programmer is compatible with USBAsp, but other programmers can be used.

    Plug the device into an USB port (or USB power supply) and check if the AVR can be programmed. It might be necessary to use 'slow speed' option of the programmer.

    >avrdude -c usbasp -p m8

    Now change to the booloader directory and type

    make program
    Now program the fuses
    make fuse

    Alternatively program the fuses by typing

    avrdude -c usbasp -p m8  -U hfuse:w:0xc0:m -U lfuse:w:0x9f:m 

  • 3
    Step 3
    make program

    Now remove the ISP wires and solder the USB connector and the two buttons and the resistor R5.

View all 4 instructions

Enjoy this project?

Share

Discussions

James wilson wrote 02/21/2017 at 16:25 point

I love this project.     Do you have any spare PCB to sell?    thanks

I wonder if it would be possible to update and list passwords to the "keypass" using a serial/usb connection.   I know that the software libraries exist to do the serial connection.    It could enter serial mode when the device is connected holding down a button and then send in a serial file with the passwords from the PC.

Also do you have a method that would allow a user name and password to be entered with one button press?

  Are you sure? yes | no

danjovic wrote 02/21/2017 at 20:32 point

If you plug the device with both buttons pressed it enters into the bootloader where you can upload the password to the eeprom using avrdude. 

I suggest you to check  #Memtype: Open Source Password Keeper which is far more user friendly. 

  Are you sure? yes | no

alpha_ninja wrote 12/07/2015 at 00:30 point

[verified: no design files missing]

  Are you sure? yes | no

danjovic wrote 12/07/2015 at 01:11 point

Great!!

  Are you sure? yes | no

alpha_ninja wrote 12/07/2015 at 02:56 point

Amazing!!

  Are you sure? yes | no

alpha_ninja wrote 12/02/2015 at 00:47 point

This is your one-week reminder to upload design documents: https://hackaday.io/project/7813-the-square-inch-project/log/28566-design-deadline

  Are you sure? yes | no

Peter Babič wrote 11/05/2015 at 11:17 point

How does the ATmega know about the NUM LOCK / SCROLL LOCK presses? This is really mysterious to me. Does HID activity share b/w all connected HID devices somehow by default?

  Are you sure? yes | no

danjovic wrote 11/06/2015 at 01:04 point

The LEDs status is sent to all HID keyboards whenever any of them commands a change.

  Are you sure? yes | no

danjovic wrote 10/24/2015 at 21:24 point

By the way, thanks for following!

  Are you sure? yes | no

danjovic wrote 10/24/2015 at 21:23 point

The a new password for the current slot is generated by tapping caps lock several times, pretty much as the DIY USB password generator from "Code and Life" blog.

  Are you sure? yes | no

Domingo wrote 10/24/2015 at 19:25 point

How to you add/edit a password?

Nice project!

  Are you sure? yes | no

Similar Projects

Does this project spark your interest?

Become a member to follow this project and never miss any updates