Close
0%
0%

Motion Sensing LED Jack-O-Lantern

An Electronic, LED, Motion Sensing Jack-O-Lantern for Halloween

Similar projects worth following
This is a simple project which uses an 8x8 RGB LED matrix and a PIR sensor to make a motion-sensing Jack-O-Lantern. The light changes colors gradually (or alternatively, flicker like a candle) until the PIR sensor in the lantern's nose is triggered. Once motion is sensed, the color rapidly alternates between red and a random color in 'staccato' fashion.

Update 2015/11/01: The Yuotube video was broken halfway through so I've uploaded a new one.

I wanted to make an interactive Jack-O-Lantern that would change colors when people get near it. I might add sound effects as well if I have time before the holiday... It uses about 200mA of a USB battery pack per hour. (You can alternatively hard-wire the power to any 5VDC supply.)

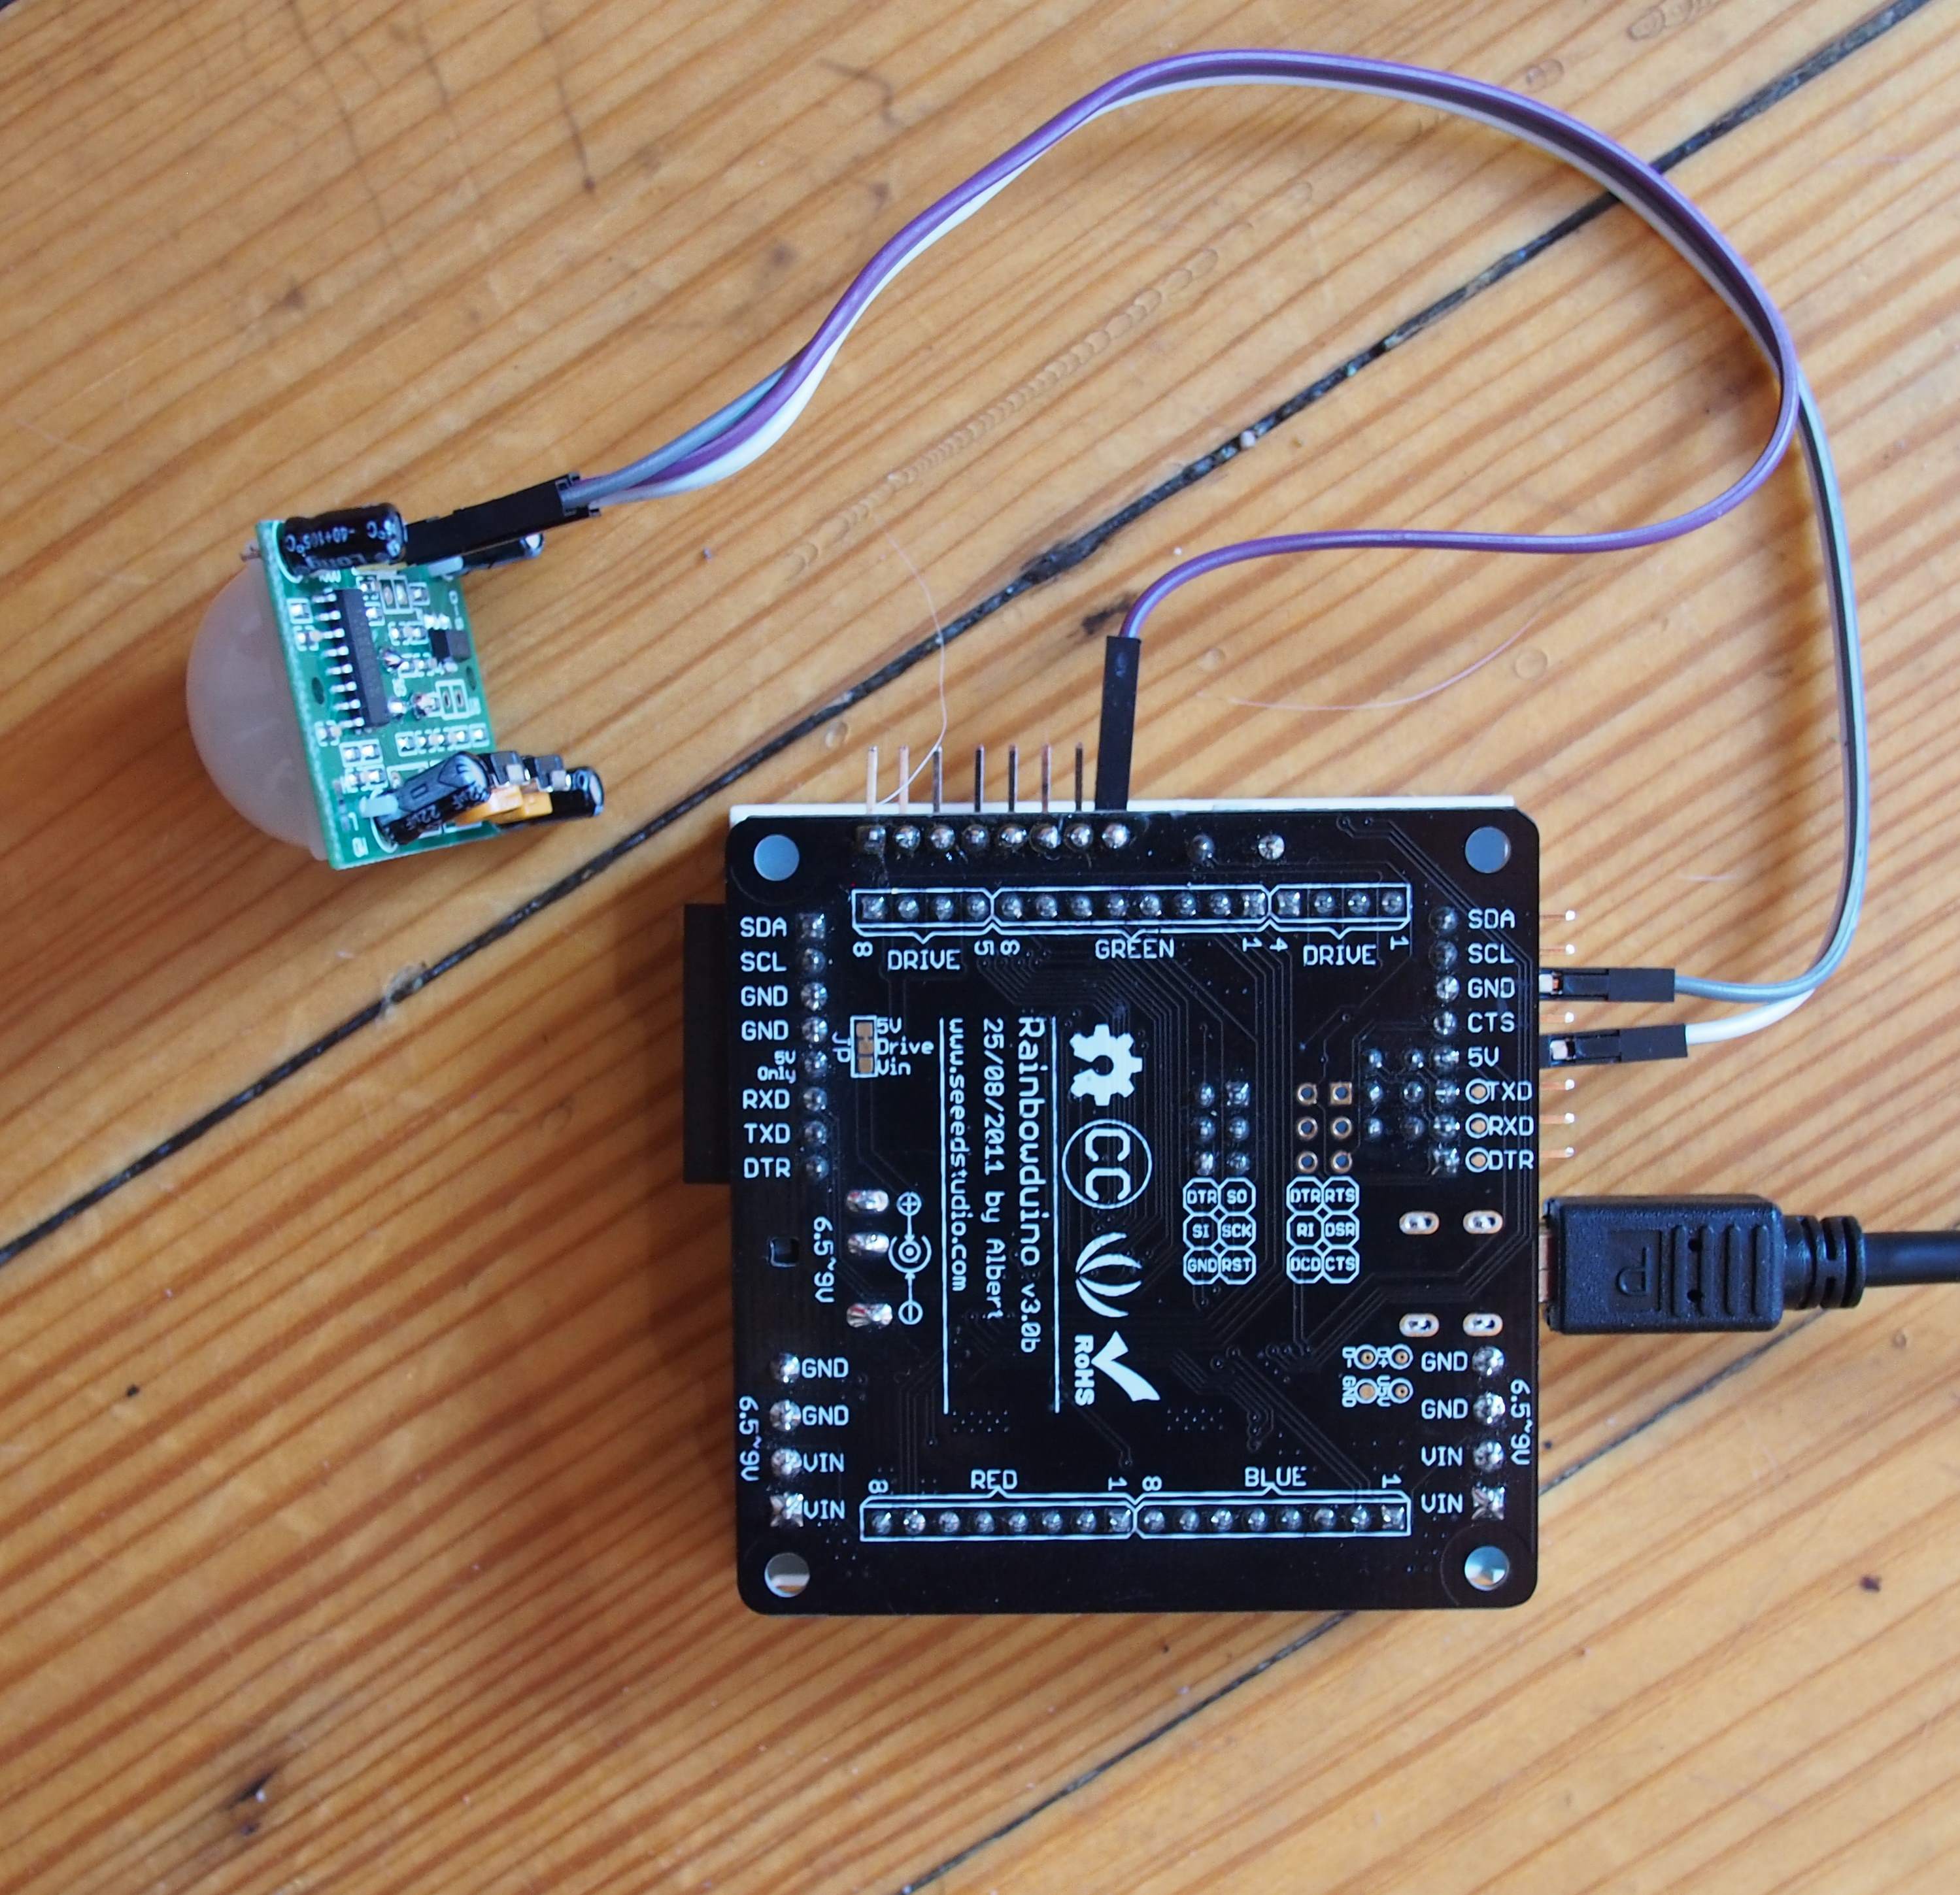
The system itself is simple and only consists of a Rainbowduino LED controller, an 8x8 RGB LED matrix, an HC-SR501 PIR sensor and a battery. The lighting pattern is controlled by the PIR sensor. By default the LEDs emulate a candle until motion is sensed at which point it flashes pseudo-random colors. There are a couple other color patterns in the sketch as well. All of them are just examples of what can be done.

HAPPY HALLOWEEN!

  • 1 × Pumpkin for the Jack-O-Lantern
  • 1 × 8x8 LED matrix
  • 1 × Rainbowduino arduino compatible 8x8 LED matrix controller
  • 1 × PIR sensor HC-SR501 motion sensor
  • 1 × USB Battery Pack (Optional, 5000mAh or greater) to power the lantern (or you can just hard wire to 5VDC...)

View all 8 components

View project log

  • 1
    Step 1

    Hardware


    All of this is pretty straightforward. No soldering was required and I just used stuff I had lying around. It takes only a few minutes to assemble.

    • Plug the 8x8 array into the rainbowduino (paying attention to polarity)
    • attach the PIR sensor- +5V to Vcc, Gnd to Gnd and Out to D3 (see photo)
    • Upload code to rainbowduino (link at left of project page)
  • 2
    Step 2

    Upload Code

    Now you can upload the code (available here - https://github.com/alphacharlie/chuckolantern)

    • Download the chuckolantern sketch from Github
    • open Arduino IDE
    • plug in your Rainbowduino
    • in tools, select 'Arduino Duemilanove or Diecimila'
    • in tools select the com port of your Rainbowduino
    • in preferences, change the sketch directory to wherever you downloaded the source
    • restart the Arduino IDE
    • open the sketch, compile and upload

    Possible encahncements - adding more sensors, sound FX, changing the light patterns, connecting multiple 8x8 together to make animated faces??? (Lots o' fun to be had!)

  • 3
    Step 3

    Testing

    Now you can plug the USB battery into the unit and see how it works. You'll also want to adjust the sensitivity and reset time on the PIR sensor at this point. With the PIR sensor facing downward, the left potentiometer is sensitivity and the right one is reset time. Clockwise on sensitivity is more sensitive. Clockwise on the reset time increases the time that the sensor remains triggered(on) before resetting.

    Once it's powered up, you should see the colors rapidly change when there is motion, alternating red. While there is no motion it should flicker like a candle (or smoothly change colors like a mood lamp depending on compile options).

View all 4 instructions

Enjoy this project?

Share

Discussions

Richard Hogben wrote 10/28/2015 at 04:31 point

Great! Now it needs wifi access so it can message you when trick or treaters arrive :)

  Are you sure? yes | no

Alpha Charlie wrote 10/28/2015 at 06:37 point

That is an awesome idea! (I might have a FONA 800 around... Would it be wrong for a jack-o-lantern to have a cell number?)

  Are you sure? yes | no

Richard Hogben wrote 10/28/2015 at 20:58 point

No, all squash should have cell numbers.

  Are you sure? yes | no

Similar Projects

Does this project spark your interest?

Become a member to follow this project and never miss any updates