 minqi bao
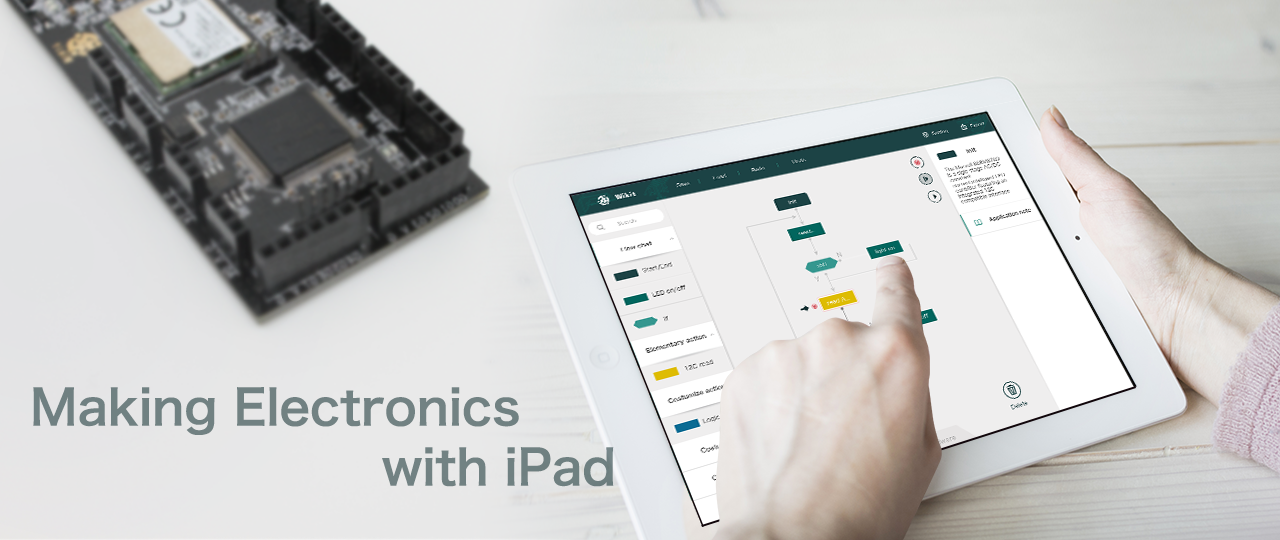
Milestone
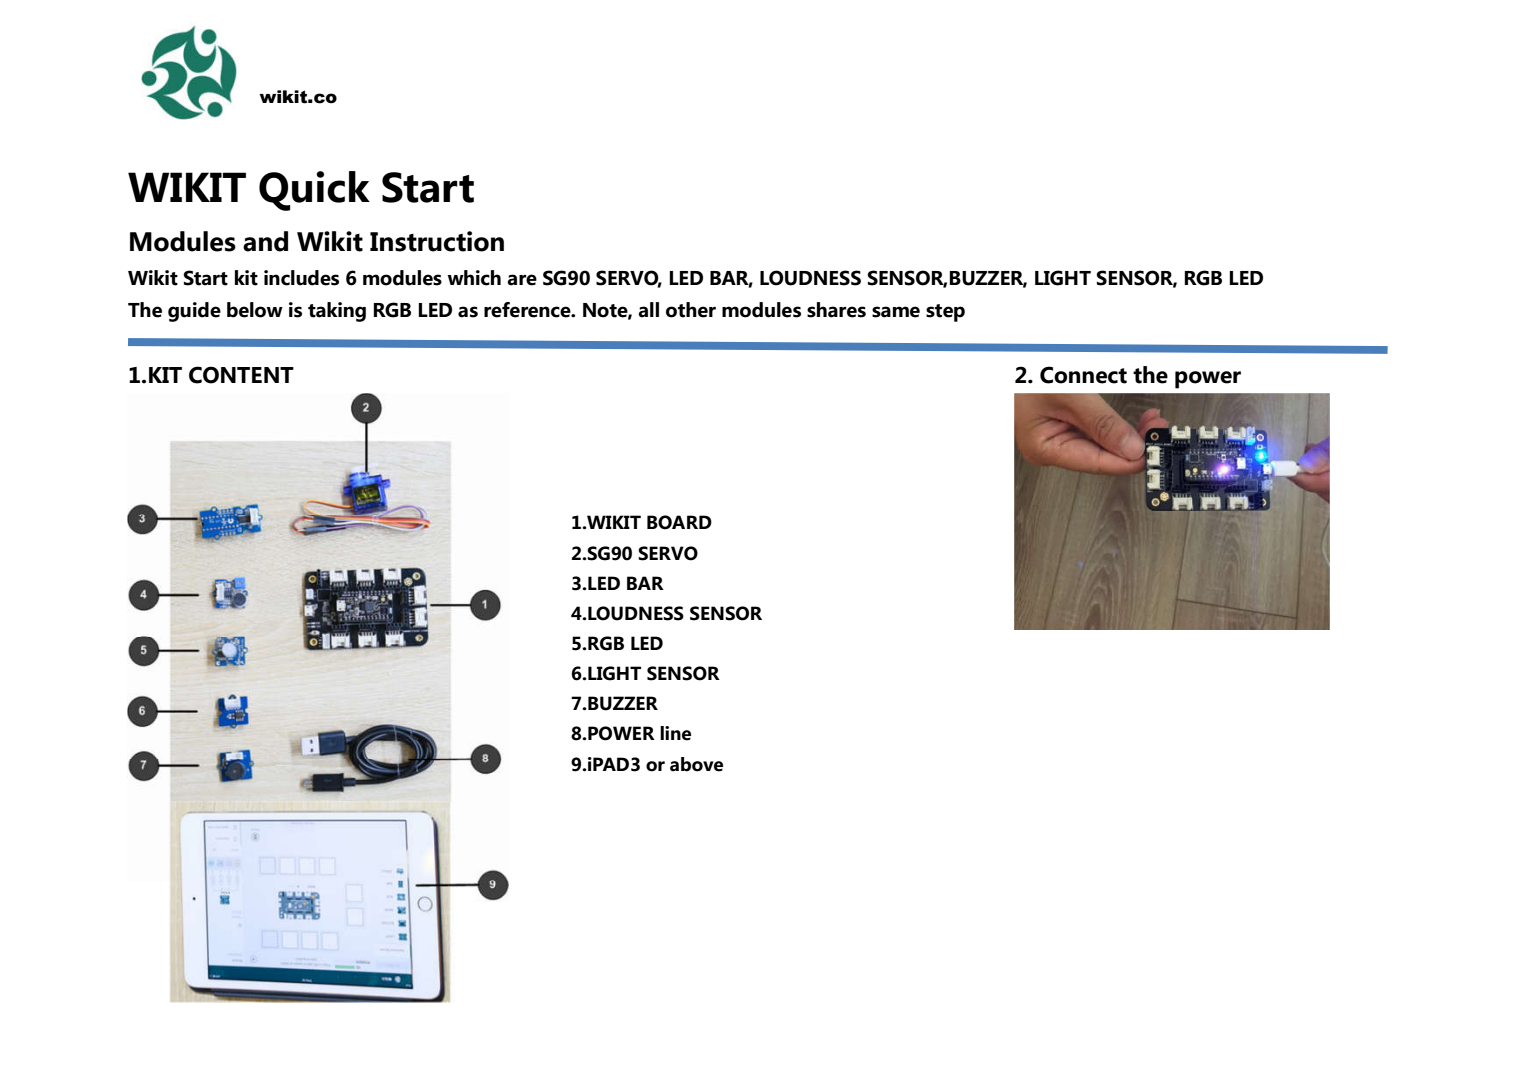
1. wikit round start kit --- a downcost version of wikit with BLE ONLY for everyone trial
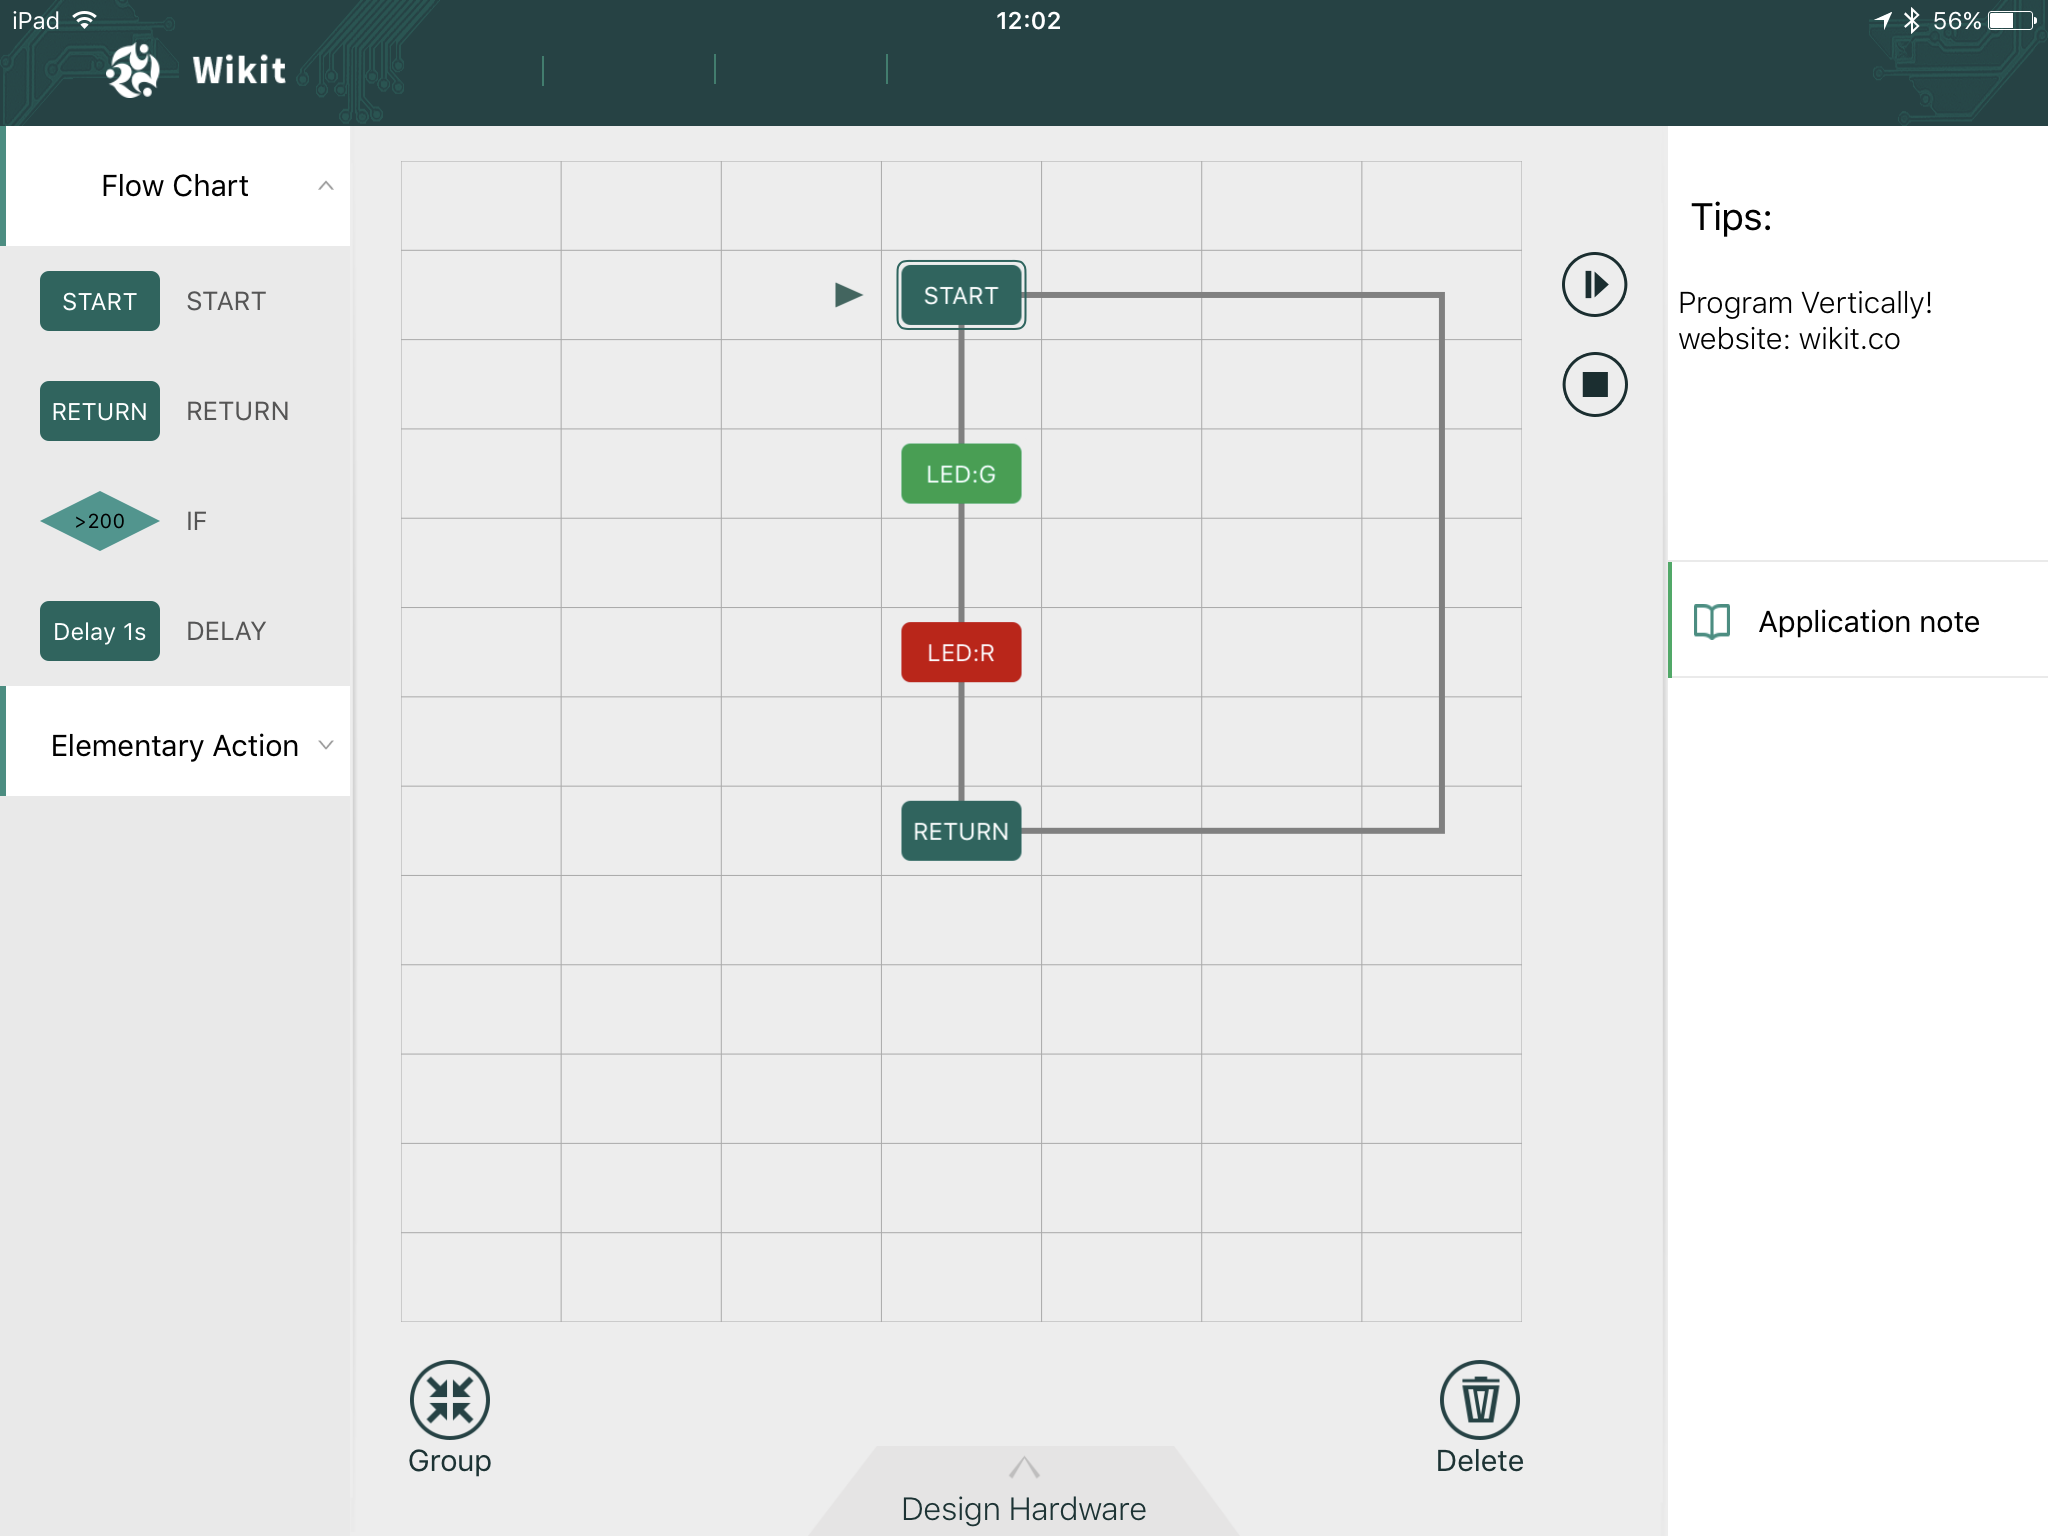
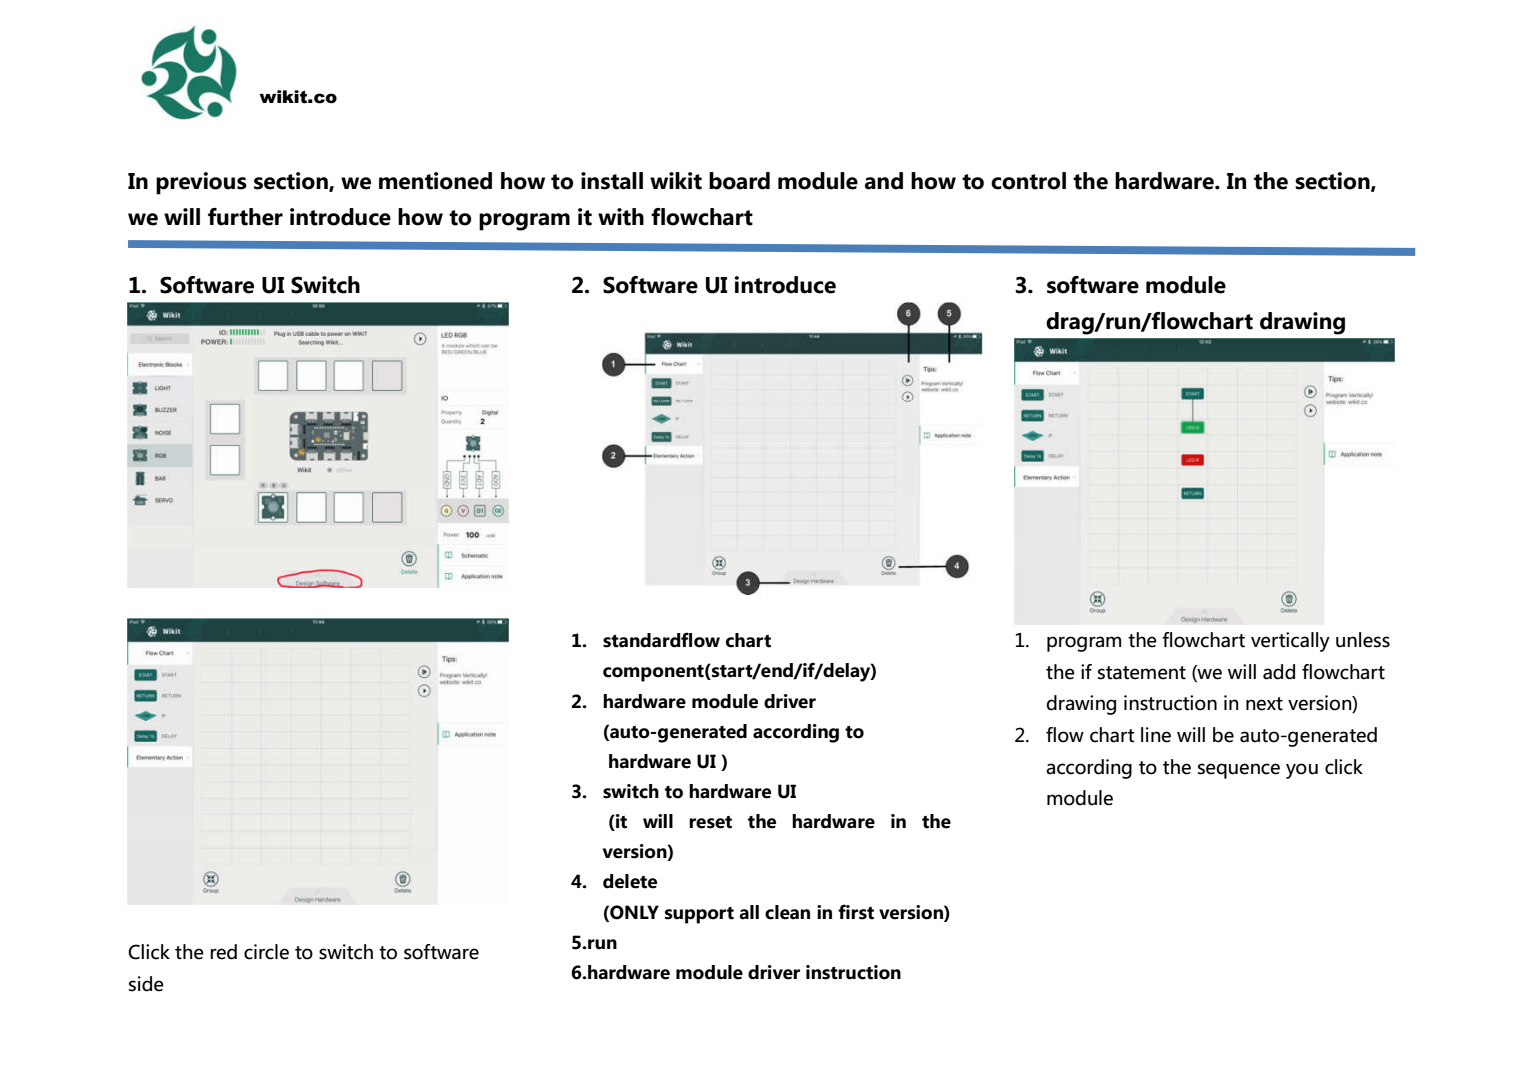
a.support flowcharts programming
b.support flowcharts step debugging
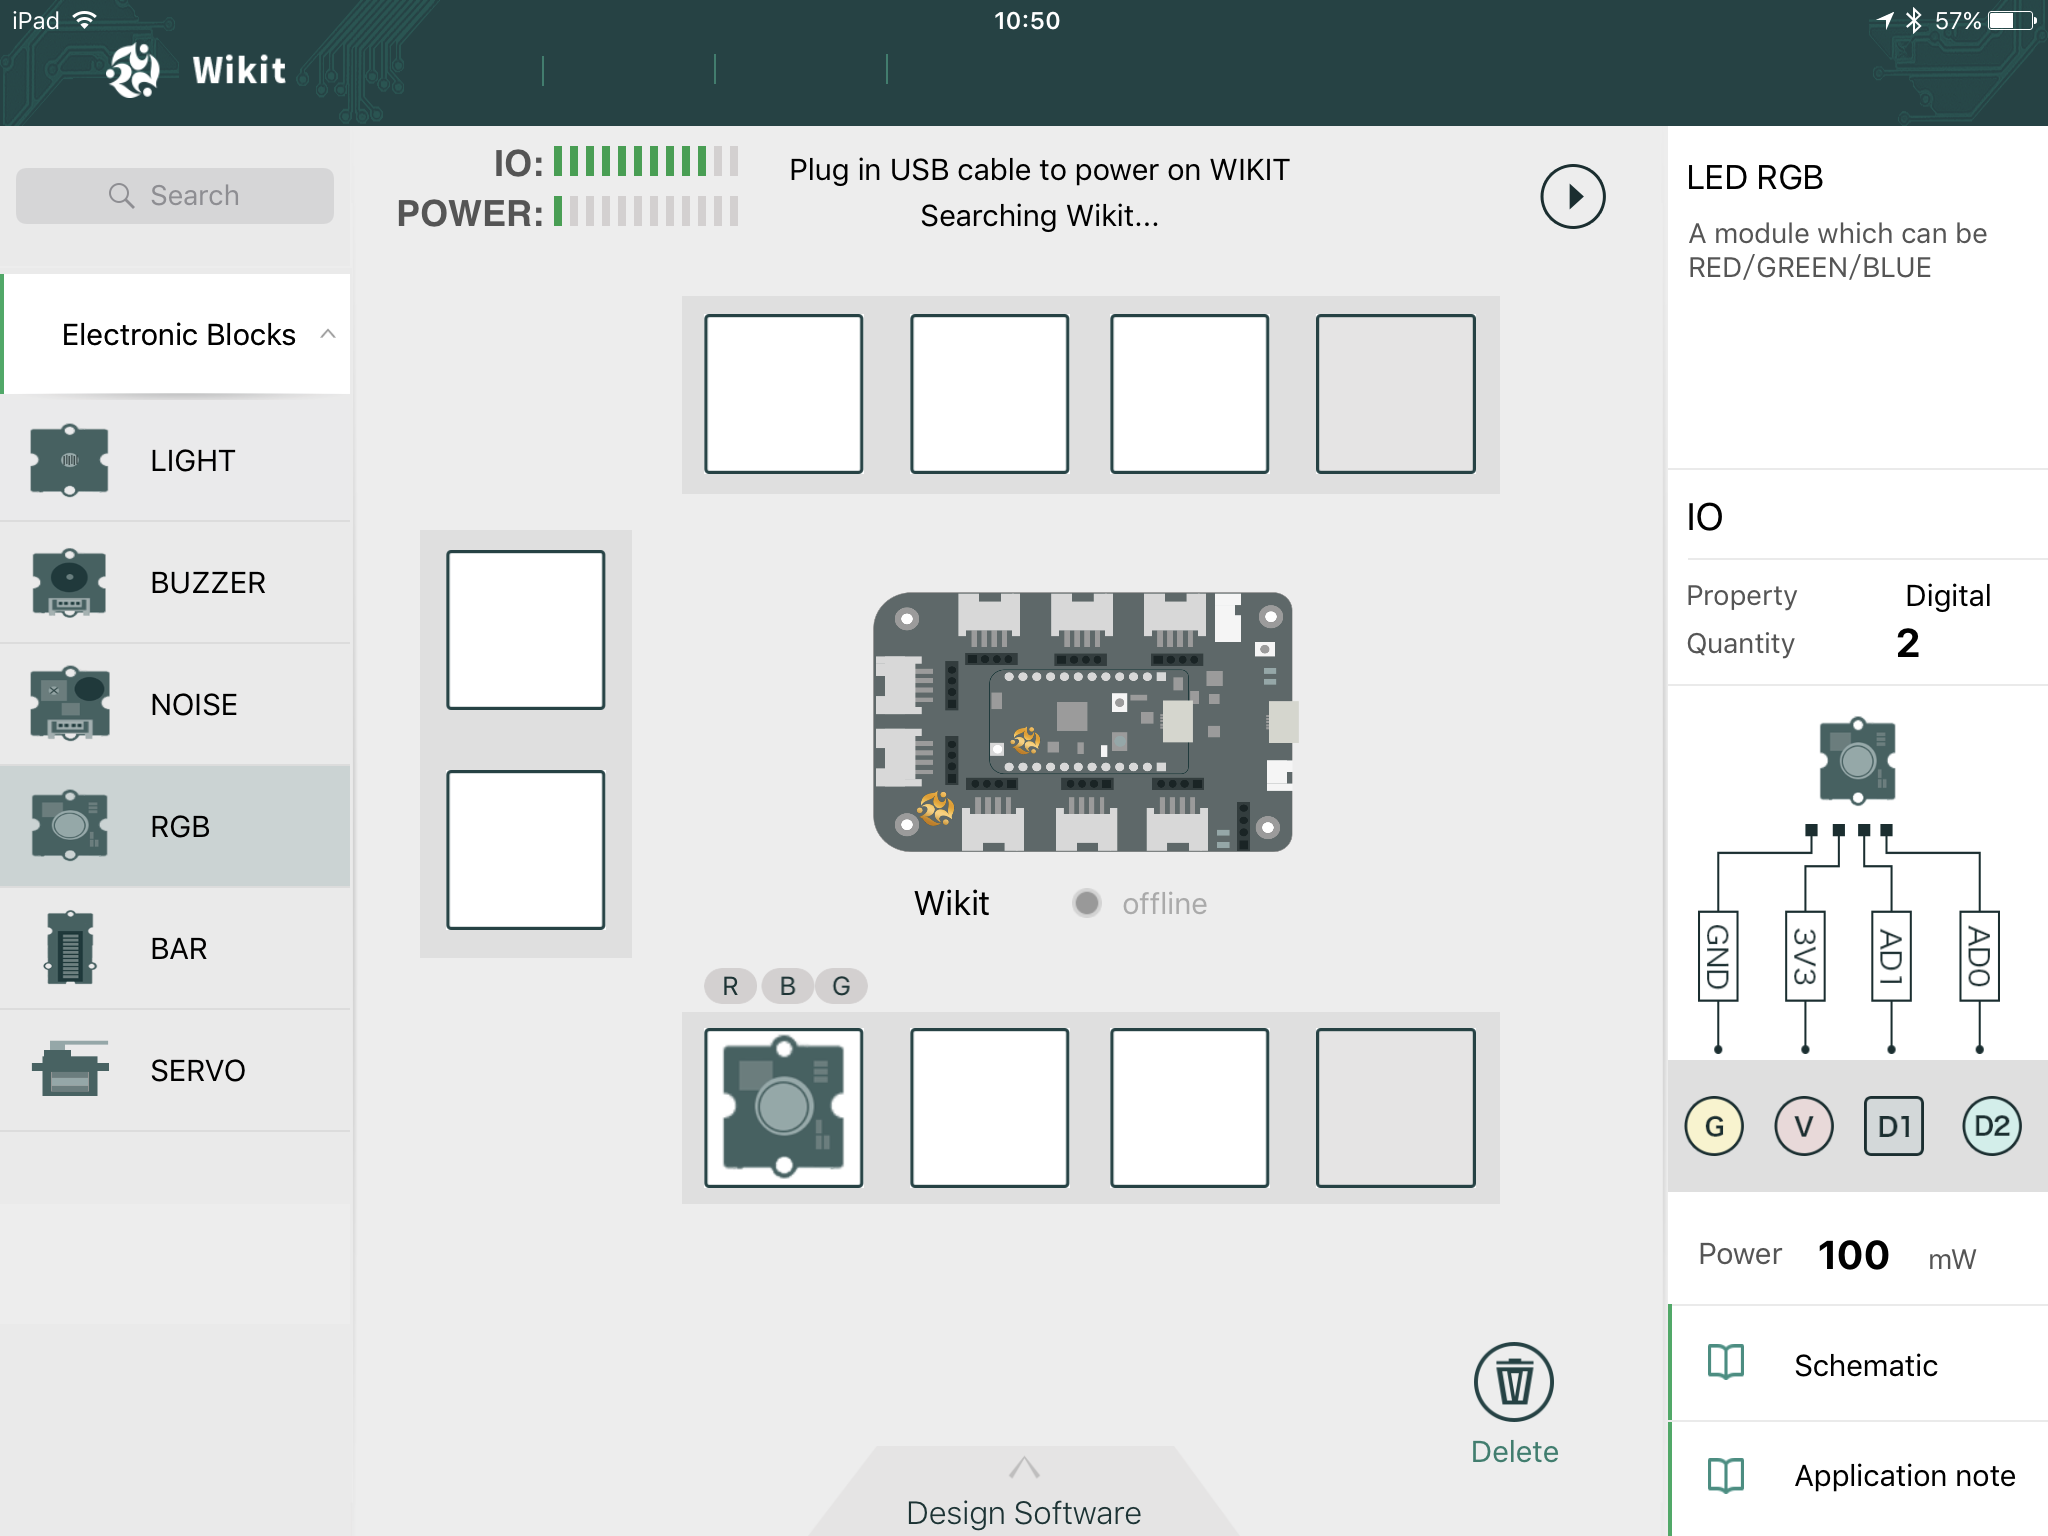
c.support hardware configuration with simple drag and drop
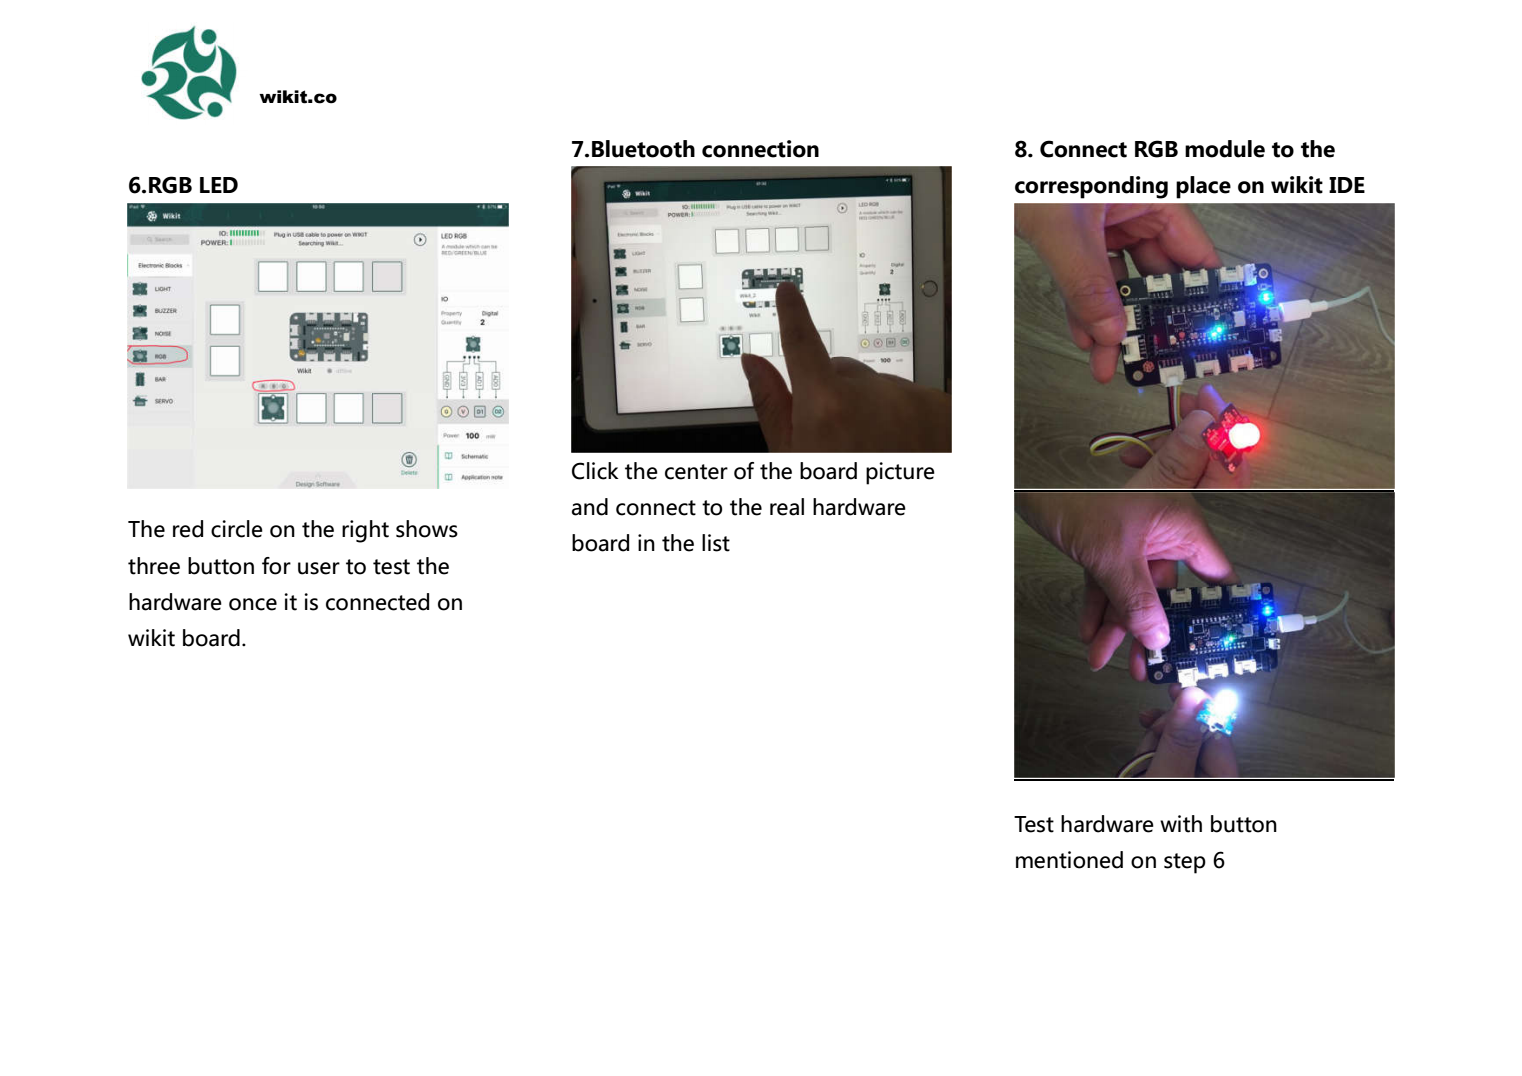
d.support hardware self-testing
e.support limited modules
2.wikit recctangle design -- backward compatible with wikit round with more professional function
a.support flowcharts programming
b.support flowcharts step debugging
c.support hardware configuration with simple drag and drop
d.support hardware self-testing
e.support arduino code import to flowcharts
f.support flowcharts export to other MCU platform design ready code.
g.support over 100 modules
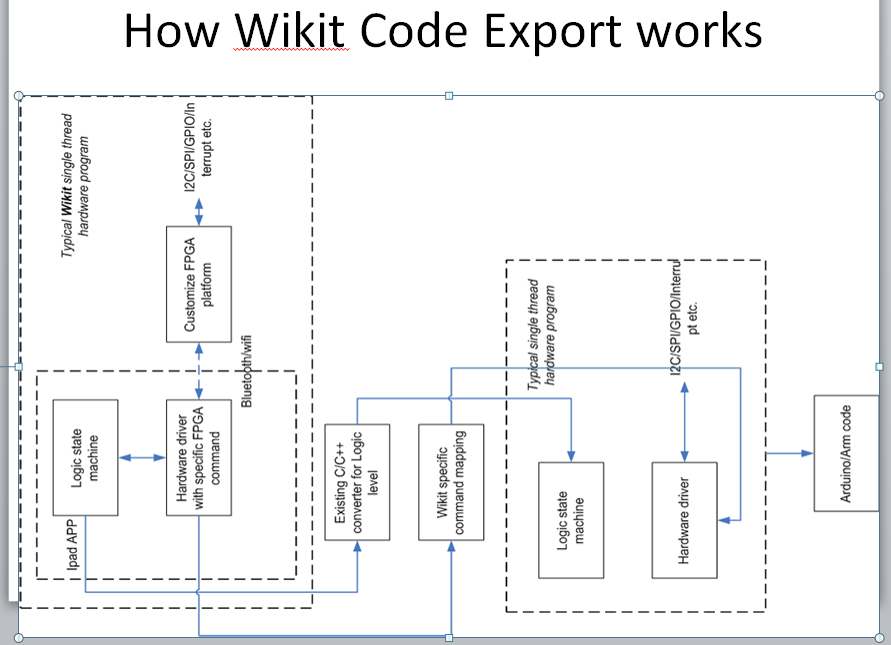
Key Technology for Wikit
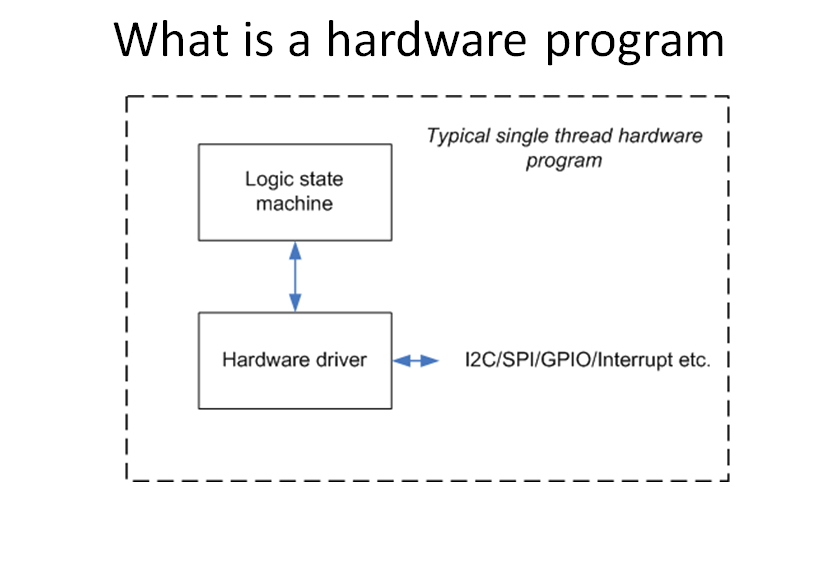
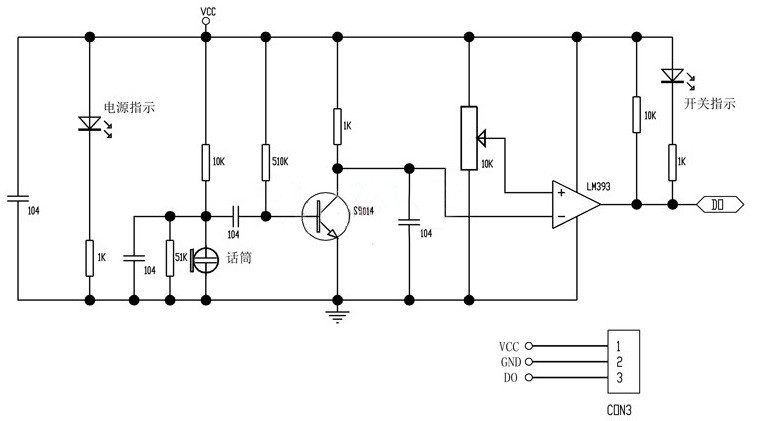
1. How hardware works
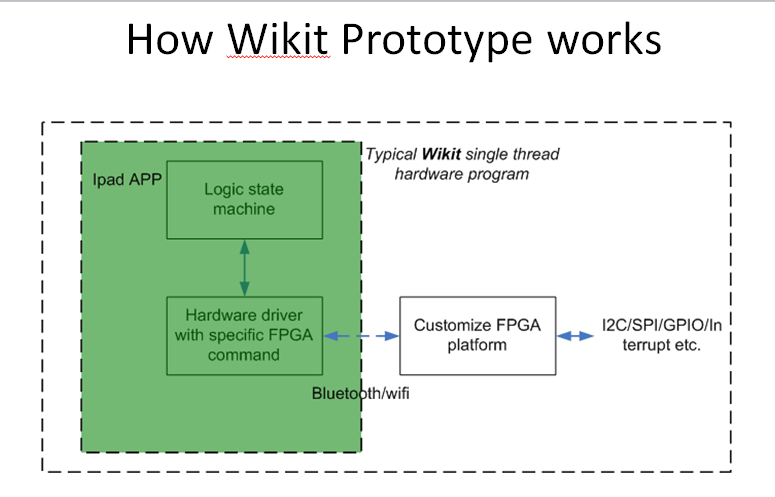
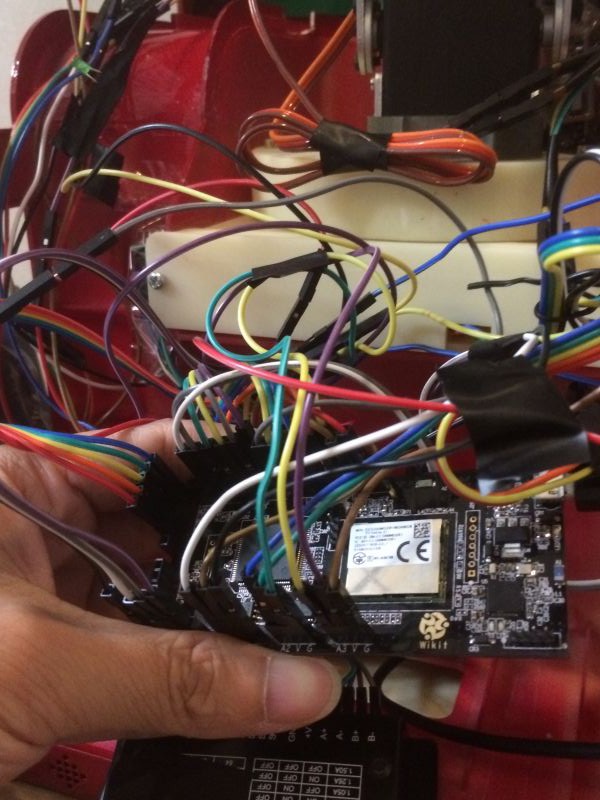
2.How wikit works
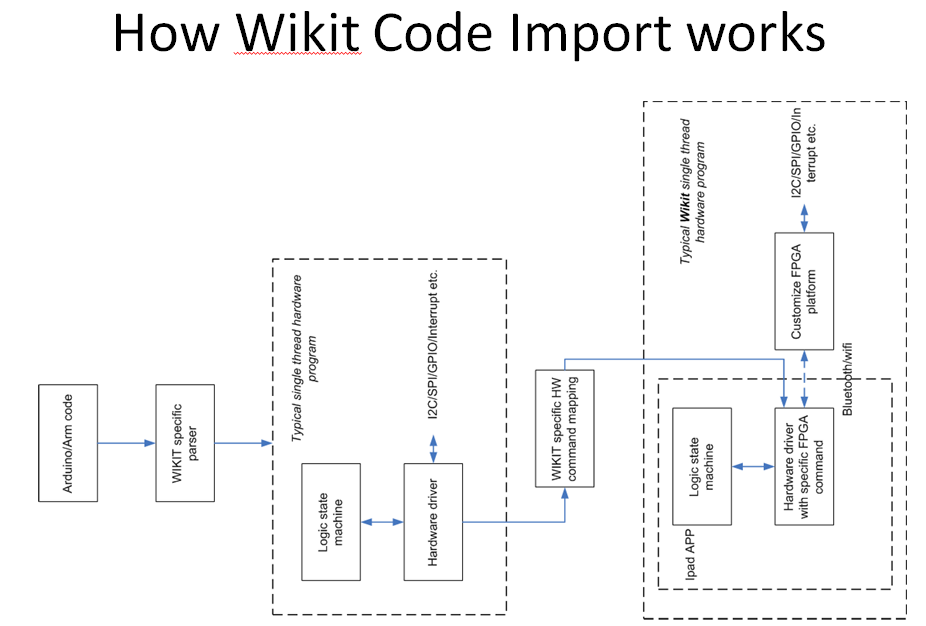
3 Arduino code import to Flowcharts
4.flowcharts export to other MCU platform design ready code
Other Creative Tech for Wikit
1.hardawre self testing -- https://youtu.be/enwGYyO7cUA
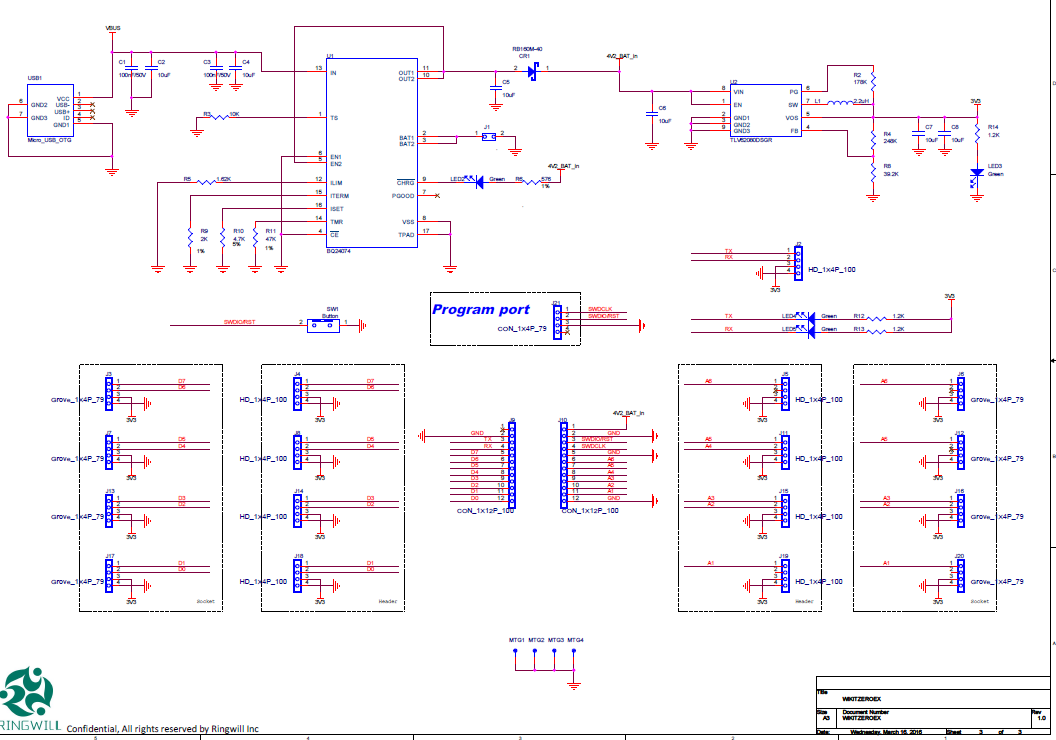
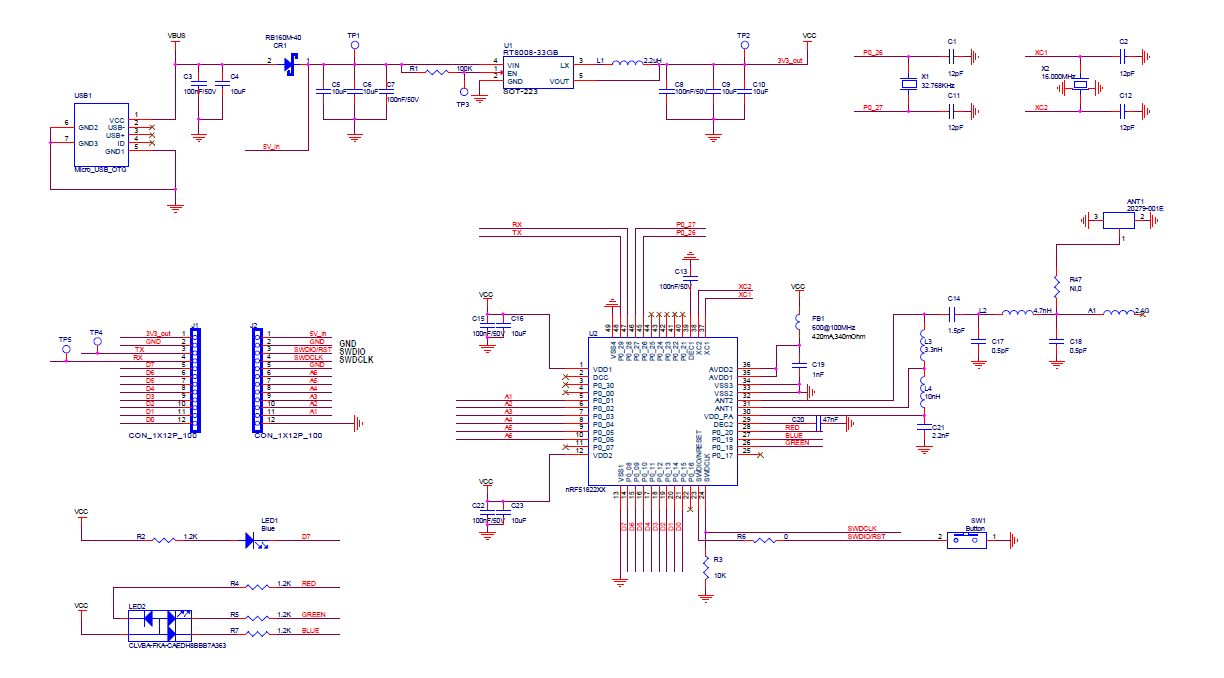
Schematic for wikit round
Schematic for wikit rectangle(update later)
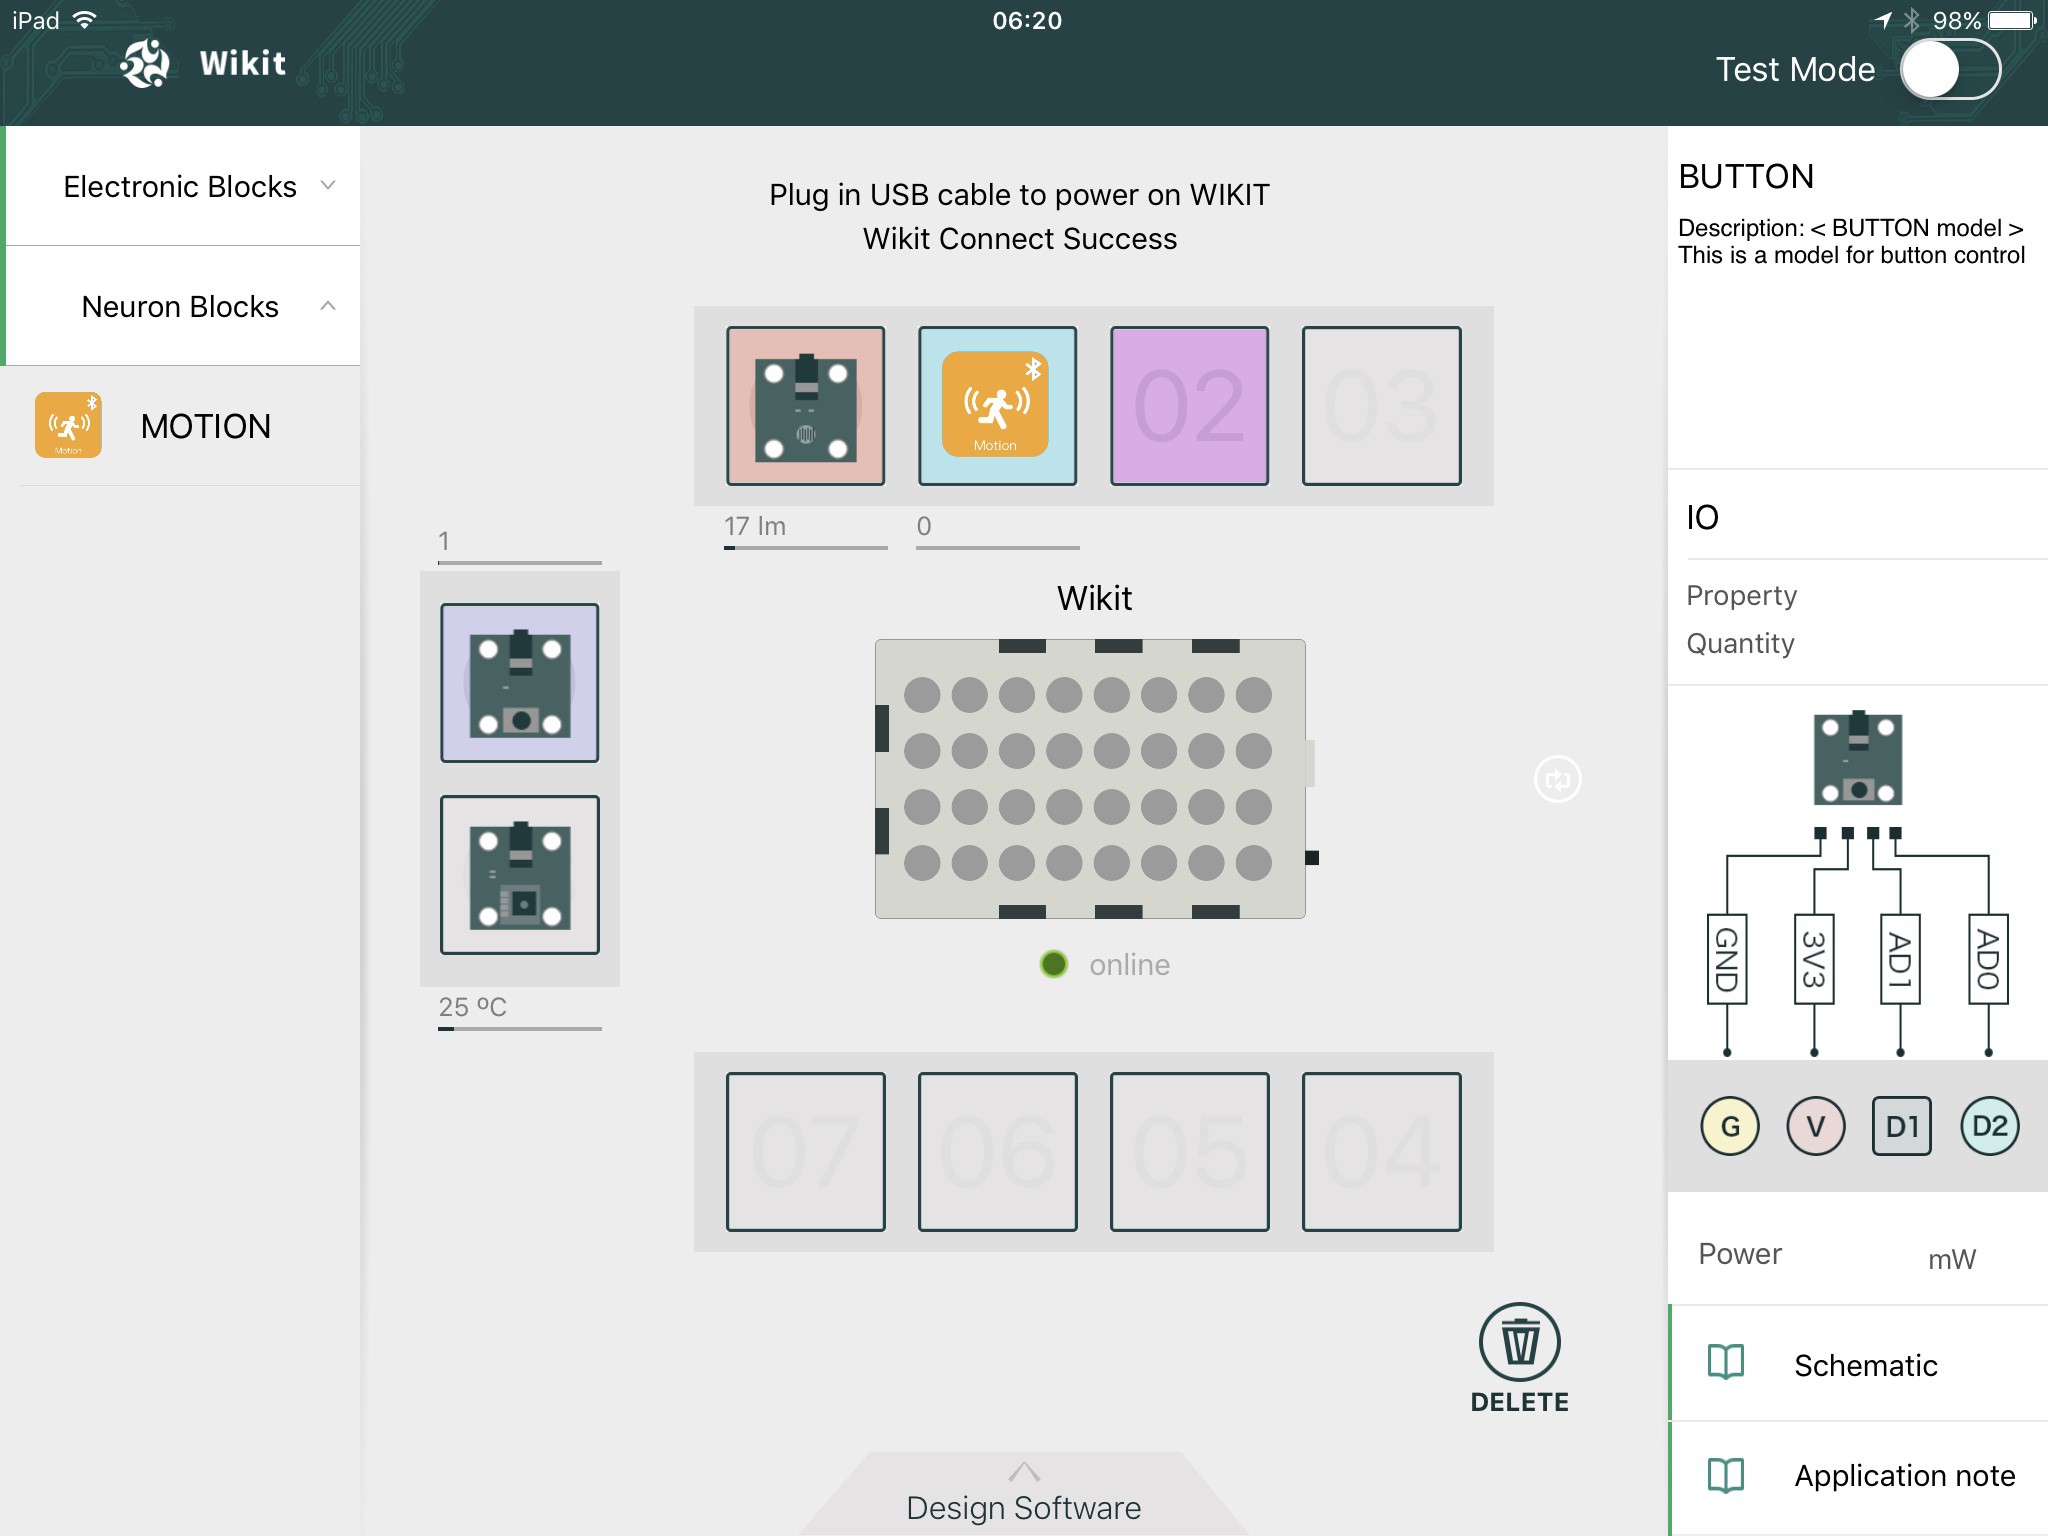
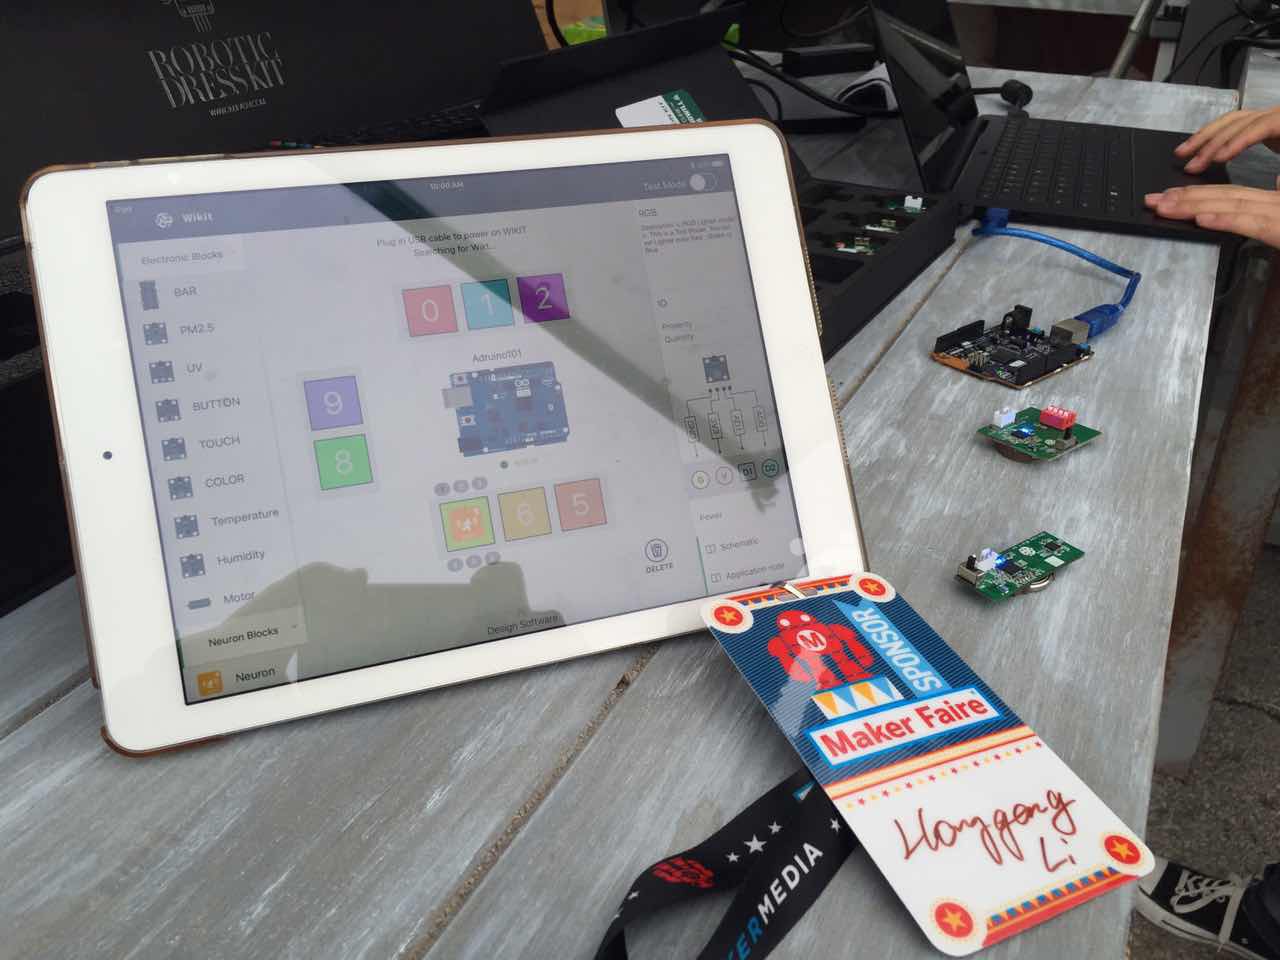
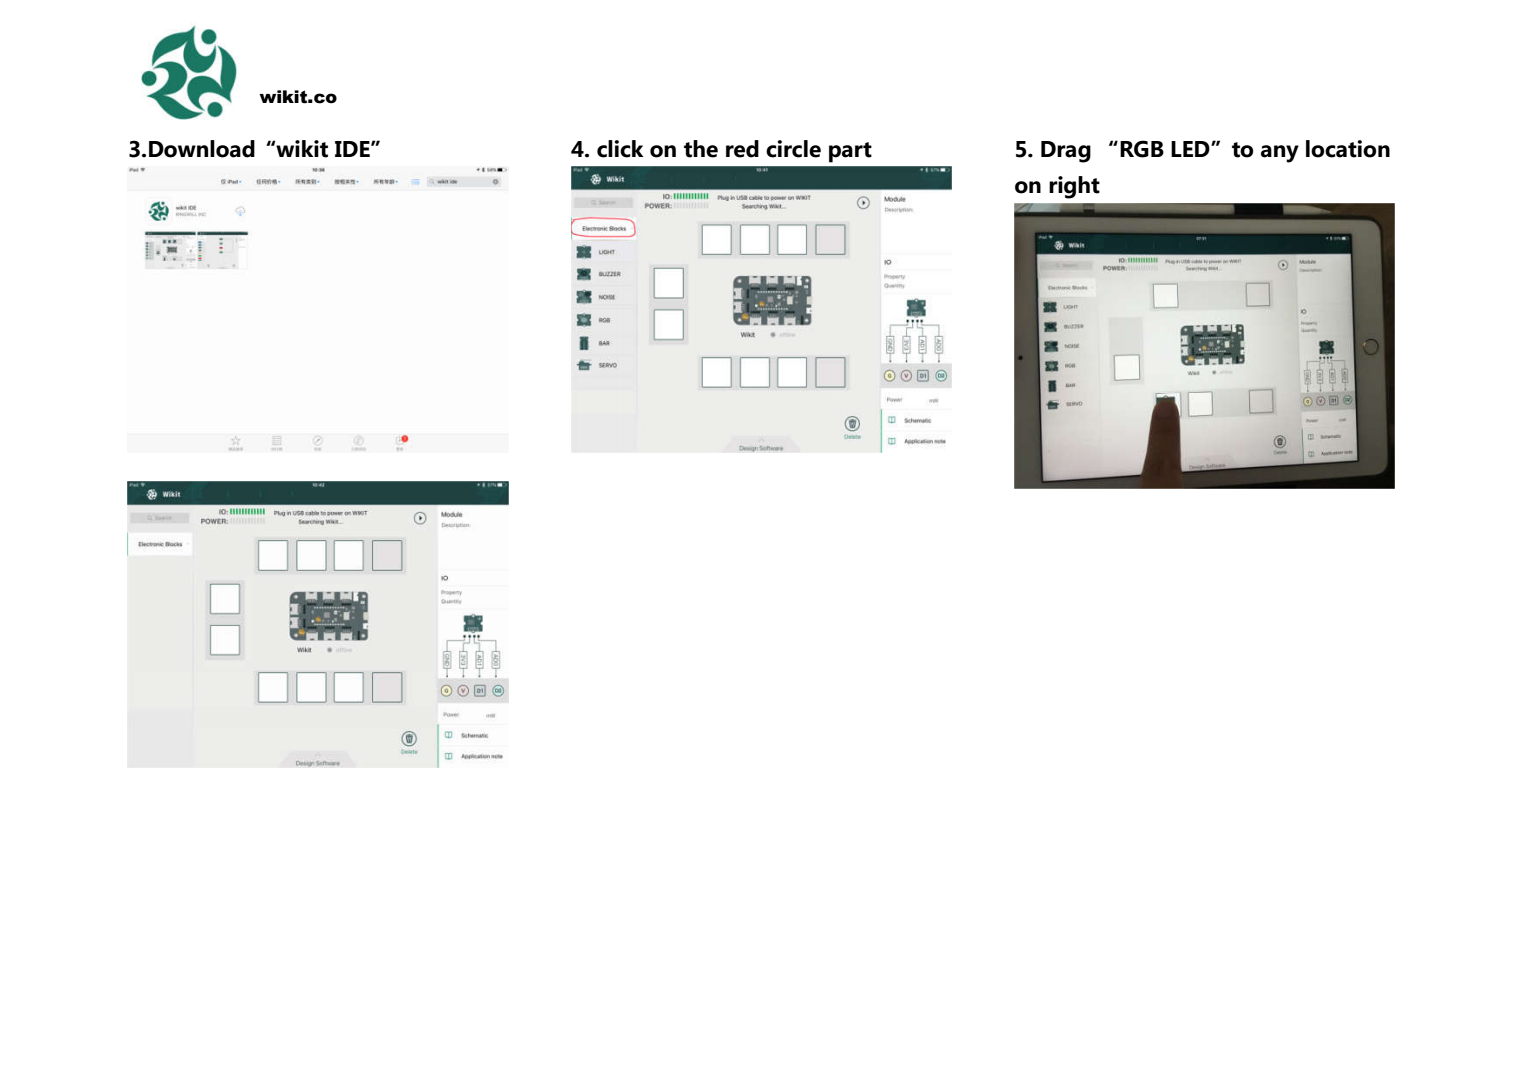
IPAD app for wikit
Search "Wikit IDE" in app store with IPAD
https://itunes.apple.com/us/app/wikit-ide/id1086637628?l=zh&ls=1&mt=8


 Rodmg
Rodmg
 agp.cooper
 sad_ken