 Jan Godde
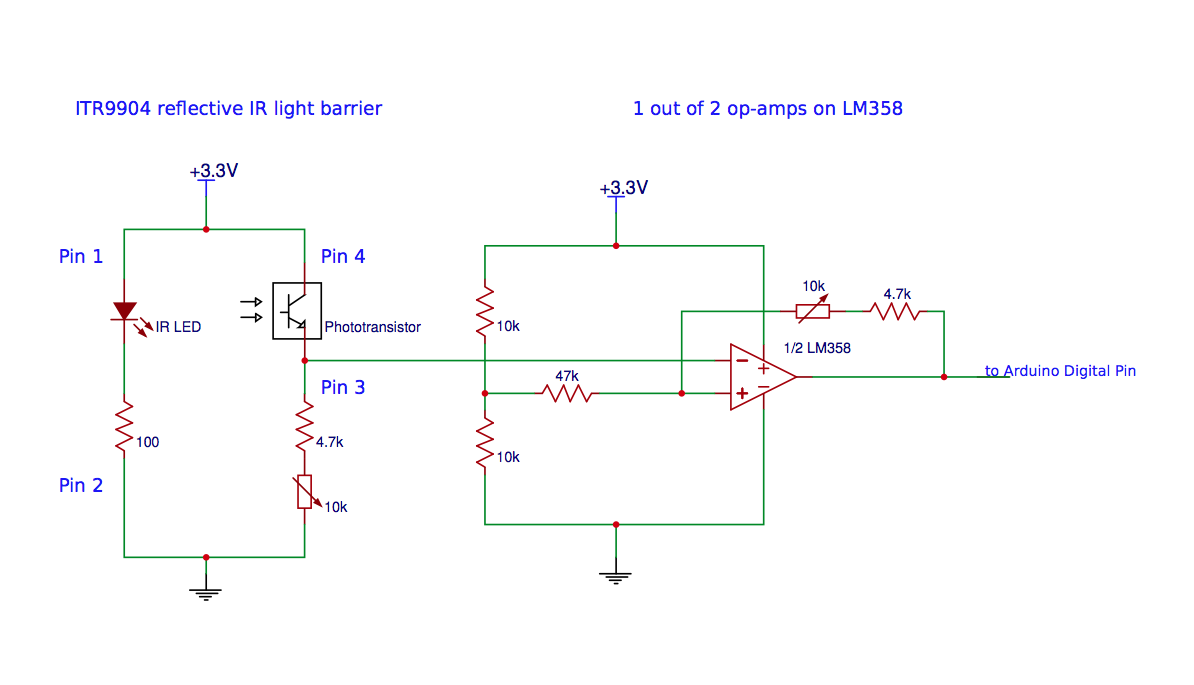
This is how one IR sensor and one op-amp are connected to the Teensy. I use some variable resistors for finetuning the thresholds. Keep in mind that operating a LM358 op-amp with only 3.3V will not give you the full output range. The output range will be missing 2V, so it will be only 1.3V (HIGH ~2.2V, LOW ~0.9V).
Two IR sensors are needed to sense direction and speed of one hard disk platter. When using only one, there is no chance for calculating the direction. When using two sensors with a 90° angle offset, you can make use of the Quadrature Encoding technique.
To connect the ribbon and pressure sensors is easy. See, for example:
Connect a pressure (FSR) sensor
SoftPot ribbon sensor product page
On the SoftPot product page, it's said not to connect Ground and Power directly. So make sure to put a 10kOhm resistor in series to connect the ground and the power pin. The center pin can be read directly.
The faders and potentiometers are connected to the Teensy like this.
For the switches, i used the <Bounce.h> library. On this page, you can find detailled information on using the switches. It's nice that you only need one digital pin and a ground connection for each switch.
The LEDs are connected with a resistor in series to make sure that there is not too much current flowing. The longer leg is connected to a digital pin, the shorter with a resistor to ground. As i used really bright white LEDs, i chose a bigger resistor than you would normally do to limit the light intensity.
The touch buttons are connected to the Teensy's touch pins directly.
Discussions
Become a Hackaday.io Member
Create an account to leave a comment. Already have an account? Log In.
I'd like to see the complete schematic- or am I missing something?
Are you sure? yes | no