 deʃhipu
I received a micro:bit board for testing for a week, killed it the next day (http://microworldtour.github.io/microbit/mahiri.html), received another one and build some robots with it (http://microworldtour.github.io/microbit/monifa.html).
0%
0%
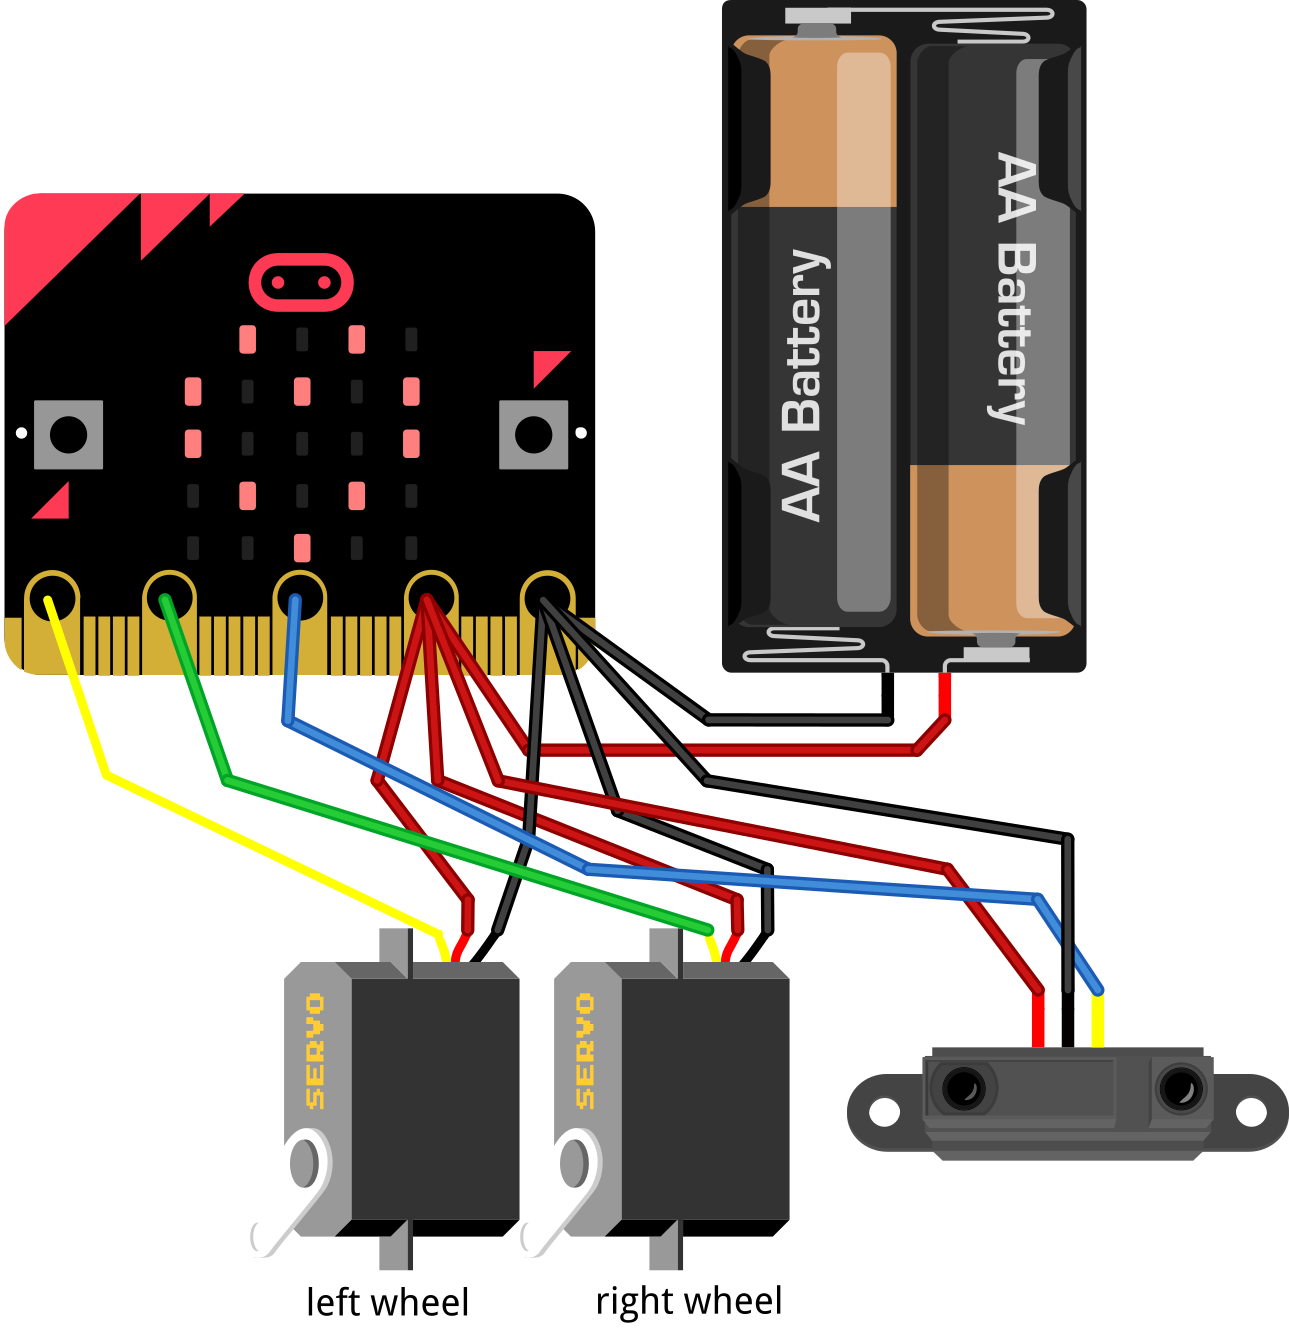
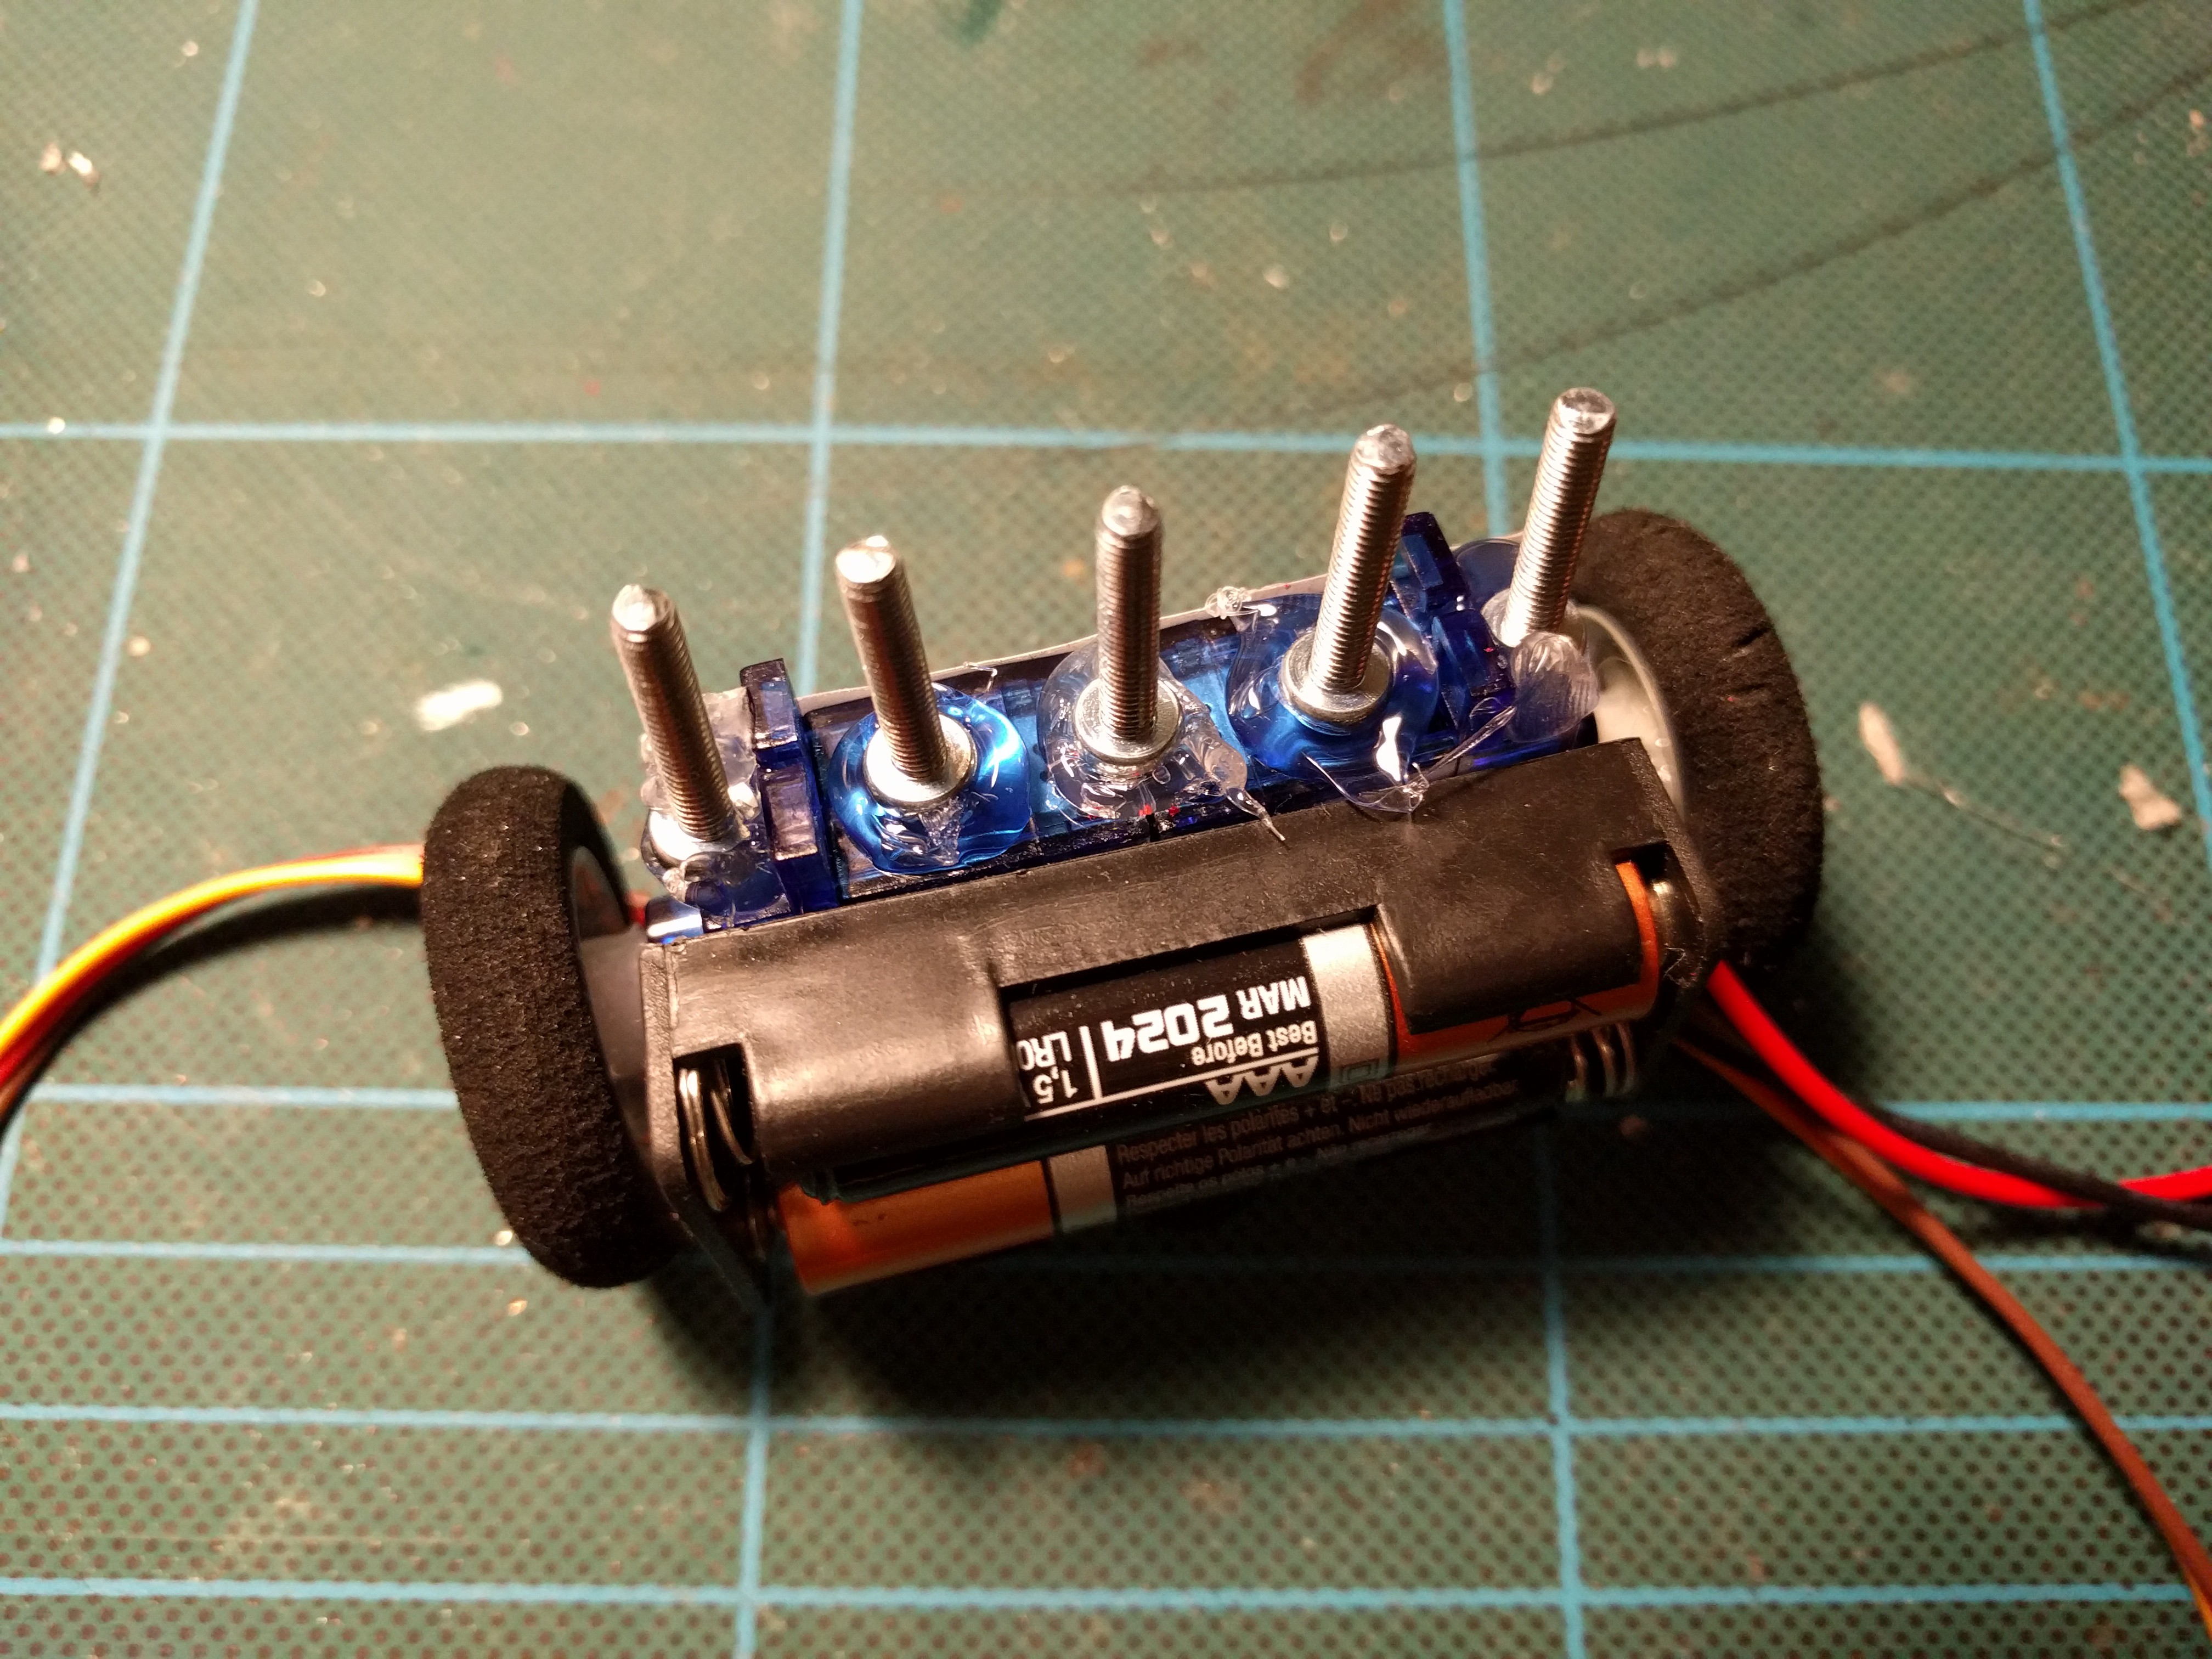
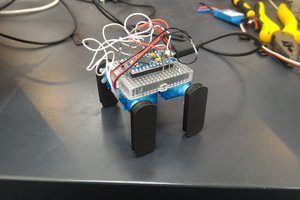
Micro:bot
A simple robot based on the BBC micro:bit.
Become a Hackaday.io member
Already have an account? Log in.
Just one more thing
To make the experience fit your profile, pick a username and tell us what interests you.
Pick an awesome username
hackaday.io/
Your profile's URL: hackaday.io/username. Max 25 alphanumeric characters.
Pick a few interests
Projects that share your interests
People that share your interests


 Jure Tuta
nice one. oh... and there's glue: 10 bonus points :)