 Jared Young
The idea is simple, find a way to make the existing mechanism trigger a modern wireless doorbell. A quick retrofit of the doorbell circuit board with a normally open reed switch(just gutted a generic window close sensor), was all that I thought I needed.
In testing this all worked, a magnet wiped past the board triggers the doorbell properly. The fail came in the fact that I did not measure the size of the bell housing and over estimated the space I had to work with inside. Cutting the board might be an option(I did literally cut one corner here, but it was not enough), and I may try that in the future, but right now it looks like that won't be enough to get the board in a place that is clear.
For now, I count this as a fail, but only because I could not squeeze it in. If you have a larger space to fit this in, it should work fine. The doorbell is smart enough to not trigger if the magnet is left over the reed switch, and will only trigger once even if the magnet spins past it a few times(I was going to mount one to the existing mechanism that spins some bell ringers around).
Fell free to try this yourself, just remember to measure before hand.
 Bill AD8BC
 Gabriel
 Steve Smith
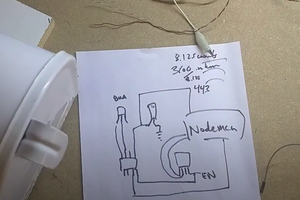
 ThinkLearnDo