 lion mclionhead
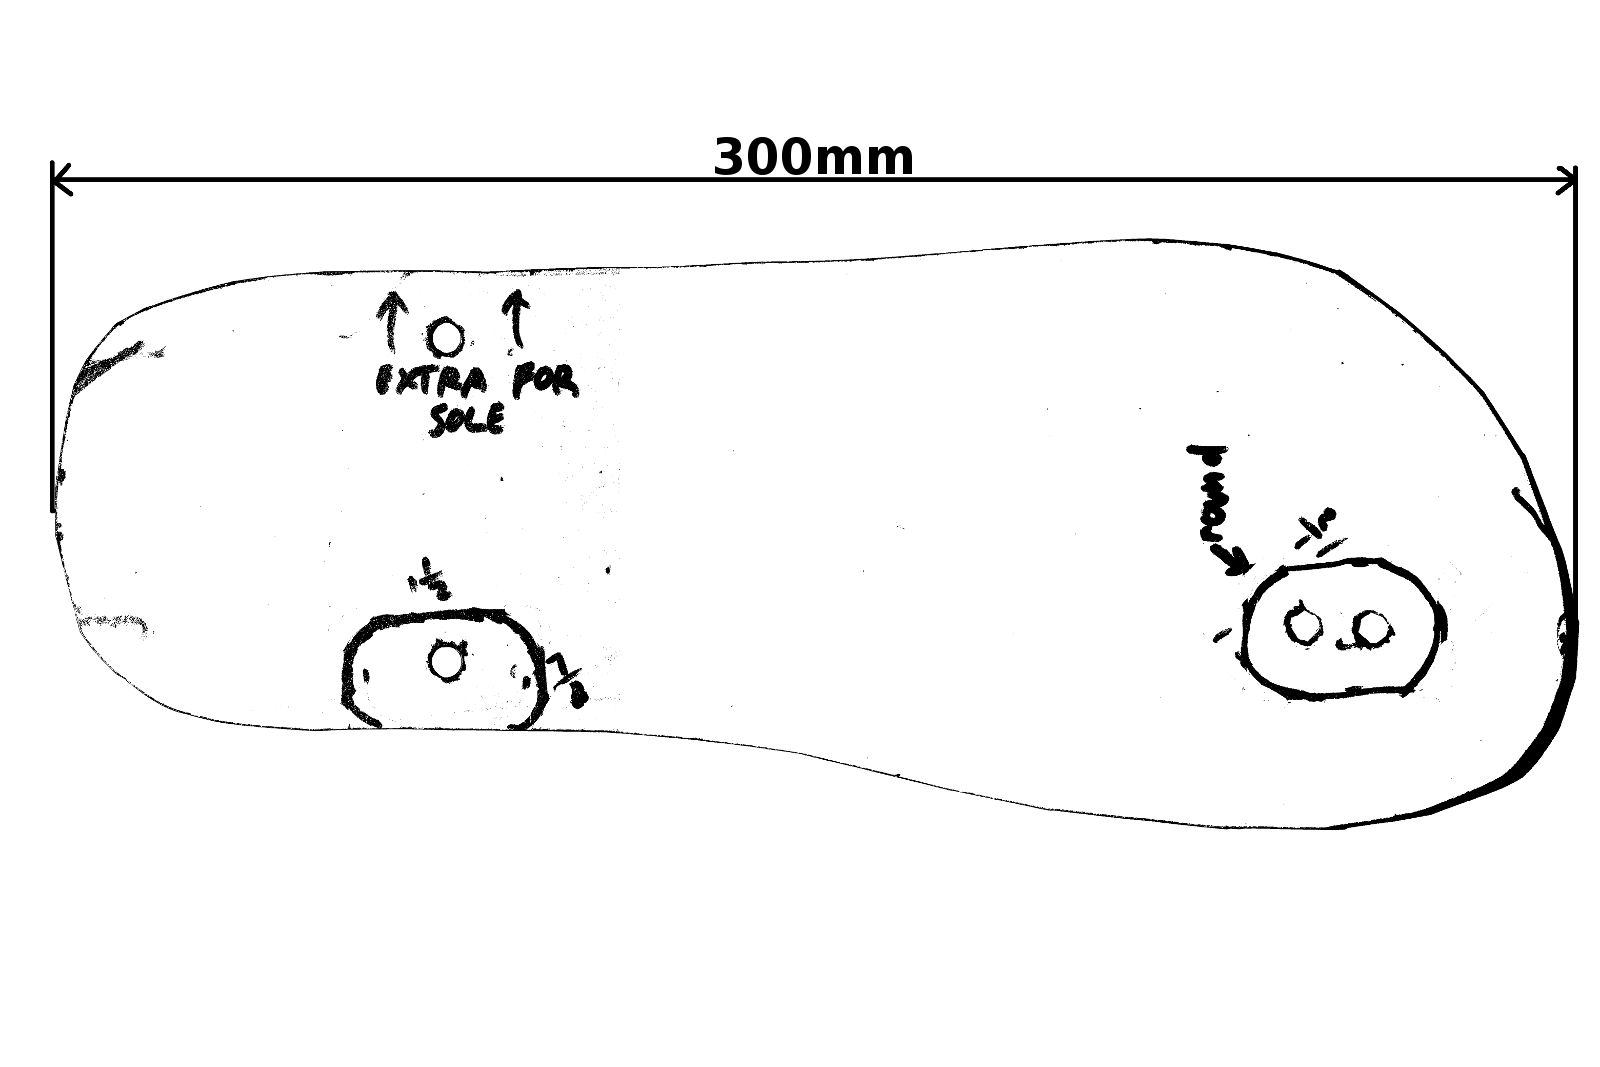
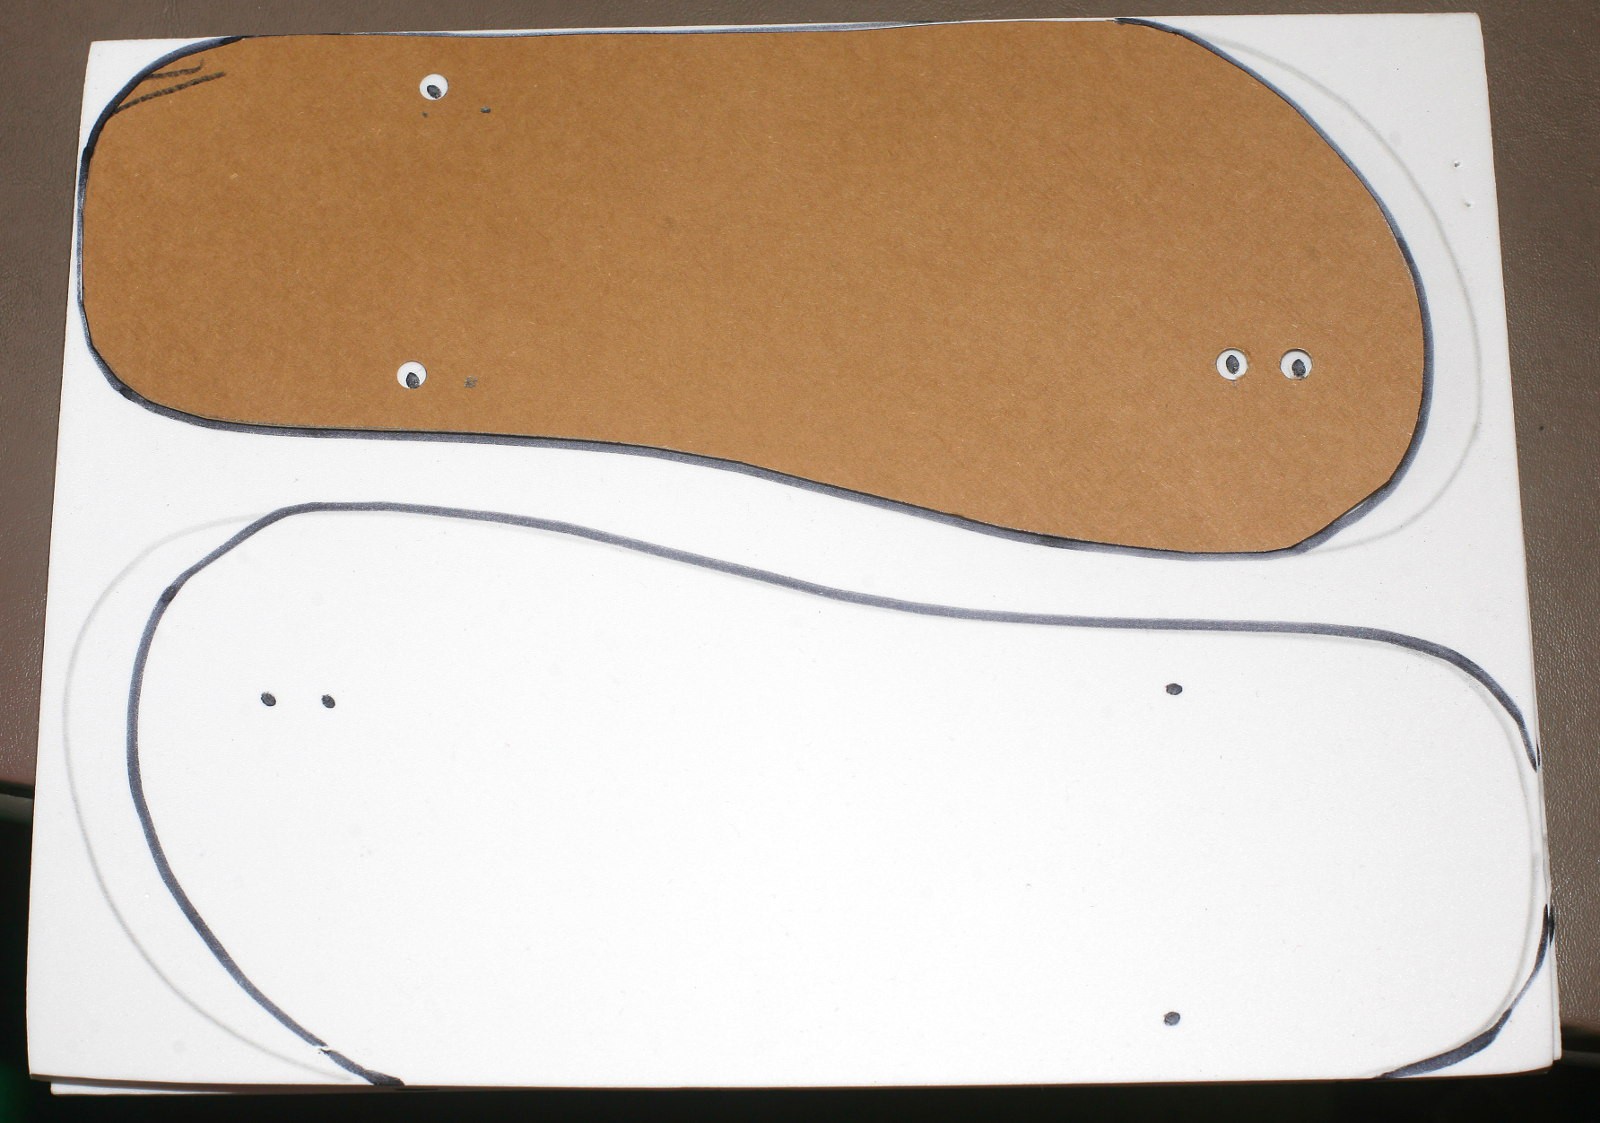
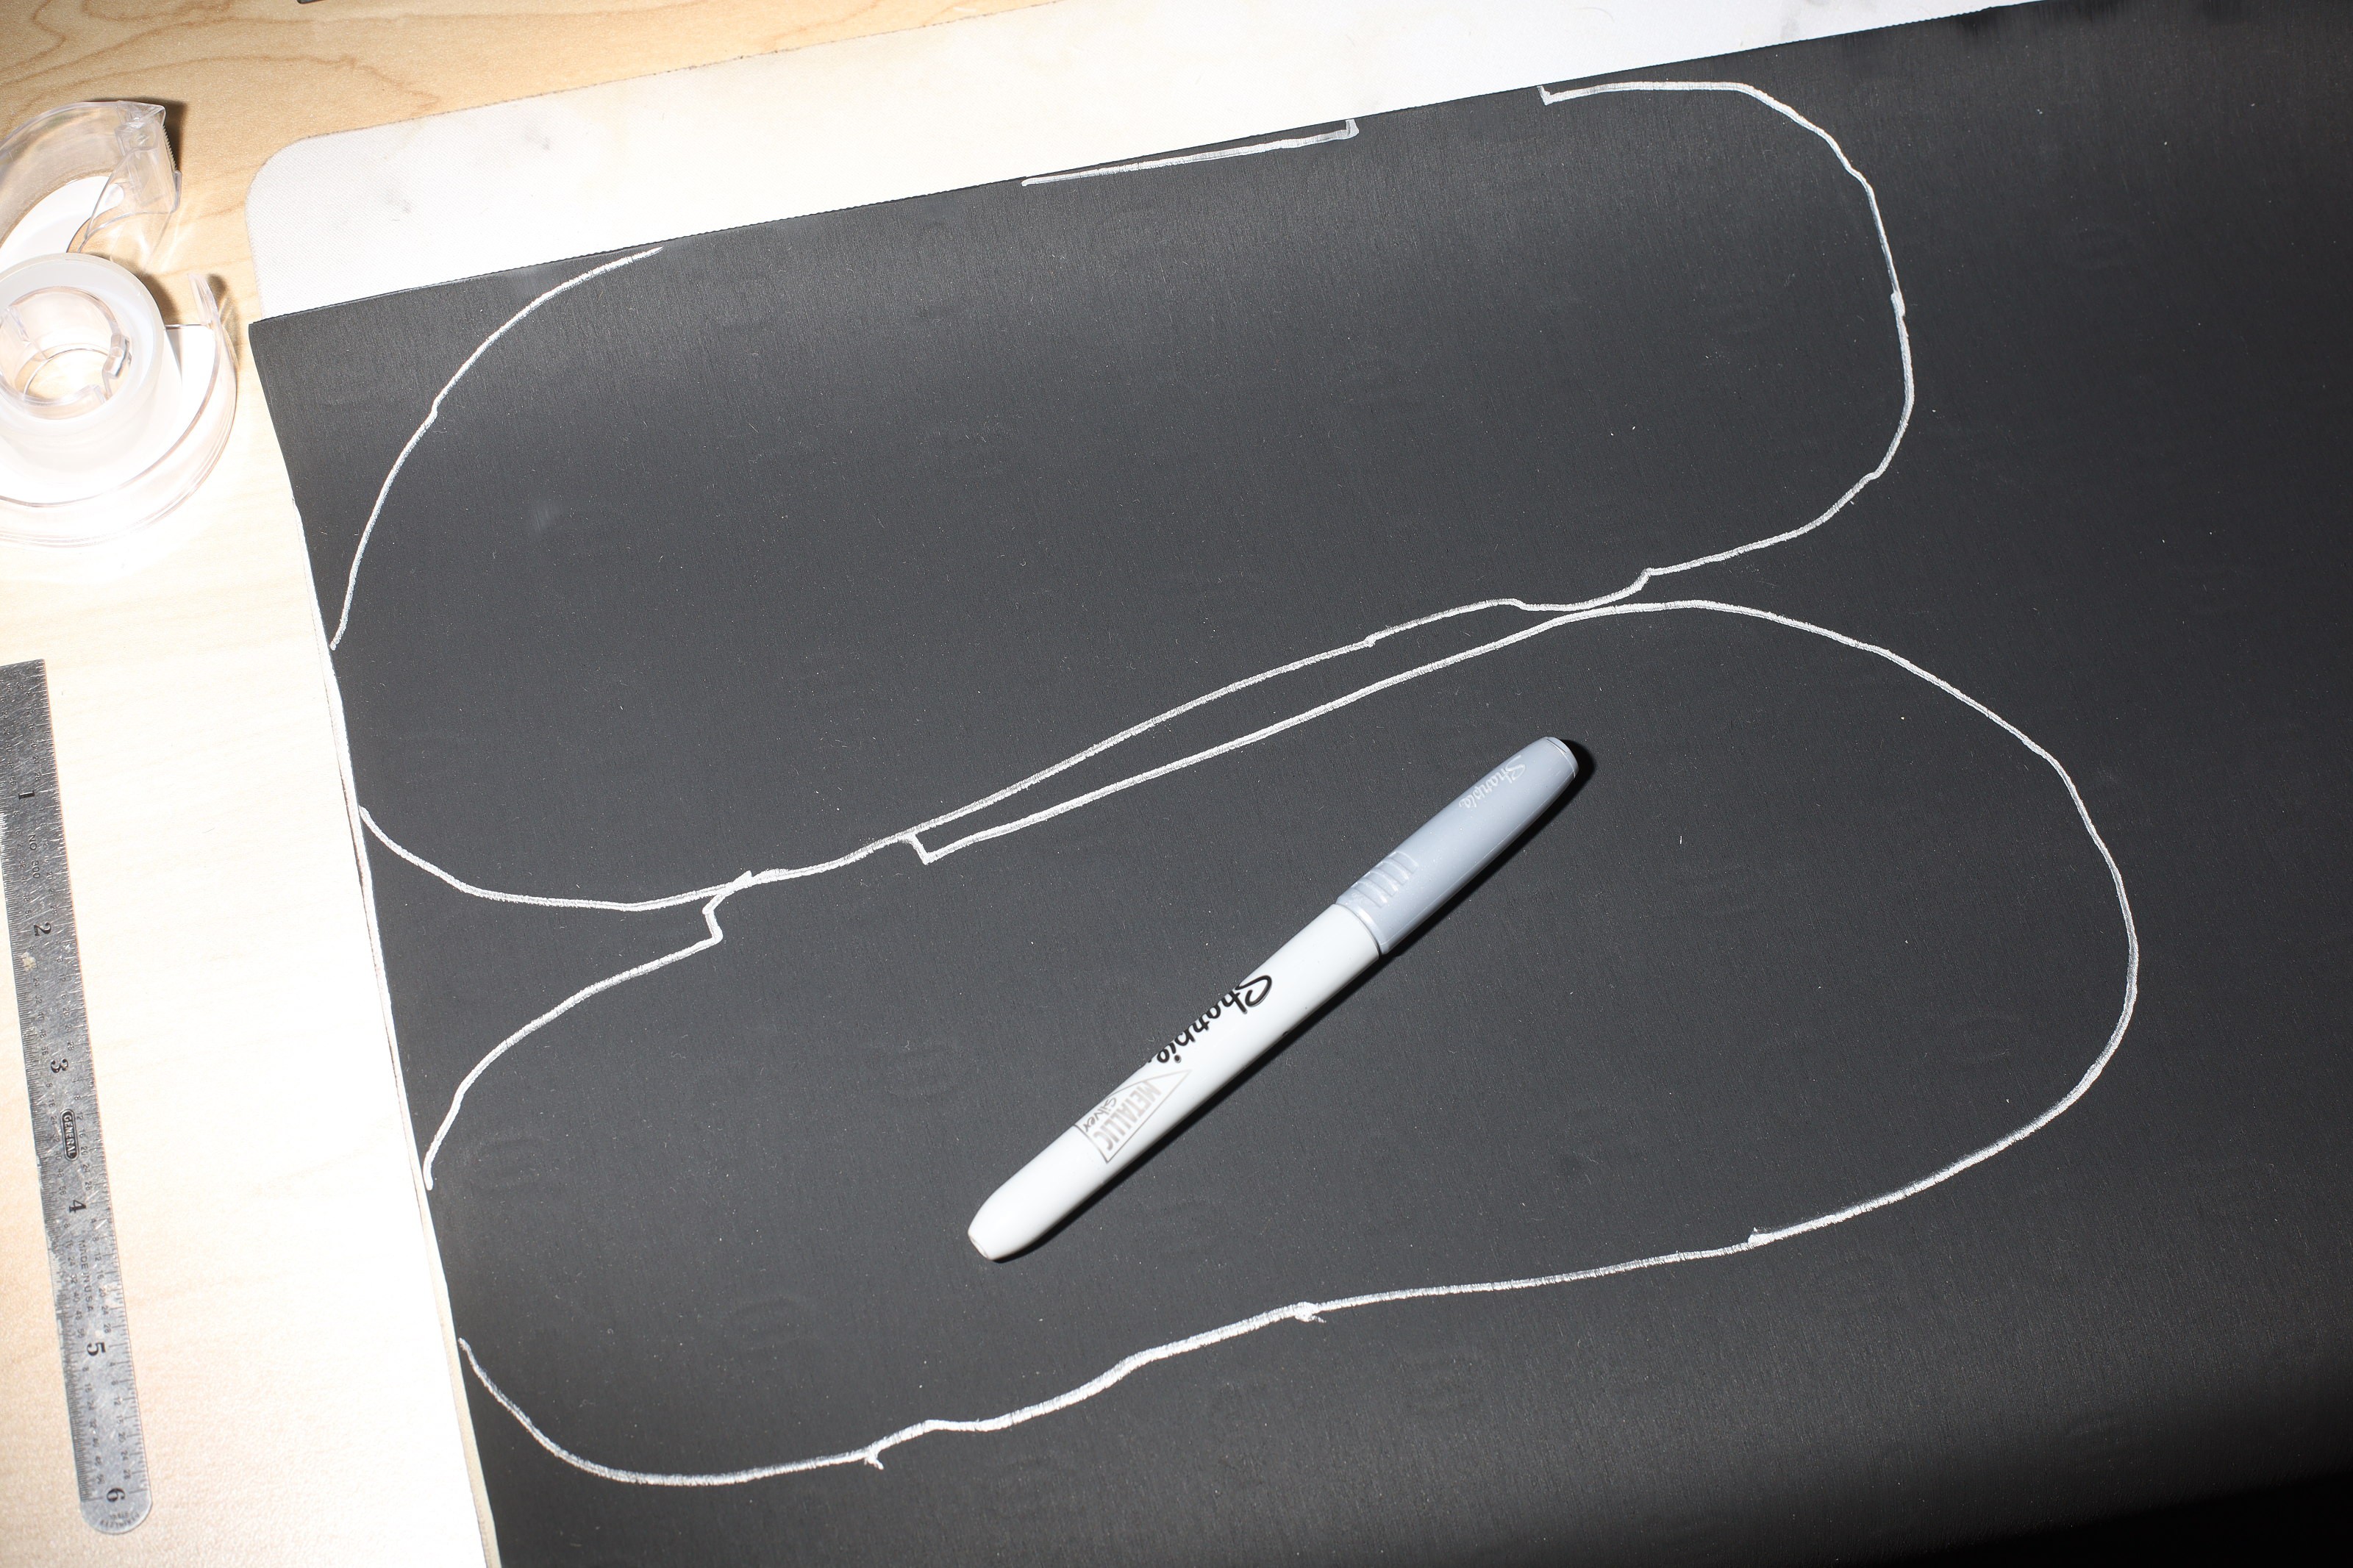
The journey begins with a template of the original modified Walmart sandal with the holes marked & the plastic pieces all drawn to scale.
The pattern is drawn on EVA. The EVA is cut with scissors. It can also be cut with a soldering iron or hot wire & lots of ventilation. Sandals have always been made of 2 layers of EVA. For speed, use 2 x 6mm sheets. For immunity to rocks use a 10mm + 6mm sheet.

E6000 was applied to 1 layer of EVA.
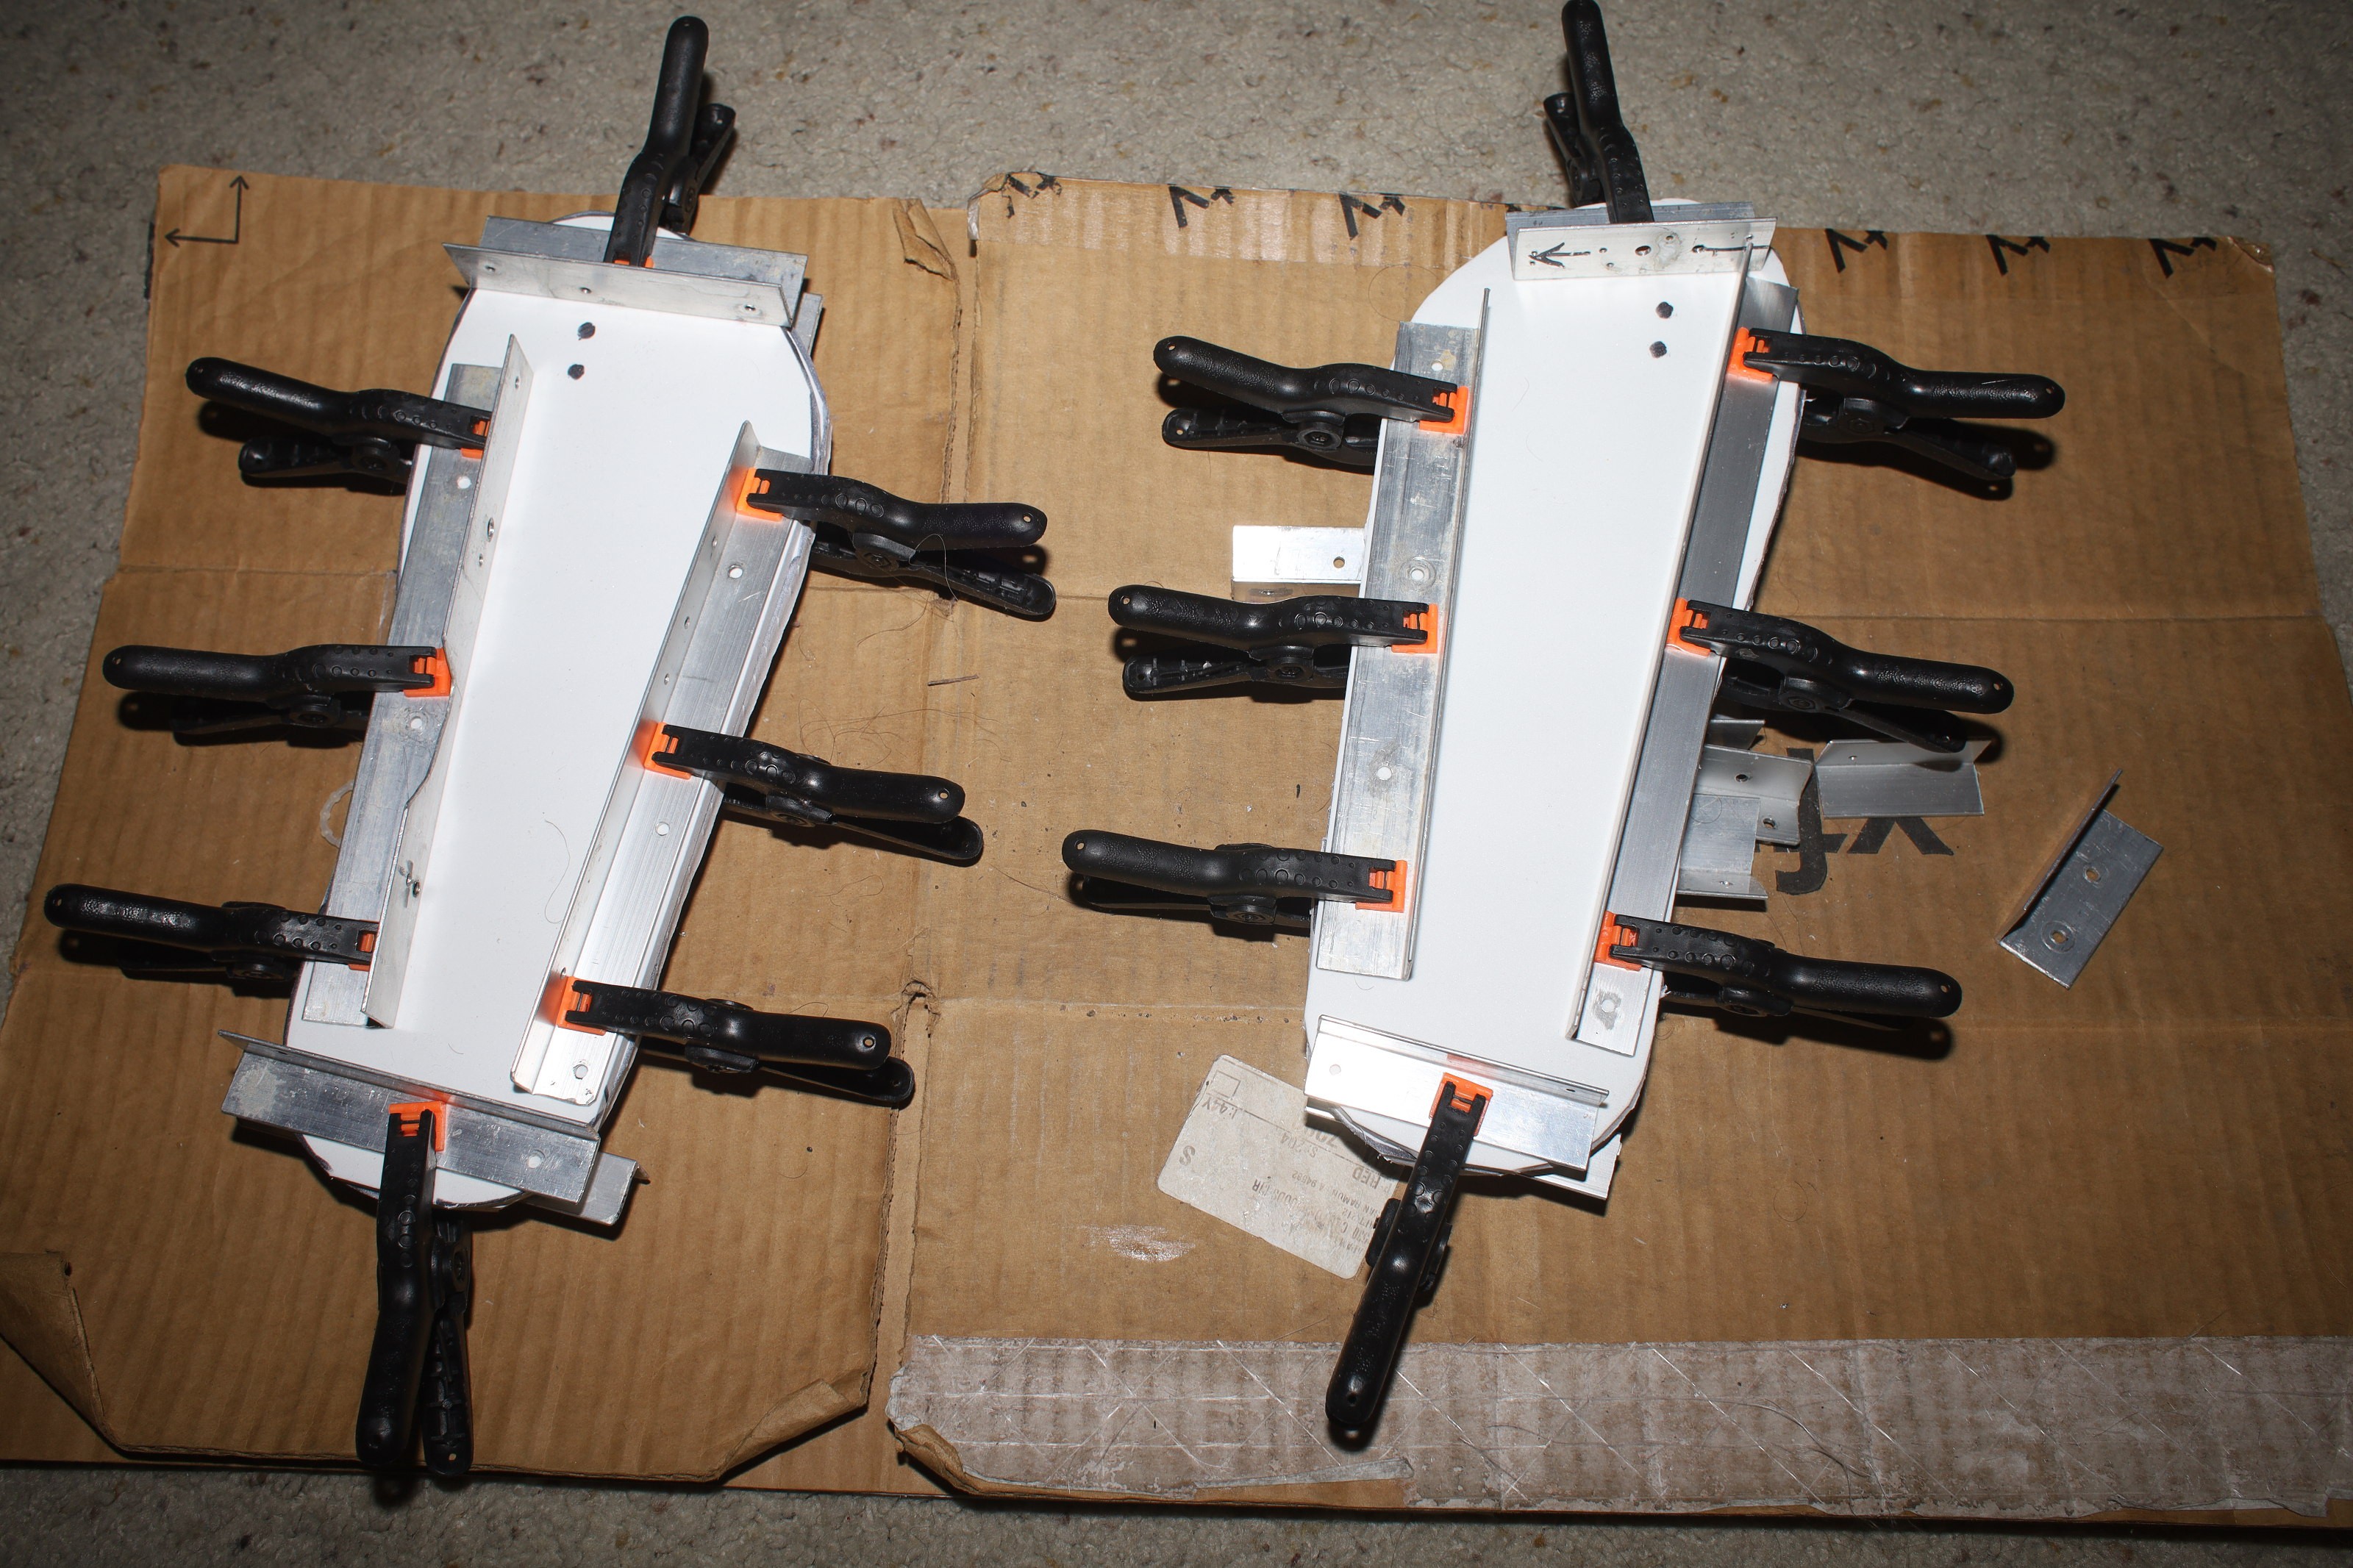
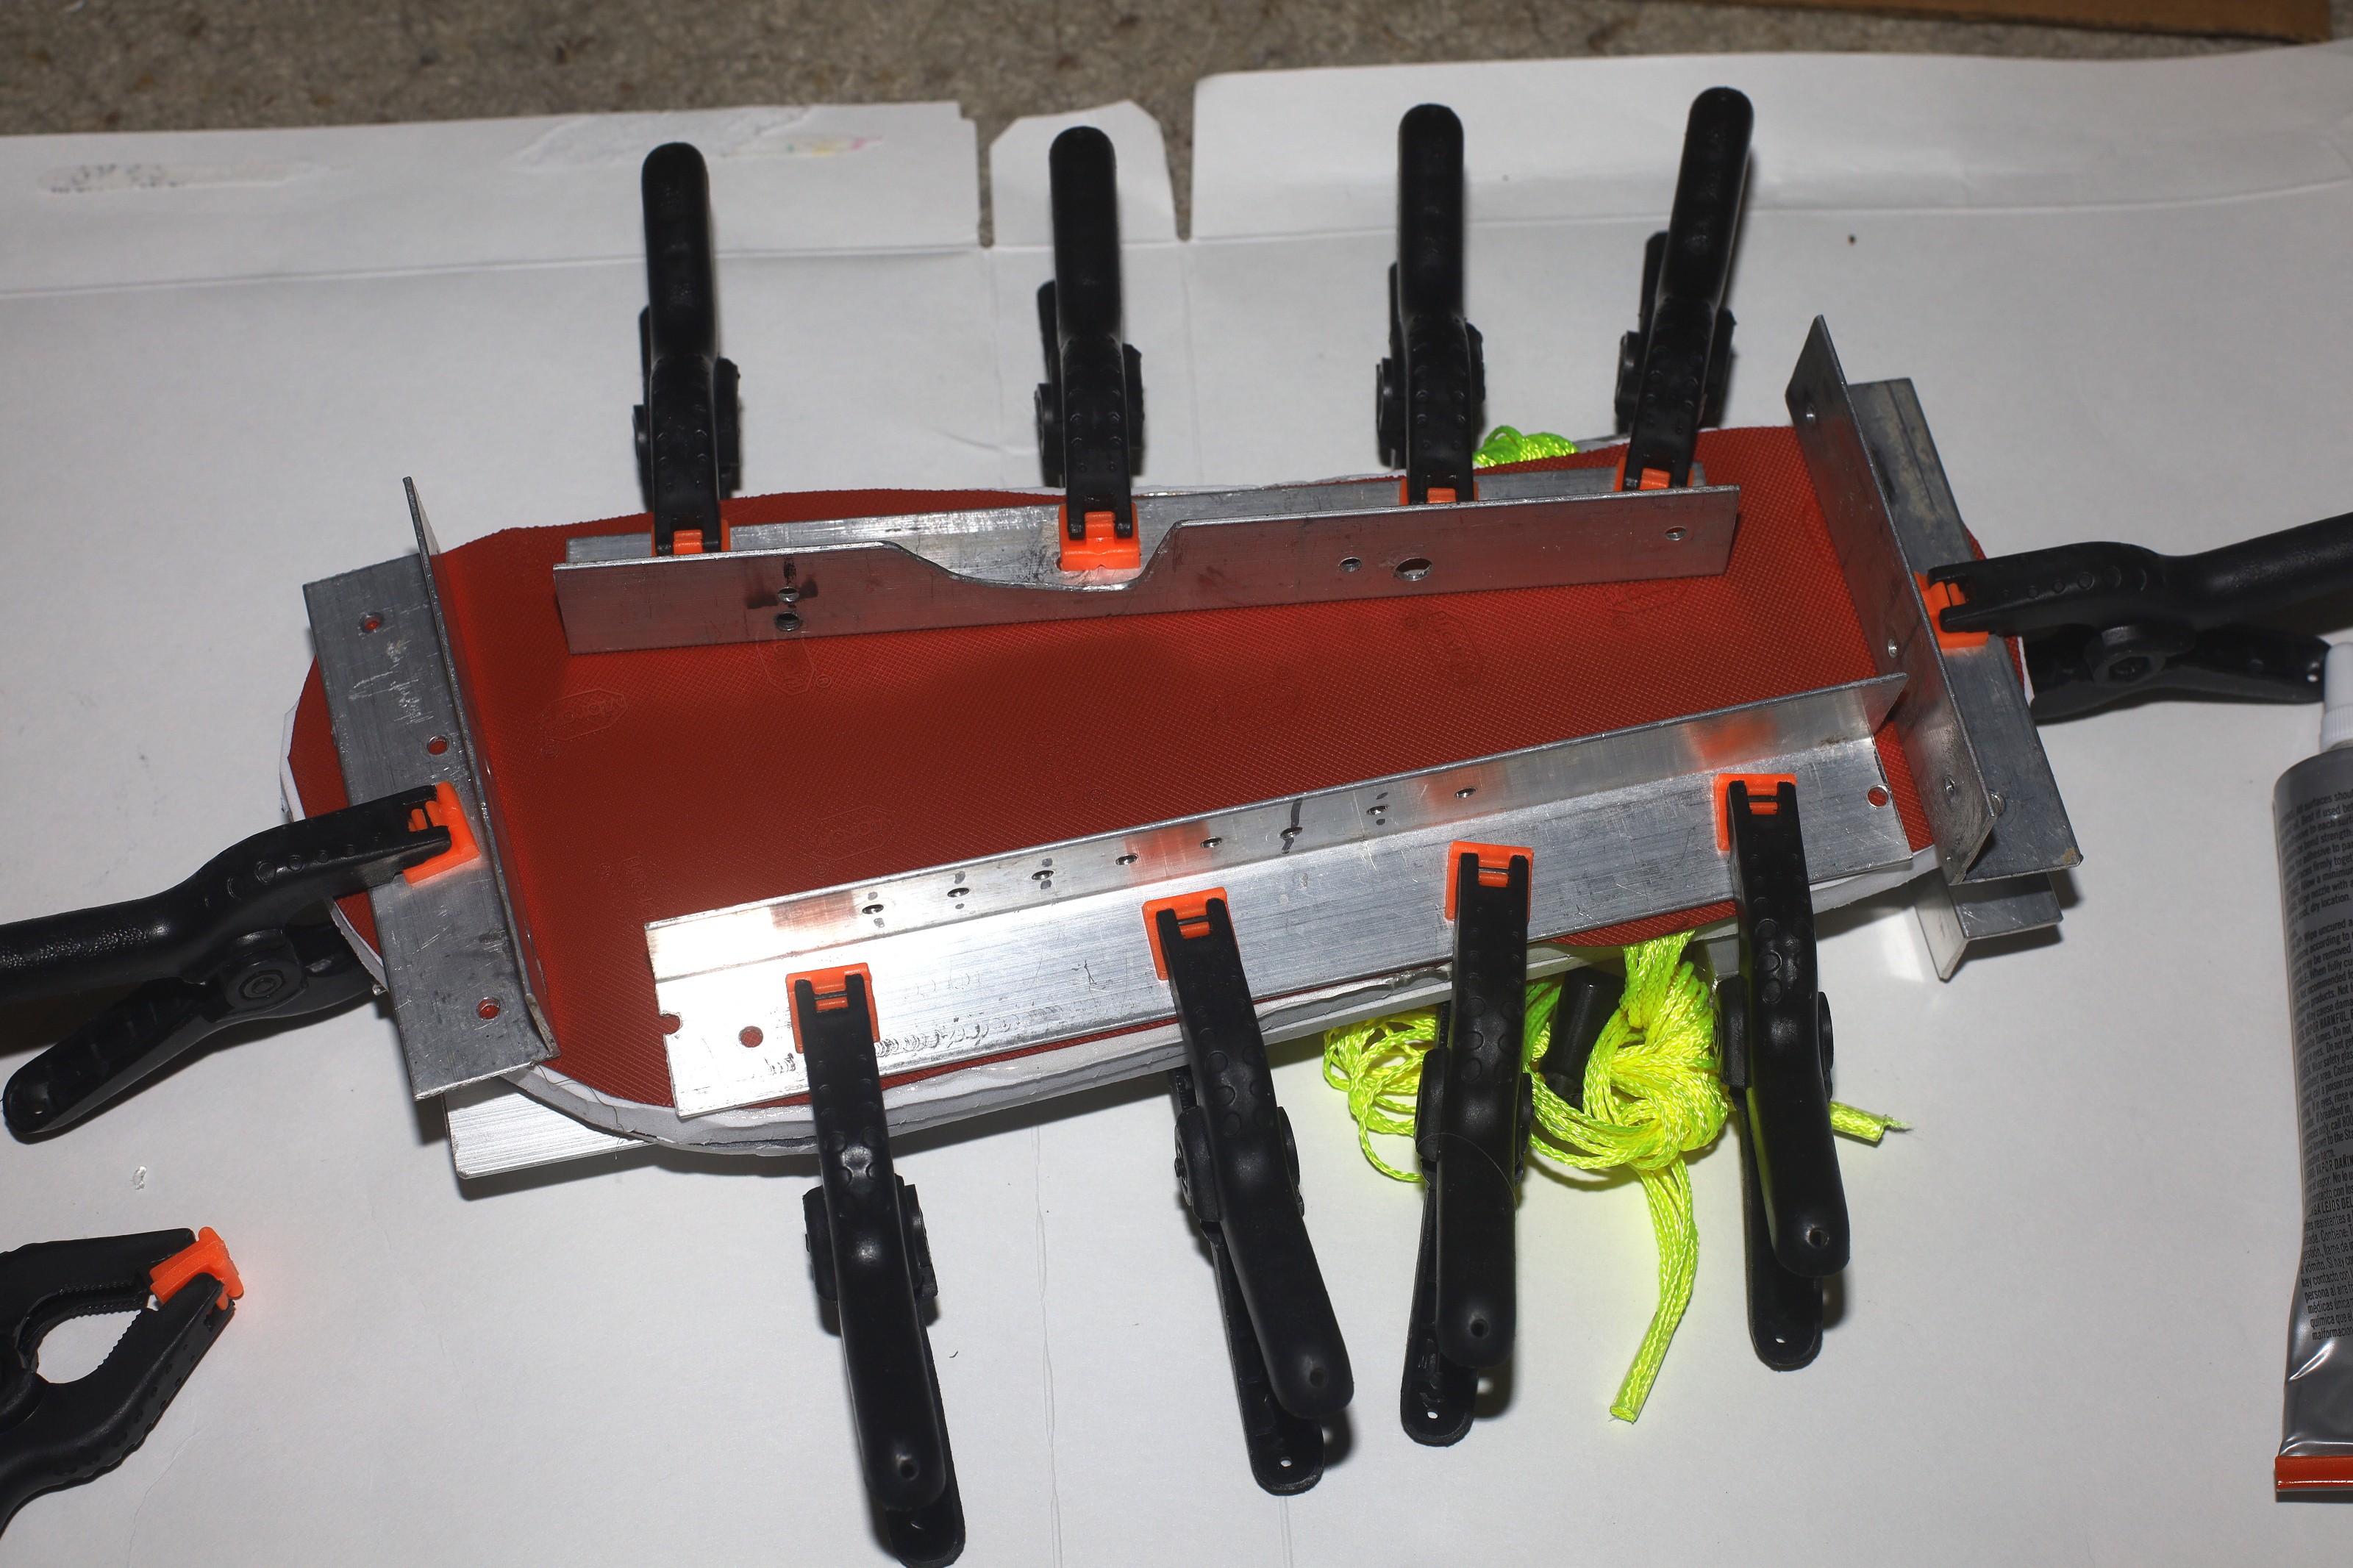
2 layers of EVA are clamped around the edges until the glue cures.
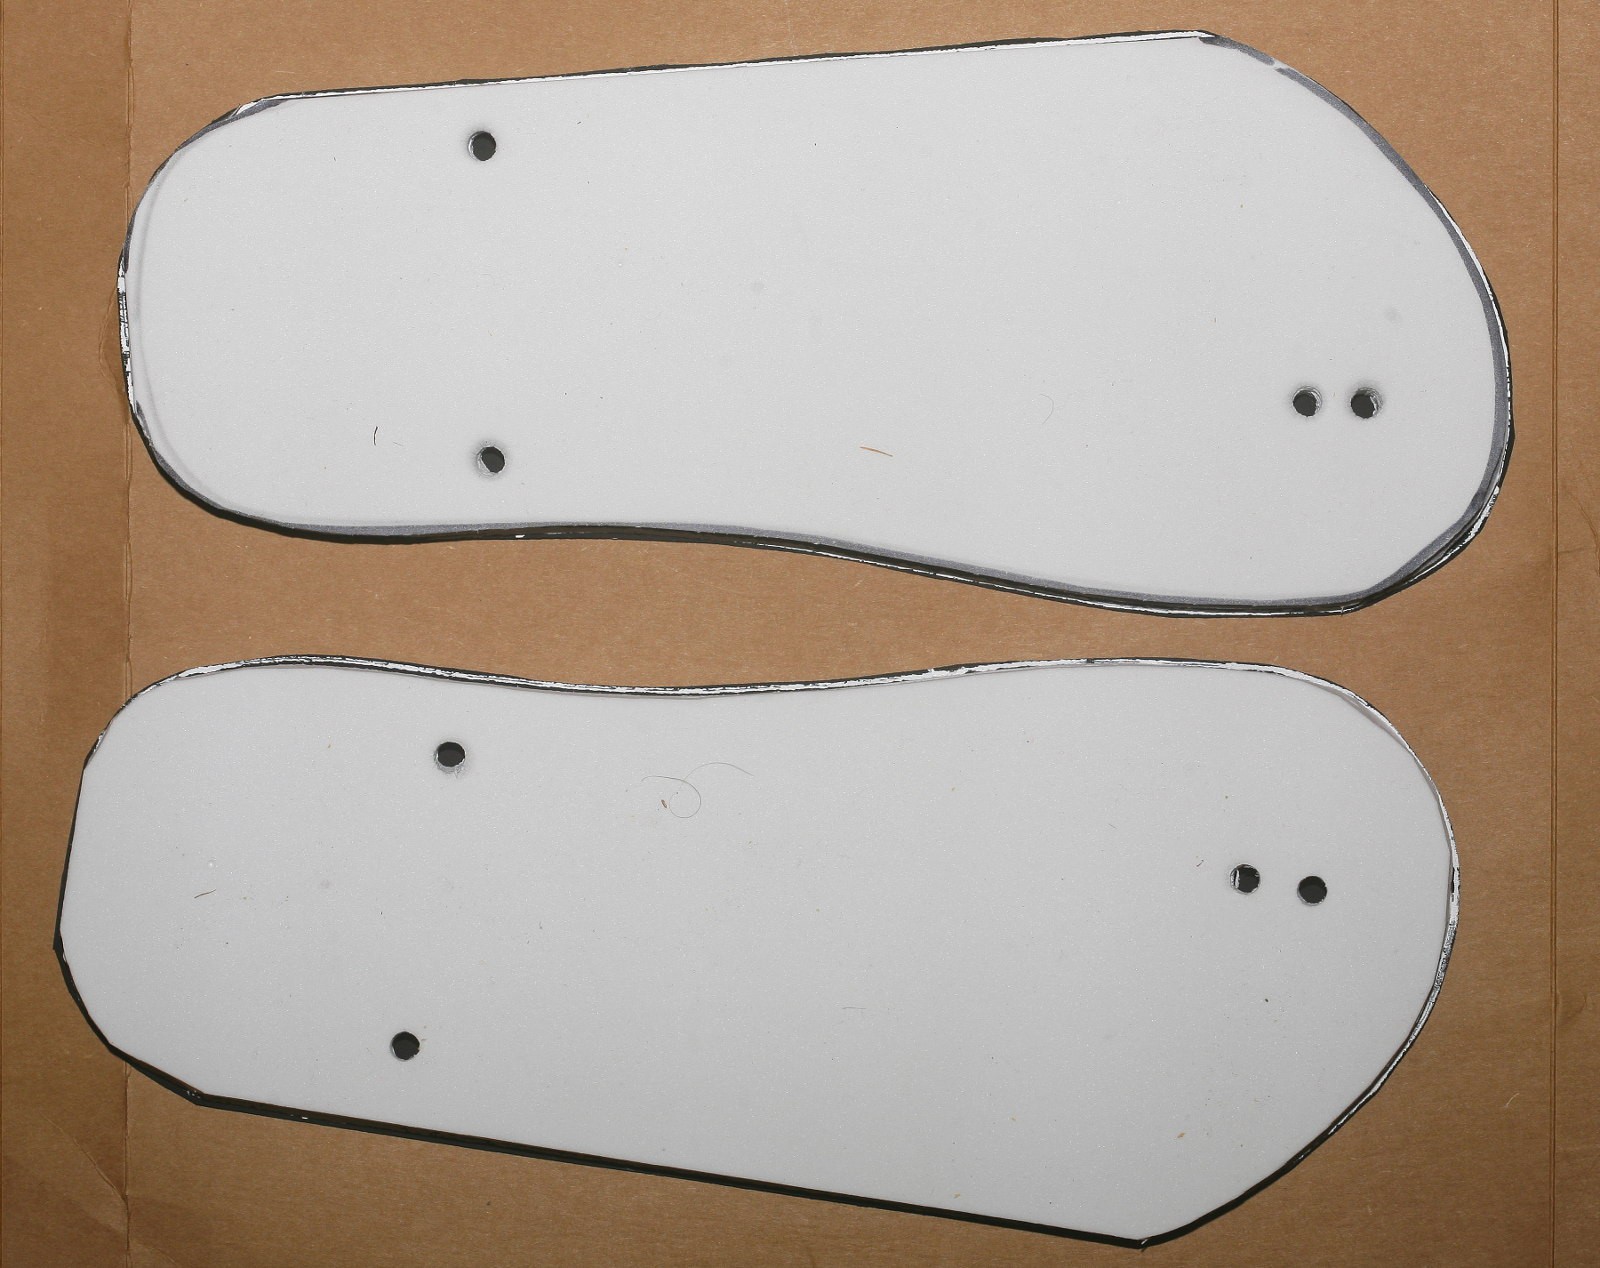
Soling has to be cut based on the final EVA size rather than the template. It has to be 1/8" wider around the string holes, to prevent sideways expansion of the foam from pressing the string directly on pavement.
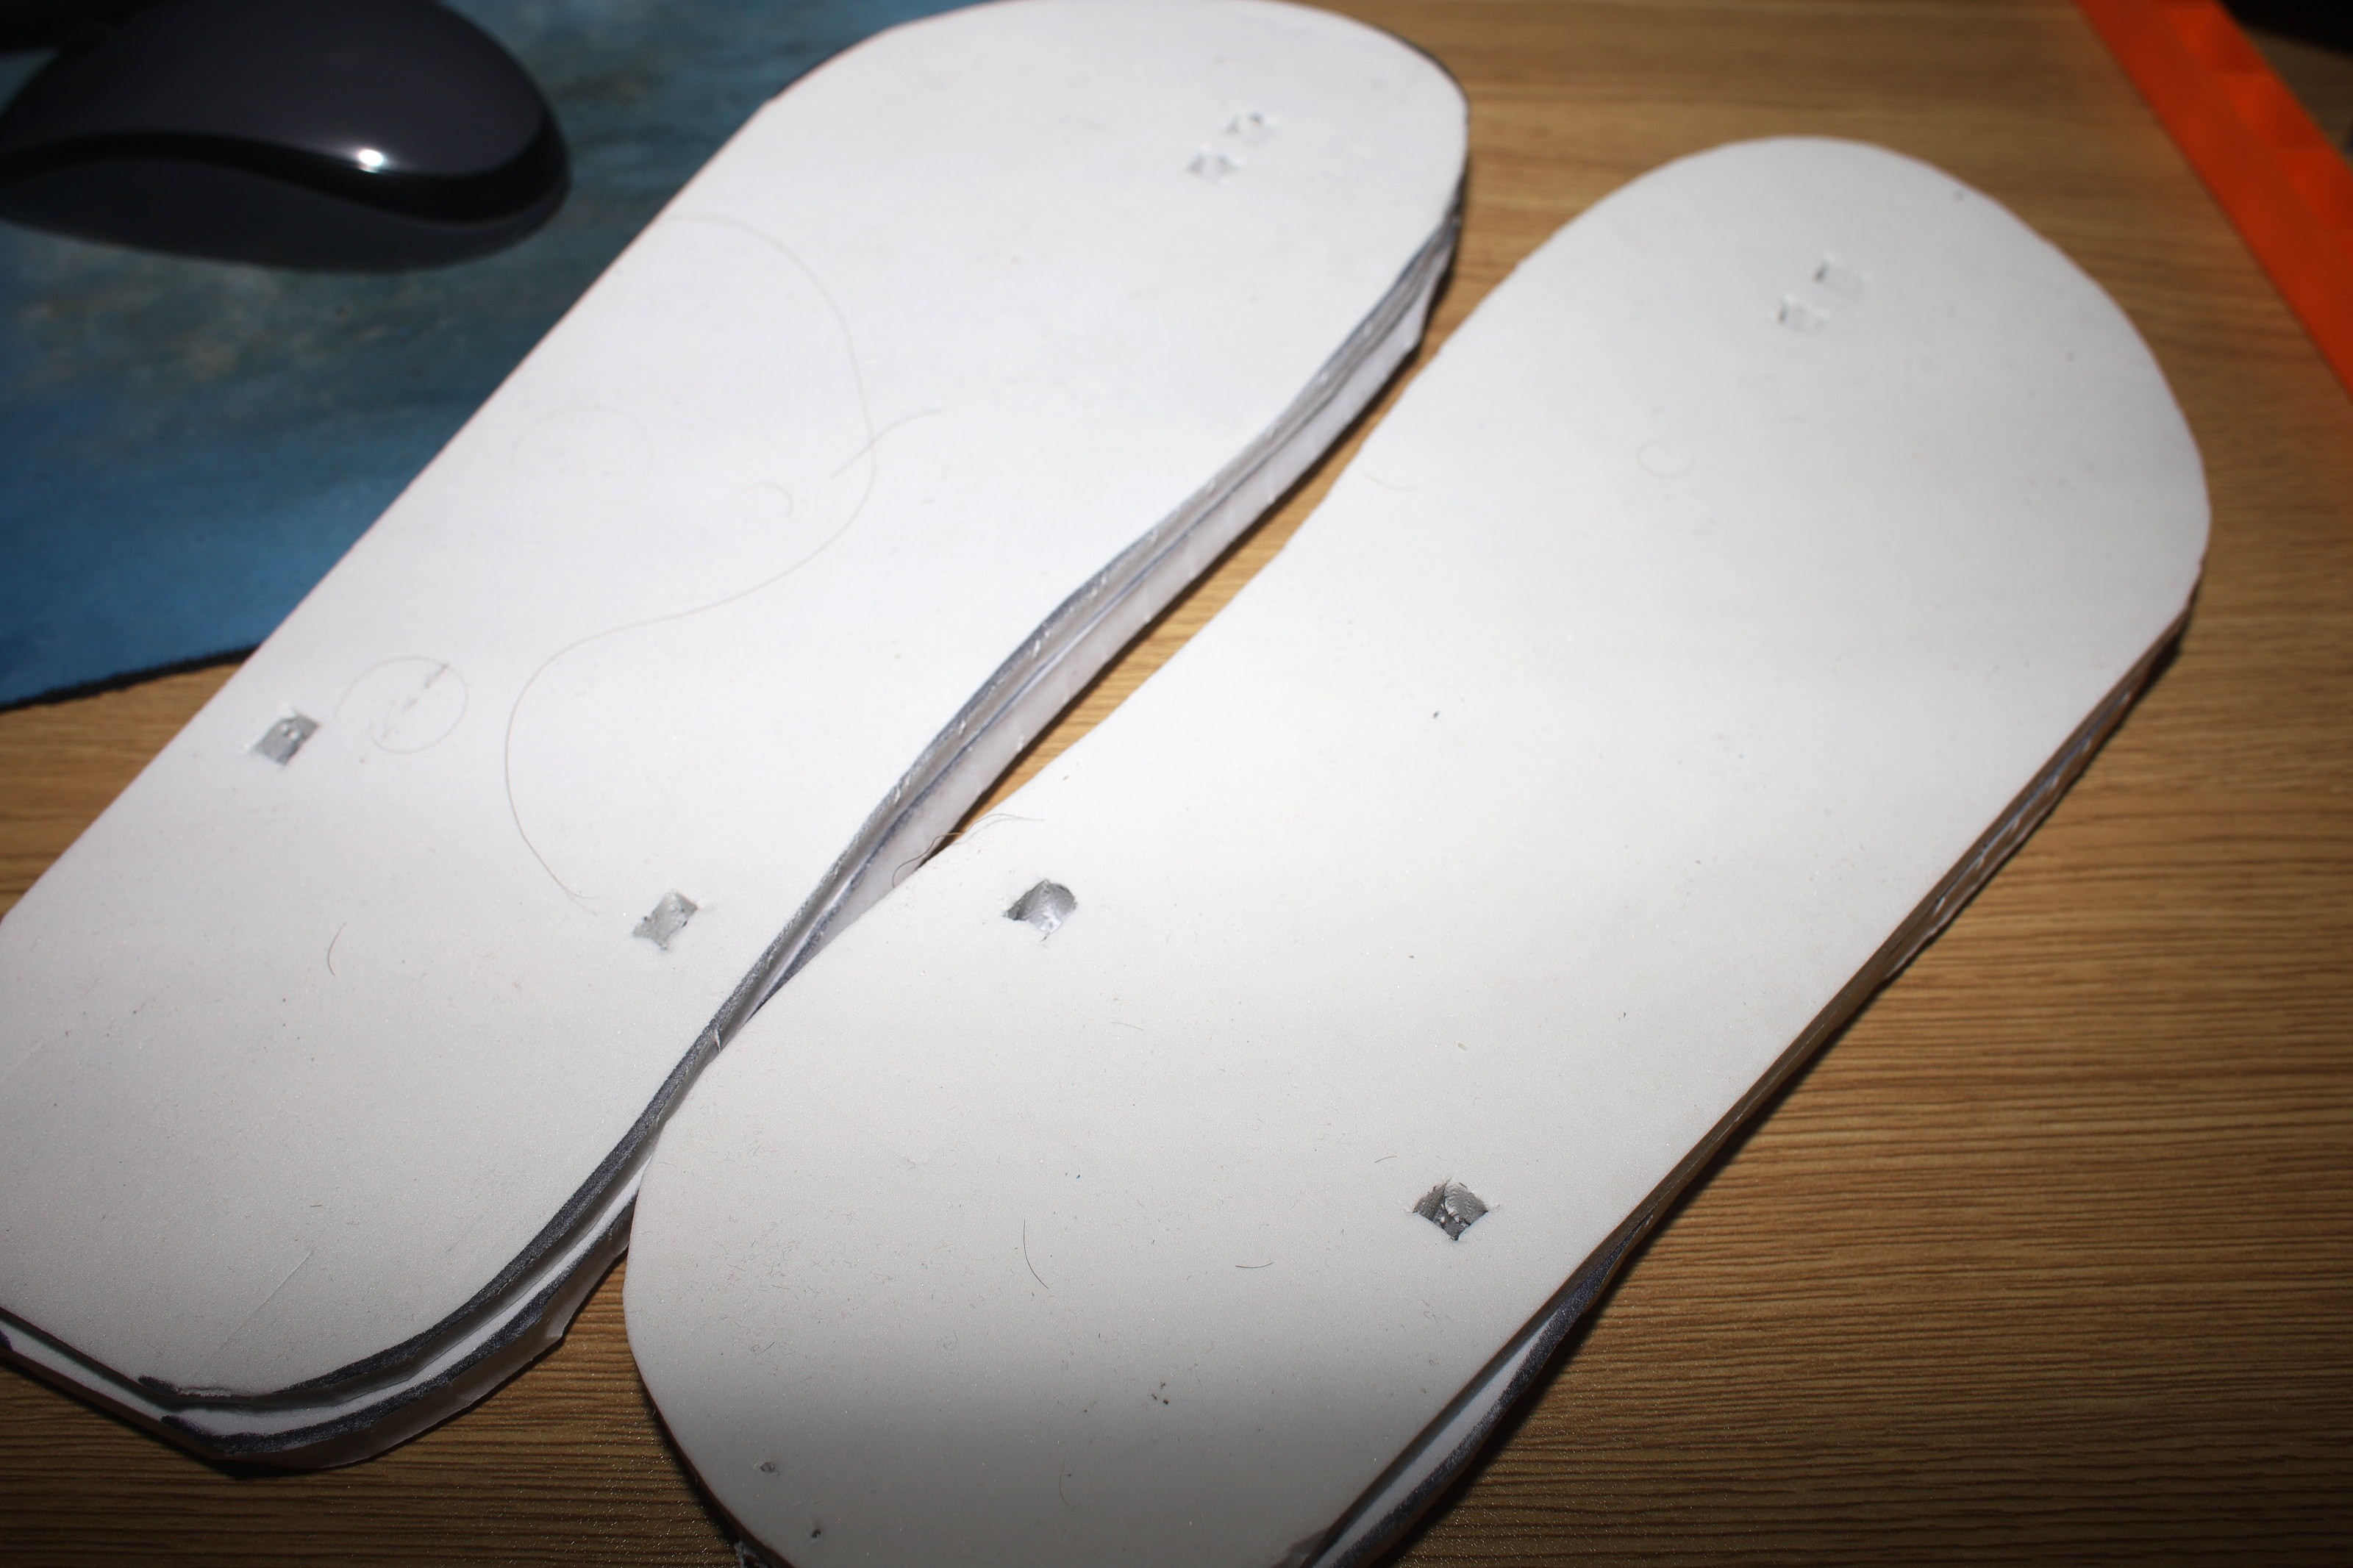
Square holes are cut in the EVA with an xacto.
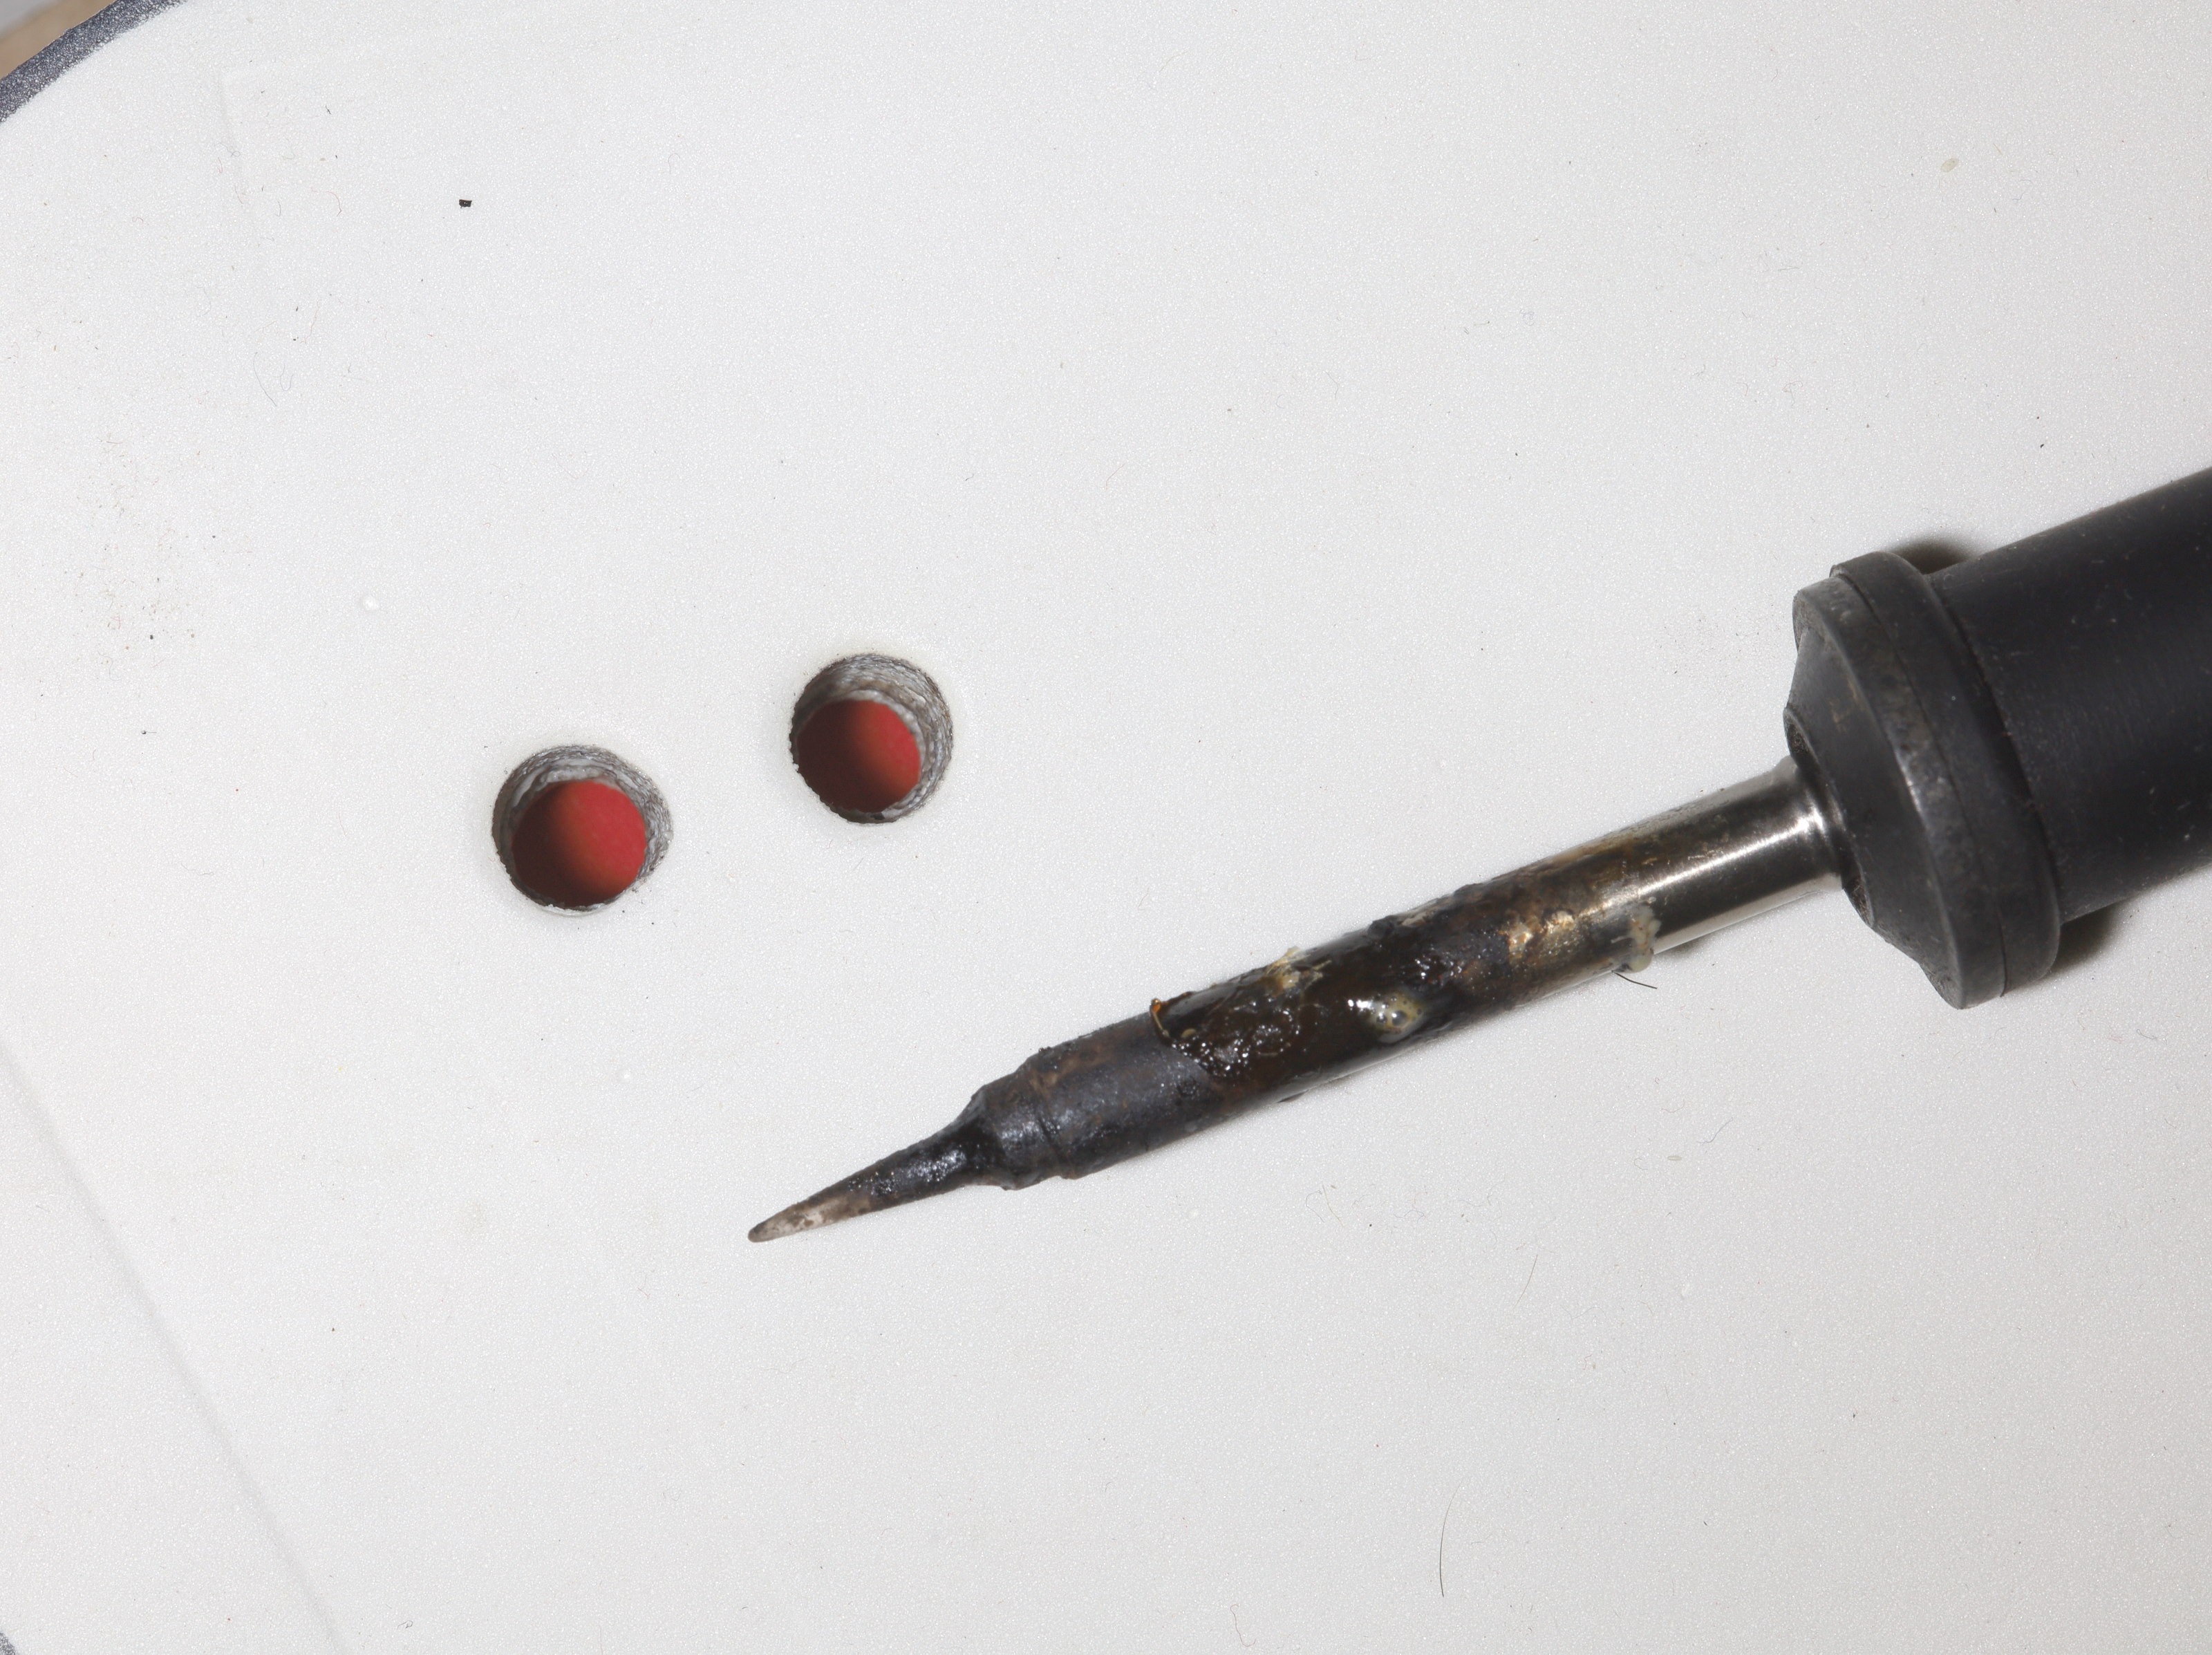
It's much easier to melt the holes with a T-12 soldering iron. The trick is using lots of ventilation & pulling the tip out without it getting stuck. It's easier to melt partway into both sides.
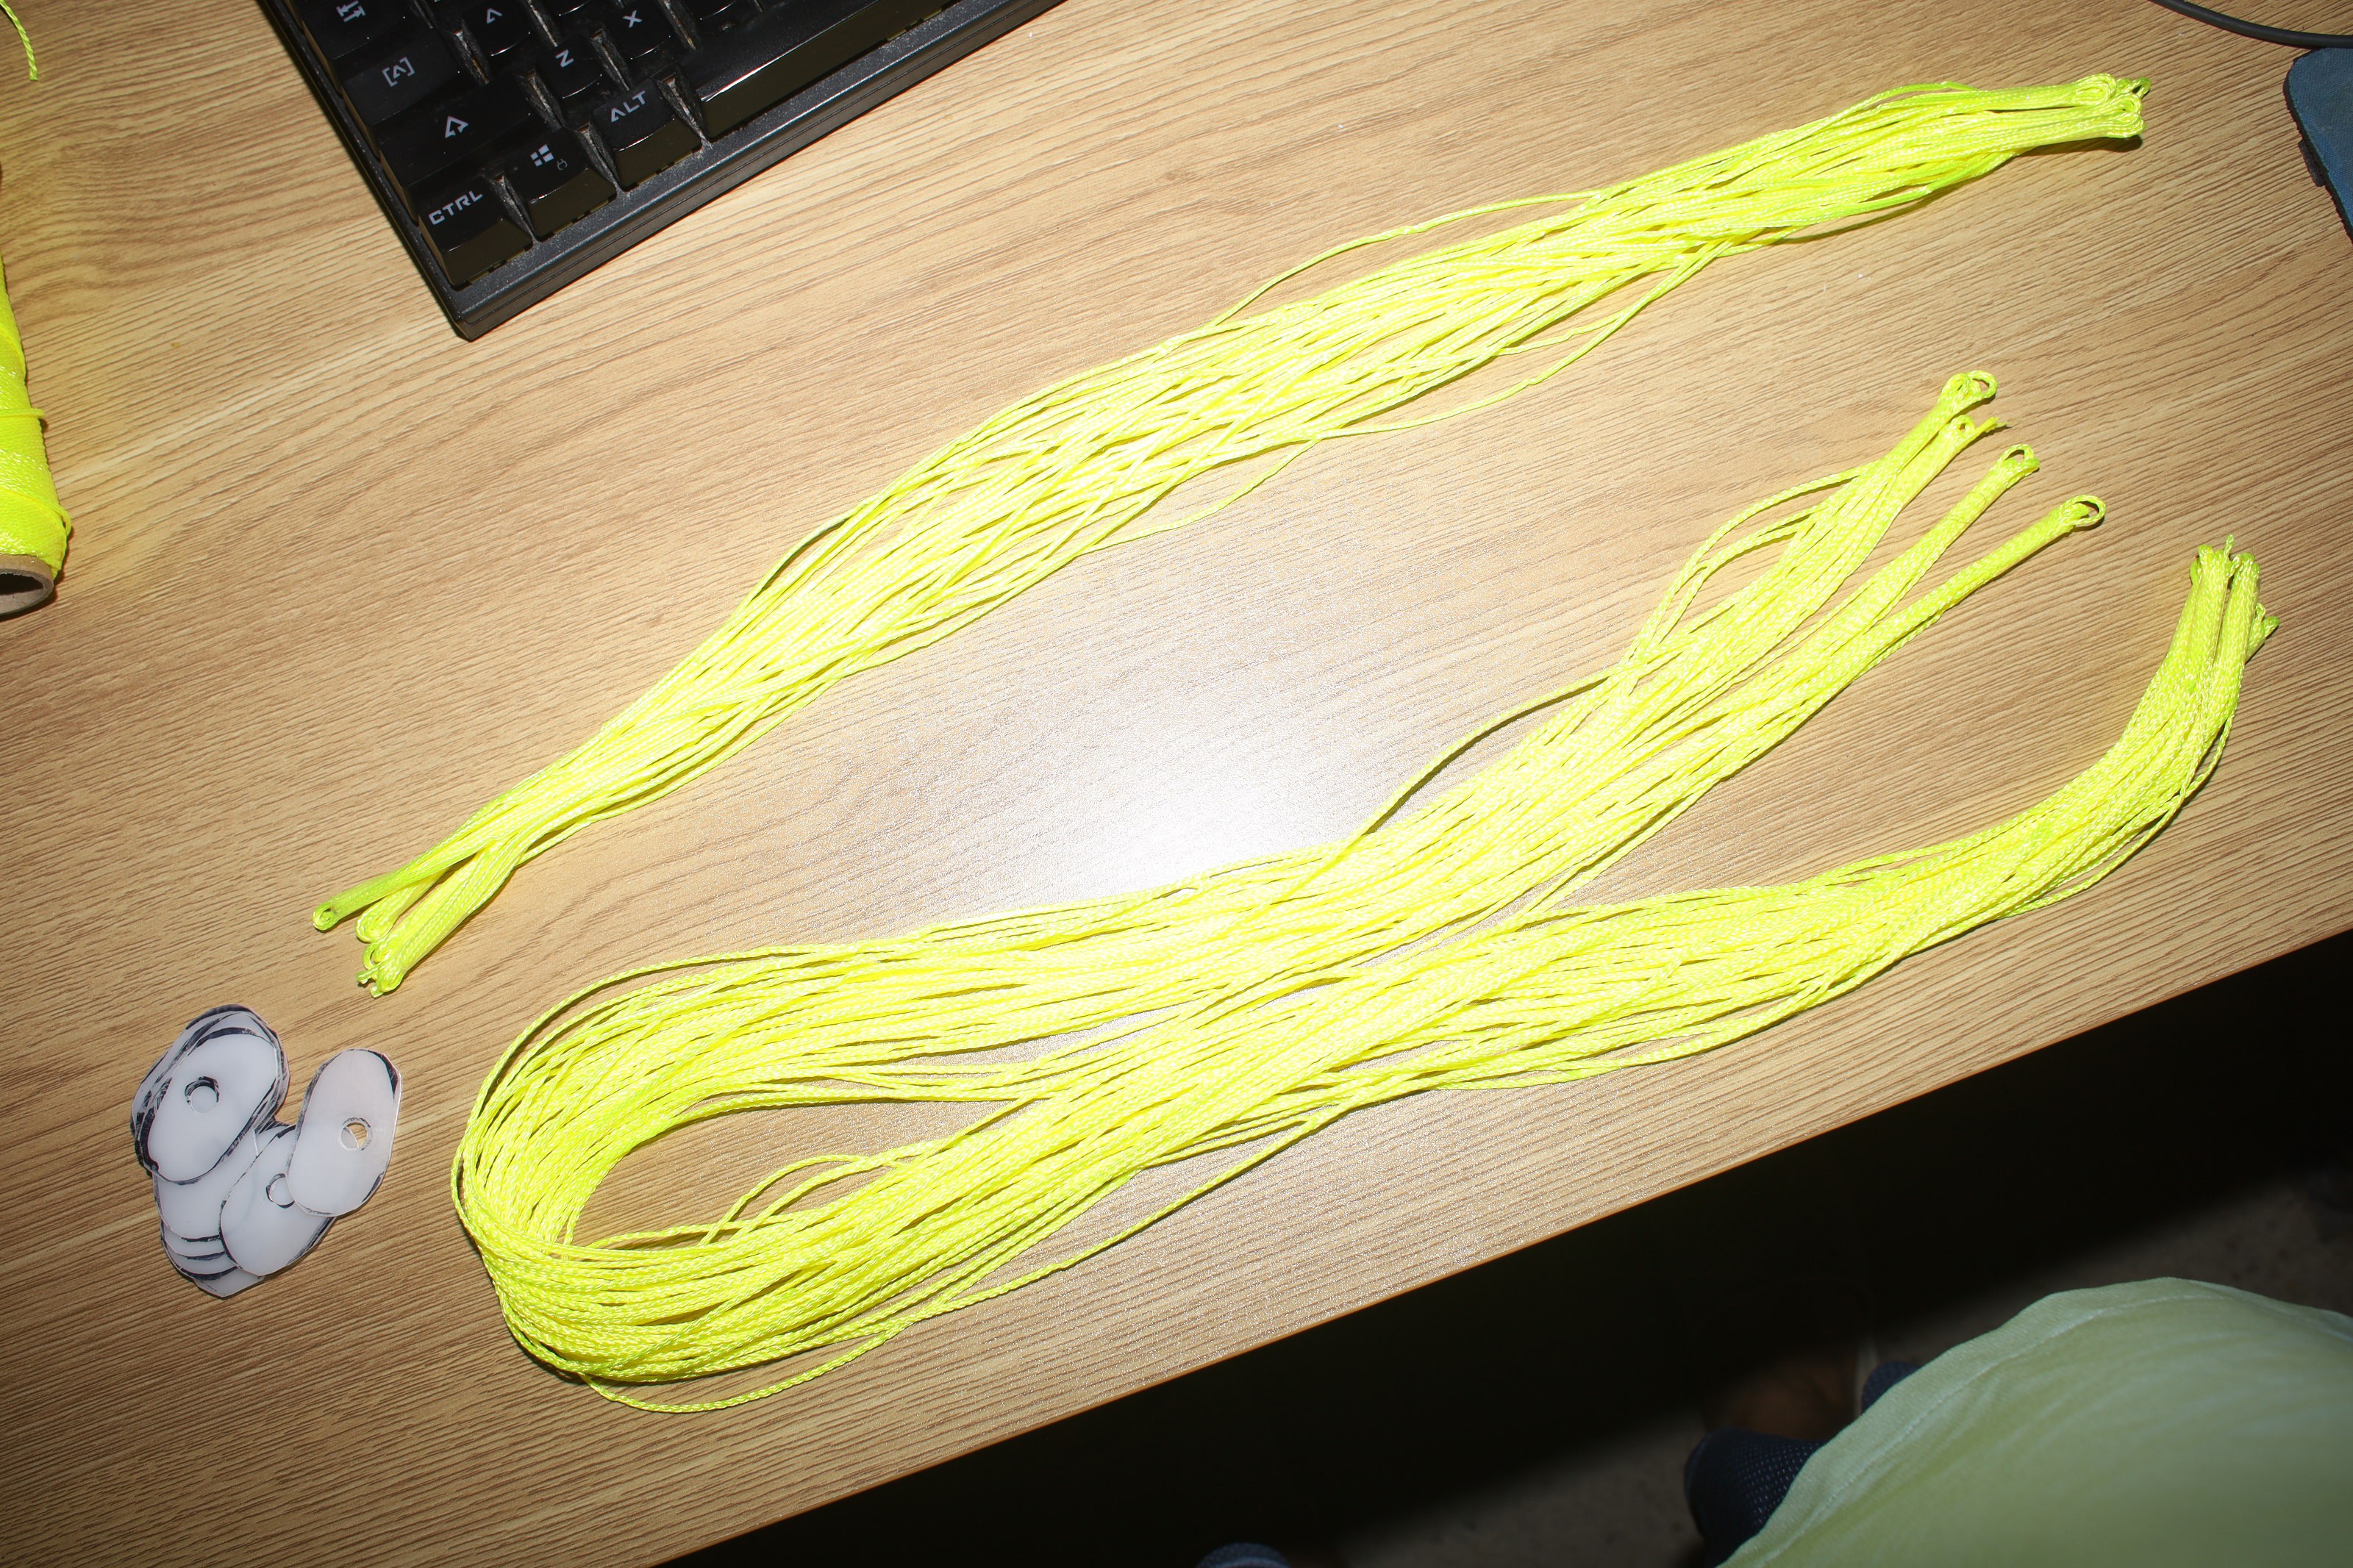
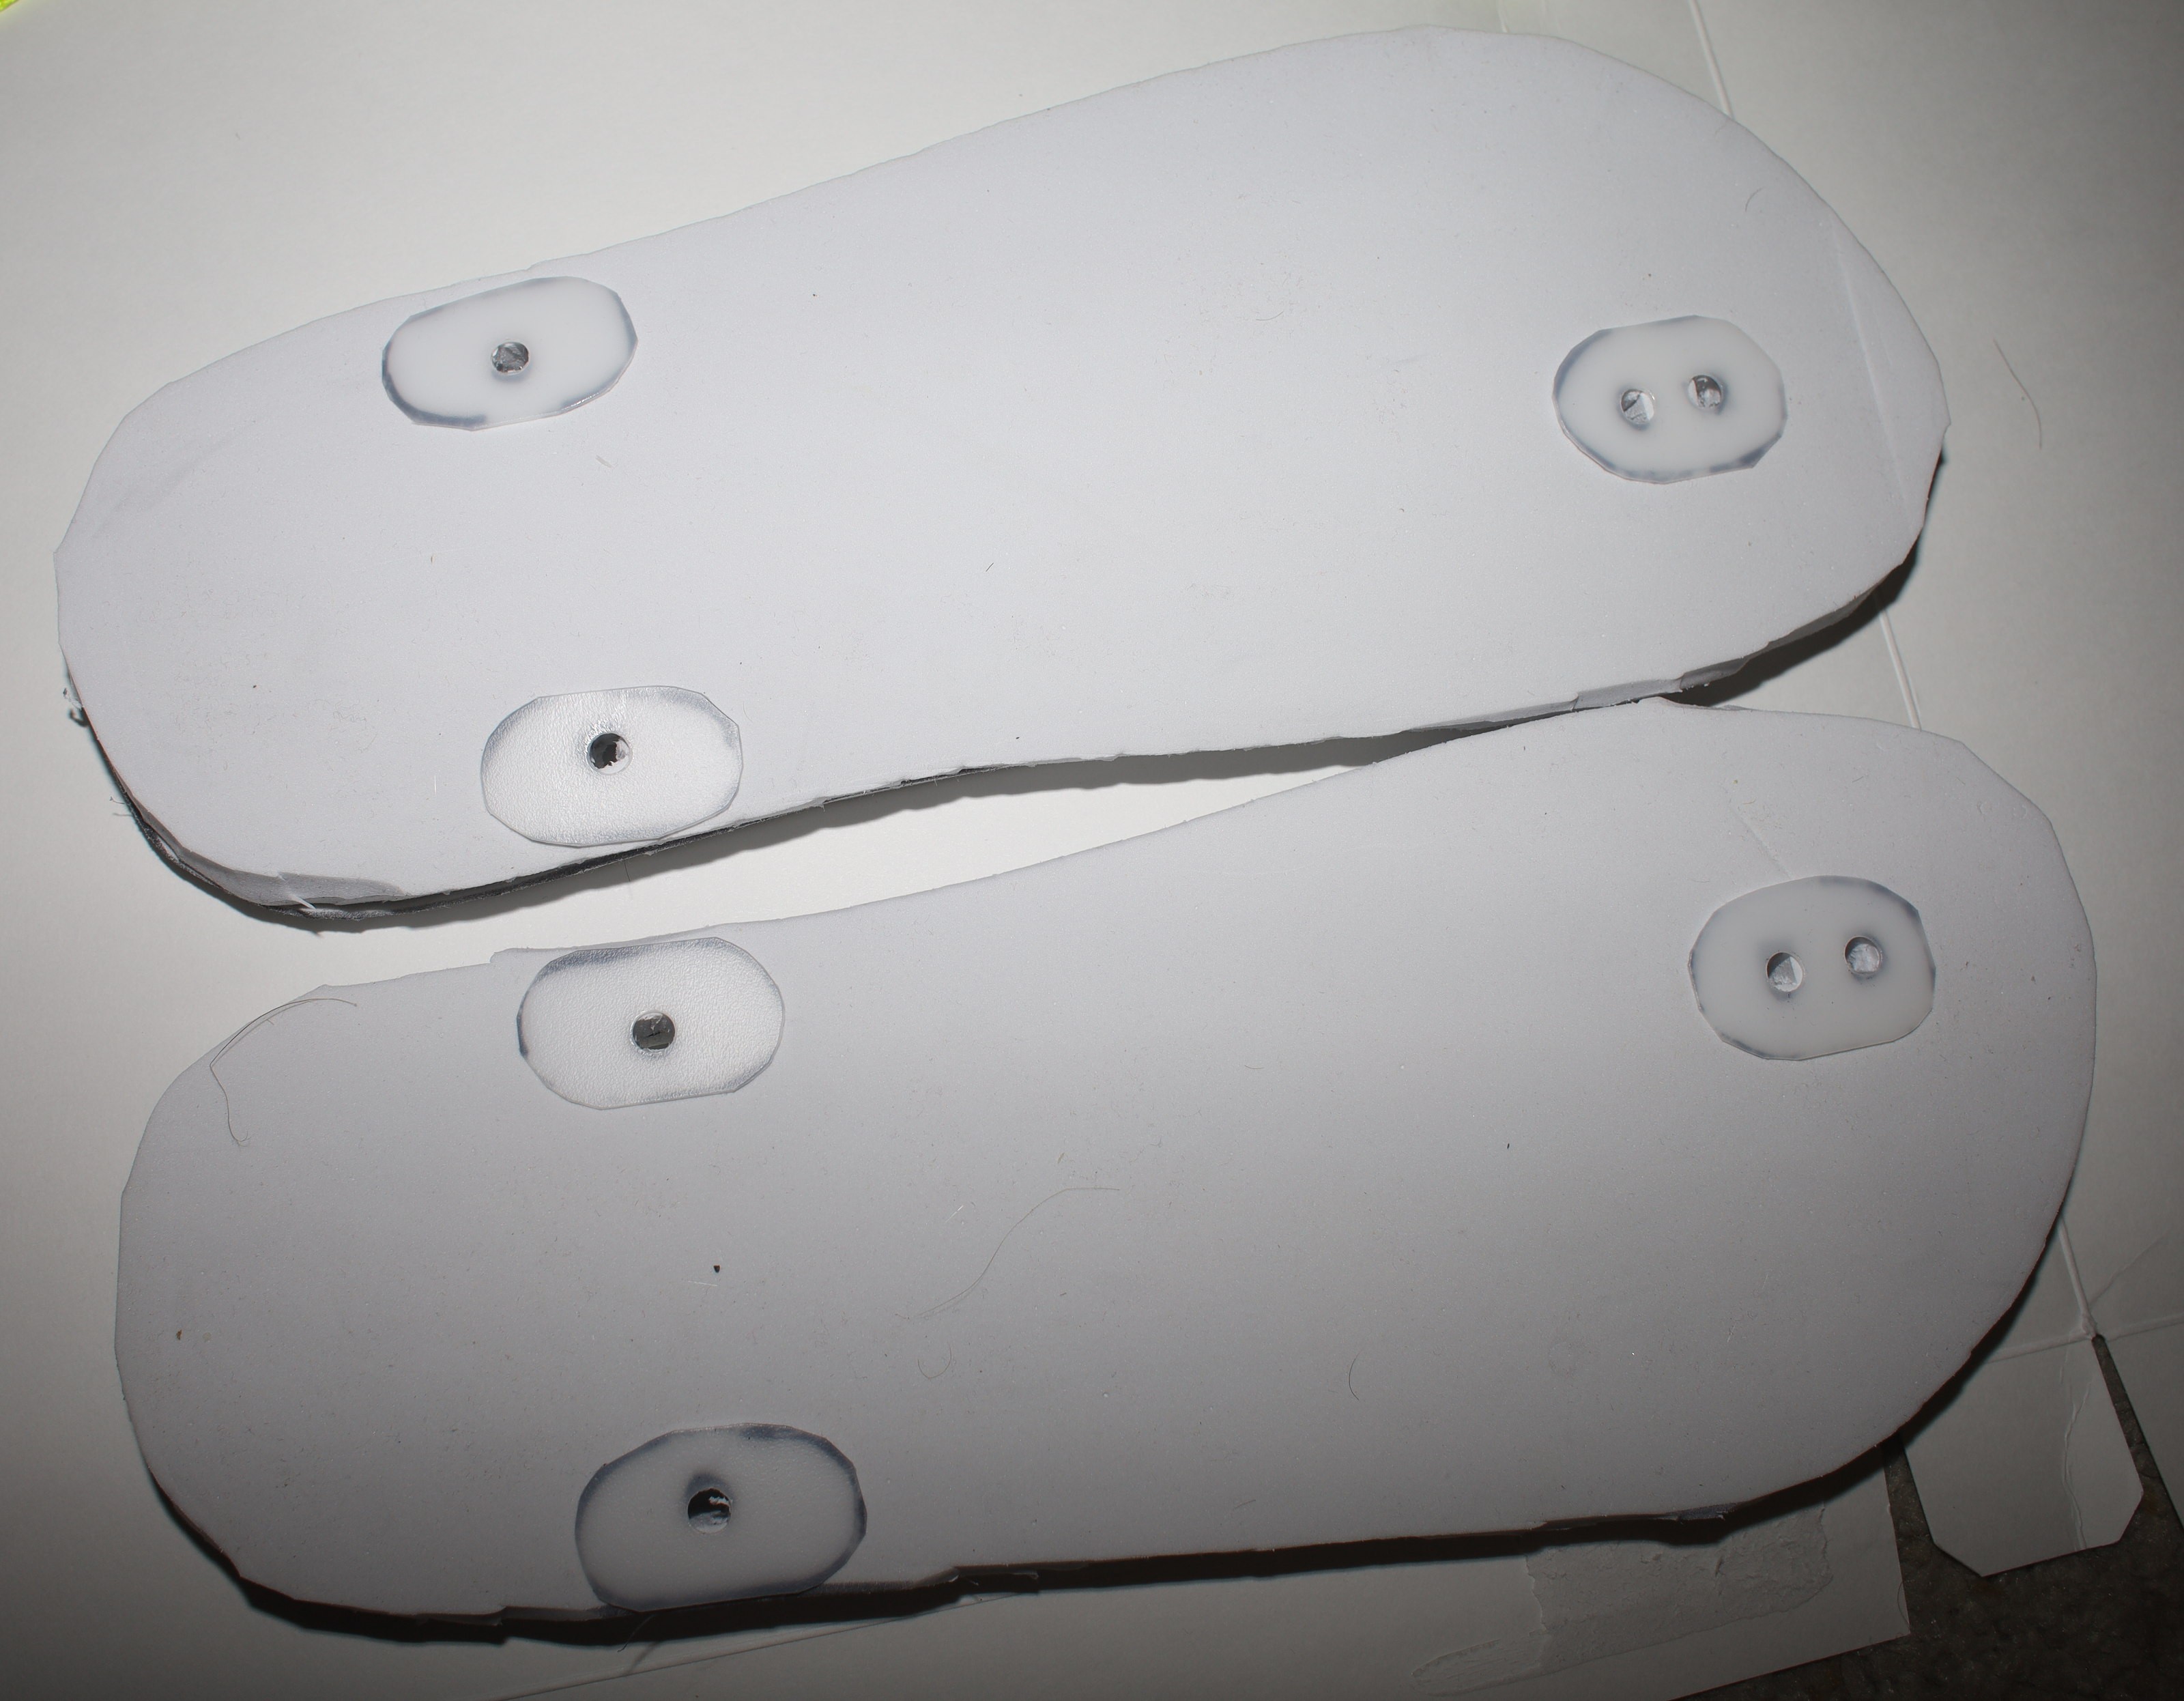
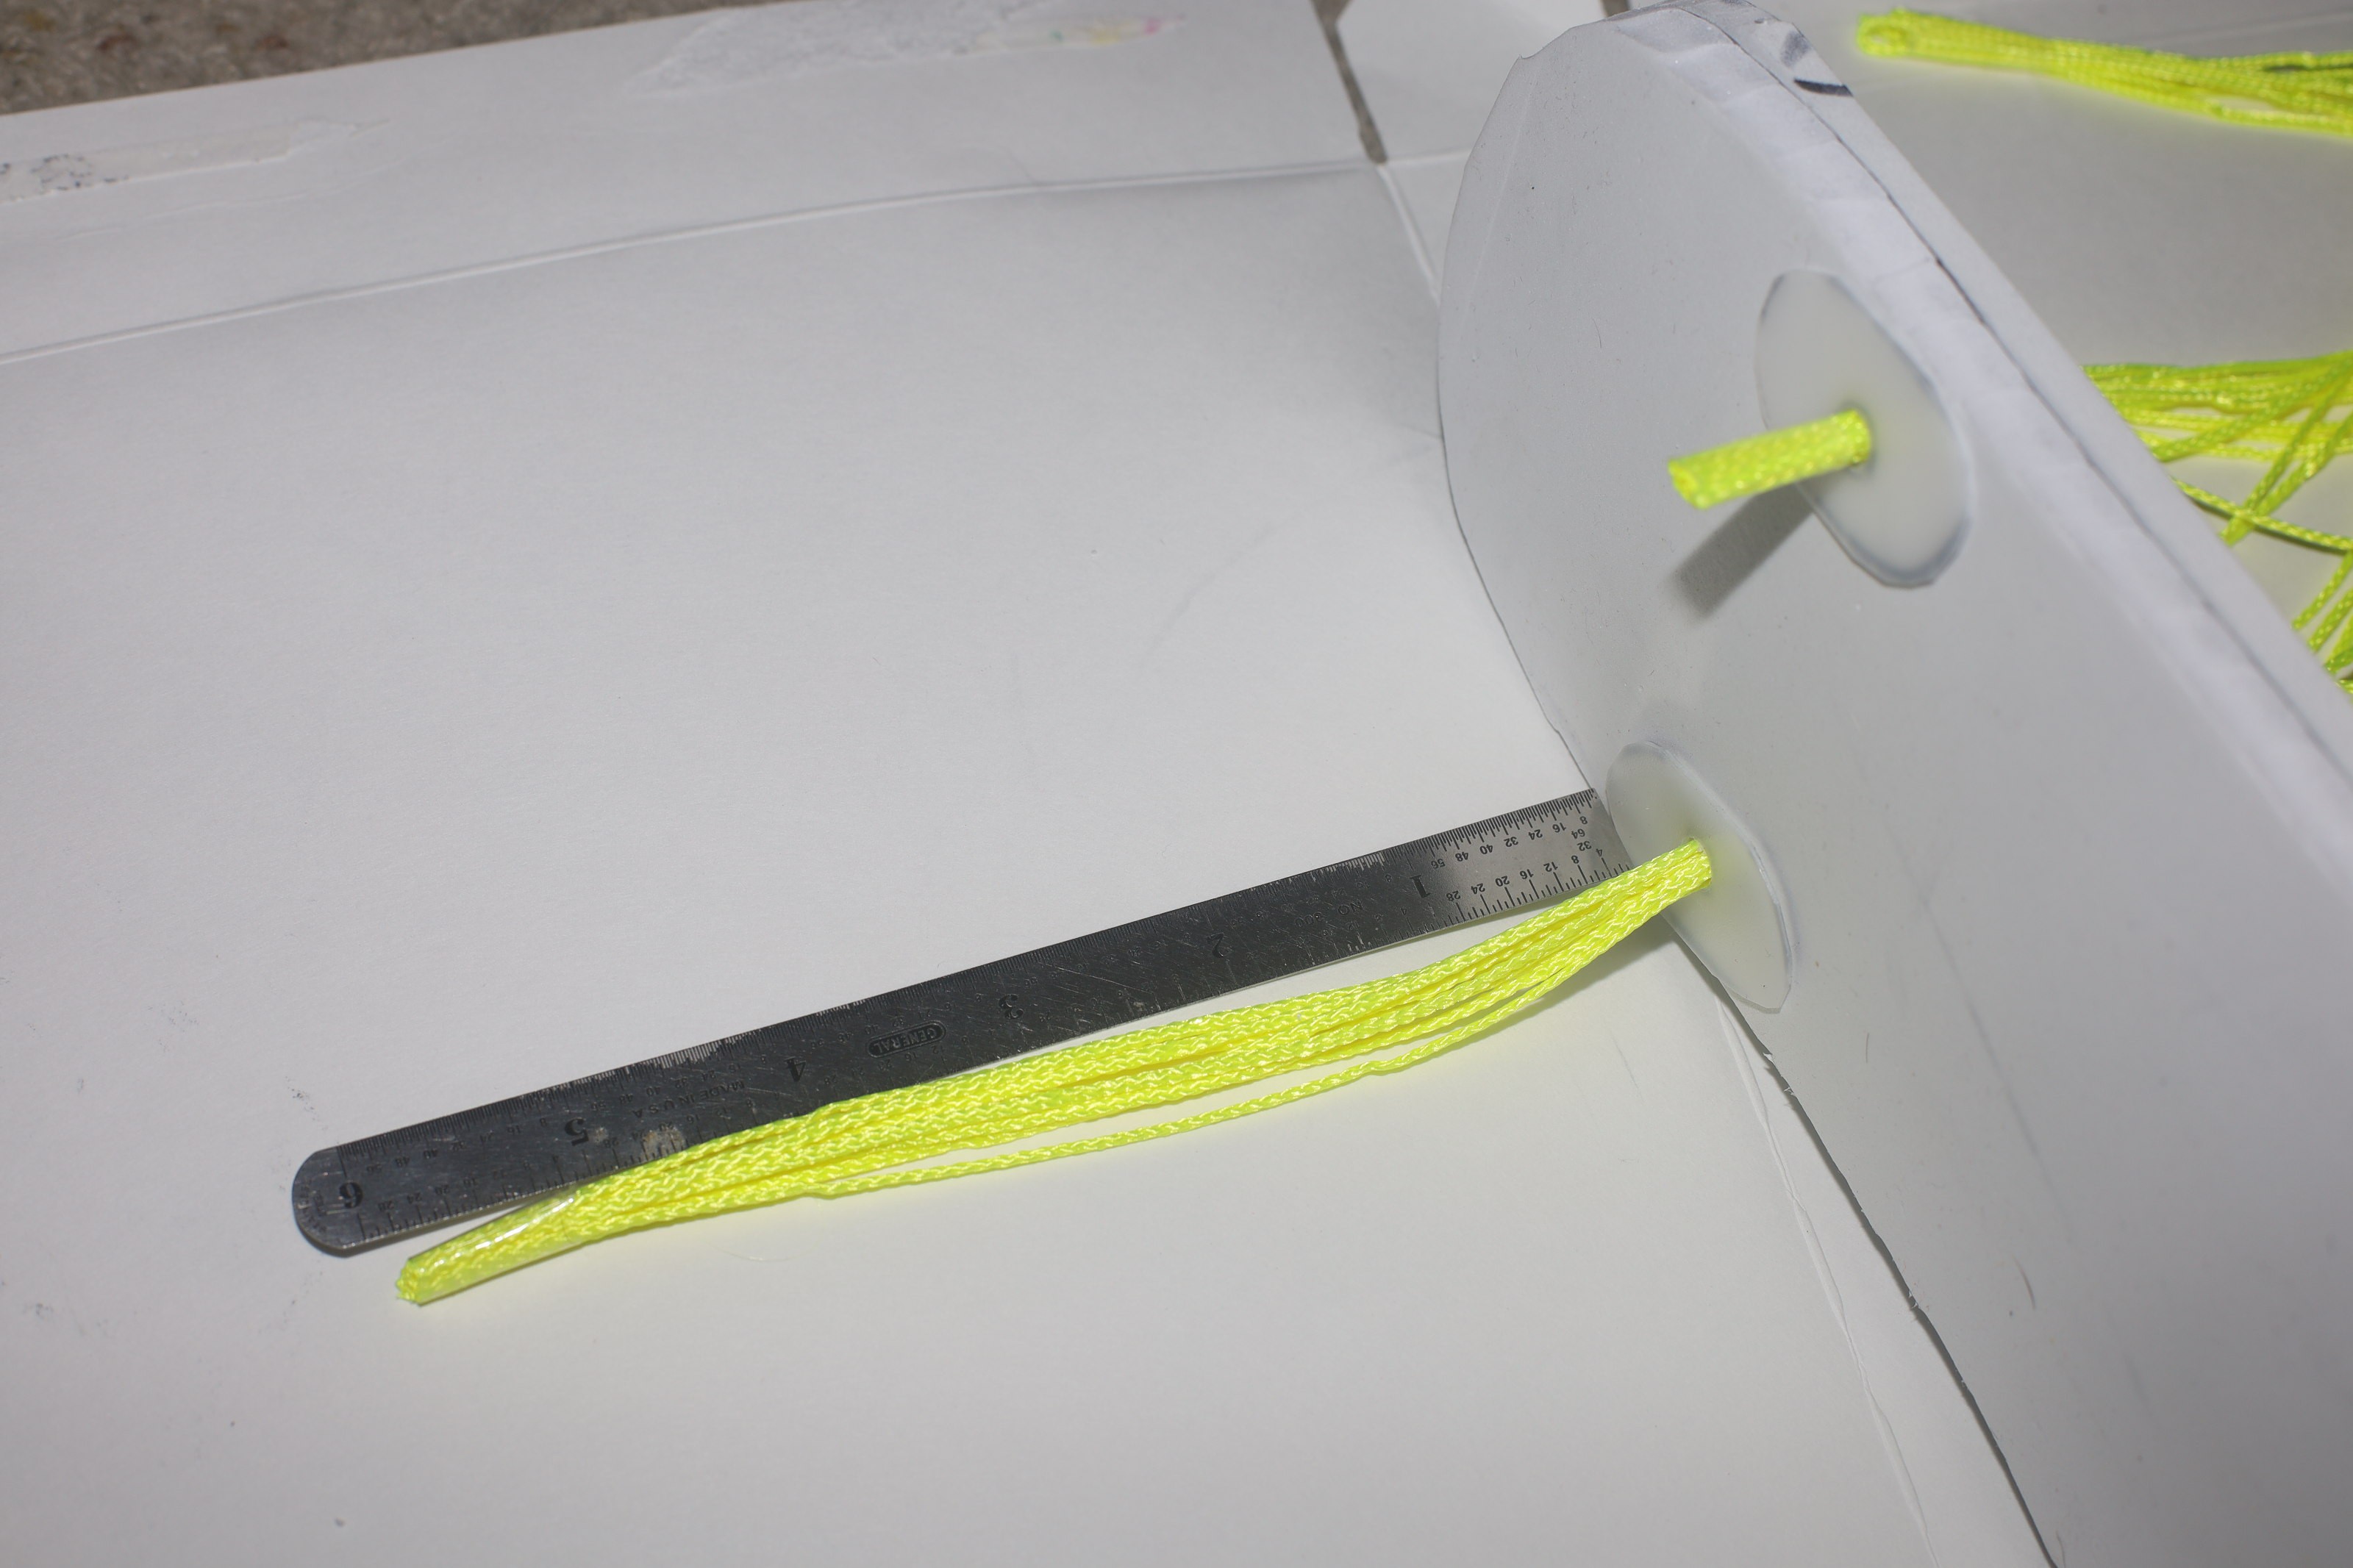
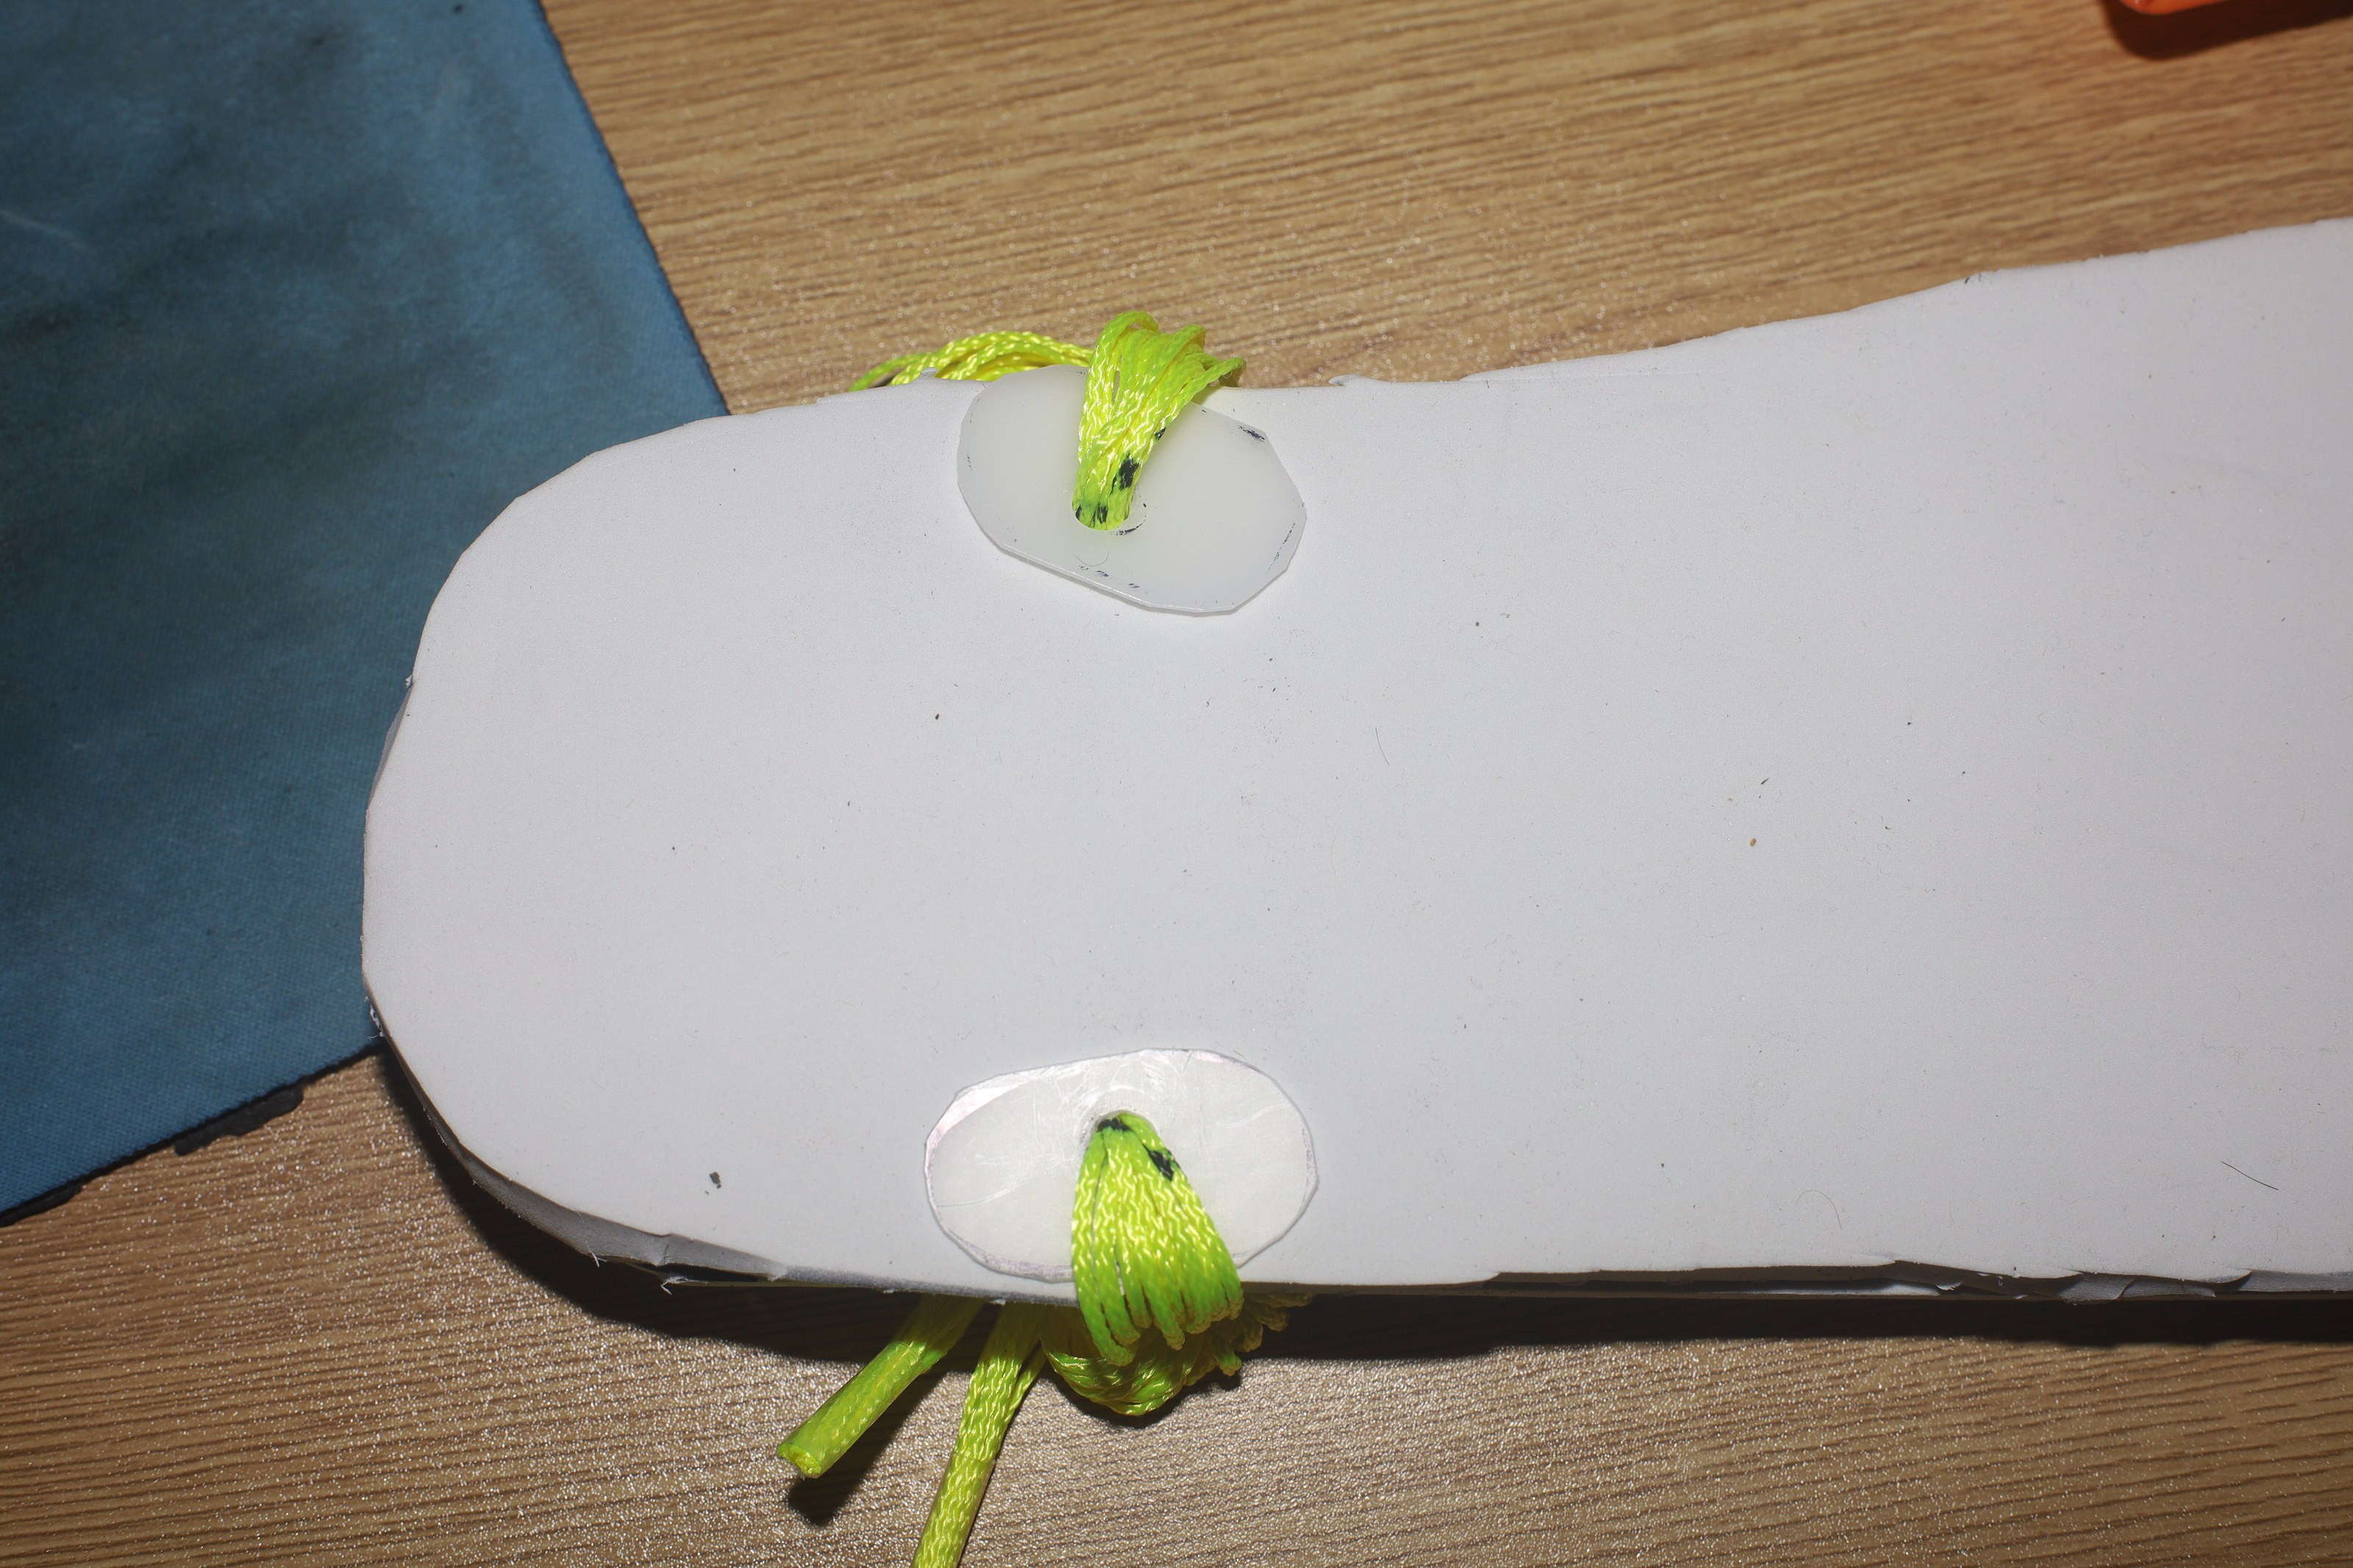
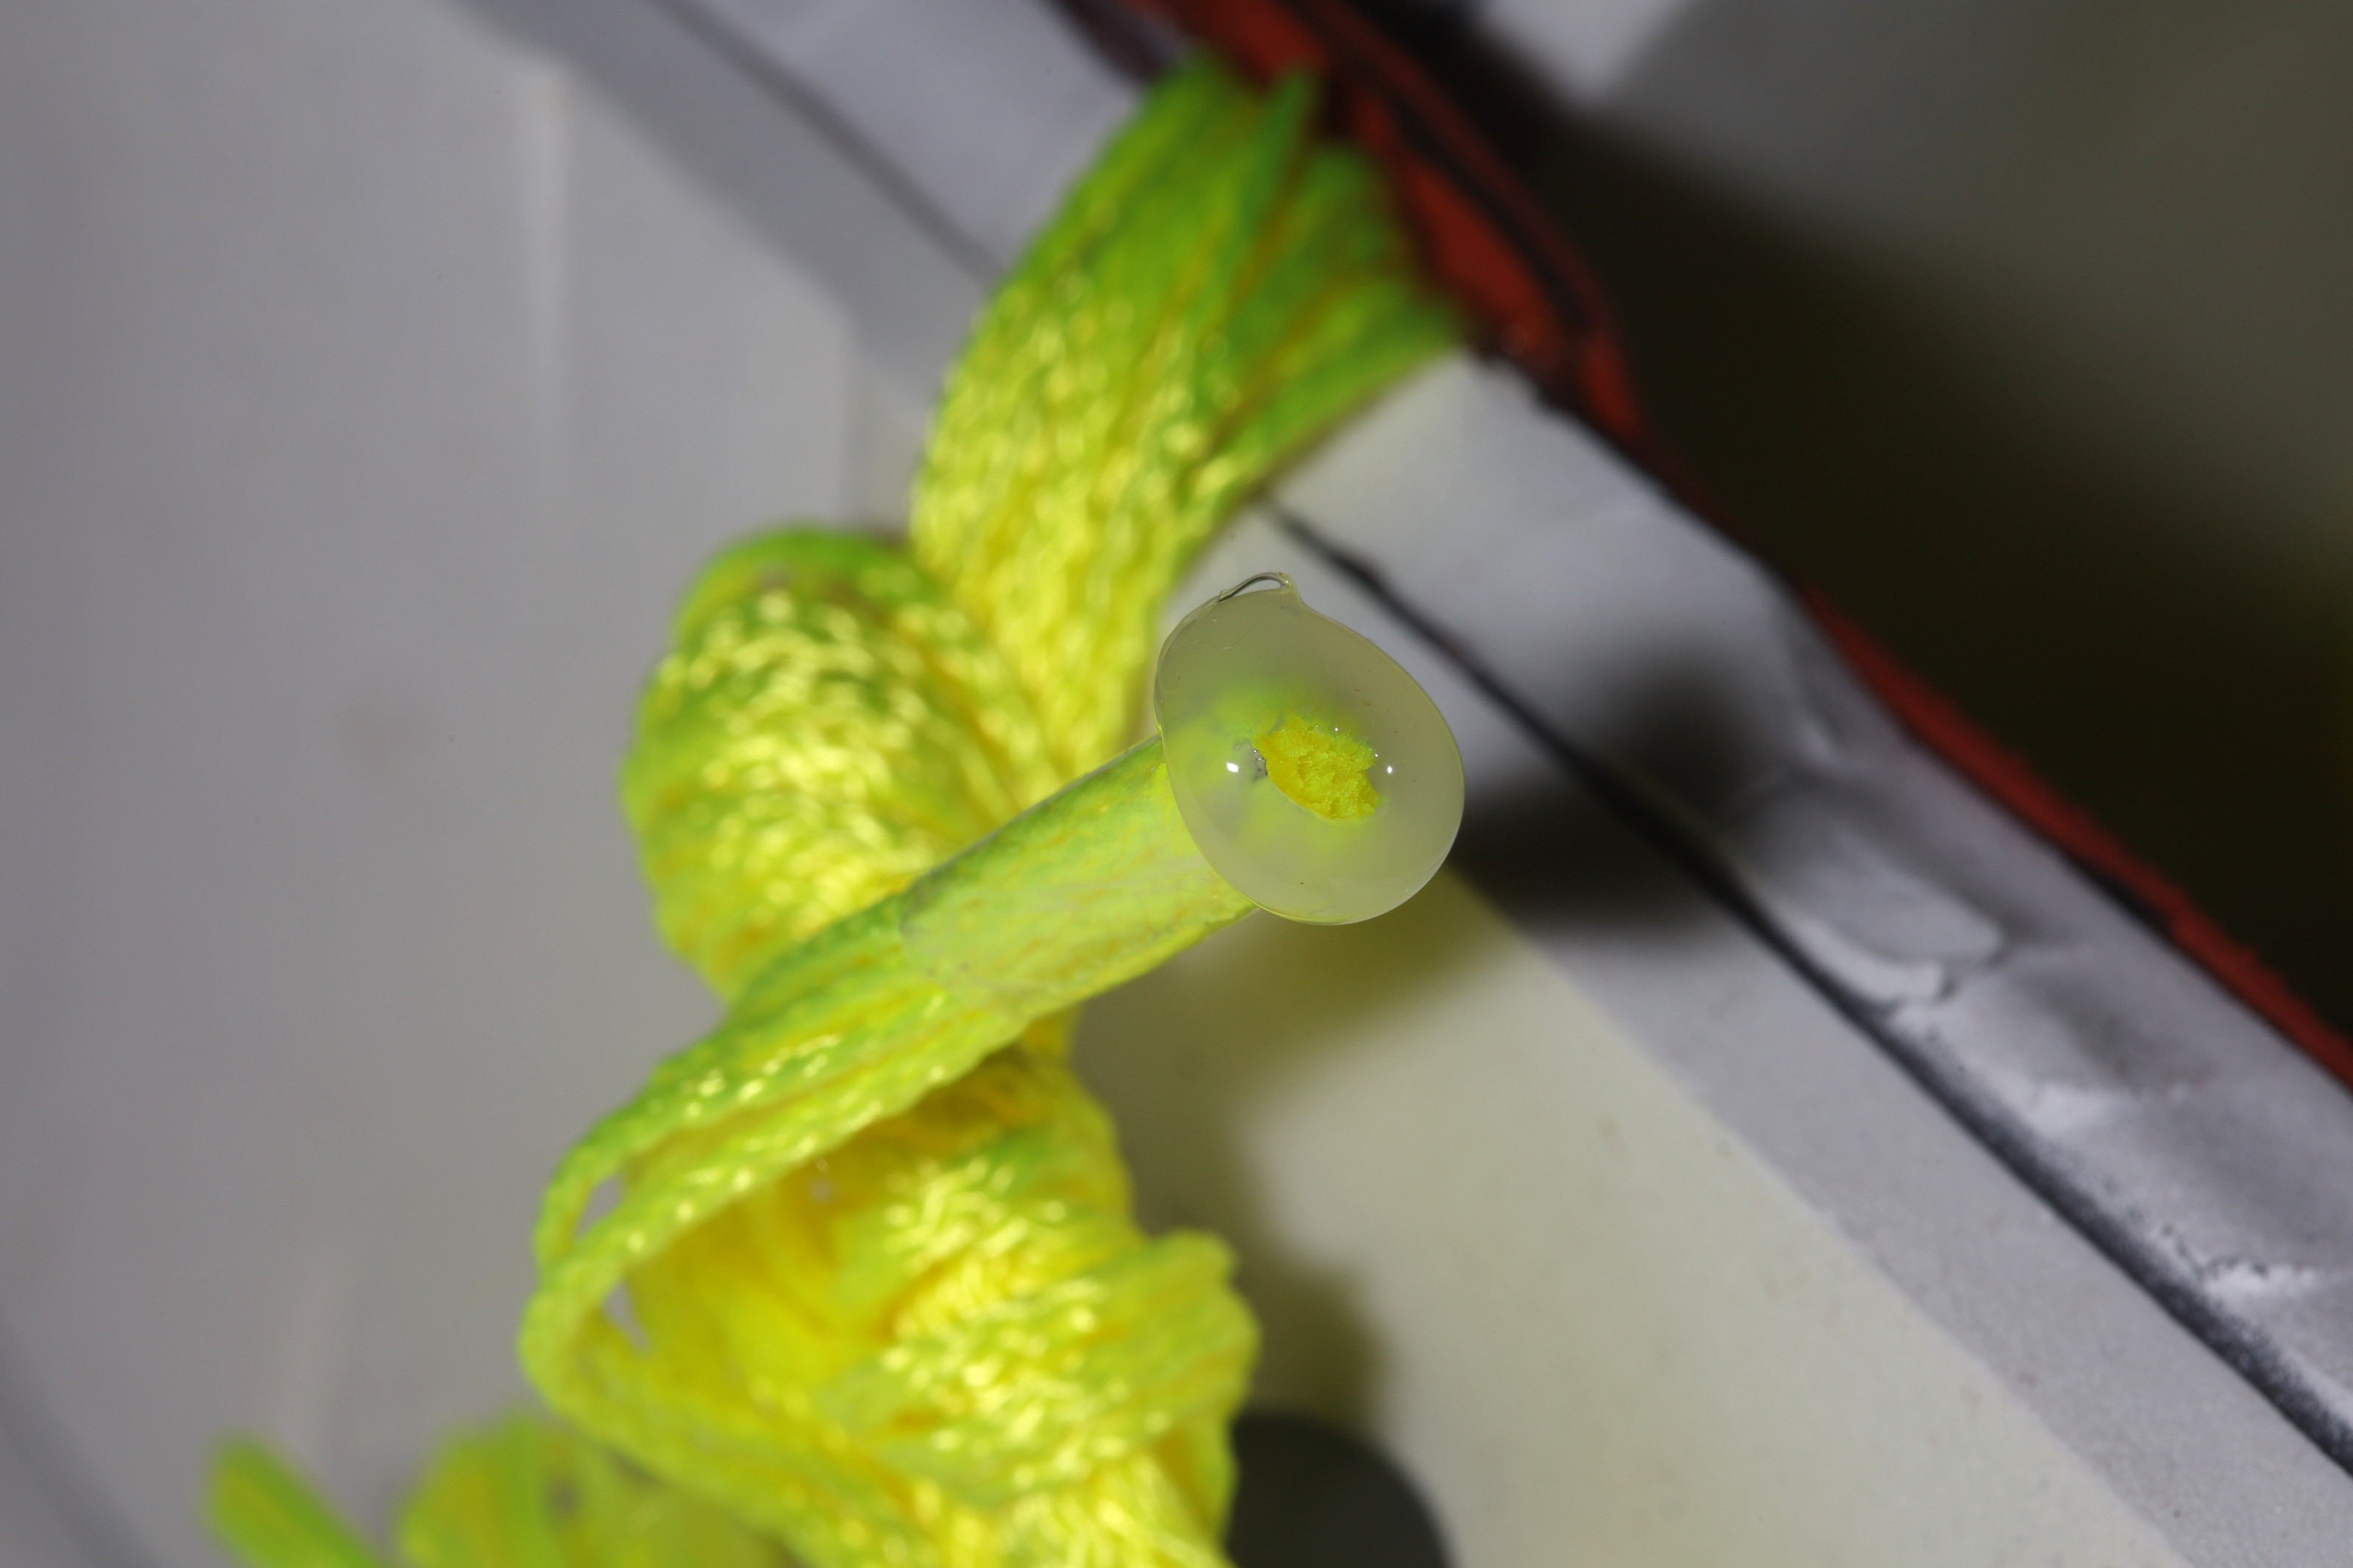
String & plastic reinforcement pieces are prepared. The ends of the string are scotched, then cut. Plastic pieces have to be round to reduce wear on the sole.
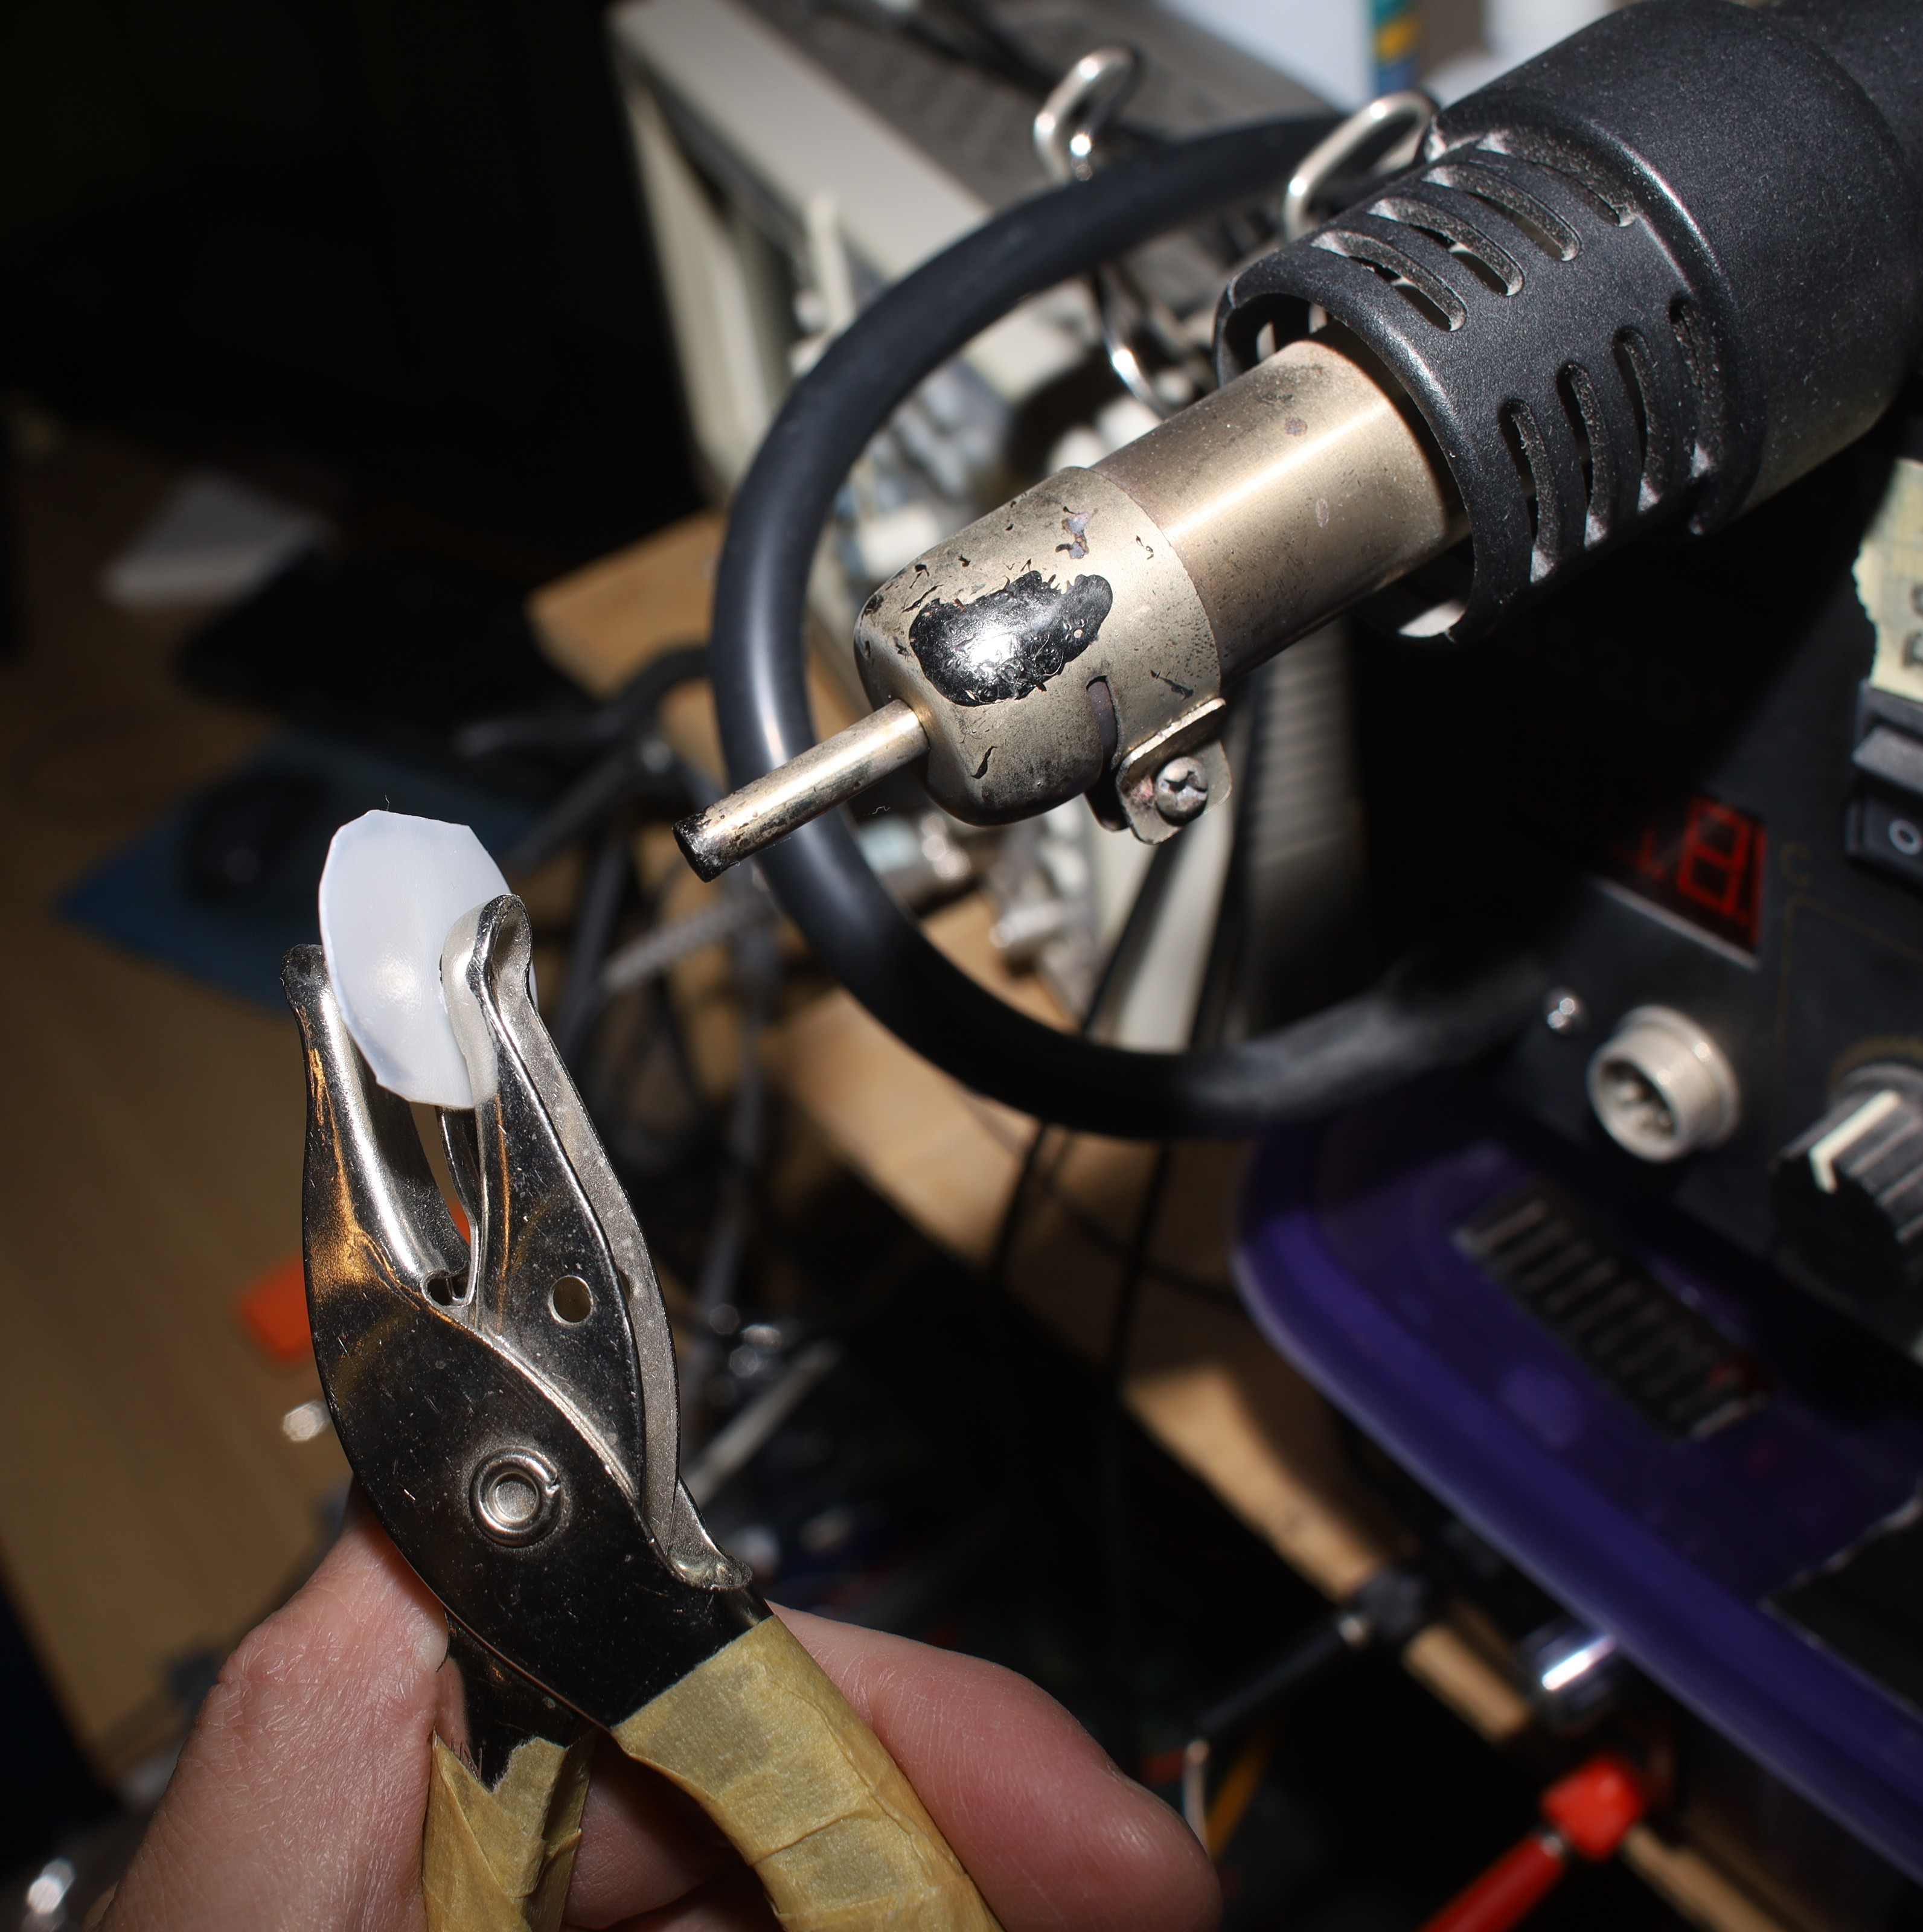
The plastic pieces are made out of isopropyl alcohol bottles. The plastic is heated, then hole punched when it's soft. The hole punch becomes very hot.

String is installed. The ankle string needs to extend different amounts behind the holes. For lions, the piece on the inside of the paw needs to extend 6" & the piece on the outside of the paw needs to extend 1".
The rear string is pulled tight, with the relative lengths of the 2 sides kept the same.

The string should be marked in the middle to keep the 2 sides from changing length.
Then the marked position is pulled out to 1/2" behind the sandal. This determines how far forward or backward the paw sits. It was determined by trial & error. A more determined animal might be able to adjust it by feeding string through the ankle holes.
At this point, the string positions in the holes should be marked to keep those constant.
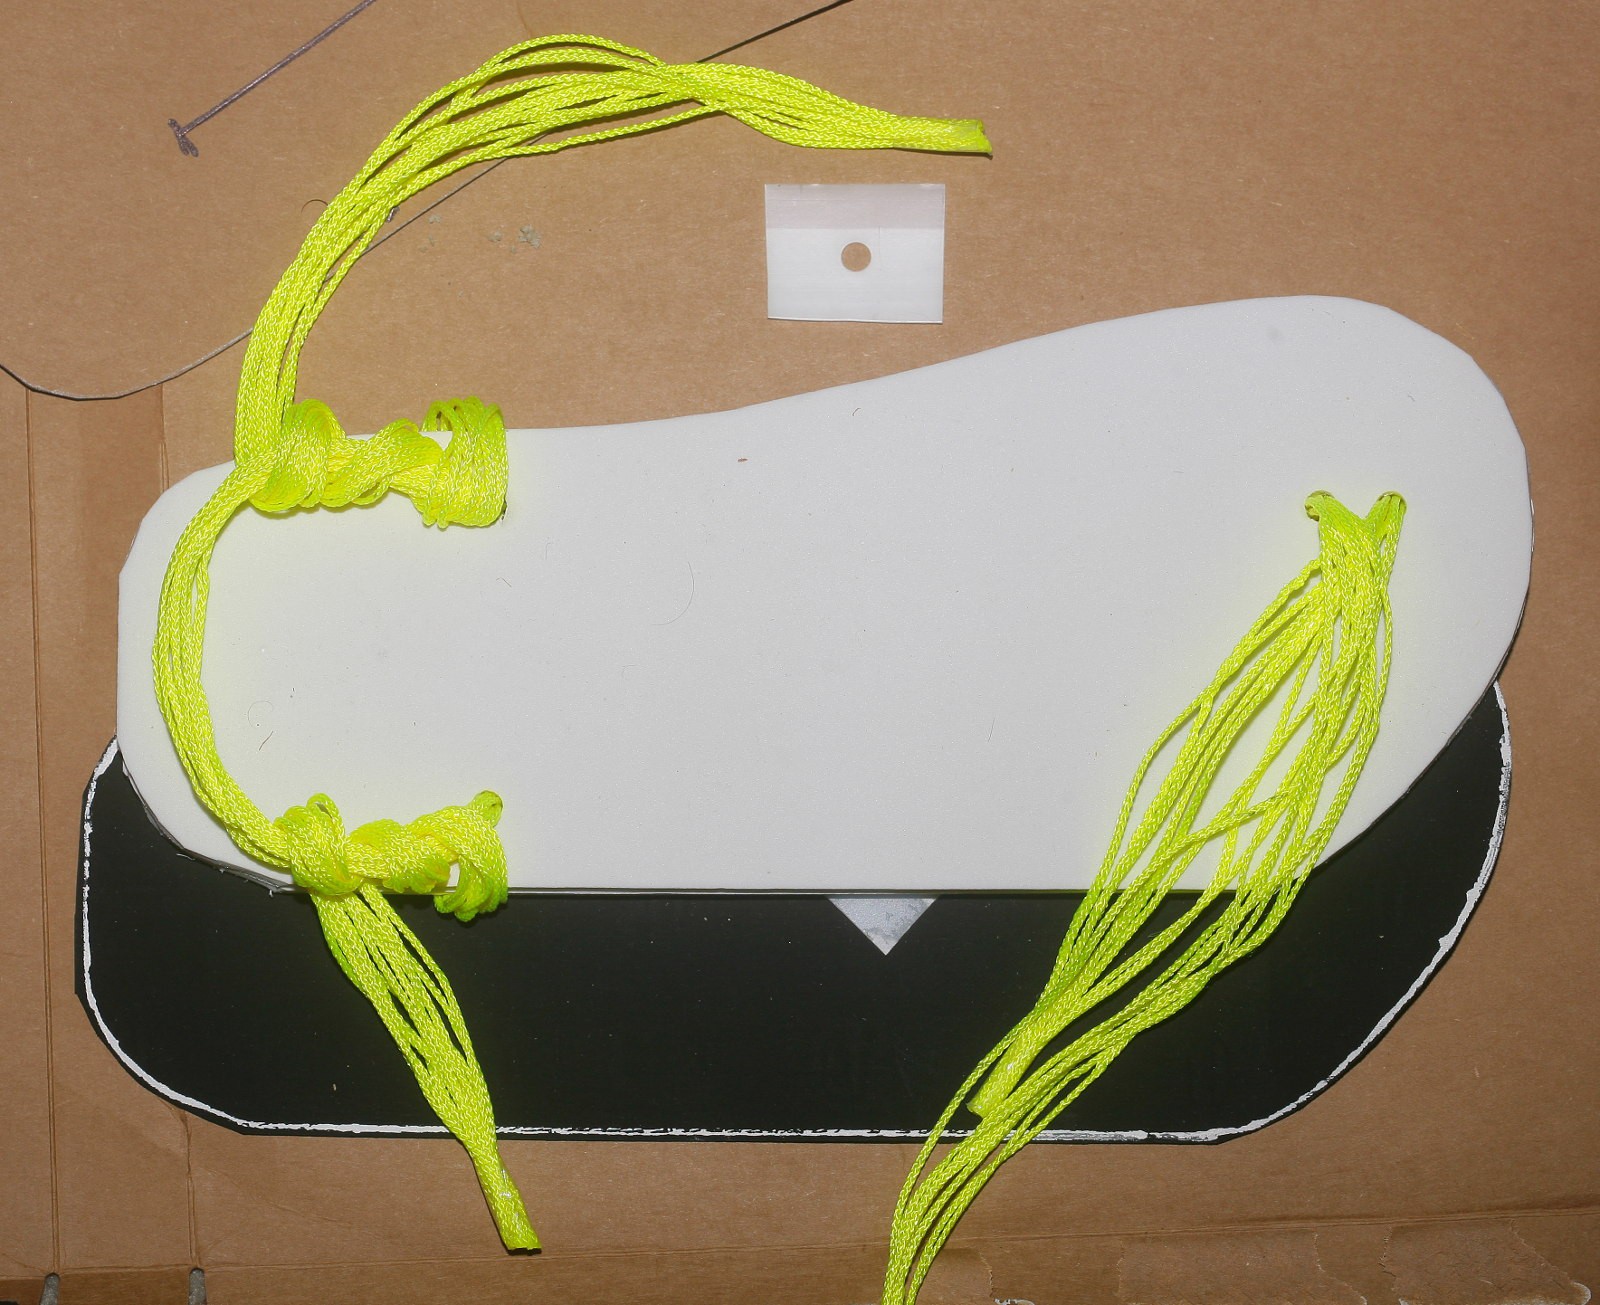
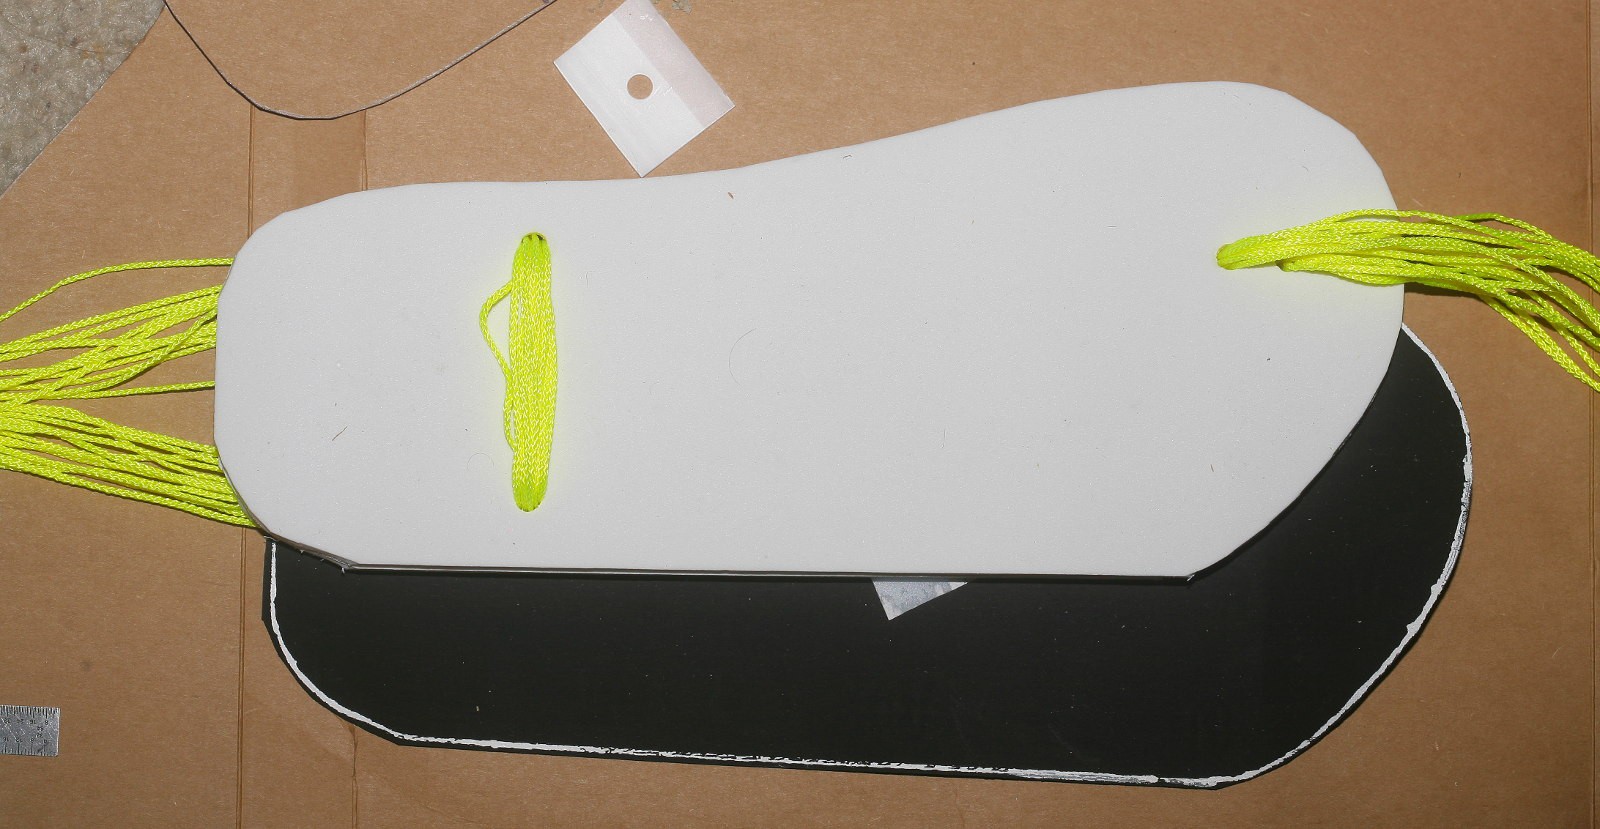
The rear string is wrapped around itself 3 times. The inner string is now longer than the outer string, allowing them to be fastened on the outside of the paw.

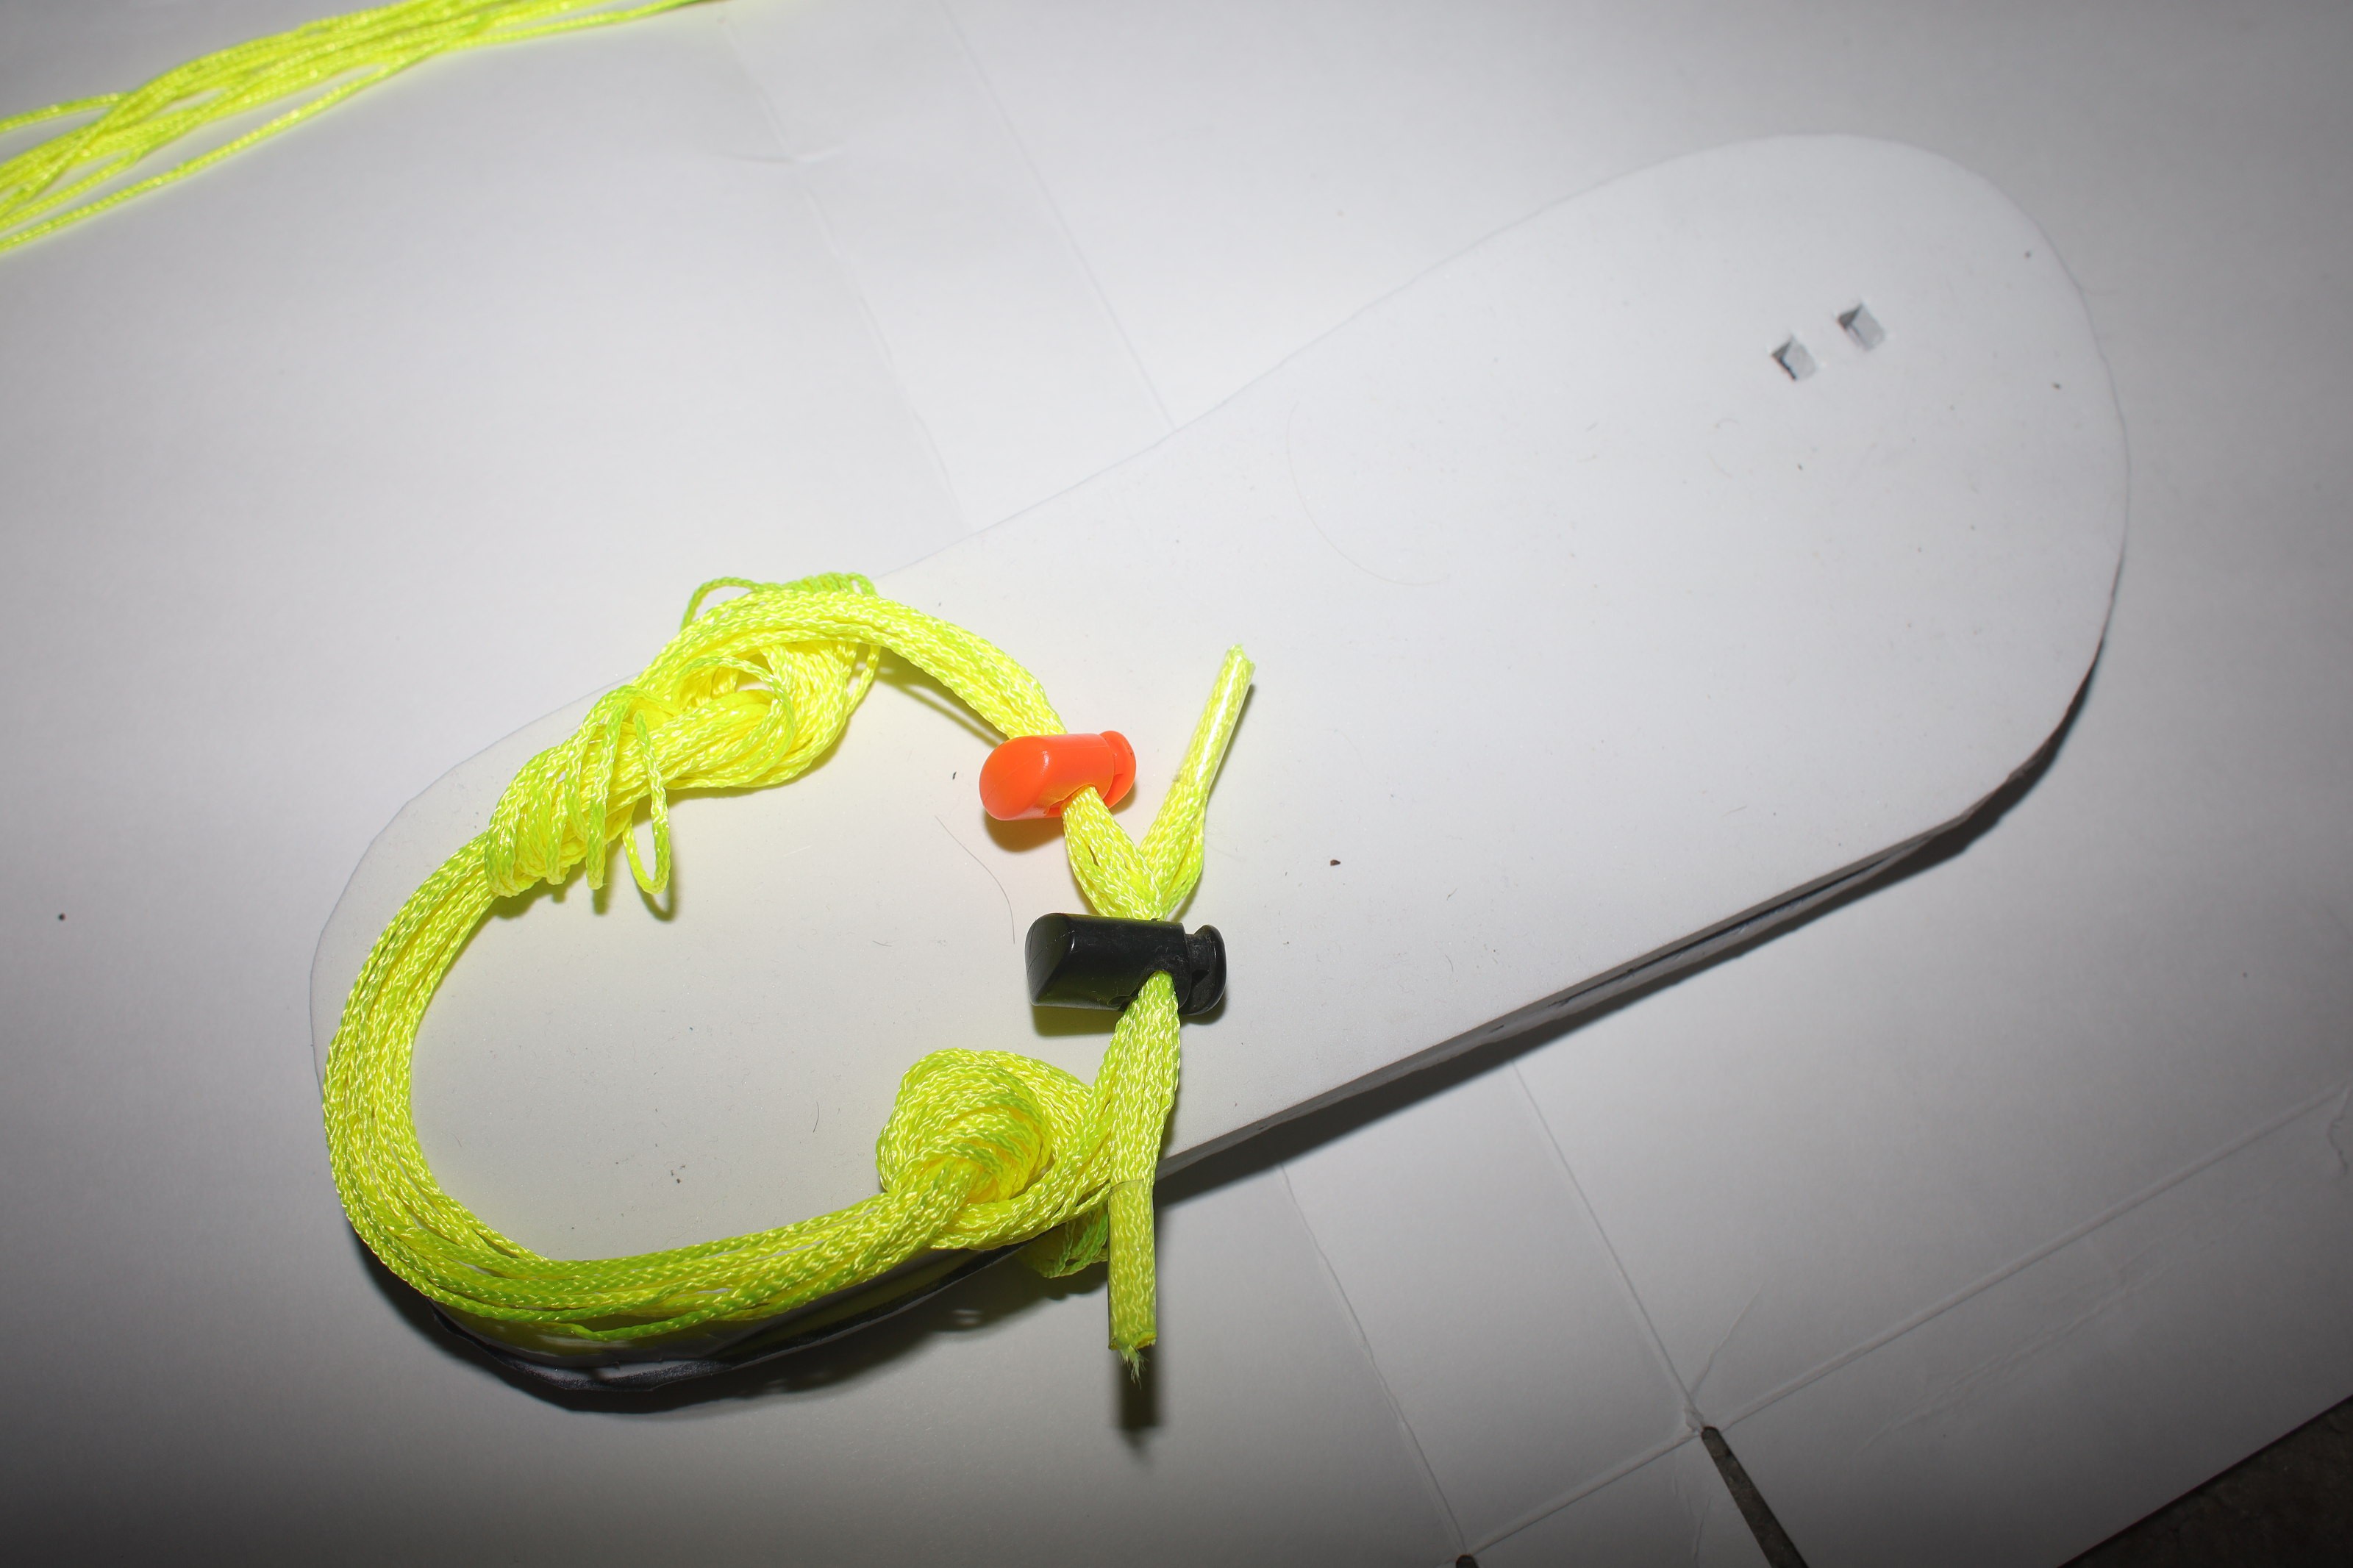
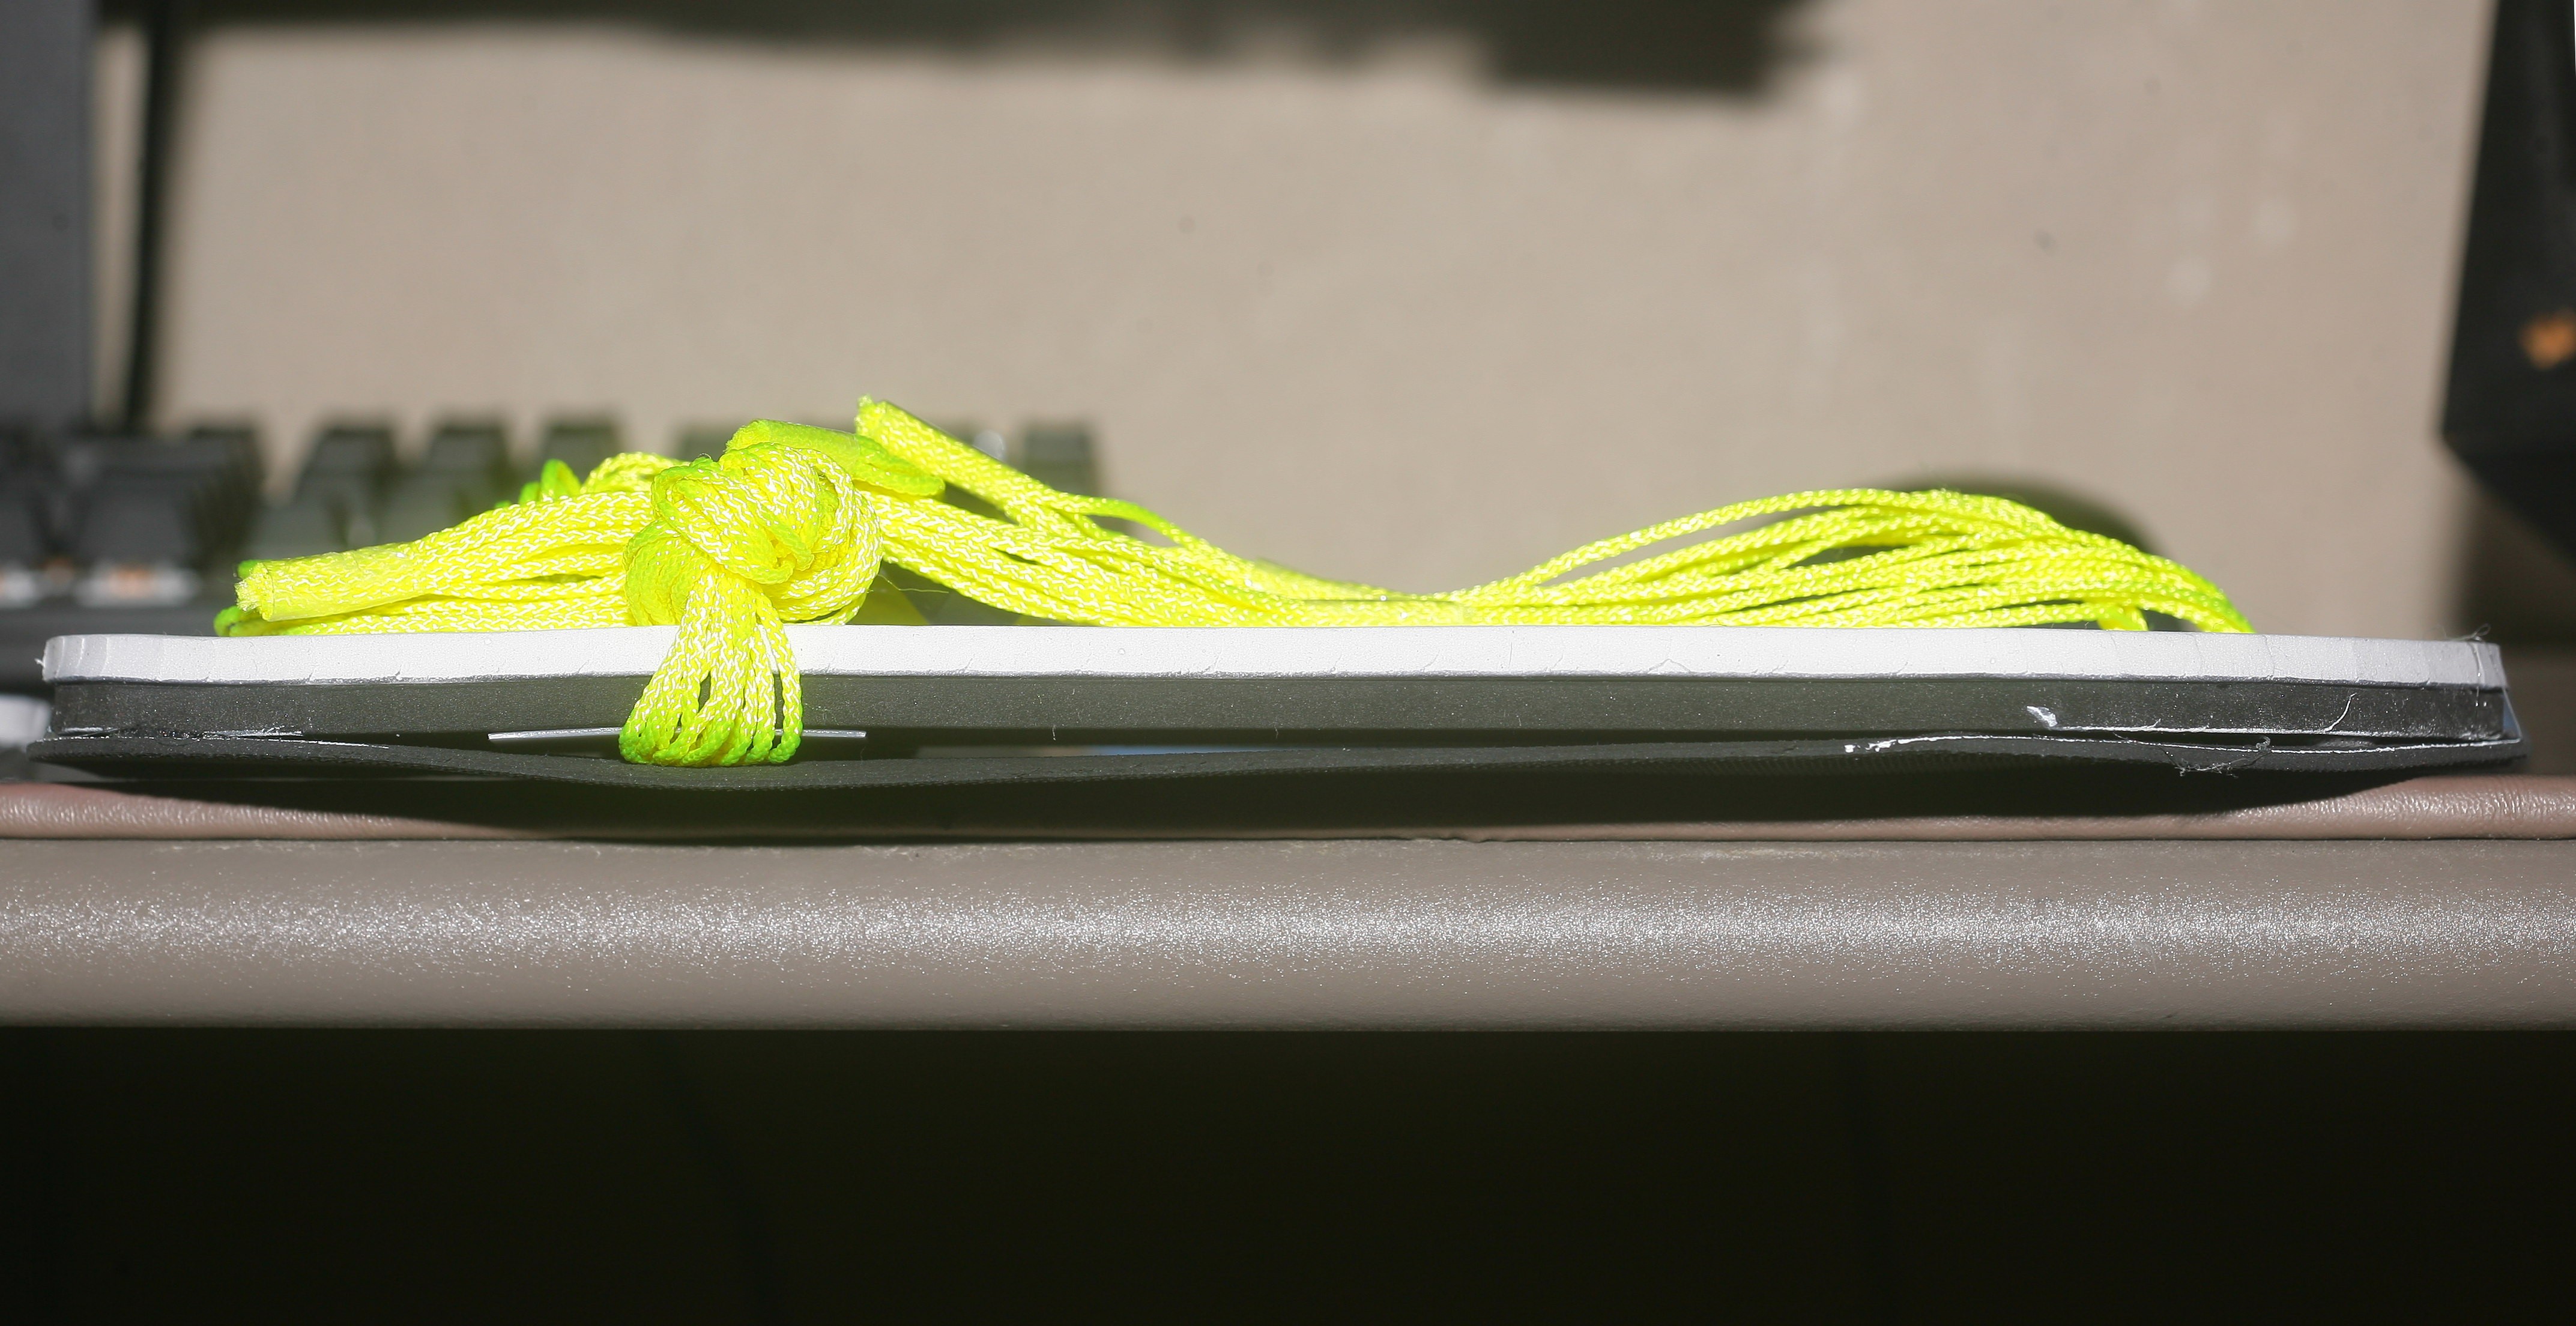
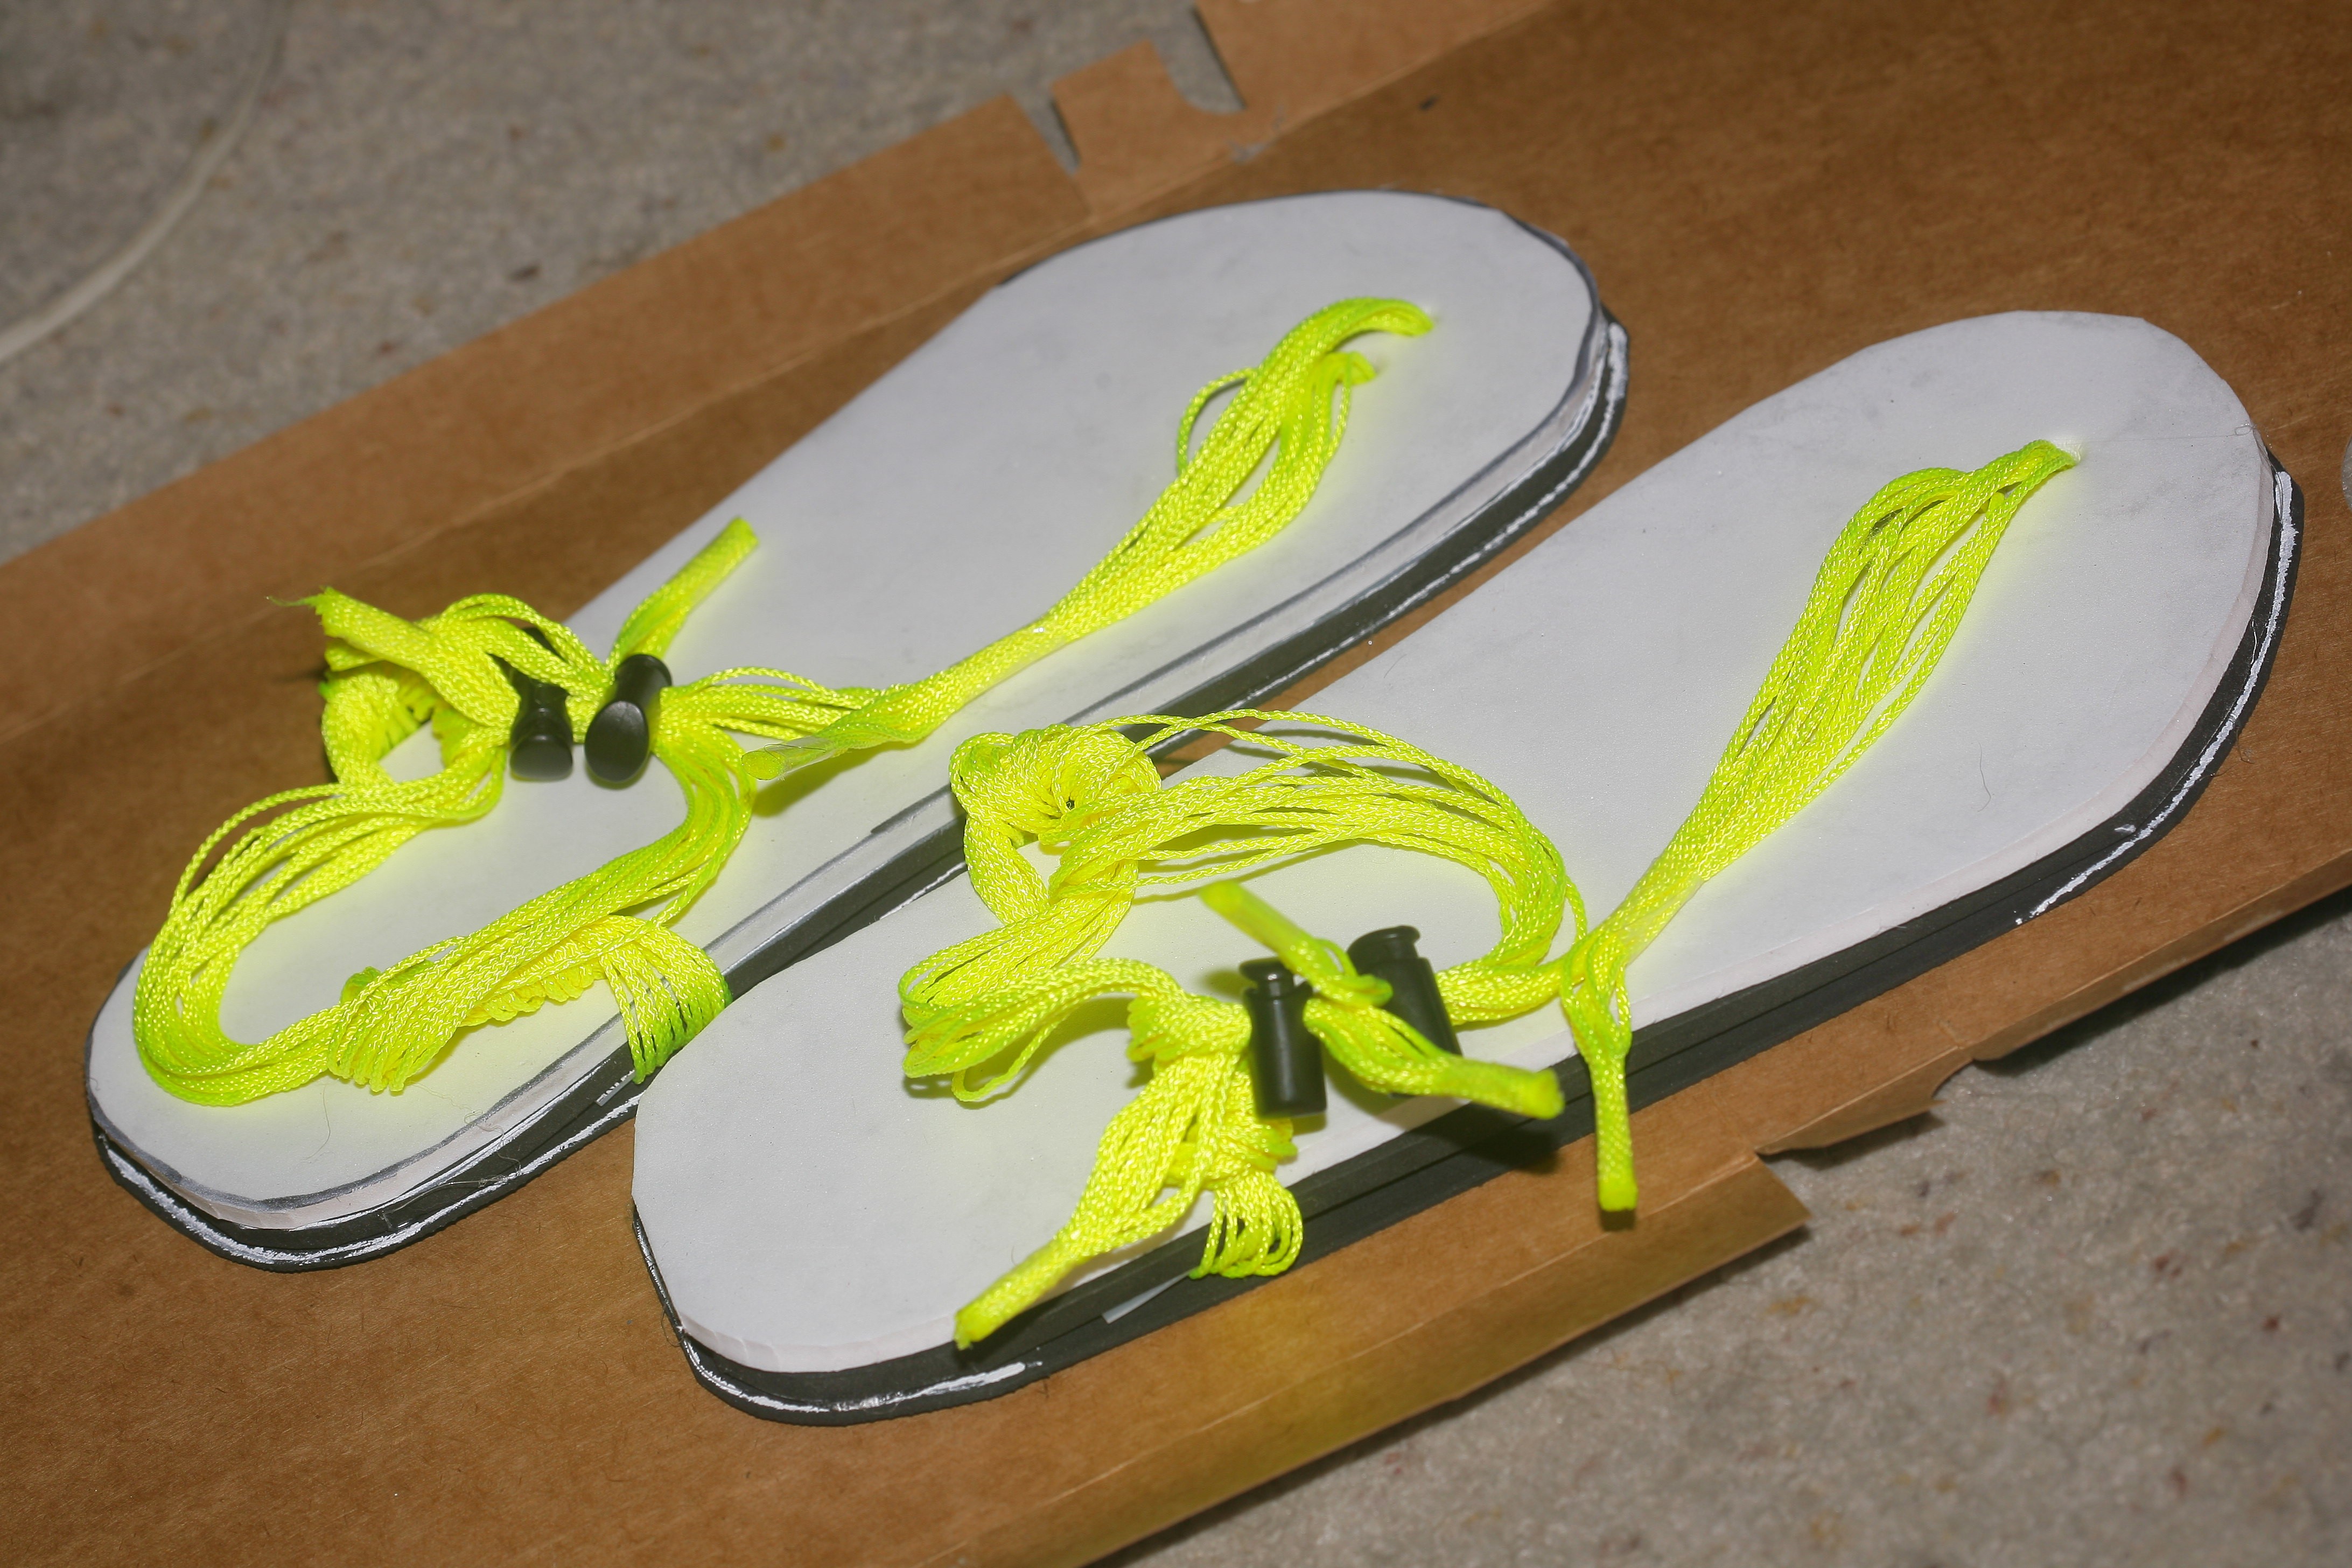
Fasteners are installed. A small orange farstener will attach to the thong. A large black farstener will attach to the ankle strap. The orange farstener is stock. The black farstener has been ground out for 2 laces to fit inside.
Rear laces fastened.
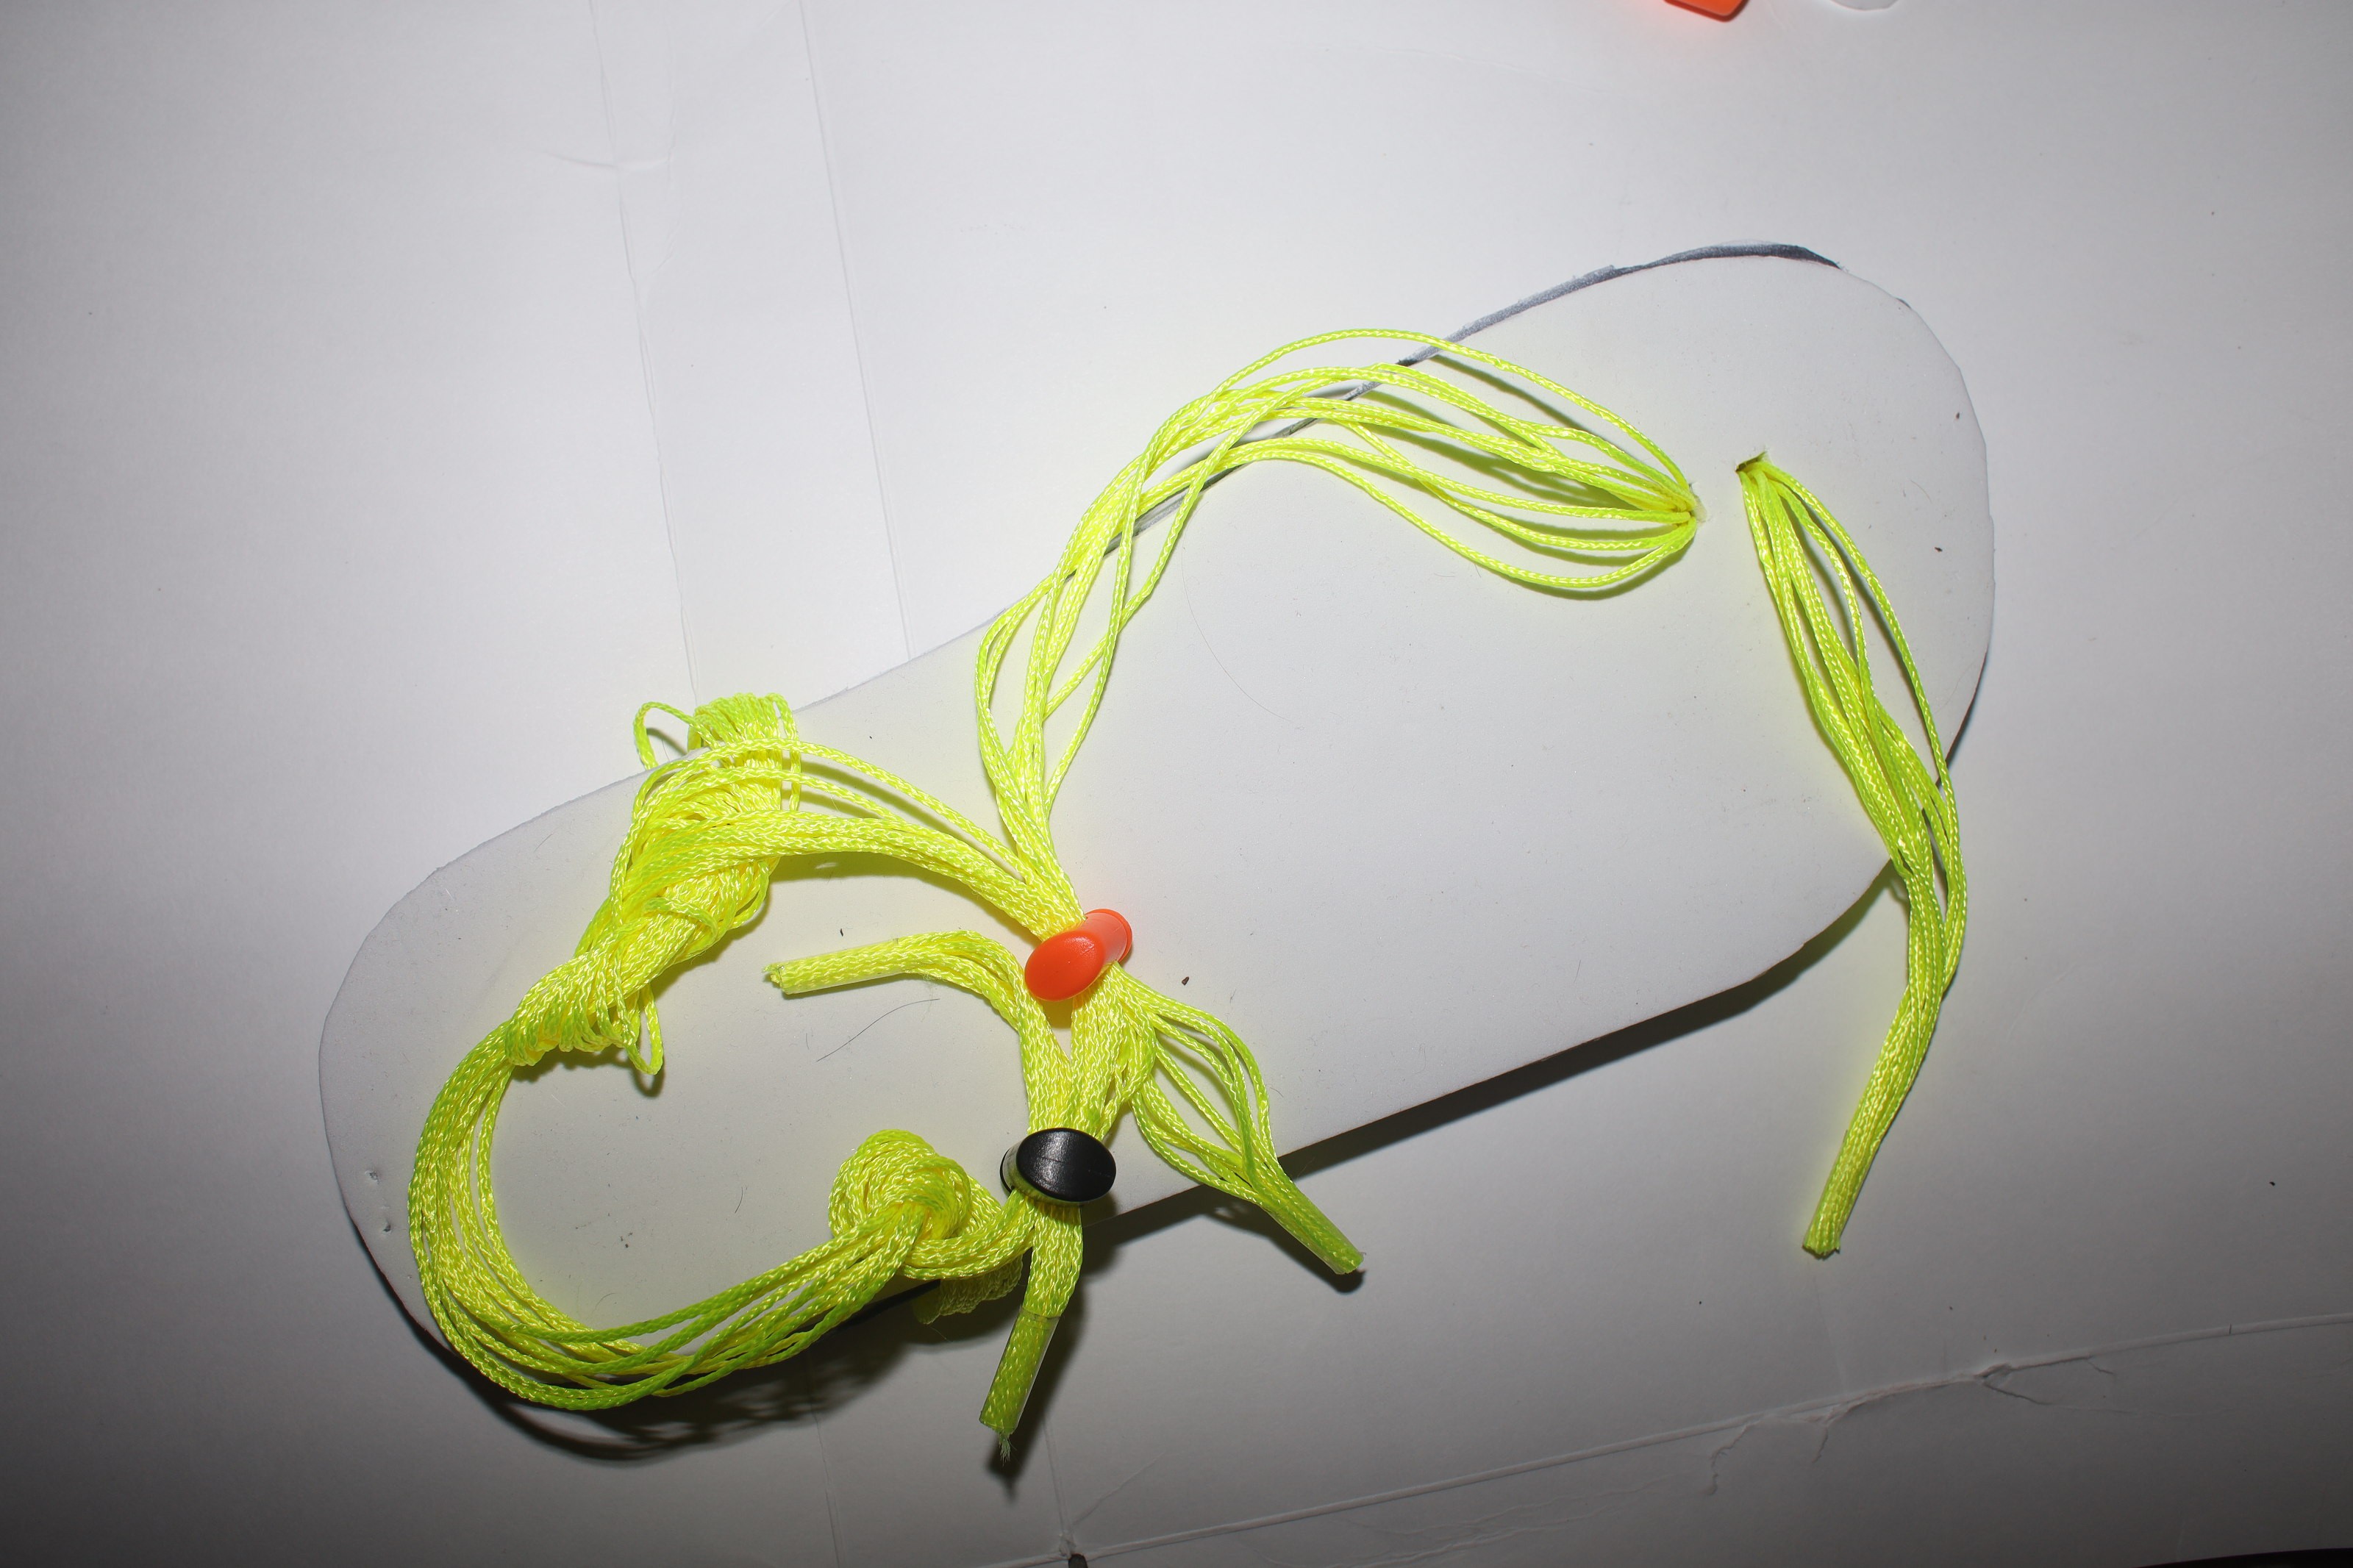
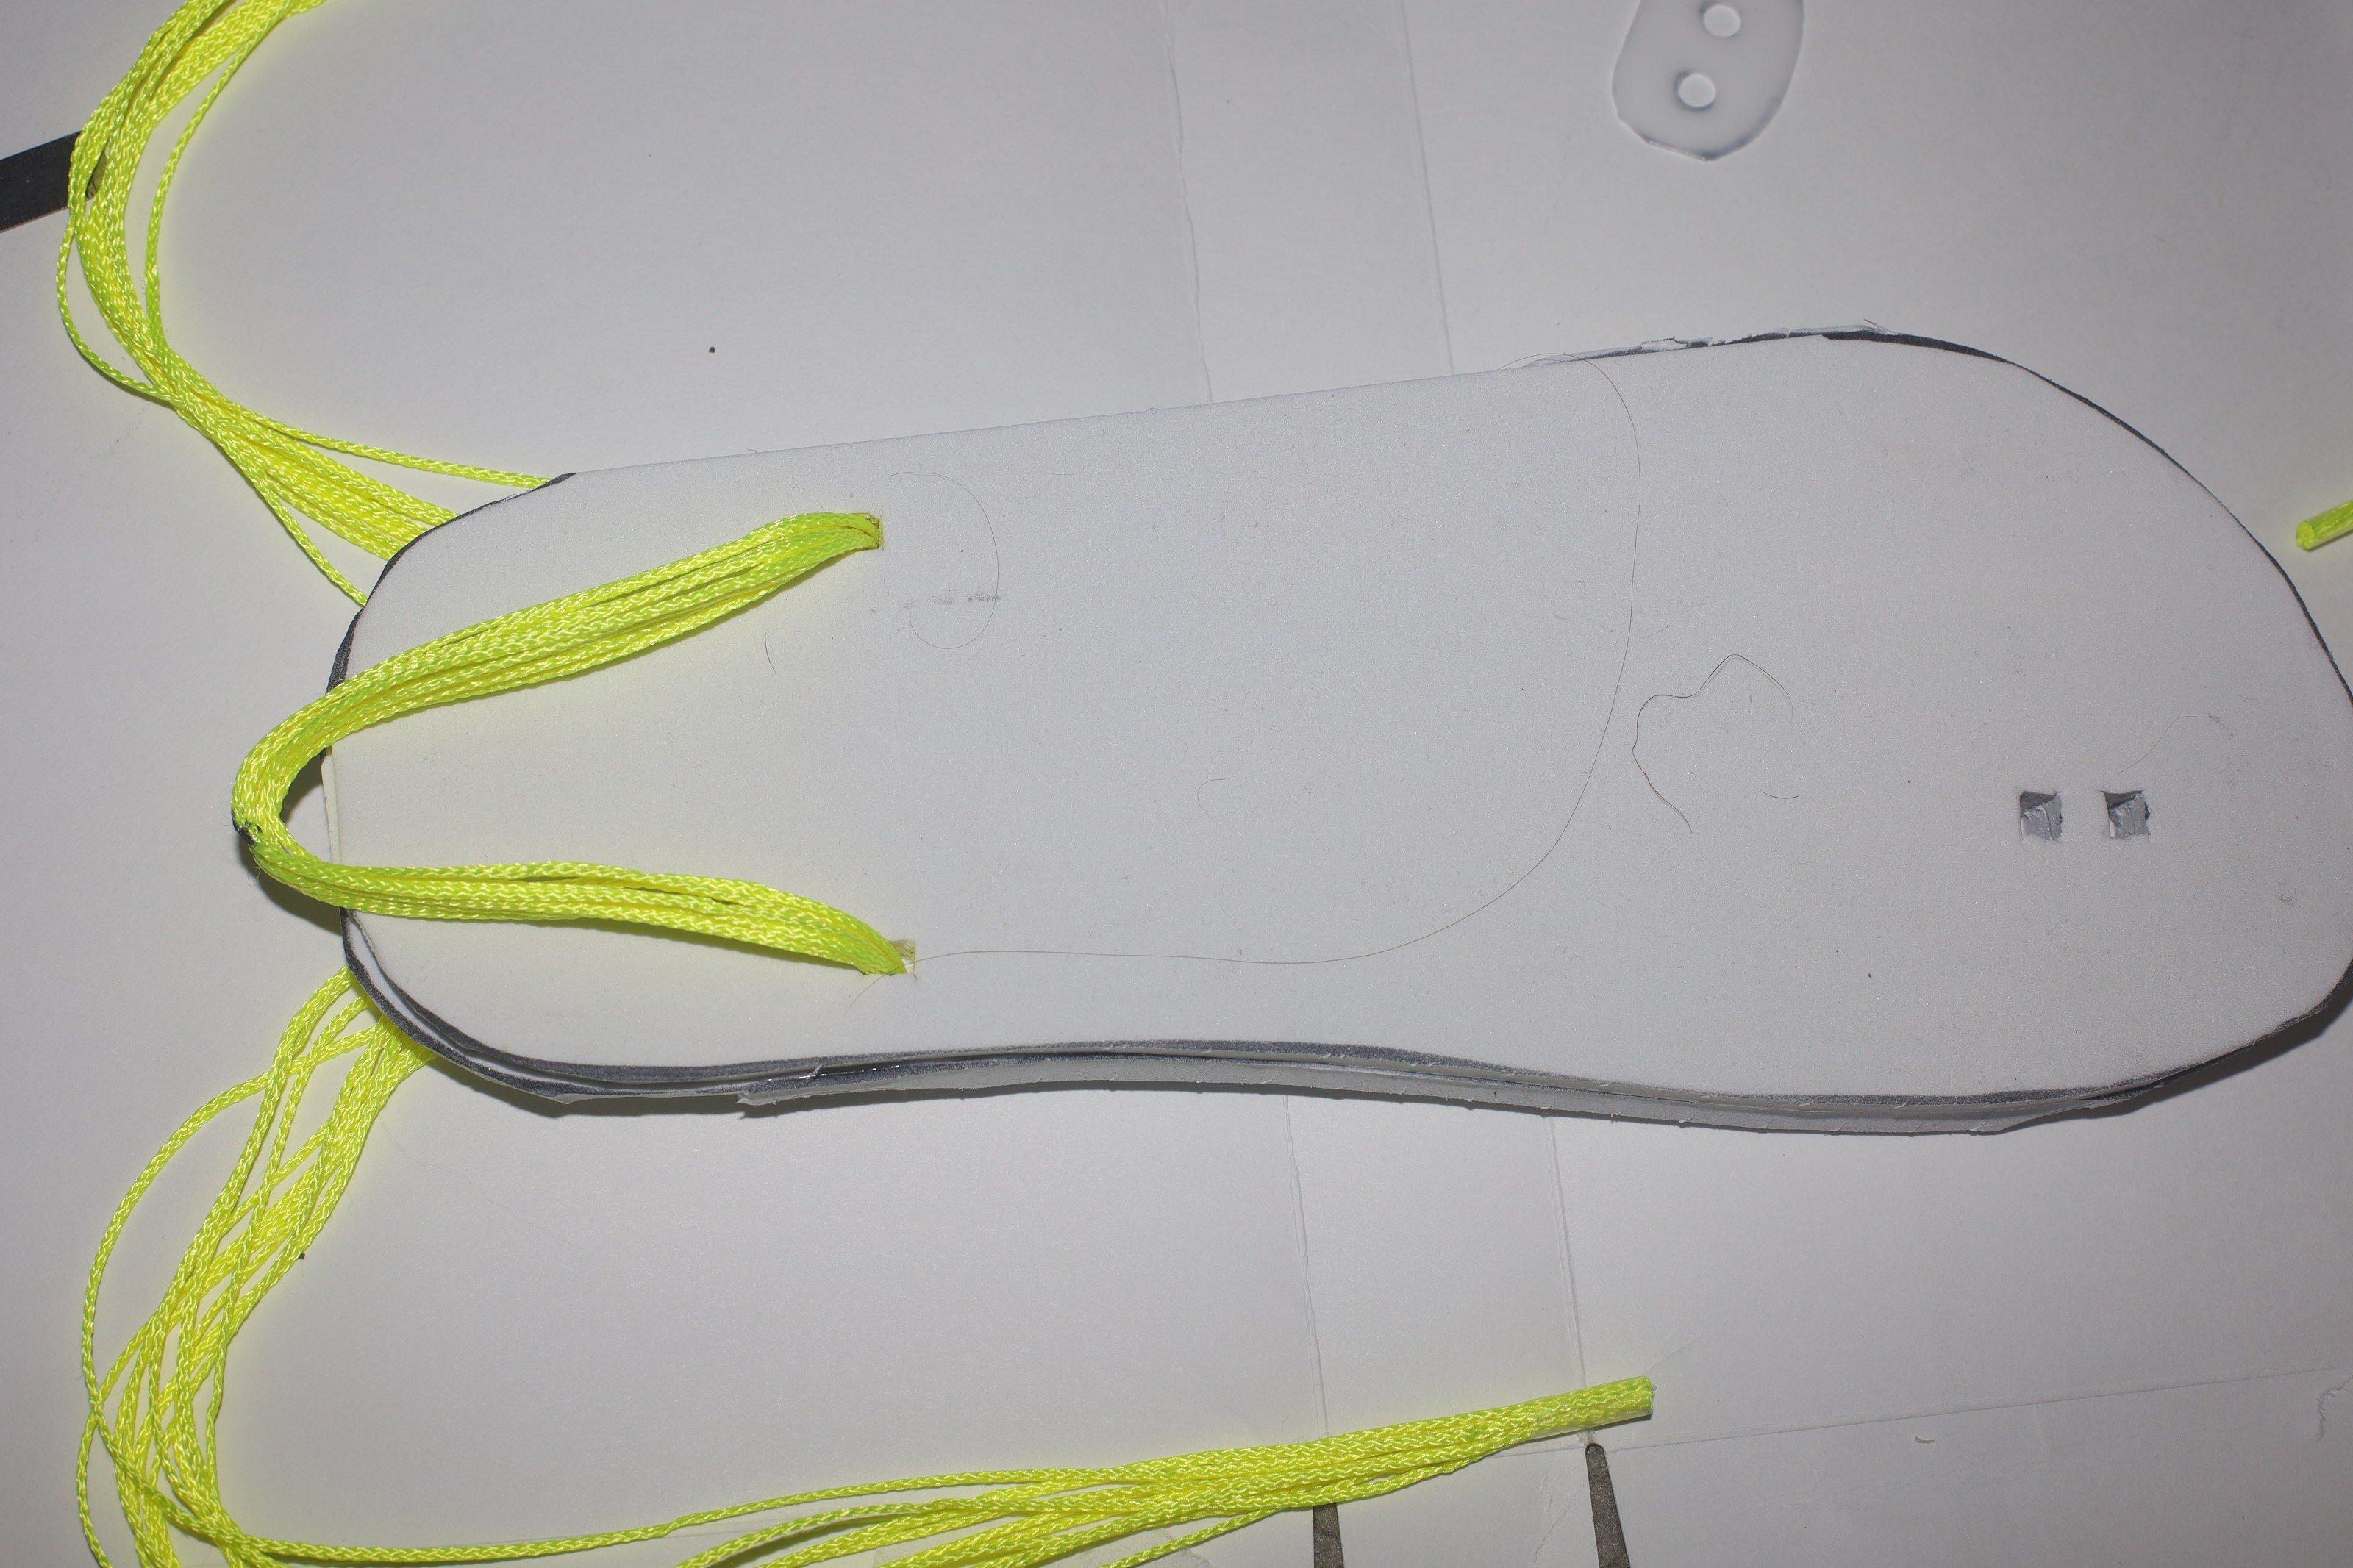
Front lace is installed.

The front lace is scotched into a loop. Important to keep the scotch tape as far from the toes as possible, so it doesn't chafe.
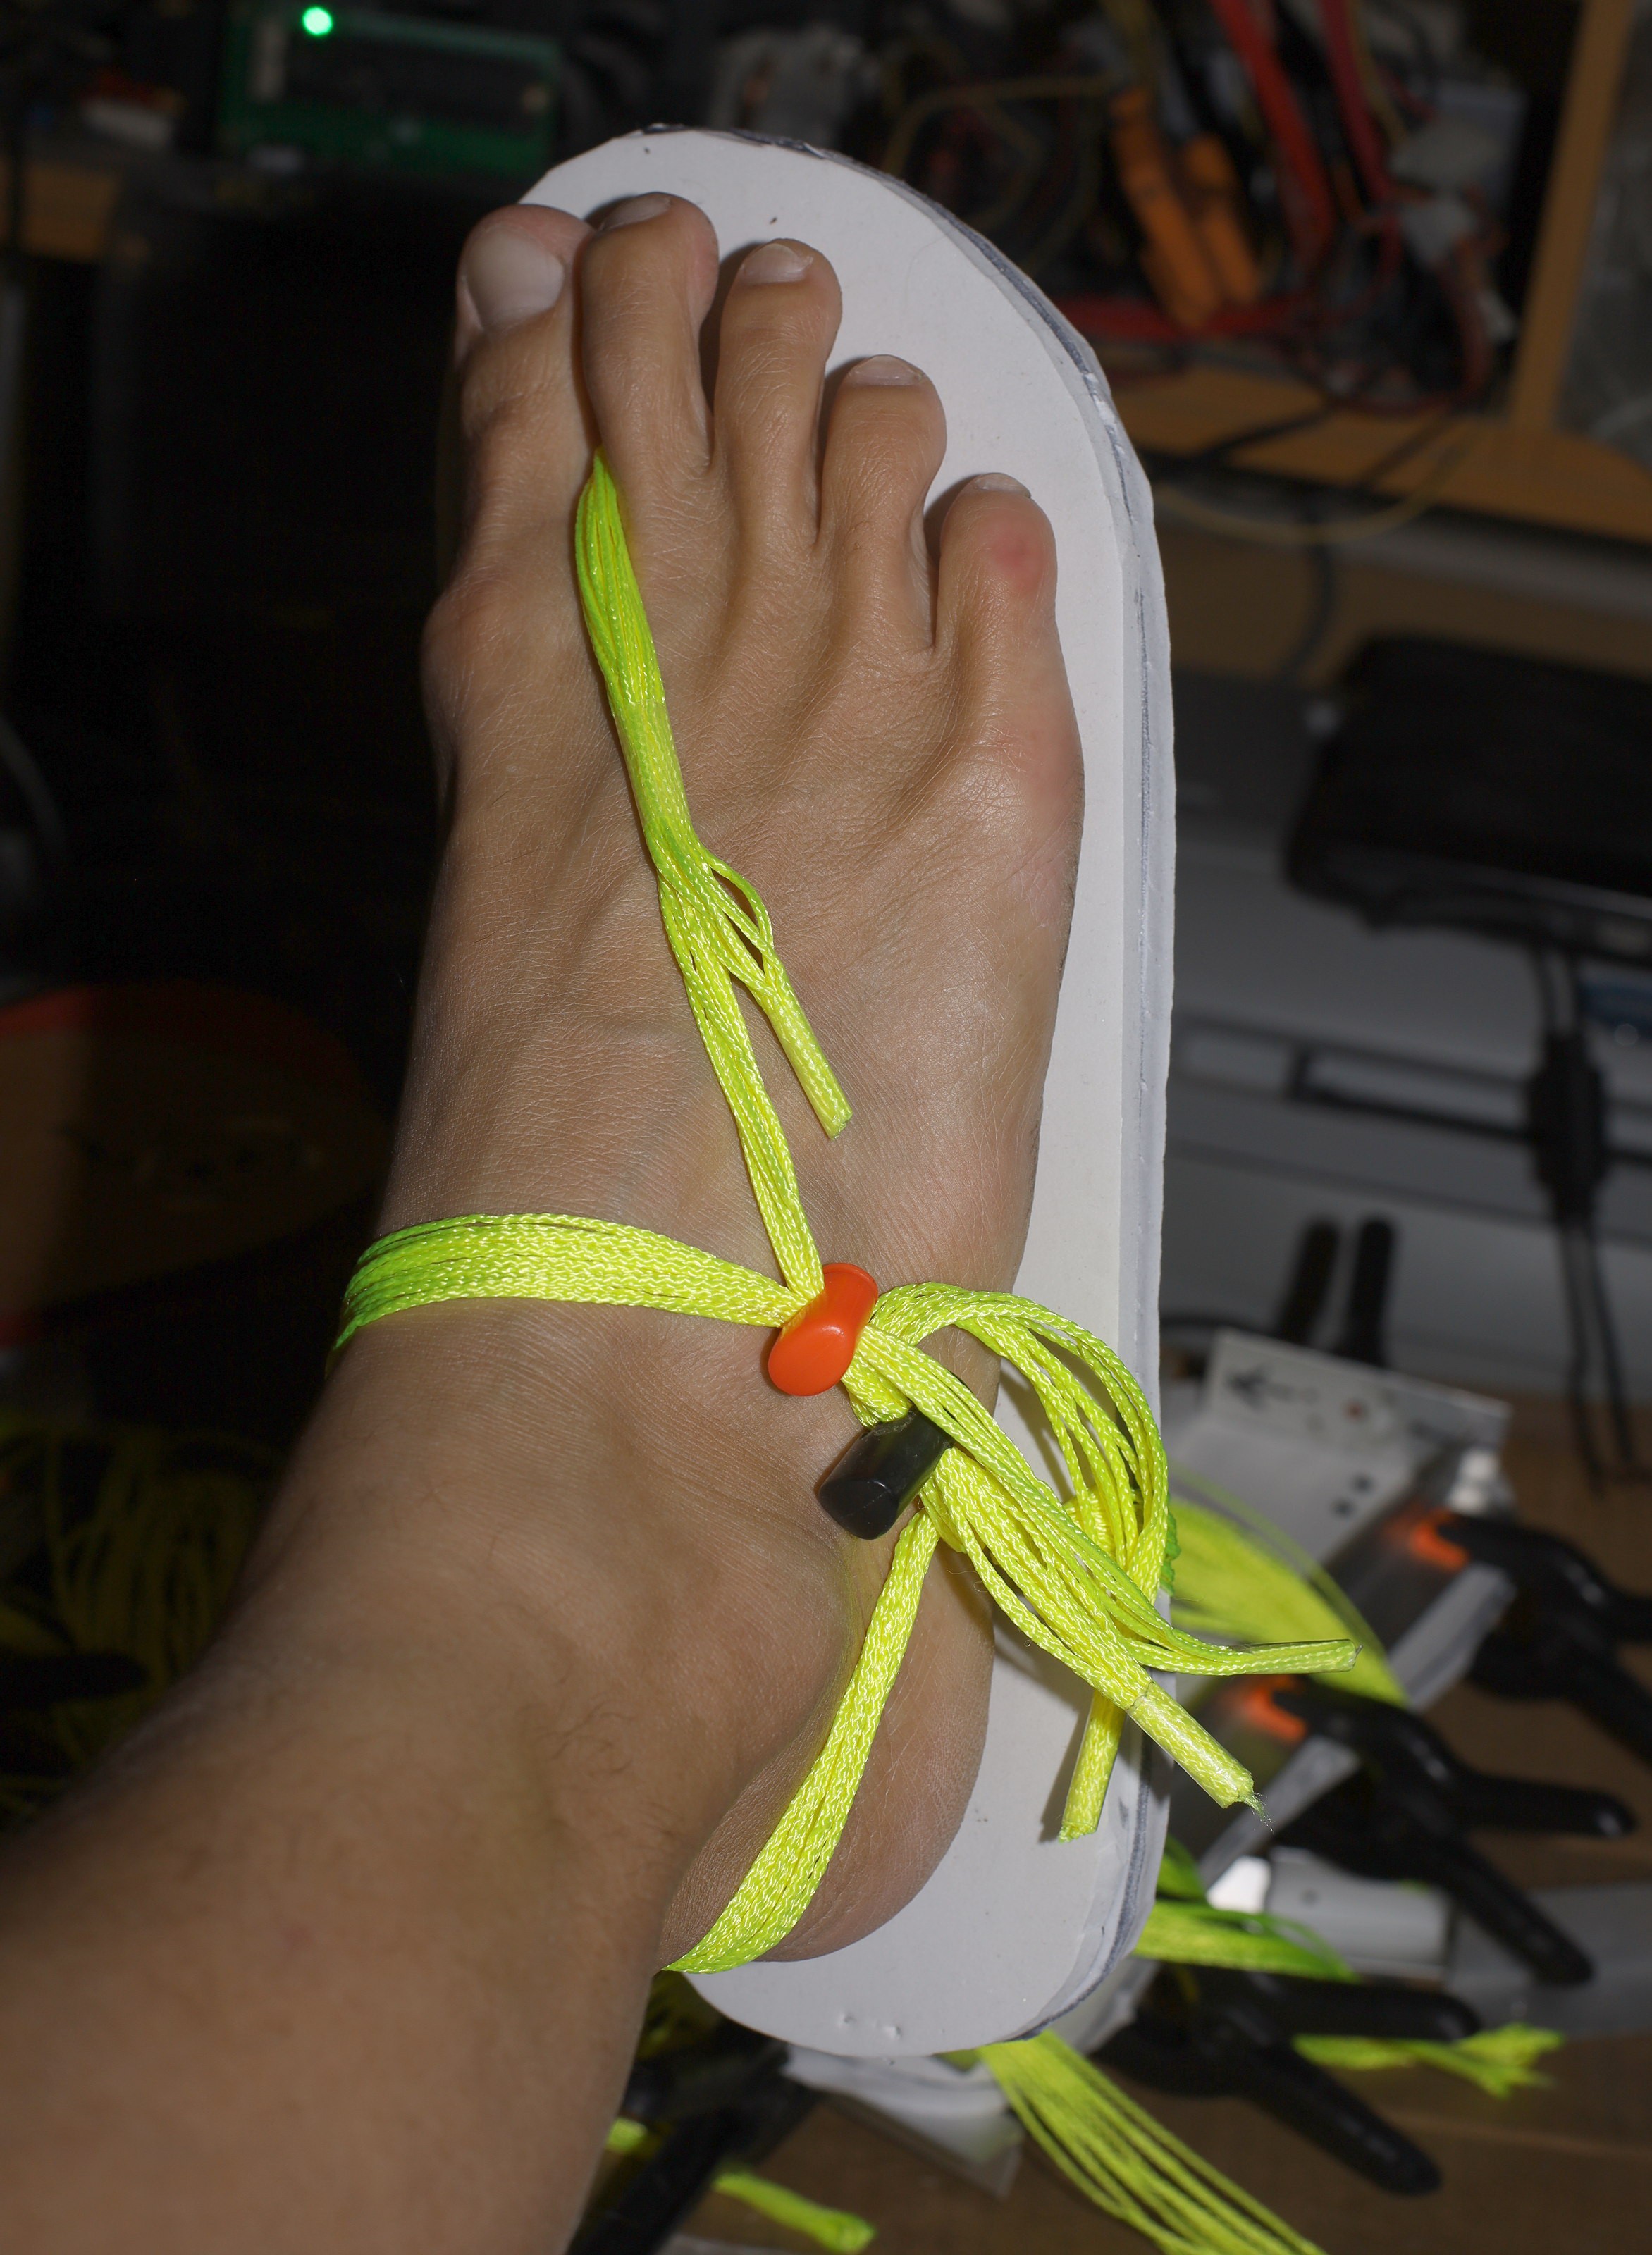
The laces are tightened against a lion paw. The trick is keeping the heal section the same length. The farsteners should all be on the outside, where they won't press on any body part. It might be easier to wait until the soles are glued on before tightening against the lion paw, but this requires keeping the glue away from all but 1 of the string holes.
Only after fitting the laces can the outline be traced on the sole. A silver sharpie is essential for black rubber.

Finally, E6000 is applied for the sole.
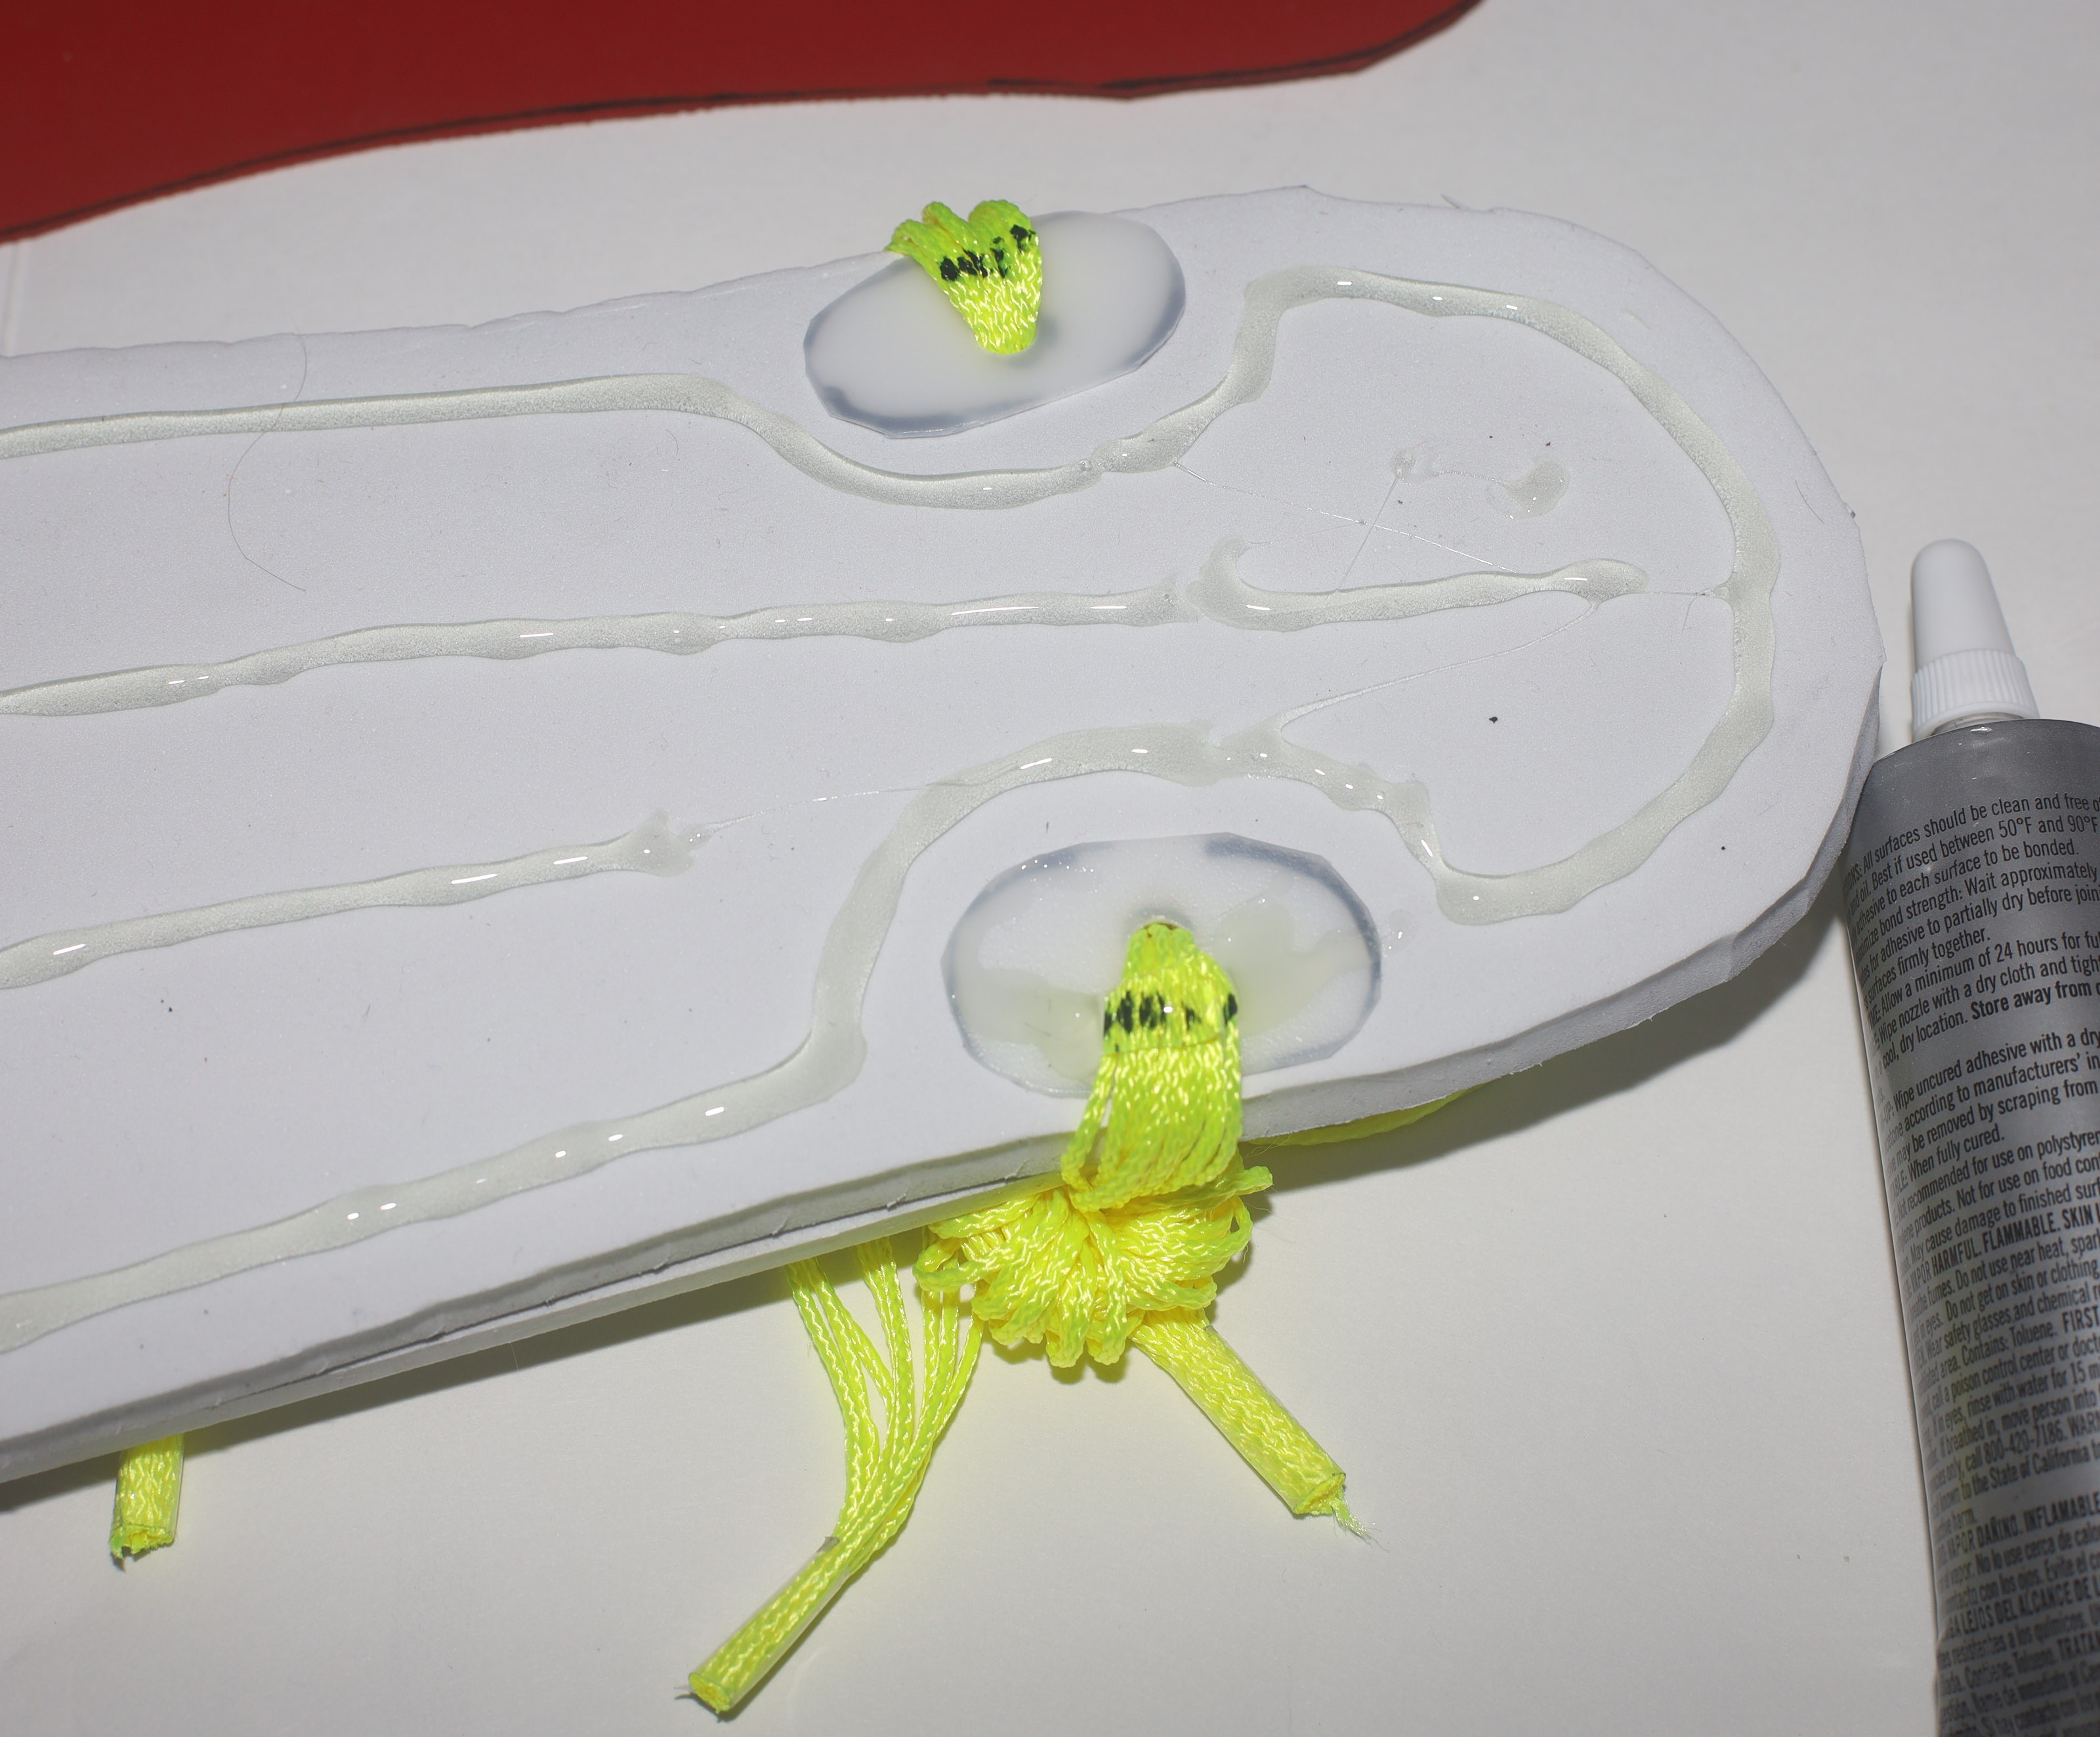
The latest trick is to glue the outer ankle string to the sole. The ankle string is pulled sideways by the thong, so this tries to keep it in position.
The sole is clamped around the edges. 2 more clamps are required than the EVA, in order to bond around the ankle string.
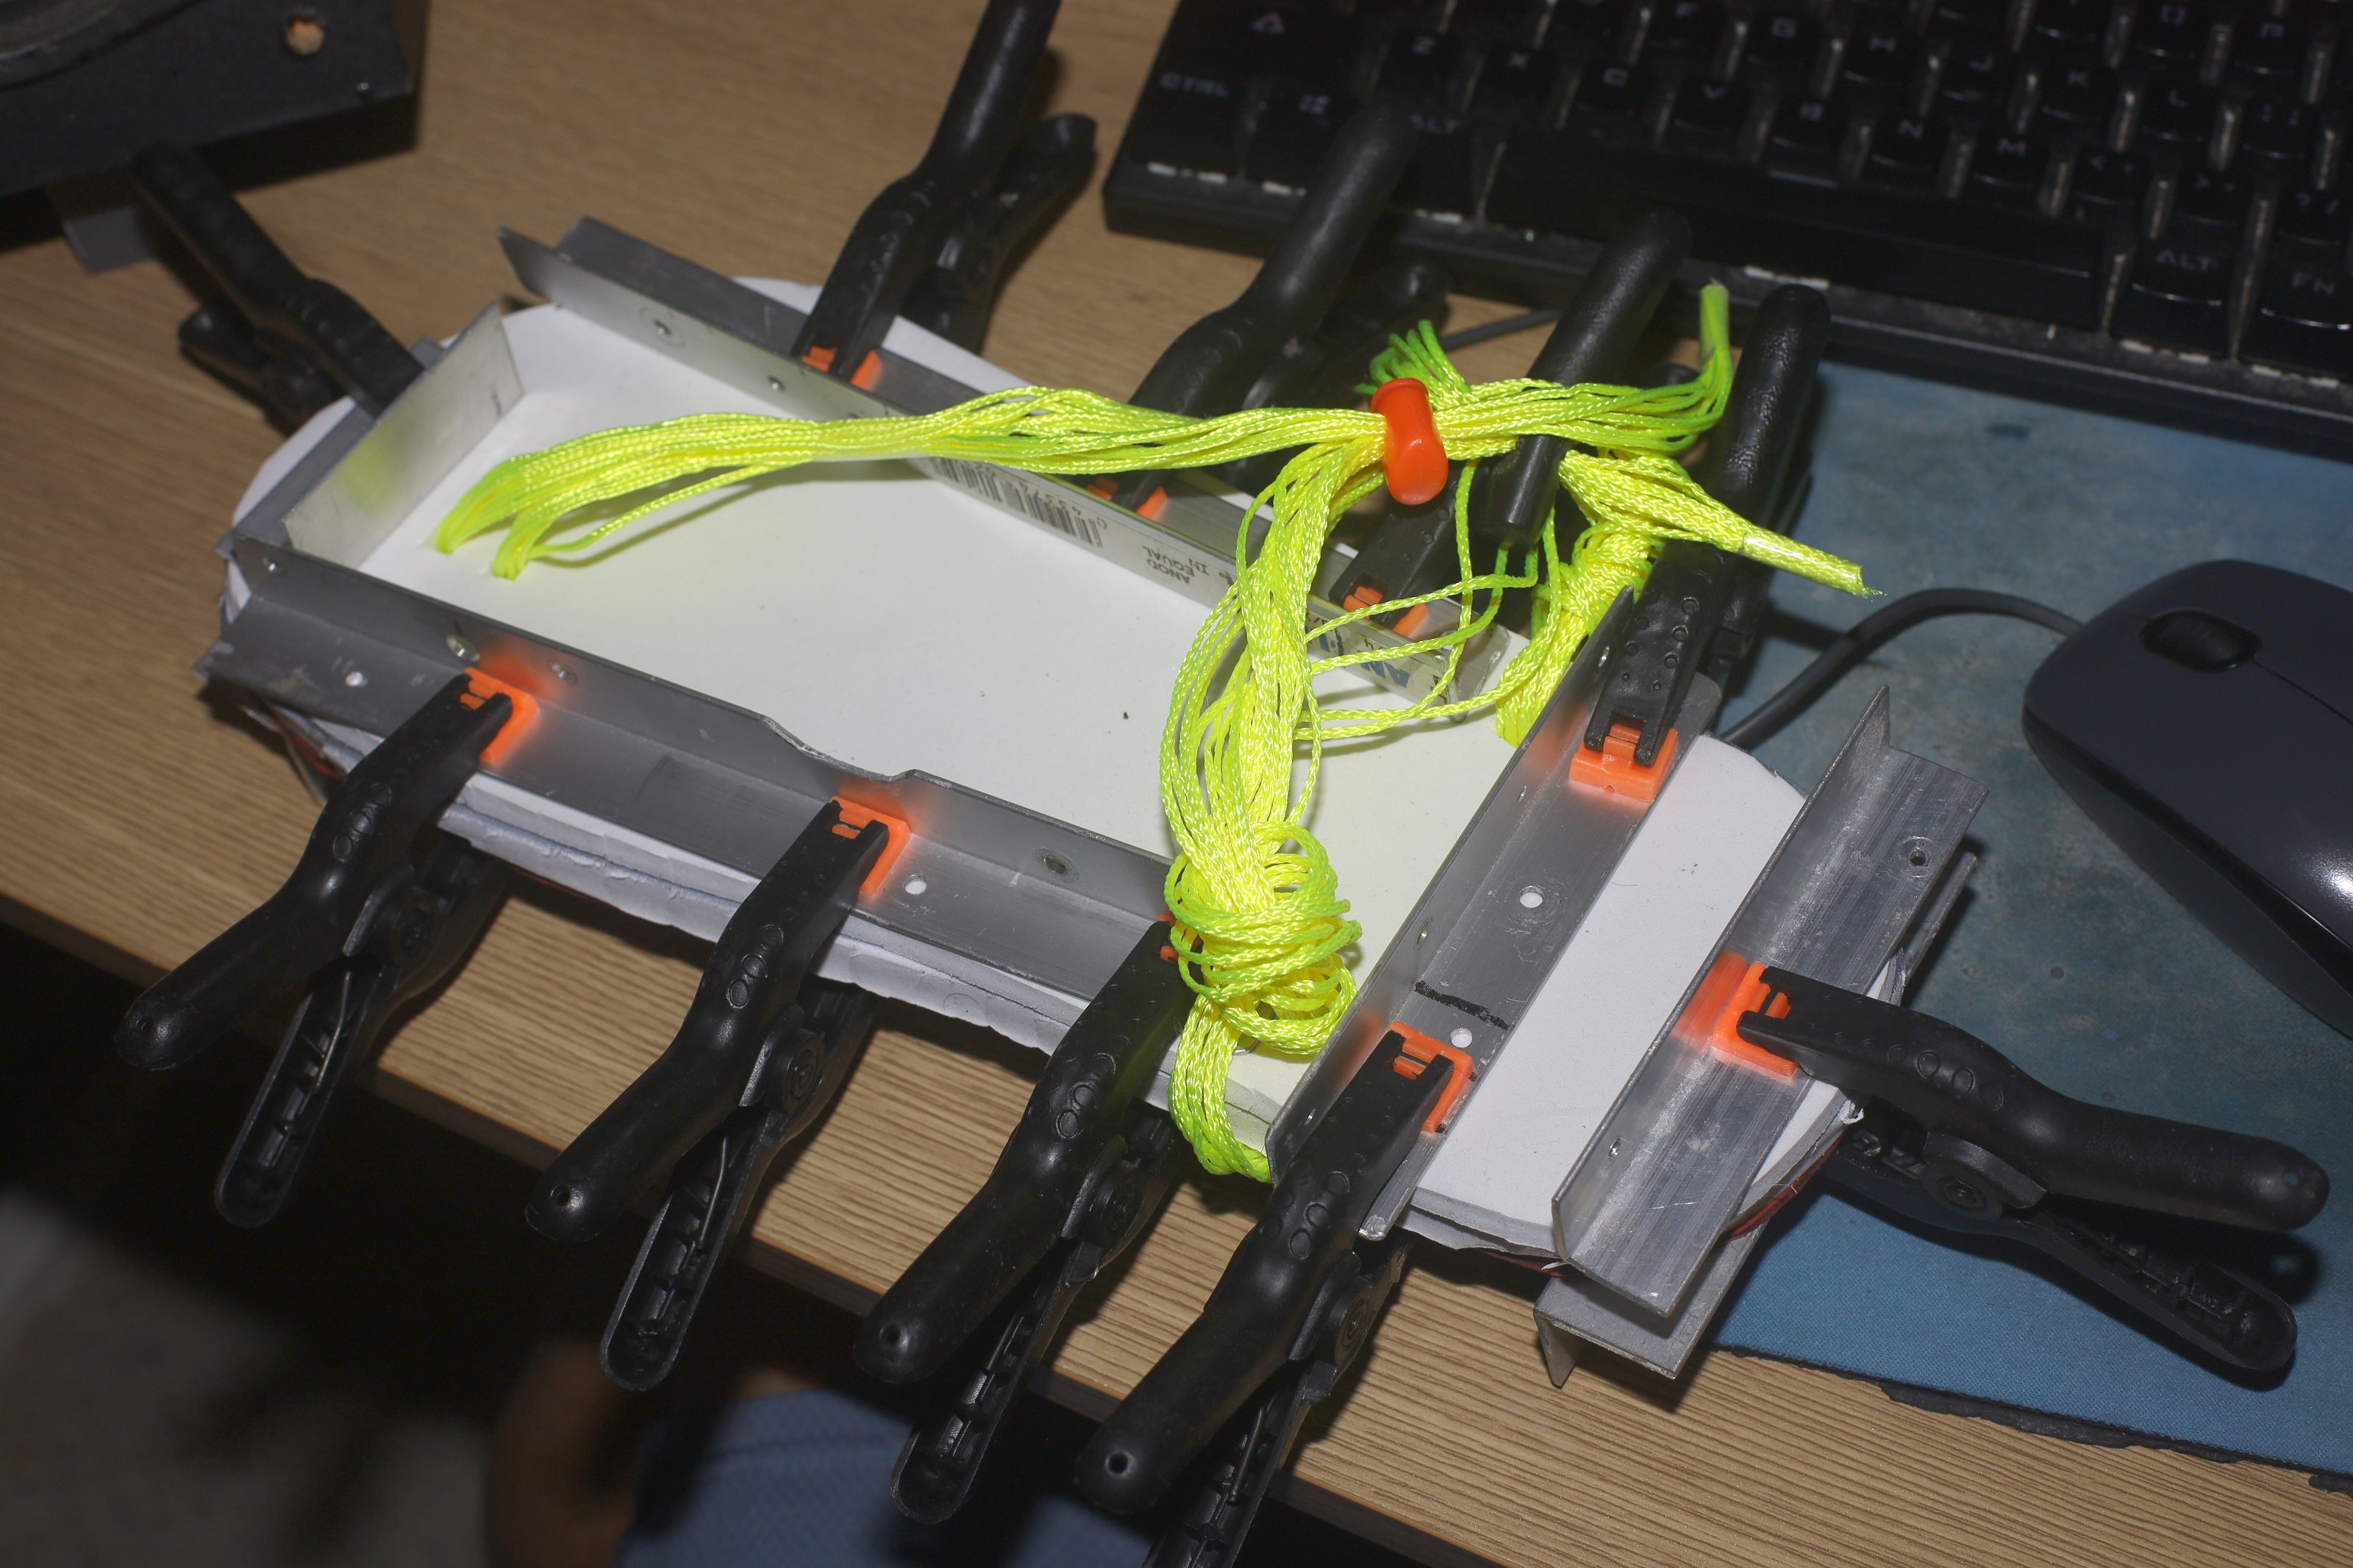
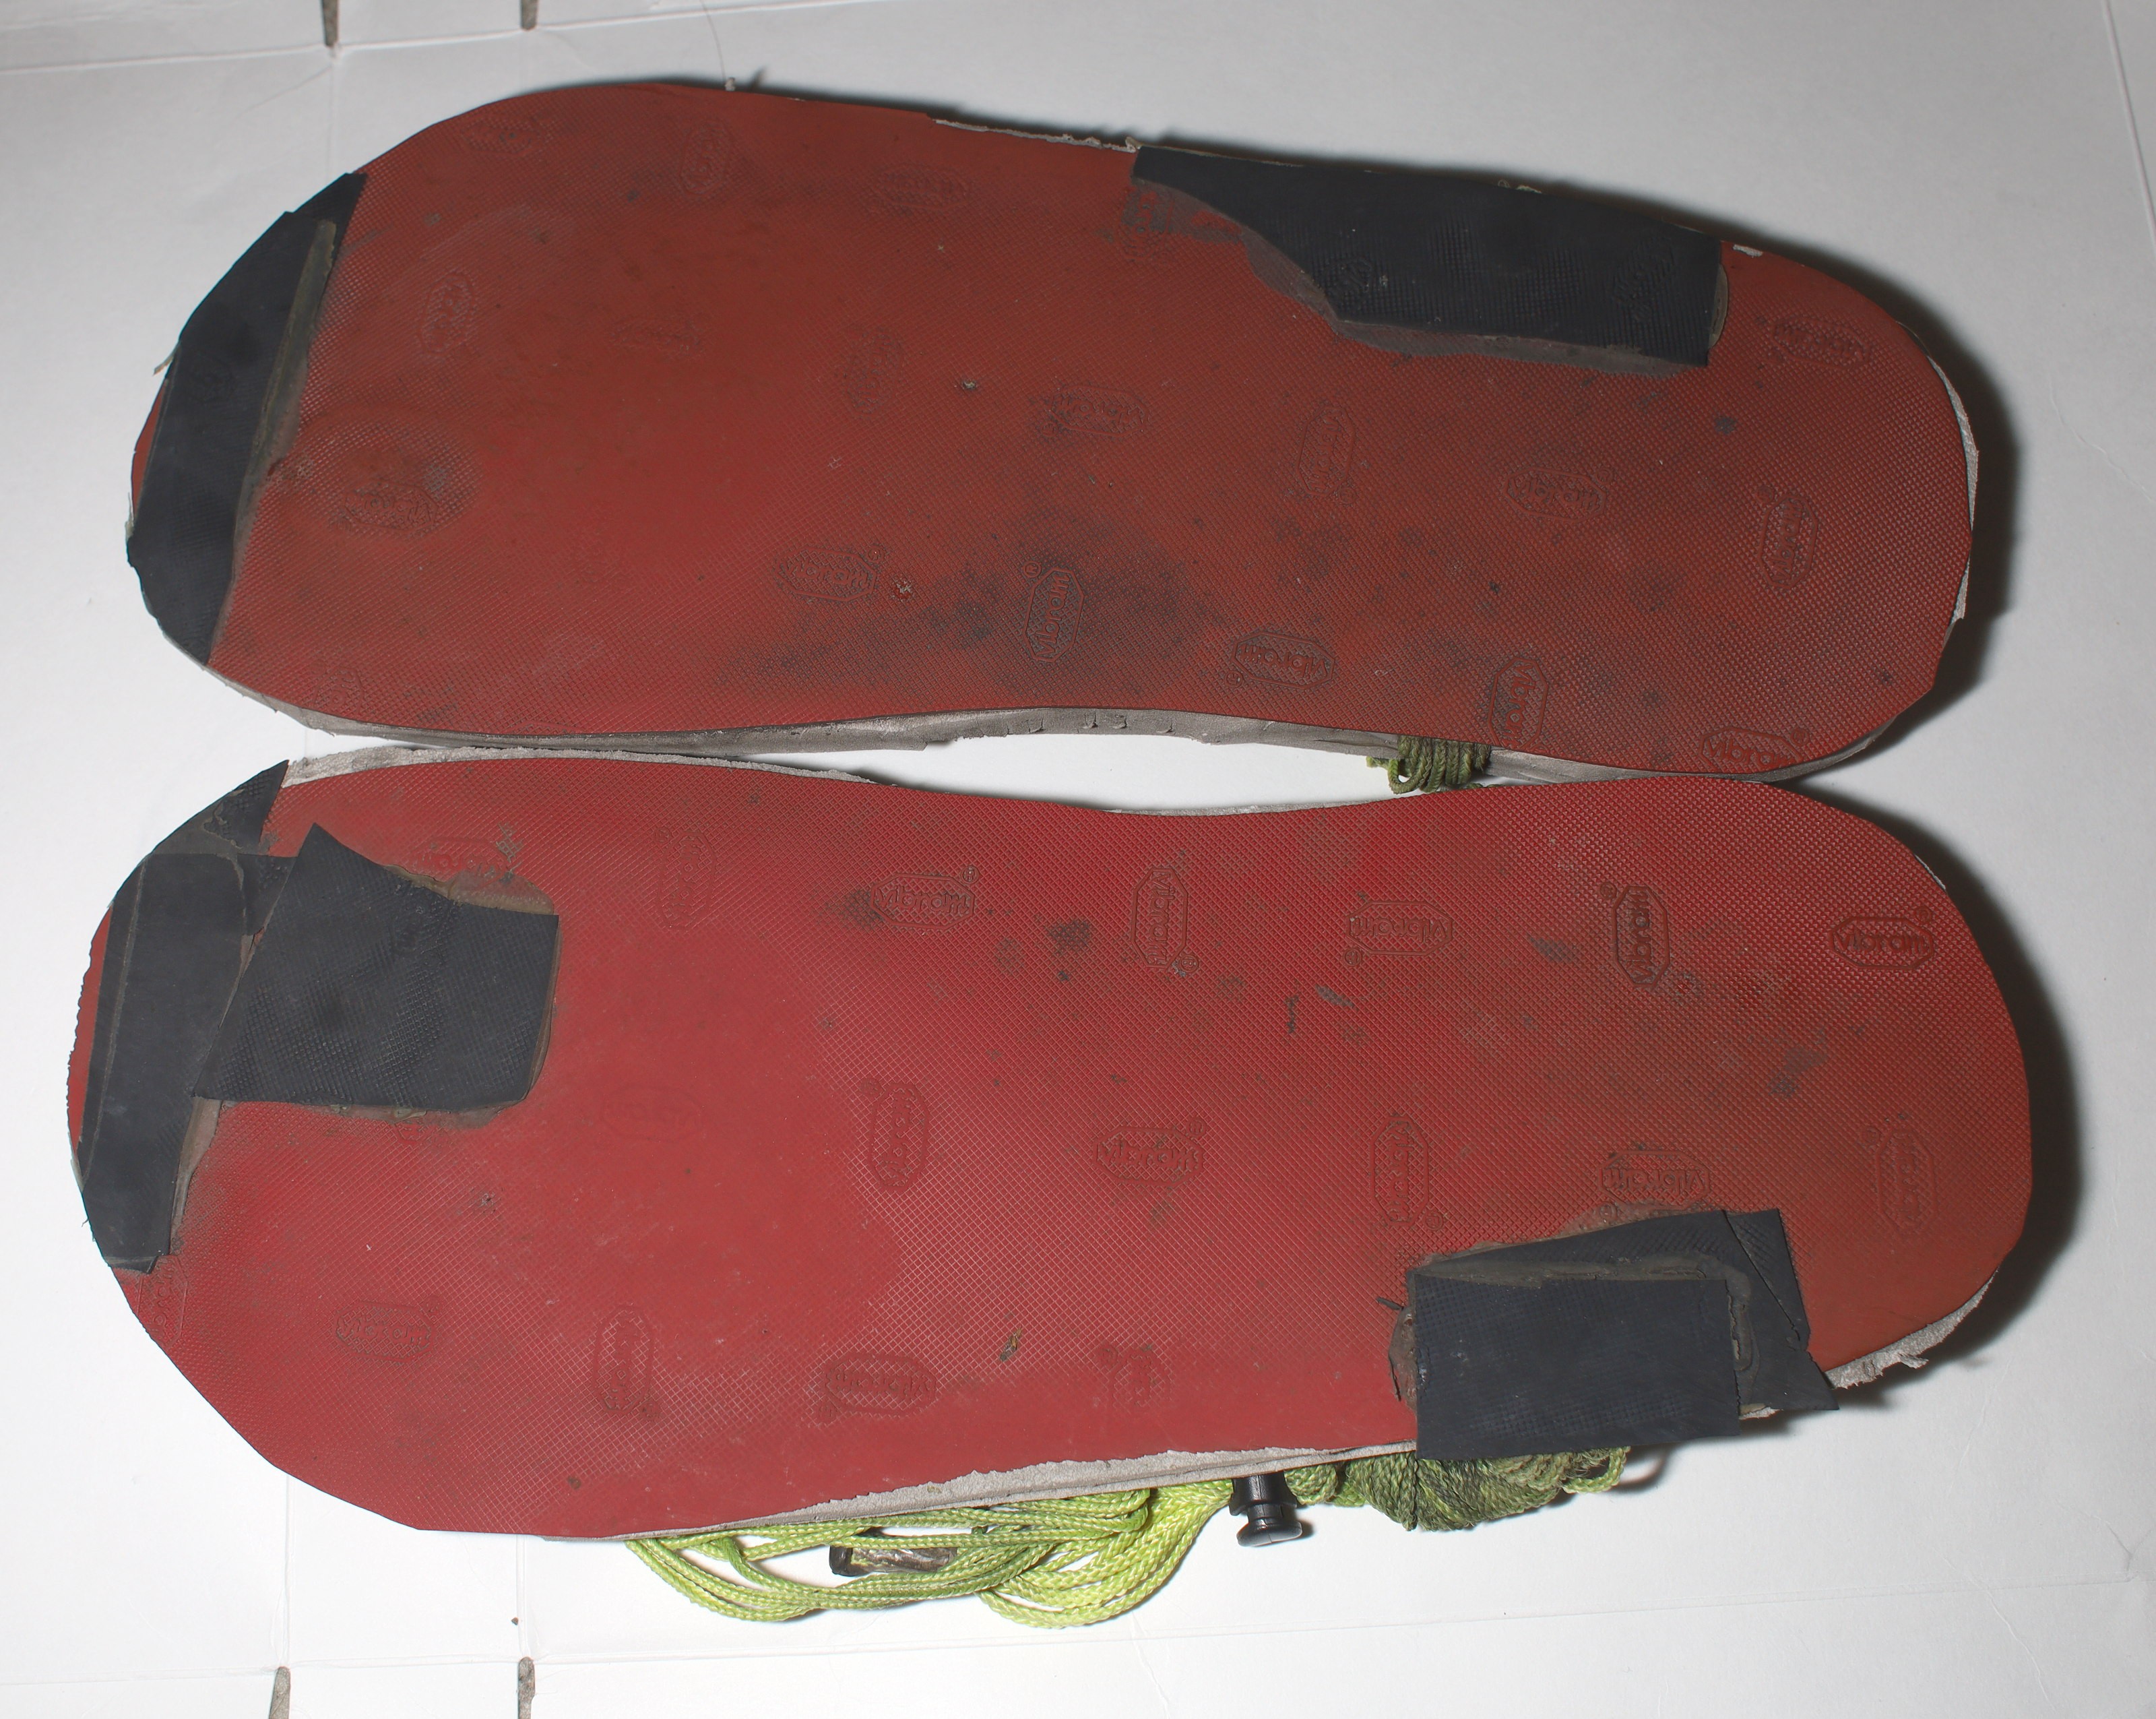
The curing process takes another 12 hours. The soles cover over all the foam, laces, & plastic reinforcements, revealing a solid rubber underside. The sandals are now permanent. The thong can be tentatively replaced with great effort & luck but the rest can't be changed without making a new sandal.
E6000 could be replaced by hot glue for temporary replacement of some parts. This causes the sole to fall off in hot weather.
CA glue is applied to the string ends before wearing. Then the ends receive a hot glue coating to prevent the CA glue from chafing. The laces can't be removed once they're CA glued.

The lace shrinks over time, but in the rare cases the measured lengths are excessive, it can be trimmed or taped to itself.
Extra soling material is later glued on the sole, where it experiences the most wear.
Discussions
Become a Hackaday.io Member
Create an account to leave a comment. Already have an account? Log In.