Close
0%
0%

Family Sync & Home Control Panel

Wall mounted touchscreen to keep family in sync, and home automation control panel.

Similar projects worth following
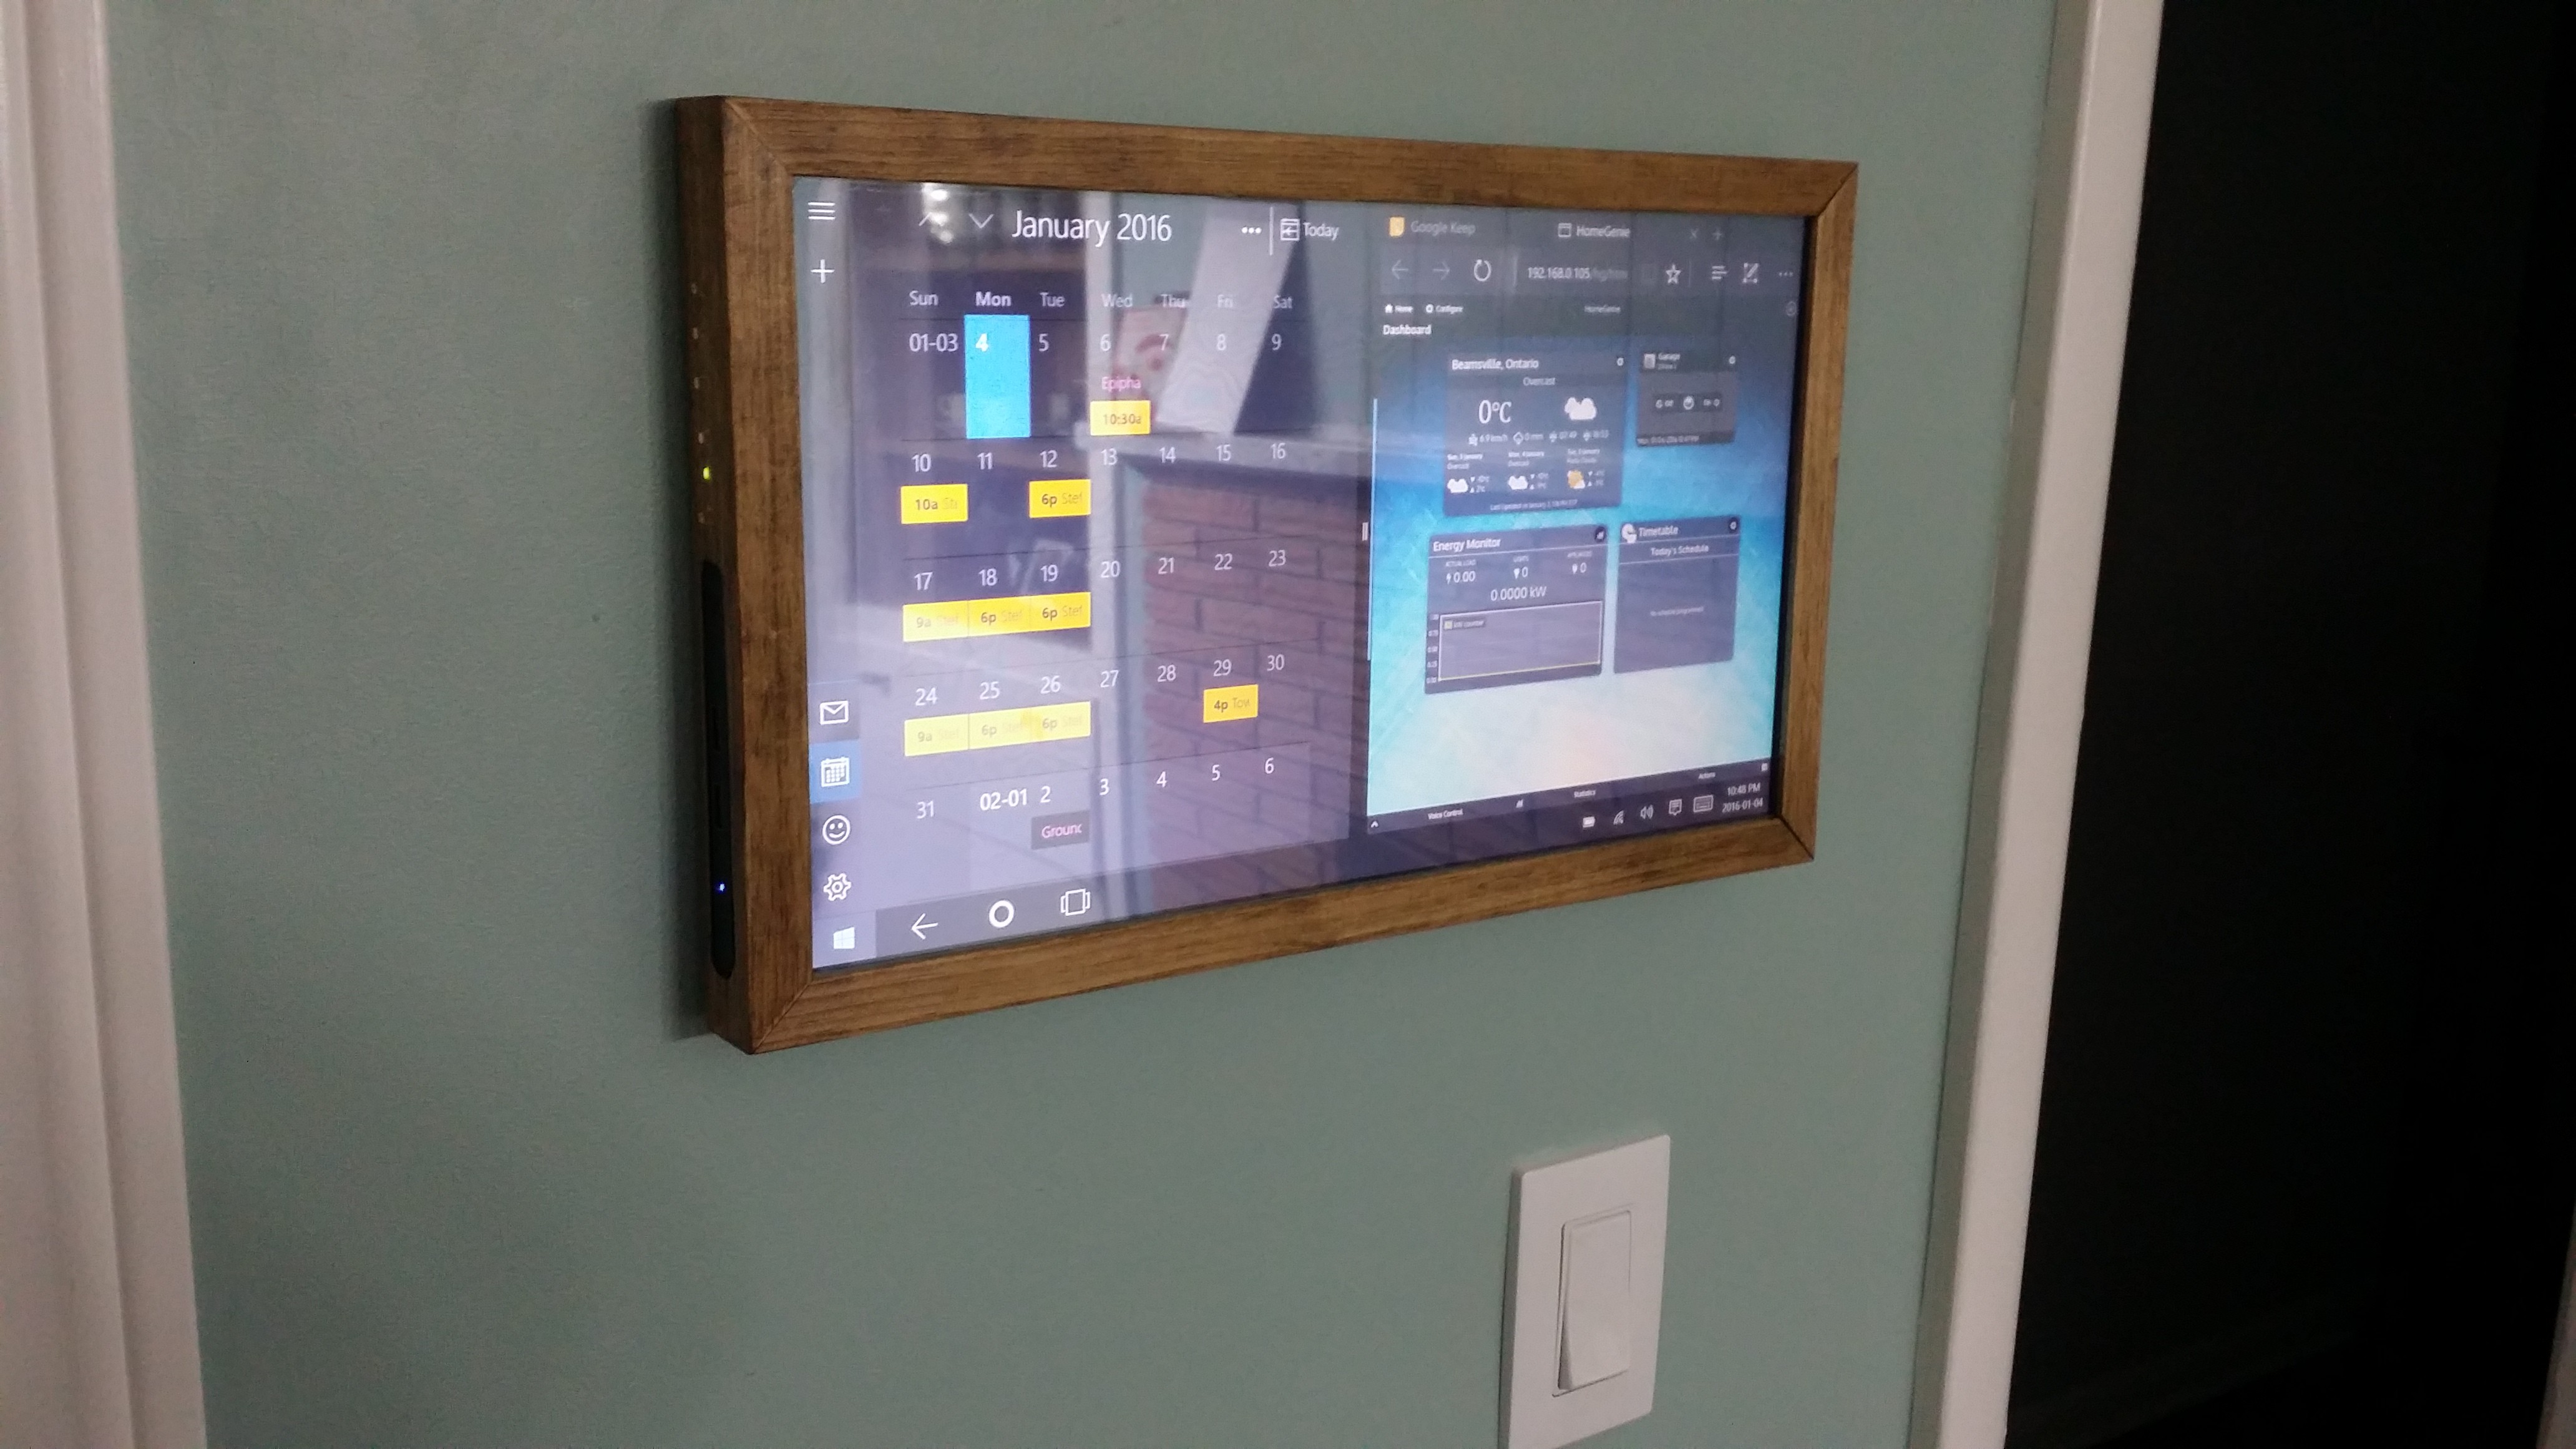
I wanted to have a neat way to display information to keep our family in sync. I wanted the display to be large enough to easily view information. I also wanted it to be easy to use, so it had to be touchscreen. I decided I would make a 17" touchscreen computer that would hang discretely in our kitchen/main entrance area.

Once I decided on how to display the information it became evident I could use it for some home automation purposes as well.

Step 1) Choose OS.

I was originally looking to use a Raspberry Pi for this project. Although I have used my Pi as a media console I was not extremely familiar with how I might get all the programs I want to use up and running so I ended up choosing to use Windows as I knew the support existed.

Step 2) Form Factor

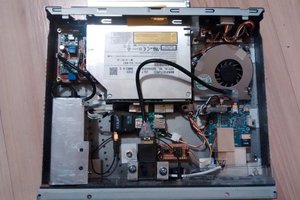
I needed this to be a discrete display hanging on the wall not much thicker than existing wall art or mirrors in the home. I determined that I'd have maybe 1/2" - 3/4" of space for the computer behind the frame holding the screen so I needed the computer to be very small. I had seen various chinese mini pc's pop up in my searches in the past and decided to go with the Ainol Mini PC. While I raise an eyebrow at the name choice, it fit my needs fairly well with these specs:

Intel Z3735F 1.83 GHz, 2GB RAM, 32GB eMMC, Windows 8.1, 7000mAh battery (acting as a UPS), Wifi & BT 4.0, 2 full size USB, micro SD card slot, mini USB port, mini HDMI port.

I could have gone with a Windows Stick computer but I liked the battery feature and the USB options. The mini pc was actually cheaper than the stick computers which fit with the budget as well.

Step 3) Choose LCD screen, compatible touchscreen panel, and compatible screen control board.

This step was a bit tricky to find a LCD screen, with perfectly sized USB touchscreen panel and the proper control board to match the LCD screen. I ended up contacting njytouch on eBay to see if they had any kits. They ended up having a full kit with all the matching components but it was too expensive for my project. I ended up purchasing the USB touchscreen panel and control board from njytouch and buying the same spec LCD screen in their kit from another eBay seller.

I must say the njytouch had amazing customer support. When I first got my control board and my LCD the colours were off. I contacted njytouch and they were very responsive. They provided the following instructions which solved my display issue:

1. Connect to any of the inputs, VGA, HDMI, DVI, etc.
2. Power up the board and switch off from the 'power' button.
3. Press and hold the 'menu' button, then press the 'power' button briefly, release the 'menu' button.
4. Then press the 'menu' button again.
5. There will now be a hidden factory setting in the OSD menu.
6. Select the factory setting using the + - keys.
7. In the factory settings change the setting 'Lvds Map' from 0 to 1.

Step 4) Frame Assembly

I now had the main components in hand and set out to find a way to mount everything nicely. I originally was going to use a metal picture frame kit to house everything nicely but my budget wouldn't allow it. I took some scrap 1x pine and made my own frame. I didn't want the frame to have too thick of a bezel hindering the touchscreen use so I made a slot the thickness of my screen and glass 1/8" from the top surface. The frame was then sanded, stained, and clearcoated to match some of our other frames. I used some L brackets to fasten the 4th side of the frame in case I ever have to removed the screen assembly in the future. Since I wanted access to the fullsize USB ports from the outside and the power button on the mini pc I used a router to create a space in the frame for the mini pc to slide into.

Step 5) Component Assembly

This was the part I was waiting for. I glued the glass USB touchscreen to my LCD panel and slid the glued assembly into the frame. After mounting the 4th side of the frame with the L brackets I now had a puzzle of components to mount fit on the backside of the LCD screen. After a few iterations I found the final position of most of the components for the most part but there were 2 things I had to figure out; 1) I didn't want to power the LCD screen and the PC with two separate power cords 2) How was I going to access the display menu and power buttons?

Display buttons: I decided to install the button board off to the side of the panel. Luckily the board was the exact depth as the cavity behind the LCD screen. After measuring out where...

Read more »

M.NT68676.2A 11486-Specification_V1.0.pdf

Spec sheet for the display controller board.

Adobe Portable Document Format - 752.86 kB - 01/04/2016 at 18:05

Preview

  • 1 × Ainol Mini PC Chinese Windows Mini PC
  • 1 × B173RW01 V.5 Laptop LCD LED Screen
  • 1 × VGA DVI HDMI Controller Board Kit M.NT68676 VGA DVI HDMI Controller Board Kit for B173RW01 LED Panel 1600X900
  • 1 × 5 Wire Resistive Touch Panel 17.3" 5 Wire Resistive Touch Panel USB Controller 16:9 For 17.3" LCD Screen
  • 1 × DC-DC Buck Voltage Converter DC-DC Buck Voltage Converter 4.5-40V 12V to 5V/2A Step-down Volt Transformer Stabilizer Voltage Regulator Module Power Supply Switch Inverter Board with LED Voltmeter 5V USB Charger

View all 12 components

  • 2 Months Of Use

    Mark Kuhlmann03/16/2016 at 12:46 0 comments

    I'm happy to report that the system has worked really well over the last couple of months. My wife has really taken to using the scheduling and really loves the weather display on the way out the door. As predicted the built in wifi ended up being too spotty for any streaming. I purchased an TP-Link Archer T1U nano wifi usb dongle and that works perfectly. We can now stream movies and watch the news online without any issues. It really helps to have some children's videos playing while making dinner. I'm still using Homegenie but have began the process of switching over to Home-Assistant. Home-Assistant works with the components I want to work with and is a bit easier to get up and running then OpenHAB. I don't mind the challenge of OpenHAB but I just do not have the time to commit to it at this point in time.

  • Check-In

    Mark Kuhlmann01/13/2016 at 13:16 0 comments

    It's been up and running for over a week and I just wanted to post my thoughts.

    1) It's been adopted quite well by my wife and it's already proving to be very useful with grocery lists, appointments, and useful weather info on the way out the door.

    2) While I've been using HomeGenie for the automation aspect, and I have no issues with it so far I'm still looking into openHAB. OpenHAB seems to support many more devices and have a lot more support. I just need to get past the initial learning curve since I do not have a background in anything relating to what I need to learn to make it work. I've started playing with the software on my laptop just until I can get it up and running. I'll transfer over to the panel once I'm confident in deploying it.

    3) Wifi - The wifi on the mini pc is doing fine for the minimal amount of data required for its core functions, but it isn't capable of streaming a movie from my NAS or playing a stream online. I may look into a nano usb wifi dongle to see if that helps. The bluetooth doesn't seem to have any issues.

  • Panel mounted and completed!

    Mark Kuhlmann01/05/2016 at 13:36 0 comments

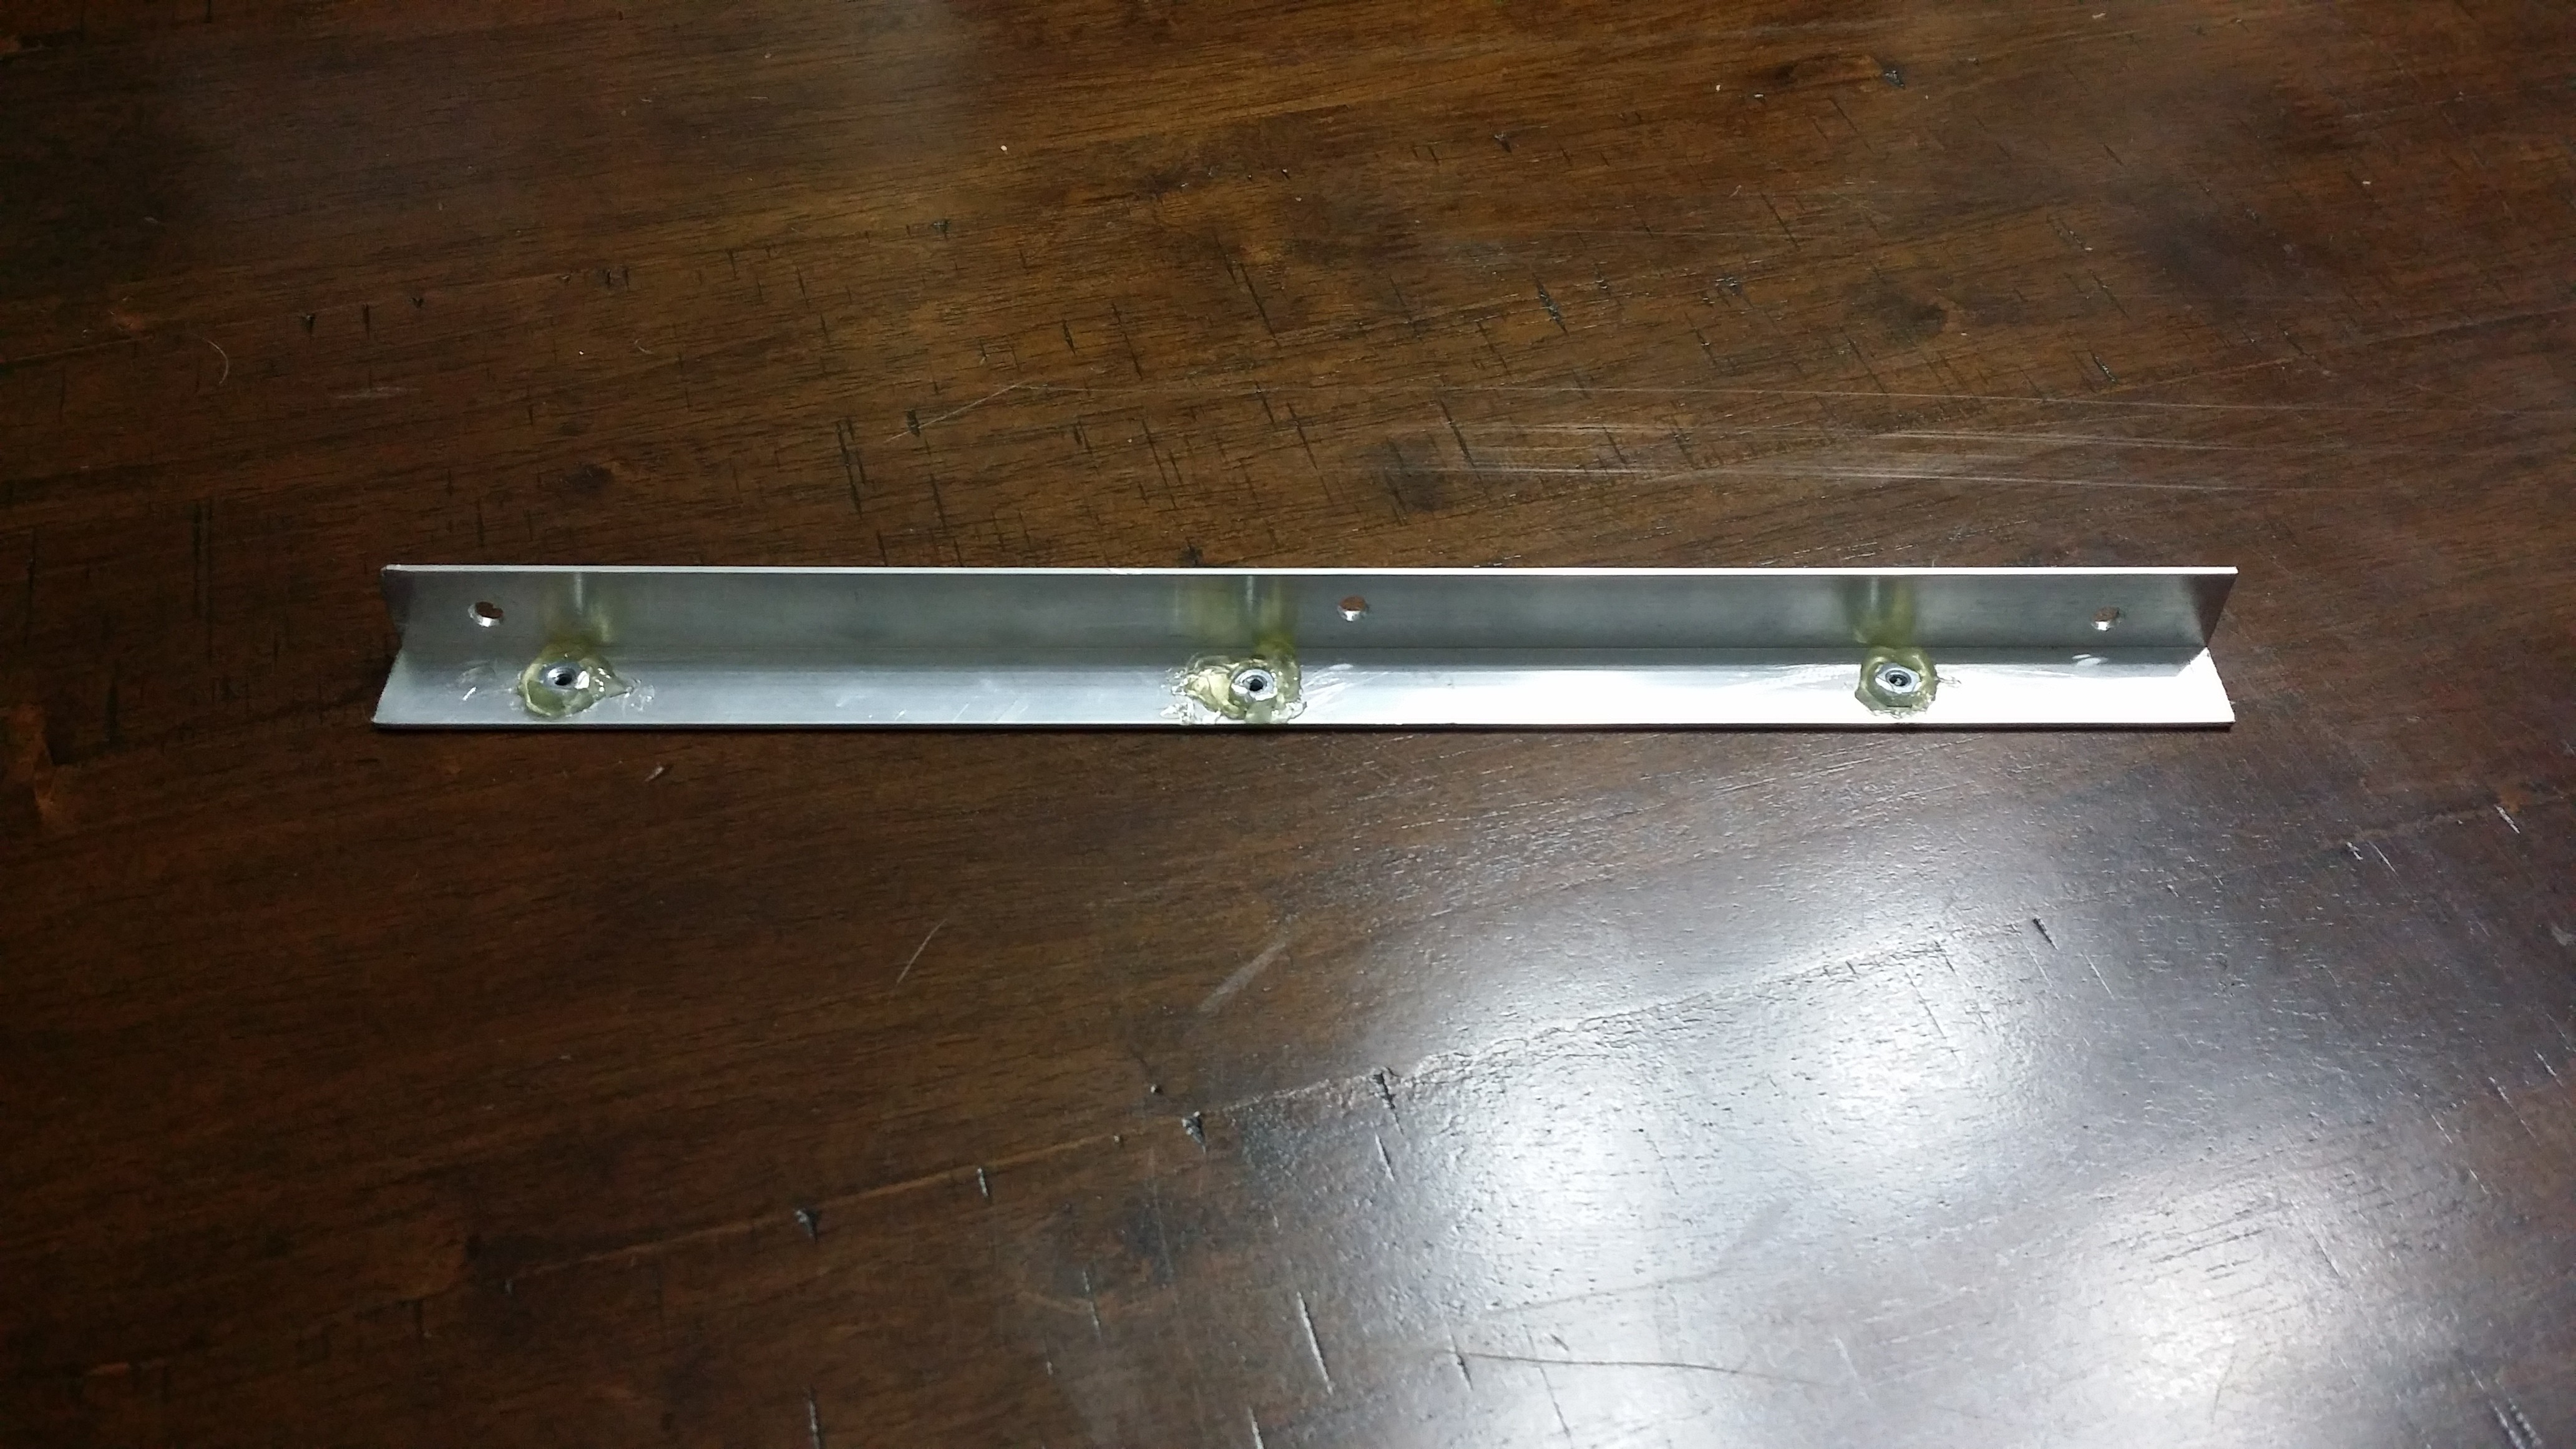
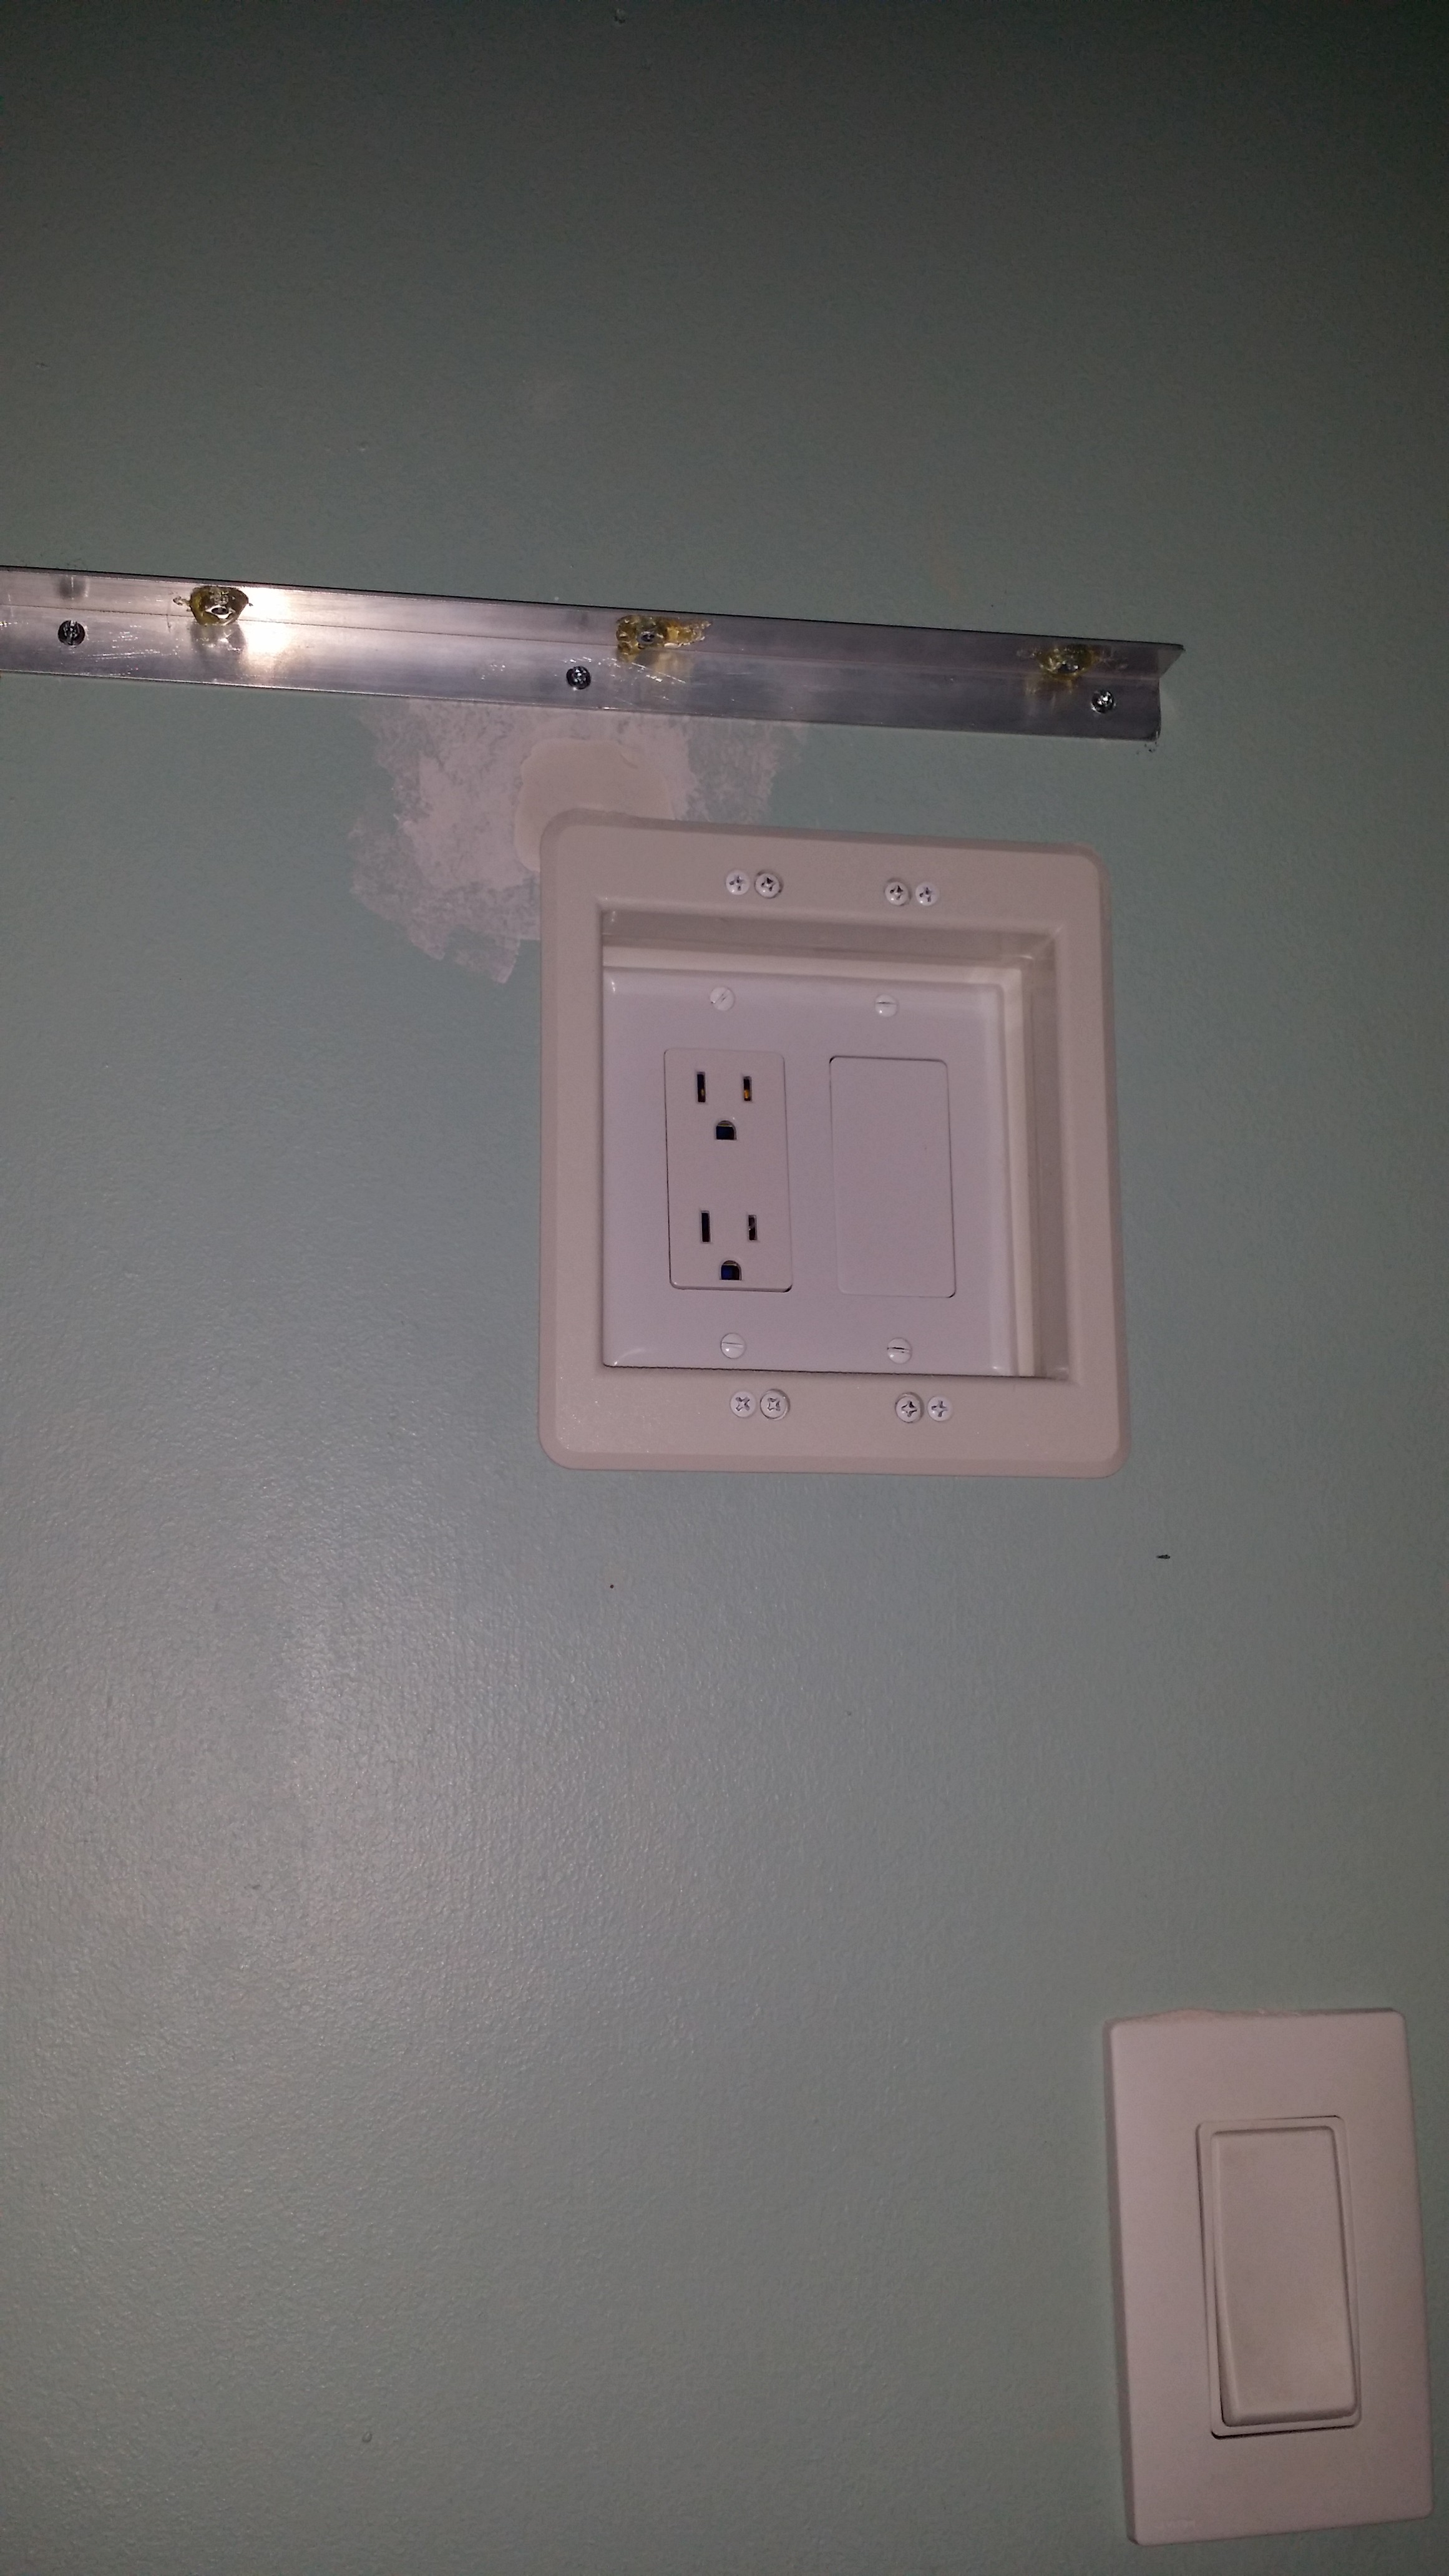
    Well I finally was able to mount the panel and complete the project last night! I Used some 3/4" aluminum angle mounted to the wall with toggle bolts. I drilled some holes through the top of the frame and through the angle and glued nuts to the angle over the holes. I would have liked to use jb weld or thicker angle and threaded it but this was all that was available. Since the screws will just be preventing the panel from falling off the angle I figured hot glue was enough to keep the nuts in place.

    Once the angle was made I had to install the recessed outlet box. I wanted the panel mounted in a way that didn't show any wiring so a recessed tv box and a low profile power adapter would do the trick. I hardwired the outlet in the recessed box from the light switch below.

    Once the outlet was wired and the angle mounted it was time to install the panel!

  • Home Automation

    Mark Kuhlmann01/01/2016 at 19:50 0 comments

    i decided to try Homegenie for the home automation software and got it up and running fairly quickly. I also installed the Aeotec micro switch module to control my outside garage lights. The garage lights can only be switched from inside the garage and there's no access to the garage from inside the house. It has always been annoying to light the driveway with my garage lights until today!

    Once the micro module was installed in the 2 gang switch box I "included" into the system with the z-stick. I added it as a module in Homegenie and it just worked. I'm really excited about this feature and can't wait to add some more home automation features. Here's a video showing the panel controlling the outside garage lights:

    Next up is mounting the panel!

  • First Log, what's been posted and what's left to do

    Mark Kuhlmann12/30/2015 at 17:18 0 comments

    I had been keeping track of my project with photo's and decided to post it here on hackaday. I've posted most of the work to date in the details section. As far was what's left:

    1) Wall Mounting: Design the backing board for the display so I can securely flush mount onto my wall. I'm going to look for some 1/8" plastic sheeting today and some wall mounting hardware.

    2) Power: Instead of running the cable to a plug located lower in the wall I might buy a recessed outlet kit such as this http://amzn.to/1ktxmoZ and run power to it from the lower outlet. Doing this would eliminate visibility on the cable and power adapter as it would sit directly behind the panel and minimize the chance that any little ones in the house will unplug and pull on the cable.

    3) Home Automation: I need to experiment a little further with OpenHAB and see how it functions. I need to install the micro module in the garage and sync with the z-wave stick to see it up and running.

    4) Sync: I need to add the family account to my wife's phone so she can start syncing and using the panel

    Concerns:

    1) Connectivity: I'm concerned about the BT and Wifi in the panel. As the modules are built into the Mini PC, and the Mini PC is enclosed behind the LCD screen there may be some issues. Since I have 2 USB ports on the side of the unit available I would buy some mini USB adapters for BT and Wifi to see if those work better

    2) Appearance: I was hoping to have a cleaner appearance but the router diameter did not match the Mini PC and there's some slight gaps in that section. I do not have a drill press and as a result the LED/Buttons were not aligned perfectly straight. All in all I'm OK with the appearance but I had some higher hopes for the finished product. If I do another version I will focus more on aesthetics.

    Possible future additions:

    Sound: I currently use BT and pair the panel to a BT speaker in the kitchen. With various audio outputs available in this system (Mini PC and display control board both have audio out) I can add some speakers directly to the unit. I'm not sure how the sound will work by using small laptop size speakers in the system and currently the BT is working well.

    Battery: The Mini PC has a built in battery but the display does not. I am thinking about installing a battery for the display. Power outages are minimal in my area so this would just be an exercise to learn some new things and being able to call it a diy "tablet".

View all 5 project logs

Enjoy this project?

Share

Discussions

nate wrote 11/16/2017 at 16:52 point

That screen looks great! Would you be interested in mounting a spare cell phone or tablet to the wall? Most of us get a new phone every few years. The old one may not be state of the art but still a powerful mini touch screen computer. I made a universal holder for cell phones and will be making one for tablets soon. check out the picture and website at my hackaday profile.

smarthomemounts com

  Are you sure? yes | no

nmy wrote 01/04/2016 at 18:00 point

looks great

  Are you sure? yes | no

Mark Kuhlmann wrote 01/04/2016 at 18:02 point

Thank you! I just got all my wall mounting hardware so I should have a new update with it mounted and complete in a few days.

  Are you sure? yes | no

Does this project spark your interest?

Become a member to follow this project and never miss any updates