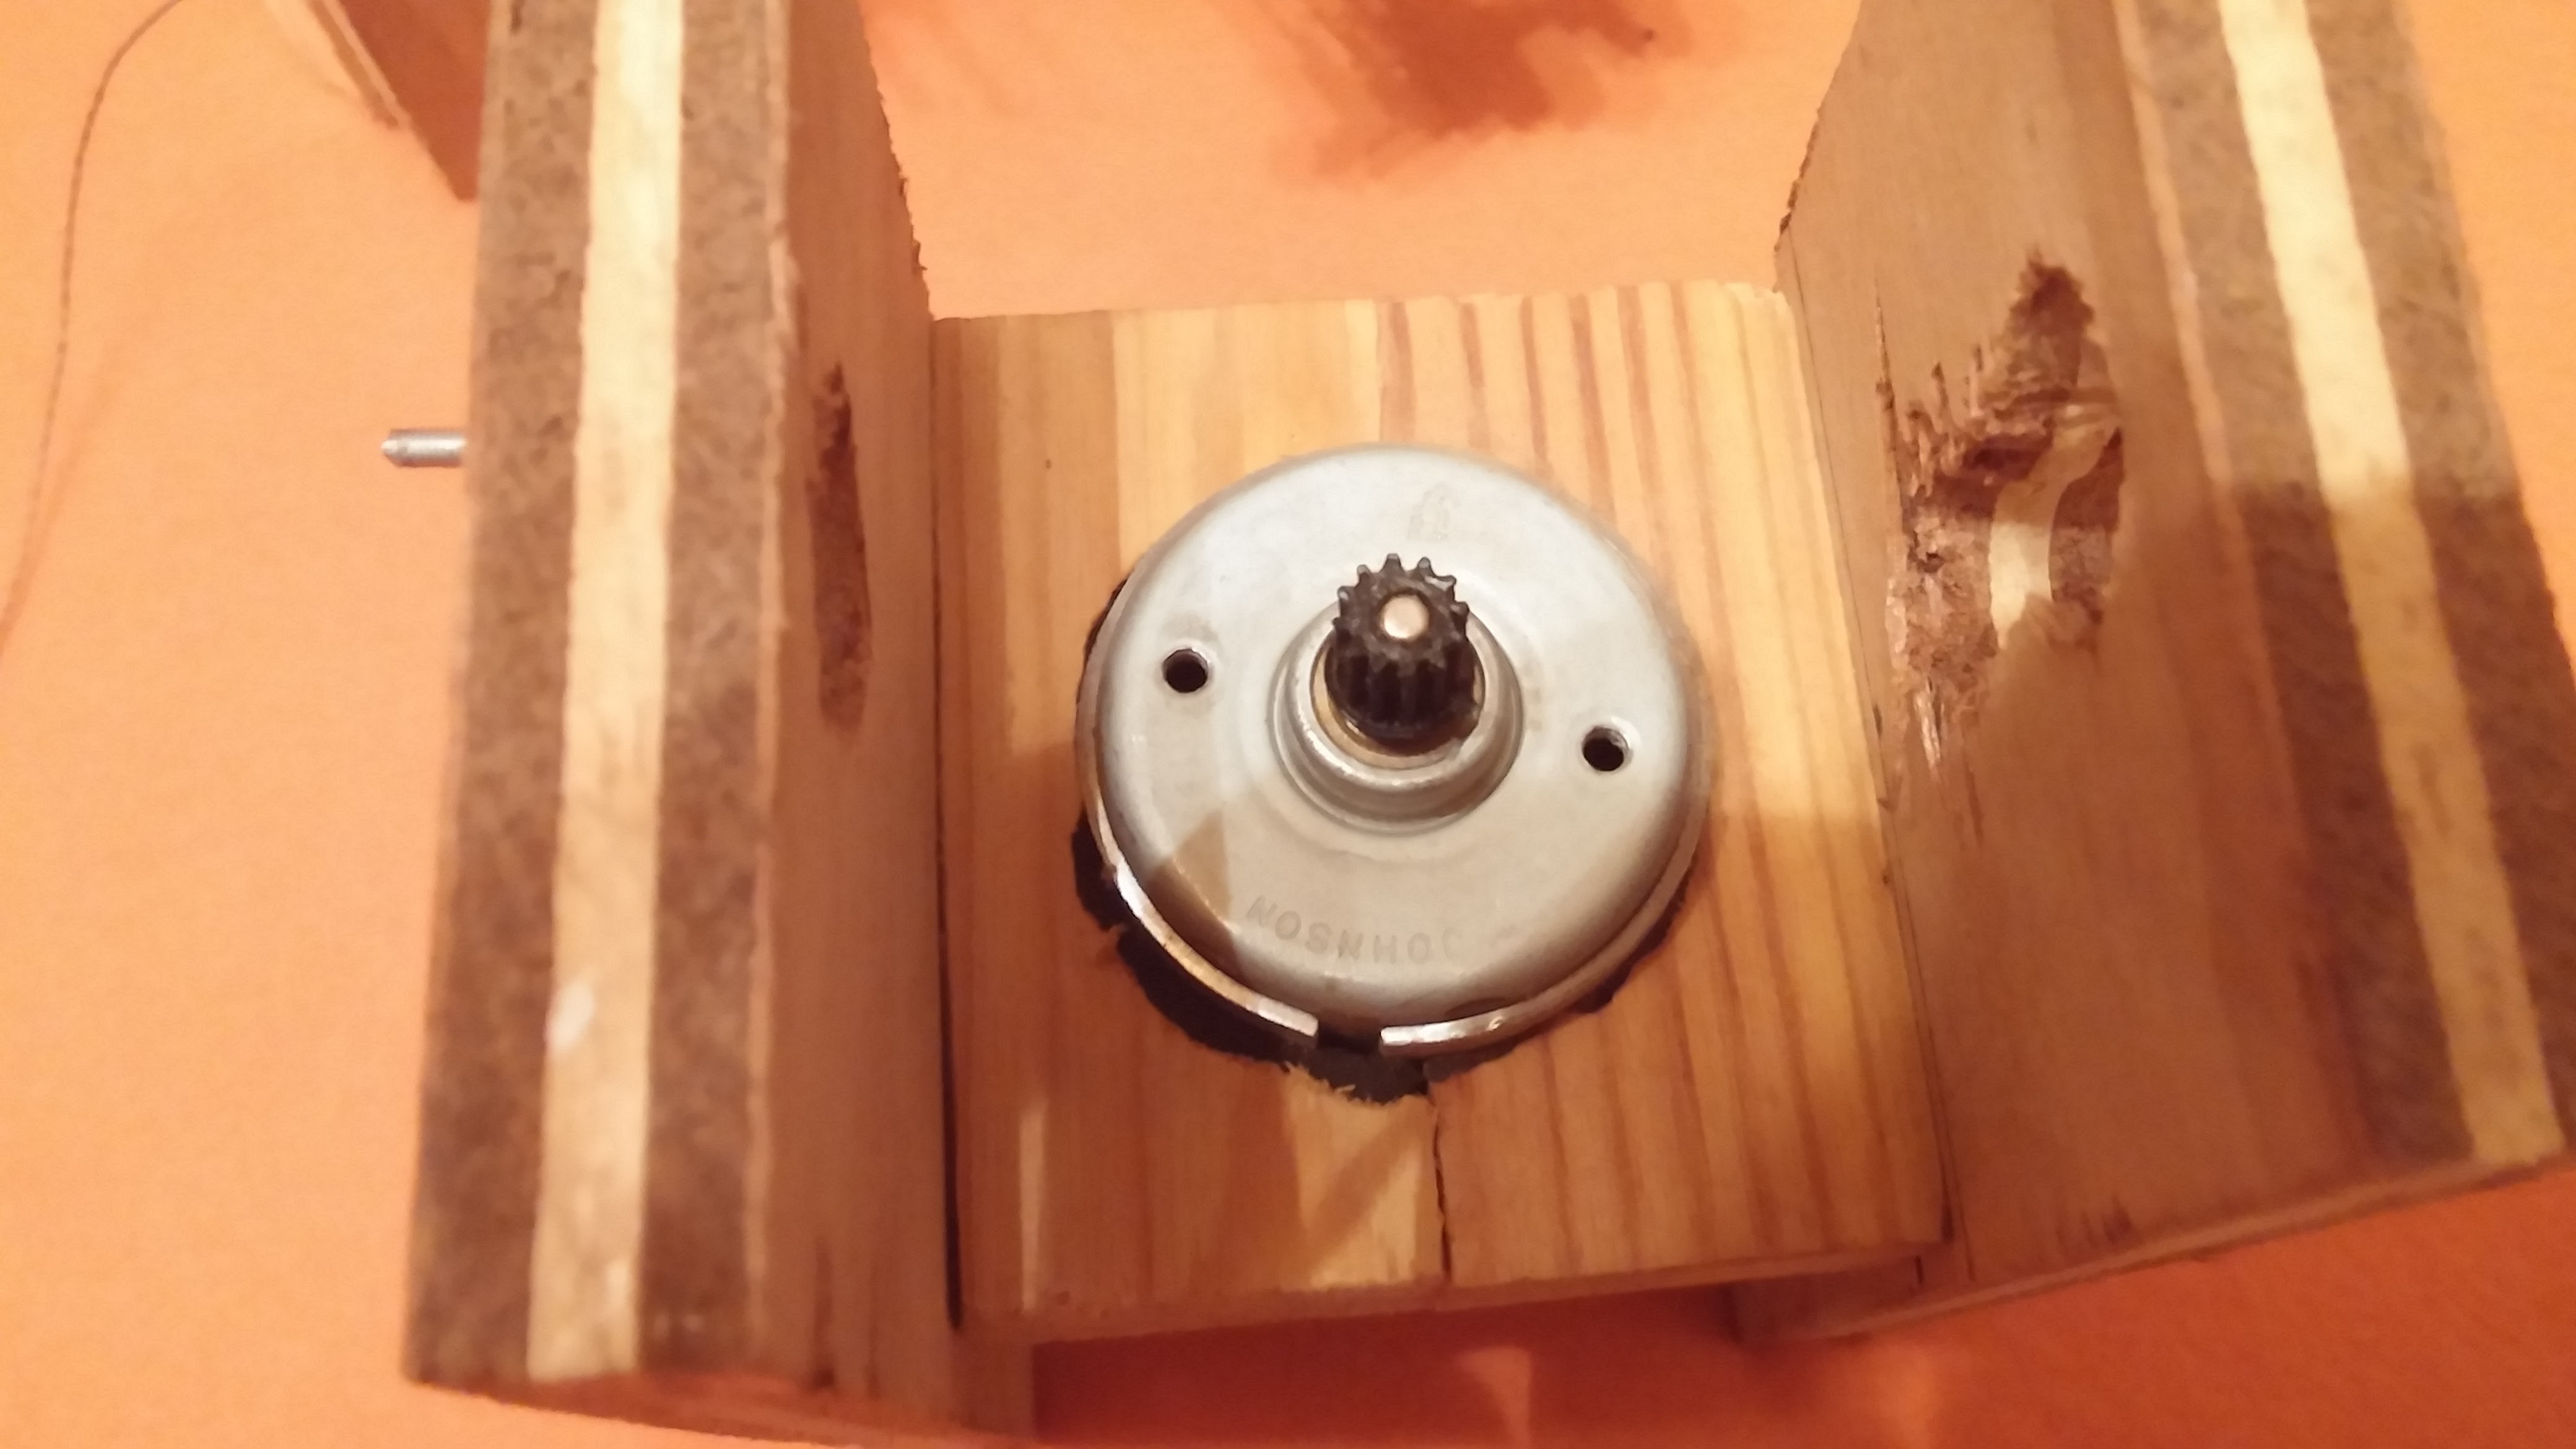
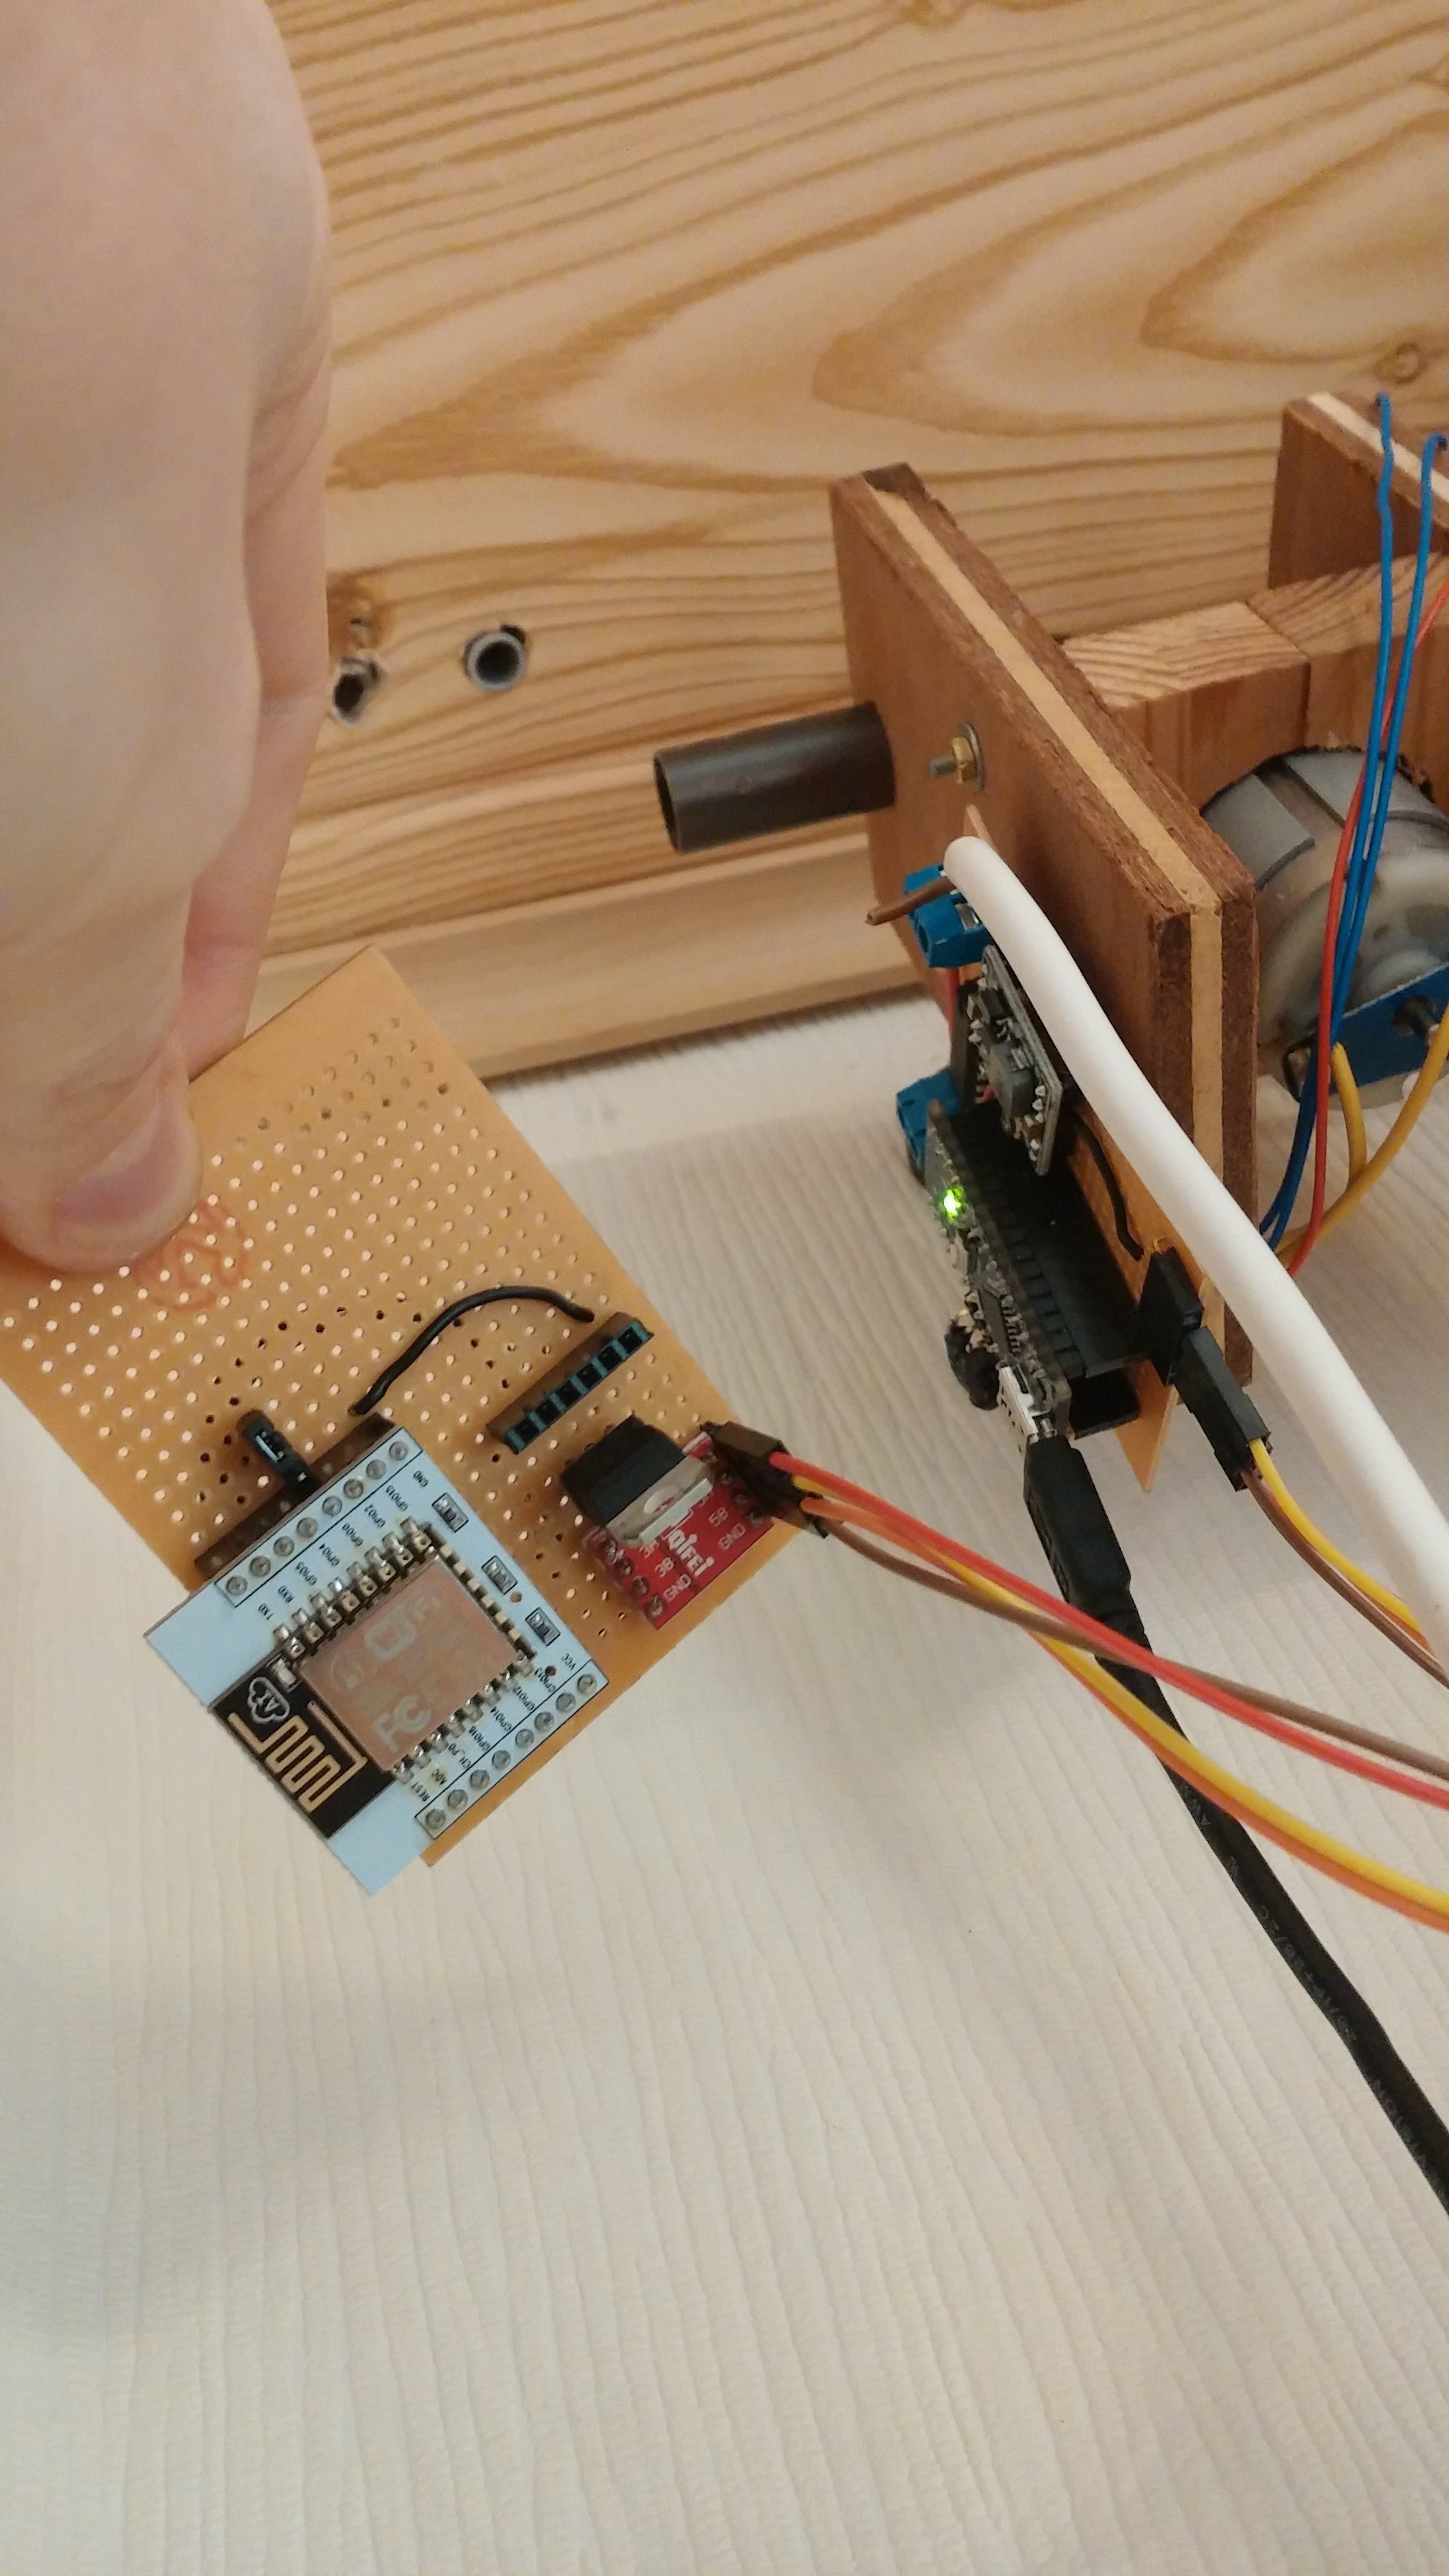
Close
0%
0%

Remote controlled curtains

with an arduino, a motor and and a timing belt

Similar projects worth following
The goal of this project is to enable me to remotely open and close the curtains in my bedroom

For a long time I wanted to motorize the curtains in my bedroom. I tried several ideas with cords, but all of them were not really practical. Then I tried it again with a timing belt and it works very good. The belt is driven by a motor, which I found in an old printer.

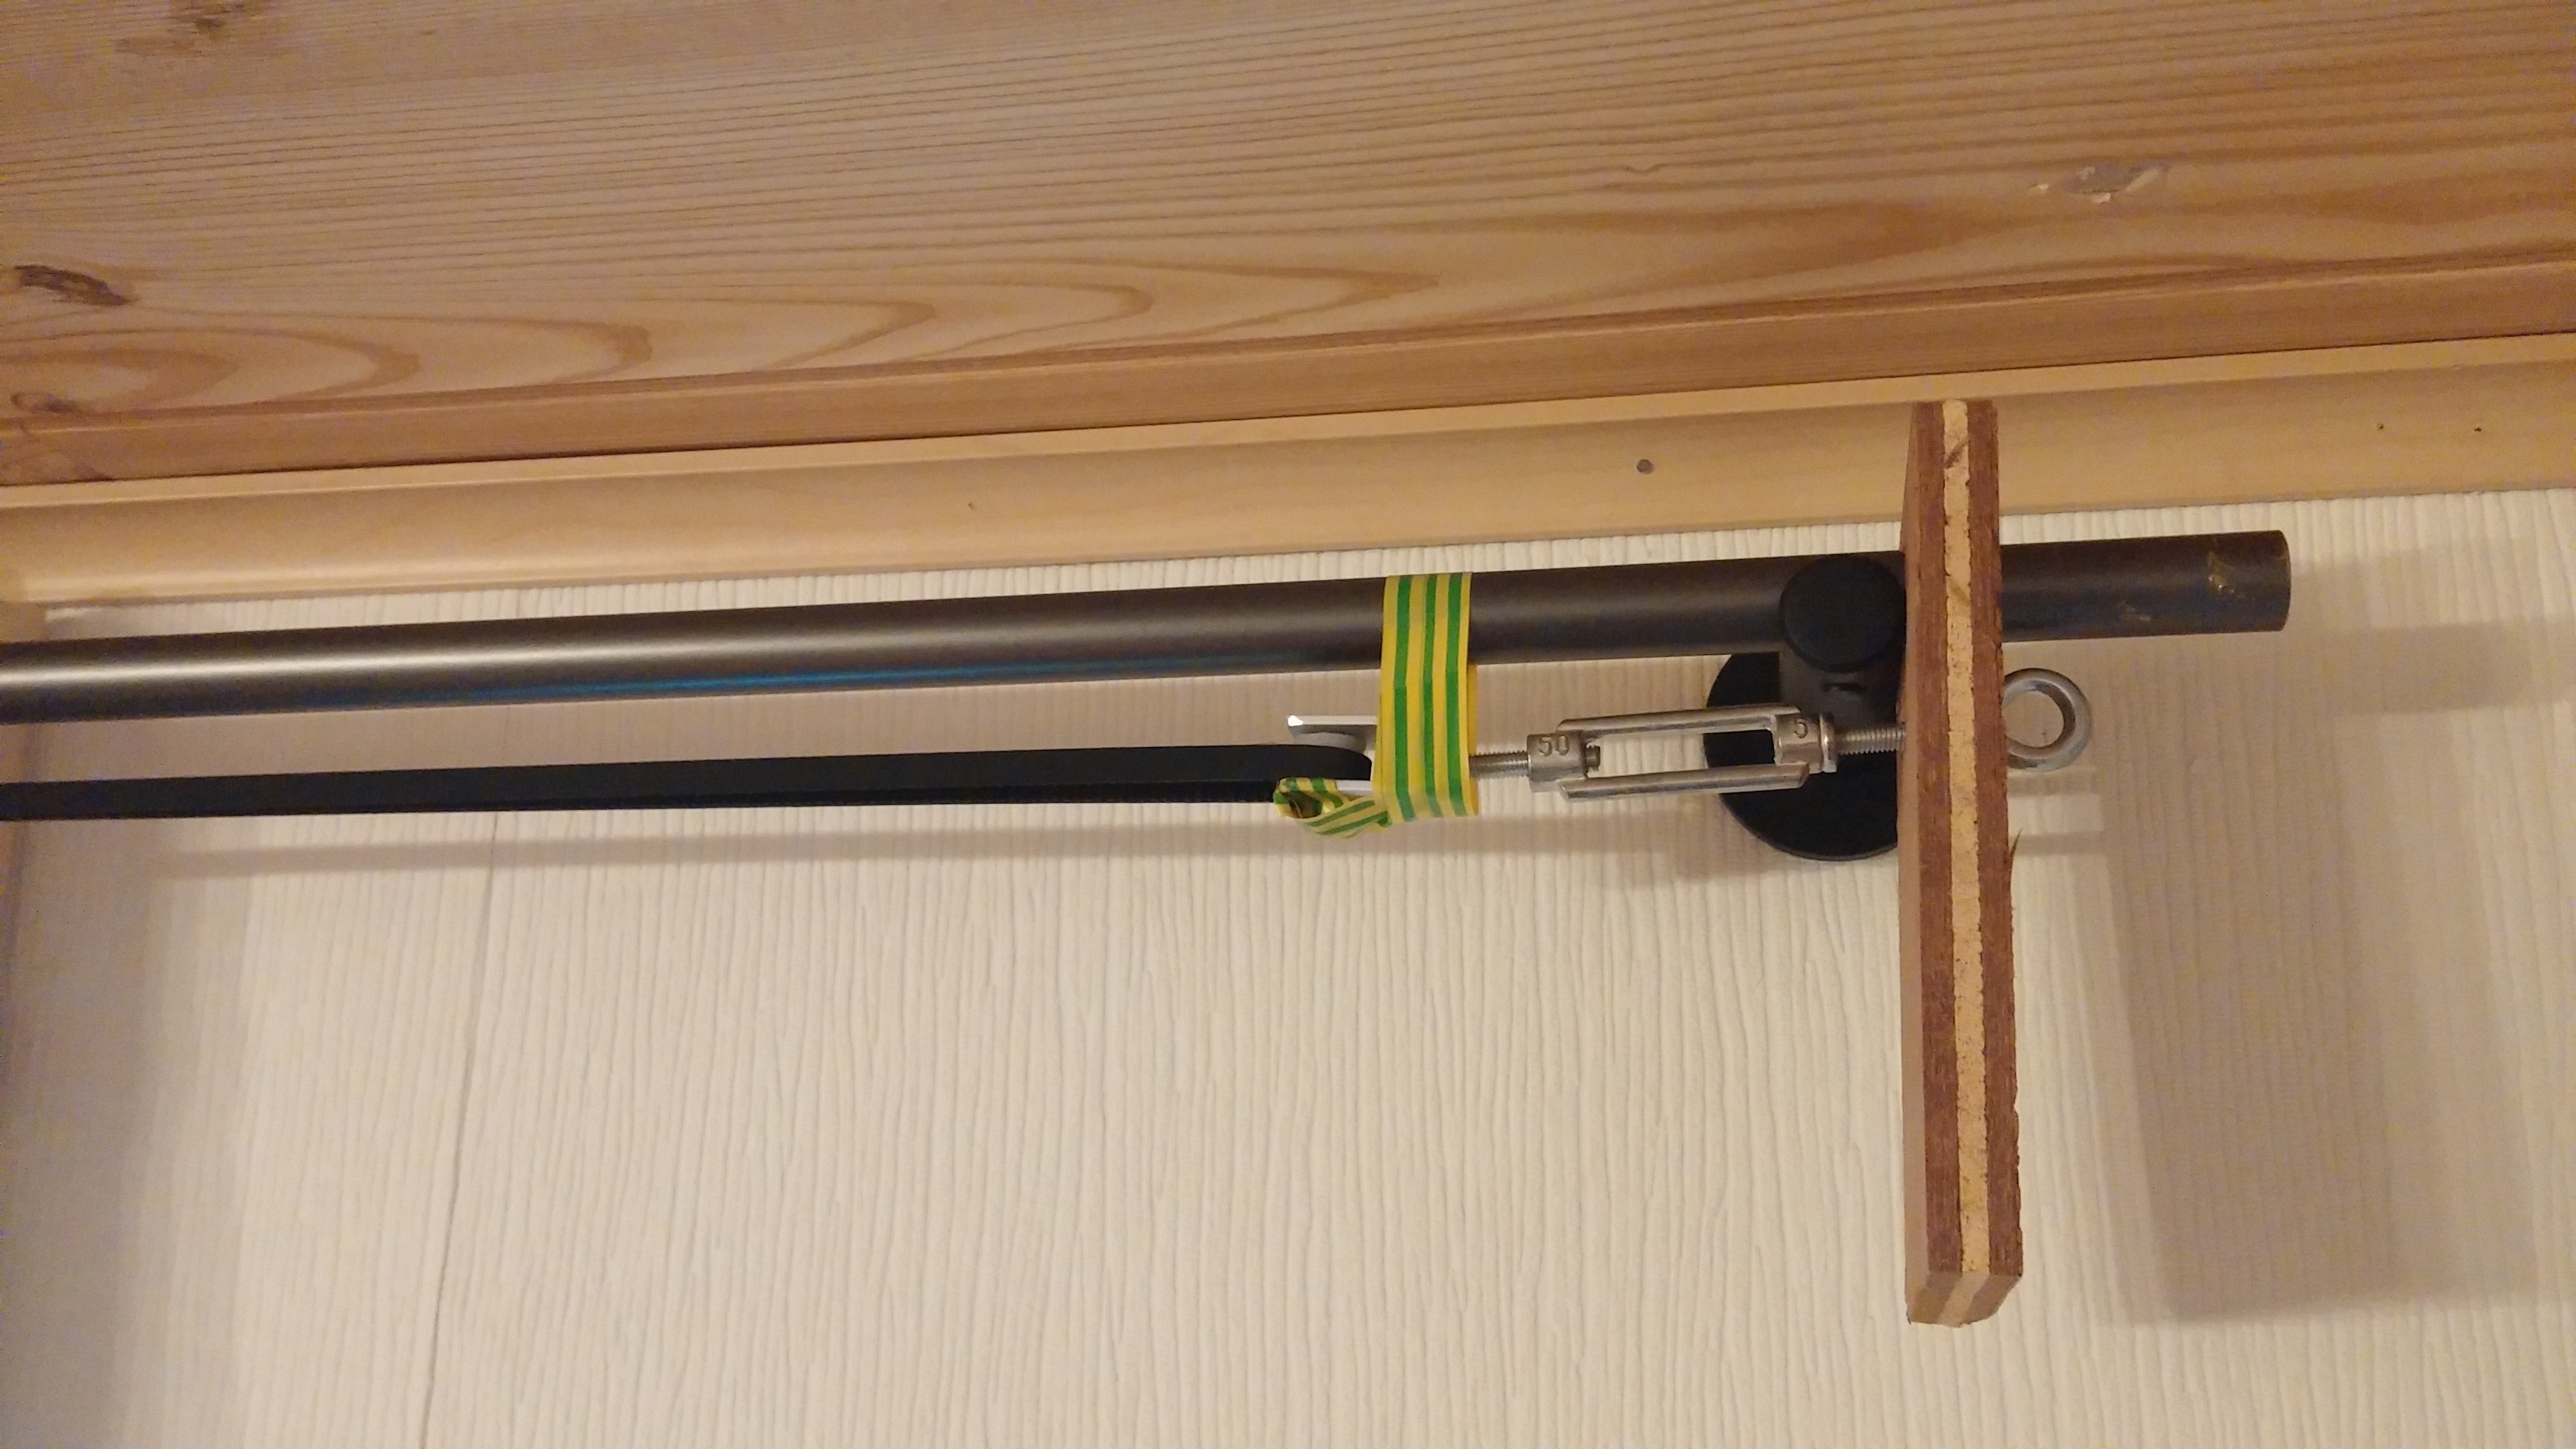
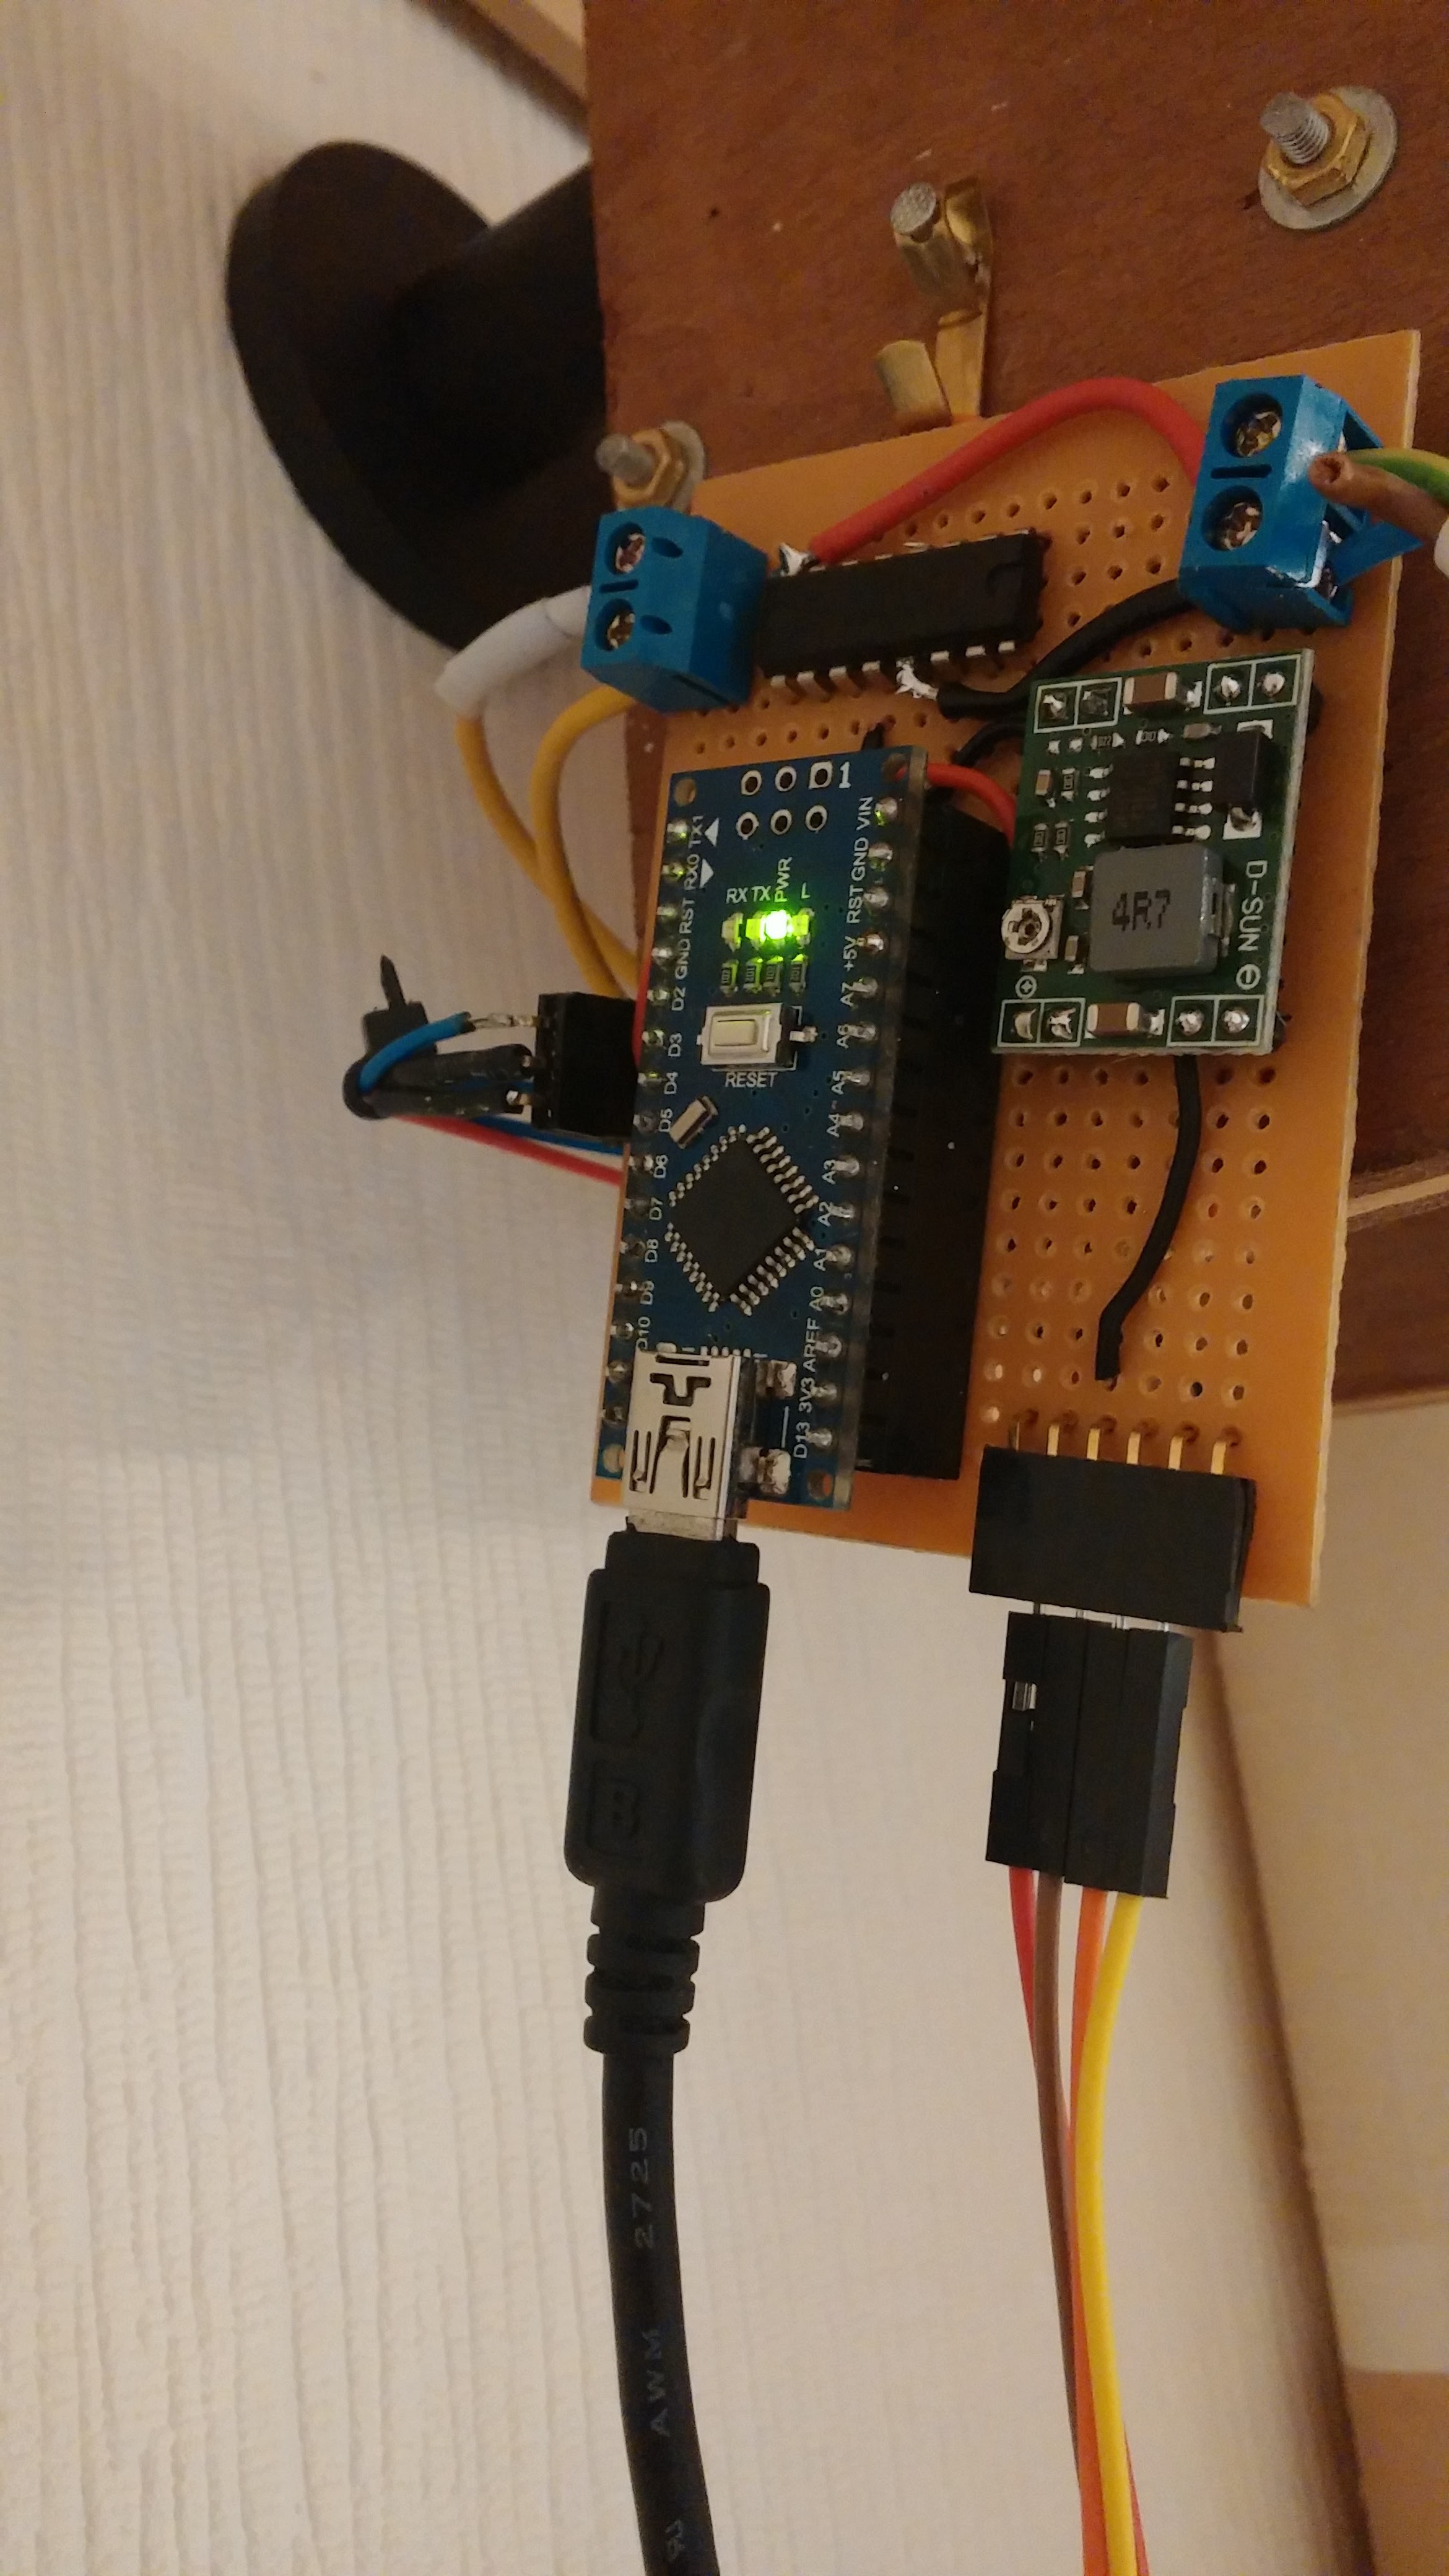
All parts are just shoved on to the curtain rod, so it is easy removeable without remains. The motor is controlled by an L293D and an arduino (I maybe replace it with an ESP 8266). Because the Motor draws quite some power, when powered by a 19V laptop charger, I had to combine both channels of the L293D. I also attached small magnets to the belt and reed contacts to the motor mount, so that the arduino is able to detect when the curtains are fully opened or closed. The opposing end holds a belt tightener made out of [previously lego] a turnbuckle. I originally planned to attach a weight with a string to the pulley slider, but the weight must be too heavy to generate enough force. [So I just pushed small sheets of cardboard between the wood and the curtain bracket until the tension was good]. The photo shows the original design without bodged cardboard.

  • 1 × Arduino
  • 1 × strong motor e.g. from an old printer
  • 1 × L293D QUADRUPLE HALF-H DRIVER
  • 1 × GT2 timing belt
  • 1 × GT2 pulley

View all 8 components

  • New belt-tightener and WIFI

    M@lte02/11/2016 at 11:50 0 comments

    Because Lego is not quite strong enough to tighten the belt perfectly, I replaced the construction with a turnbuckle and a simple custom made pulley attached to it. With this, I am able to dial in the tension very precise, so that it has no slip but also is not wearing the belt to much. To prevent the belt from being twisted by the new tightener, I secured it with some electrical tape.


    Here is also a picture of the other side with the dc-motor and its gear.


    To be enable to integrate this project into my home automation, I attached an ESP 8266 to the arduino.
    It is connected via serial and currently just hangs from the wires under the arduino but i plan to move it somewhere else in the room, to attach more sensors for my home automation to it.


    As you can see, there is an voltage regulator on the board, but it seems to be broken and just produces 19V (the supply voltage from the ac-adapter), so i still use an USB adapter.

  • it's working

    M@lte01/02/2016 at 23:06 0 comments

    I have finished all the hardware and wrote a simple program to test the functionality. Currently the arduino is controlled by my laptop over USB, but I will upgrade it to WIFI very soon.

View all 2 project logs

Enjoy this project?

Share

Discussions

sanchit-agarwal wrote 04/12/2018 at 07:35 point

Very nice !!

I am also trying to setup this on my curtains but i couldn't figure out the mechanics. How to attach the belt to the curtains and stuff. My curtains have a similar design as yours. Could you please help me out ?

I am attaching a photo of my curtains for better clarity.

https://drive.google.com/file/d/1GCehHbsNjfI6-n67i2CF41omLuLAiO5J/view?usp=drivesdk

  Are you sure? yes | no

Jean-Christophe Duperron wrote 02/11/2016 at 05:53 point

Pretty nice! So silent! Having a link to your driver? The printer motor is it an step motor?

I have both but still not try to drive it...

Tell us if your able to tell your drive with an esp8266.

More photos of the curtain trail and hook will be appreciated!

I'll share if I manage to send command with my allready installed raspberry pi / MQTT /openhab to an esp8266 and participate to your h@ck!

Kudos!

Update: I found this for you... and I

http://blog.nyl.io/esp8266-motor/

  Are you sure? yes | no

M@lte wrote 02/11/2016 at 11:57 point

As mentioend in the description, I use a L293D to drive the motor. Here is a link to the datasheet: http://www.ti.com/lit/ds/symlink/l293.pdf
the motor is a normal dc motor, but with the magnets attached to the belt and reed contacts to read their positions, it is possible to drive it from opened to closed state. everything in between would not be very precise, but because i just want to open/close it, this is ok.
I also posted an update with some more pictures.

  Are you sure? yes | no

Similar Projects

Does this project spark your interest?

Become a member to follow this project and never miss any updates