 Maarten Janssen
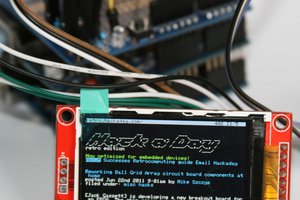
I designed this handheld around the Sharp LM15SGFNZ07 LCD that I found in my old MC60 phone. A while ago I wrote an Arduino library to control this screen using SPI. I based my implementation on code by Mindogas which was too slow to be practical but gave some excellent insights on how the LCD should be controlled. The LM15SGFNZ07 has a total of 4096 colors and a rather strange resolution of 101x80 pixels.
When I had my library finished I thought it may be fun to try and make my own handheld gaming thingy (it doesn't have a name yet). I wanted it to use cheap parts that are easy to hook up together. So the cost are kept to a minimum and it should be easy enough to build for most hobbyists. The LCD is probably the hardest to come by, but it can be salvaged from scrapped Siemens phones (A65, M55, C60, MC60, S55, A60).
To play tunes and sounds I wrote a little library that I like to call 'Auduino'. It takes a string that defines the tune and plays it in the background. The syntax of the tune string I based on what is common in, among others, Qbasic. For example "T160O4CDEPL8FGAPL16B>CD".
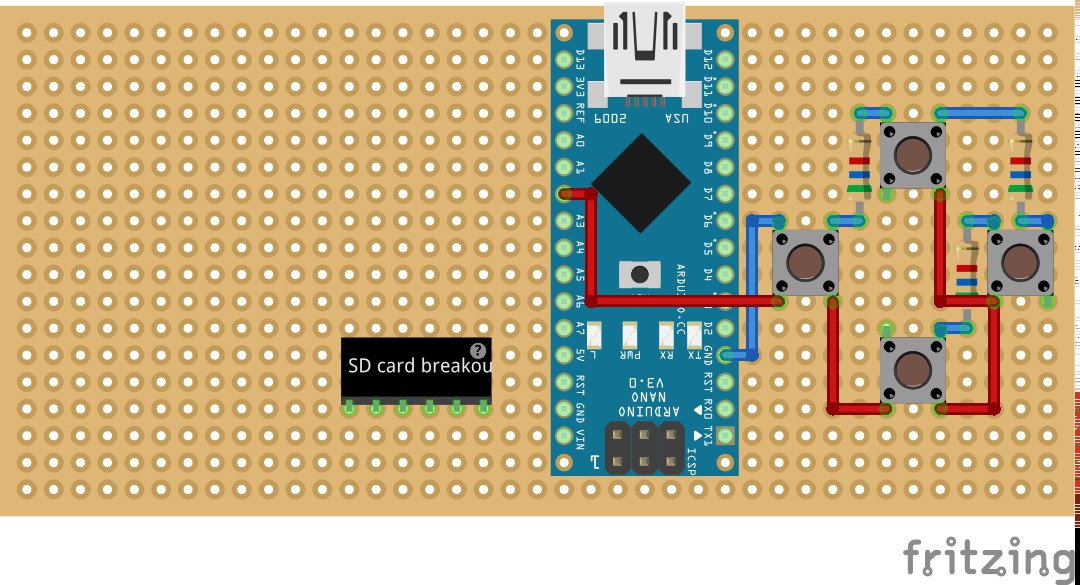
The way the buttons are connected came without putting much thought into it. I planned to connect each button to a digital input, but while soldering I though that it may be better to connect them to an analoge input to save some pins. So there is no real logic in the analoge values assigned to the buttons. The joystick is supposed to be a fully analogue stick, however the range is very small and maxed out about half way from the center. For that reason it's implemented as digital up, down, left, right in the software.
What's still left to do on this:
- Compile all loose bits and pieces of code into a library that can be used with the system
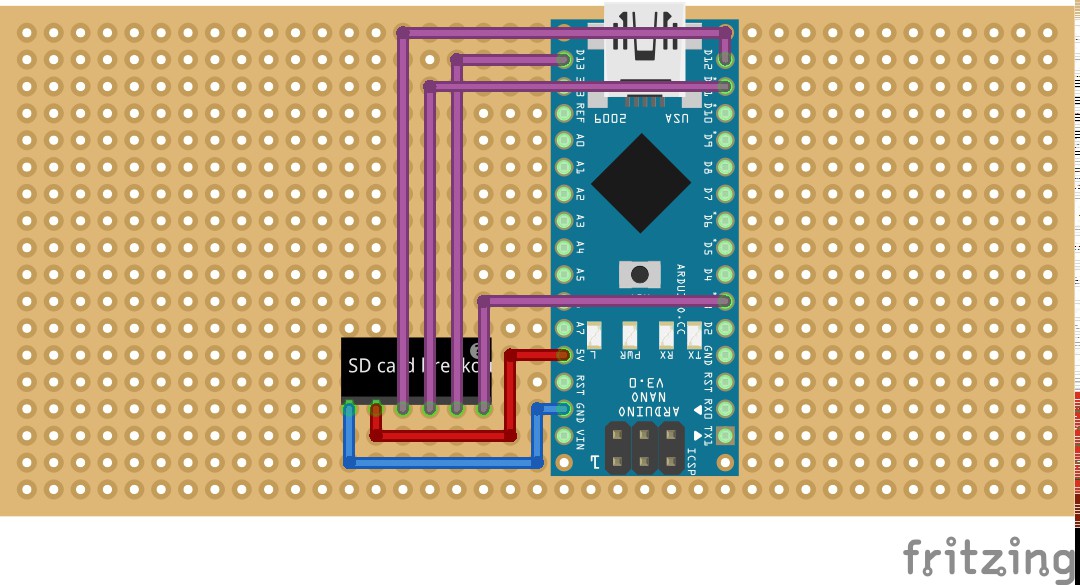
- Strip down the standard SD library so it only contains the bare minimum and there is more space left for the actual program
- Complete the demo game Heartlight (and maybe write some more?)
- Attach a battery
- See if I can 3D print a case for it


 Gilchrist
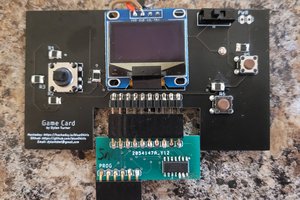
 Dylan Turner
 Valters Mednis
I just found one of these displays in a drawer, thanks for sharing! :)