 Pinomelean
To isolate the copper from the aluminium profiles, i used a long piece of biberglass mosquito net.
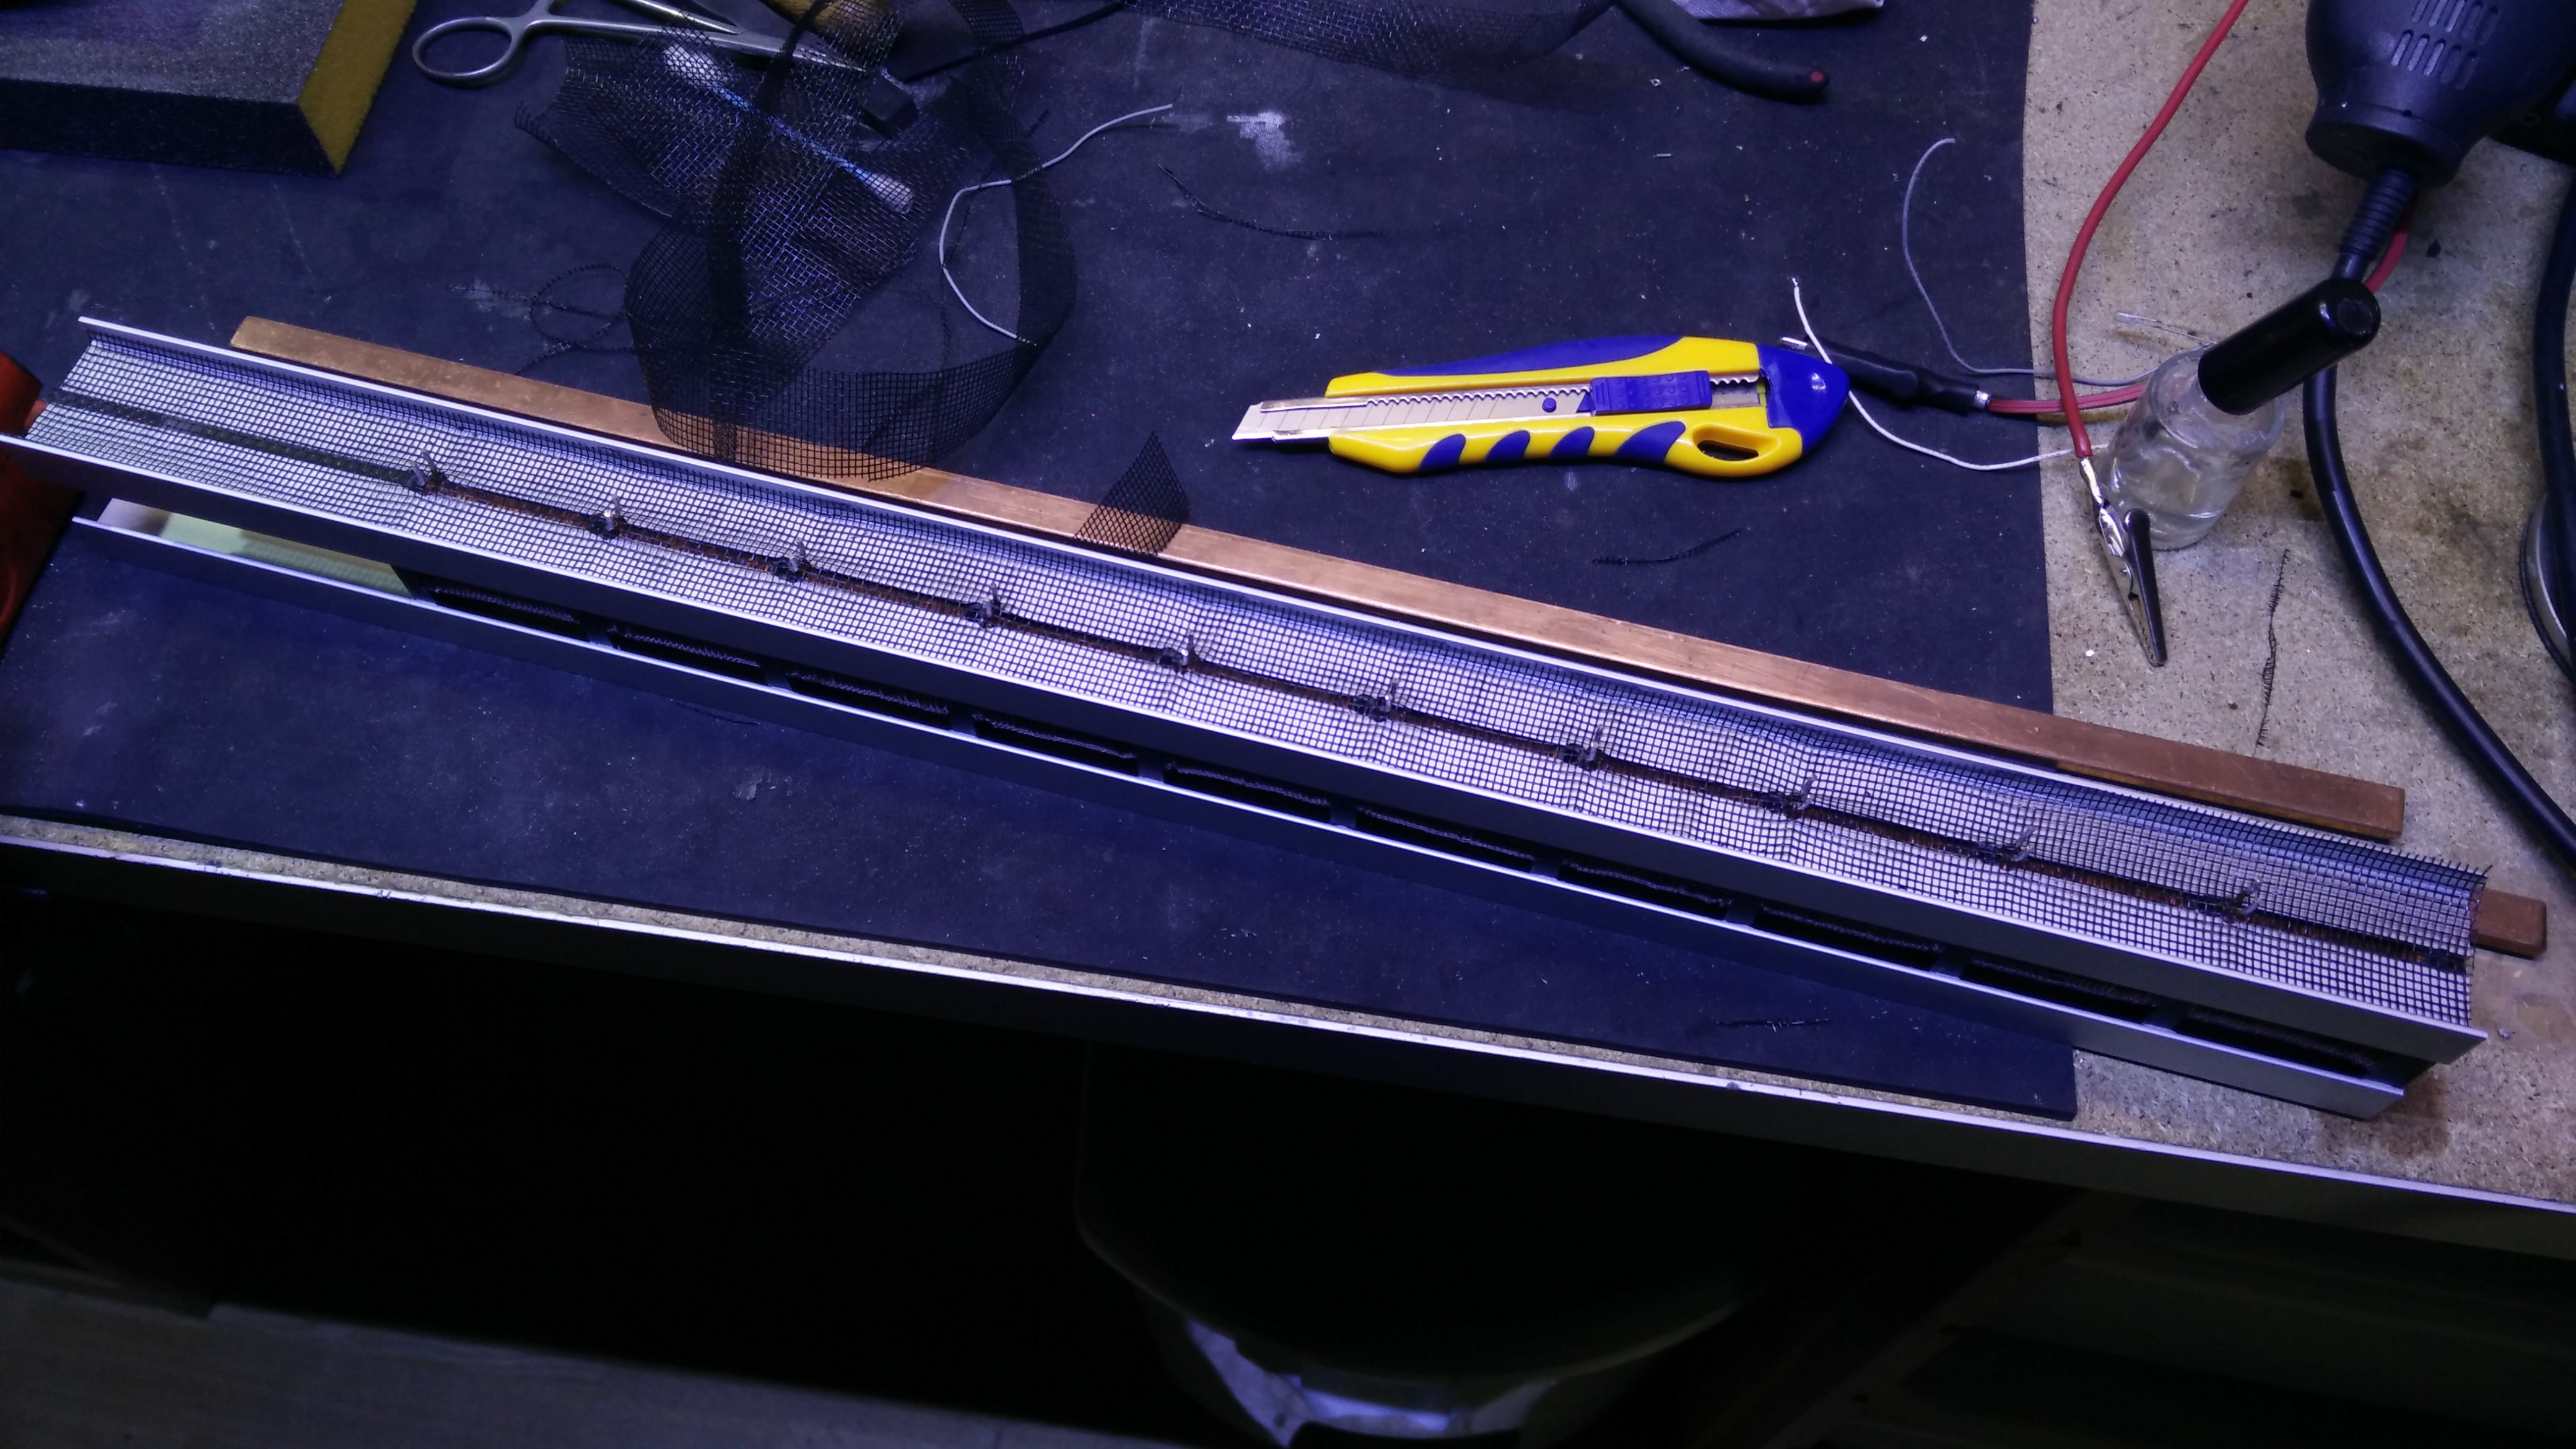
The net keeps the copper from rubbing against the aluminium, keeping them electricaly isolated.
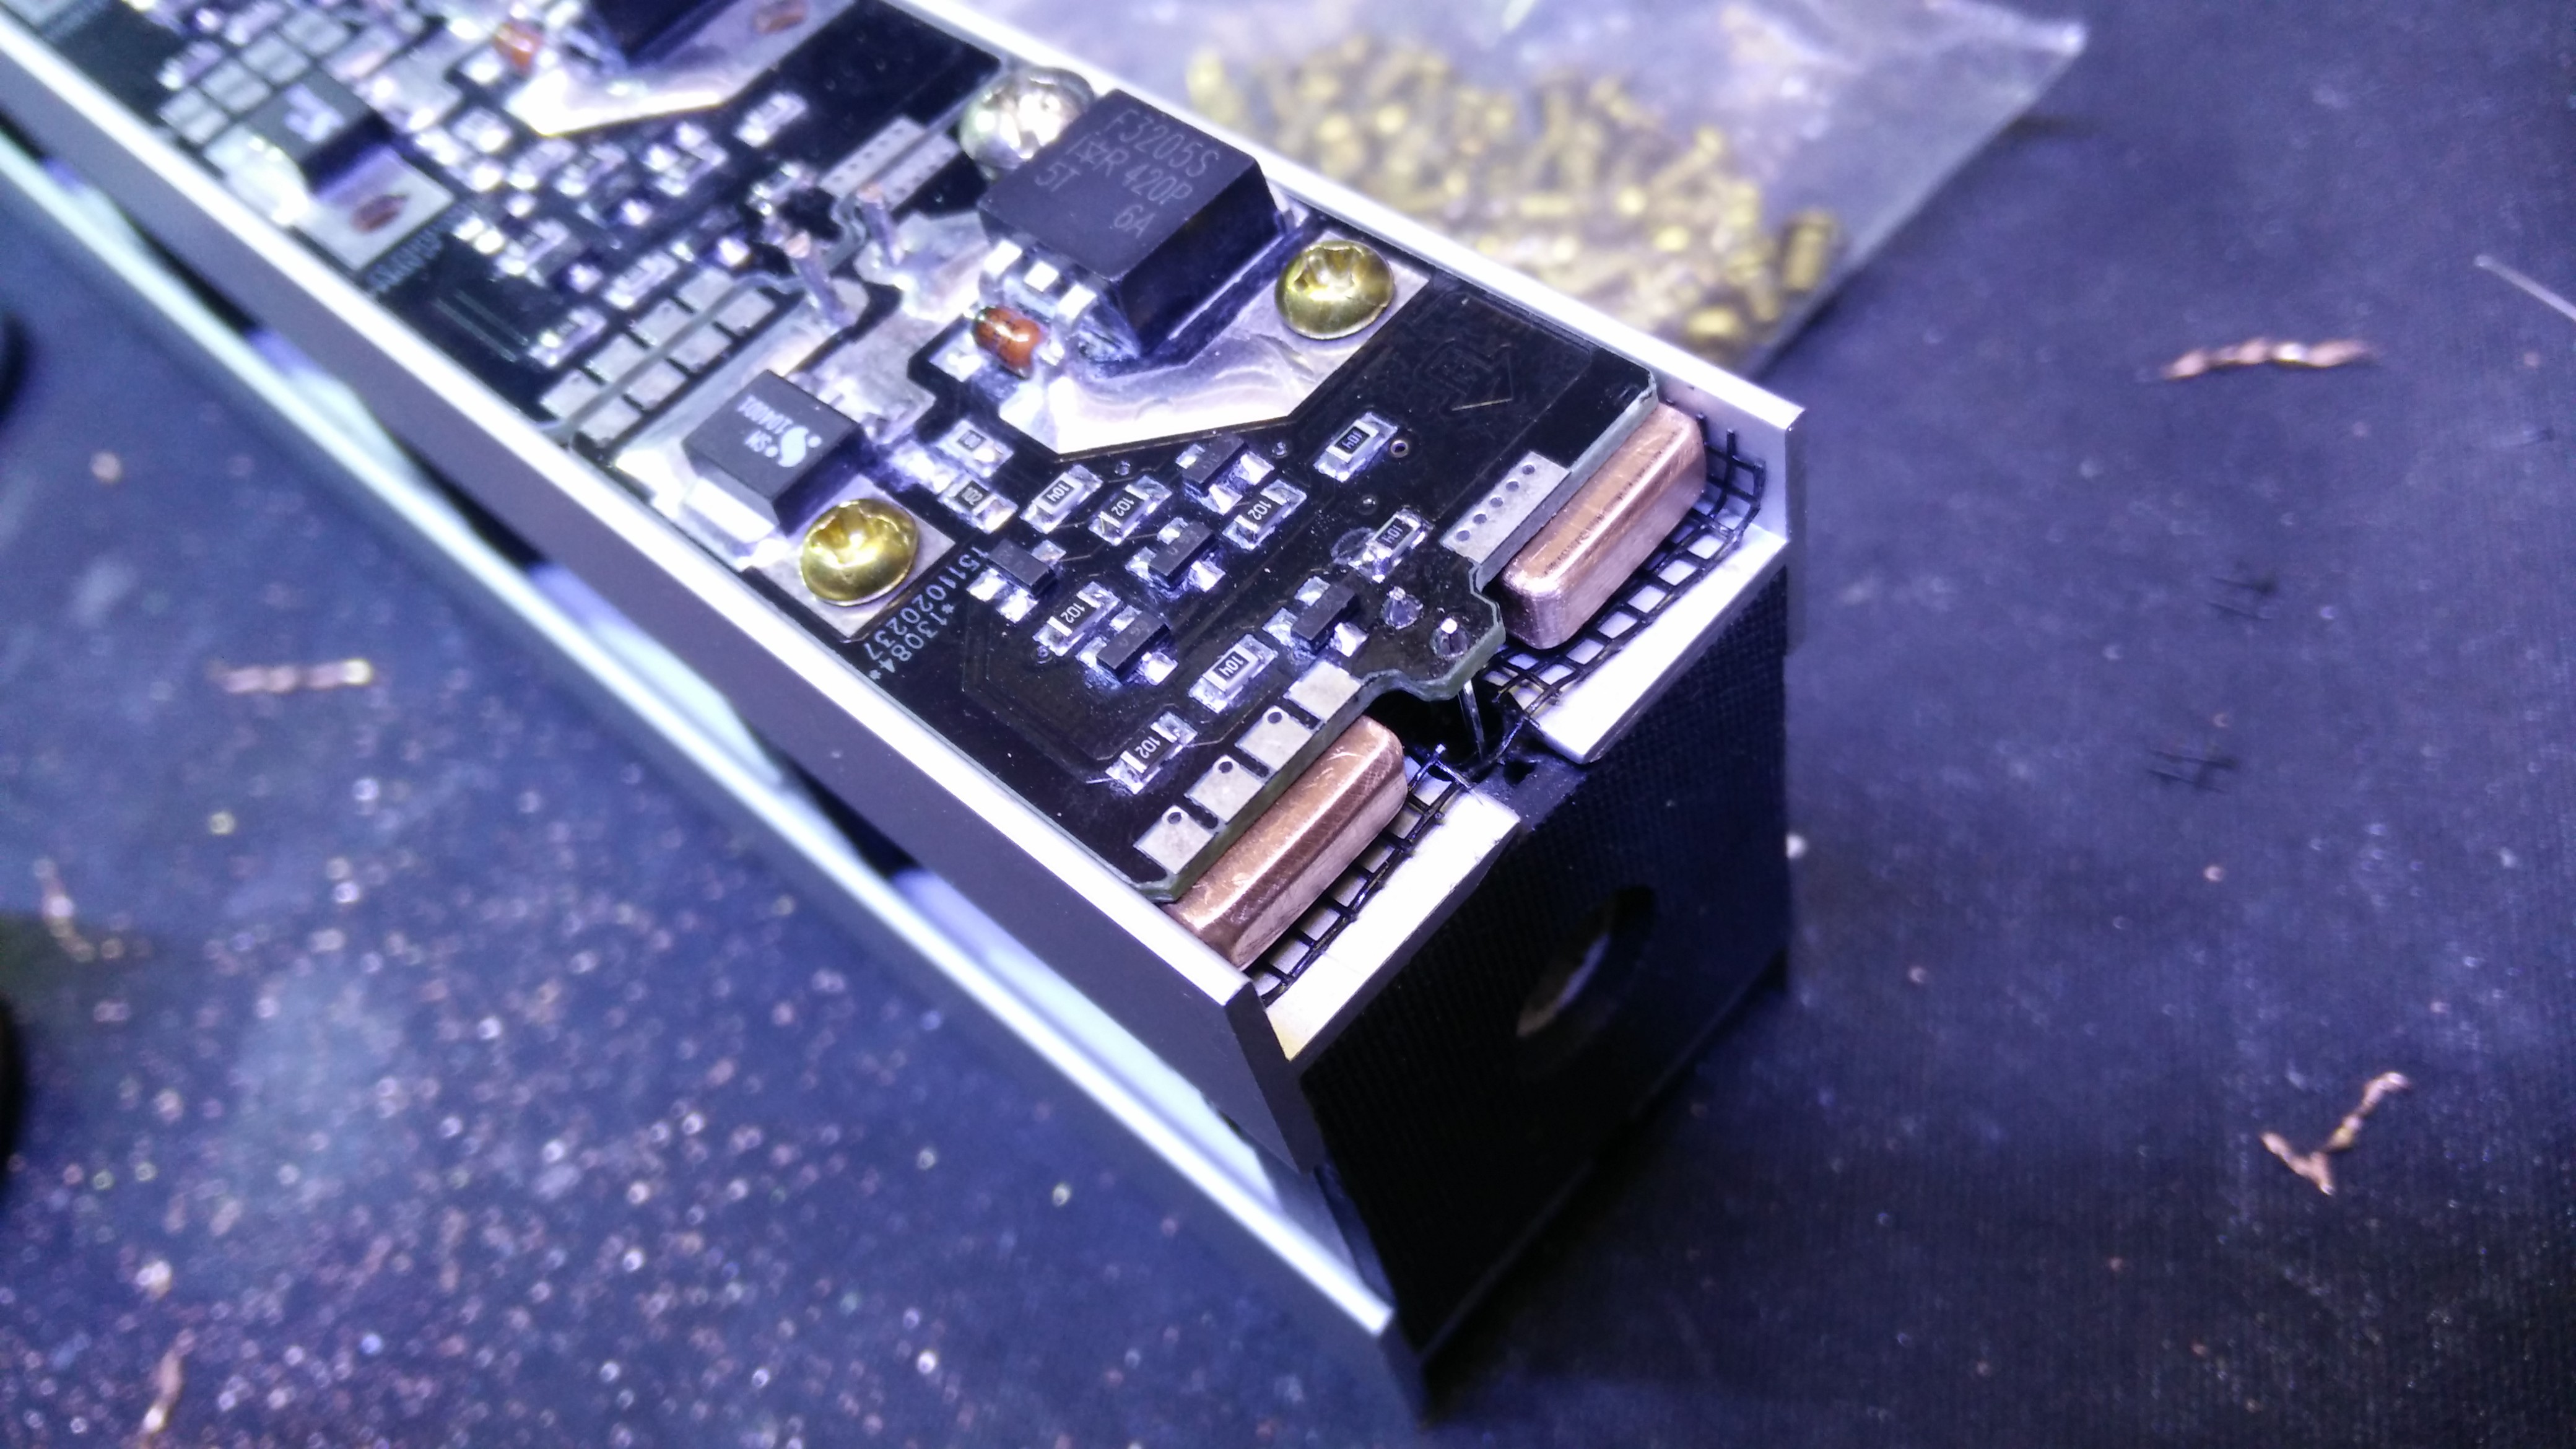
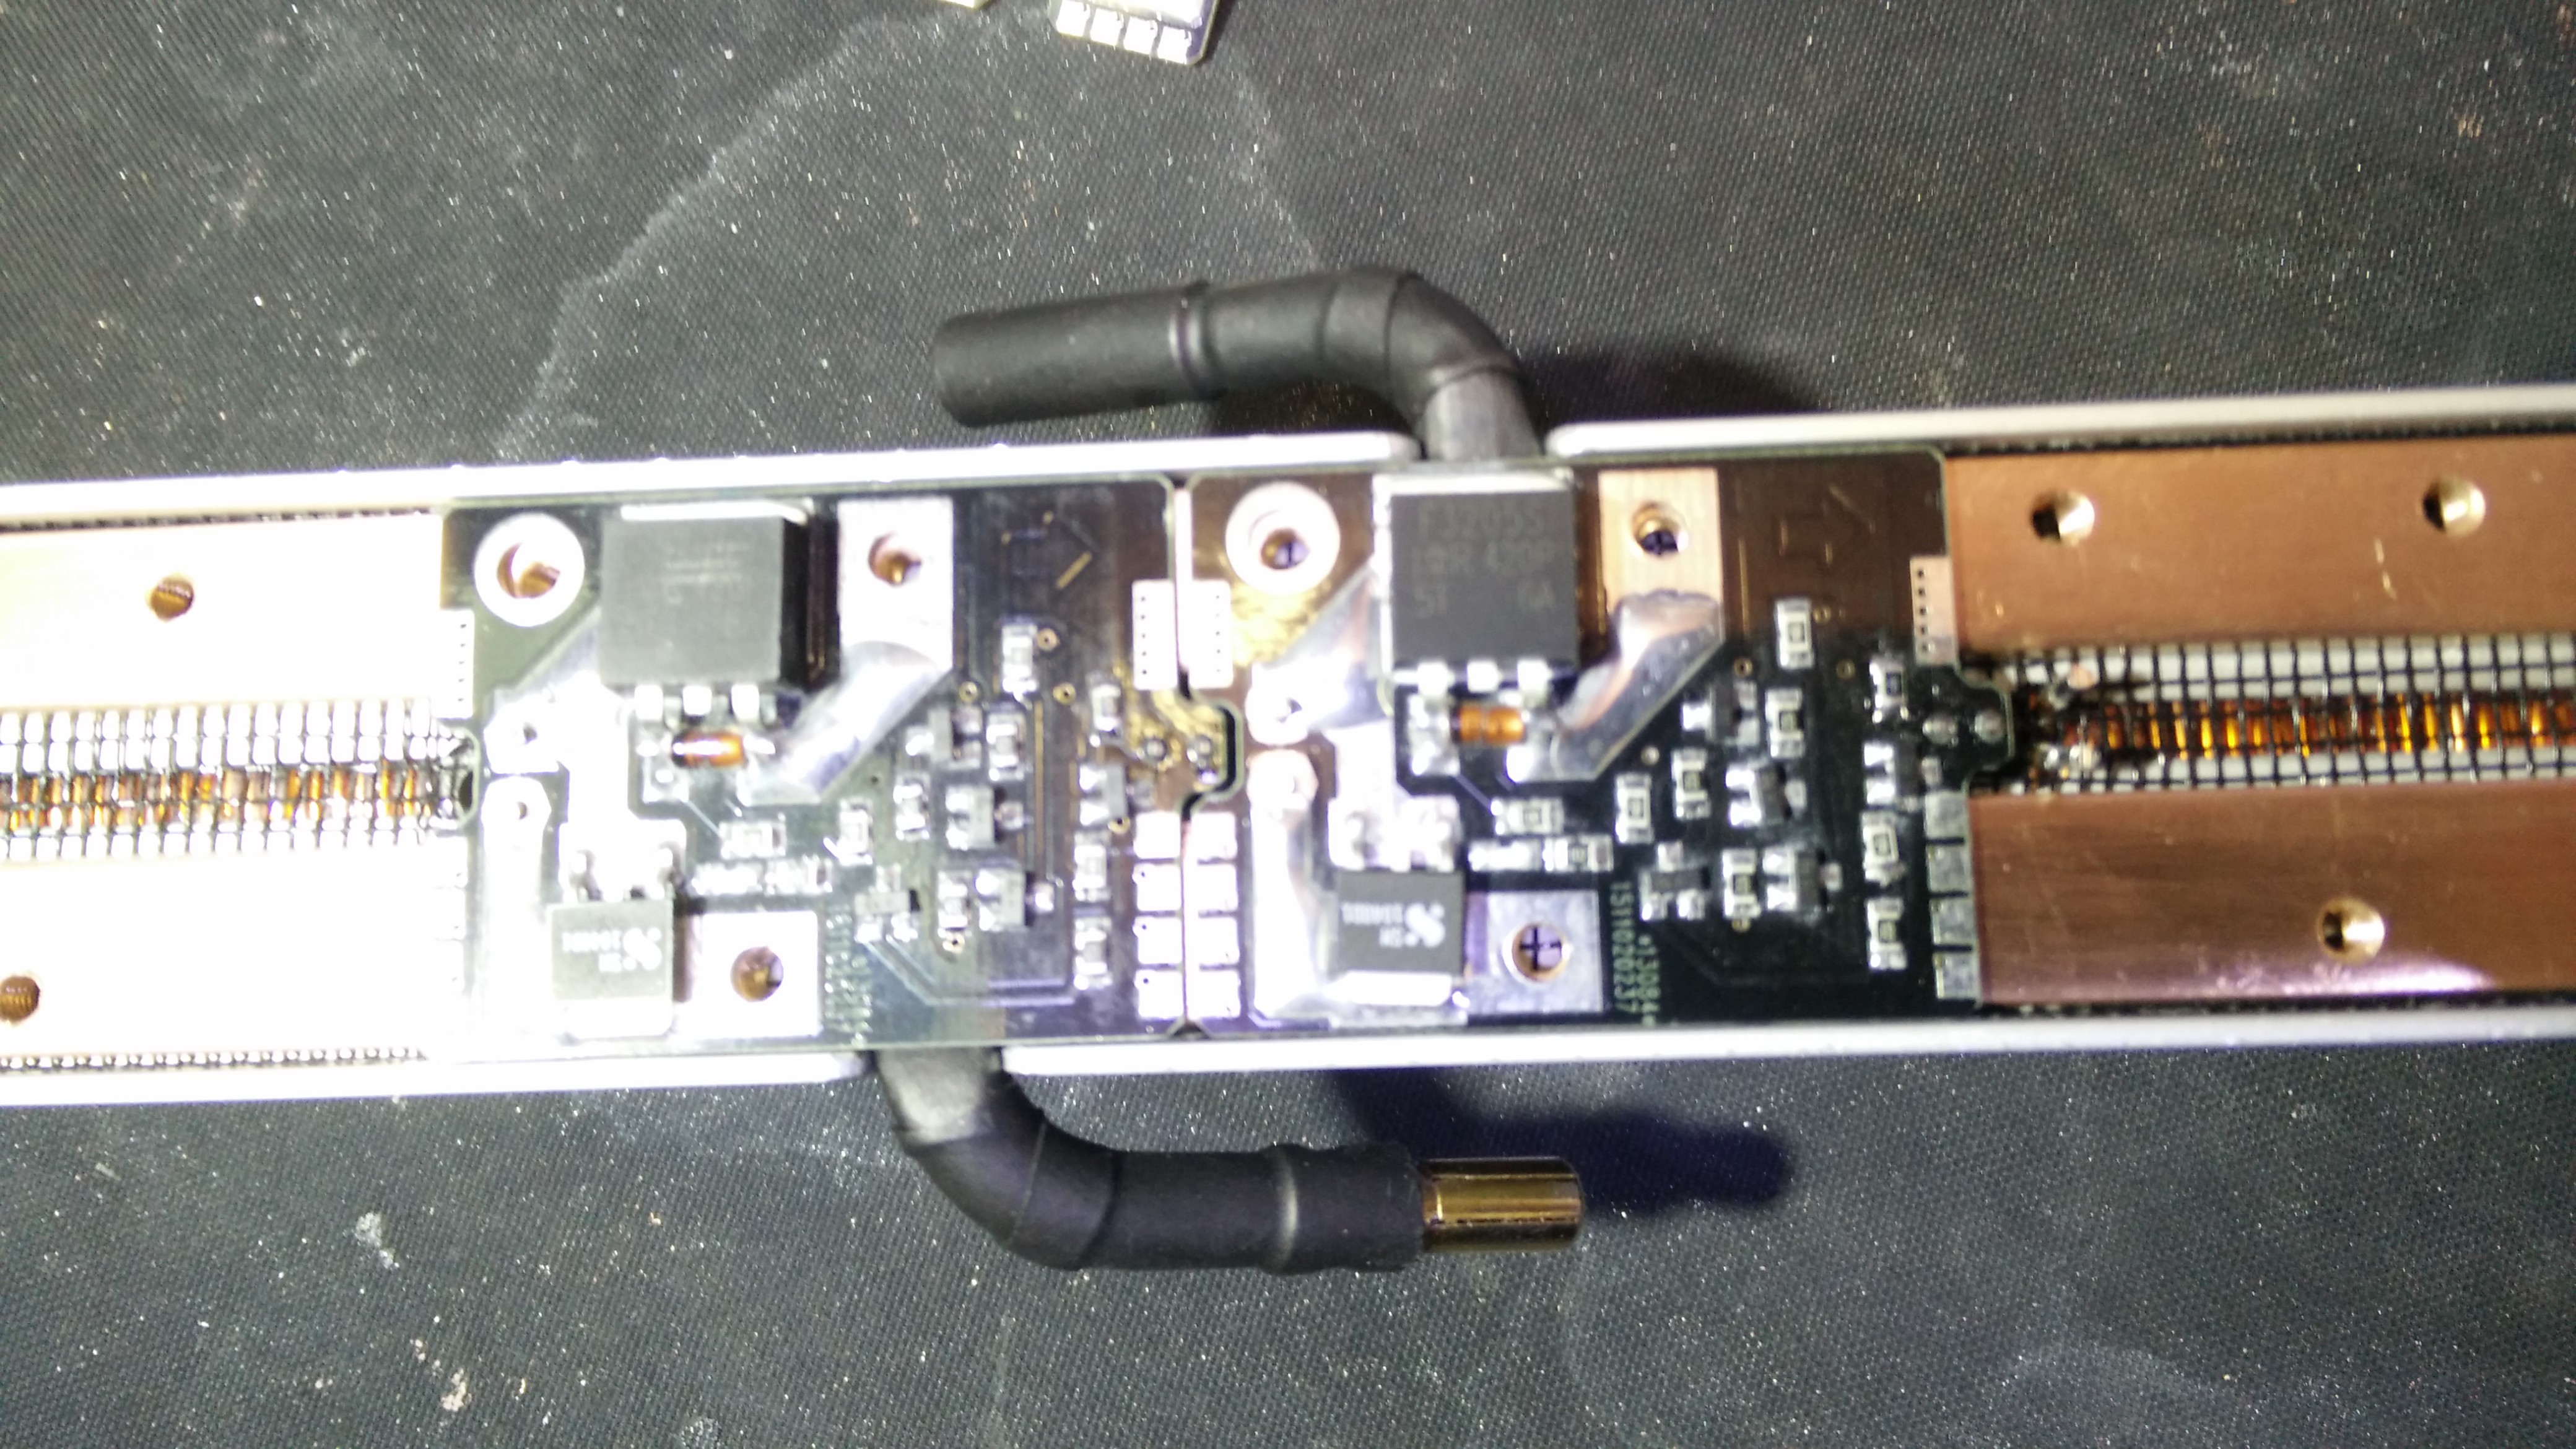
Here you can see how the copper bars sit nicely in the net lined assembly, the PCB fits on the copper bars, and the coil wires and photodiodes have just enough room to get through.
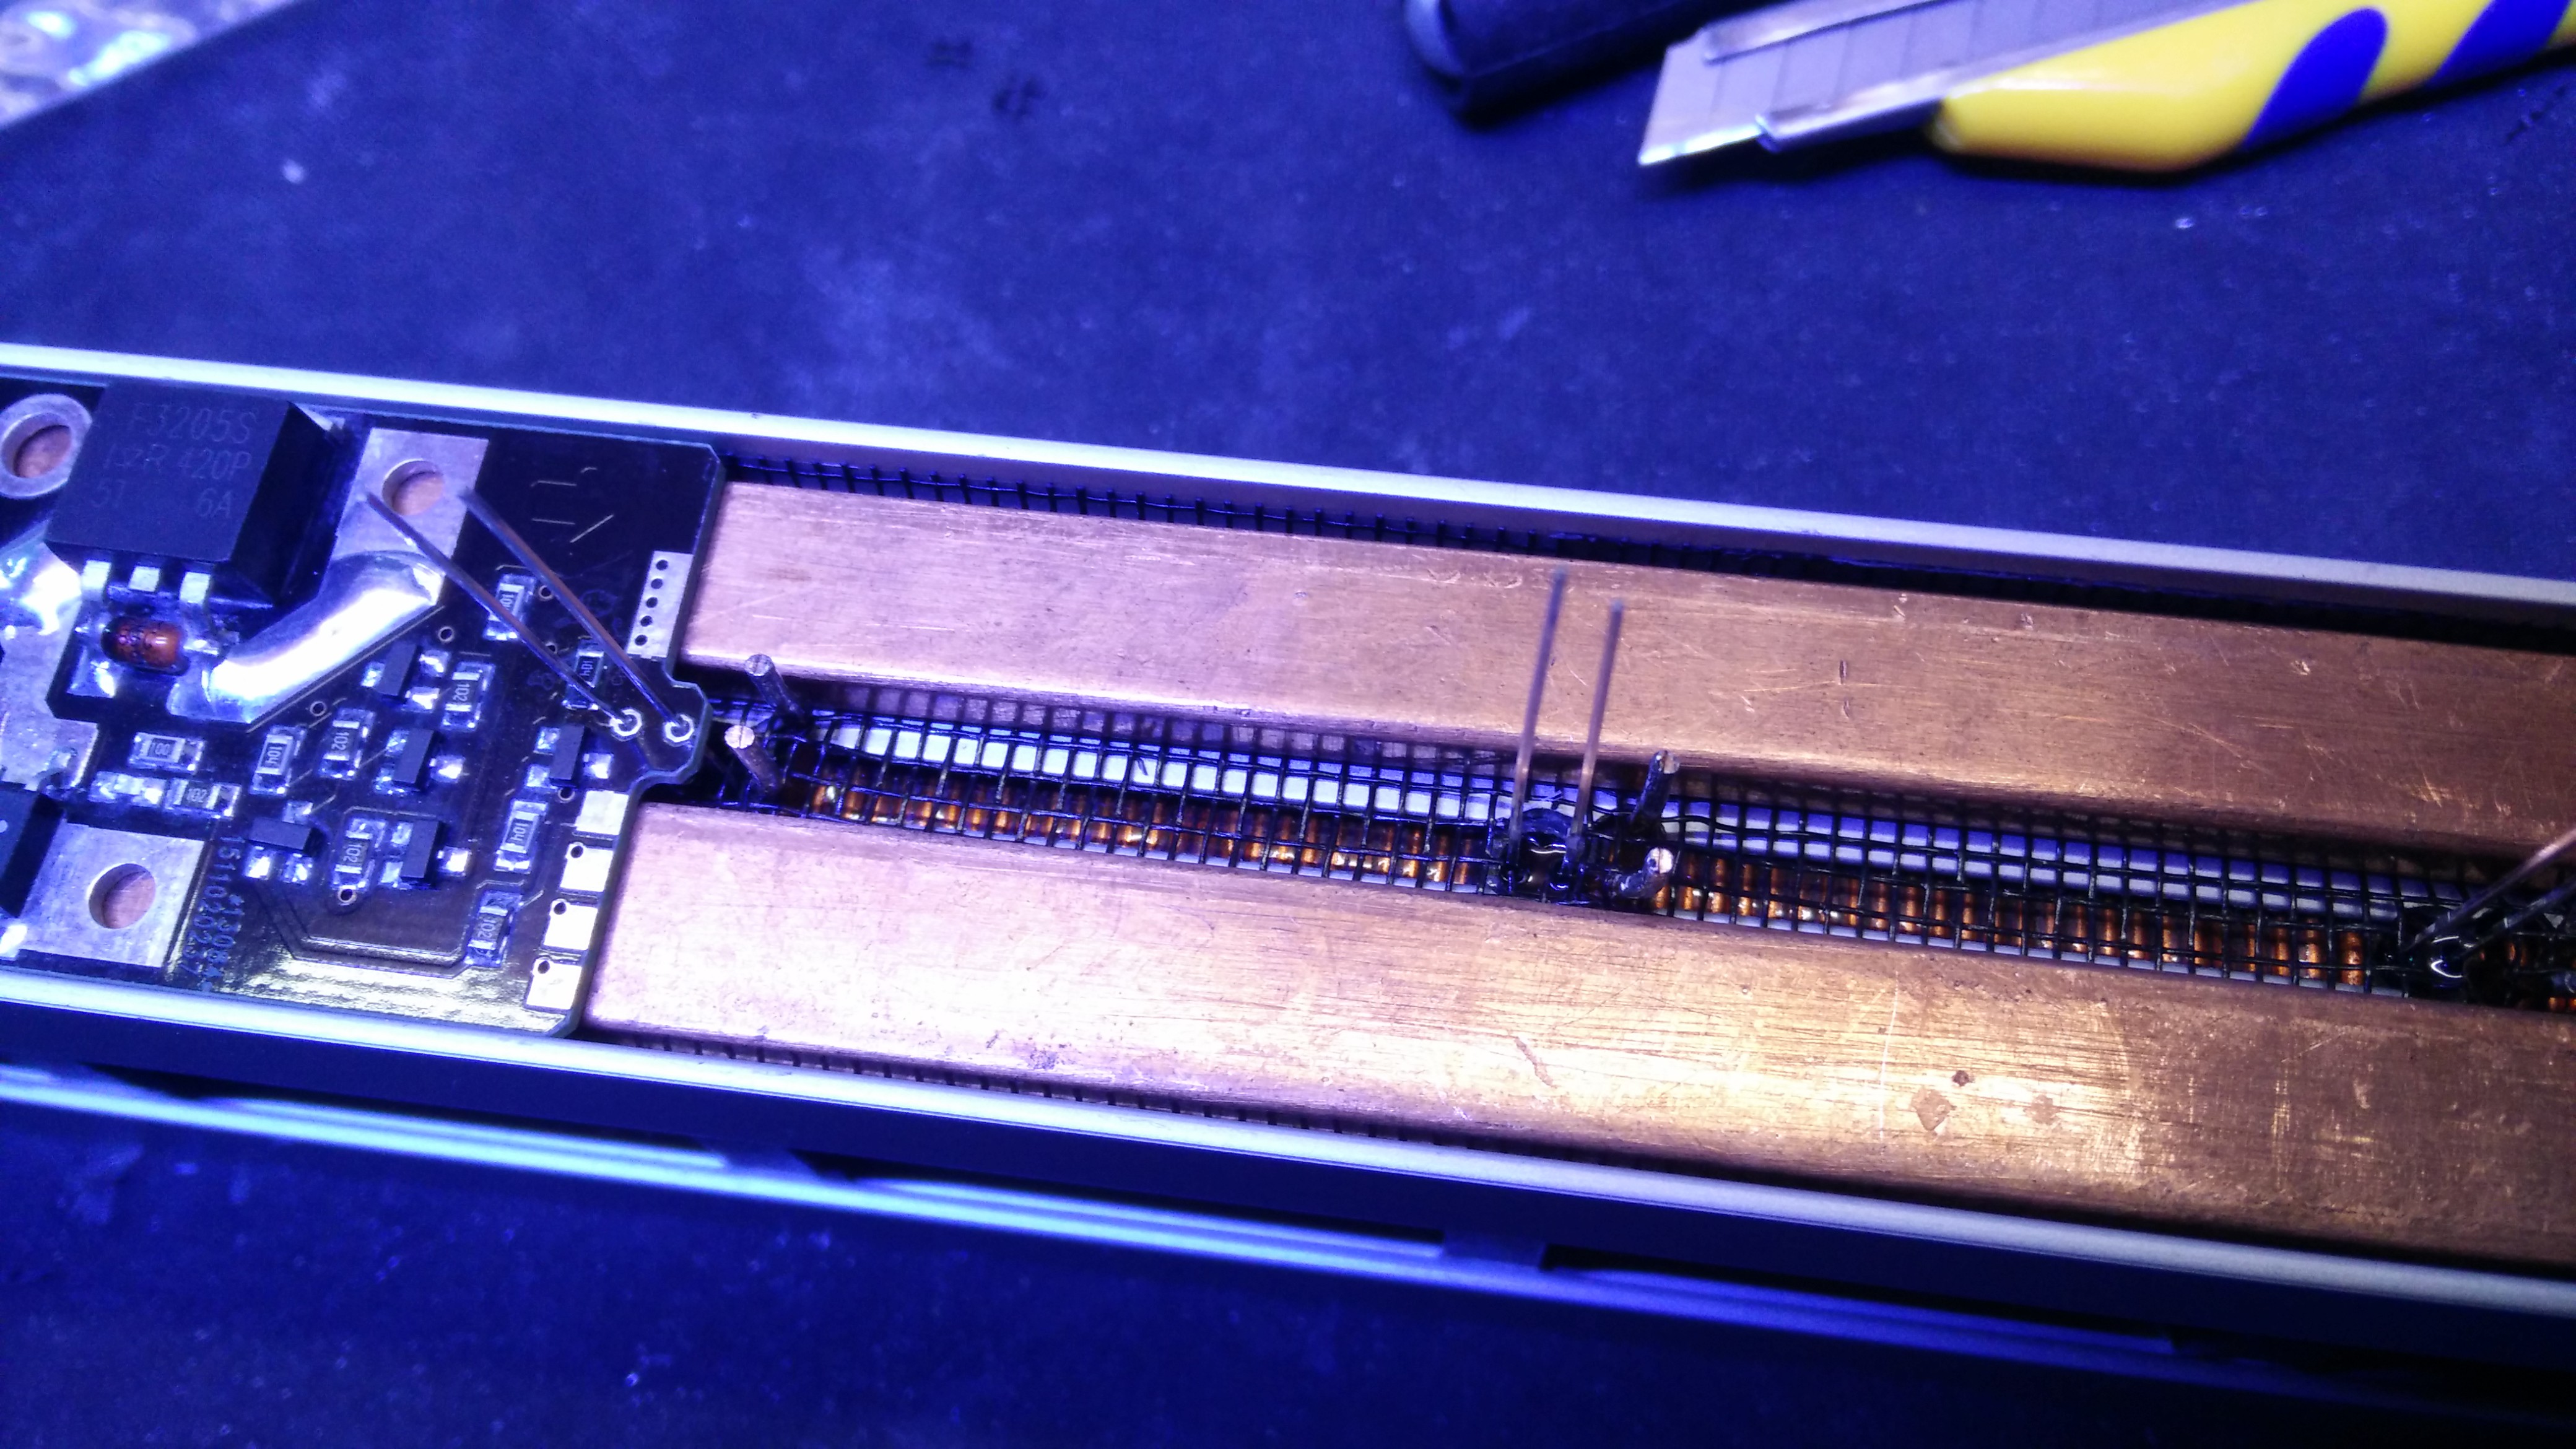
Once all the PCBs were placed, the photodiodes were soldered and the drill positions marked onto the copper bars.
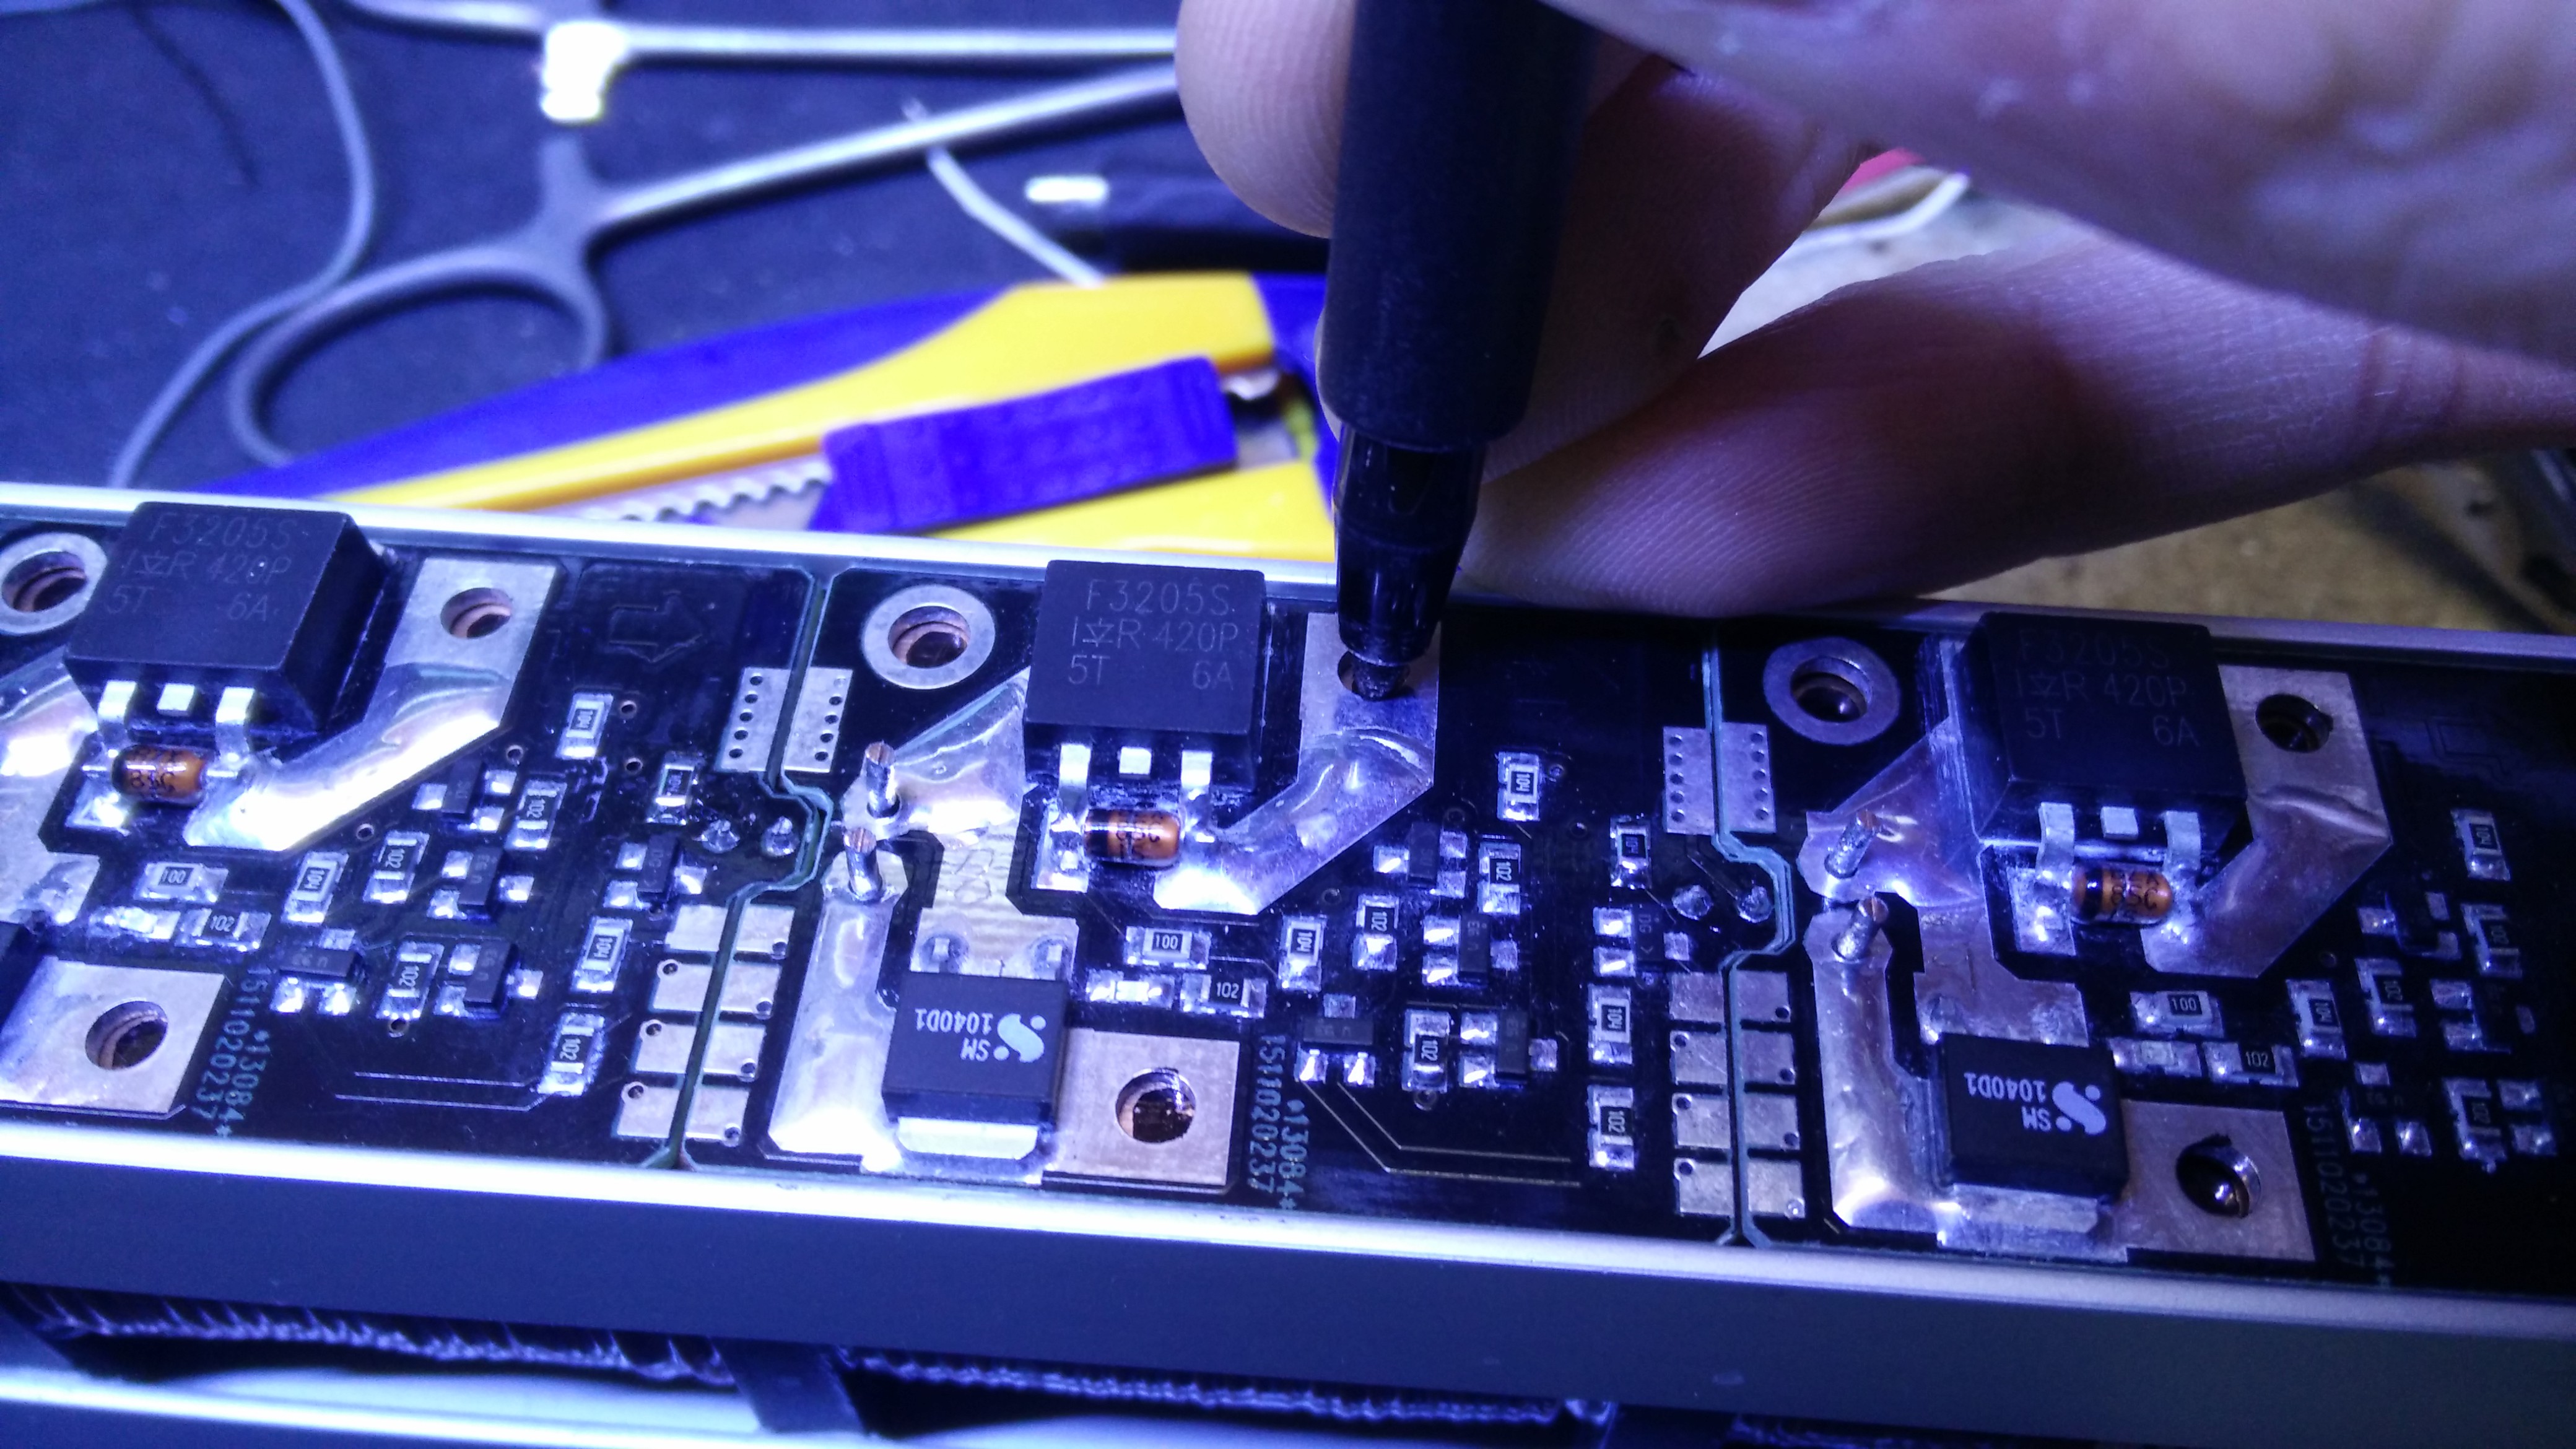
Holes were drilled and taped for M3 screws.
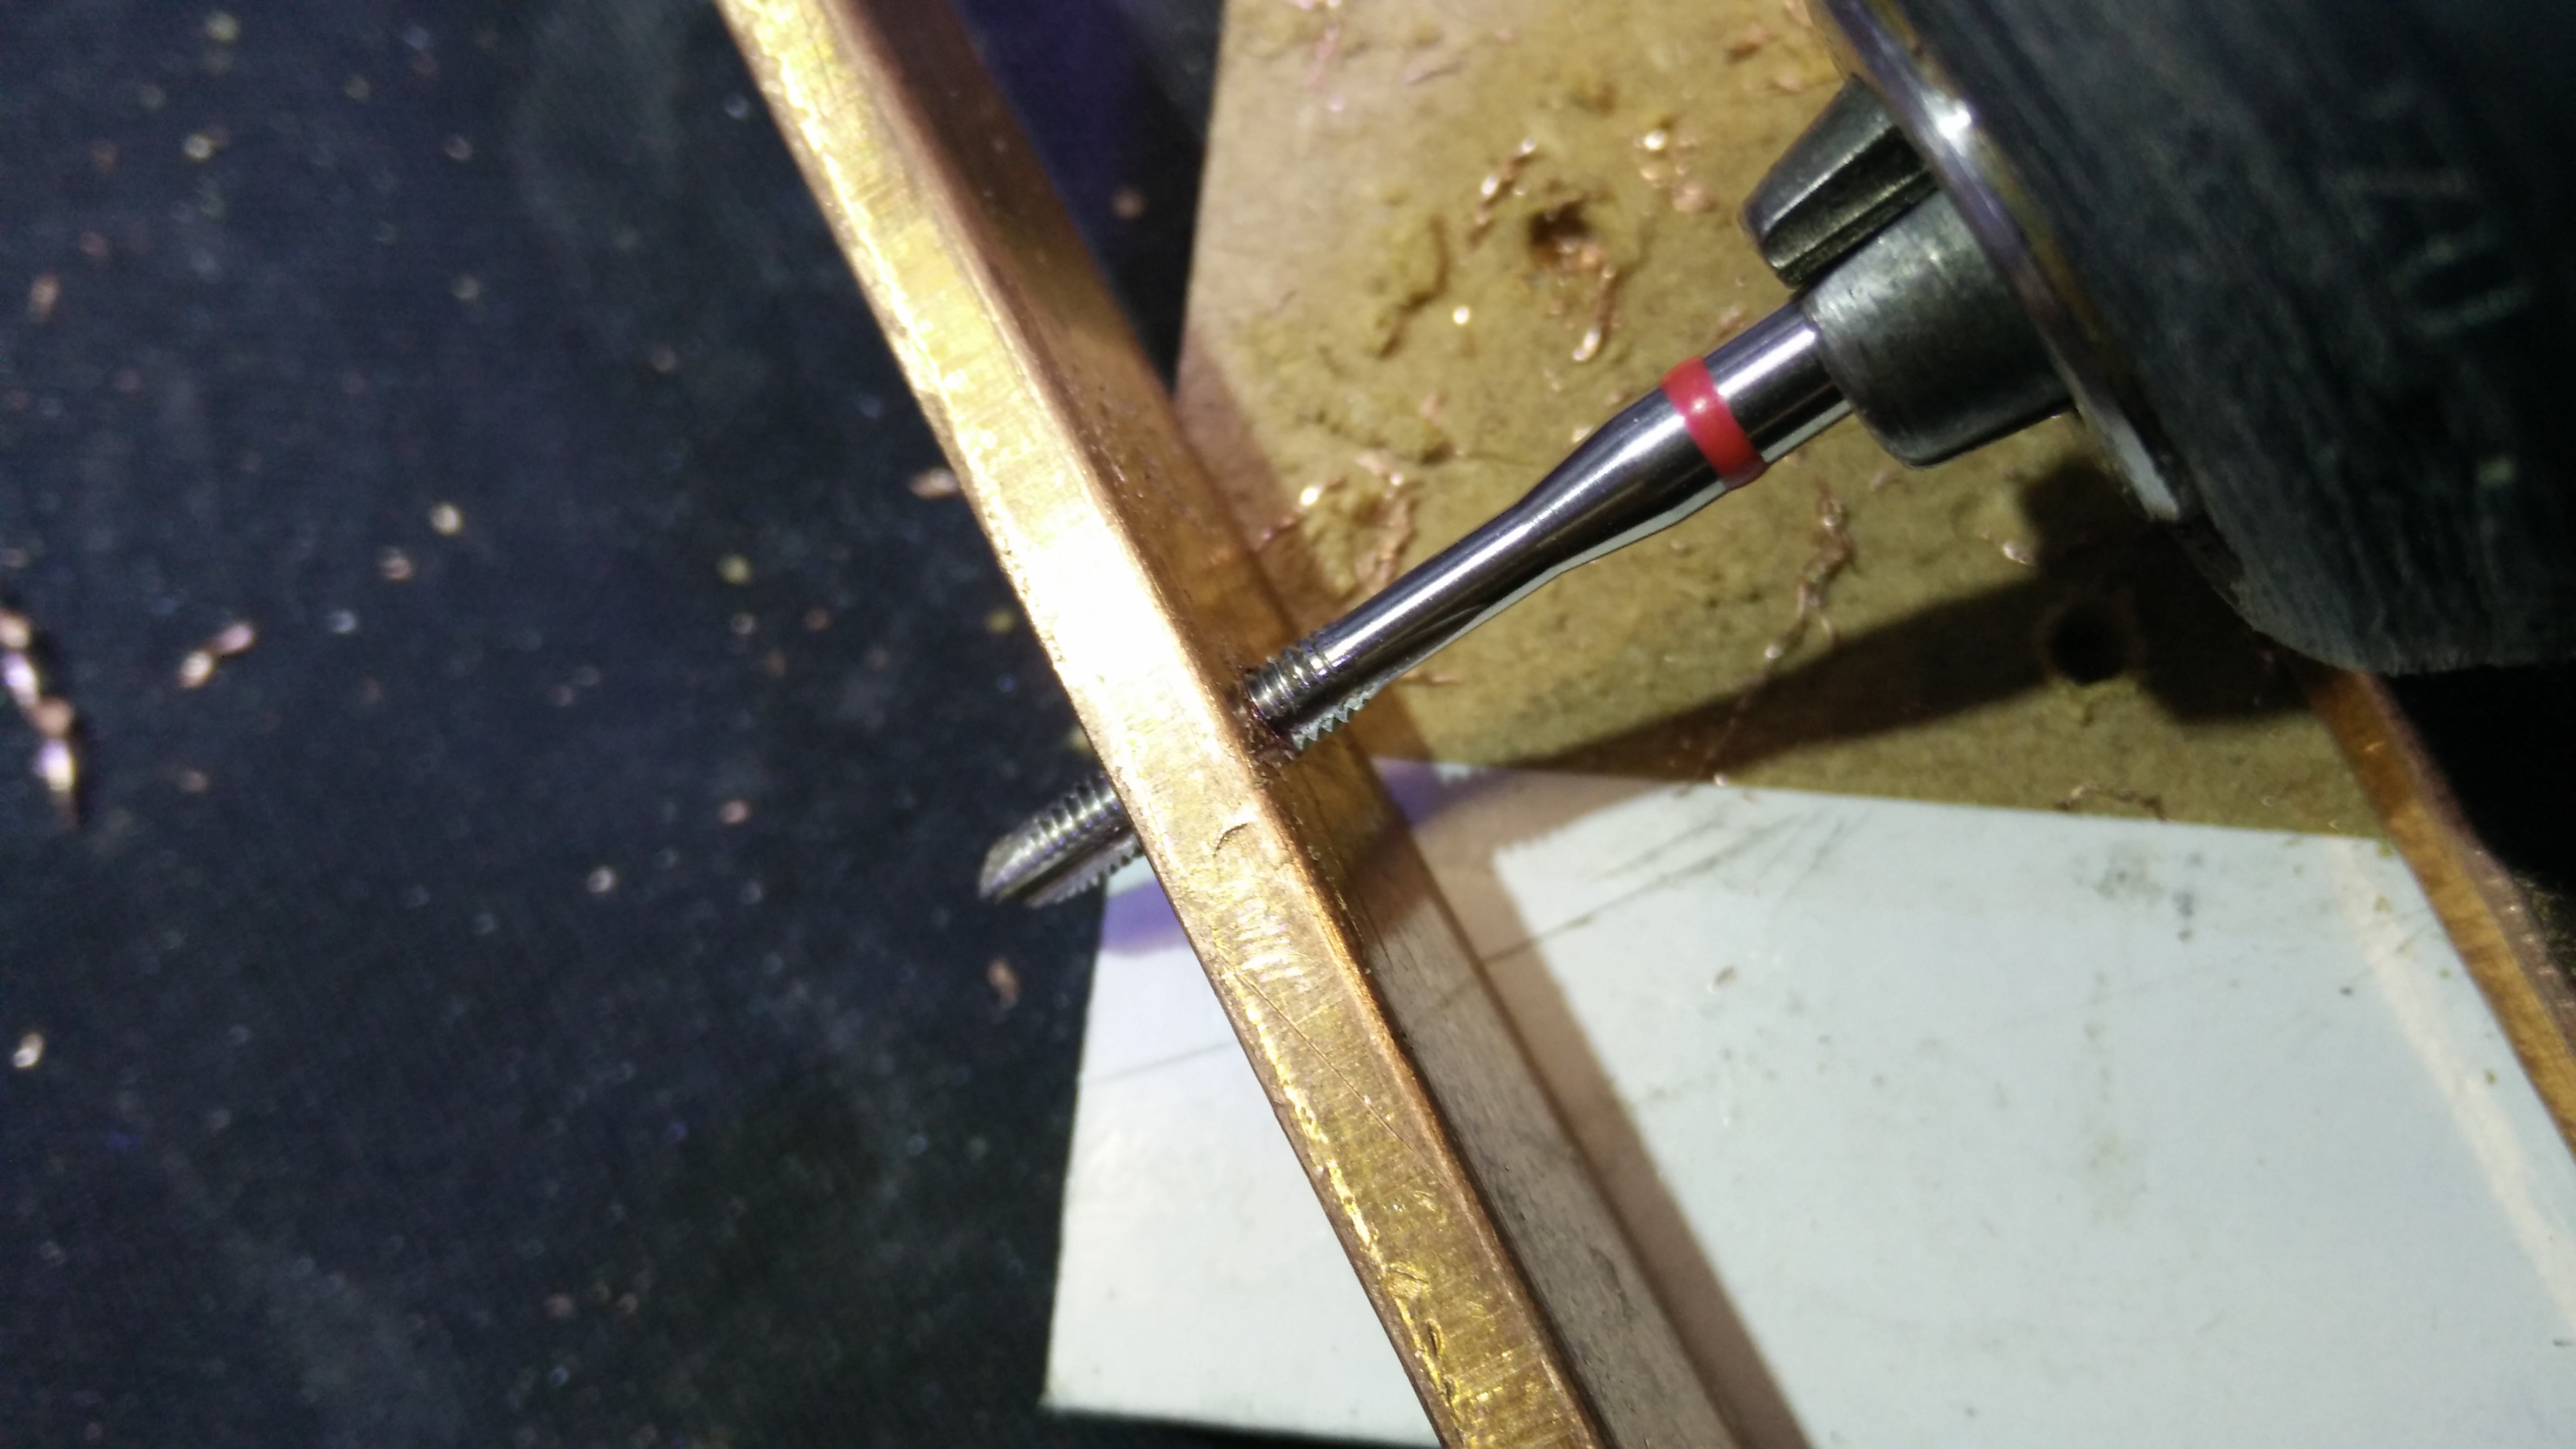
The electrical connection between the PCBs and the copper bars is made with 5mm brass screws. Steel screws would do ok (i used regular ones in v1.0), but i managed to find them in brass. They will lower the power losses by electrical resistance.
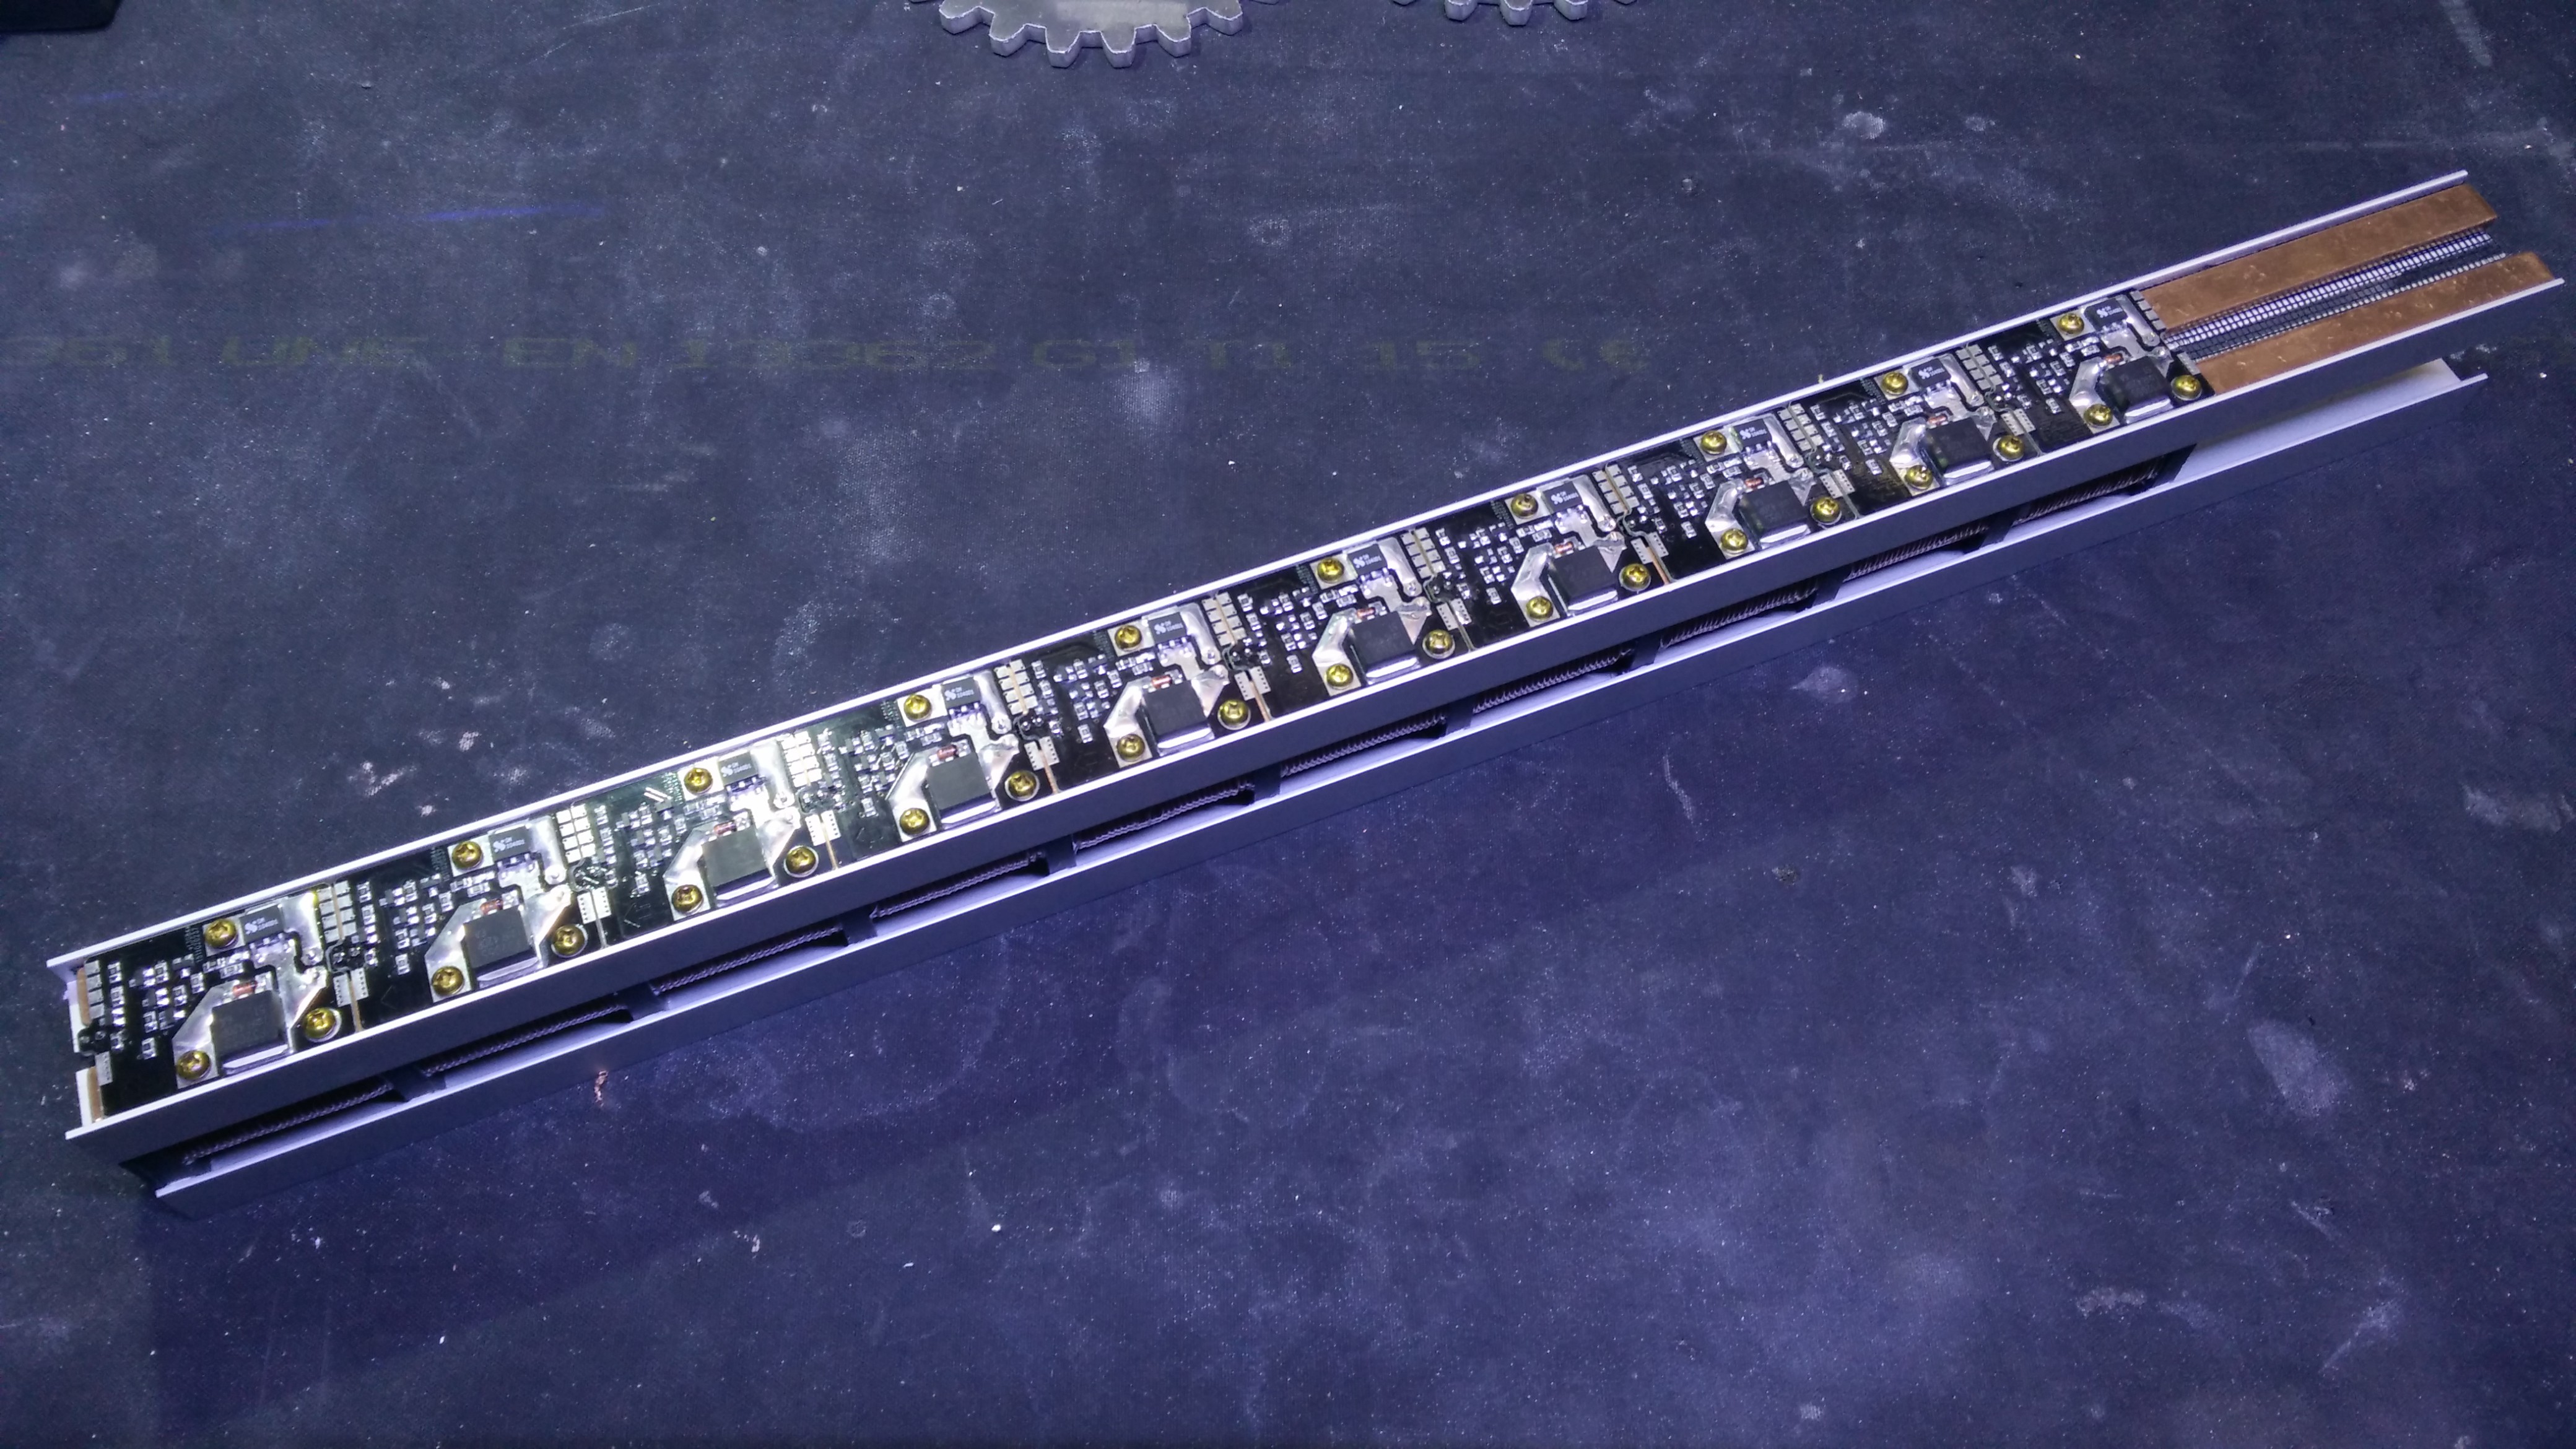
I planned to glue the bars to the aluminium profiles through the net, but i think that when the coil wires get soldered to the boards, the busbars will be held in place just fine.
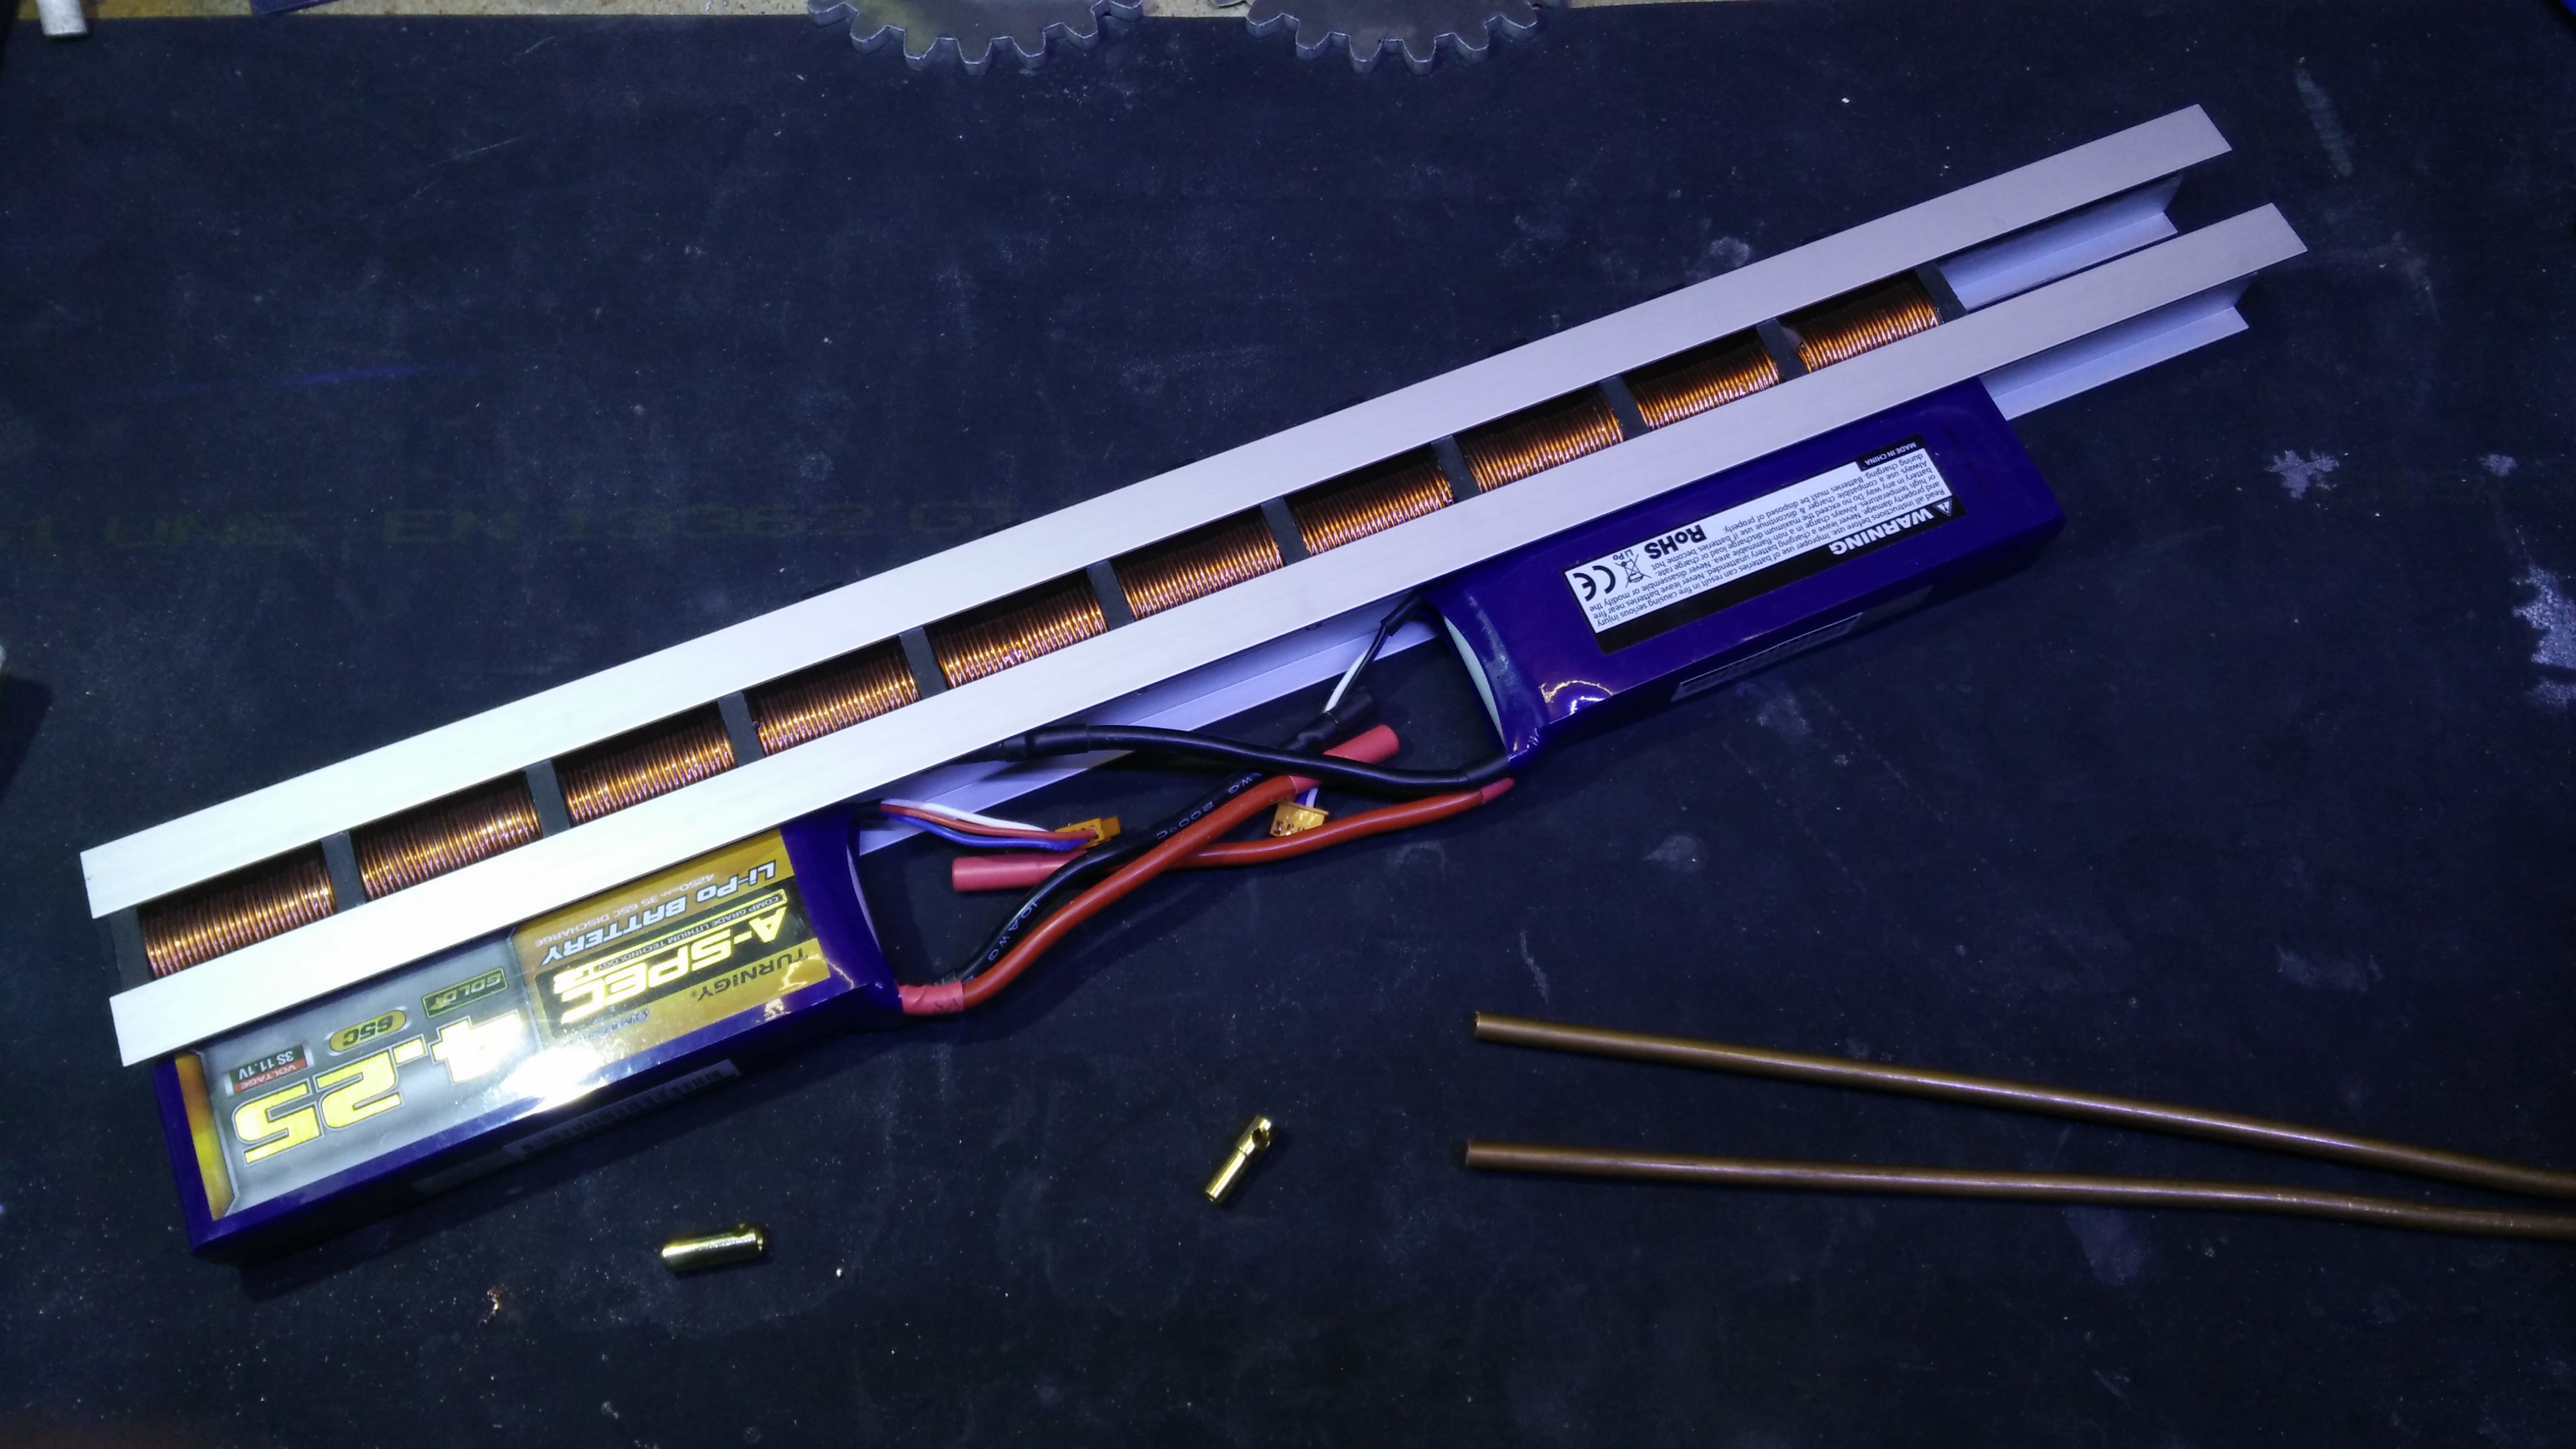
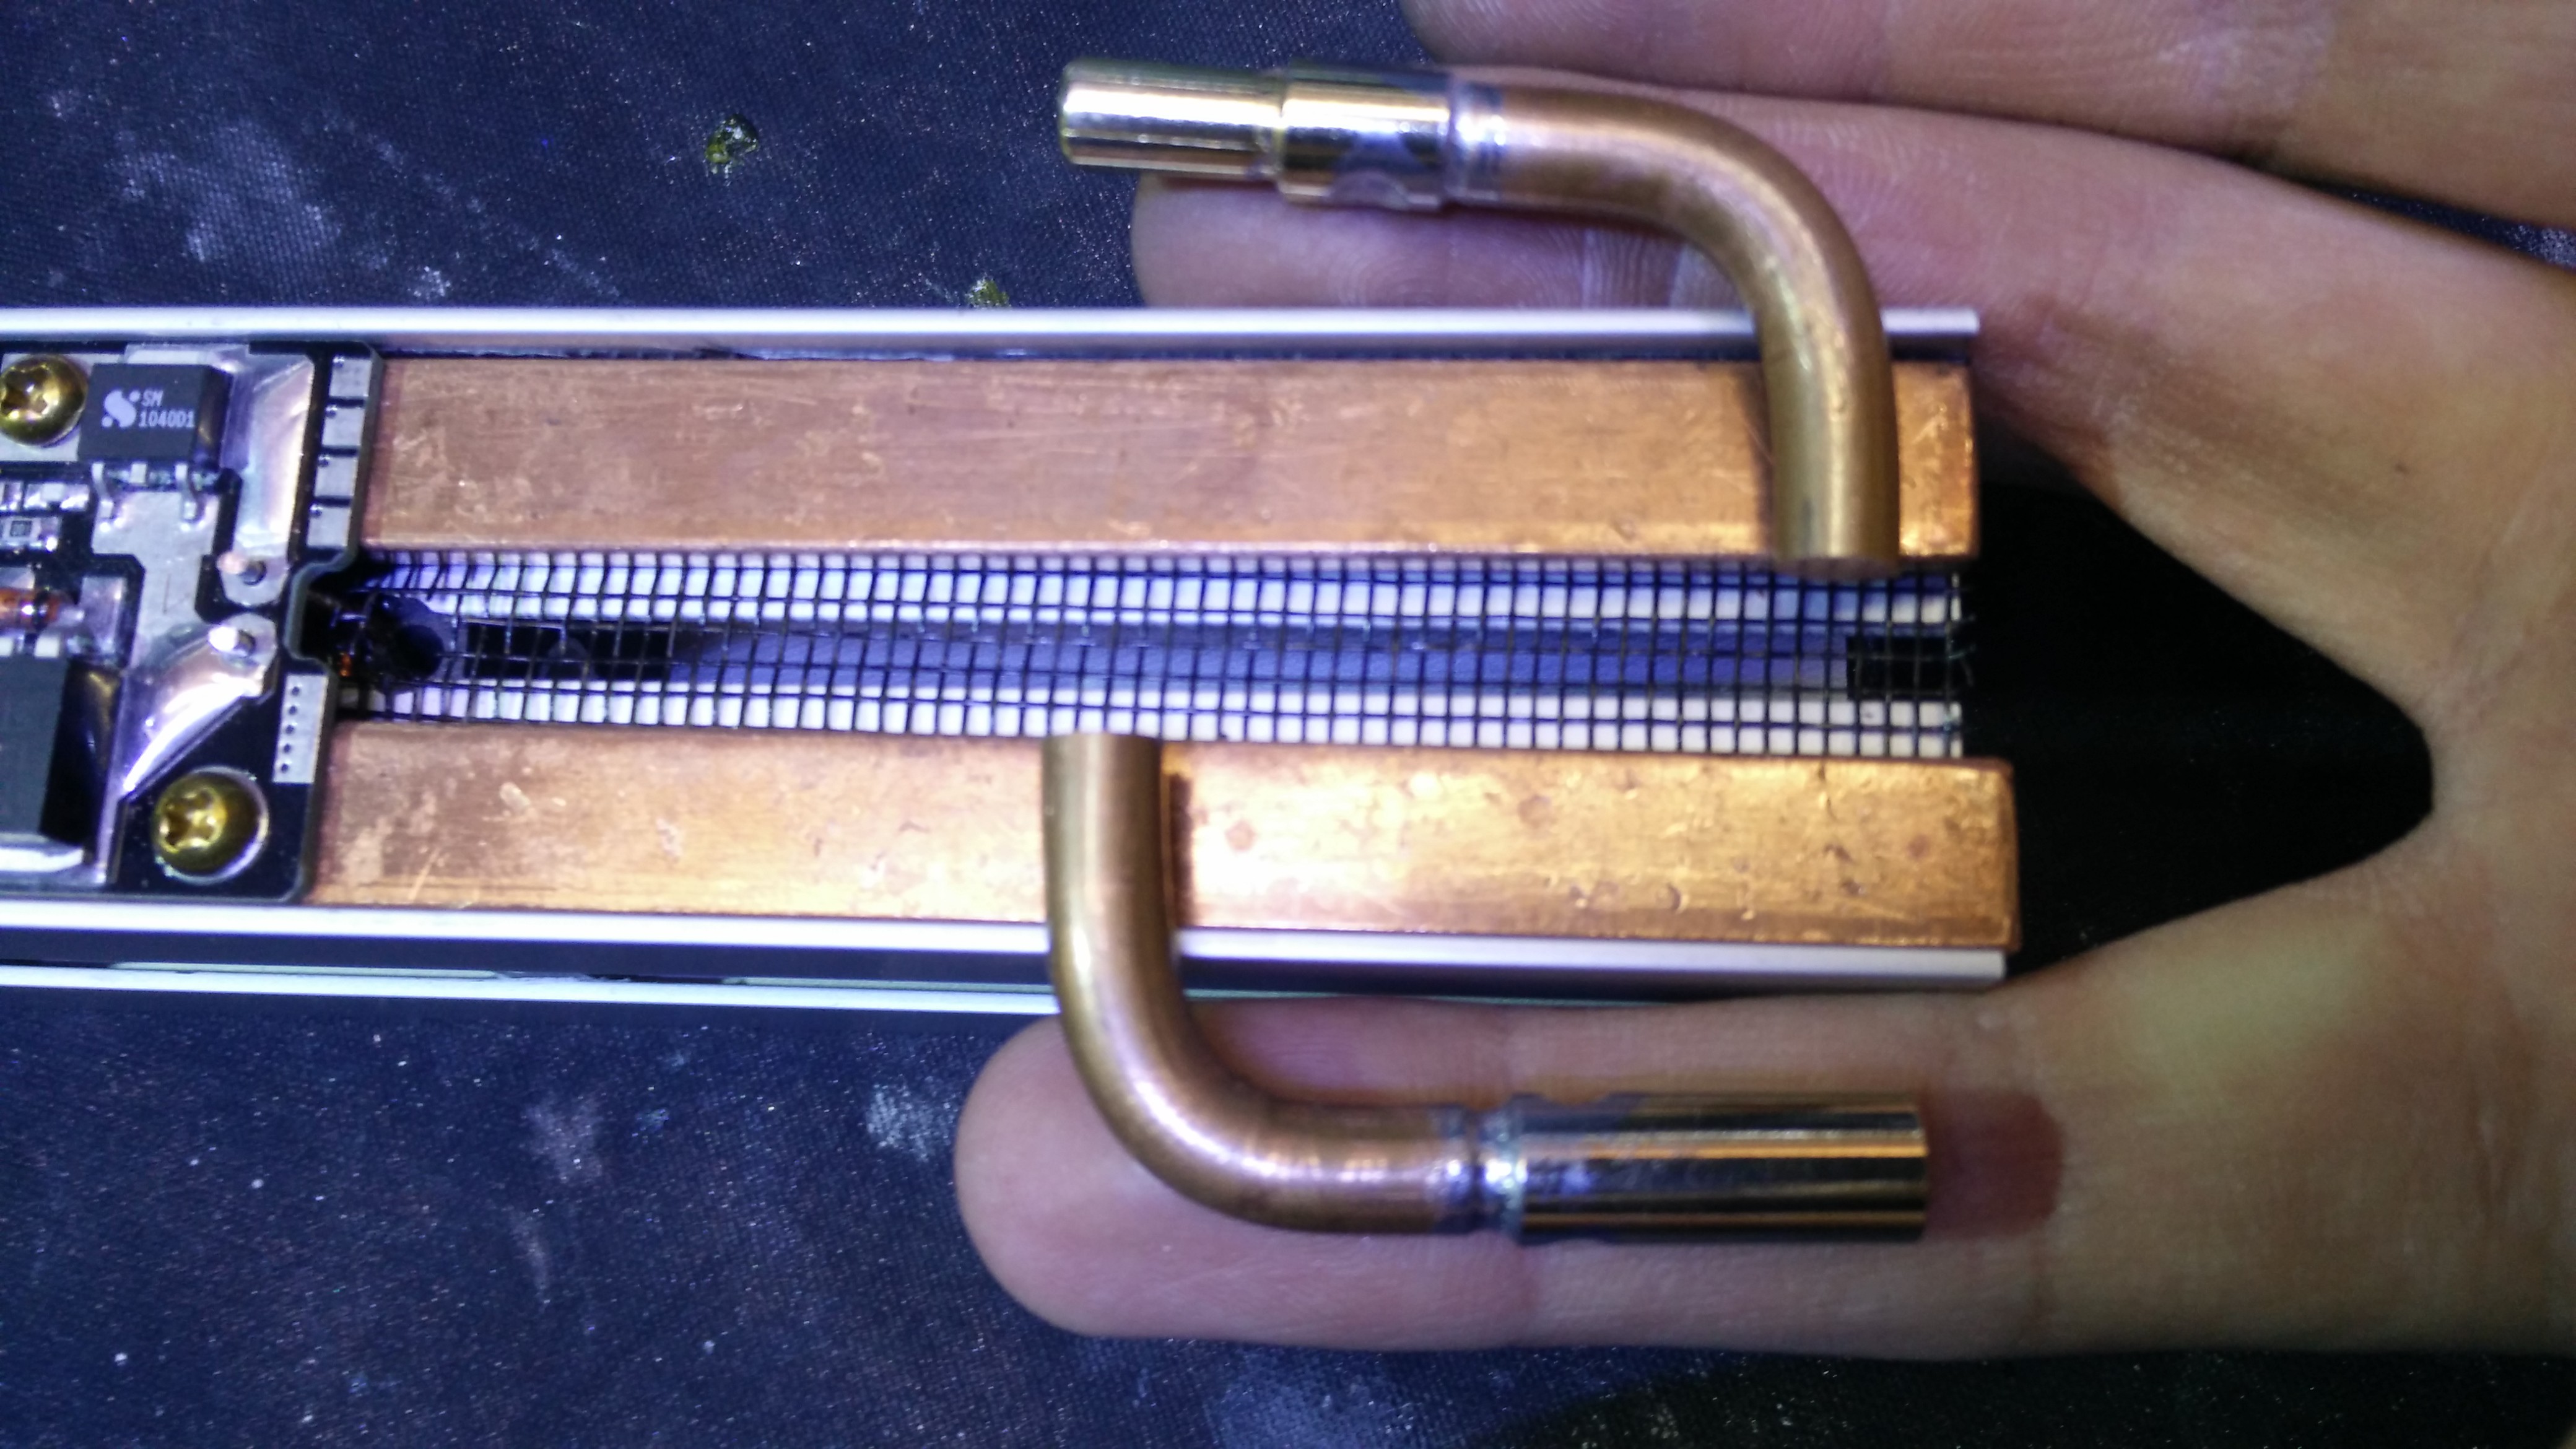
Now i need to add connectors for the batteries. The batteries i bought use 5.5mm gold plated connectors, which should be adequate for the high currents the rifle will draw.
 I cut two pieces of round copper bar and turn down the ends to press fit the connectors.

The connectors were soldered to improve the electrical connection and the bars bent to about 90º.
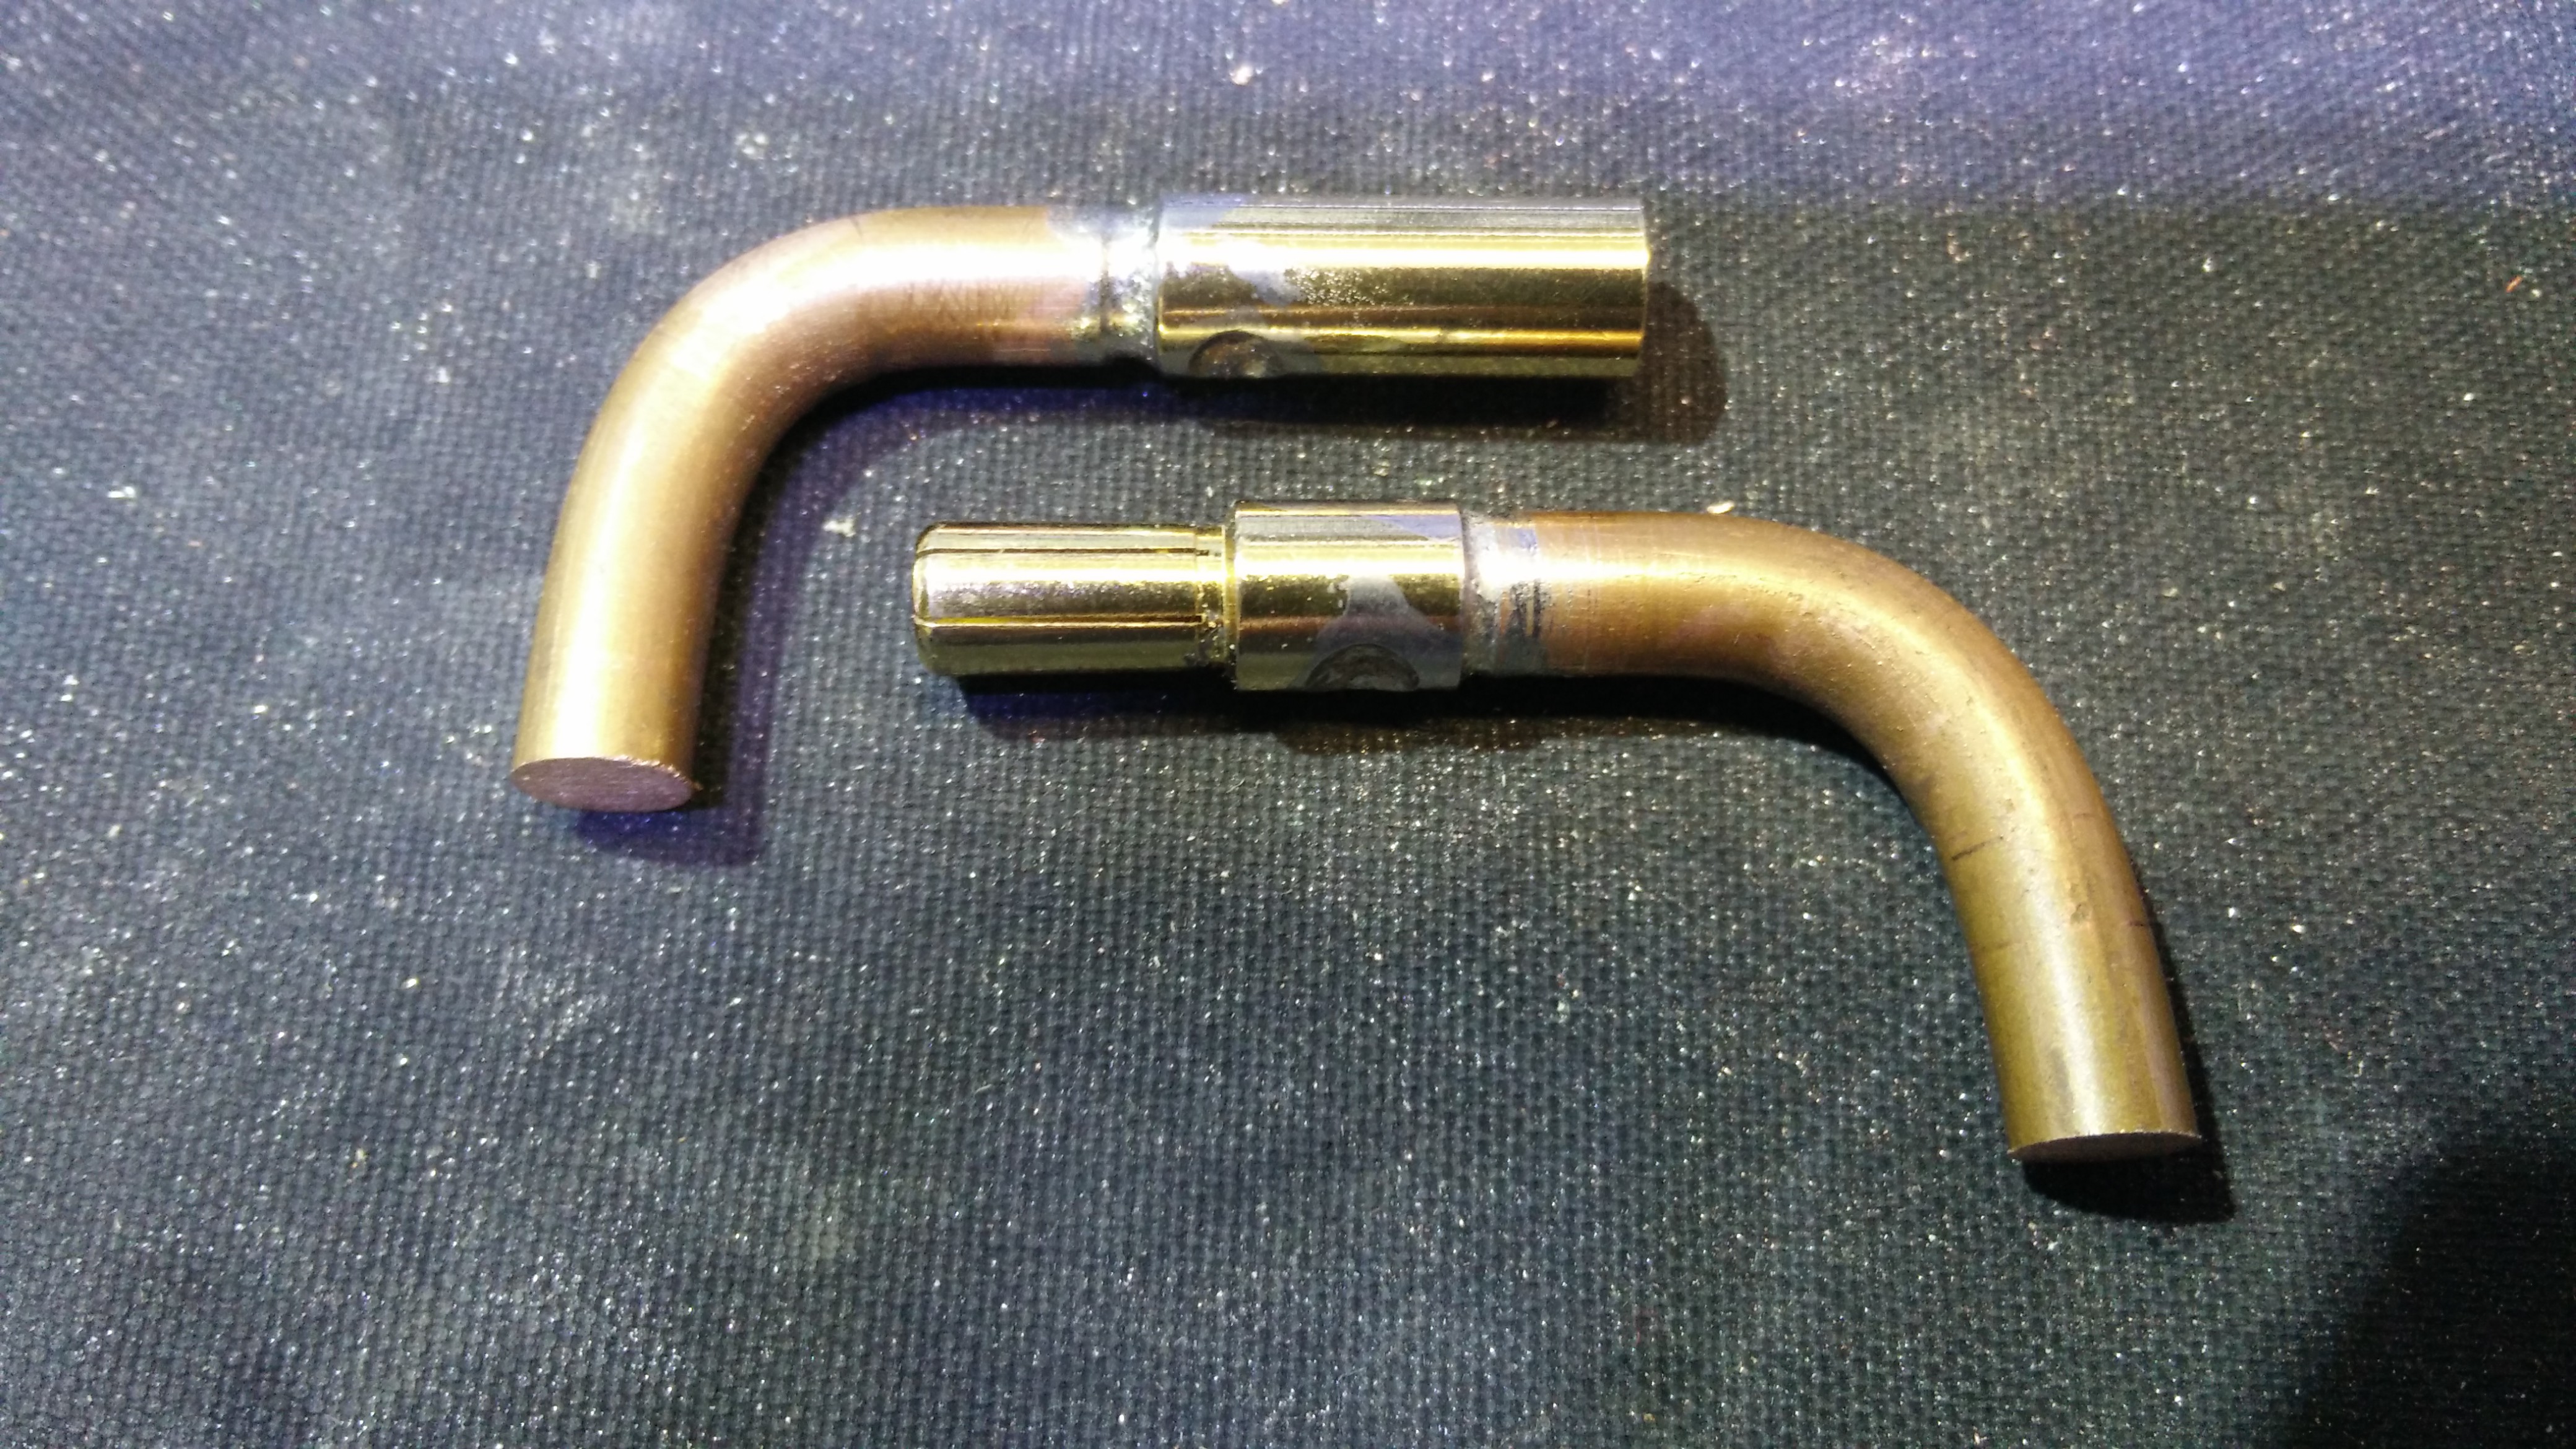
They will be connected to the busbars facing opposite directions and slightly angled down.
For this, i carved a recess in the busbars and a mating flat surface in the connector bar. A hole was carved in the aluminium profiles too, leaving a bit of room for insulation on the copper bar.
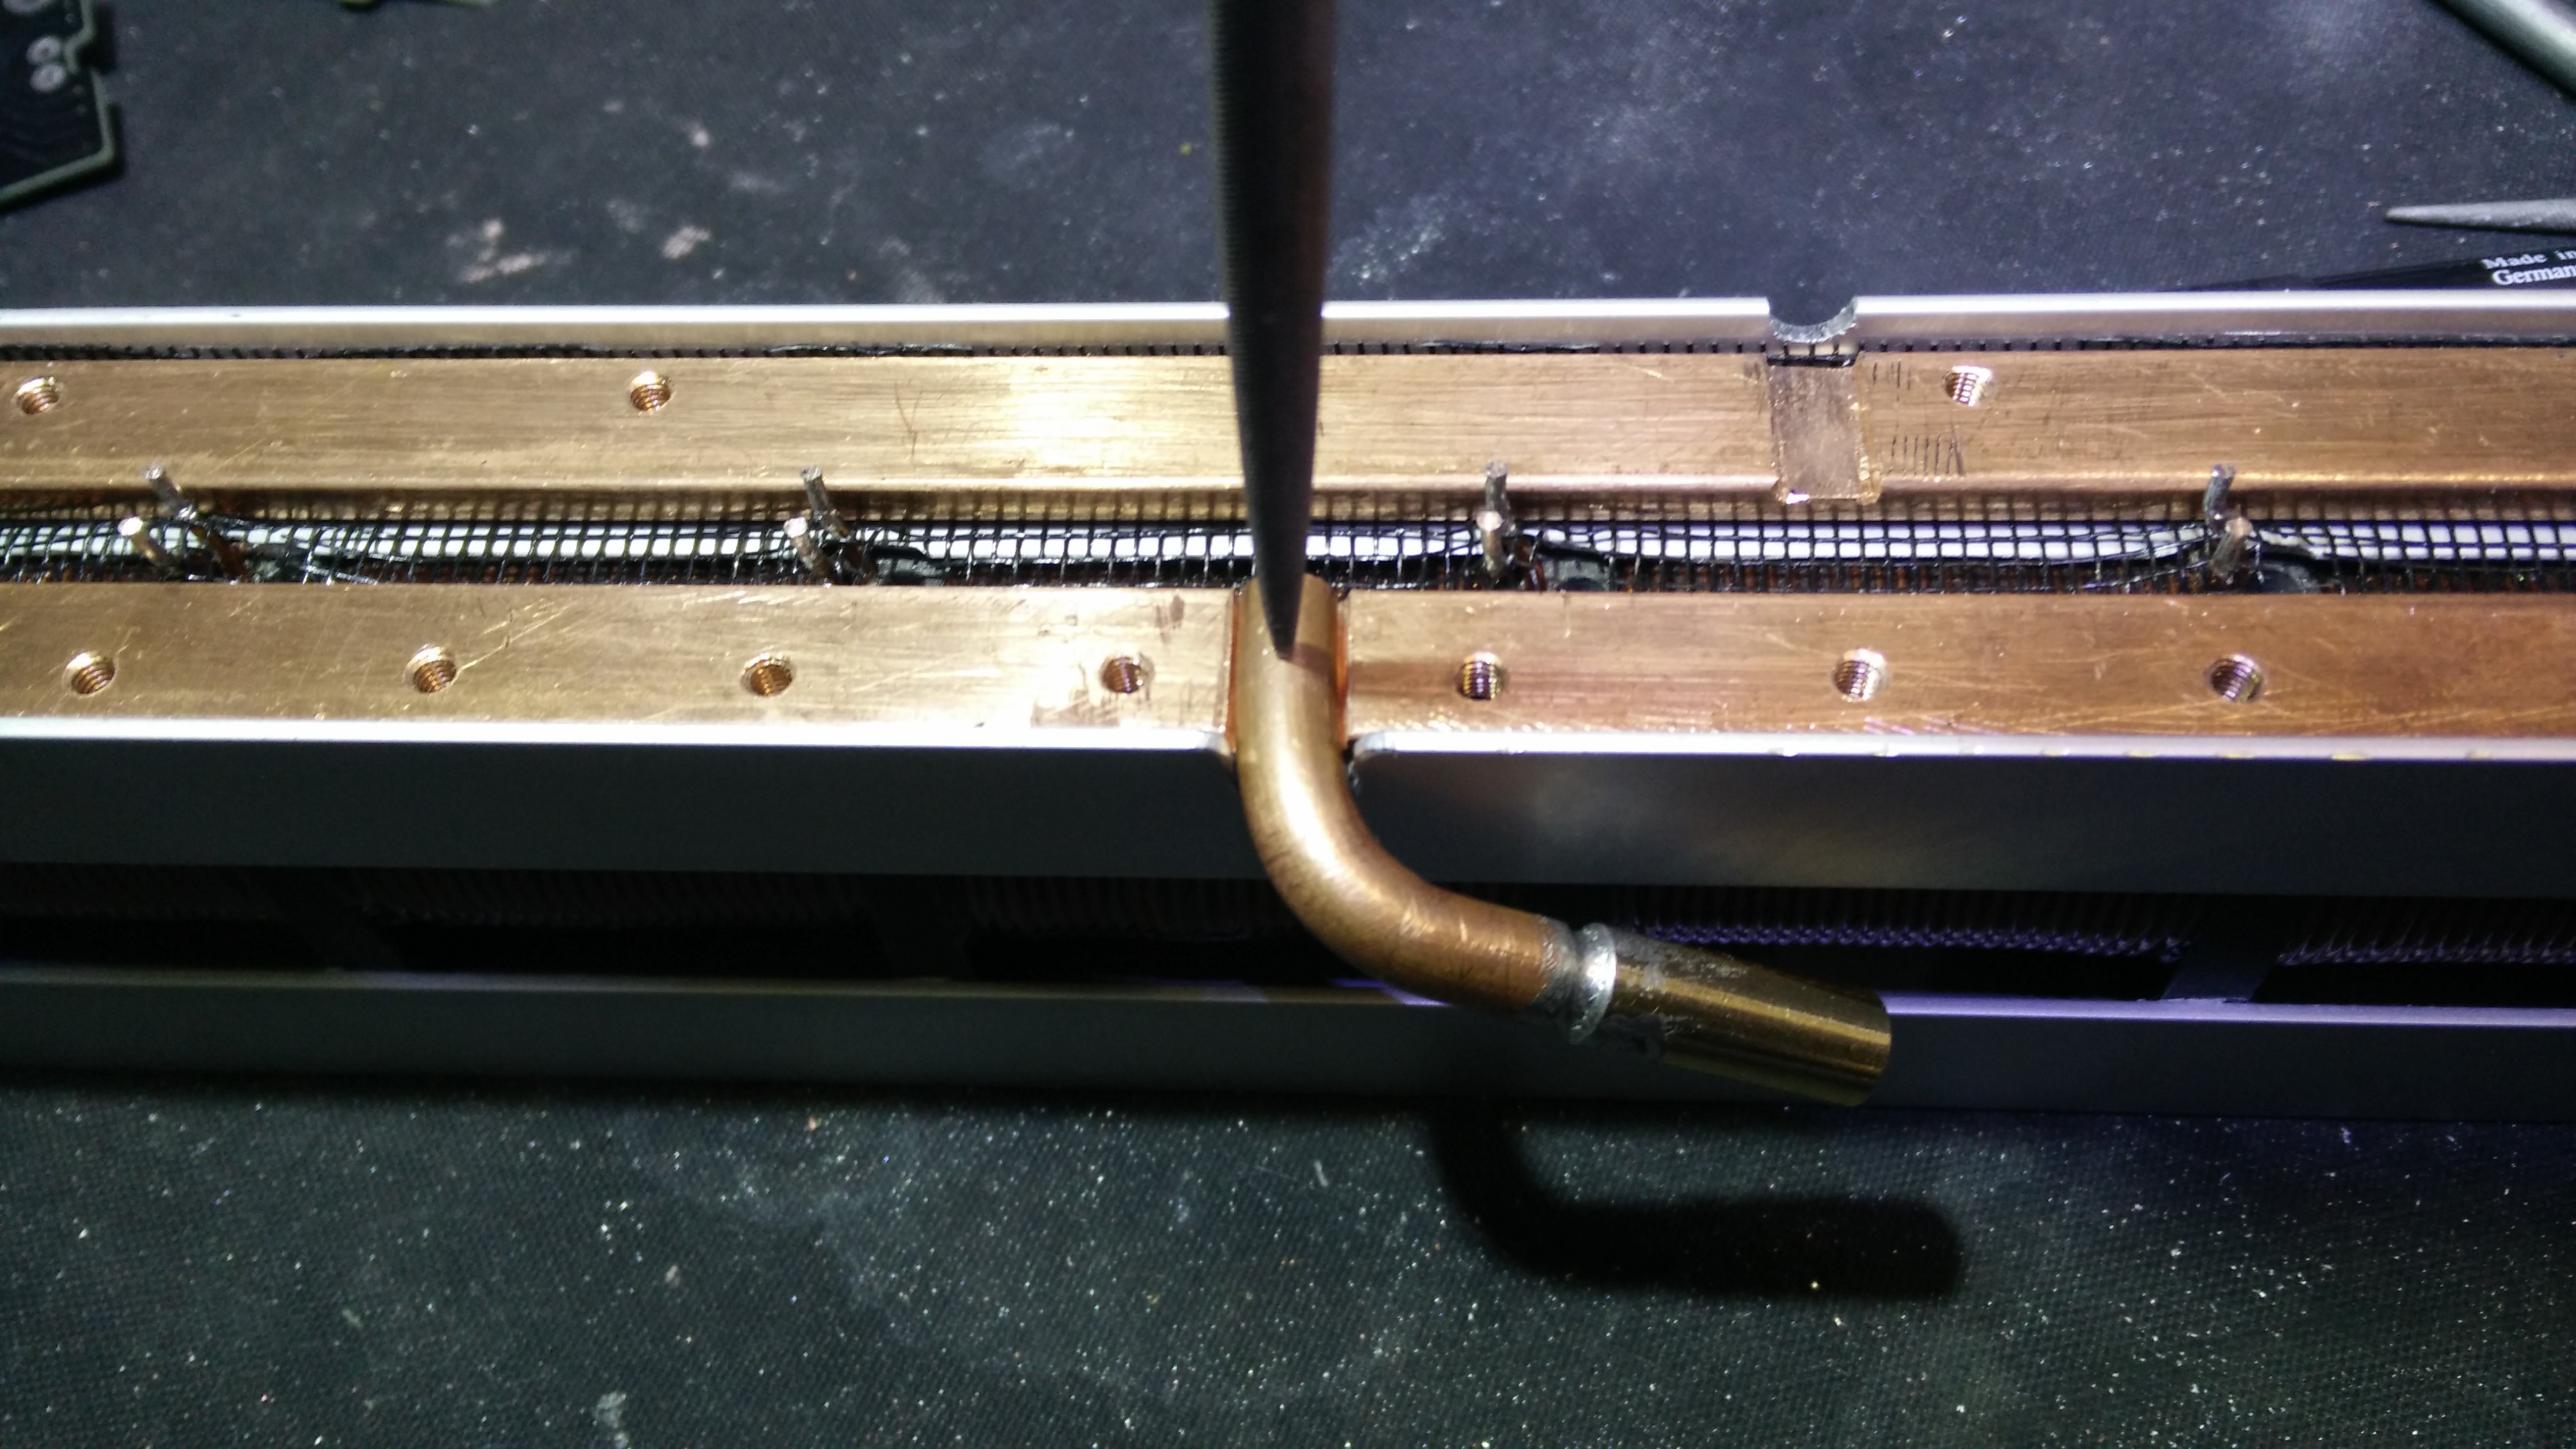
Then, i soldered the connector bar to the busbar and filed it flat to match the busbar surface. I made sure not to solder the connector for the battery + cable onto the - busbar and viceversa.
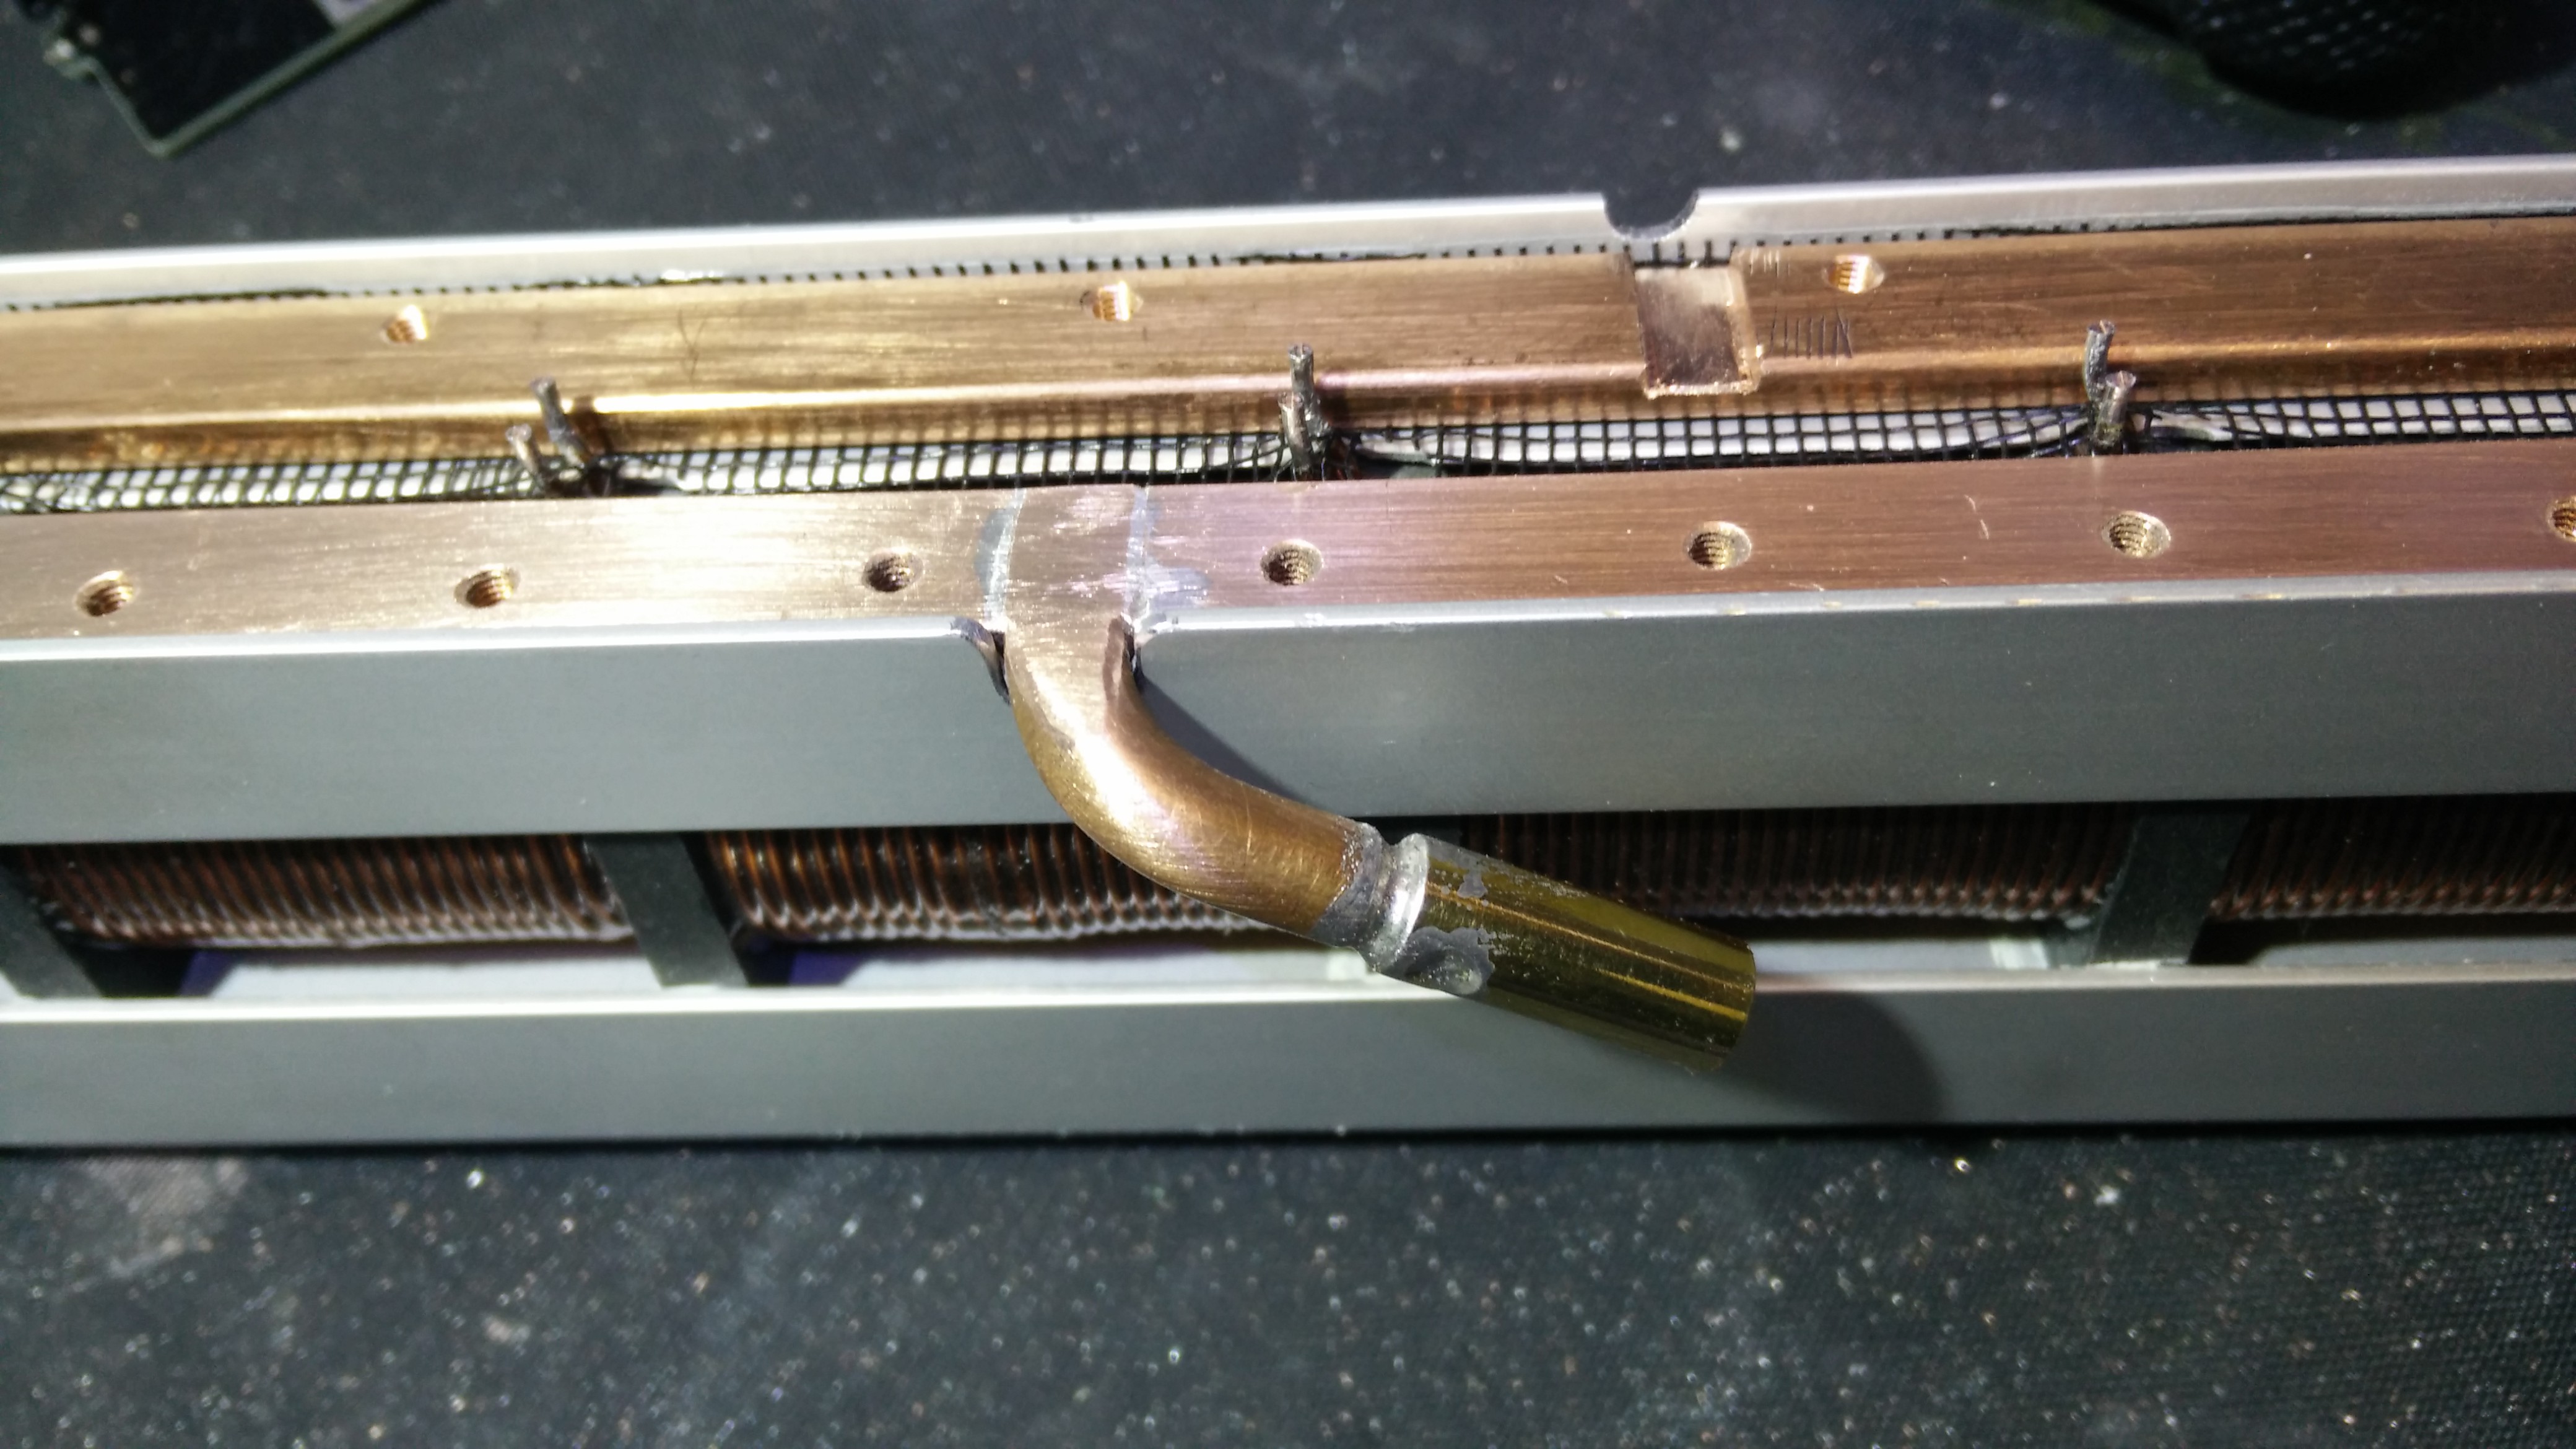
I repeated the process with the other connector and this is what they look like:
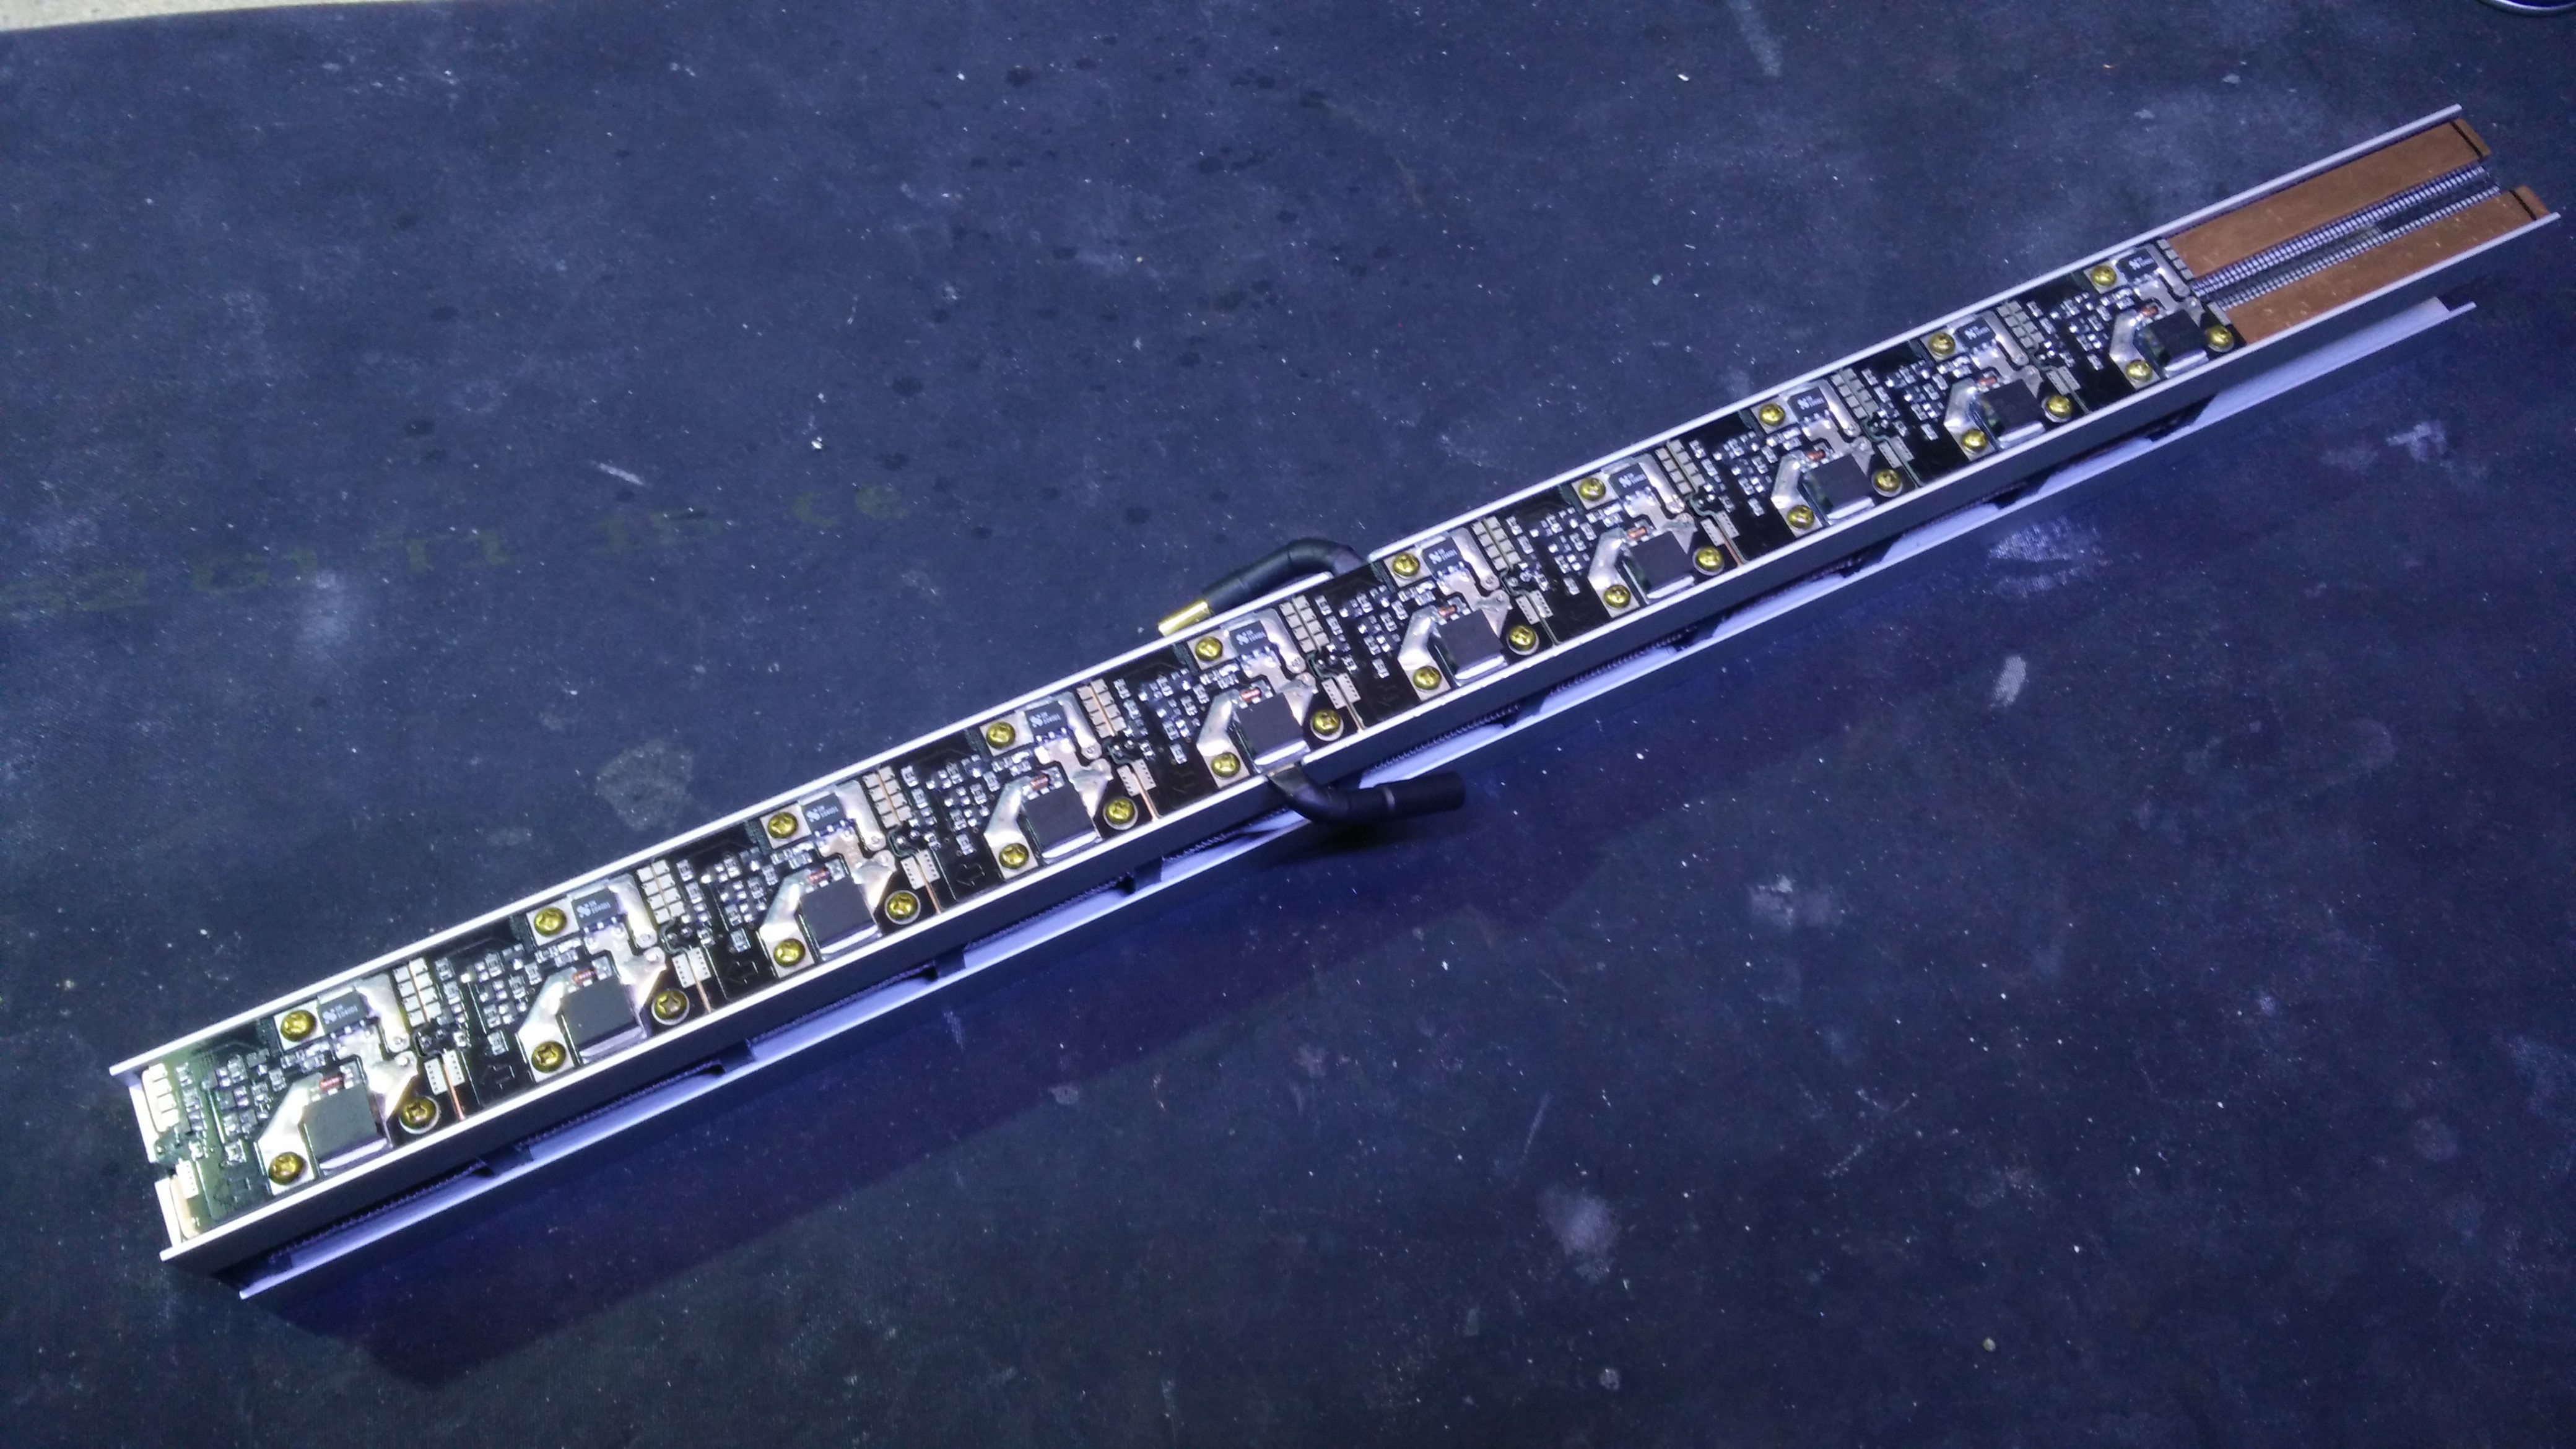
I covered the connectors with heat shrink tubing so there would be no exposed metal to short the batteries together.
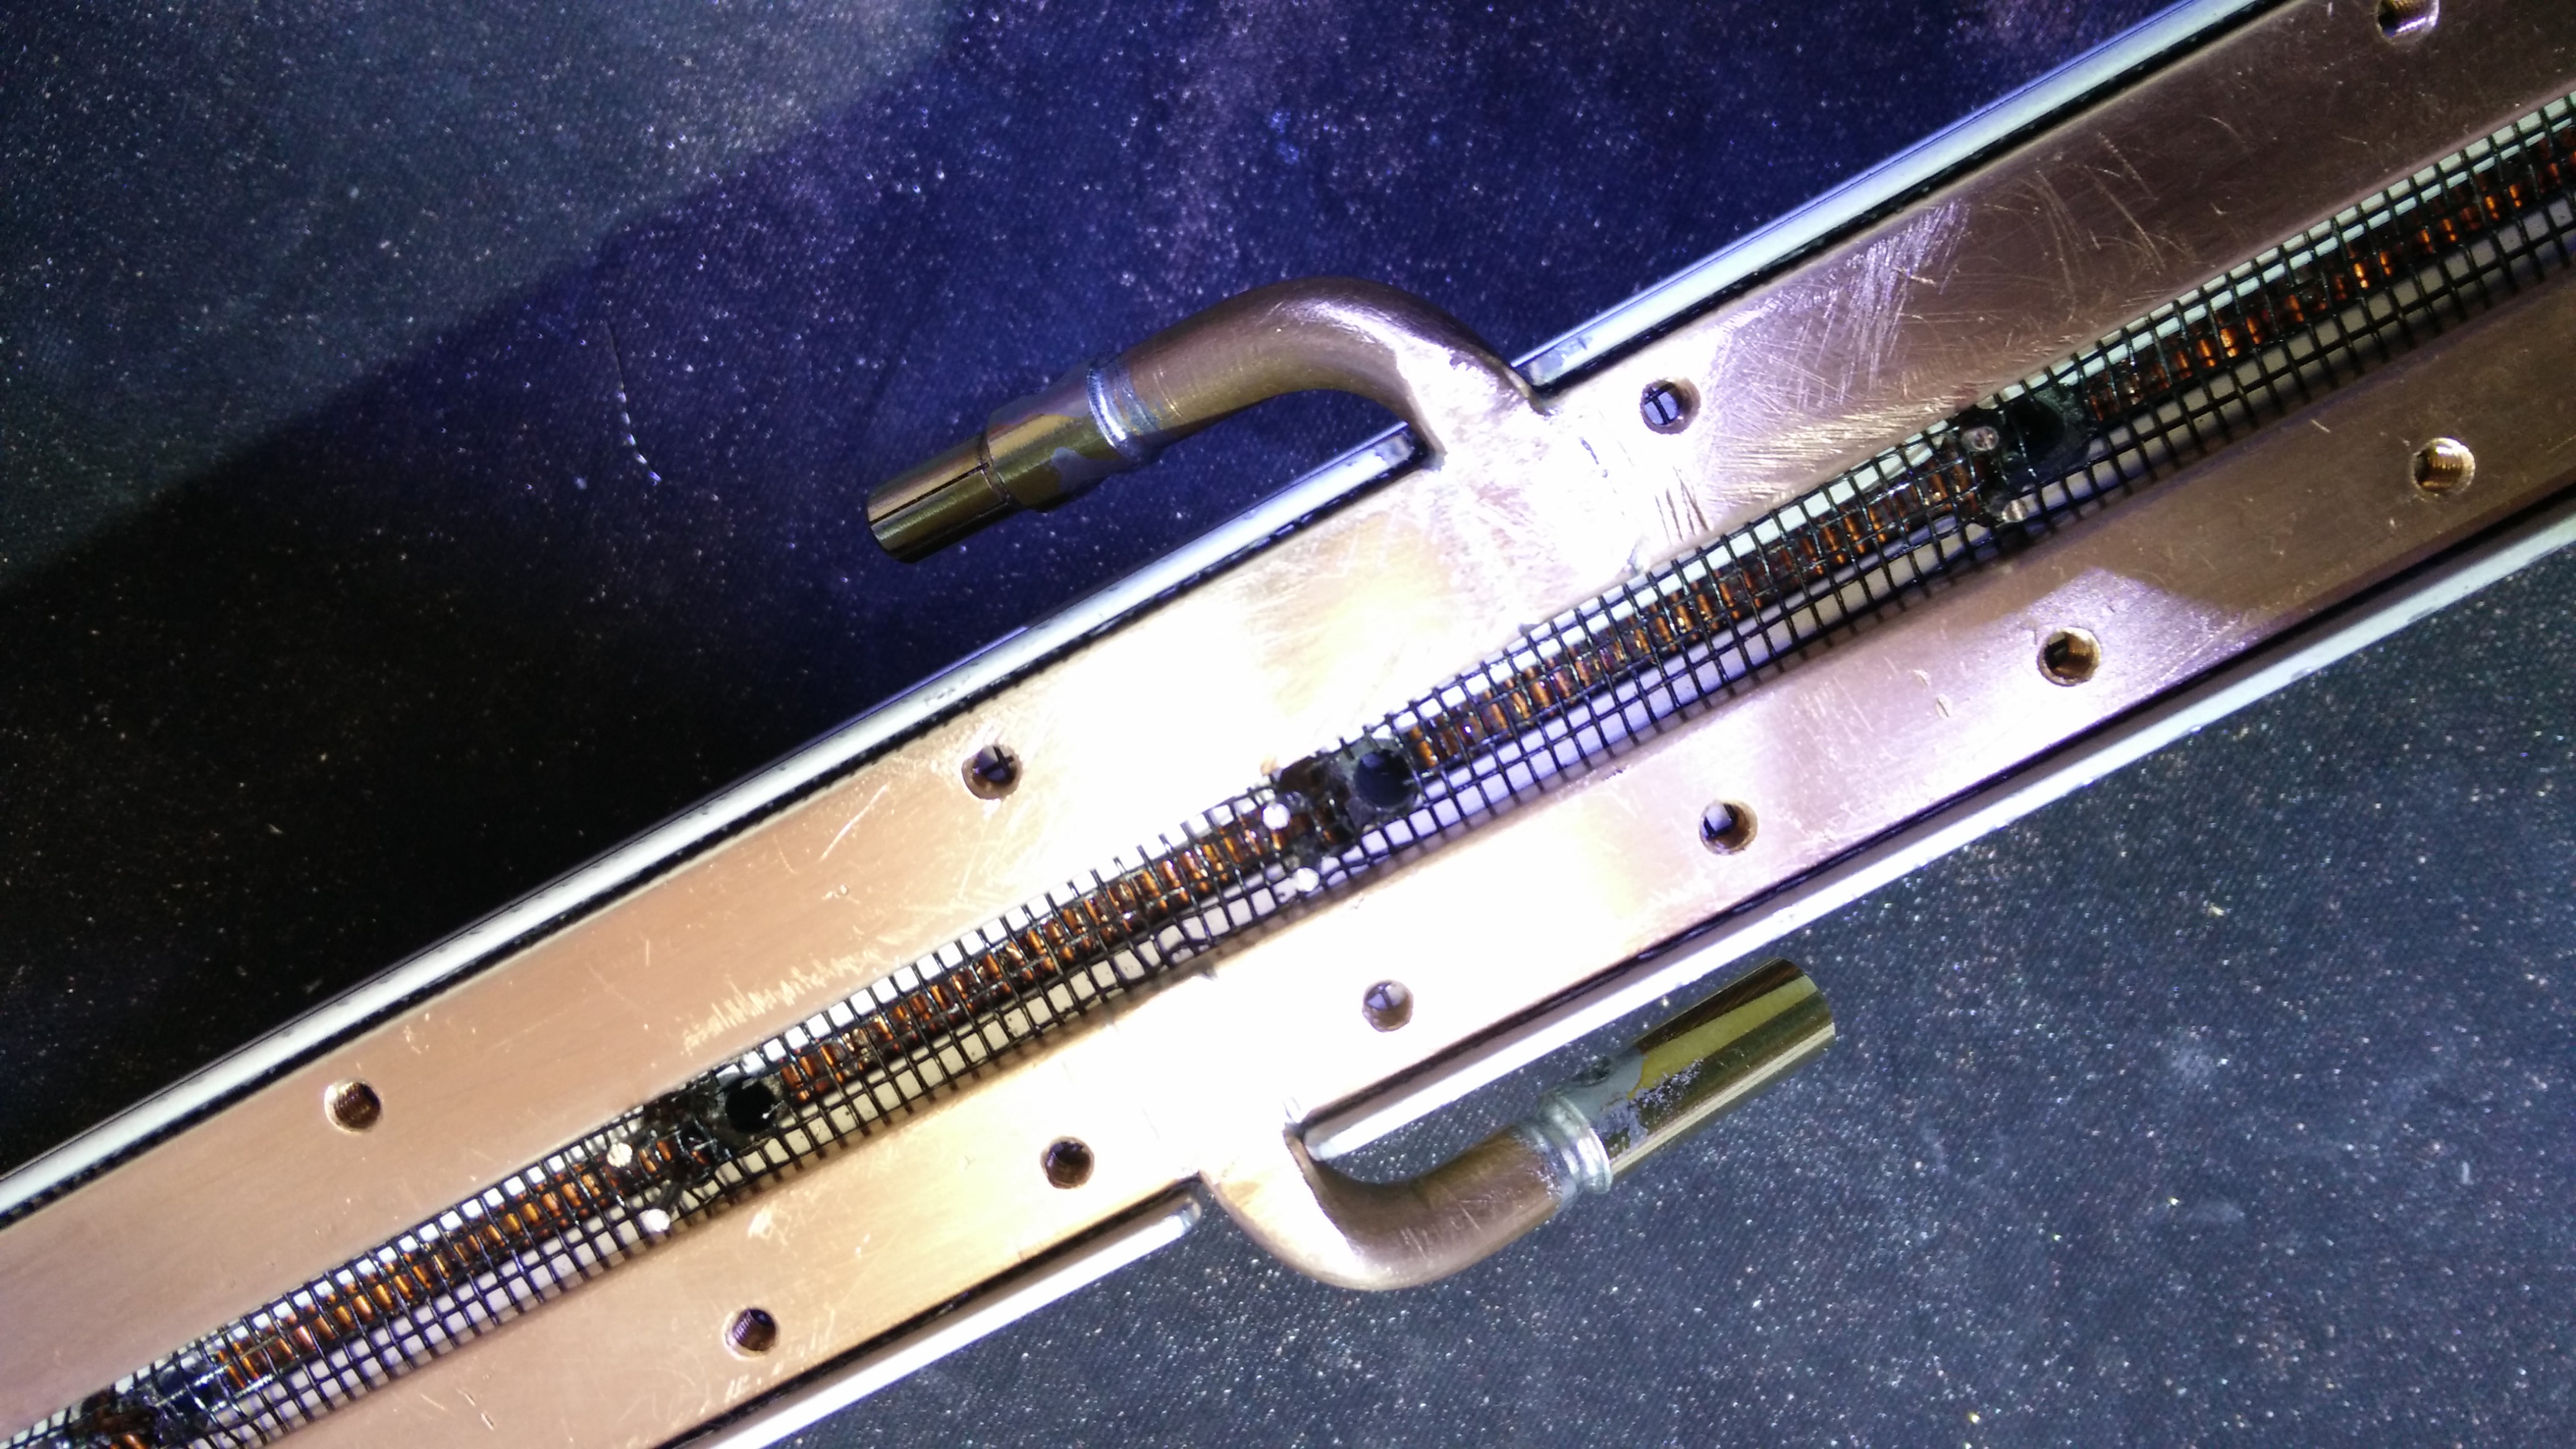
For now, the busbars are done. I leave the back end exposed because i will need to place a board there to control whatever projectile injection mechanism i come up with in the future. As you can see, all the boards fit nicely on the connection part, which is centered on the coils so as to reduce the resistance to the furthest ones.
 The batteries wil be placed under the coil section of the rifle, leaving a gap between them where i will place a grip for the rifle and the connection between the batteries, which will likely include a protection circuit.

Discussions
Become a Hackaday.io Member
Create an account to leave a comment. Already have an account? Log In.