 Jeremy
I have been working on a lite version of eXaDrums for weeks, and now is the time to share the results of this experiment.
Raspberry Pi Zero W
First of all, eXaDrums Lite uses a Raspberry Pi Zero W and is running Raspbian Stretch Lite. As you probably guessed, there's is no graphical user interface installed on the Pi Zero. So how does it work?
The Raspberry Pi runs libeXaDrums on a headless system. It's configured to behave as a wireless access point. An executable communicates (I will share it when it will be in a little more advanced state) with libeXaDrums and creates a socket server in order to receive messages from the user. The user sends those messages through a graphical user interface installed on an Android device that is connected to the Pi's wifi network.
Android application
So far, the application is very minimalist and consists of a Start/Stop and a Quit button:
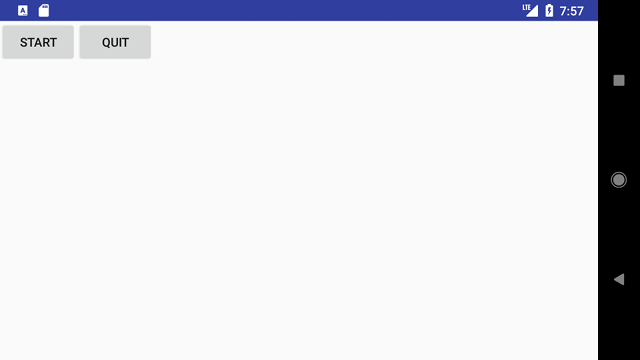
When you click on the Start button it sends a message to the Raspberry Pi, which starts the module, and gets a confirmation back. After the confirmation has been received, the button becomes a Stop button.
Signal conditioning with a LM386
In order to keep it compact, I've done my best to make everything fit on a RaspIO Analog Zero board. I needed something that can be connected to a standard drum pad, so I tried to use op amps to get a voltage that is compatible with the MCP3008 (0 to 3.3V).
As it turns out, the LM386 is a very good chip for that. I've found that people often use a resistor to reduce the drum pads piezo voltages, but I also need this voltage to have a DC component of 1.65V (3.3/2 V). The LM386 takes in a voltage that can vary between -0.4V to 0.4V, amplifies it and adds a DC component to the amplified voltage. Unfortunately, because of the supply's voltage range, that DC component is 2.5V. Not a problem, we can just add another potentiometer to lower it to 1.65V.
Thus, I ended up with the following schematic:
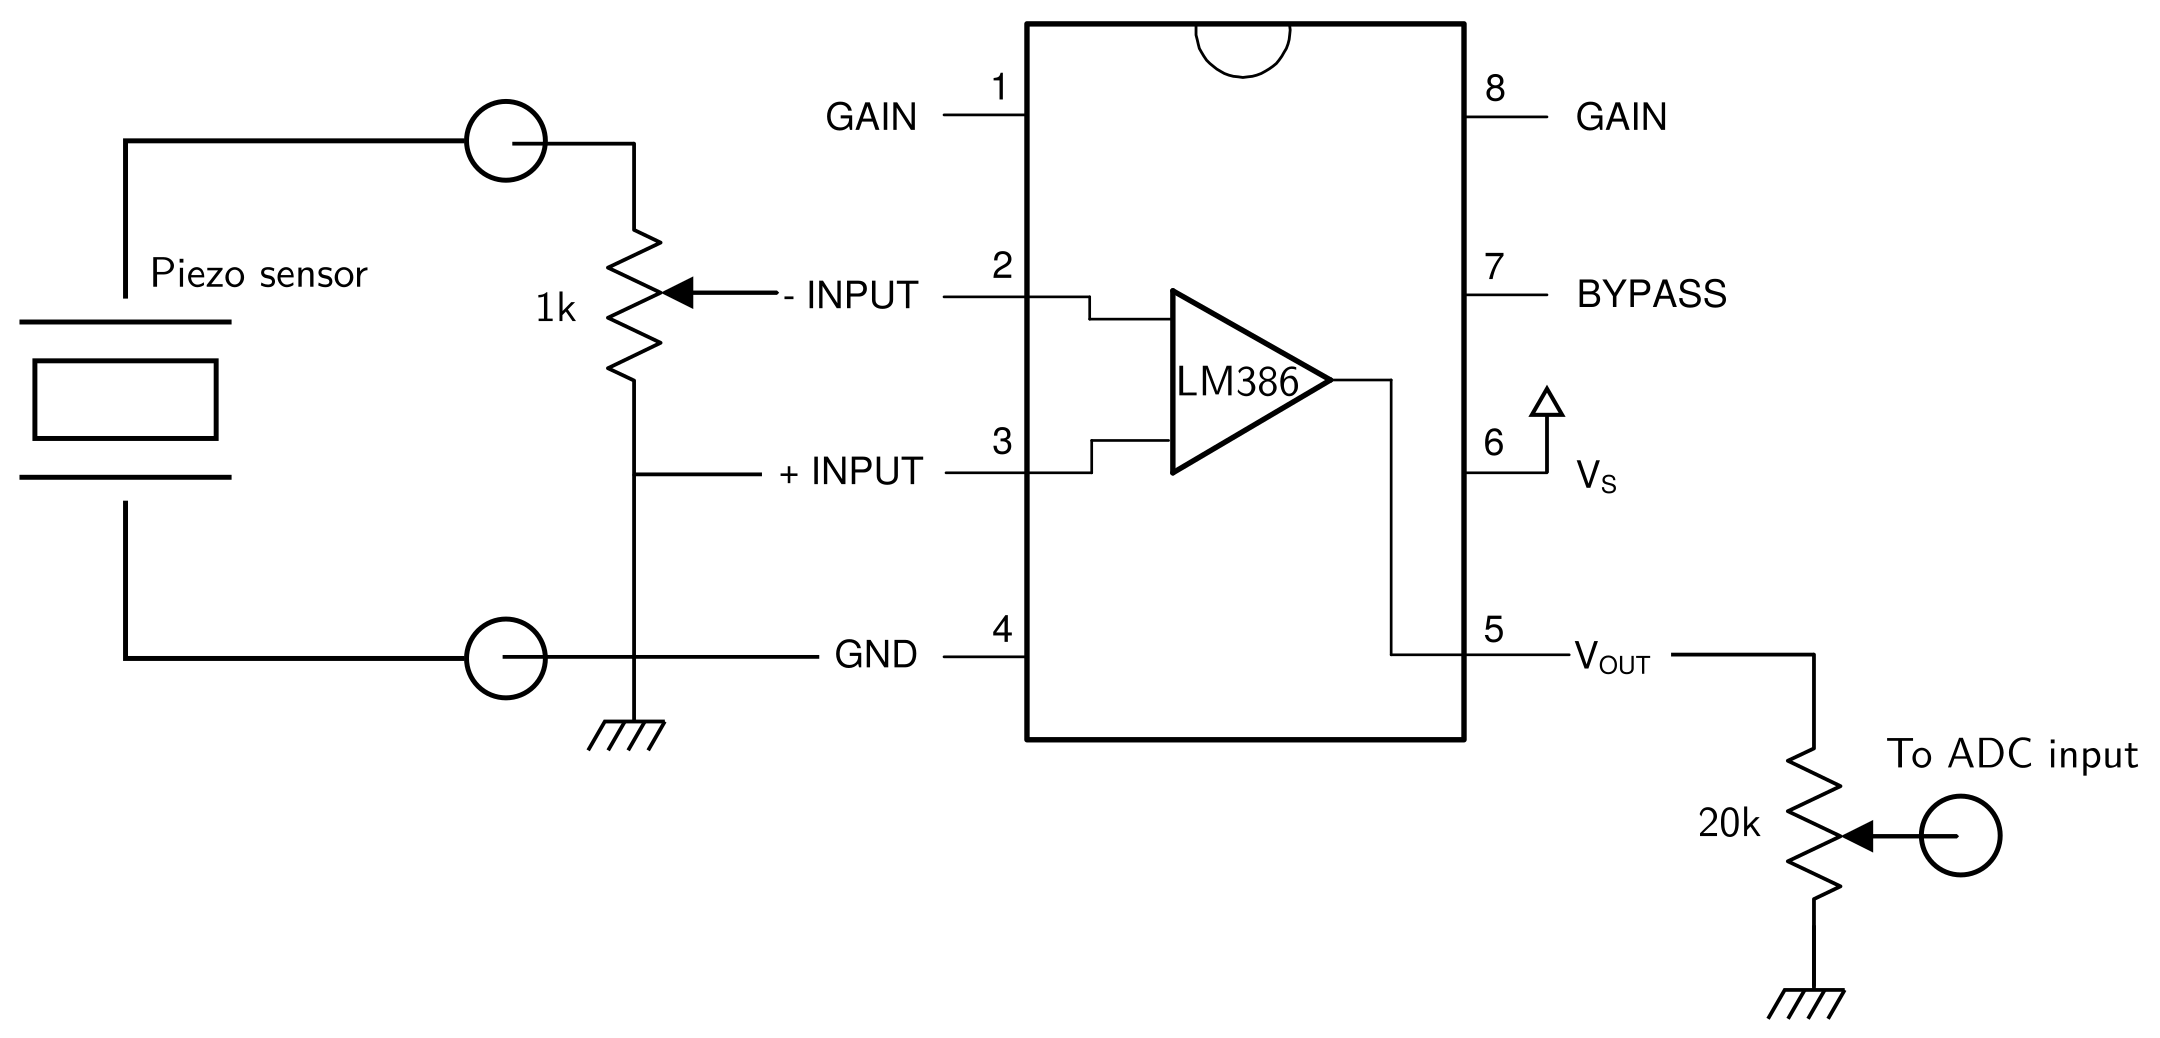
where the input potentiometer is used to reduce the output voltage of the piezo sensor to fit the -0.4V to 0.4V requirement, and the output potentiometer to set the output DC component to 1.65V.
That leads to the following design, using the prototyping area of the RaspIO Analog Zero:
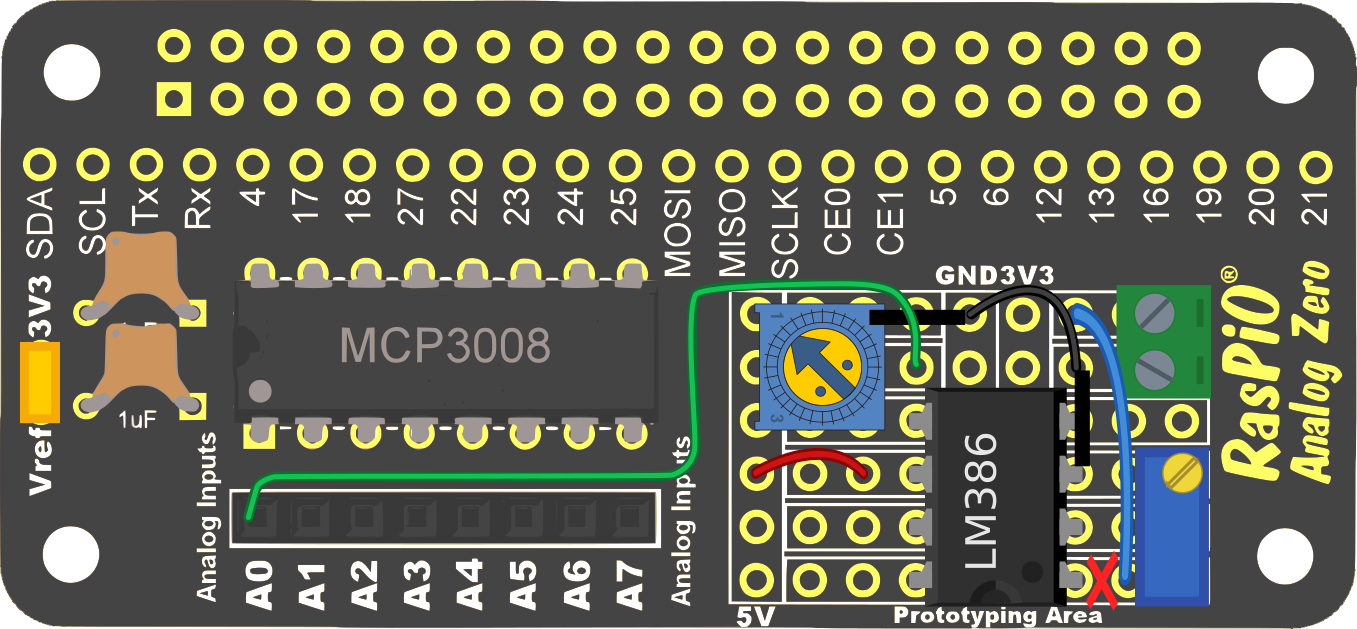
where the black lines represent connections between the pads (soldered together at the back of the board), and the red cross a cut track underneath the board (the blue wire must be disconnected from the first pin of the LM386).
That works perfectly for a single drum as the fast response of the LM386 adds up almost no latency.
If you wonder how that sounds like, check out this video:
eXaDrums Lite
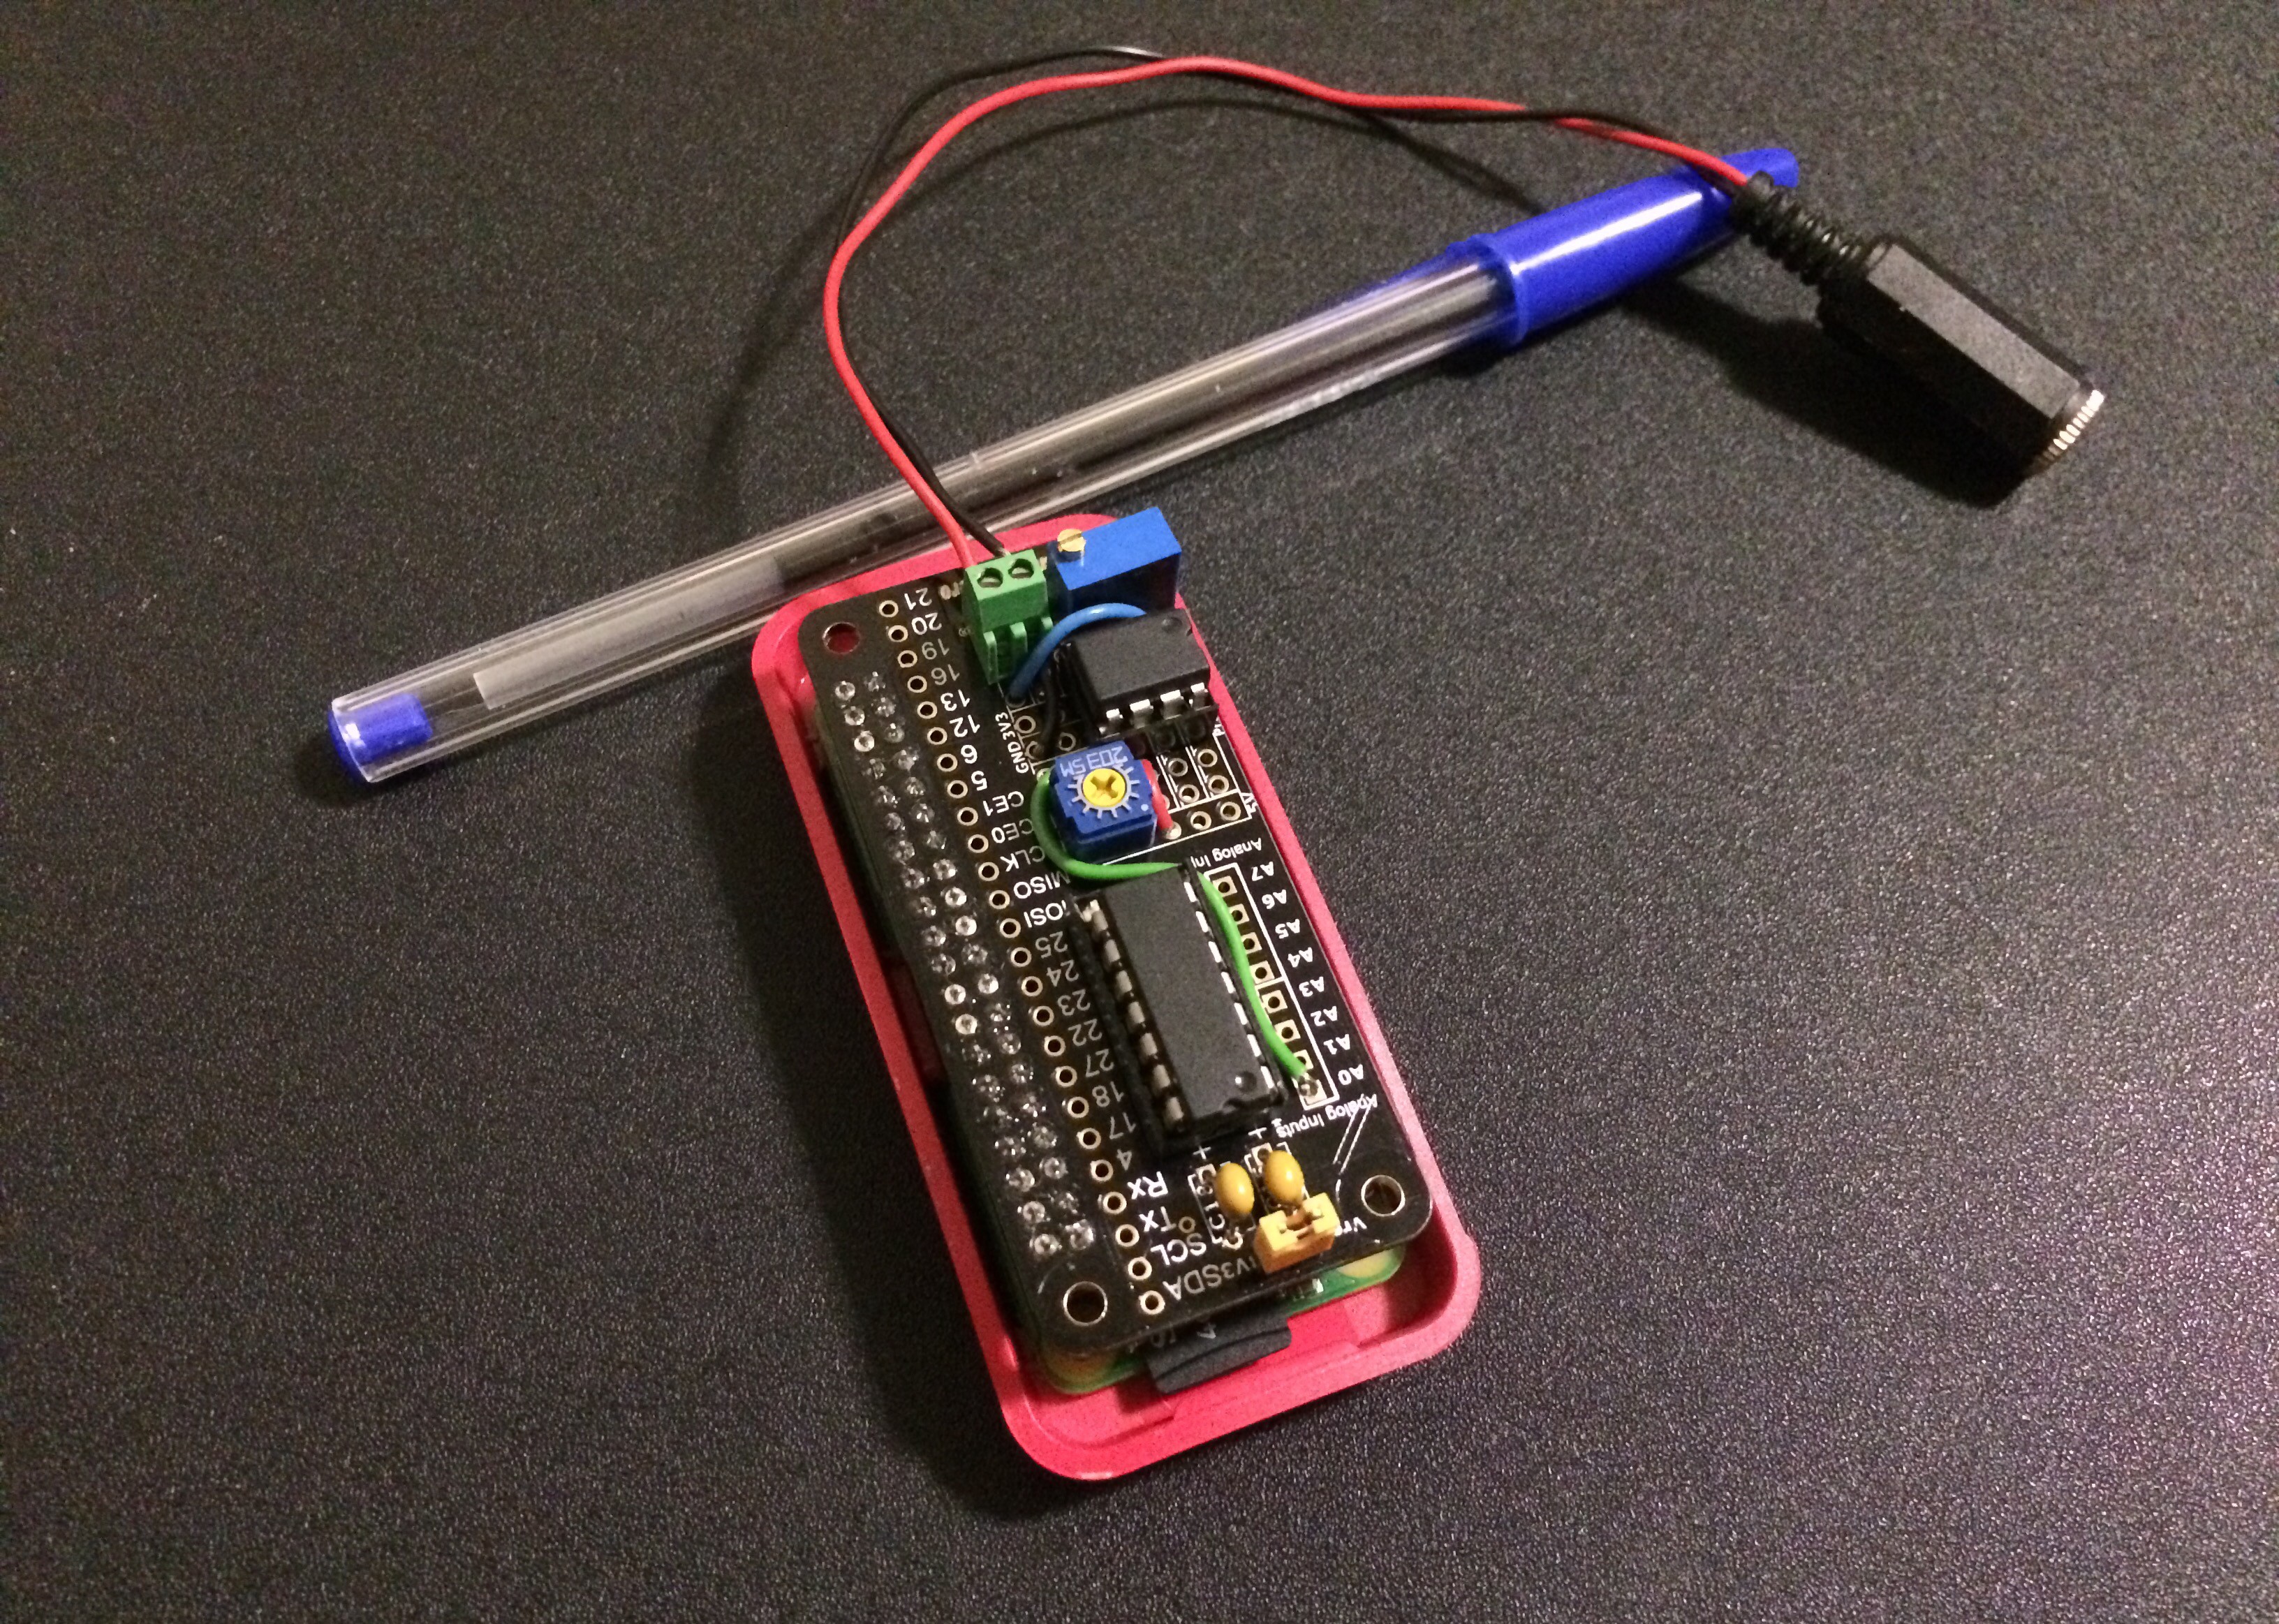
So here we go, this is a first test of a minimalist and cheaper version of eXaDrums. It's also a lot easier to build, so if you want to try eXaDrums but can't be bothered with all the complexity of the complete version, you can start by building yourself an eXaDrums Lite module like this one:
I'll keep working on the Android application and make it so that it can be used almost the same way as the full version of eXaDrums.
Needless to say that, as far as power consumption goes, eXaDrums Lite is way more efficient. In fact, even using a USB soundcard that draws about 80mA, the module runs continuously for more than 5 hours with a 3.7V 2200mAh battery. This is about 4 or 5 times more than the complete version of eXaDrums.
Discussions
Become a Hackaday.io Member
Create an account to leave a comment. Already have an account? Log In.