Close
0%
0%

Mr. Gibbs

A powerful, inexpensive, and extensible tactical sailing computer

Similar projects worth following
Project Home: http://mrgibbs.io
Demonstration: http://blog.mrgibbs.io/mr-gibbs-bench/

Mr. Gibbs is a powerful, inexpensive, and extensible tactical sailing computer. After getting fed up with the expensive commercial offerings (Velocitek, TackTick, RockBox), I decided to build my own and make it open source.

The goal of this project is to build a system which will meet or exceed the functionality of commercially available tactical sailing compass/gps units, with inexpensive, easy to acquire commodity hardware. A minimum configuration of the Mr. Gibbs unit and a Pebble watch will cost less than $150 to build.

The latest iteration runs on a Raspberry Pi Zero with Jessie Lite. It uses bluez5 for better bluetooth support (including BLE), and it uses 2 18650s for power. It also includes a BLE wind vane which is self powered and mounts to the mast with no wires.
  • 1 × Raspberry Pi Zero (Works on A+,B+, and 2, *should* work on zero but is untested)
  • 2 × MPU-6050 6 Axis Acclerometer/Gyro
  • 1 × HMC5883L Magnetometer Connectors and Accessories / Board-to-Board and Card Edge Connectors
  • 1 × Ublox NEO-6M GPS
  • 1 × Bluetooth 4.0 USB

View all 25 components

  • Gibbs 2.0 - On the water again

    Brook Patten05/20/2016 at 16:52 0 comments

    Mr Gibbs 2.0 had his 2nd shot at the water again last weekend, with a little more success this time.

    The crows nest: In Situ

    First, the good news. All the functionality we had in 1.0/2015 is working as it should again on the new bluetooth foundation. Pebble pairing etc had some snags but it's now working great, and the silly issue with the root console talking to the GPS via UART is obviously fixed so the GPS is working correctly again too. Work continues, however, on the wind sensor.

    When doing testing on my bench everything worked fine, even with the sensor ~50 ft away. The real world, however, not so much. What I think we figured out is that while the great outdoors is great from a standpoint of low EMF, few obstructions etc, it's not so great at providing surfaces for the RF to bounce off of. In this case I originally hung the PCB right under the anemometer on the front of the mast. The problem with this approach is that that the RF needs to somehow get from the front of the mast, to the back of the boat where I am, and it doesn't have anything to bounce off of. More optimized BT antennas such as the one in my iPhone had no problem talking to the wind sensor, but the $5 USB bt adapter I'm using on the Pi had issues. We resolved this with a bit of a hack (literally).

    Excuse the poor photoshop, I didn't get an actual picture of the hackjob prior to its destruction

    The basic idea behind the hack is simple, we moved the PCB & bluetooth radio back to the crane so that the RF would have a straight shot from the mast to the cockpit. I sawed off the bottom of the mount to reduce the weight aloft. This arrangement, while ugly, did resolve our signal issues.

    With 40 degree weather and winds gusting 25-40mph all day, we didn't get to sail, but the upside was that I spent the day sitting 30 ft from the boat, running in/out of the clubhouse trying out new code & configurations, so with that "tight loop" of being able to code and test in-situ I was able to accomplish quite a bit in terms of adding more robustness to the system. It will now handle a number of different disconnect/reconnect situations much better with both the pebble and wind vane, so I think that will come in very handy this season as we start using it more.

    Unfortunately, the temp and wind were still a little crazy Sunday, but the sun was out, so we attempted to sail anyway. We were not out very long before we decided it was too crazy for us and we headed in, but not before a crash-jib and a capsize which quickly pounded the wind-vane into the mud at the bottom of the lake. It actually survived pretty well. The PCB & battery never got wet, they still work fine. The anemometer, while caked with mud, once cleaned off still works. The wind-vane however did pull loose and was lost to the depths. I have ordered a new one ($25! try ordering a part from B&G or Raymarine for that!) so it should be back to 100% in time for racing next weekend.

    Despite not racing, we were able to capture some good data into a sqlite file (in which the accelerometer/gyro clearly show the capsize of course) so that was a small victory.

  • Mr. Gibbs 2.0 first sail, miserable failure

    Brook Patten05/04/2016 at 04:32 0 comments

    Well it's a good thing I wasn't relying upon Mr. Gibbs to navigate the ocean! The system had some issues, to say the least. The bad news is I didn't get to gather any usable data over the weekend, and we did not actually get to use the system at all. The good news is the issues are fixable, and I learned some important lessons.

    The biggest issue was that the GPS did not work. At the time it didn't make any sense, after all, the GPS was working fine last season right? The problem turned out to be 1 simple setting I forgot to change in my Jessie image, the setting which pipes the serial port to the root console. Essentially what was happening was the gps was dumping NMEA strings into the root console, and the console was dumping error messages back to the GPS. After about 30 seconds or so of this (during which the GPS would appear to work) the stream would go off the rails and the GPS would be rendered useless. Simply disabling the serial port root console fixes this issue. Unfortunately, without GPS data the rest of the system is fairly useless. Why didn't I catch this? Well first of all because I didn't have any time to do much testing last week, and second because when bench testing in my shop I use "simulated" gps, aka NMEA strings read from a file. A hard lesson learned.

    Perhaps the kind engineers at the US Naval Research facility can help me troubleshoot my GPS.

    The next issue was that I allowed my pebble to pair with Mr. Gibbs, but then later unpaired it from the watch. The problem here is that Mr. Gibbs doesn't know that, it just keeps trying to reconnect as if it was paired. Without a monitor/keyboard there is no way to unpair a Bluetooth device from Mr. Gibbs. I added some exception handling code so that if a connection fails, it will un-pair the device, enable discovery, and attempt to re-pair and reconnect. This should allow me to recover from this situation in the future without needing to "plug in" and poke around.

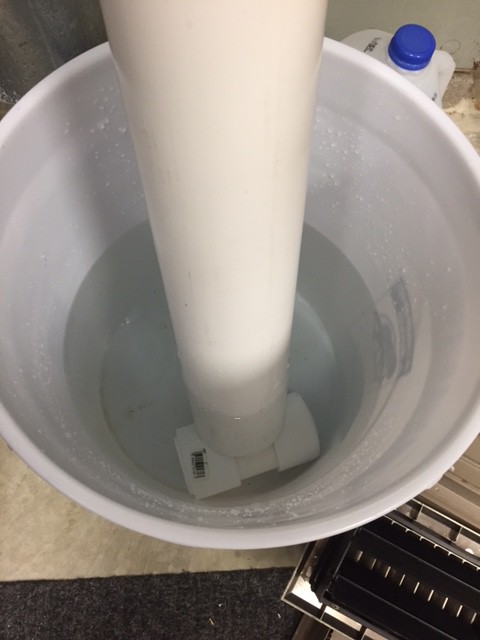
    Preparing to water-depth test the mast sensors

    The final issue was that the wind sensor did not work at all. It was able to connect to the sensor, however the sensor did not report any data. This was the most surprising failure to me. The other two I accepted because I haven't spent any time in that code for a few months. The wind sensor though is what I've been spending most of my copious free time working on, so when it failed utterly it was a bummer. I think the issue is timing. The wind in DC was strong, and the anemometer was spinning faster than I ever tested it on the bench. I believe this created a situation where interrupts were stacking up on the micro controller faster than it could process them, and the clock does not tick between interrupts so there are no deltas to compare, and thus no data. I decided to re-write the wind sensor code to use an existing debounce library, no interrupts, and one big loop.

    Simulating real world forces with household items can be... problematic

    Lesson learned: test with the full range of sensor input, in this case wind speed. It's surprisingly difficult to generate an artificial 30mph wind to attempt to saturate the microcontroller, but I have a plan involving a leaf blower. On the plus side, we did have a brief capsize that put the wind vane in the water and it survived unscathed so I consider that a victory for the PVC monstrosity I constructed to keep it dry.


    The old stars and stripes kite is not my fastest, but it seemed fitting given the venue.

    Other than Mr. Gibbs, we had a good regatta. We had a number of "first sail of the season"-type gear issues from hardware coming loose to knots coming undone and halyards going up the mast, all of which my crew handled in stride. One unforeseen downside to Mr. Gibbs failure was that not only did we not have that functionality, we also didn't pack a backup stopwatch. The pebble has a stopwatch app, but it is not baked in, it has to be loaded just like any other app, so we were timing our starts based on the minute hand. Suffice...

    Read more »

  • Mr. Gibbs 2.0 Hitting the Water

    Brook Patten04/21/2016 at 04:00 0 comments

    Mr. Gibbs 2.0 Hitting the Water

    Well I finally hit my 2.0 milestone, It's a good thing I started my updates in January! After our national regatta in September I took a break for a while. It seemed pointless to do any work on it knowing that winter was coming and I wouldn't be able to test anything until spring. Thankfully in January I got the itch and started working again, and thinking back now I've worked pretty solidly on it since then. I never would have gotten as much done this year had I waited until sailing season started, some of these changes took farlonger than I anticipated.

    The biggest, most obvious enhancement to the system since last year is the addition of the "crows nest" aka the wind speed/direction sensor which communicates to Mr. Gibbs via bluetooth low energy.

    It's not all that impressive to look at now, but the software changes to make it work were substantial both by me, as well as the contributors on BlueZ. 1.0 used BlueZ 4 and had some more minor shortcomings (such as the fact that you had to plug in a monitor and pair the pebble yourself) and some larger shortcomings such as the lack of functional bluetooth low energy support. I won't re-hash all the steps it took to get it working here (indeed, the majority of my blog posts explain this in detail) but suffice to say it was non-trivial. With the new wind vane I have access to a ton of new measured and calculated values which will be great fun to play with this season.

    • Apparent Wind Speed
    • Apparent Wind Direction
    • Mast Heel
    • Mast Pitch
    • True Wind Speed
    • True Wind Direction
    • Mast Bend Port/Starboard
    • Mast Bend Fore/Aft
    • Nominal Speed (for current wind)
    • Nominal Speed %

    With all this new data it became apparent I was going to want something a little more sophisticated than flat files for logging. For now I am using SQLite and each day the system creates a new .db file and recreates the necessary tables.

    To facilitate post-race analysis of all this data I have begun a new browser based implementation of VisualSail, though that is not complete yet for 2.0.

    In addition, I now have a solid platform on which to build sensors and accessories of all shapes and sizes that utilize either standard bluetooth or low energy protocols. Right off the top of my head I know that the next two devices will be a "big display" (the most common request from people who are unsure of the wrist watch idea and accustomed to the existing commercial offerings), and a low energy load cell to measure rig tension.

    The pebble plugin also got a lot of work. It now should work with all models of pebble, I spent a lot of time re-working the app-installation procedure to make it play nice with 3.x.

    The system overall is far smoother to use since all pairing and connection happens automatically on startup. The hardware is smaller, more durable, cheaper, and more energy efficient, it's amazing the difference even 1 year makes in the hobbyist electronics world! Lastly it's now made with printed PCBs which yields a much cleaner final product.

    The immediate next step is obvious, I'm going sailing this weekend at our first regatta of the year, so no doubt this weekend will yield bugs, ideas, or a bunch of frustration. I expect 2.0.x releases to happen for a couple months now as I patch up issues I discover on the water and refine things. In the coming month or so I also plan to release a pre-made raspbian image which will have all my hackings pre-configured to minimize the amount of setup a potential contributor has to do.

    Longer term, I have some features planned for 2.1 but this list is by no means final so I'd love to hear ideas. One that I'm considering adding is the ability to "talk", possibly even accept voice commands. That would be an interesting project because it would require a few new technology pieces such as a2dp audio (both directions), text to speech, speech to text, and building out a protocol to communicate effectively.

    Another idea is to build out a neural network which I could train using empirical data and...

    Read more »

  • BLE Wind Vane Assembly

    Brook Patten04/21/2016 at 03:59 0 comments

    BLE Wind Vane Assembly

    With the main Mr. Gibbs assembly mostly worked out and waterproof, I set my sights on the wind vane this evening.

    The mount for the wind vane is intended to clamp on the top of my mast. It is made up of 2 pieces of PVC which are pop riveted together. The Peet Bros anemometer/vane is mounted into the top of the smaller pipe, and a "clean out" plug is glued to the bottom end. The larger section of pipe is the part which will clamp to the mast (with the assistance of a velcro strap) and it has a slot cut into it to give it some give.

    The Peet Bros Anemometer is a 4 conductor phone wire, so I thought it would be easy to just use normal RJ connectors to connect it to the blend micro. The tricky part is making this all as waterproof as possible. I made a smaller capsule out of 1" PVC for the "crows nest" board, battery, etc which gets inserted into the bottom of the larger mount.

    Inside of this capsule is where the real guts of the operation live. The 4 conductors to the vane go out the top, and the battery (1 18650 cell) go in the bottom.

    The PVC enclosure seems pretty ideal in terms of RF interference. In testing I was able to get well over the distance that will be required away and still have a strong data feed. One thing that still remains to be done is to figure out how to make sure everything stays oriented correctly so that heel/pitch measurements won't get shifted around, but I suspect if all else fails a small amount of bubble wrap will do the job.

    Lastly, I soldered a new USB plug on to my Pi-Zero. This time I used 30 AWG kynar wire so that the wires wouldn't fray or get shorted out because the shielding had melted, this works out much better than the previous wire I had used.

    With everything assembled I was of course anxious to give it all a dry run. I ran into a few software issues which I'm going to detail in another post because it's pretty lengthy.

    So what does the wind vane do for me? Quite a bit actually. First, there are 4 new "raw" values available.

    • Apparent Wind Speed
    • Apparent Wind Direction
    • Mast Heel
    • Mast Pitch

    By combining Apparent wind with the course over ground and speed from the GPS, we can calculate

    • True Wind Speed
    • True Wind Direction

    By combining the heel / pitch values from the Accelerometer in the boat, we can theoretically calculate. (This is really just me experimenting, I don't know if this one will actually work)

    • Mast Bend Port/Starboard
    • Mast Bend Fore/Aft

    Lastly, (and perhaps the most exciting one to me) is that I can record maximum boat speed values for each combination of true wind speed + true wind direction, and over time generate polar charts. The system can then refer back to these polars using current values and tell me

    • Nominal Speed (for current wind)
    • Nominal Speed %

    That last number is the big one. My ongoing goal has been to distill it down to 3 numbers. VMC % I already have, otherwise known as "am I going the right direction?". With Nominal Speed %, I now have "am I going as fast as I should be?"

    I'm also working on a web UI which will allow loading/viewing of the data Mr. Gibbs records. Here's a quick demo of the polar chart in action.

    Astute readers will also note a new addition to the pebble fleet, I upgraded my "daily" to the newer time model. It worked just fine with Mr. Gibbs since I had already done the legwork to make it work with firmware 3+

  • Final Prototype Assembly

    Brook Patten04/21/2016 at 03:58 0 comments

    Final Prototype Assembly

    With the first regatta of 2016 only 2 weeks away, I'm finally getting the latest revision of Mr. Gibbs to the point where it's ready to actually throw on the boat and sail. The major development of late has been revisions of the PCBs for Mr. Gibbs, as well as "The Crows Nest" aka the mast mounted anemometer & wind vane. It took 3 tries to get things positioned right on Mr. Gibbs, but I did manage to get a functional Crows nest on the first try. Both boards showed up this week.

    You'll note that it's still using the MPU-6050 Accelerometer/Gyro andHMC5883L Magnetometer rather than the newer MPU-9250 that has both combined in one breakout. There are 2 reasons for this decision, first is cost, the combo of 6050+5883L cost less than a 9250, and second is that I simply don't have the time right now to code the necessary bits for the 9250 given that the other arrangement is working fine.

    I will still probably tweak the designs a bit more, there are a few problems still, but they are relatively minor. On Mr. Gibbs, the power input is near the 5883L, the problem this presents is that most power regulators I'm buying have a magnet around the wiring to remove noise, this magnet is obviously going to affect my compass readings, for now I will likely just remove the magnet.

    On the Crows nest there are 2 problems with the LEDS. First, mounting them on the back has proven to be a dumb idea, they would be better mounted between the Blend Micro and the MPU-6050 in the blank space, or at the end. Second, they are too close together so right now I can't mount the vane LED at all. Again, minor, but annoying nonetheless.

    The good news is that despite these flaws both boards work fine. I was able to receive wind data via BLE, as well as read data from the GPS, Accelerometer, and Compass. Finally, both devices run on the 18650 Lithium batteries as planned (though I have not tested for how long yet)

    For enclosures, the previously blogged 2.5" PVC pipe is still the plan for Mr. Gibbs, and I have built a mast head mount for the crows nest which will hold both the PCB, 1 18650 battery, and the Peet Bros anemometer.


    Now the bad news. On Raspbian Jessie the built-in BlueZ version does not appear to support Gatt via dbus even with the experimental flag enabled. The obvious solution was to upgrade BlueZ, I did this by adding debian stretch sources and leaving jessie as the default and then updating BlueZ via apt that way. Success! Gatt seemed to be working.

    And then I ran Mr. Gibbs and it failed to connect to a Pebble. A quick glance at dmesg yeilded Bluetooth: SMP security requested but not available. It appears that there is a kernel bug in that version of the kernel which prevents the pairing from occuring. Running rpi-update does not appear to resolve the issue (that would have been too easy). So I'm left with using old blueZ (which can't use gatt) or new blueZ (which can't pair).

    It appears my next step is to compile a more modern kernel to hopefully resolve the SMP issue. We're about to find out how deep the rabbit hole goes.

  • First Round of PCBs

    Brook Patten04/21/2016 at 03:57 0 comments

    The first prototype breakout with the Pi Zero has been reasonably successful, but really put my soldering skills and patience to the test. After resolving issues with shorts and durability, I finally decided it was time to consider having a PCB (printed circuit board) made rather than to mess with wire-wrapping and soldering as I have been doing.

    Disclaimer, I'm a software guy, I have never designed a PCB before, and I have no idea what I'm doing.

    That being said, it seems like the tools are really good these days. My first draft of the Mr. Gibbs board was done infritzing, and is being fabricated by OSH Park.

    There's nothing particular novel or interesting about this board. It simply connects power to everything, uart to the gps, and i2c to the compass and accelerometer. I added a header for power input, a 4 pin header for an external i2c device (TBD), a switch to turn power on/off, and a momentary push button tied to a GPIO which will probably be used to trigger bluetooth pairing.

    I also started working on a design for the Crows Nest (BLE wind sensor) which will go on the mast.

    This board is designed to be used with the blend micro, an MPU-6050 accelerometer, and a peet bros anemometer. There are 2 pulldown resistors for the anemometer reed switches, LEDs to show bluetooth status and anemometer switch closures, and a power header.

    I posted all the files on github with the source. They have been sent to fab at OSH Park but I haven't gotten them back yet so they have not been tested. The Crows Nest isn't even ready for fab yet, but I should finish it up soon.

    So far fritzing has been meeting my needs, though I definitely feel like I should spend the time to learn to use kicad or eagle. I'm sure I will in time.

  • Pi Zero Project Update

    Brook Patten03/14/2016 at 03:28 0 comments

    Read this post on my Blog

    #Hardware#

    The big change for the 2016 prototype is the change from the Raspberry Pi 2, to the Pi Zero. This change does a number of beneficial things such as lowering overall cost, increasing battery life, and shrinking the footprint.

    Getting Mr. Gibbs to run on the Pi Zero took a little effort. The latest changes to the bluetooth stack require a bleeding edge version of Mono, and Mono does not (that I've found anyway) provide armel CI builds that will run on the Zero. The good news is that [building Mono from source on the Pi Zero](https://github.com/brookpatten/MrGibbs/blob/master/README.md) is pretty straightforward, if time consuming.

    In the interest of saving time between iterations, I went ahead and bought all parts in triplicate to make 3 eventual prototypes.

    The [new protoboard](http://amzn.to/1Llj86z) is 3cm x 7cm to roughly match the size of the Pi Zero. The circuit is very simple, UART tx/rx to the GPS, i2c sda/scl to the HMC5883L compass and MPU-6050 accelerometer, and +5V/grd to everything. I added a 90 degree header to act as a plug for the [power regulator](http://amzn.to/1Llj86z), and a [40 pin male header](http://amzn.to/1LljRF3) to connect to the Pi.

    The [40 pin female](http://amzn.to/1pFLpLk) connector is soldered to the back of the Pi Zero, and the 2 boards snap together via the 40 pin connector, and then the Pi is attached to the [18650 battery holder](http://amzn.to/24Z6iRU) via double sided tape. The [GPS antenna](http://amzn.to/1YPeXCd) is secured to the end with tape as well.

    For an enclosure, I decided to build my own out of 2" PVC pipe which is readily available, cheap, and water tight.

    I did some basic tests to ensure it was waterproof in a 5 gallon bucket.

    I still have a bit more to do in terms of testing and configuration, I'm having some issues with i2c on the Zero, and the new GPS (I changed vendors to save $6, always a good idea) but I'm hopeful these issues will be resolved soon.

    ---

    #Software

    The biggest change in terms of software has been to get the Bluetooth Low Energy Wind speed/direction sensor working. This allows a slew of new interesting metrics.

    * Apparent Wind Direction

    * Apparent Wind Speed

    * True Wind Direction

    * True Wind Speed

    * Mast Heel

    * Mast Pitch

    * Mast Bend Beam (Difference in angle left/right from hull sensor to mast sensor)

    * Mast Bend Centerline (Difference in angle front/back from hull sensor to mast sensor)

    * Peak Speed in Knots (peak speed from Polar Chart for current true wind speed/direction)

    * Peak Speed Percent (current speed as a percent of peak)

    The last one is the one I am most interested in. The end goal has always been to have Mr. Gibbs process as much objective data as possible and distill it down to simple numbers for the Skipper. In theory I want 3 numbers.

    * Am I going the right direction (AKA, VMC %)

    * Am I going fast (Peak Speed Percent)

    * What should I be doing next (TBD, but one idea is distance until next tack)

    With VMC % working last season, and now Peak Speed % too, we're making real progress toward this goal.

    ---

    The other big development has been the addition of persistence plugins. Currently there are 2, both of which use Sqlite and Dapper to record data. The first is the StateLogger plugin, which simply logs all the values to a set of tables. A new database is started at each boot so that individual days of data can easily be removed.

    The second is the PolarRecorder, which takes the current true wind speed/direction and looks up a normalized polar value on the current chart. If the current boatspeed is better than the existing value it updates the polar, if not, it returns the existing value as the peak for metrics. The idea is that over the course of the season we will build out polars for our boat based on empirical data.

    ---

    That's all for now, progress is happening quite quickly now since most of the work is in the managed space. My first regatta is mid-April so I'm hoping to have all of the [2.0](https://github.com/brookpatten/MrGibbs/issues)...

    Read more »

  • Pi Zero build Progress

    Brook Patten03/14/2016 at 02:57 0 comments
  • Bluetooth Low Energy with C#, BlueZ 5 and Mono

    Brook Patten03/08/2016 at 20:13 0 comments
  • Easy waterproof enclosure for a Raspberry Pi Zero

    Brook Patten02/19/2016 at 04:57 0 comments

View all 21 project logs

View all instructions

Enjoy this project?

Share

Discussions

MrGod2U wrote 03/29/2024 at 19:33 point

Hey Brook! I came across this while looking for a debounce circuit for my Peet Bros Anemometer. I had one on a breadboard and tried designing a PCB for my first time, they arrived but didn't work!

I've tried software debounce with no luck, the breadboard one worked amazing (couple resistors and a capacitor for both switches going through a Schmitt trigger)

I'm wondering if you could share how you tackled this! I'll include a link to a picture of my schematic that didn't work (I wish I'd not taken the breadboard apart, will have to start over maybe).

https://imgur.com/a/65fFt3y

  Are you sure? yes | no

Erland Lewin wrote 02/19/2016 at 22:17 point

I'm building a chart plotter for sailing with a Raspberry Pi, also with Bluetooth (but for communicating from a GPS/Magnetometer wireless dongle to the chart plotter). I'm using a Pixel Qi sunlight readable display. I'm using a PowerBank style USB-battery for the main power for now. The GPS/Compass dongle should be able to run off solar cells without any external power, and I keep the screen/RPi and battery together.

So it seems our projects have quite some overlap - you're welcome to check out my PiChart project ( https://hackaday.io/project/9471-pi-chart ), and maybe there are some areas where we could cooperate or share ideas.

  Are you sure? yes | no

Brook Patten wrote 02/23/2016 at 14:49 point

Sure, thanks for getting in touch.  I have looked at those Pixel Qi displays for potentially using them as a big dashboard display but I decided they're too costly for something I would want to put on my boat (where things tend to get wet and/or destroyed) for this project.

My code is more tailored for bouy / dinghy racing so I don't have anything like charting capability, It's usually a safe assumption for this type of course that it's far enough from land and shallow water that it shouldn't interfere with the race.

I just got my new version running on a Pi Zero with 2x 18650 batteries and it has gotten MUCH smaller than last year with the powerbank + Pi 2.

Have you used the new hardware opengl support in the latest jessie release?  I wonder if that would help smooth out your chart rendering/zooming?

  Are you sure? yes | no

Similar Projects

Does this project spark your interest?

Become a member to follow this project and never miss any updates