Close
0%
0%

Digital joystick (8-bit) to USB adapter

Connect two digital joysticks (C64/128/Atari/Amiga era) as USB game controllers

Similar projects worth following
A small project completed in one day with resources available at hand.

This hardware and code allows to connect two 8-bit era joysticks to a modern PC as USB game controllers. Optionally the joystick events can be translated into keypresses: WSAD and arrow keys.

It was built in three hours using a small food container, two DB9 male sockets, one Arduino Micro Pro and some wires as all the components.

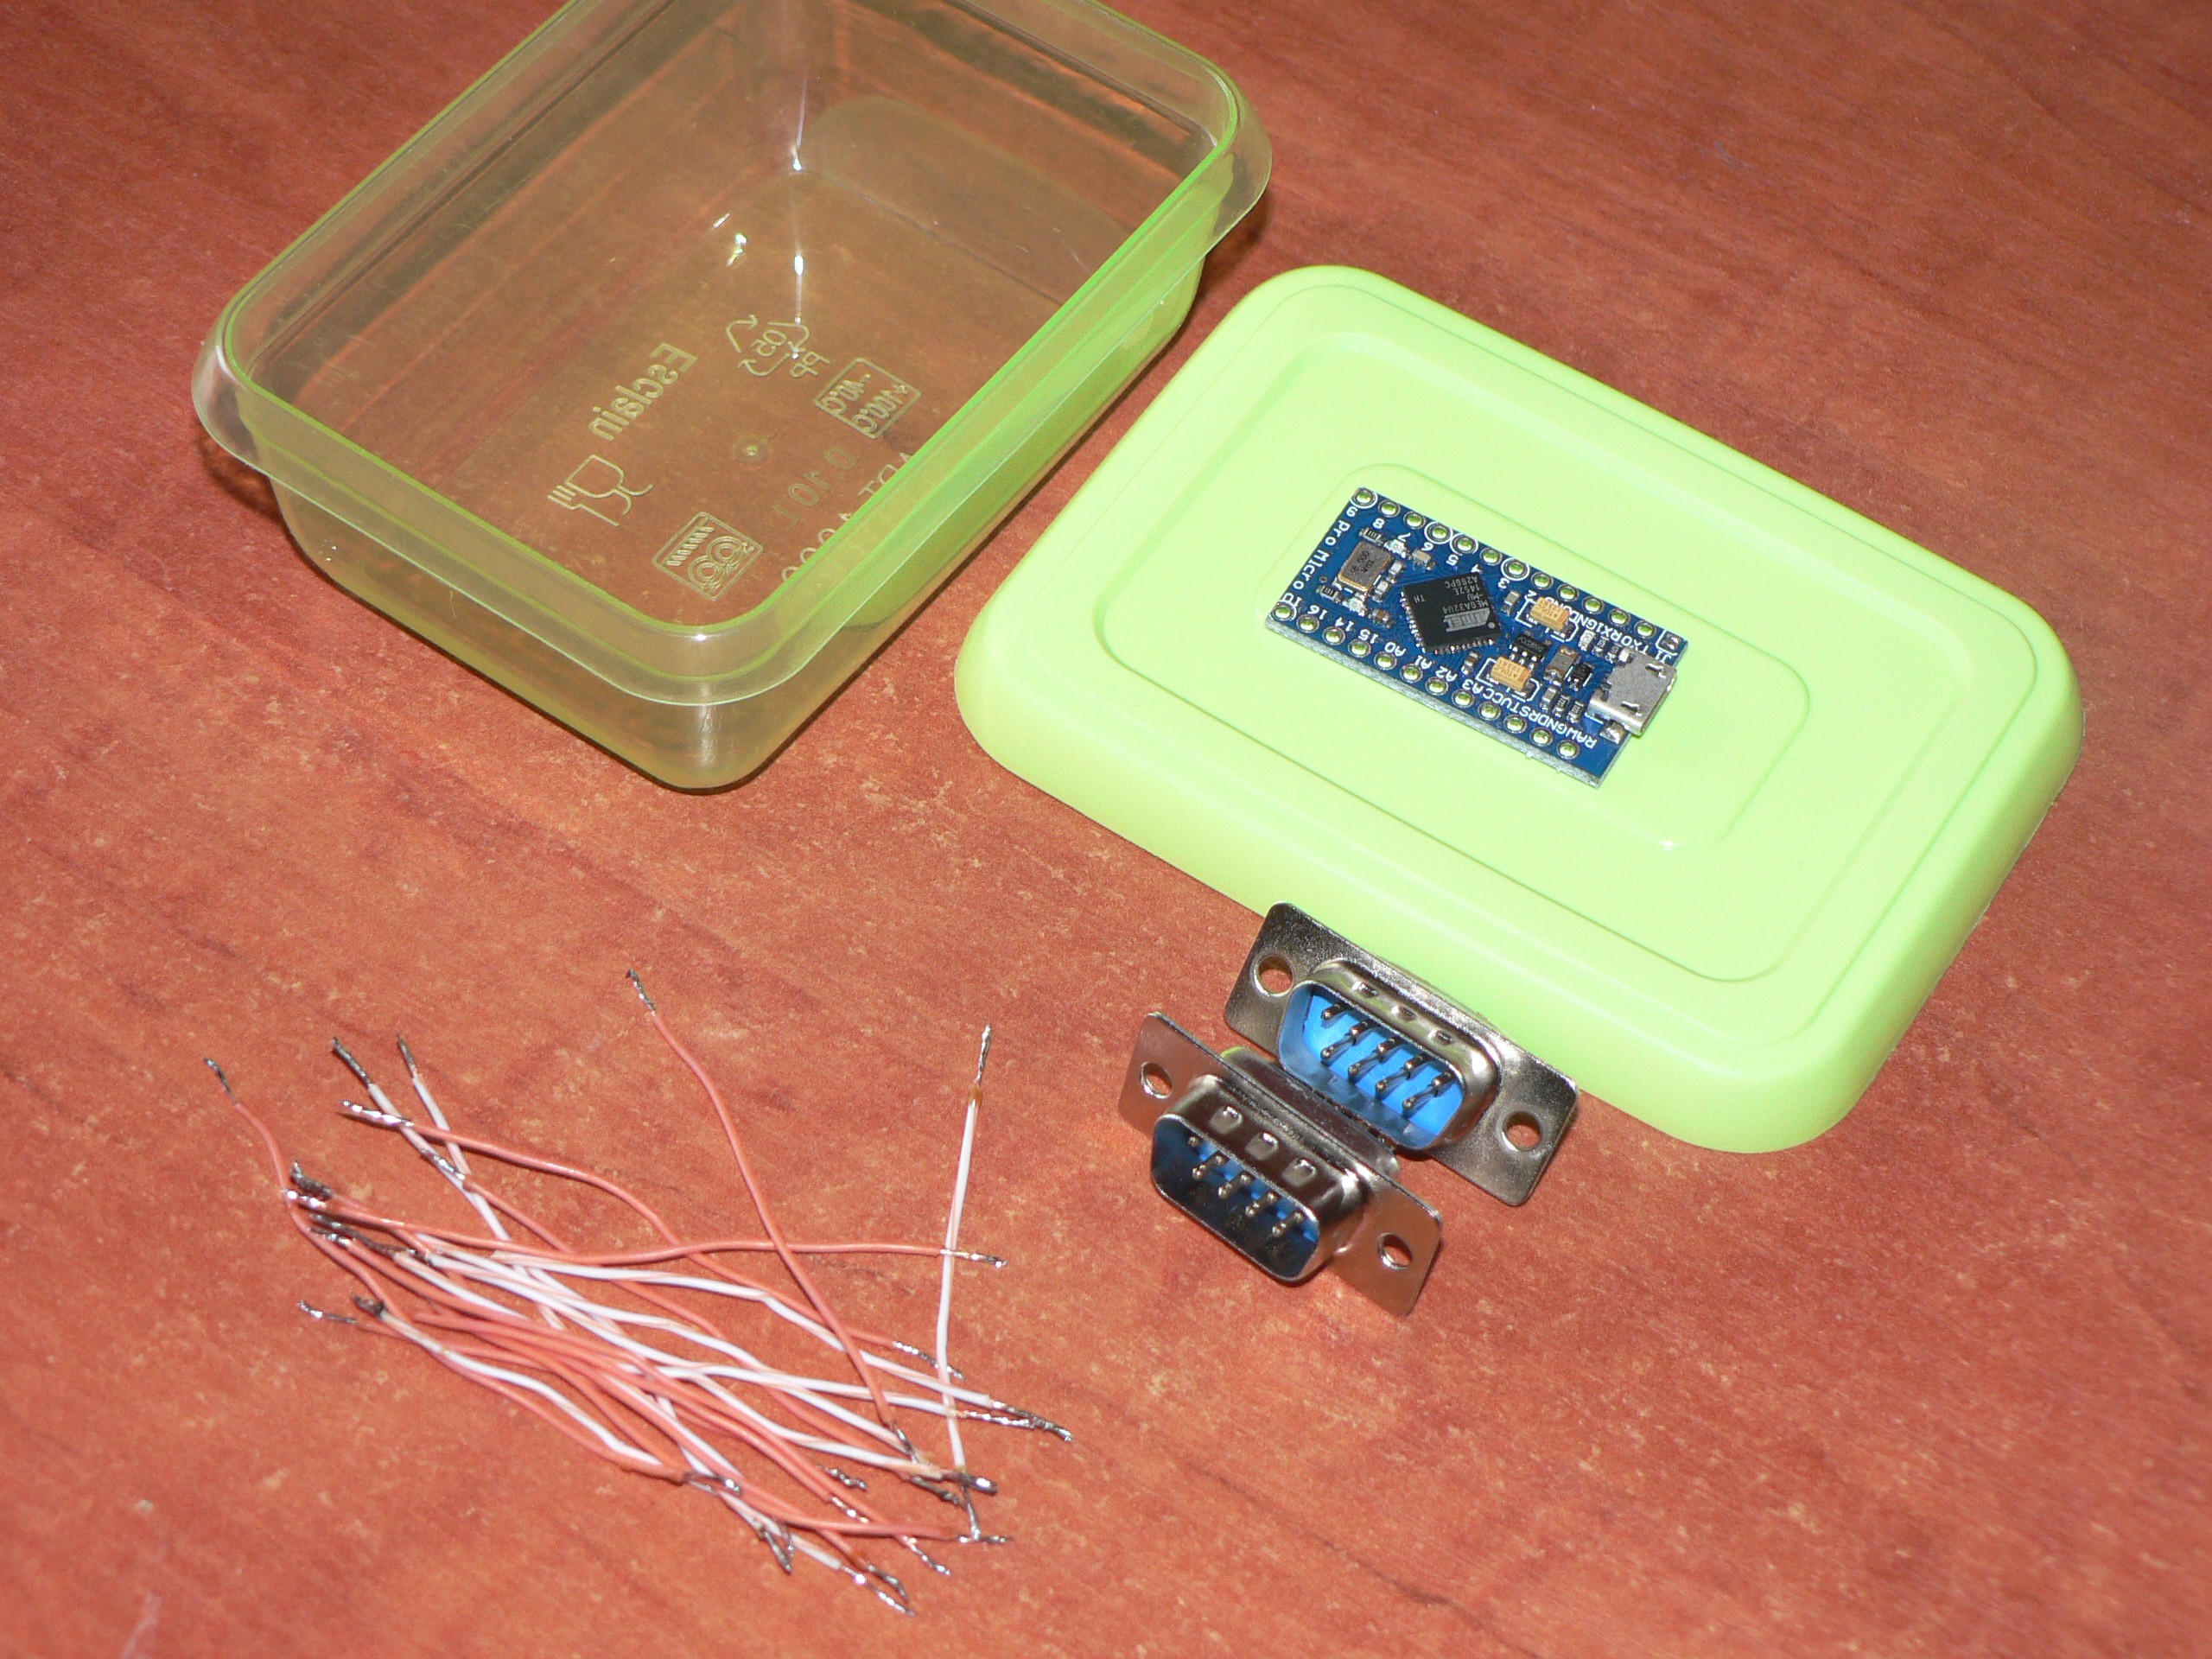
Please read the documentation from README.md in github repository for list of connections and software features.

  • 1 × Arduino Micro Pro
  • 2 × DB9 male socket for cable That's where joysticks are connected
  • 1 × Small food container Cheap enclosure
  • 18 × Pieces of wire

  • C++ wins again

    Maciej Witkowiak02/10/2016 at 22:38 0 comments

    I have just rewritten joystick code in fully object-oriented fashion.

    Earlier DigitalJoystick constructor needed 13 arguments (USB Joystick handle, 5 pins, 5 keys, potx and poty). Now it is constructed from objects xAxis, yAxis and trigger.

    • there is no code repetition anymore - both axes are handled by the same class
    • the code is easier to read
    • the cost? there was no cost, I saved 24 bytes of flash

    Comparison side by side is here.

    I put "again" in the title because of earlier experiences from my other project (check out "Programming" section). It is actually more efficient to write fully object-oriented code for 8-bit microcontroller.

    Unbelievable.

  • Project completed

    Maciej Witkowiak02/07/2016 at 00:34 0 comments

    Project completed, tested sucessfully with VICE and MAME.

View all 2 project logs

  • 1
    Step 1

    Gather all the components

  • 2
    Step 2

    Use Dremel tool to drill holes for DB9 sockets. It's very easy in soft and thin plastic.

  • 3
    Step 3

    Solder wires. For me the easiest way was to solder to Arduino board first and then to cable socket. When you are done, connect and test joystick #1

View all 5 instructions

Enjoy this project?

Share

Discussions

Andrea wrote 01/09/2019 at 14:43 point

I'm searching a Sketch for 2  Joystick with 2 or more fire buttons (Amiga\Msx Joystick)
How is the max number of buttons we can define with 2 joystick and 1 Arduino Micro?
When project is ready and I connect it to my windows pc, Do I see 2 gamepad at the same time?
The connection is standard or I always have to config them? (For example with a commercial gamepad Fire buttons and directonal buttons are plug and play configured always )
Thanks

  Are you sure? yes | no

Similar Projects

Does this project spark your interest?

Become a member to follow this project and never miss any updates