Next we need to wire our sensors.
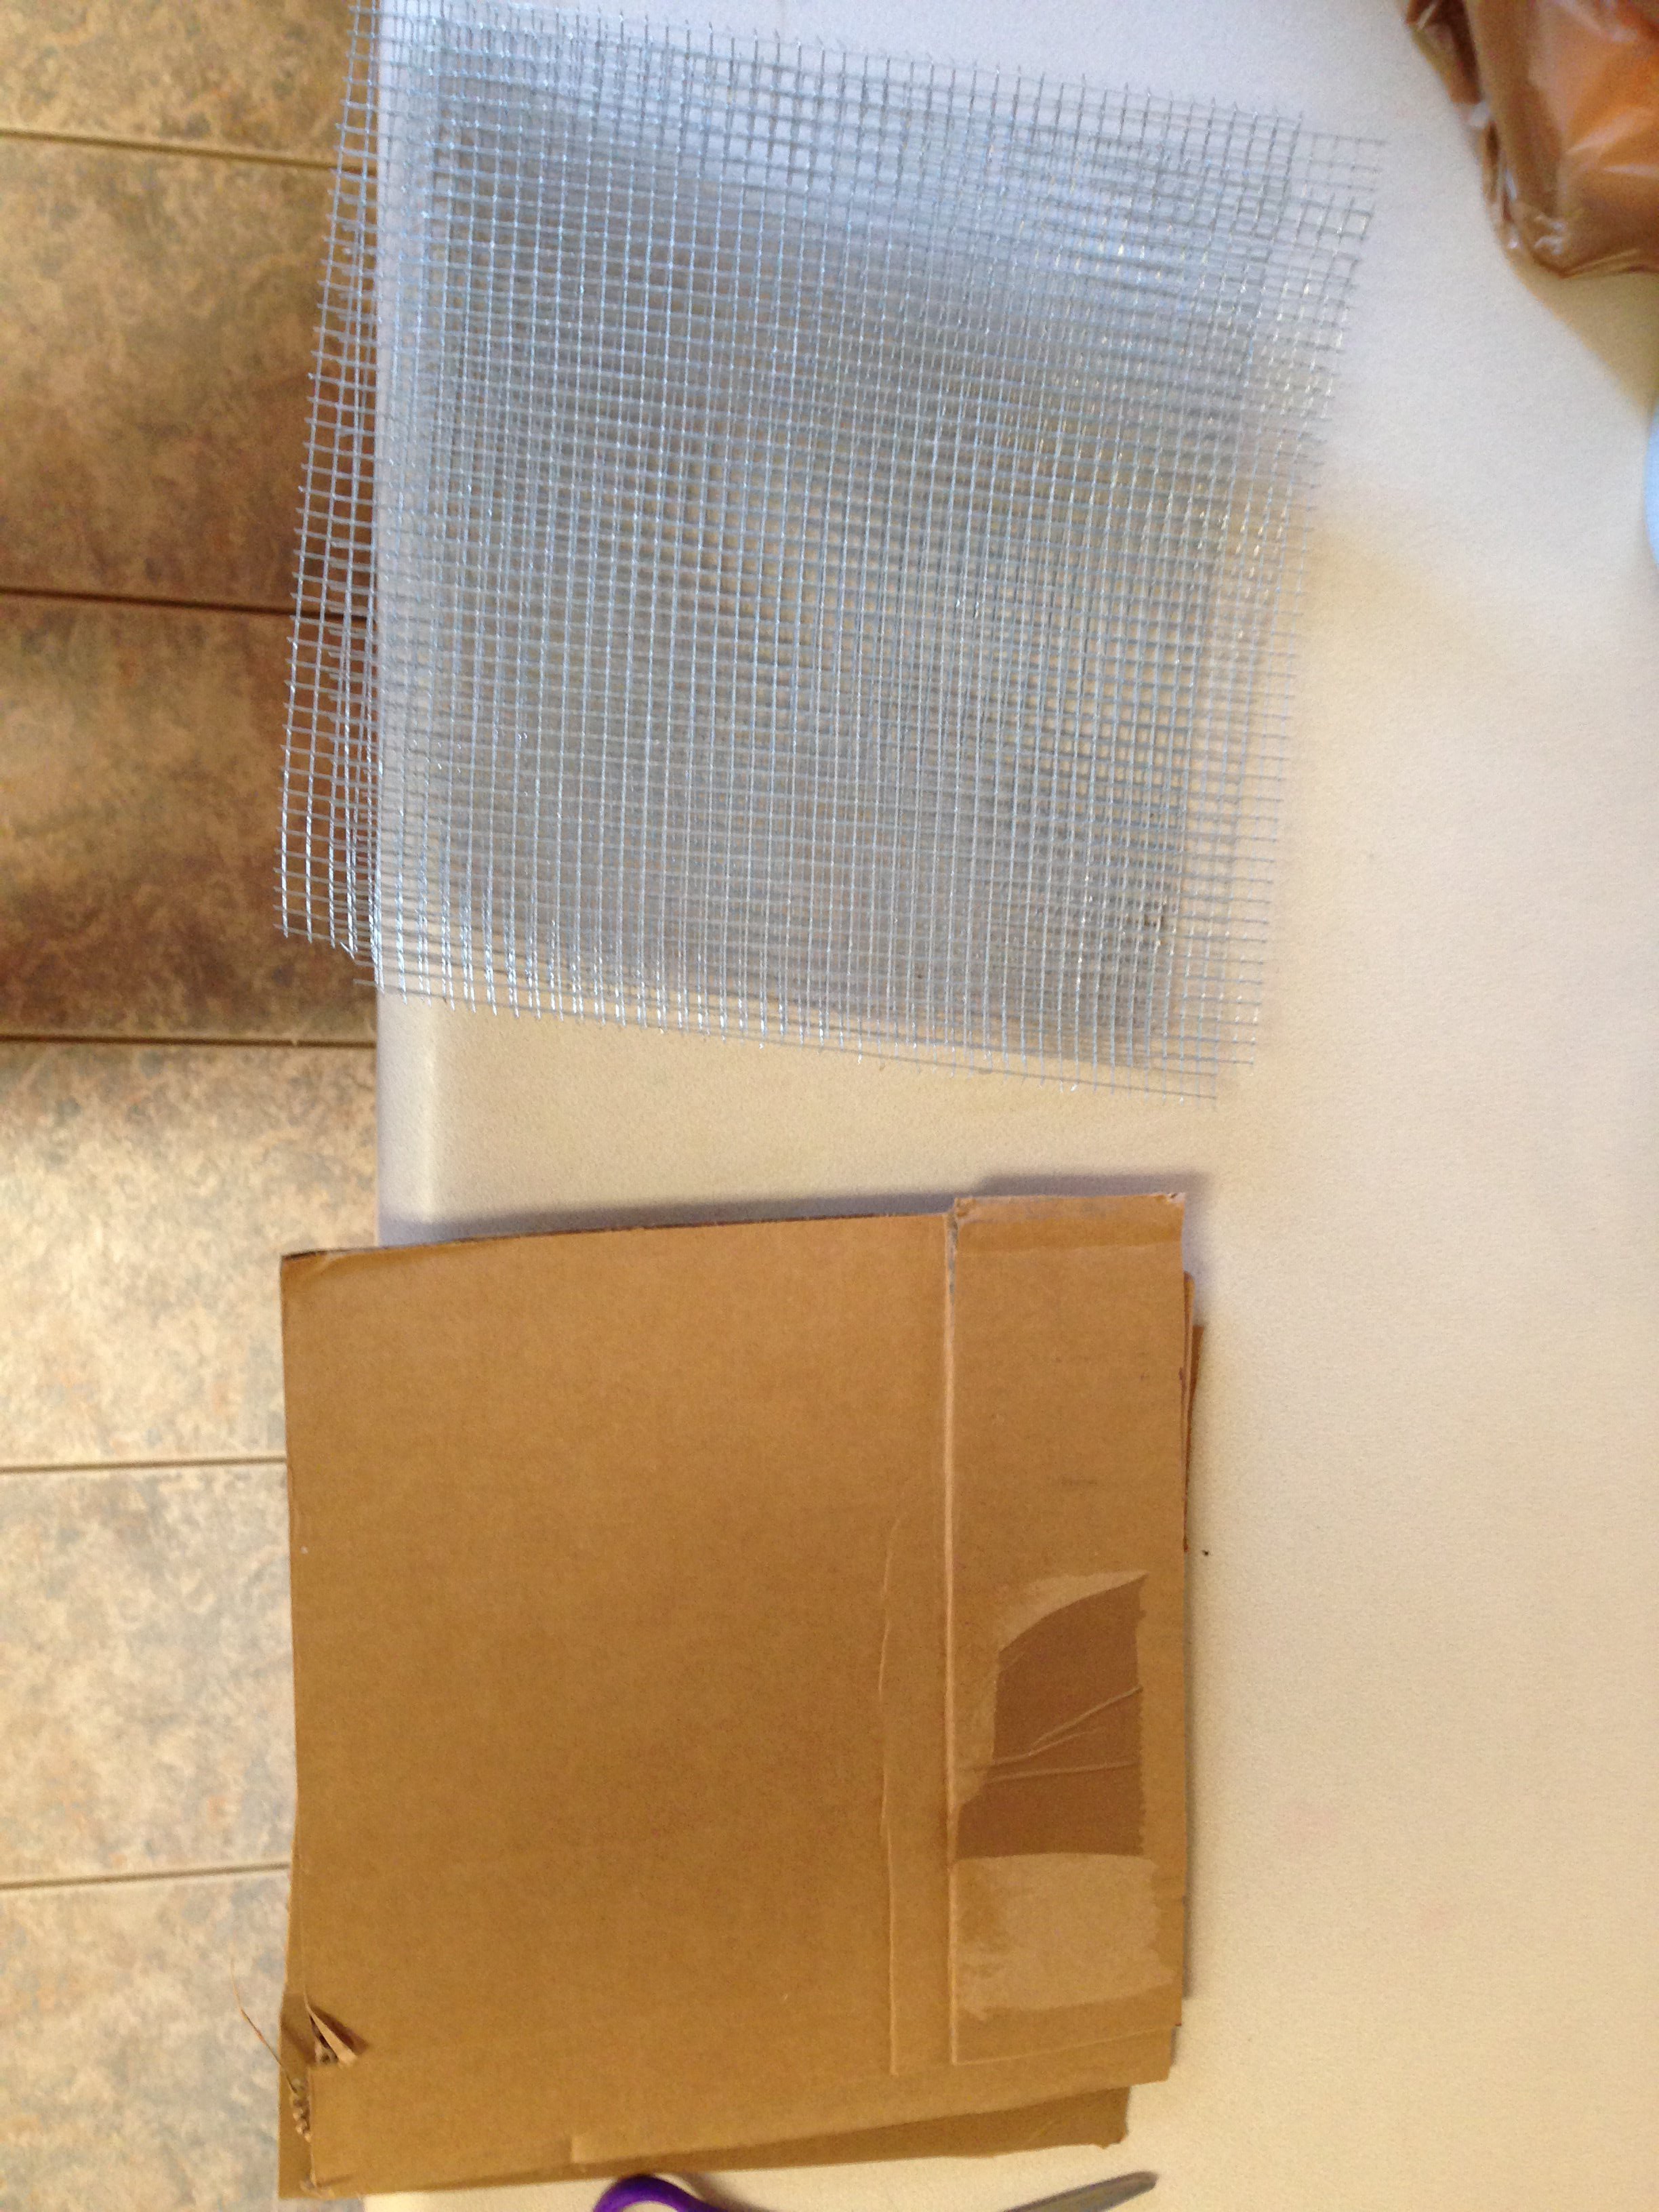
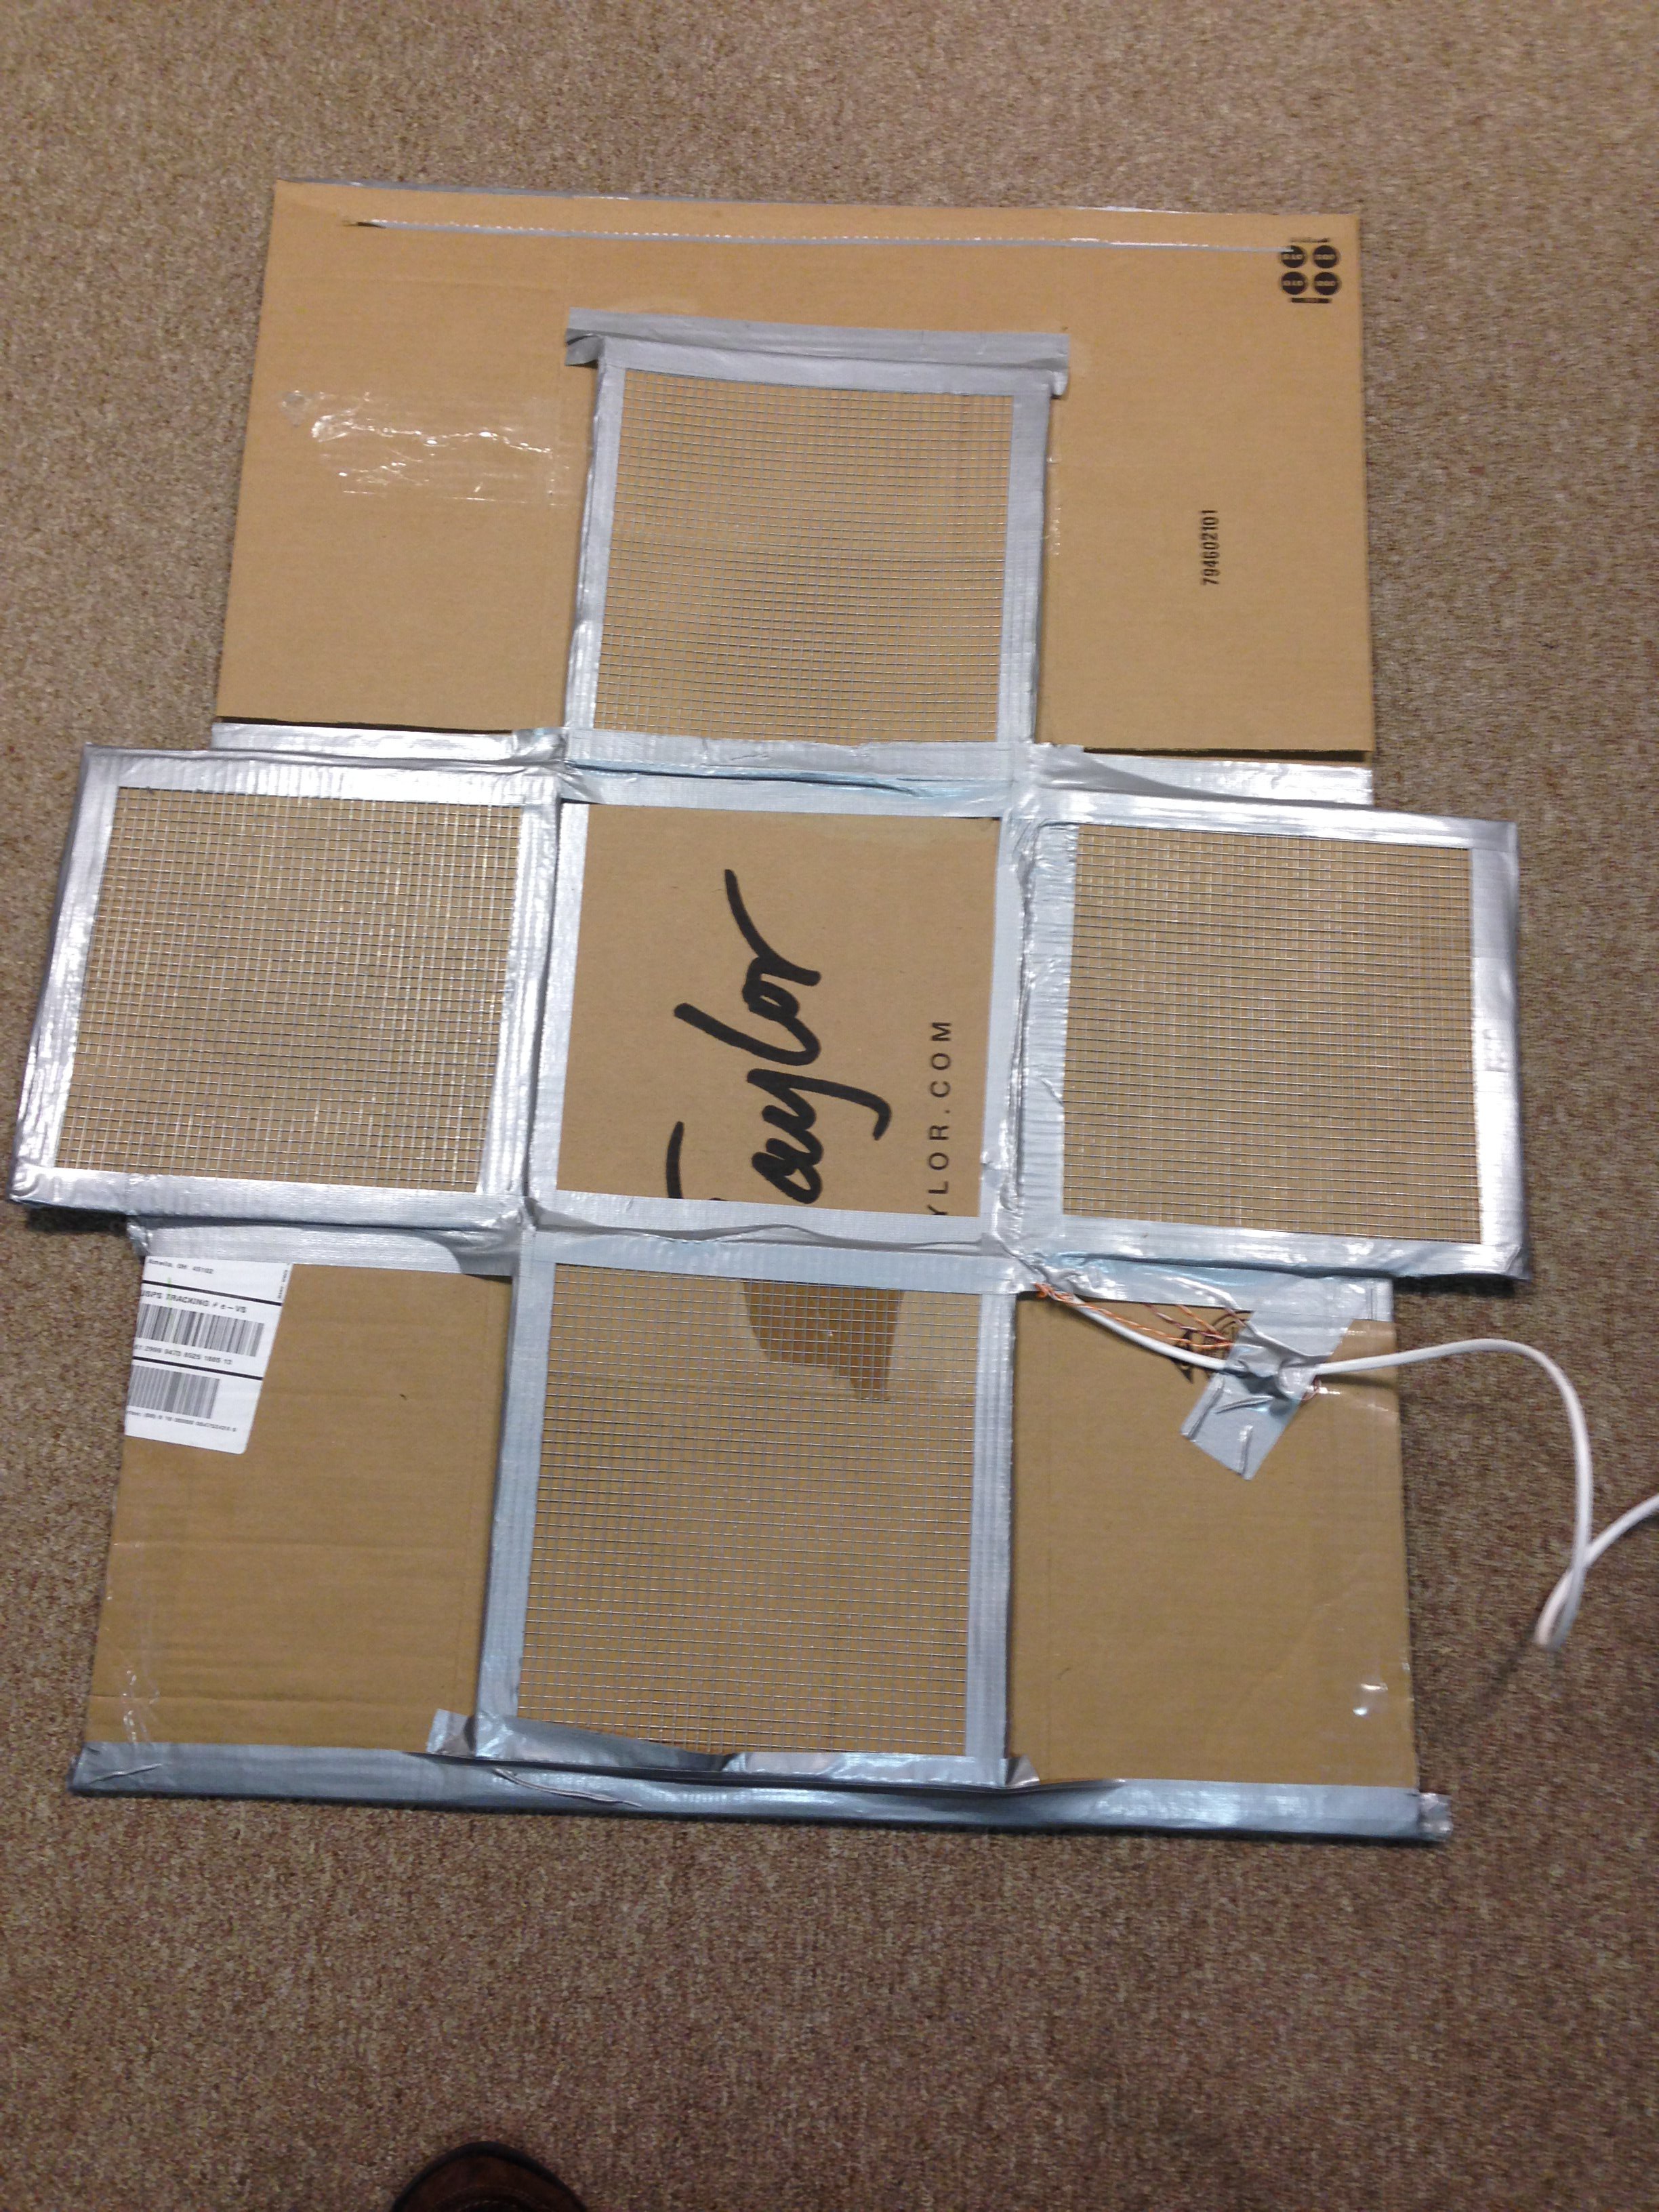
Cut 1/4" Chicken wire into 8x 11" by 11" squares. Cut cardboard into 11.25" by 11.25" squares.
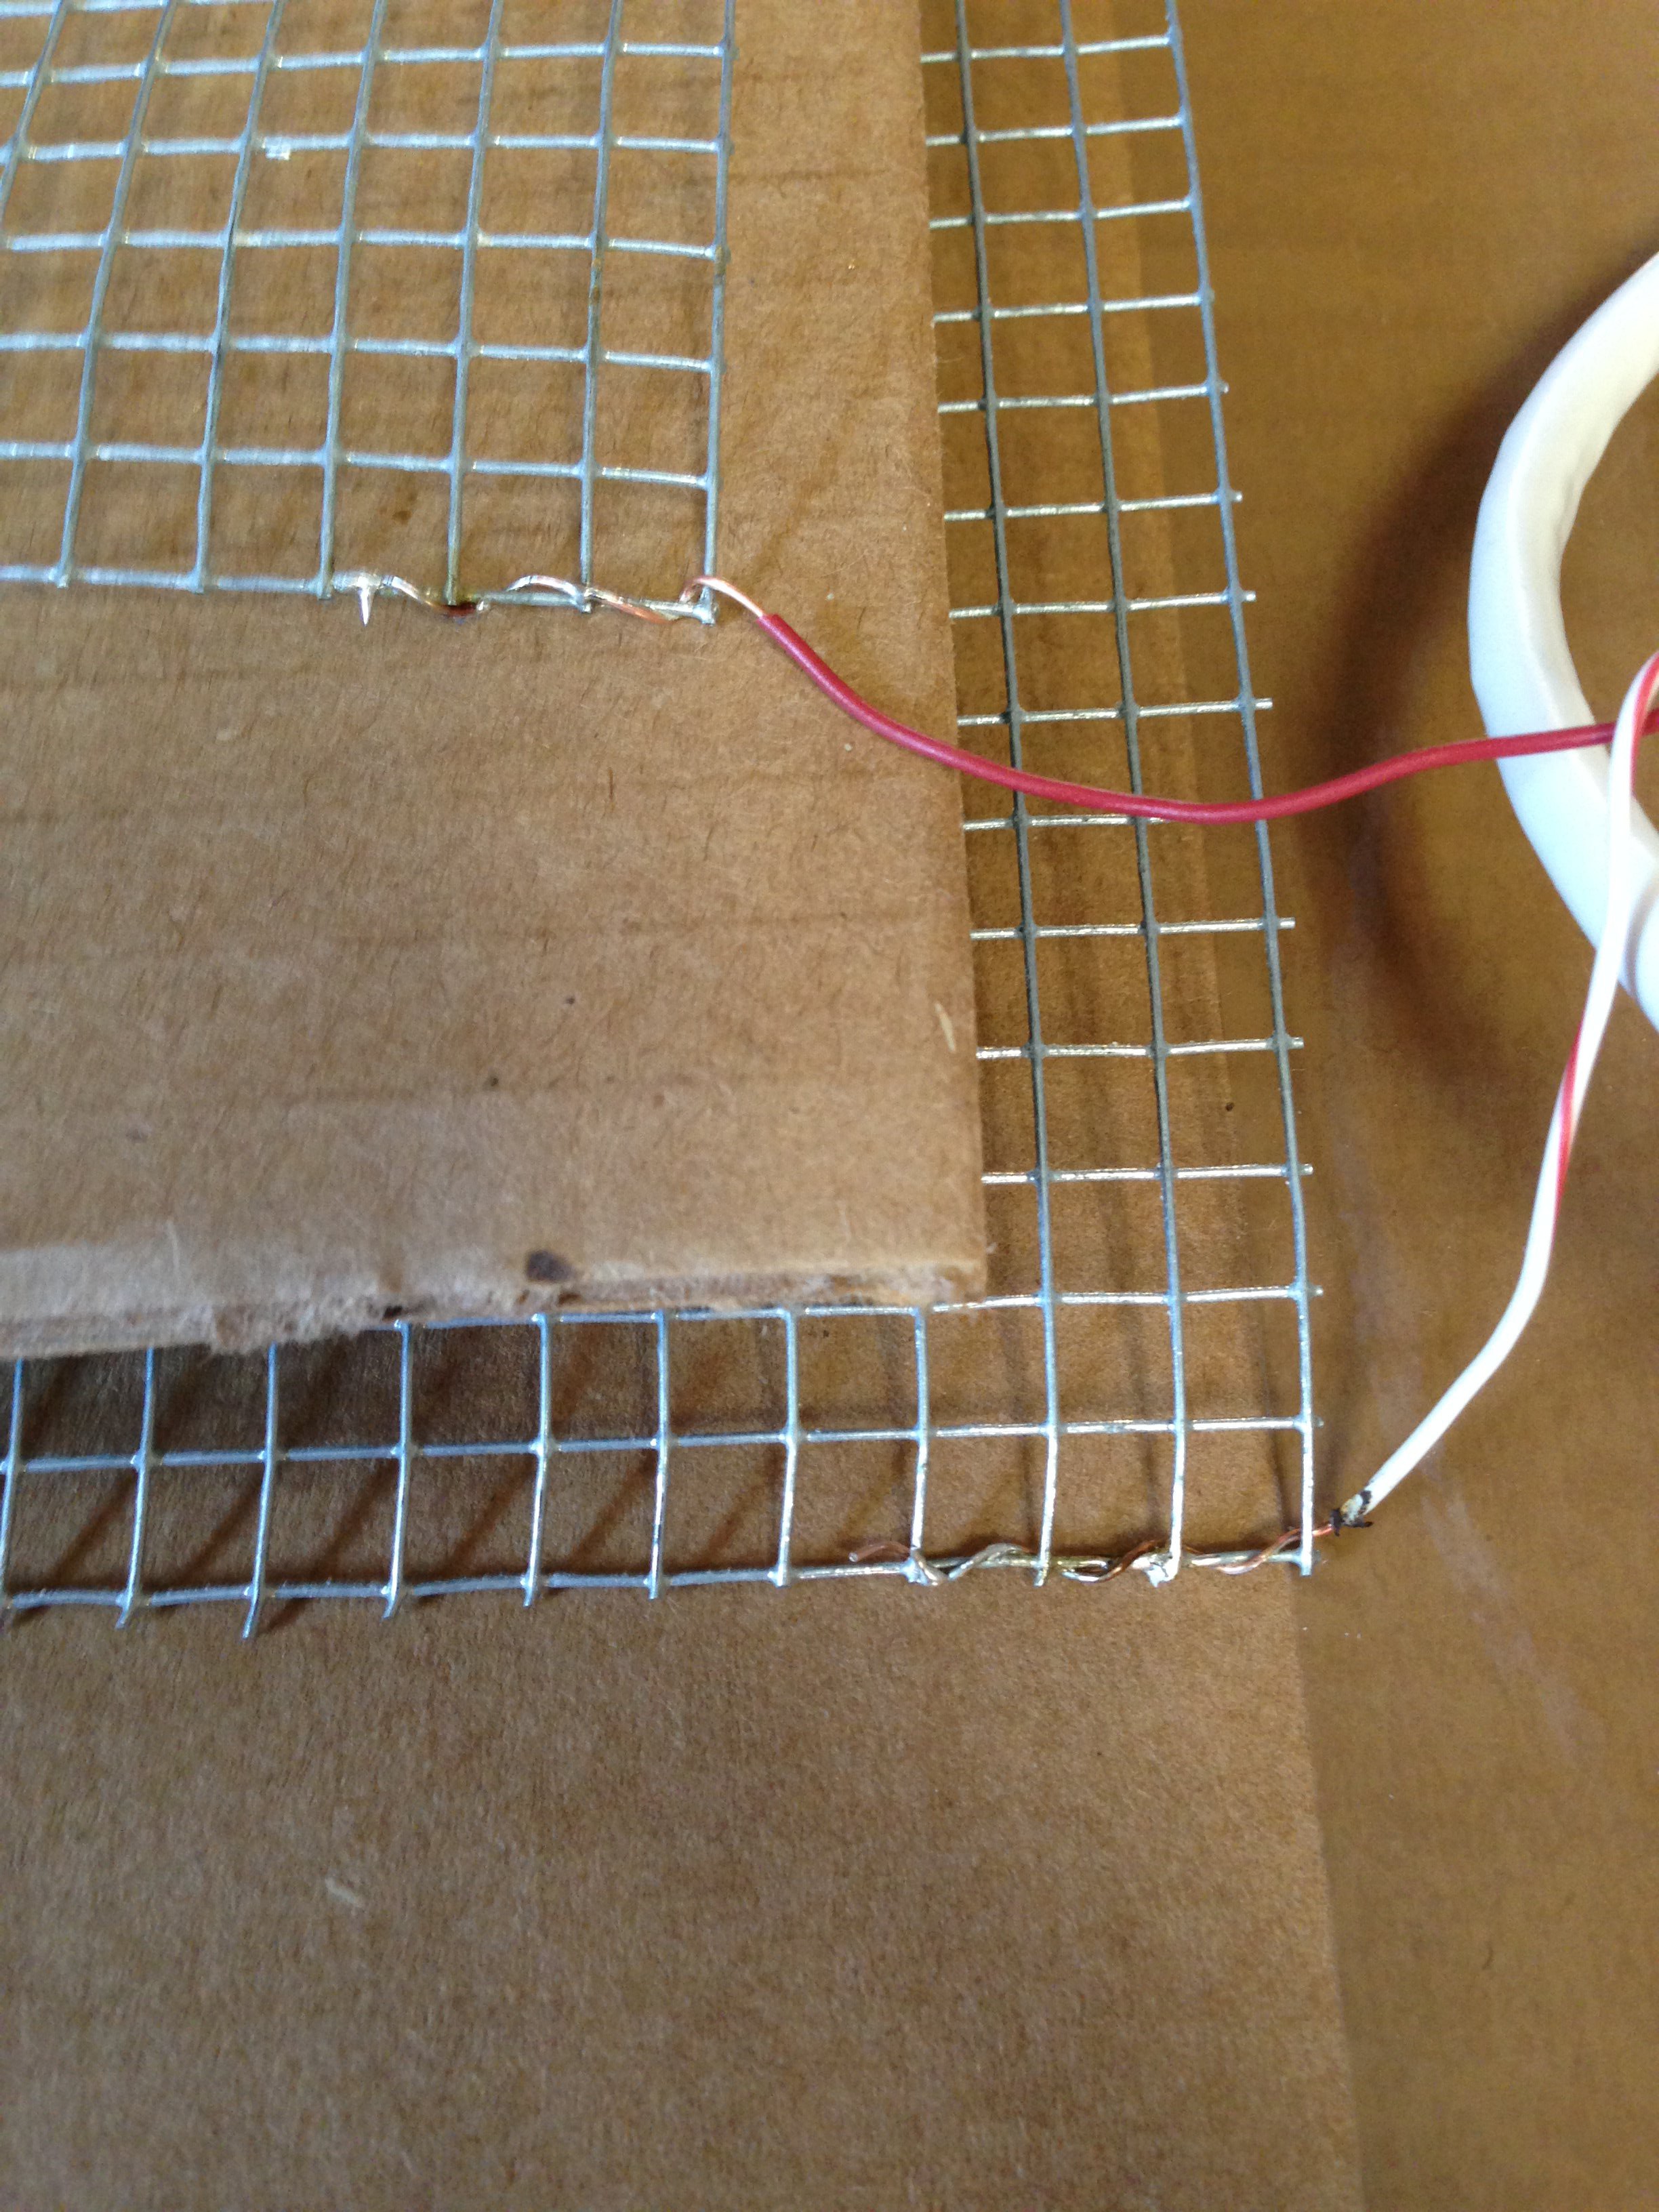
Run the arduino cods to monitor the serial feed as you go to tape up the sensors. The code will freeze if you are shorting to ground. It will display a negative number if you are not wired correctly. If you keep getting random flicker or are still getting a floating signal verify your connection to ground isn't loose and restart the arduino. I had to pull the tape off a few times to re-soldier my grounds. Don't wrap the soldiered joint in tape, you want to be able to see if it is loose when you peel back that outer layer of tape. Also a warning, that loose ground may not be visible until you've played a song or two.

Note: there is a setting in stepmania to bypass the controller simultaneous left&right or up&down lockout.
I've logged about 4 hours on this prototype. I'm happy with the performance of the sensors. I can do 6-8s no problem. I can only do one 9, the issue is that the chicken wire is actually overly grippy. It grabs the shoe and prevents it from sliding across the surface when you want to move your feet without lifting them up.
Discussions
Become a Hackaday.io Member
Create an account to leave a comment. Already have an account? Log In.