 shlonkin
I have a tendency to scavenge. When designing and sourcing parts I always dig through my scraps and try to make use of them. I like doing that and I think it's a good thing. Plus it certainly increases the hack factor(hackiness?) of my projects. My decision to use an audio amplifier torn from the carcass of a dead stereo is a good example. But it also makes the project somewhat less reproducible because anyone wanting to copy my design isn't going to have the same junk pile.
In the interest of making this project more easily reproducible, and thus open, I redesigned the audio output part of the circuit to use easy to source parts. And while I was at it, I designed it to be much more suitable for this application. Here is an updated schematic.
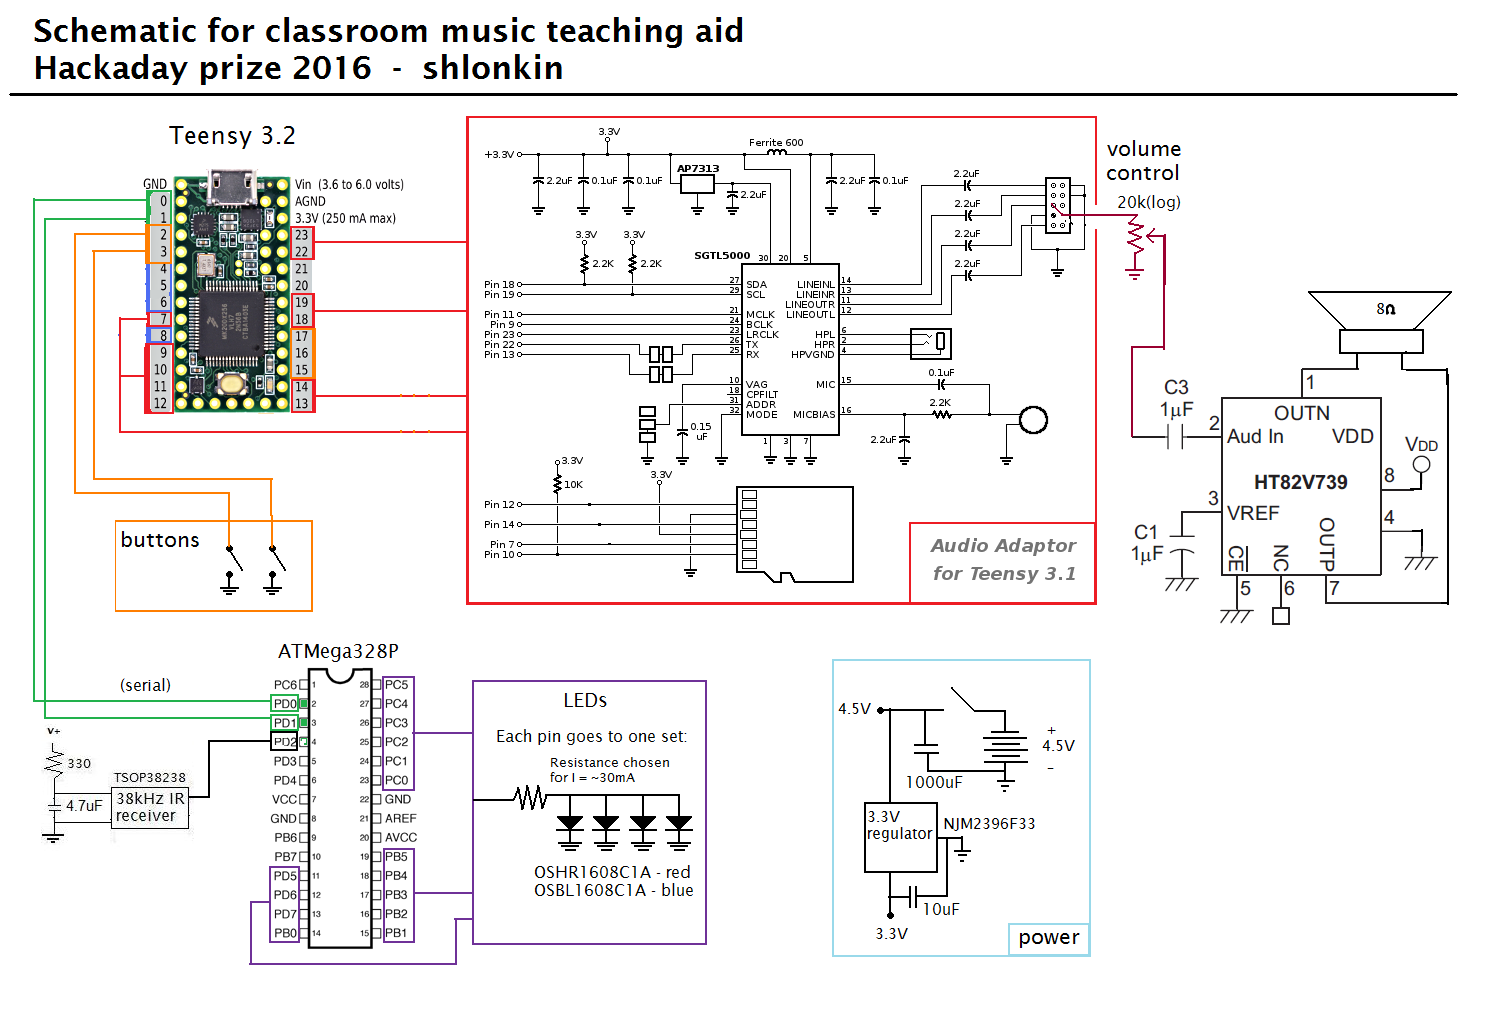 The main difference is the HT82V739 audio power amp on the right which replaces that big chunk of circuitry I had before. One other change is the removal of the second battery pack since this amp is designed for low voltage, battery powered devices.
Although I'm still waiting for the amp to arrive, I soldered the circuit up and assembled the rest of the circuitry, except for the LEDs. Here is the new version of the board sandwiched between the Teensy and audio shield. The amp goes in the small socket on the top right.
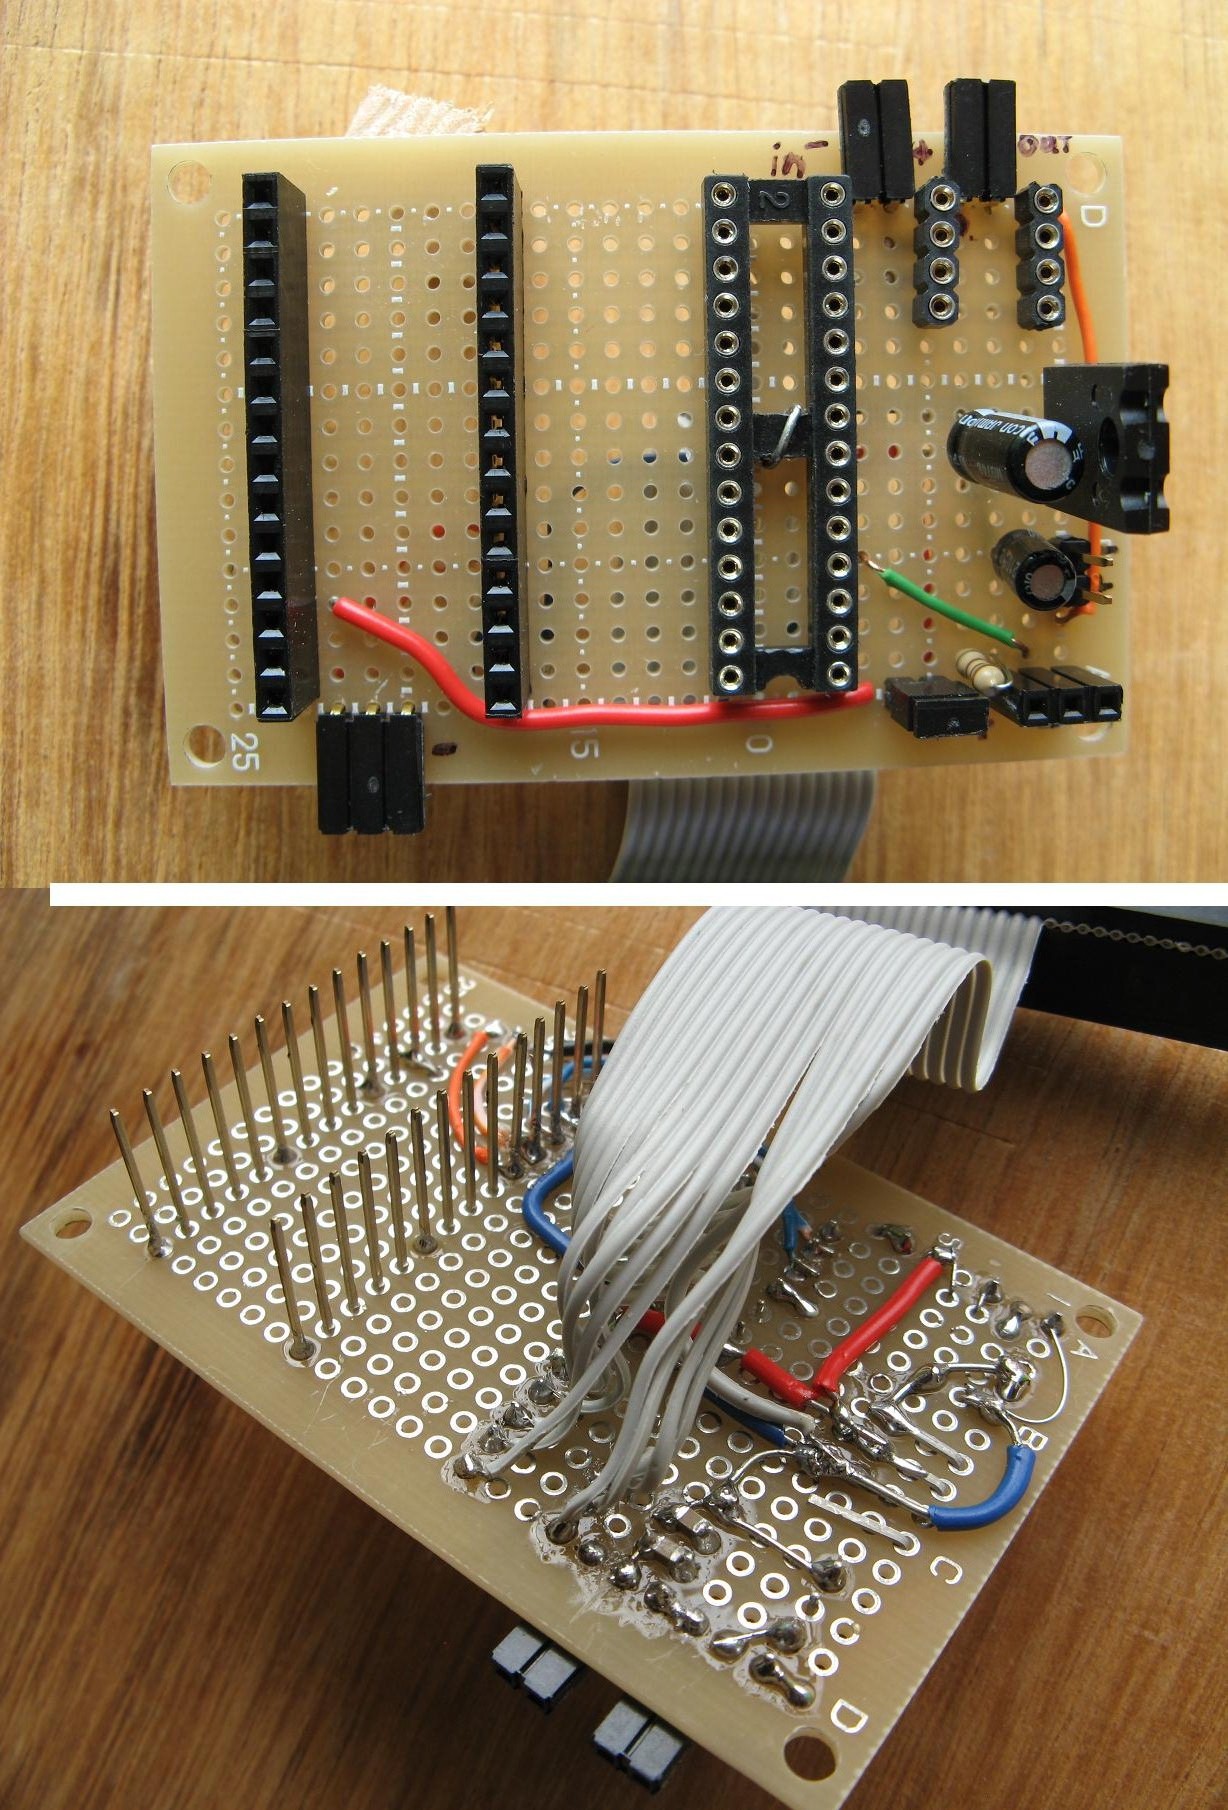
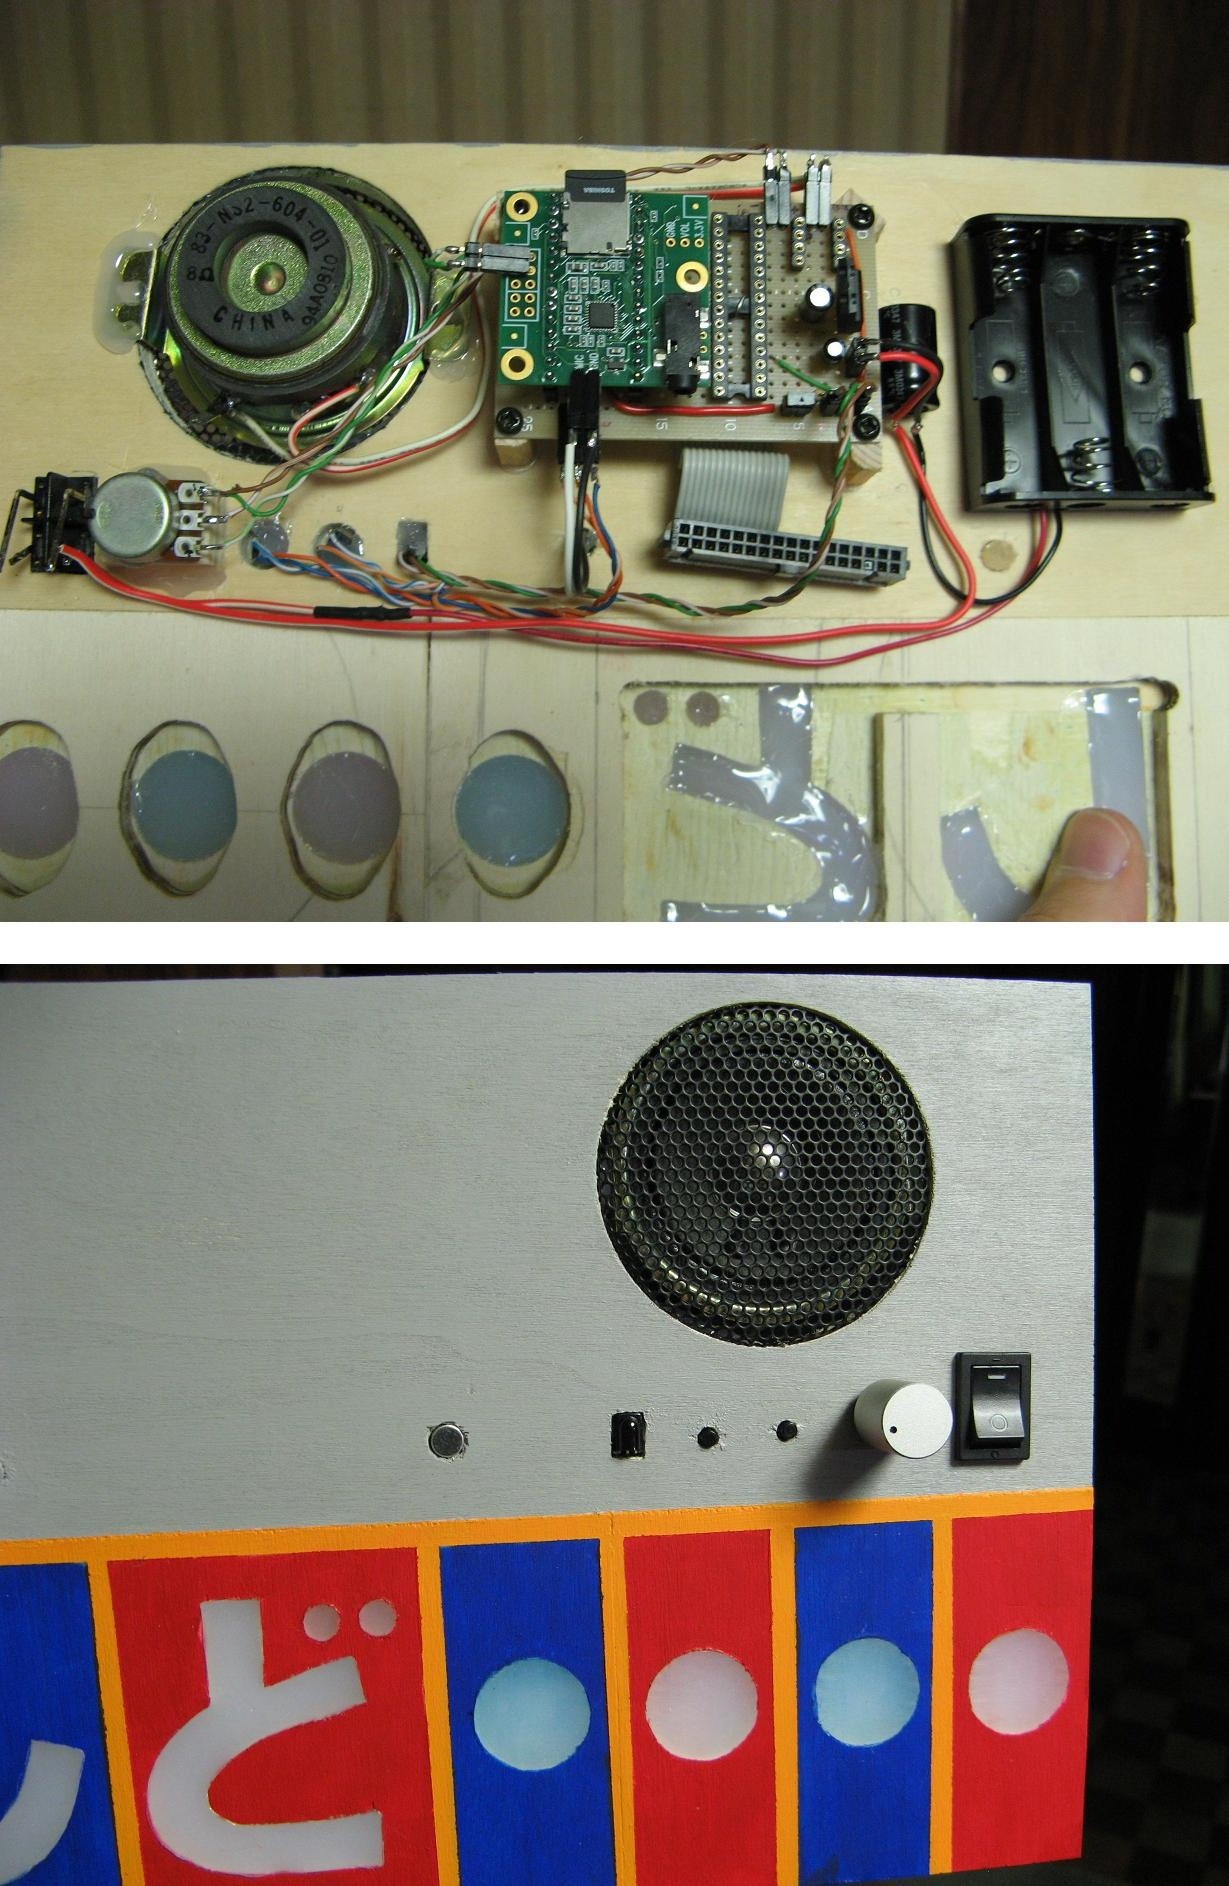
And here it is all assembled. Note that familiar looking connector on the ribbon cable. That will connect to all the LED segments. Since I'm still in the prototype design stage I want to be able to disassemble everything easily, so everything is connected via pins and headers rather than soldering directly.
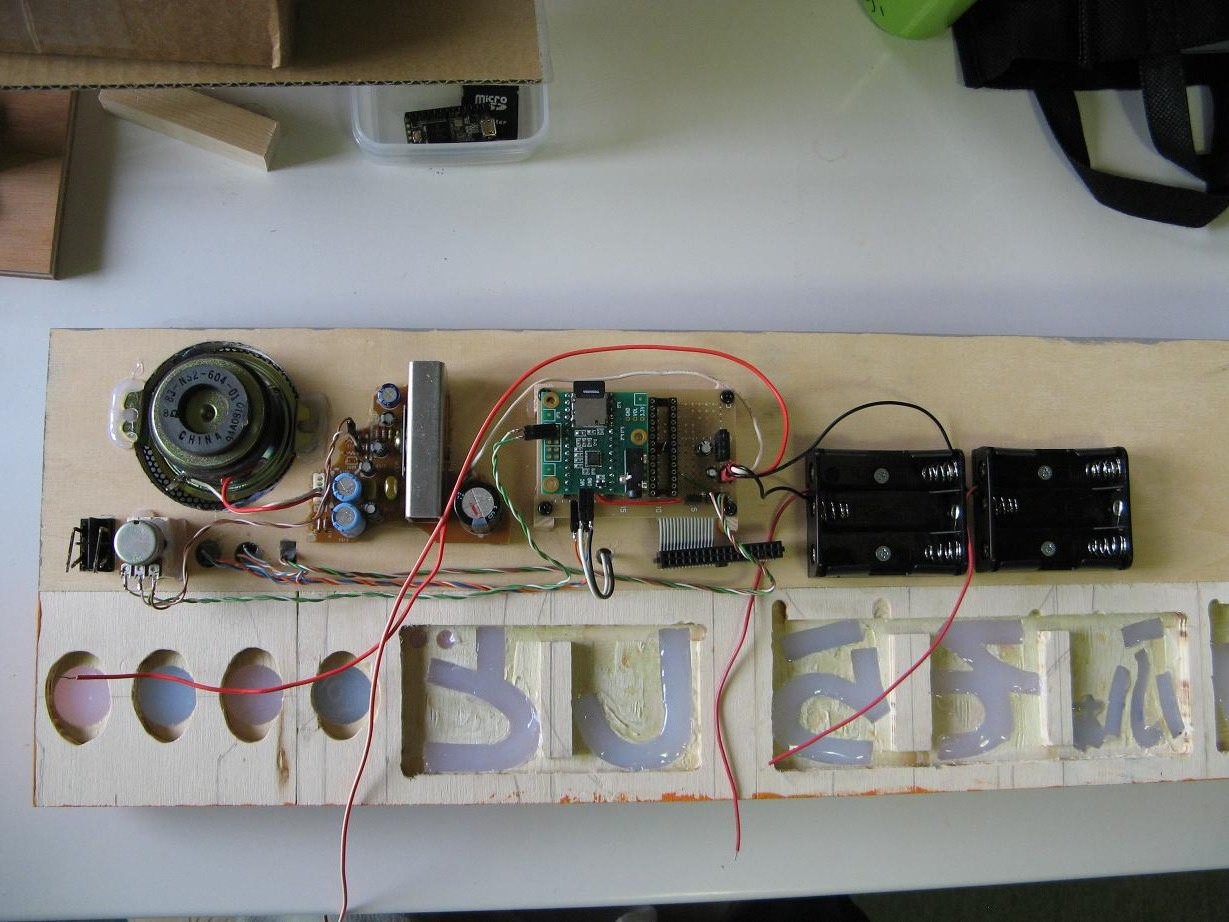
Just for comparison, here is what the previous version looked like. It was much larger and more complex. I like the new version much better.
Discussions
Become a Hackaday.io Member
Create an account to leave a comment. Already have an account? Log In.