 Markus Dieterle
Time to post an update...
So far I've done some additional testing with a different camera, playing around with a few different options for "fswebcam" and looked into the options for GPIO programming on the Pi, as well as getting my feet wet in the "Fritzing" software. More details below...
Testing with the Logitech C920
Since I've been somewhat disappointed with the results I got using the images from the Logitech C270 webcam, I've switched it out for the Logitech C920 that I usually use with my computer. Apart from having the ability to produce images in full HD resolution (1920 by 1080 pixels), it produces better quality images in just about any setting, and is still among the top-rated webcams overall.
So hooked it up to the Pi 2 and used "fswebcam" like before to take a few hand-held shots from my "fox" test print in dark and light conditions. I used the command line options for fswebcam to produce not only dark and light images in two resolutions - 1280 by 720 and 1920 by 1080 - but also to take images with default settings, deinterlace and/or greyscale processing. My hope was that the deinterlacing and/or the greyscale conversion might help to improve the pictures and produce better results with the Tesseract OCR processing.
While the images turned out to be better than with the C270, sharpness, text sizes within the image and lighting still produced too much variation and difficulties with identifying the text. I still ran the images through Tesseract OCR though, but the text I got from that was no better than with the C270 images before.
Here is an example:
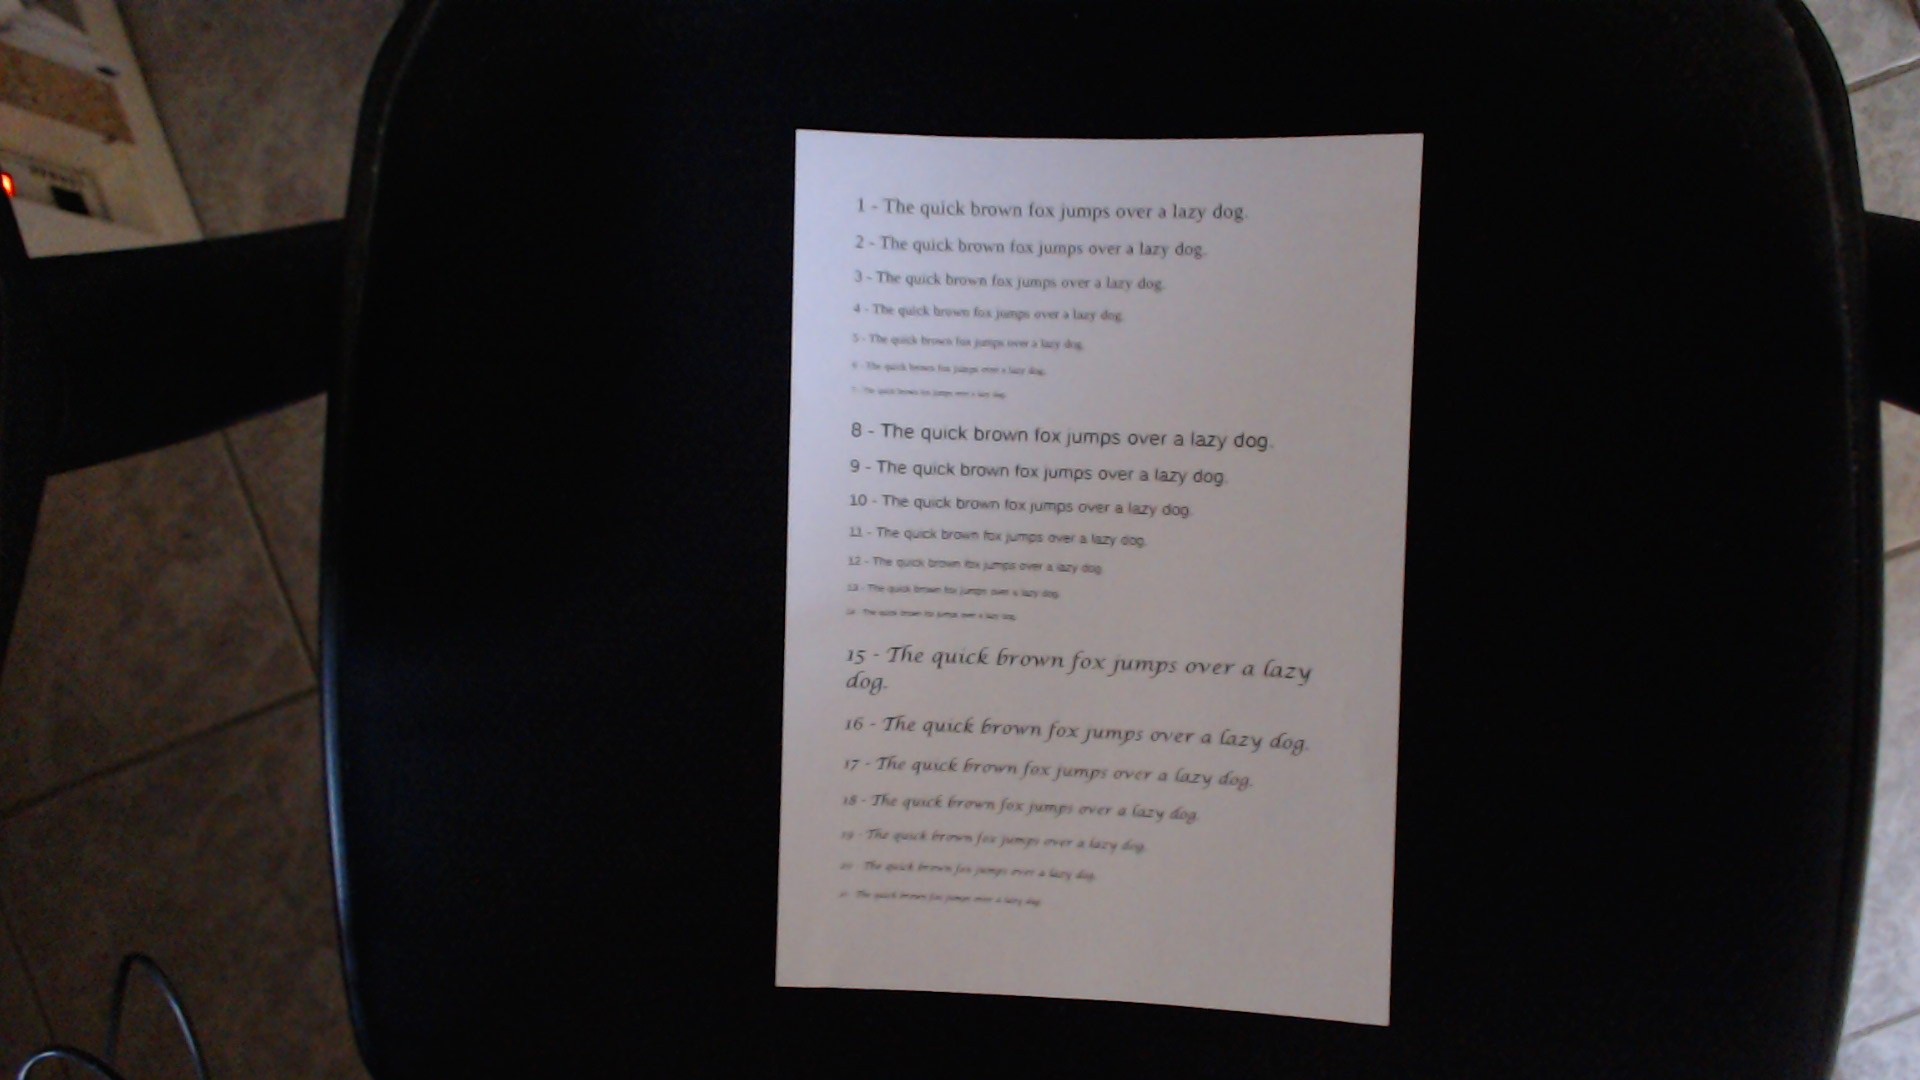
To a human eye, at least the lines with the bigger text sizes are readable, but still small and not very sharp. With the smaller text, reading gets extremely difficult.
As tesseract worked pretty well with the scanned images, it is pretty much clear by now that the software (like most any other OCR software I guess) has not been designed and optimised for a mobile usage with such difficult, unsharp images in any way.
The other main problem I see with the webcams, is that I don't have an autofocus option that could be activated before taking a picture. While the C920 has some nice build-in features like automatic low-light correction and face detection, several additional control options need additional software which isn't available for Linux, and there's no autofocus option anyway. It should be a fix-focus lens, and without the additional options that you get on modern digital cameras for photography - like shutter speed, image stabilisation, aperture settings etc. - the images you get from shooting "hand-held" are far from ideal for OCR processing.
The best option would likely be to use a live view image from a normal digital camera, but this is usually not transmitted over the USB port, but through the HDMI port of such cameras, or via a wireless connection to a mobile control app on a phone or tablet.
I'm not yet ready to call it quits, though.
If no other camera or stabilisation option can improve the results significantly, the worst case scenario would be that the project turns into a non-mobile application. Using a camera in a fixed holder, placed in a constant distance over a book, magazine etc., and with ideal, controlled lighting, a lot of the causes for poor image quality can be avoided - which should produce good enough images that the OCR conversion might work properly.
Pi GPIO programming using C/C++
Apart from the additional tests, I did some research about Raspberry Pi GPIO programming as that's needed in order to add the external control buttons for scanning and volume control, and maybe mode switching.
As this is my first project with the Raspberry Pi, I had to do some learning here.
For my purposes - using C/C++ to write the software for integrating the different parts and processes needed in this project - I have decided to use wiringPi. I downloaded and installed the "wiringPi" library and tools into an extra "DevTools" directory on the Pi just following the instructions on the official website.
Since I've already started learning Arduino programming a few months ago, using wiringPi seems pretty straightforward so far. Just choose and set up some pins for digital input, do some physical wiring using pushbuttons and a few resistors, and then initialise and probe the status of the buttons within the program.
Planning out the basic wiring, I'm also taking into account the later addition of the Pimoronic pHat DAC board. I've found a decent overview of the GPIO pins it uses right here, so I can avoid to use those pins for the control buttons.
Forward into Fritzing
In order to plan and document this project a little more, I've started installing and using the "Fritzing" software (or rather learning how to use it). I've downloaded the additional library from Adafruit and used that to add a few things from my prototyping setup, but some parts are still missing for a complete diagram - like a (generic) USB webcam or a Pi hat template for the DAC board.
I definitely need some more training with this in order to get really comfortable here, and maybe add some new custom parts as well.
I think it's worth the effort as the results I've seen so far on other projects are really useful and definitely improve the documentation and make it easier for other people to re-create the projects for themselves.
Exploring an alternative development environment
On a side note, I've also dabbled with a new development environment for this project.
Since I chose to use the "light" version of Raspbian for this project, I can't use a nice IDE or graphical editor for development directly on the Pi. And since I'm not very comfortable with using "nano" on the Pi for each bit of coding, I prefer to write the code on my iMac and transfer it to the Pi using FileZilla or similar options.
If I use a code editor like "Atom" on the Mac under OS X, I can easily set up FileZilla to directly open it for any source code files transferred from the Pi. Compiling and linking have to be done on the Pi, which is ok as I can open a serial or SSH connection to the Pi at the same time as the FTP/SFTP connection through FileZilla.
I could speed up the coding a little by having the same tools and libraries installed as on the Pi. However, that's a little tricky under OS X, even though the OS is a microkernel-based Linux variation at its core.
So I've fired up Parallels Desktop - a virtualisation solution I've been licensing and using for quite a while now - and started up my virtual machine with Debian Linux, as the Pi's Raspbian operating system is (for the most part) based on Debian. If you need something similar, you can easily use VirtualBox for free - it doesn't offer the same level of integration with MacOS X or the same kind of graphics acceleration, but works well enough for normal desktop usage - and it's open source software.
Using Debian Linux, I was able to install all of the software packages that I installed on the Raspberry Pi before: fswebcam, sane, graphicsmagick, tesseract-ocr, festival, git and wiringPi.
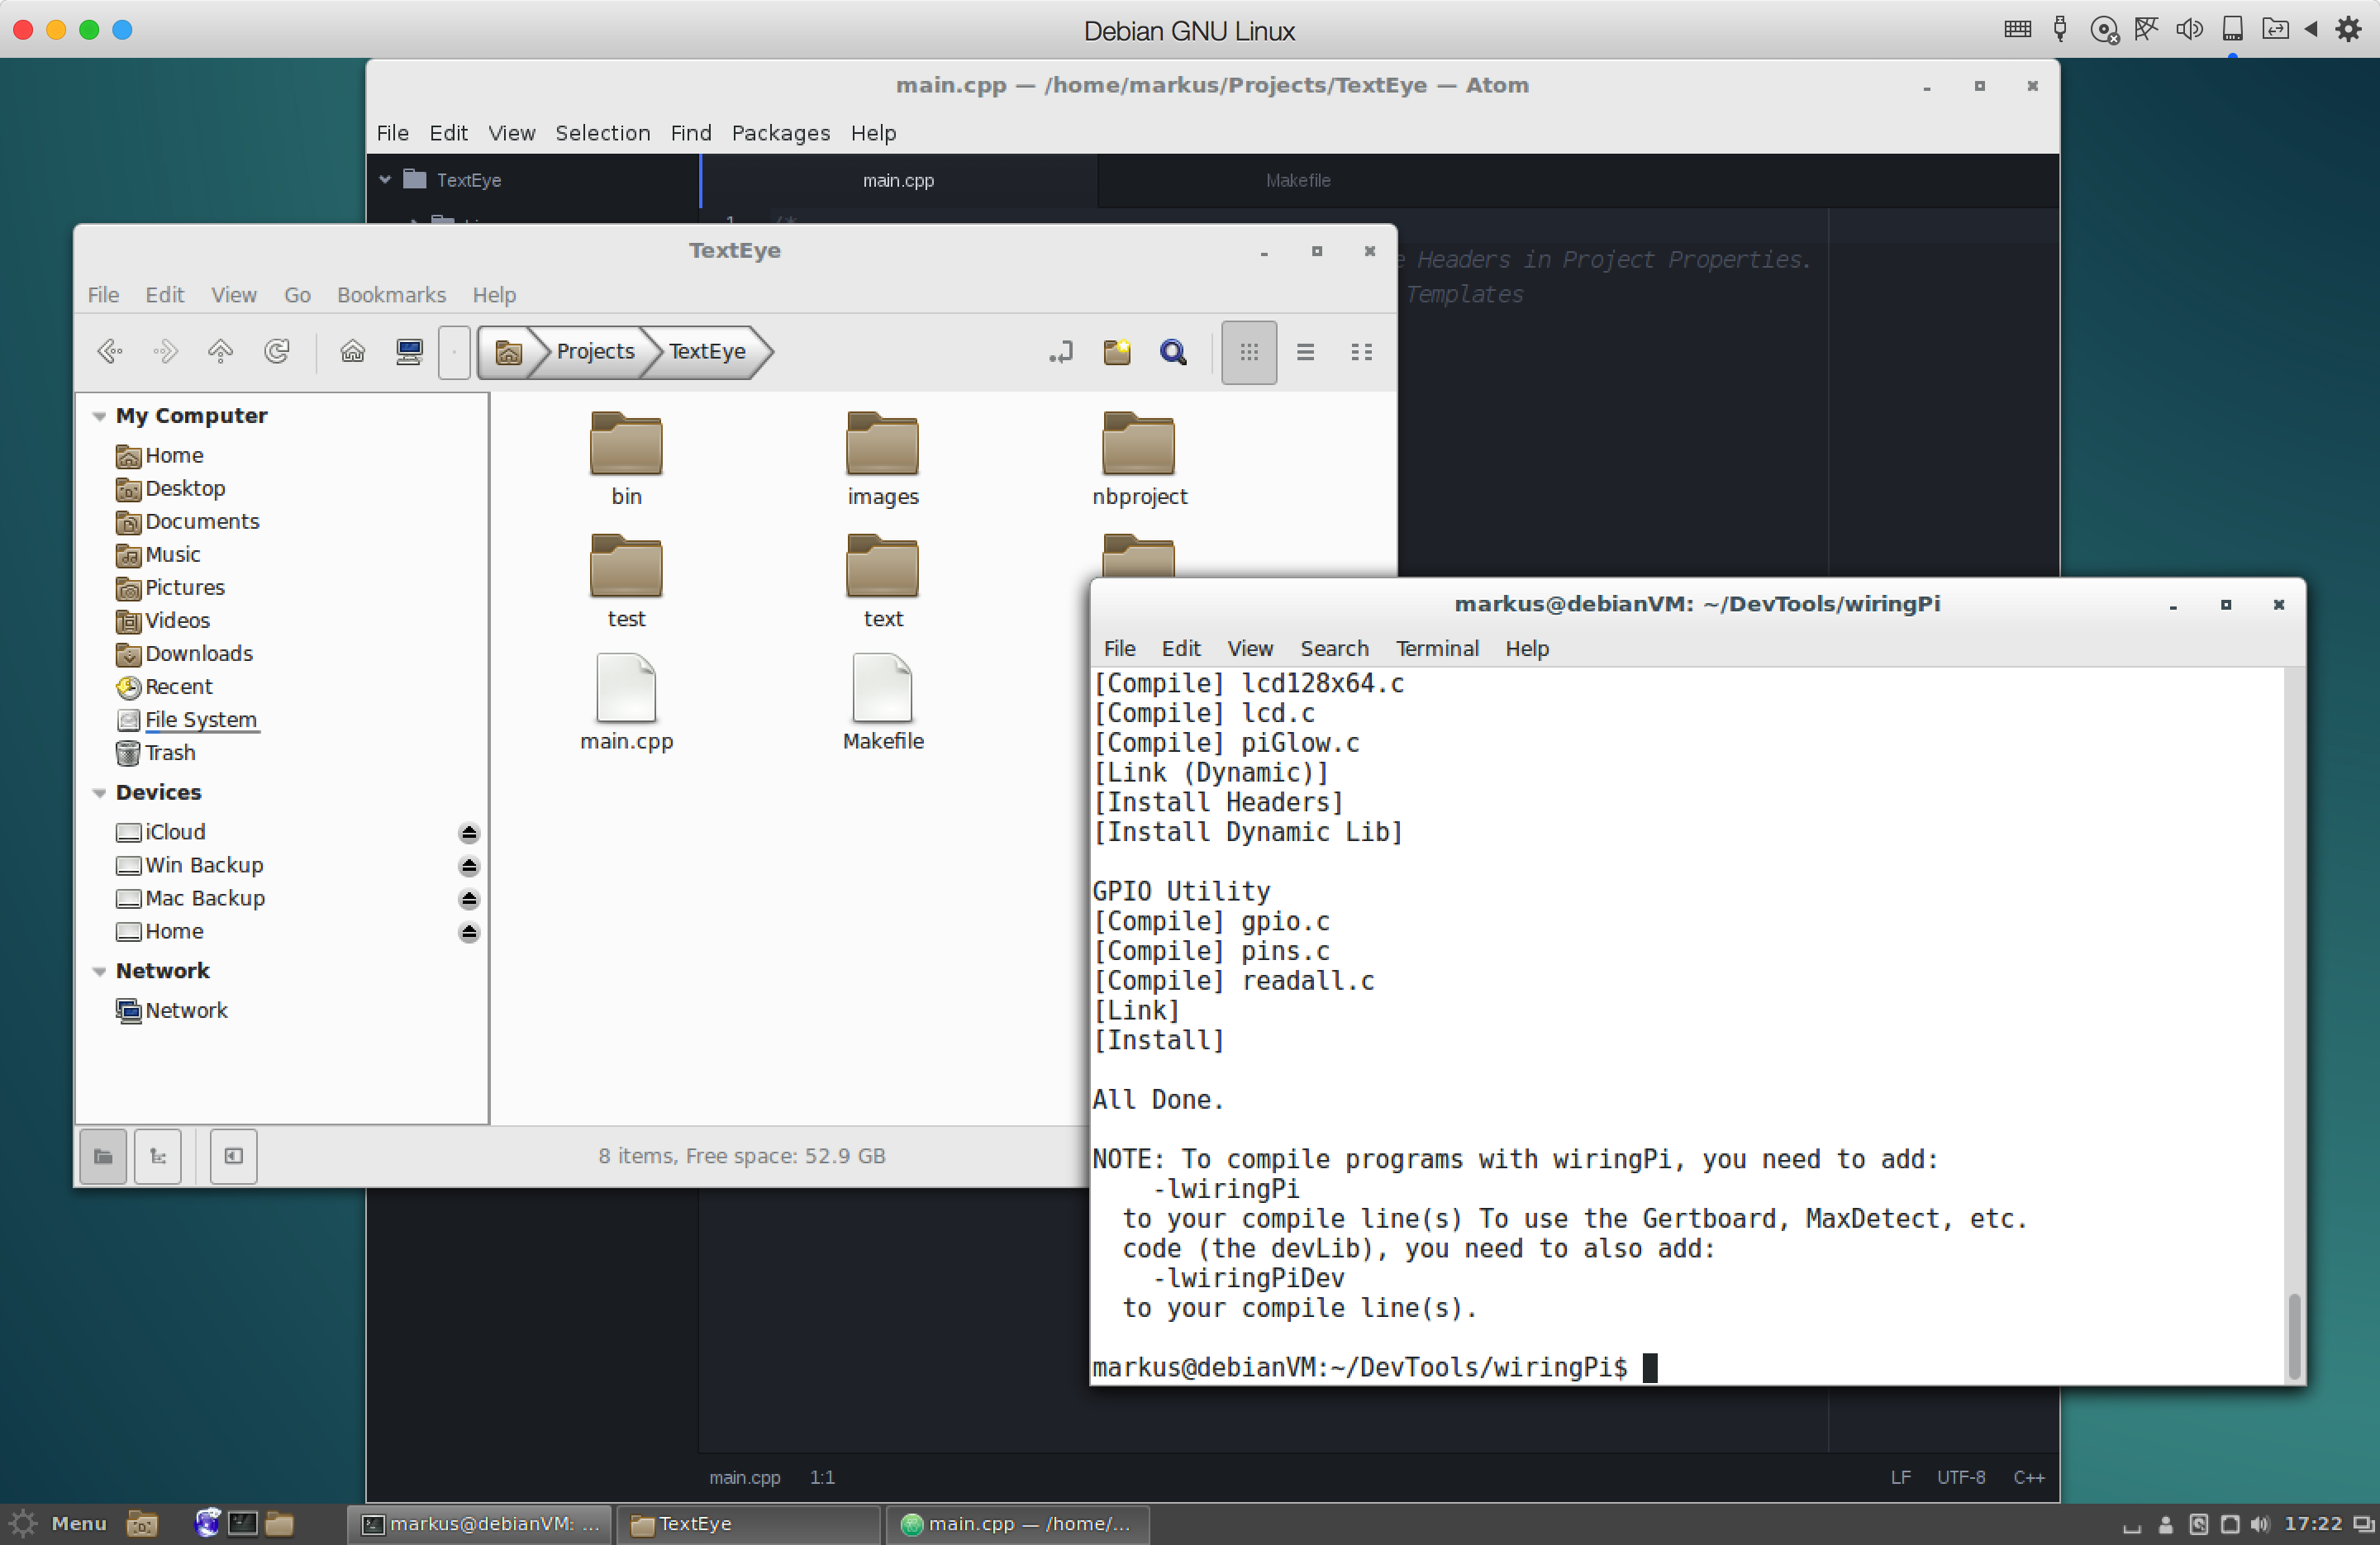
In addition to that, I also installed the Atom editor as well as the Netbeans IDE (and additional Java SDK) for a nice little open source development environment.
While I don't have a cross-compiler for the Pi CPU, this setup should be able to compile the C/C++ code using the wiringPi library properly (including make via makefile) before I upload it to the Pi itself.
I will also try to install wiringPi on the Mac under Mac OS X though and see if that works as well. If it doesn't, Debian should do the trick.
This should speed up the development process a little as the Pi itself is not as fast as the 64bit Debian Linux VM on the Mac.
So far so good...
Discussions
Become a Hackaday.io Member
Create an account to leave a comment. Already have an account? Log In.
Hello Varun,
If you use a standard USB webcam, it should be possible to hook that up to the Pi Zero using a USB to micro-USB adapter.
You can install the "fswebcam" software package and use this from the command line or a shell script (see the official documentation here: https://www.raspberrypi.org/documentation/usage/webcams/). The main API functions from this software can also be used in C or C++ code - you may have to dive into the source code though in order to find out how that is used properly.
While the default "picamera" Python module does not work with USB-connected webcams, you can use the "cv2" module (from the Open Computer Vision project) instead. That does work with USB webcams.
You also may need the "sleep" function from the "time" module along with it (to give the camera a little time after initialization before you take a picture). Documentation for that can be found on the OpenCV.org website (https://www.opencv.org/). Apart from the basic functions for using a USB webcam to take a picture, the module also has a lot of image processing functions.
As for the autofocus, you may need a USB webcam that already has that. I think there might be a related configuraion option within the "cv2" module (not sure, I'm still working on the Python camera code and haven't covered everything yet).
If you want a camera with a zoom and autofocus - like a standard digital photo camera - you may need a different solution.
I also haven't looked into other camera modules that could be hooked up to the Raspberry Pi. If those do not supply a related function library for SPI or whatever connection they use (for control), we are out of luck I guess. I currently don't know other useful optiuons.
Hope this helps...
Greetings,
Markus.
Are you sure? yes | no
Hey there, I am looking for an Autofocus camera that can be hooked up with my Pi Zero and unfortunately I couldn't find anything on that. Especially the USB webcams and USB camera module don't support the driver software of Pi. Any luck on finding a solution regarding Autofocus part on your end ??
Are you sure? yes | no