 Markus Dieterle
In the last few days I've been busy with other things, so the project did not get along as far as I would have liked.
But I guess small steps will get me closer to the finish line as well as bigger steps, it just takes more time...
So here's a little update:
A little more hardware
While a few pieces are still missing (or will likely be switched out like the pushbutton switches), I've managed to get hold of a few more hardware pieces for this project and started with the prototype assembly:
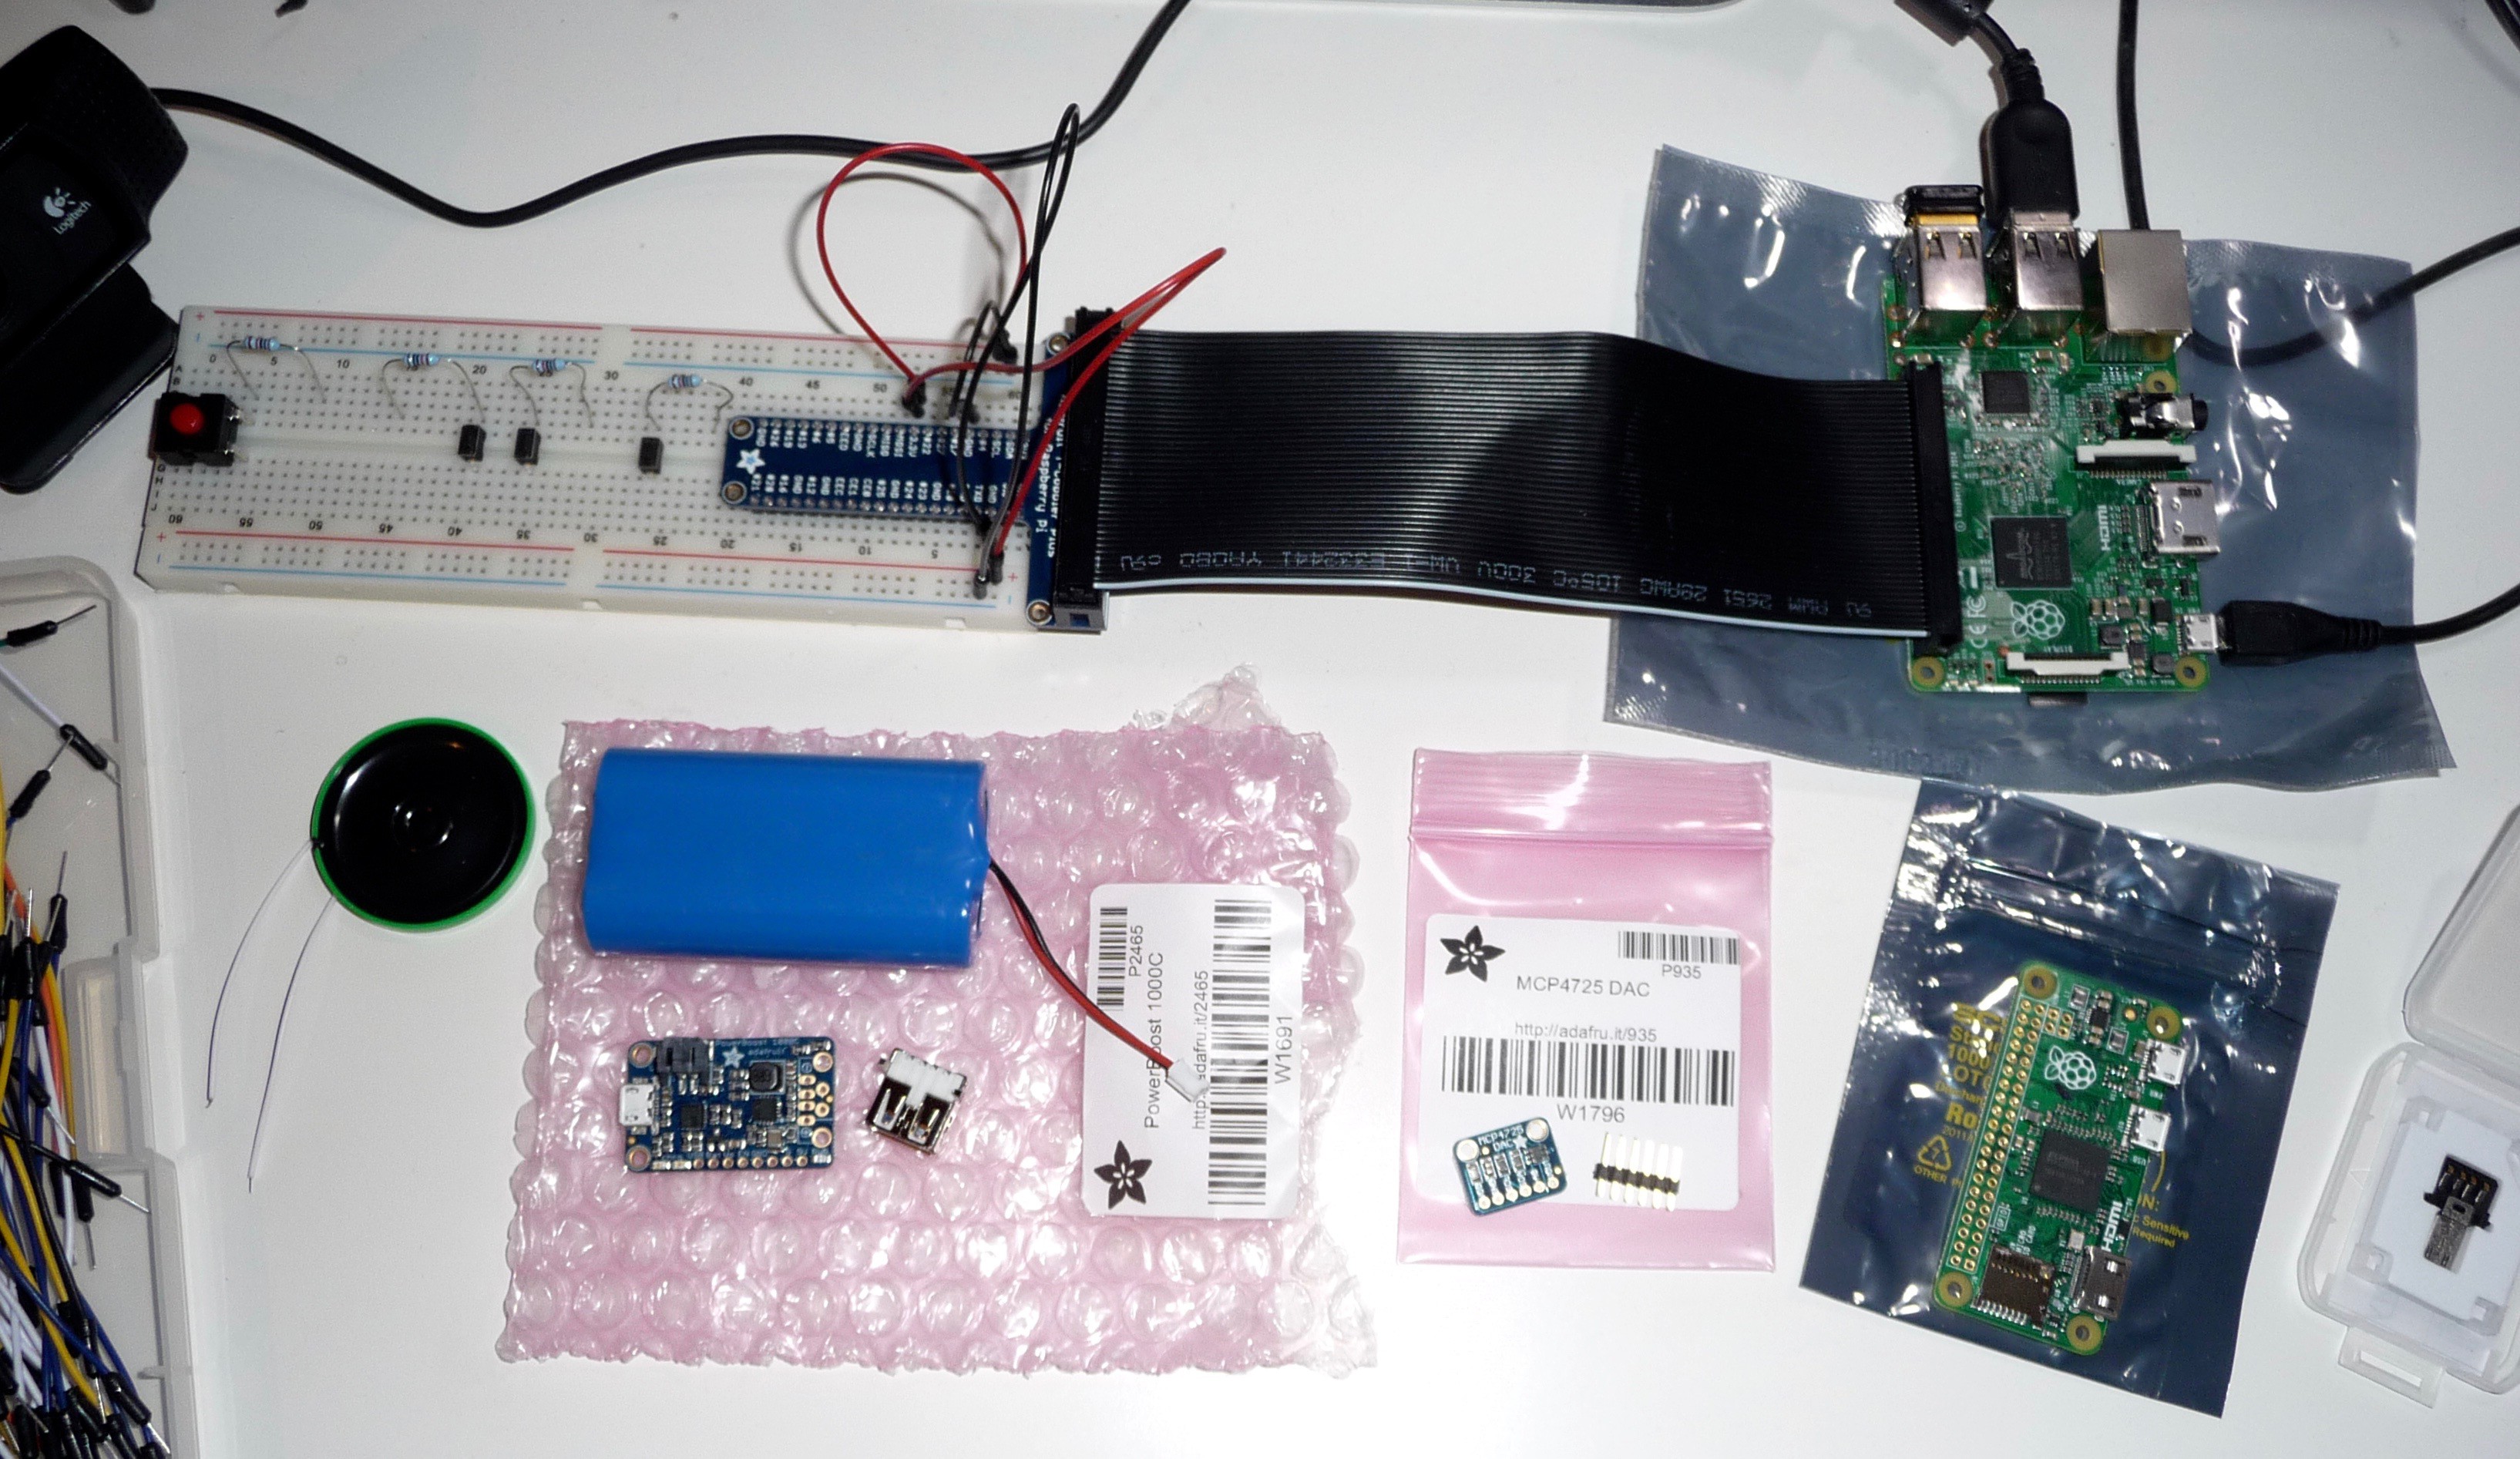
The Adafruit Powerboost 1000 charger board has arrived, along with a rechargeable 4400 mAh lithium ion battery. The smaller 2200 mAh version wasn't in stock at the local reseller, as well as the smaller lithium polymer batteries. I don't have any data on how much power the webcam actually needs, but this battery should give me a pretty nice power reserve to work with.
The PiMoroni pHat DAC board still hasn't arrived and it's unclear how long I have to wait for it, so for now I got the 12bit DAC board with i2C interface from Adafruit as an alternative. It should not be much more complicated to use this than the Pi hat version, and it's only needed for the Pi Zero anyway.
Speaking of the Pi Zero: as you can see on the lower right side, the Pi Zero I won in the contest has just arrived today. I've also got a tiny USB to USB-2-go adapter, but no free USB hub at the moment. I can do some basic tests with the SD card I already used with the Pi A+ and Pi 2, using the adapter and my mini WiFi plug, but for complete tests I need to do some soldering.
By the way, this is what the Pi Zero looks like with the power connection and the mini USB WiFi adapter:
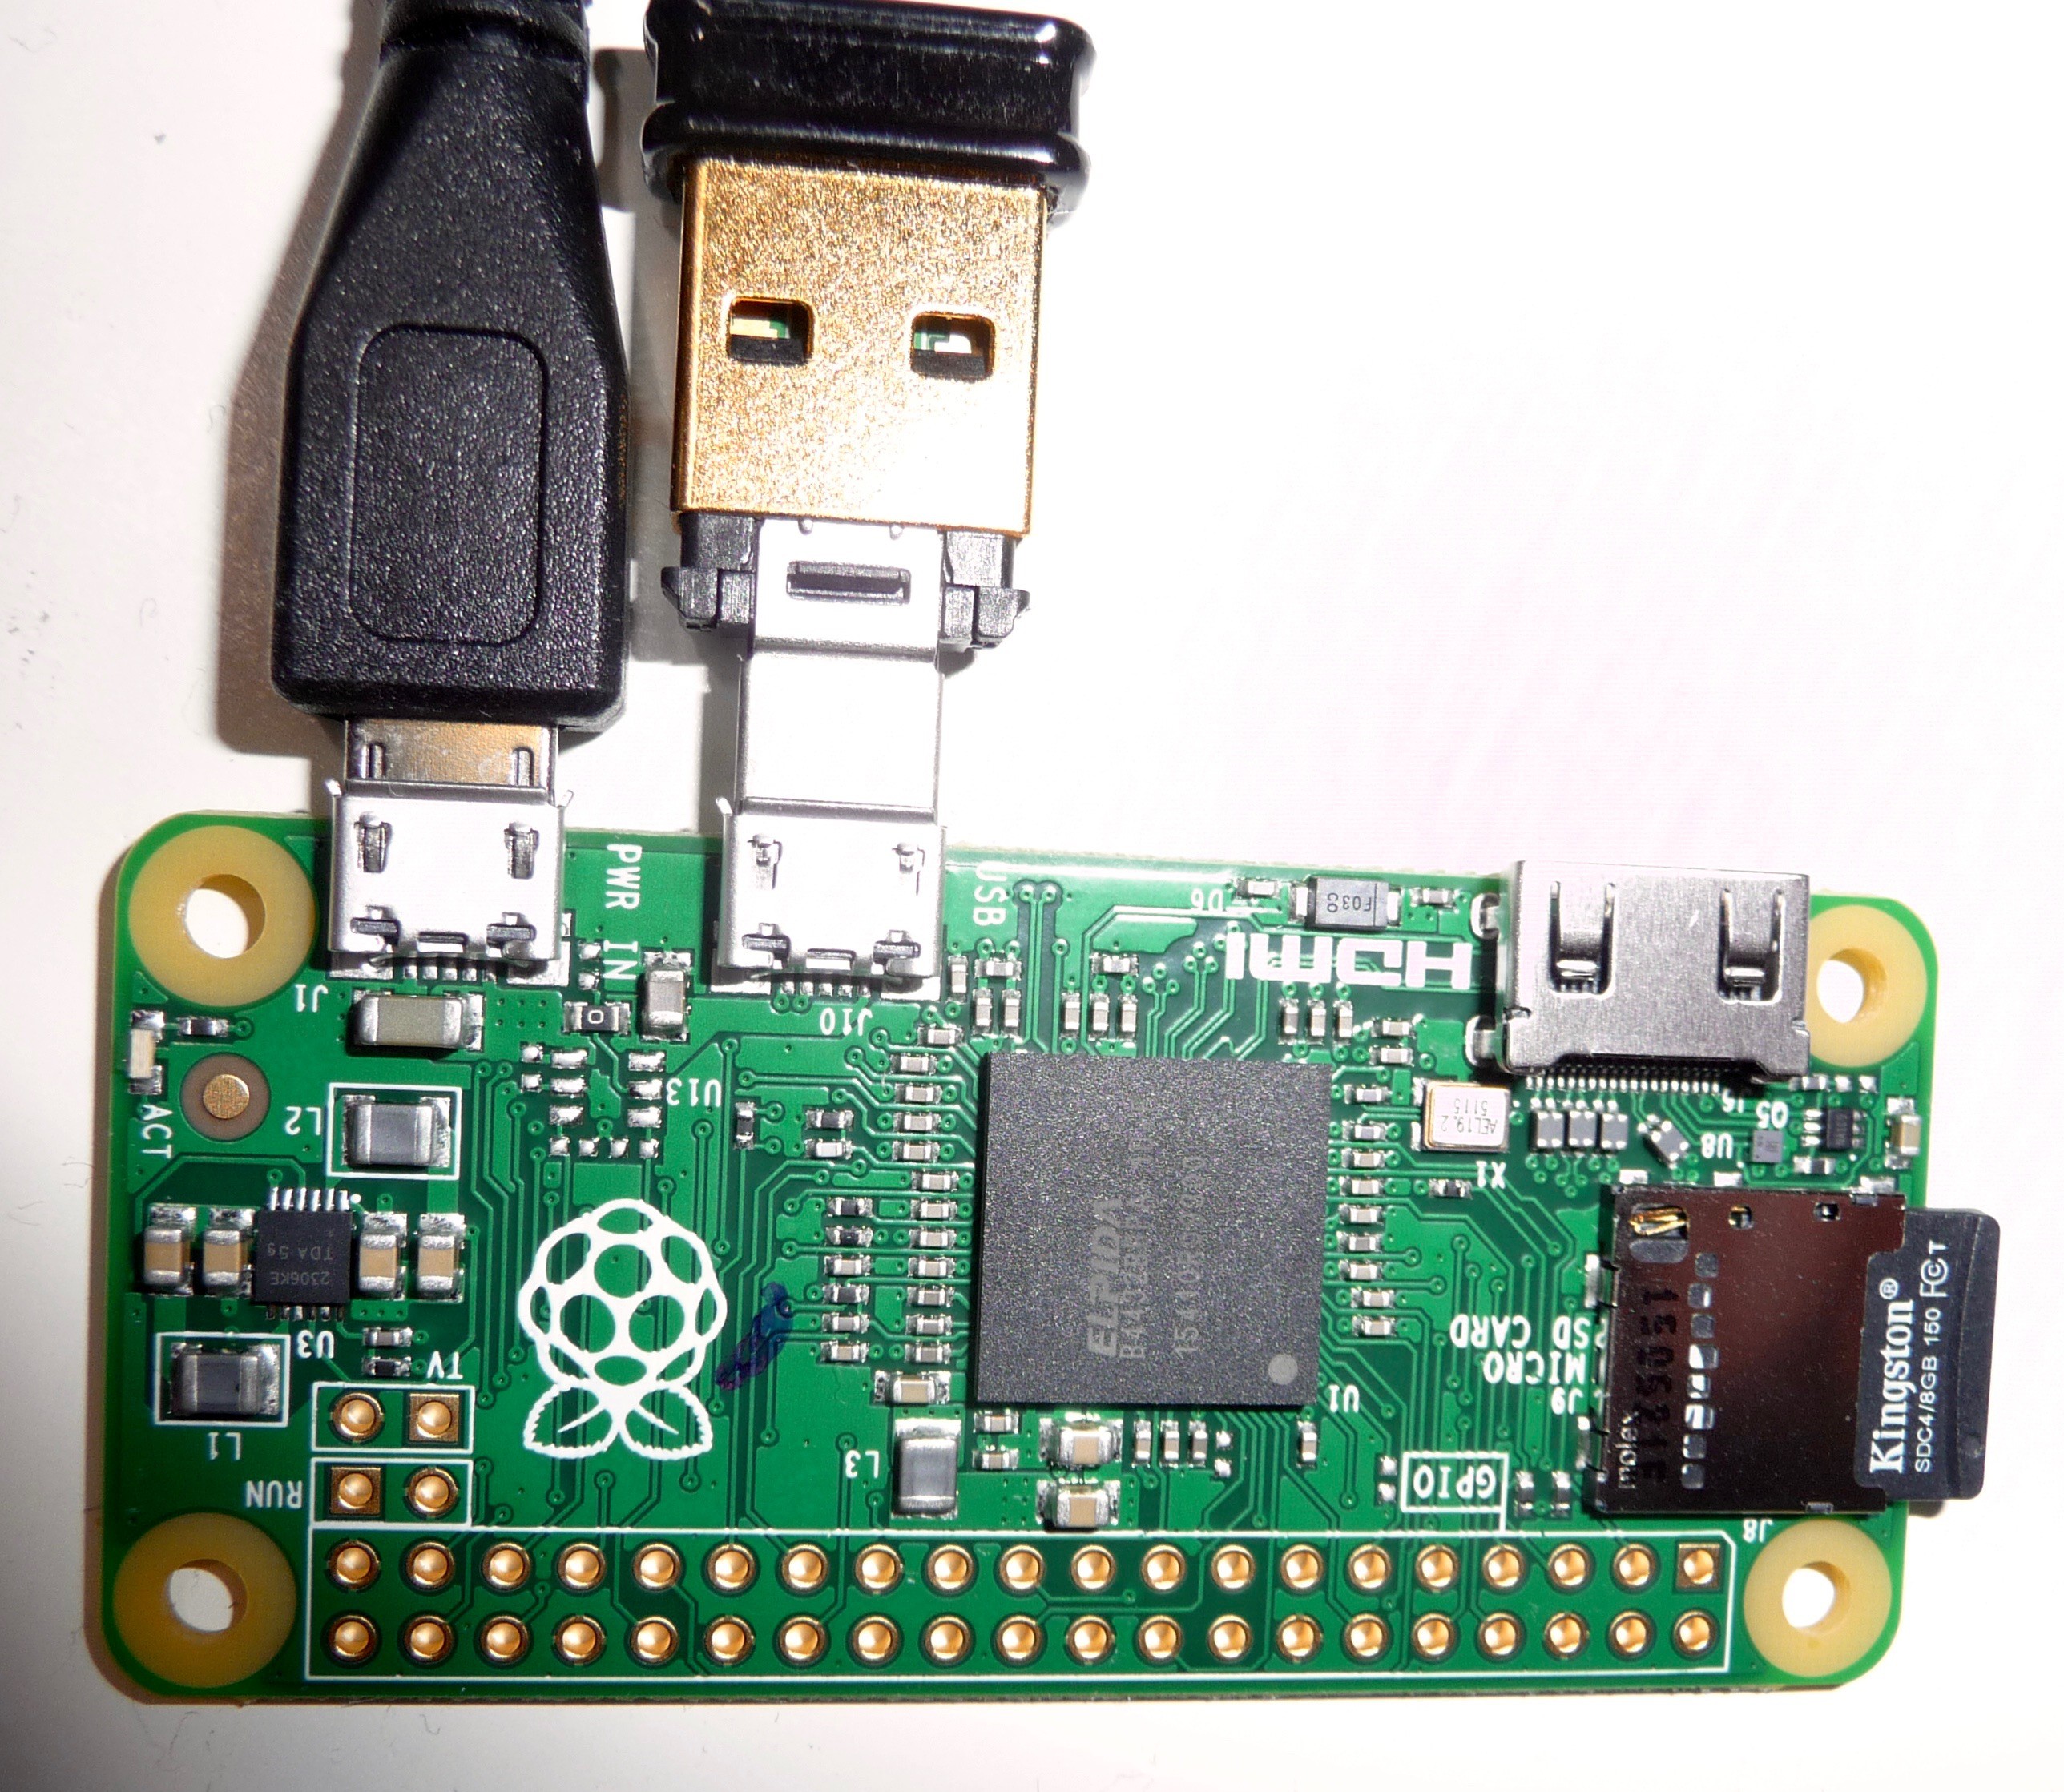
While the WiFi adapter almost vanishes inside a standard USB port, it still looks huge connected to the Pi Zero even with the tiny USB to USB-2-go adapter. This single board computer is really small... I like it! :)
Slow software progress
Due to my other activities in the last few days, the software development has suffered.
I've started with coding, but did not make much progress so far. The good thing is, that the structure and details become clearer as I go along. Just like carving out a nice statue out of a block of stone.
So nothing much to show here.
I've also done some additional image processing tests and played around with different options and operations of the "graphicsmagick" software. Testing taking a full HD resolution greyscale image (1920 by 1080 pixels) from the C920 webcam in PNG format, I stumbled across another potential pitfall for the image processing: errors in the PNG to TIFF format conversion.
Here is what one of the PNG files originally looked line (I had to export it to JPG as the PNG was bigger than the allowed 3MB):

After just performing the PNG to TIFF conversion that is needed in order to get a valid input format for the tesseract OCR software, the result of the conversion looked like this:
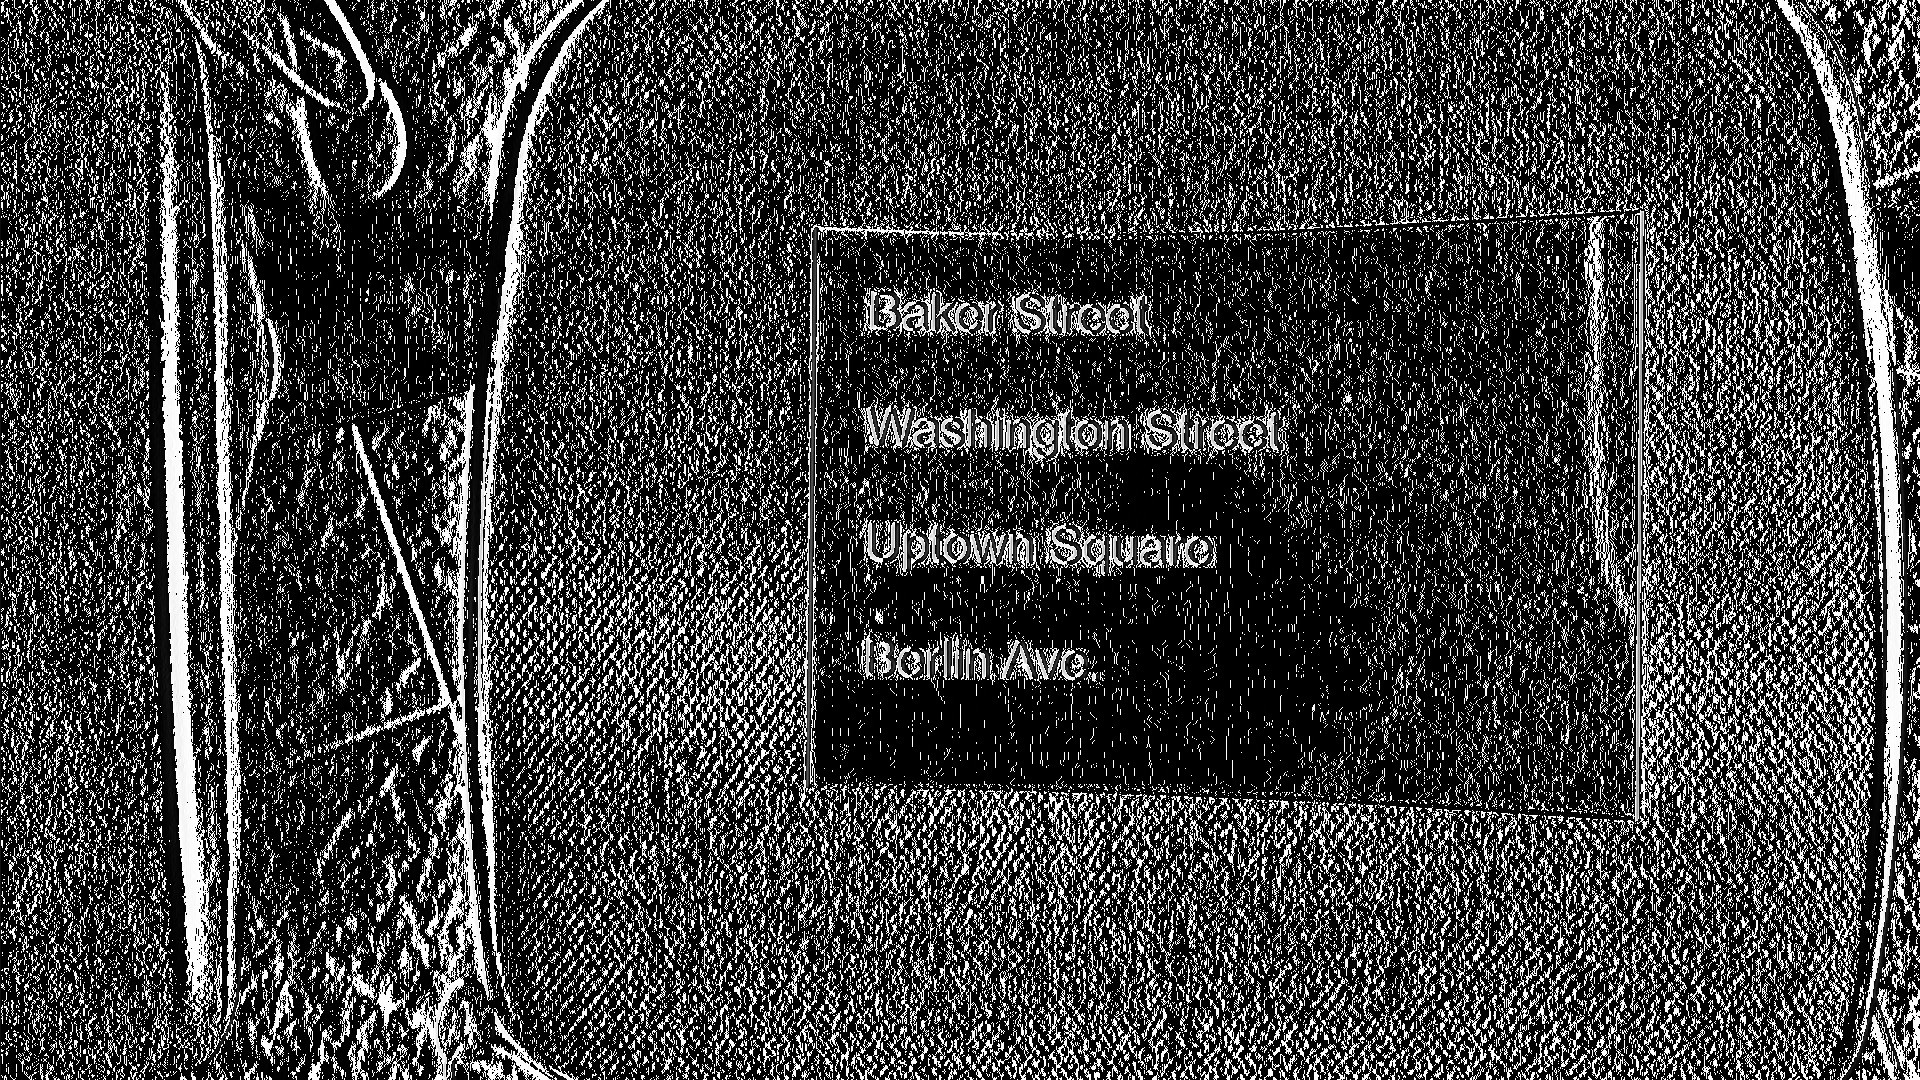
Needless to say, this does not work at all for a proper OCR conversion. I also tested the same image size and camera for a normal colour image, with the same result.
Since the earlier tests did provide properly converted images, I guess this may have something to do with the additional "delay" and "skip frames" options I tried for "fswebcam". Strange nonetheless, as the default image looks pretty normal.
Why can't the standard image processing be more reliable? :(
A new idea - sort of
Since the basic image quality is really important for the standard OCR processing, I've thought about different options for improving just that.
Software optimisations aside, the best bet seems to be to use a different camera, with higher resolution, image stabilisation, autofocus etc. - all the nice features that most digital stills cameras already have, from simpler point-and-shoot cameras up to the big and expensive DSLRs.
So it might be an even better idea in the long run to look into using a not-to-big point-and-shoot camera instead of a webcam.
The "TextEye" could be a camera add-on, similar to an extended battery/grip unit like the ones which are available for most DSLR cameras.
If the signal for the full button press that the camera needs in order to take a picture can be tapped into, that could act as as start signal for the image conversion, OCR processing and speech output. On cameras with a "hot shoe" slot or similar connection for an external flash, this signal should be available through the flash connector.
The tricky part is to access the memory card or internal memory of the camera from the Raspberry Pi. Ideally, the camera should take the picture and save it to an SD card, and the Pi should then access the card and read the most recent image file, treating the camera's SD card reader/writer as an external, mounted file system.
From there the picture could be converted and saved to the default SD card of the Pi (with a constant name), then OCR processed and text-to-speech converted just like with the original design.
With an additional hack into the camera's on/off switch, the TextEye module (with integrated speaker) could be booted up and shut down with the same button automatically. Not really necessary, but a nice addition.
The additional battery might also be omitted if it would be possible to tap into the power from the camera, although this would probably shorten the possible overall operation time quite substantially - small and medium sized cameras don't have very powerful or long lasting batteries to start with. So I guess it's better to leave the additional battery in there, though it might be smaller as it does not have to power the camera.
For the moment, I'll continue to work on the original design for this project, but I will definitely look into this option as well. Apart from the camera and the basic camera connection, the rest of the hardware and software is the same for this new design. Custom cases are needed in both versions, and the second design option would also need changes or adapters for different cameras. But mainly the components have to be placed a little differently for a nice fit in both cases.
So the main question is: can a standard SD card reader/writer inside a digital camera be hacked properly in order to achieve this?
If anyone has already done that or can provide links to a similar project, I'd appreciate it.
This design variation may not solve all of the image processing problems, but it should provide a much better starting point and image quality.
Discussions
Become a Hackaday.io Member
Create an account to leave a comment. Already have an account? Log In.