 Kn/vD
Kn/vDI have been asked to show the full stack of ELLO 2M together. With my limited resources at home it is a bit difficult, but here it is. I hope it is clear enough :-)
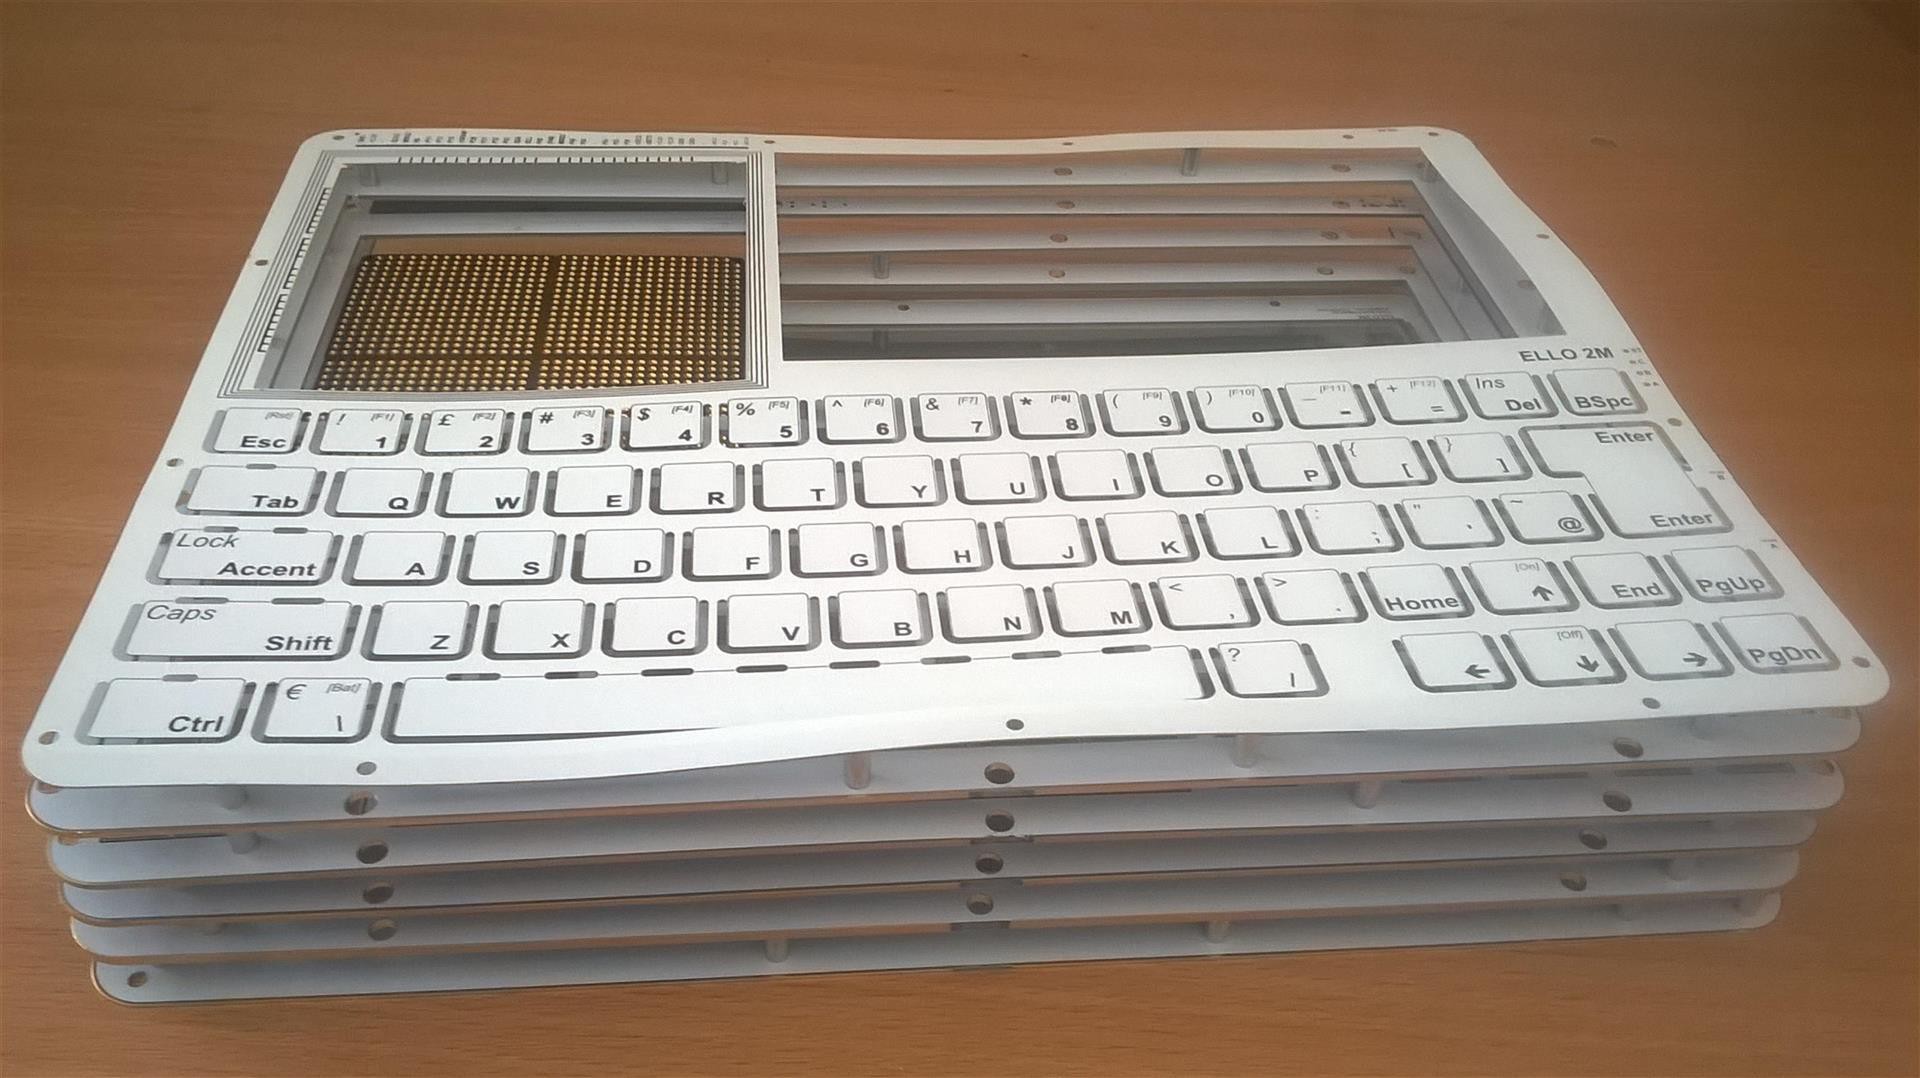
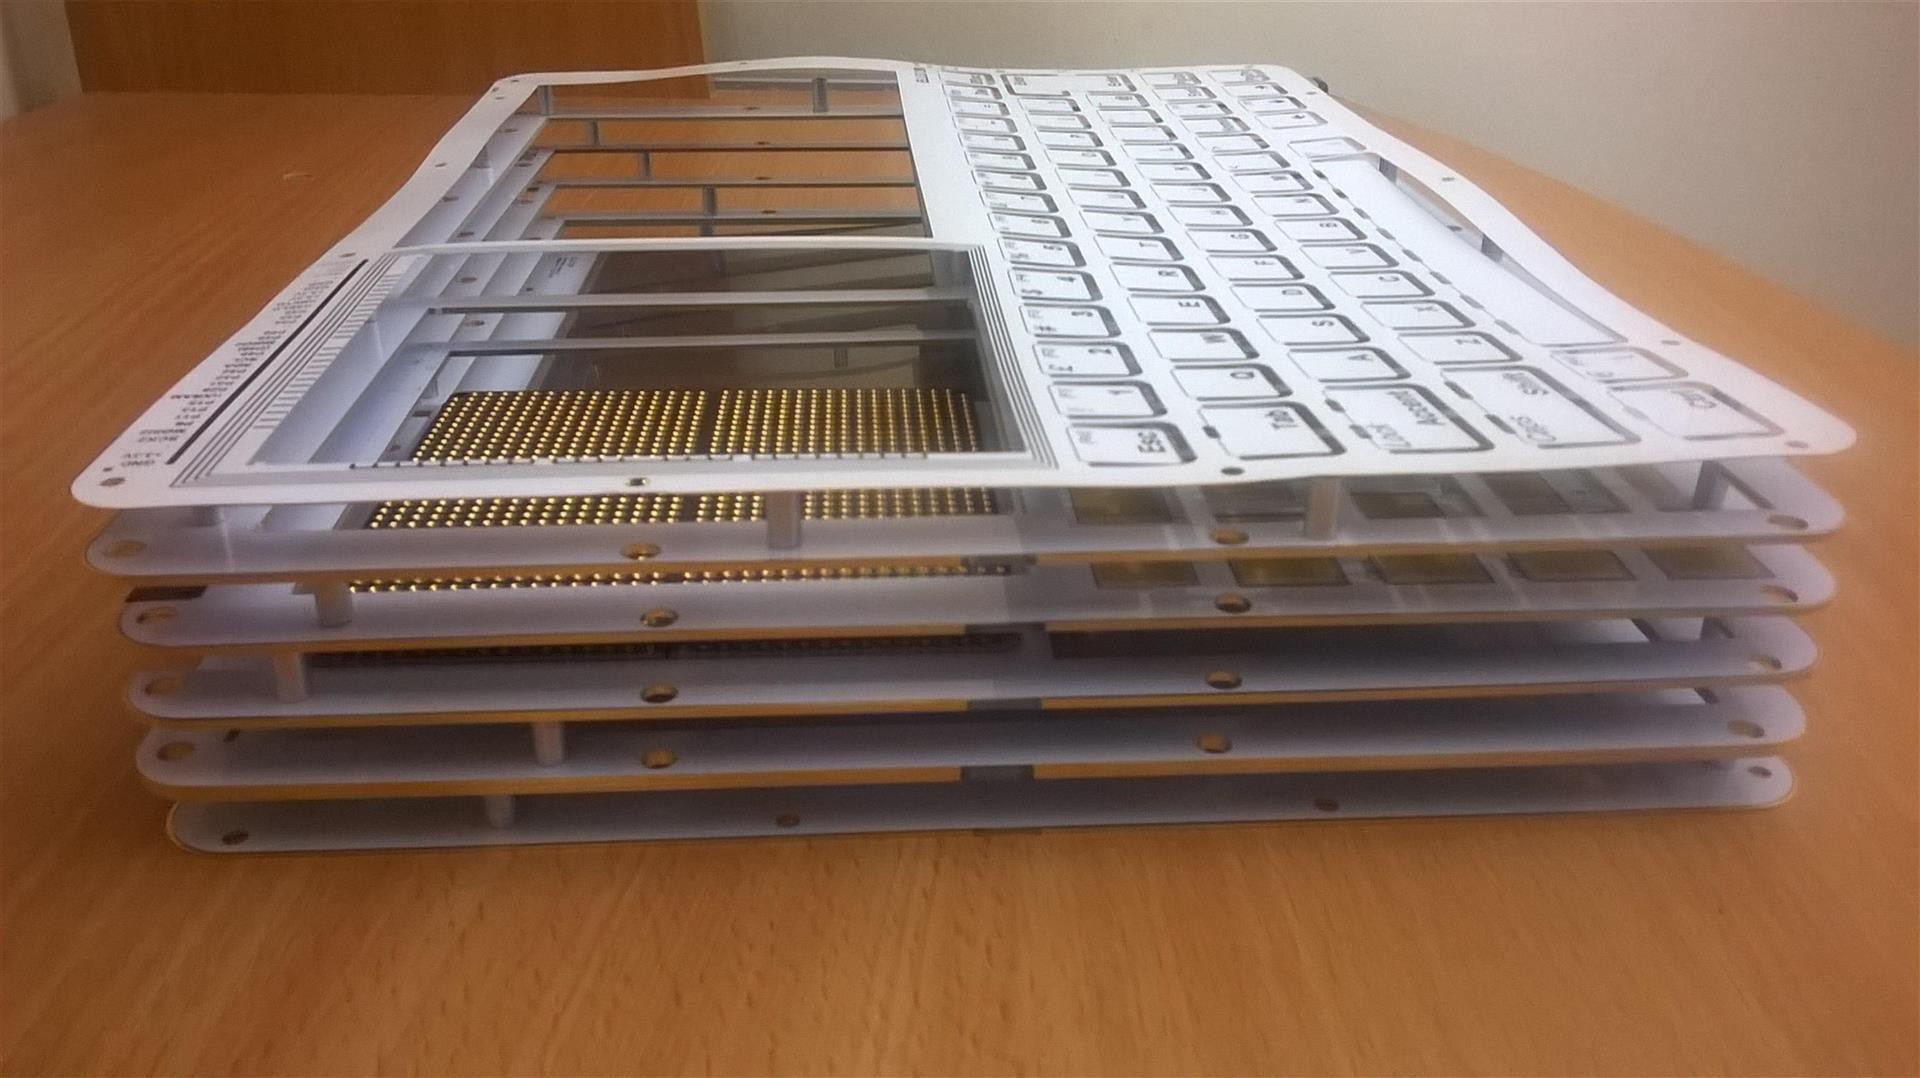
These pictures can demonstrate how everything stack together. They also show clearly how thin the front panel is in order to achieve proper flexibility for the keys.
When I assemble ELLO, I spray adhesive over the surface of the frame board underneath and stick the keyboard panel on it. This way it creates a nice and robust keyboard. It cost me a few panels until work out the details.
Another detail is the prototyping space. When the configuration includes the four sockets, another frame PCB is needed immediately before the bottom lid, only to accommodate some room for the socket pins on the bottom side. I have designed a special panel for this as well. Everything fits together and every 0.1mm counts!
Ah, by the way my crowdfunding campaign for ELLO is only a few hours away from now: https://www.crowdsupply.com/knivd/ello-2m
Discussions
Become a Hackaday.io Member
Create an account to leave a comment. Already have an account? Log In.
Brilliant!
Are you sure? yes | no
That's impressive!
Are you sure? yes | no